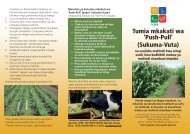
A Primer on Planting and Managing 'PushâPull' Fields for Stemborer ...
A Primer on Planting and Managing 'PushâPull' Fields for Stemborer ...
A Primer on Planting and Managing 'PushâPull' Fields for Stemborer ...
- No tags were found...

Create successful ePaper yourself
Turn your PDF publications into a flip-book with our unique Google optimized e-Paper software.
How To Establish A Push-pull PlotStep 1. L<strong>and</strong> preparati<strong>on</strong>• Clear your l<strong>and</strong> during the dry seas<strong>on</strong>.• Plough <strong>and</strong> harrow your l<strong>and</strong> to a fine tilth (until the soilhas no large lumps) be<strong>for</strong>e the <strong>on</strong>set of the rains.• Desmodium has very small seeds; there<strong>for</strong>e the soil shouldbe carefully prepared so that it is as fine <strong>and</strong> clean aspossible.• Measure out your push-pull plot to a maximum size of 50by 50 m (Figure 11).• If you wish to layout a push-pull plot <strong>on</strong> l<strong>and</strong> that is largerthan 50 by 50 m, then measure out those pieces of l<strong>and</strong>into plots of maximum 50 x 50 m size.• If your l<strong>and</strong> is less than 50 by 50 m, the push pull technologywill still work; however, do not plant push-pull in plots lessthan 10 by 10 m as the Napier grass will have a shadingeffect <strong>on</strong> the maize crop.Area <strong>for</strong> planting Napiergrass around the maizeArea <strong>for</strong> maize<strong>and</strong> desmodiumintercropping1 meter path roundArea <strong>for</strong> planting Napiergrass around the maizeFigure 11. Layout of a push-pull plot13