BRAD NAILER / STAPLER 2-IN-1 KIT - Harbor Freight Tools
BRAD NAILER / STAPLER 2-IN-1 KIT - Harbor Freight Tools
BRAD NAILER / STAPLER 2-IN-1 KIT - Harbor Freight Tools
- No tags were found...
Create successful ePaper yourself
Turn your PDF publications into a flip-book with our unique Google optimized e-Paper software.
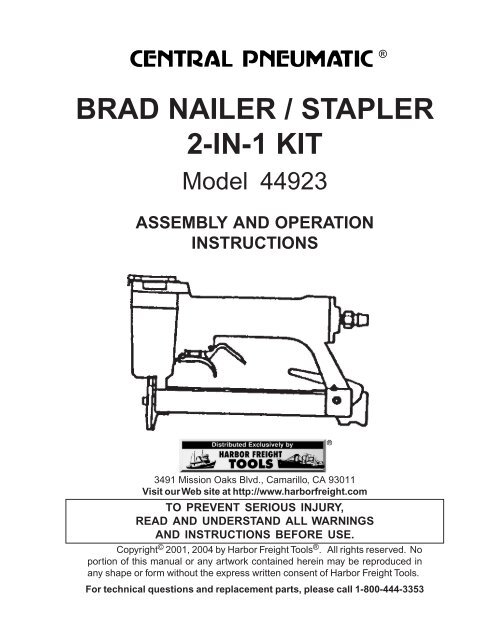
®<strong>BRAD</strong> <strong>NAILER</strong> / <strong>STAPLER</strong>2-<strong>IN</strong>-1 <strong>KIT</strong>Model 44923ASSEMBLY AND OPERATION<strong>IN</strong>STRUCTIONS3491 Mission Oaks Blvd., Camarillo, CA 93011Visit our Web site at http://www.harborfreight.comTO PREVENT SERIOUS <strong>IN</strong>JURY,READ AND UNDERSTAND ALL WARN<strong>IN</strong>GSAND <strong>IN</strong>STRUCTIONS BEFORE USE.Copyright © 2001, 2004 by <strong>Harbor</strong> <strong>Freight</strong> <strong>Tools</strong> ® . All rights reserved. Noportion of this manual or any artwork contained herein may be reproduced inany shape or form without the express written consent of <strong>Harbor</strong> <strong>Freight</strong> <strong>Tools</strong>.For technical questions and replacement parts, please call 1-800-444-3353
SpecificationsStapleCapacity3 / 16” Crown., .034” Thick (20 ga.) ,3 / 8 - 5 / 8 ” LongI ncluded Staples 20ga. ,5 / 8 " Long,3 / 6 ” Crown (Qty. = 8001 )B rad Capacity . 039-.042” Dia. (18 ga.) ,5 / 8 – 1-3 / 6 ” LonSave This ManualYou will need the manual for the safety warnings and precautions, assembly instructions,operating and maintenance procedures, parts list and diagram. Keep your invoice withthis manual. Write the invoice number on the inside of the front cover. Keep the manual andinvoice in a safe and dry place for future reference.Safety Warnings and PrecautionsWARN<strong>IN</strong>G: When using tool, basic safety precautions should always befollowed to reduce the risk of personal injury and damage to equipment.Read all instructions before using this tool!1. Keep work area clean. Cluttered areas invite injuries.1 gI ncluded Brads 18ga. ,3 / 4 ”,1”, and 1-3 / 6 ” Long (Qty. = 800 EachReplacement BradsMagazineCapacity 100OperatingPSISKU 33205 - 18g3 / 4 " long;SKU 33206 - 18g 1" long;SKU 33207 - 18g 1-3 / 6 " lon60-100 PSIAirInlet Size1 / 4 ” NPTSafetyFeatureCFMAccessoriesDouble Trigger8 @ 90 PSI1 )1 g3 mm & 4 mm Hex Keys, Inlet Coupler Plug, Lubricating Oil2. Observe work area conditions. Do not use machines or power tools in damp or wetlocations. Do not expose to rain. Keep work area well lit. Do not use electrically poweredtools in the presence of flammable gases or liquids.3. Keep children away. Children must never be allowed in the work area. Do not let themhandle machines, tools, extension cords, or air hoses.4. Store idle equipment. When not in use, tools must be stored in a dry location to inhibitrust. Always lock up tools and keep out of reach of children.5. Use the right tool for the job. Do not attempt to force a small tool or attachment to dothe work of a larger industrial tool. There are certain applications for which this tool wasdesigned. It will do the job better and more safely at the rate for which it was intended.Do not modify this tool and do not use this tool for a purpose for which it was not intended.6. Dress properly. Do not wear loose clothing or jewelry as they can be caught in movingparts. Protective, electrically non-conductive clothes and non-skid footwear arerecommended when working. Wear restrictive hair covering to contain long hair.7. Do not overreach. Keep proper footing and balance at all times. Do not reach over oracross running machines or air hoses.SKU 44923 For technical questions, please call 1-800-444-3353. Page 2
Loading StaplesALWAYS WEAR ANSI APPROVED IMPACT SAFETY GOGGLES WHENRELOAD<strong>IN</strong>G OR DO<strong>IN</strong>G ANY OTHER MA<strong>IN</strong>TENANCE ON THIS TOOL. Otherpeople in the work area must also wear ANSI approved impact safety goggles.Warning! Make sure the Nailer is not attached to the air hose whenever loading the tool.1. The Nailer/Stapler should be in the same position as in Figure 2.2. As in Figure 3, depress Magazine Lock (229) and slide Magazine Cover (227) open.3. Slide the staples over the Magazine’s Core (216) (see Figure 4).4. After the staples reach the nose of the tool, close the Magazine Cover (see Figure 5).Figure 2Figure 3MagazineLock (229)MagazineCover (227)Figure 4Figure 5Core (216)MagazineCover (227)Loading Brad NailsALWAYS WEAR ANSI APPROVED IMPACT SAFETY GOGGLES WHENRELOAD<strong>IN</strong>G OR DO<strong>IN</strong>G ANY OTHER MA<strong>IN</strong>TENANCE ON THIS TOOL. Otherpeople in the work area must also wear ANSI approved impact safety goggles.Warning! Make sure the Nailer is not attached tothe air hose whenever loading the tool.1. Follow Loading Staples steps 1 and 2, above.2. Insert the Brad Nails into the Magazine, letting thepointed end ride on the rail along the bottom ofthe Magazine (205) (see Figures 4 and 6).3. After the Nails reach the nose of the tool, closethe Magazine Cover (227) (see Figure 6, below).MagazineCover (227)Figure 6SKU 44923 For technical questions, please call 1-800-444-3353. Page 6
Operating the Nailer1. Attach the Nailer to the air supply at the Air Inlet (122). Start your compressor and checkthe pressure making sure it is set at the recommended 60-100 PSI and not to go over themaximum 100 PSI.2. To fire, place the nose of the Nailer on the workpiece. The Nailer should not fire if theSafety Trigger (123) is not depressed. Once depressed, gently and briefly squeeze theTrigger (125) once. Do not fire repeatedly. Nails could bounce off of one another,damaging the work piece or causing PERSONAL <strong>IN</strong>JURY.Note: When using Brad Nails, the Driver Guide (206) might leave a slightmark on the surface of the workpiece which is larger than the nailbrad. It occurs normally because the Driver Guide (206) tip isslightly wider to accomodate staples.To help avoid this, angle the tool slightly as shown in Figure 7.Figure 7Anytime any maintenance or repairs are done (including clearing jams), FIRST:1. Disconnect the Nailer from the air hose.2. Empty the Magazine (205) completely.3. Attempt to fire the Nailer into a piece of scrap wood to ensure that it is disconnectedand is incapable of firing any brads.4. Always leave the Magazine Cover (227) open during maintenance. The Magazineis spring-loaded and may cause parts or a nail to fly out of the Nailer.Clearing JamsFigure 81. Disconnect tool from air hose, empty the Magazine(205) of nails, release any built-up air pressure, andleave the magazine open, as explained above.2. While doing this step and the next, hold the Nailerpointed away from you and any other people orfragile objects - see Figure 8. Loosen both CoverHex Bolts (234) on Driver Guide Cover C (233) 3/4of a turn each - see Figure 9.3. Slide Driver Guide Cover C (233) toward the noseof the Nailer slightly until the holes (See Figure 9.)in Driver Guide Cover C (233) line up with the headsof both Cover Hex Bolts (234).holeFigure 94. Carefully remove Driver Guide Cover C (233) andremove the jammed nail. Pliers may be necessaryto remove a stuck nail.Cover HexBolt (234)Driver GuideCover C (234)SKU 44923 For technical questions, please call 1-800-444-3353. Page 7
Clearing Jams (continued)5. Inspect the Driver (114) for bends or breakage - seeFigure 10. If it is not fully retracted or damaged, donot use the tool until it is repaired by a qualifiedtechnician.6. Lightly oil the Driver (114) and replace Driver GuideCover C (233). Slide Driver Guide Cover C (233)away from the nose of the Nailer until the shafts ofthe Cover Hex Bolts (234) fit into the slots in theCover. Tighten both Cover Hex Bolts (234) securely.Figure 10Driver (114)7. Reload the Nailer.8. Reconnect the Nailer to the air hose.9. Press the nose of the Nailer against an appropriate piece of scrap wood.10. Test fire the Nailer several times, checking for proper operation.11. Disconnect the Nailer, remove the nails and store Nailer in a location out of children’sreach.Anytime any maintenance or repairs are done, FIRST:1. Disconnect the Nailer from the air hose.2. Empty the Magazine (205) completely.3. Attempt to fire the Nailer into a piece of scrap wood to ensure that it is disconnectedand is incapable of firing any brads.4. Always leave the Magazine Cover (227) open during maintenance. The Magazineis spring-loaded and may cause parts or a nail to fly out of the Nailer.MaintenanceANY MA<strong>IN</strong>TENANCE OR REPAIRS ASIDE FROM THAT LISTED BELOW SHOULDONLY BE PERFORMED BY A QUALIFIED TECHNICIAN.1. Inspect all of the nuts and screws and make sure they are securely fastened.2. Periodically lubricate the driving mechanism and magazine with a light oil. Wipe downwith a clean cloth.3. Inspect and clean the Air Filter Regulator and the Air Compressor according tomanufacturer’s instructions.SKU 44923 For technical questions, please call 1-800-444-3353. Page 8
Assembly DrawingSKU 44923 For technical questions, please call 1-800-444-3353. Page 10


