4 channel surveillance - MikeCooperDesign.com
4 channel surveillance - MikeCooperDesign.com
4 channel surveillance - MikeCooperDesign.com
- No tags were found...
Create successful ePaper yourself
Turn your PDF publications into a flip-book with our unique Google optimized e-Paper software.
SpecificationsVideo Standard NTSC/PALVideoAudioPreviewRecordingHard driveAudioVideoMotionDetectionMicroprocessorNetworkInterfaceHDD Port4-Input Channels/1-OutputChannel1-Input Channel/1-OutputChannelNTSC:20x480@30fps(each CH)ResolutionPAL:720x576@25fps(each CH)Full-DI, 1-Channel/4-Features Channel/1-ChannelPlaybackNTSC: 720x240@60fps (Total)Resolution PAL:720x288@50fps(Total)Variable FrameFeatures Rate, up to 200 hrs,recording timeQuality 4 Levels250 gigabite hard driveADPCM2 CODECMPEG4 CompressionSelectable Area and SensitivityDetection32-bit RISC ProcessorRJ45USB Port USB 2.0Audio PortRemoteControlAdapterSupport SATA Hard driveOptionalSupport IR Remote ControlInput: 120 V ~ / 60 HzOutput: 12 VDC, 5AIncludedAccessories4 Infrared Day/Night Cameras(Two 3.6mm wide angle andtwo 6mm for longer range, allare color in daylight and black& white infrared night viewing),Camera Cables, RemoteControl, USB Cable, CableSplitter, Power Cord, PowerAdapter, Software CD, Two AAABatteries,NOTICE: Camera <strong>surveillance</strong> may beprohibited by laws that vary fromstate to state. Check laws in yourarea before using for <strong>surveillance</strong>.This device <strong>com</strong>plies with part 15 ofthe FCC Rules. Operation is subject to thefollowing two conditions: (1) This devicemay not cause harmful interference, and(2) this device must accept any interferencereceived, including interference thatmay cause undesired operation.To the extent that you use this unitwith software other than what is provided,we will not be responsible for any loss ordamage to your <strong>com</strong>puter or contents.Trademark AcknowledgementsEthernet, Internet Explorer (IE), ActiveX,DivX, and Windows XP, WindowsVista are registered trademarks of therespective holders.UnpackingWhen unpacking, make sure that theitem is intact and undamaged. If any partsare missing or broken, please call HarborFreight Tools at 1-800-444-3353 as soonas possible.REV 10hSKU 67139 For technical questions, please call 1-800-444-3353. Page 7
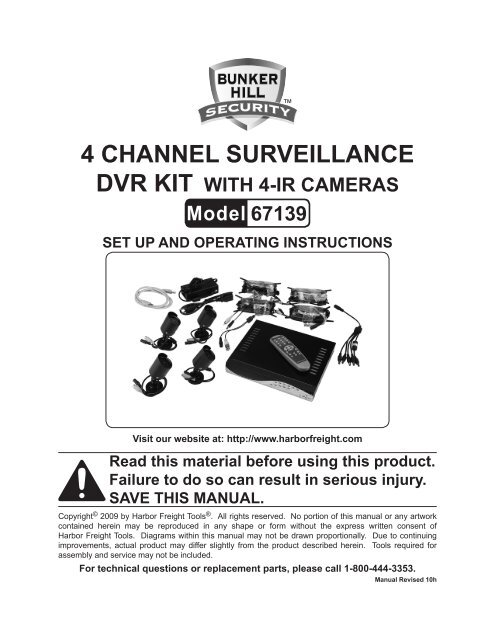
Instructions forputting into use8 91011121321Read the entire ImportantSafety Informationsection at the beginning of thismanual including all text undersubheadings therein before setup or use of this product.To preventserious injuryfrom accidentaloperation:Unplug the unit from itselectrical outlet beforeassembling or making anyadjustments to the wiring.Components3 4 5 6 714 1617Figure 2 - Front Panel1. PWR - LED indicates unit is on.2.HDD - LED indicates hard drive is inuse.3. CH1 - Channel 14. CH2 - Channel 25. CH3 - Channel 36. CH4 - Channel 415USB CableSoftware CDBatteriesPower AdapterPower CordCameraCablesCable Splitter7. Quad - View all <strong>channel</strong>s8. REW - Rewind in playback mode.9. PAUSE - Pause in Playback Mode,Auto Sequence Display in Live Mode.10. PLAY - Play.11. FWD - Fast Forward in PlaybackMode.12. STOP - Stop.CamerasFigure 1Remote ControlDVRUSB Port13. REC - Record.14. [MENU] - Move Left / Menu / ESC.15. [UP] - Move up.16. [SEL] - Move Right / Select / Edit.17. [DOWN] - Move down.REV 10hSKU 67139 For technical questions, please call 1-800-444-3353. Page 8
3 4 5 6 7 8Figure 3 - Back Panel11. AUDIO OUTPUT - Speaker connection.2. AUDIO INPUT - Microphone connection.3. LAN - Internet/LAN Ethernet port.4. VIDEO OUTPUT - monitor connection.5. CH1 - Camera 1 connection.6. CH2 - Camera 2 connection.7. CH3 - Camera 3 connection.8. CH4 - Camera 4 connection.9. POWER INPUT JACK - 12V DCConnector from main power adapter.29Figure 40 - 9AllMenuSELNumber Keys(1 - 4 ChannelSelect)Display AllChannelsEnter / ExitMenu/ Up / Down/ Left / RightAudio/SearchMuteSelectRewindPlayForwardRecordPause /PlaybackStopSearch or switchaudio <strong>channel</strong>sTurn on/off audiooutputREV 10hSKU 67139 For technical questions, please call 1-800-444-3353. Page 9
Operating Instructions1.2.3.4.Read the entire ImportantSafety Informationsection at the beginning of thismanual including all text undersubheadings therein before setup or use of this product.Work Area Set UpDesignate a work area that is cleanand well-lit. The work area must notallow access by children or pets toprevent distraction and injury.Route the power cord and all cablingalong a safe route without creating atripping hazard or exposing the cordand cables to possible damage.Use a surge protector (sold separately)to help guard against electricalpower fluctuations.IMPORTANT: Before mounting anyof the cameras, test the unit by hookingup all the connections, and testingall the features to insure the unitis working properly. There are two6mm cameras for longer range, andtwo 3.6mm cameras for wider angle,shorter range, viewing. Test thecameras for the best location beforeinstalling. Each camera is labeled onthe side of the unit.Setup OverviewThis unit can be set up in several differentconfigurations. The simplest iswith a TV monitor. For set up throughthe internet there are specific softwarerequirements and you will needto have an understanding of your modem,your <strong>com</strong>puter and your internetconnection settings, as well as portforwarding knowledge. Following arethe possible set up options.DVR with a TV monitor (sold separately)- This is the simplest set upthat allows you to adjust all the settings,view and record live imagesand play back any recordings. You donot have <strong>com</strong>puter or internet capabilitieswith this set up.SKU 67139 For technical questions, please call 1-800-444-3353. Page 101.2.3.4.DVR with a <strong>com</strong>puter and a TV monitor(both sold separately) - This setup allows you to view recorded fileson a <strong>com</strong>puter connected to the unit.You cannot record when the unit isconnected directly to the <strong>com</strong>puter.DVR and a <strong>com</strong>puter, connectedto the same modem and accessedthrough your web browser (<strong>com</strong>puterand modem sold separately) - Thisset up allows you to adjust all thesettings, view and record live images,and play back any recordings throughyour web browser. You will first needa TV monitor to set up the system.This option may not function with allweb browsers.Remote access through your internetservice - This arrangement allowsremote access to the DVR throughthe internet. You will need to have theunit already set up as in the previousparagraph, and have <strong>com</strong>puterand internet set up knowledge of portforwarding and your modem’s externalIP address in order to set up thisconfiguration.REV 10h
1.Starting the DVROnce the unit is connected andplugged in, the Power LED will lightup.checking hdd……master [ maxtOr s tm3250310a]-new-dvrFOrmat hdd cOnFirm(select) FOrmat / (menu) cancel?Note: When detecting a new hard drive,the DVR will prompt you to format thehard drive.2. Initially, the DVR will boot-up and displaythe current version and releasedate of the DVR firmware for a fewseconds.checking hdd……master [maxtOr stm3250310a]slave……4.Press (SEL) to format the new harddrive, or (MENU) to cancel and enterthe system.After the DVR has finished bootingup, it will enter the mode it is programmedfor, including recording ifit is the scheduled time period forrecording.3. The DVR will then automatically detectthe hard drive and show the harddrive information.If there is any problem with the harddrive, the DVR will display the informationand will not finish its boot upprogram.REV 10hSKU 67139 For technical questions, please call 1-800-444-3353. Page 12
OPERATING INSTRUCTIONSRECORDING1 23 4A-REC [M] 39% 2009/02/22 16:09:441. Set up all the functions of the DVRfollowing “Programming the DVR”.2.AUDIOPress the record button to beginrecording according to the scheduleyou have set.Each Channel set to record will displaya recording symbol [ ] next tothe <strong>channel</strong> number.The <strong>channel</strong> which is set to audiowill display one of the following audiosymbols next to the record symbol.- Audio output is off.- Audio output is on and audiois attached to the indicated <strong>channel</strong>.When the symbol is red it indicatesthat audio is currently recording.To mute the audio signal, press theDOWN button. The audio signalwill continue to record and can beheard in playback mode.S-REC - Motion sensor recording.N-REC - No recording.OTHER DATAThe following will display along theremaining lower edge of the screen:[M] or [S]- Indicates which hard driveis in use (M=Master, S= slave).#% - Displays the percentage of harddrive disk space used.YYYY/MM/DD - Displays currentYear/Month/Day.HH:MM:SS - Displays current time(hours:minutes:seconds).Note: If the date, time or any othersettings are incorrect you will need tostop recording and go back to the setup menu to reset the functions.STOPPINGTo stop recording, press theSTOP button. If the password functionis enabled you will be promptedfor the password and will not be ableto stop recording without the currentpassword.RECORDING MODEOne of the following will display alongthe bottom left of the screen:A-REC - Normal recording.REV 10hSKU 67139 For technical questions, please call 1-800-444-3353. Page 13
Estimated Record TimeThe following charts show theestimated recording time based on160GB of hard drive space:Type Quality 60 48 32 16 1fps fps fps fps fpsHighest 62 78 116 232 3720High 88 110 165 330 5280NTSCNormal 107 134 201 401 6420Low 120 150 225 450 7200Type Quality 50 36 24 12 1fps fps fps fps fpsHighest 64 89 133 267 3200High 90 125 188 375 4500PALNormal 110 153 229 458 5500Low 123 171 256 513 6150To read the above charts, referto the total frame rate and videoquality settings which you have setthe cameras to (under “Setting upthe DVR Functions Through theMain Menu” Section - sub sections:“Record Frame Rate” and “VideoQuality”).NTSC and PAL are differentbroadcast standards. Each countryuses one standard. Your unit is set toNTSC for use in the United States.The fps (frames per second) is thetotal frame rate. The Quality is thevideo quality. The numbers in thebody of the the charts are the numberof hours of record time. For instance,in the top chart (Type=NTSC), if youset the unit to a total of 60 fps andthe quality to High, you will be ableto record for 88 hours to a hard drivewhich has 160GB of available space.A larger hard drive will allow for morerecording time.1.PLAYBACKTo watch recorded videos, you willneed to enter Playback mode. To enterPlayback mode, first press STOPto stop recording.search videODISK: MASTER SLAVE [NONE]08/09/19 1 1:16:31 - 0 8/09/19 15:05:48TYPE: EVENT TIMEPLAY: E VENT LIST00006 T 2008/09/19 15:07:4000006 T 2008/09/19 14:07:4000006 T 2008/09/19 13:07:4000006 T 2008/09/19 12:07:4000006 T 2008/09/19 11:07:4000006 T 2008/09/19 10:07:4000006 T 2008/09/19 09:07:40( ) MOVE (SEL)SELECT( ) PLAY (MENU) PREV MENUPress the PLAY button to go toPLAYBACK mode and display the“Search Video” screen. The mostrecent recording will play.To play a different recording:Press the [MENU] button while inPLAYBACK mode. The system willlist all the recordings, with the mostrecent at the top of the list.2. Press the UP or DOWN buttonto select a recording.3. Press PLAY to play the recording.4.Press Stop to stop playing the recording.REV 10hSKU 67139 For technical questions, please call 1-800-444-3353. Page 14
NETWORK SETUPThe 67139 allows you to view yourDVR through the Internet. This isespecially useful for remote securitymonitoring.Set up the unit using a TV monitor soyou can view the Main Menu duringset up. You will not need the TV monitoronce the set up is <strong>com</strong>plete.What you will need to set up TheDVR OnlineYou will need:• The DVR connected to a router.• The router connected to the Internet.2.3.4.5.Connect the network cable (soldseparately) to the back of the DVR inthe Ethernet port.Connect the other end of the networkcable to an available port on therouter. The port should be labeled 1-4or 1-8.Power on the DVR by reconnectingthe power cable on the back of theDVR.A green light should light up on theback of the DVR at the Ethernet connectionand also at the port on therouter.Finding your DVR’s Internal IPAddress• A PC or laptop that is connected tothe same router as the DVR.• A <strong>com</strong>patible web browser (instructionswere developed with a <strong>com</strong>monweb browser , other browsersmay not be <strong>com</strong>patible).• A genuine and fully updated versionof Windows XP or Vista.Note: The <strong>com</strong>puter and DVR need to beconnected to the same router. The<strong>com</strong>puter is required at the locationto view the DVR for initial set up, butis not needed for remote access oncethe unit is set up and working properly.1.Connecting Your DVR to theRouterPower off the DVR by removing thepower cable from the back of theDVR.By default, the DVR IP mode is set toStatic. Changing the Static to DHCP,will cause the DVR to automaticallyretrieve an IP address from the connectedrouter. Unless your networkrequires a static IP address, leave theDVR IP Allocation set as DHCP.To retrieve the address information:a. Press Menu.b. Move the cursor next to NetworkSetup and press Select.REV 10hSKU 67139 For technical questions, please call 1-800-444-3353. Page 15
c. Check that the “IP Allocation” is setto DHCP.d. Write down your IP address, subnetMask, Gateway and HTTP Port(default is 80). This information willbe used in the next few steps to viewthe DVR on your <strong>com</strong>puter and theInternet.e. Go to the User Setup menu andwrite down the admin ID and adminpassword. The default is “admin”and “111111”.Note: If your router does not supportDHCP, contact your network administratorto supply you with your IPinformation. If the DVR needs to storePPPoE (DSL/ADSL) settings, contactyour ISP (Internet Service Provider)for the proper settings.Preparing Your Computer forViewing the DVRInstalling Software1.2.3.4.Insert Software CD into your <strong>com</strong>puter’sCD-ROM drive.Open the CD directory.Double click on “DxClient 2.7.1-ENG”.Run the “Install” program.Follow the setup wizard to finish theinstallation.Adding DVR to Trusted SitesEvery <strong>com</strong>puter that is accessingthe DVR will need to be configuredto download and run ActiveX controls.This is a one time change andonly needs to be made on the <strong>com</strong>puterthat is accessing the DVR. Thiscan be done by changing your webbrowser settings so it only affectswebsites that you specifically addto the trusted sites list. Or you canchange the setting for all websites.It is re<strong>com</strong>mended that you onlychange the setting for your trustedsites.The Software CD includes a PC viewerprogram for the DVR (DxClient2.7.1). This program is for backing upvideo files and remote access. Youmay also need to change the securitysettings of the web browser.To install the PC Viewer program:CAUTION: Lowering the safety settings ofyour <strong>com</strong>puter can open your <strong>com</strong>puterup to viruses. Do this at yourown risk.To add the DVR’s IP address to theTrusted Sites on a <strong>com</strong>mon webbrowser:Open your web browser.SKU 67139 For technical questions, please call 1-800-444-3353. Page 161.2.3.4.5.6.Click on TOOLS.Click on INTERNET OPTIONS.Click on SECURITY Tab.Click on TRUSTED SITES.Click on SITES button.REV 10h
7.Type in the IP address of the DVR inthe following format:HTTP://129.168.1.108Note: The bold underlined numbers areyour IP address and will be differentfrom the numbers shown in the aboveexample.8.9.10.1.2.3.4.5.If “Require server verification (https:)for all sites” is selected you will needto uncheck the selection box.Click ADD.Close window.To change the default setting for theTRUSTED SITES zone to low, on theMain Settings:Click on DEFAULT LEVEL.Change security level of the zone to“Low” by sliding the slider to the bottom.This will allow ActiveX controls fromthe DVR to be downloaded and theDVR to be viewed on the <strong>com</strong>puter.Click APPLY.Click OK.You should now see the connectedcameras on the <strong>com</strong>puter screen inthe DxClient backup program. Followthe instructions for “Backup Program”to use the software.Viewing Your DVROutside of Your NetworkOnce you have successfully set upand viewed your DVR through arouter, you are now able to set upyour router to view the DVR while ata remote location. This process iscalled Port Forwarding. Port Forwardingis required if you want to viewthe DVR from a <strong>com</strong>puter that is notconnected to the same router. Thisprocess opens a path on your home/business network to allow you to viewyour DVR video feed from outsideyour network (over the Internet).There are many makes and modelsof routers. You will need to follow theinstructions from your router’s manufacturerfor port forwarding. Consultonline sources or have a qualified<strong>com</strong>puter technician <strong>com</strong>plete thistask if needed.Once you have successfully set upport forwarding from the modemwhere the DVR is located, you will beprompted to enter your user name(default: admin), password (default:111111)and install ActiveX controls.You will now be able to view theDVR from any PC in the world withinternet access and proper <strong>com</strong>putersettings.REV 10hSKU 67139 For technical questions, please call 1-800-444-3353. Page 17
Programmingthe DVRMain Menu Directory:CHANNEL (CAMERA) SETUP1 o n 2 o n<strong>channel</strong> setupMainMenuCamera SetupRecord SetupRecord Frame RateVideo QualityRecord ScheduleSensor SetupHard Drive SetupMiscellaneous SetupNetwork SetupLanguageReset MenuChange PasswordSet TimeHidden ChannelAudio Port SetupImage ParametersPassword EnableKeypad TonesSeq. Dwell Time3 o n 4 o n( )Move ( SEL) Select ( MENU) EscThe Channel (Camera) Setup submenuallows you to turn the camerason or off.To set the functions of the DVR youwill need to select and adjust itemsfrom the Main Menu.main menuCAMERA SETUPRECORD SETUPRECORD FRAMERATEVIDEO qUALITY HIGHRECORD SCHEDULESENSOR SETUPHARD DRIVE SETUPMISCELLANEOUS SETUPNETWORK SETUPLANGUAGE ENGLISHRESET MENU( )MOVE (SEL)SELECT ( MENU)EXIT1.2.3.In the Channel Set Up Menu, pressthe arrow keys [ , , and ] toselect a <strong>channel</strong> (camera).Press [SEL] to change the settingbetween “on” or “off”.Press [MENU] to exit the CameraSetup sub-menu once all the camera<strong>channel</strong>s have been set.Note: If a <strong>channel</strong> is set to OFF in ChannelSetup, the DVR will not recordfrom that camera, and the FrameRate will not be able to be set for thatcamera.1. Press [Menu] to enter the Main Menu.2.To access the menu options andmake selections within the MainMenu and Sub-Menus:a. Press up and down to select items.b. Press [SEL] to change an option.c. Press [MENU] to save any changesand return to the previous Menu.REV 10hSKU 67139 For technical questions, please call 1-800-444-3353. Page 18
RECORD SETUPRECORD FRAME RATE1 O N 2 NOrecord setup1 3 FPS 2 5 FPSrecord FramerateTOTAL 36 FPS3 O N 4 O N3 2 5FPS 4 3FPS( )MOVE ( SEL) SELECT (MENU) ESC( )MOVE (SEL)+ ( )- (MENU) EXIT1.2.3.The Record Setup sub-menu allowsyou to choose which <strong>channel</strong>s (cameras)will record.In the Record Setup sub-menu, pressthe arrow keys [ , , and ] toselect a <strong>channel</strong> (camera).Press [SEL] to change the settingbetween “on” or “off”.Press [MENU] to exit the RecordSetup sub-menu once all the camera<strong>channel</strong>s have been set.Note: If a <strong>channel</strong> has been disabled (setto “off”) in the Channel Setup, it willnot be able to record, and “NOCAM”will display for that <strong>channel</strong> on thescreen in the Record Setup submenu.1.2.3.4.The total number of photos takenper second is divided among thecameras. The total frame rate of allthe cameras in use is set to 60fps(frames per second). The higher settingsproduce better images, but useup more hard drive space.In the Record Frame Rate sub-menu,press the arrow keys [ , , and] to select a <strong>channel</strong> (camera).Press [SEL] to increase, or STOPto decrease, the number of framesper second for that camera.Repeat step 1 and 2 for each camera,keeping the total number offrames per second (displayed in thecenter of the screen) at or below 60.Press [MENU] to exit the RecordFrame Rate sub-menu once all thecamera frame rates have been set.Note: The DVR will automatically adjustthe largest frame rate to a smallervalue if you enter more than a total of60fps for all the cameras.Note: If you have your DVR set to PAL,your maximum framerate is 50fps.SKU 67139 For technical questions, please call 1-800-444-3353. Page 19
VIDEO QUALITYmain menuCAMERA SETUPRECORD SETUPRECORD FRAMERATEVIDEO qUALITY HIGHRECORD SCHEDULESENSOR SETUPHARD DRIVE SETUPMISCELLANEOUS SETUPNETWORK SETUPLANGUAGE ENGLISHRESET MENU( )MOVE ( SEL)SELECT (MENU)ESCVideo Quality can be set to Highest,High, Normal, and Low. The highersettings produce better images, butuse up more hard drive space. Thecameras are all set to the same settingin one step in the Main Menu.In the Main Menu, use the arrow keysto select Video Quality. Press the[SEL] button to change between thefour video quality settings.RECORD SCHEDULErecord schedule1.2.3.The time line shows a 24 hour period,based on AM/PM (0=12).In the Record Schedule sub-menu,press the arrow keys [ , , and] to move the marker to the desiredtime.Press [SEL] to modify the recordingmode. The Mode options are:a. NO-RECORD (white) - The DVR willnot record during this period.b. NORMAL RECORD (red) - The DVRwill record continuously during thisperiod.c. SENSOR RECORD (S) - The DVRwill begin recording when the motionsensor is activated.Press [MENU] to exit the RecordSchedule sub-menu once the recordingoptions have been set.Note: Once all the menu options are set,press the REC button to activatethe Record Schedule.SENSOR SETUPampm0… 3… 6… 9… 0… 3…. 6… 9…NO-RECORDNORMAL-RECORDS SENSOR -RECORD( )MOVE (SEL)SELECT ( MENU) EXITsensOr setupSENSORED RECORD TIME 30ALARM ON TIME 0 5MOTION DETECTOR SETUP( )MOVE ( SEL)SELECT (MENU)ESCThe Record Schedule sub-menu allowsyou to customize the recordingtime for the cameras. The camerasare all set to the same schedule.The Sensor Setup sub-menu setshow long (in seconds) the cameraswill record once the sensor is activated,and whether or not, and how long(in seconds), the alarm will sound.SKU 67139 For technical questions, please call 1-800-444-3353. Page 20
This menu also has the sub-menu:“Motion Detector Setup”, for settingmotion detection options.SENSOR RECORD TIMEMOTION DETECTOR SETUPmotion detector setup1.In the Sensor Setup sub-menu, pressthe up or down arrow keys [ , ] toselect “Sensor Record Time”.CH1 ON Level 2 AreaCH2 ON Level 2 AreaCH3 ON Level 2 AreaCH4 ON Level 2 Area2.Press [SEL] to increase, or STOPto decrease, the number of secondsto record once the sensor is activated.The recording time can be set to5, 10, 15, 20, 25 or 30 seconds.ALARM ON TIME1.2.In the Sensor Setup sub-menu, pressthe up or down arrow keys [ , ] toselect “Alarm on Time”.Press [SEL] to switch between thefollowing options:a. CONT - The alarm will sound oncethe motion sensor is activated andwill continue until any key is pressedon the DVR or remote.b. OFF - No alarm will sound.c. # - The alarm will sound for the numberof seconds indicated. The alarmcan be set to 5, 10, 15, 20, 25 or 30seconds. Press [SEL] to increase, or[STOP] to decrease the number.1.2.( )MOVE ( SEL)SELECT (MENU)ESCThis sub-menu allows you to set themotion detection options for eachcamera.In the Sensor Setup sub-menu, pressthe up or down arrow keys [ , ] toselect “Motion Detector Setup”.Press [SEL] to enter the Motion DetectorSetup sub-menu.3. Press the arrow keys [ , , and] to move between the <strong>channel</strong>sand the options for each. Press [SEL]button to change the settings for eachoption. The options and settings are:a. On/Off - Use the [SEL] button totoggle between enabling (On) or disabling(Off) motion detection recordingfor each <strong>channel</strong>.b. Level - Use the [SEL] button to setthe sensitivity level from 1 (lowest) to3 (highest).c. Area - Use the [SEL] button to enterthis sub-menu.SKU 67139 For technical questions, please call 1-800-444-3353. Page 21
AREA SELECTIONIt also shows hard drive size and howmuch memory is used.1.2.In the Main Menu, press the up ordown arrow keys [ , ] to select“Hard Drive Setup”.Press [SEL] to enter the Hard DriveSetup sub-menu.OVERWRITE ENABLE/DISABLEThis sub-menu shows the camera’sview broken up into a grid. Youchoose which sections of the imagedetect motion.1. To set individual blocks of the screen:a. Press the arrow keys [ , , and] to select a block in the grid2.3.4.5.b. Press the [SEL] button to toggle betweenshowing the image in the block(motion is detected where the imagecan be seen), or shading the image inthe block (motion will not be detectedin theses areas).To disable all areas of the screenfrom detection, press STOP . Thescreen will be <strong>com</strong>pletely shaded.To have all of the camera’s viewingarea detect motion, select QUAD. Allof the screen will be in view.Press [MENU] to exit sub-menu.Press [MENU] twice more to go backto the Main Menu.HARD DRIVE SETUPThe Hard Drive Setup sub-menu allowsyou to set whether to overwriteold video once the hard drive is full,and it allows you to format the harddrive.hard drive setupOVERWRITE ENABLED [ ON]MAXTOR STM250310ASMASTER HDD SIZE 250203MBMASTER HDD USED 124931MB 50%MASTER HDD FORMATSLAVE HDD SIZE N/ASLAVE HDD USED N /ASLAVE HDD FORMAT( )MOVE ( SEL)SELECT (MENU)EXIT1. In the Hard Drive Setup sub-menu,press the arrow keys [ , ] to select“Overwrite Enabled”.2.Press [SEL] to switch between the“ON” which will overwrite the oldestvideo when the hard drive is full, and“OFF” which will stop recording whenthe hard drive is full.MASTER HDD FORMAT1.2.3.In the Hard Drive Setup sub-menu,press the arrow keys [ , ] to select“Master HDD Format”.Press [SEL] to Format the hard drive.This will erase all recorded videofrom the hard drive and will make thehard drive readable by the DVR.You will be prompted for a passwordbefore formatting. The default passwordis “111111”.SKU 67139 For technical questions, please call 1-800-444-3353. Page 22
CAUTION: All recorded video will be deletedwhen the hard drive is formatted.4.1.2.Press [MENU] to exit sub-menu.MISCELLANEOUS SETUPThe miscellaneous setup sub-menuallows access to a variety of functionsincluding changing the password,setting the time, and setting the audioport.In the Main Menu, press the up ordown arrow keys [ , ] to select“Miscellaneous Setup”.Press [SEL] to enter the MiscellaneousSetup sub-menu.CHANGE PASSWORDCURRENT PASSWORDNEWPASSWORDCOMFIRM PASSWORD[- - - - -][- - - - -][- - - - -]3. Enter the current password first, thenenter the new password. Re-enter thenew password to confirm.Note: The password must be 6 characterslong, and can be any key except[MENU].4.Press [MENU] to exit sub-menu.SET TIMEset time2008/11/11 17:50:011.2.The default password is set to“111111”. You may change the password,but be sure to write it down andkeep it in a safe place so you do notforget the new password. To changethe password:In the Miscellaneous Setup submenu,press the arrow keys [ , ] toselect “Change Password”.Press [SEL] to enter the sub-menu.1.2.( )MOVE ( SEL)SELECT (MENU) ESCThe system date and time format isYYYY/MM/DD and HH:MM:SS. To setthe date and time:In the Miscellaneous Setup submenu,press the arrow keys [ , ] toselect “Set Time”.Press [SEL] to enter the sub-menu.Press [3. ] or [ ] to select theunit to change, then press [SEL] toSKU 67139 For technical questions, please call 1-800-444-3353. Page 23
4.change the value. Repeat for eachvalue.Press [MENU] to save and return tothe previous menu.HIDDEN CHANNELAUDIO PORT SETUPaudio port setupAUDIO PORT1-VIDEO CHANNELAUDIO PORT1-RECORD[ 1 ][ OFF ]( )MOVE ( SEL)SELECT (MENU)EXIT1.2.3.The system provides the option tohide a <strong>channel</strong> (camera) . The selected<strong>channel</strong> can still record whileit is hidden, the images are just notviewable until playback. To hide a<strong>channel</strong>:In the Miscellaneous Setup submenu,press the arrow keys [ , ] toselect “Hidden Channel”.Press [SEL] to select the <strong>channel</strong>number to hide.Press [MENU] to save and return tothe previous menu.1.2.To set up the Audio Port, first checkto see which camera you have set upwith a microphone (sold separately).To enable the audio recording function:In the Miscellaneous Setup submenu,press the arrow keys [ , ] toselect “Audio Port Setup”.Press [SEL] to select the <strong>channel</strong>number where the microphone islocated.3. Press the arrow keys [ , ] to select“Audio Port - Record”.4.5.Press [SEL] to toggle between settingthe audio “on” or “off”.Press [MENU] to save and return tothe previous menu.SKU 67139 For technical questions, please call 1-800-444-3353. Page 24
IMAGE PARAMETERSPASSWORD ENABLE1.2.In the Image Parameters sub-menuyou adjust the quality of the image.To make the adjustments:In the Miscellaneous Setup submenu,press the arrow keys [ , ] toselect “Image Parameters”.Press [SEL] to enter the image soyou can edit the parameters.1.You will always need the currentpassword to format the hard drive,to reset the menu, or to access thecustomer port. To access other partsof the system, you can enable or disablethe password. To turn passwordaccess on or off:In the Miscellaneous Setup submenu,press the arrow keys [ , ] toselect “Password Enable”.2.Press [SEL] to toggle between “on”and “off”.KEYPAD TONES3.Press [ ] or [ ] buttons to select oneof the following settings, then press[ ] or [ ] to adjust the levels.4.CON: ContrastBRI: BrightnessHUE: HueSAT: SaturationPress [MENU] to save and return tothe previous menu.Some models have a buzzer soundavailable for the [SEL] button. Ifequipped, to set the buzzer sound forthe [SEL] button to on or off:REV 10dSKU 67139 For technical questions, please call 1-800-444-3353. Page 25
1.In the Miscellaneous Setup submenu,press the arrow keys [ , ] toselect “Keypad Tones”.if one of the cameras is not properlyconnected. To set this function on oroff:2. Press [SEL] to toggle between “on”and “off”.SEQ. DWELL TIME1.2.In the Miscellaneous Setup submenu,press the arrow keys [ , ] toselect “Video Sound Loss”.Press [SEL] to choose between “off”and “on” to change the setting.LANGUAGE1.2.The Sequence Dwell function setsthe amount of time (1, 5, 10, 15, 30 or60 seconds) that the system spendson one setting. To set this function onor off, and to set the time level:In the Miscellaneous Setup submenu,press the arrow keys [ , ] toselect “Seq. Dwell Time”.Press [SEL] to choose between “off”and one of the time settings.VIDEO LOSS SOUNDThe default language is English. Tochange the OSD language to a differentlanguage:1.2.In the Main Menu, press the arrowkeys [ , ] to select “Language”.Press [SEL] to cycle through the languageoptions.The Video Loss Sound function turnsa buzzer on or off which will soundSKU 67139 For technical questions, please call 1-800-444-3353. Page 26
RESET MENUMAC Address1.2.3.1.To reset the menu to the factory settings:In the Main Menu, press the arrowkeys [ , ] to select “Reset Menu”.Press [SEL] to reset the menu.You will be prompted to enter the currentpassword.Network Set up Sub-MenuThe Network Set up sub-menu allowsyou to customize the DVR to yournetwork settings.In the Main Menu, press the up ordown arrow keys [ , ] to select“Network Setup”.This indicates the DVR network port’sphysical address.IMPORTANT: The MAC (Media AccessControl) address is your <strong>com</strong>puter’sunique hardware identity code. Thissetting should only be changed ifmultiple DVRs are being setup on thesame network. The first part of thecode must not be changed from it’ssetting of “00”.Note: For new network settings to take affect,the DVR must be restarted aftermaking any changes.IP ALLOCATION2.Press [SEL] to enter the NetworkSetup sub-menu.The DVR supports DHCP and StaticIP modes.REV 10gSKU 67139 For technical questions, please call 1-800-444-3353. Page 27
If your modem/router supports DHCPfunctions, you can use DHCP mode.If you set your IP Allocation to DHCPmode you do not set the IP Address,Subnet Mask or Gateway.you may need to change the securitysettings and enable all ActiveX functions.SUBNET MASKIf you set your IP Allocation to Staticmode, you will need to setup the followingIP Address, Subnet Mask andGateway settings manually.IP ADDRESSThe Subnet Mask is the identifyingnumber used to determine where anIP address belongs on a local areanetwork. Consult your modem/routerfor your LAN’s subnet mask.Set up your IP setting according tothe actual network connected to theDVR. Consult your modem/router foryour IP address.Follow the same steps as for changingthe IP Address numbers to makeany changes to the Subnet Mask.GATEWAYTo adjust the setting:3. Press [ ] or [ ] to move to thenumber to change.4. Press the arrow keys [ , ] tochange the number.5.Press [SEL] to accept the change.6. Press STOP to delete a number.7. Press REC to insert a number.8.Press [MENU] to save and return toprevious menu.Note: Before using your web browser toview the program over the network,Set this number to the gateway set byyour modem/router, provided by yourinternet service provider.SKU 67139 For technical questions, please call 1-800-444-3353. Page 28
Follow the same steps as for changingthe IP Address numbers to makeany changes to the Subnet Mask.DNS ADDRESSUSER SETUPWhen accessing the DVR from aremote location, you will be promptedfor a login and password. The defaultlogin is “admin” for full administratorrights, and the default password is“111111”.[ ][ ]This code is provided by your localISP.Follow the same steps as for changingthe IP Address numbers to makeany changes to the Subnet Mask.HTTP PORTYou can set an additional “user ID”and password to setup a user withlimited access, allowing only viewingof live video over a network.To change the ID and passwords:9. Press [ ] or [ ] to move to thenumber to change.10. Press the arrow keys [ , ] tochange the number.11.Press [SEL] to accept the change.12. Press STOP to delete a number.13. Press REC to insert a number.This port number is used to <strong>com</strong>municatewith the PC. The default is 80. Itcan be changed from 1024 to 49151.Follow the same steps as for changingthe IP Address numbers to makeany changes to the Subnet Mask.14.Press [MENU] to save and return toprevious menu.SKU 67139 For technical questions, please call 1-800-444-3353. Page 29
DDNS SETUPIf you require an external service tomaintain a dynamic IP address, enterthe user information here.Follow the same steps as for changingthe IP Address numbers to makeany changes to the Subnet Mask.SKU 67139 For technical questions, please call 1-800-444-3353. Page 30
Backup ProgramThe viewer program installed fromthe Software disk allows you tobackup video to other storage mediaconnected through your PC.Videos can be backed up as AVI filesor MSC files. MSC files are onlyavailable for playback using the softwareprovided on the DVR.PROGRAM CONTROLSFollowing are the available controls inthe program window:211. PTZ - Pan/tilt/zoom functions (notavailable).2.3.Zoom in, zoom out (not available).HHD play mode - Plays a video fromthe DVR hard drive.7.8.9.10.11.12.13.14.15.16.17.18.19.20.21.Program Local Setting - Configurationwindow for settings.Remote DVR ControlSwitch between Storage DevicesCapture ImageBACKUPControls 12 through 20 allow manipulationof the selected video, includingtwo speeds of fast forward andrewind as well as sliders for locatingspecific sequences of the video:Accelerated Rewind 60xRewind 10xForwardStopPlaybackFast Forward 10xAccelerated Fast Forward 60xPlayback sliderAudio sliderSearch Time - Used to search for avideo based on the time it was recorded.4.5.6.FILE Play Mode - Plays a video fromthe file you choose in another storagelocation.NET Play Mode - Plays video remotelyover the internet or intranet.Event list - Lists the recorded videos.SKU 67139 For technical questions, please call 1-800-444-3353. Page 31
RUNNING THE PROGRAMPLAYING OR BACKING UP A VIDEOThe system will detect the hard driveautomatically when you connect theDVR to your PC with the USB cable.A USB icon will appear in the systemtray (right bottom corner of thescreen). Double-click the icon to runthe program.3. To play or backup a video, clickEVENT list to open a list of files.4.5.Locate the desired video. Click PLAYto play the video.To Backup the video, click BACKUPafter clicking PLAY.SETTINGS CONFIGURATIONYou will need to choose several settingsfor backup, including whether tosave the file as AVI or MSC.6.7.To stop the backup, click BACKUPagain.To Stop playing the video, clickSTOP.LOCATING AND PLAYING SAVED FILES1.2.To enter the Configuration Window,click on Program Local Setting.Make any adjustments needed, thenclick SAVE.1. Click on FILE Play Mode to find a fileother than the files on the DVR.Choose a folder to open.SKU 67139 For technical questions, please call 1-800-444-3353. Page 322.3.Double-click on the file to play thevideo.REV 10h
NET PLAY MODEWEB BROWSERREMOTE CONTROL DVR1.2.3.This mode allows you to remotelycontrol your DVR via the internet orintranet using the software application.While in the PC Viewer D6 Series,click on NET Play Mode to open loginwindow.Enter the following information of theDVR that you want to remotely access:Host Name - The IP address that theDVR is on.Host Port - The port you programmedinto the DVR.User Name - “admin” or user nameyou entered in Set Up.Password - “111111” or passwordyou created in Set Up.Click LOGIN to enter the main page.Note: Admin level will be able to accessall of the program functions remotely.User level will only be able to accessviewing of live video.4.Click on NET Play Mode to exit theremote DVR.1.This mode allows you to connect tothe DVR through your web browser.Enter the IP address and domainname of remote DVR in the addressbar.Note: If the port number is not 80, add theport number before the IP address ordomain name.2.3.You will be prompted for the sameinformation as Net Play Mode. Enterthe following information of the DVRthat you want to remotely access:Host Name - The IP address that theDVR is on.Host Port - The port you programmedinto the DVR.User Name - “admin” or user nameyou entered in Set Up.Password - “111111” or passwordyou created in Set Up.Click LOGIN to enter the main page.Note: Admin level will be able to accessall of the program functions remotely.User level will only be able to accessviewing of live video.SKU 67139 For technical questions, please call 1-800-444-3353. Page 33
4.Click on NET Play Mode to exit theremote DVR.SEARCH TIME OPTIONThe Search Time option is availableonly through your web browser’s accessof the system. To find a videothrough this menu you will need toknow the time the video was recorded.1.2.3.4.To install a separate hard drive:Make sure the hard drive is set toMaster according to the hard drivemanual.Carefully remove the Top Cover.Connect the Data Cable to the HardDrive.Connect the Power Cord to the HardDrive.5.Replace the Top Cover.1. To use the Search Time Function,click on Search Time to open theSearch Time menu.2.3.Enter the time of the desired file andclick OK to find the file.Click on NET Play Mode to exit theremote DVR.Audio ConnectionTo add audio to one of the cameralocations, plug a microphone (soldseparately) into the Audio Input jackon the back of the DVR. Route themicrophone to the chosen camera.Hard Disk InstallationAn additional hard disk can be connectedto this unit. Consult your harddrive manual for installation and haveinstalled by a qualified technician.Note: Do not disconnect the hard drivefrom the unit when the DVR is running.SKU 67139 For technical questions, please call 1-800-444-3353. Page 34
Maintenance/ServicingNTSC/PAL Output SelectProcedures not specificallyexplained in this manualmust be performed only by aqualified technician.To preventserious injuryfrom accidentaloperation:Unplug the unit from itselectrical outlet beforeperforming any inspection,maintenance, or cleaningprocedures.To prevent seriousinjury from unit failure:Do not use damagedequipment. If abnormal noiseoccurs, have the problemcorrected before further use.This unit is set to NTSC video format. Itcan be changed to PAL by changing thejumper JS1 setting. This change must bemade by a qualified technician. To makethis adjustment:1.2.Open the cover.Slide the switch to NTSC or PAL asneeded for your system.Cleaning and MaintenanceBEFORE EACH USE, inspect thegeneral condition of the unit, includingconnections, wiring and cameras.Check for loose or damaged hardware,damaged electrical wiring, andany other condition that may affect itssafe operation.WARNING! If the supply cord ofthis DVR is damaged, it must bereplaced only by a qualified servicetechnician.3.Replace and secure the cover.SKU 67139 For technical questions, please call 1-800-444-3353. Page 35
TroubleshootingProblem Possible Causes Likely SolutionsCamera 1. Loose or incorrect 1. Check that all wire connections are secure and in thedoes not connections.correct location.record 2. Camera settings need 2. Through Main Menu check that:or is not adjusting.a. Camera Setup - Channel is ON.displayed.b. Record Setup - Channel is ON.c. Record Framerate - Adjust frames per second.d. Record Schedule - Set to Normal or Sensor for recordtime desired.e. Sensor Setup - Set Record time once sensor is acti-vated.f. Motion Detector Setup - If desired, set to ON and setsensitivity level -(block out area you do not want detected).g. Misc. Setup - Check that time is set to current time.h. Misc. Setup - Check whether <strong>channel</strong> is hidden fromview (will still record, but will not display live image, onlyshows up on playback).i. Misc. Setup - Adjust Image Parameters for clearest im-age.Cannotaccessconnectedmodem.1.2.Loose or incorrectconnections.Incorrect addressinformation.1. Check that the connections are secure and plugged into thecorrect location in the correct order.2. Through the Main Menu under Network Setup,- Check that IP Allocation is set to DHCP.*- Note the IP Address.- Enter the IP Address in the address bar in InternetExplorer and press enter. You will access the HD.*Note: if your modem does not support DHCP, you will needto get the address information from your internet provider.Error codeswhen tryingto installDxClientsoftwareIn<strong>com</strong>patibility with webbrowser.Check if web browser is <strong>com</strong>patible with software. This willrequire online research to determine your web browser’s<strong>com</strong>patibility and operations necessary for installation. Youmay need to consult a qualified software technician if needed.Follow all safety precautions whenever diagnosing or servicing thetool. Disconnect power supply before service.REV 10hSKU 67139 For technical questions, please call 1-800-444-3353. Page 36
Problem Possible Causes Likely SolutionsCannotaccess DVRremotely.1. Port forwarding not<strong>com</strong>pleted.1. Complete port forwarding procedures to set up the modemfor port forwarding. If needed, consult online information ora qualified <strong>com</strong>puter technician to <strong>com</strong>plete this task. Youwill need to obtain the external IP address of the modem to<strong>com</strong>plete this step.2. Incorrect IP address.3. Firewall protectionhindering access.2. Check for correct external IP address.3. Check firewall settings.BuzzersoundingPoor qualityimages4. Proxy not specified.One or more of thecameras are notconnected.1. If viewed on TVscreen, TV settingsCamera settings needadjusting.4. Add to allowed IP addresses.Check that all the camera wiring is <strong>com</strong>pletely plugged in at allconnection points.1. Through the Main Menu check thata. Record Framerate - Adjust frames per second.b. Video Quality - Increase to Highest setting.c. Misc. Setup - Adjust the Image Parameters for clearestimage.Follow all safety precautions whenever diagnosing or servicing thetool. Disconnect power supply before service.REV 10hSKU 67139 For technical questions, please call 1-800-444-3353. Page 37
PLEASE READ THE FOLLOWING CAREFULLYNeither the manufacturer or distributor makes any representation or warrantyof any kind to the buyer that he or she is qualified to make any repairs to theproduct, or that he or she is qualified to replace any parts of the product. Infact, the manufacturer and/or distributor expressly states that all repairs andparts replacements should be undertaken by certified and licensed technicians,and not by the buyer. The buyer assumes all risk and liability arising out of hisor her repairs to the original product or replacement parts thereto, or arisingout of his or her installation of replacement parts thereto.Record Product’s Serial Number Here:Note: If product has no serial number, record month and year of purchase instead.SKU 67139 For technical questions, please call 1-800-444-3353. Page 38


