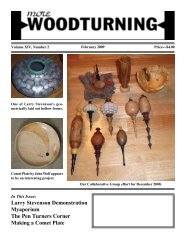
MAKING A BABY RATTLE — 18th Century Style - More Woodturning
MAKING A BABY RATTLE — 18th Century Style - More Woodturning
MAKING A BABY RATTLE — 18th Century Style - More Woodturning
- No tags were found...

You also want an ePaper? Increase the reach of your titles
YUMPU automatically turns print PDFs into web optimized ePapers that Google loves.
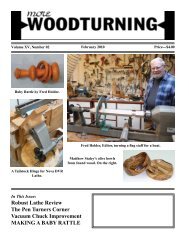
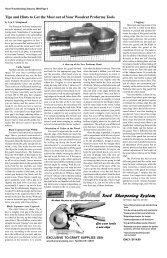
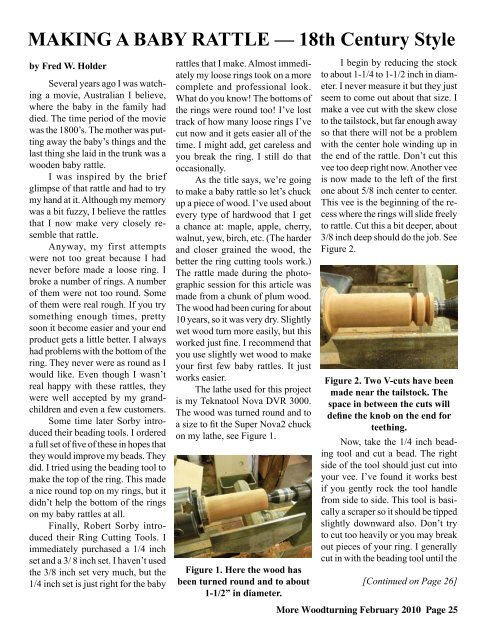
<strong>MAKING</strong> A <strong>BABY</strong> <strong>RATTLE</strong> <strong>—</strong> <strong>18th</strong> <strong>Century</strong> <strong>Style</strong>by Fred W. HolderSeveral years ago I was watchinga movie, Australian I believe,where the baby in the family haddied. The time period of the moviewas the 1800’s. The mother was puttingaway the baby’s things and thelast thing she laid in the trunk was awooden baby rattle.I was inspired by the briefglimpse of that rattle and had to trymy hand at it. Although my memorywas a bit fuzzy, I believe the rattlesthat I now make very closely resemblethat rattle.Anyway, my first attemptswere not too great because I hadnever before made a loose ring. Ibroke a number of rings. A numberof them were not too round. Someof them were real rough. If you trysomething enough times, prettysoon it become easier and your endproduct gets a little better. I alwayshad problems with the bottom of thering. They never were as round as Iwould like. Even though I wasn’treal happy with these rattles, theywere well accepted by my grandchildrenand even a few customers.Some time later Sorby introducedtheir beading tools. I ordereda full set of five of these in hopes thatthey would improve my beads. Theydid. I tried using the beading tool tomake the top of the ring. This madea nice round top on my rings, but itdidn’t help the bottom of the ringson my baby rattles at all.Finally, Robert Sorby introducedtheir Ring Cutting Tools. Iimmediately purchased a 1/4 inchset and a 3/ 8 inch set. I haven’t usedthe 3/8 inch set very much, but the1/4 inch set is just right for the babyrattles that I make. Almost immediatelymy loose rings took on a morecomplete and professional look.What do you know! The bottoms ofthe rings were round too! I’ve losttrack of how many loose rings I’vecut now and it gets easier all of thetime. I might add, get careless andyou break the ring. I still do thatoccasionally.As the title says, we’re goingto make a baby rattle so let’s chuckup a piece of wood. I’ve used aboutevery type of hardwood that I geta chance at: maple, apple, cherry,walnut, yew, birch, etc. (The harderand closer grained the wood, thebetter the ring cutting tools work.)The rattle made during the photographicsession for this article wasmade from a chunk of plum wood.The wood had been curing for about10 years, so it was very dry. Slightlywet wood turn more easily, but thisworked just fine. I recommend thatyou use slightly wet wood to makeyour first few baby rattles. It justworks easier.The lathe used for this projectis my Teknatool Nova DVR 3000.The wood was turned round and toa size to fit the Super Nova2 chuckon my lathe, see Figure 1.Figure 1. Here the wood hasbeen turned round and to about1-1/2” in diameter.I begin by reducing the stockto about 1-1/4 to 1-1/2 inch in diameter.I never measure it but they justseem to come out about that size. Imake a vee cut with the skew closeto the tailstock, but far enough awayso that there will not be a problemwith the center hole winding up inthe end of the rattle. Don’t cut thisvee too deep right now. Another veeis now made to the left of the firstone about 5/8 inch center to center.This vee is the beginning of the recesswhere the rings will slide freelyto rattle. Cut this a bit deeper, about3/8 inch deep should do the job. SeeFigure 2.Figure 2. Two V-cuts have beenmade near the tailstock. Thespace in between the cuts willdefine the knob on the end forteething.Now, take the 1/4 inch beadingtool and cut a bead. The rightside of the tool should just cut intoyour vee. I’ve found it works bestif you gently rock the tool handlefrom side to side. This tool is basicallya scraper so it should be tippedslightly downward also. Don’t tryto cut too heavily or you may breakout pieces of your ring. I generallycut in with the beading tool until the[Continued on Page 26]<strong>More</strong> <strong>Woodturning</strong> February 2010 Page 25
Baby Rattle Continued fromPage 25ring has just cleaned up. See Figure3. The only sharpening you need todo on the beading tool is to hone thetop face. You should never grind theother parts that were ground to shapeat the factory.Using the skew chisel, I cut avee about 1/2 inch to the left of thering recess and another one aboutone inch further to the left to definethe far left dimension of the rattle,also the end of the handle. Form abead between the handle and thering recess. Make this bead smallerthan the ring diameters, but largerthan the inside diameter of the rings,you don’t want them to slip off.Figure 3. Here the top of thering to be has been cut with theSorby beading tool.The skew chisel is used towiden the space on each side of thebead. You need a 3/8 to 1/2 inchwide vee on either side of the bead.I generally cut straight in on eitherside of the bead with the long pointof the skew. It doesn’t really matterwhich side of the bead you attackwith the ring cutting tools first. I’vedeveloped the habit of cutting onthe right side first and then cuttingthe ring loose with the left sidetool. It takes a little practice to usethese tools. A steady hand and alittle care is all that’s needed. Youdon’t have to be a great woodturnerto cut a very acceptable loose ringwith these tools. The instructionsthat came with the ring cutting toolssaid you can cut rings without usingthe beading tool first, but I’ve foundmy rings are better when the beadingtool is used to cut the top.Figure 4. Here the ring is nearlycut loose. I finally cut the ringloose with the tool on the leftside of the ring.From the Woodcraft catalog,here are the instructions for cuttinga loose ring:(1) cut a bead with a beading tool,(2) cut to depth beside the bead witha parting tool,(3) use the right ring tool to cut therear right of the ring,(4) use the left ring tool to cut therear left of the ring, which will alsoseparate the ring.Once the ring is loose, I takea 3/8 inch spindle gouge and makethe recess deeper to allow the ringto float freely.Make a second loose ring withthe right hand side of the beadingtool just cutting into the vee on theleft side of the ring recess. (SeeFigure 5.) This is done in exactly thesame manner as the first ring. Usethe 1/ 4 inch spindle gouge to cleanup and size the bottom of the ringrecess. I generally cut this down toabout 1/2 to 3/8 inch in diameter.Again its not critical, no need to sizespecifically.Figure 5. Starting the secondloose ring.Form the handle and put intwo decorative vee cuts with theskew. At this time I cut the vee atthe end of the handle down to about1/4 inch. I then shift to the far rightside and turn the piece between thefirst vee cut and the ring recess intoa pleasing knob shape. Babies liketo cut their teeth on this knob, atleast my grandson used his for thatpurpose. Again leave about 1/4 inchof material on the right end, also.(See Figure 6.)Now, you can sand the rattle. Igenerally don’t go finer than 280 or320 grit or a fine grit as some sandpapers are marked. Remember, thisis going into a baby’s mouth and, ifthey are cutting teeth, it will not besmooth for very long. I personallyPage 26 <strong>More</strong> <strong>Woodturning</strong> February 2010
find them more attractive if theyaren’t too highly polished.Figure 6. Here the piece is prettymuch ready for sanding.Figure 8. The finished baby rattle. Now ready to ship to mycustomer.Figure 7. The Robert Sorbytools used in this project: (topto bottom) Right hand side tool,beading tool, and left hand sidetool.After I’m satisfied with thesanding job, I cut the vee’s at eachend down to about 1/8 inch, justenough to still hold everything together.I prefer to separate the rattlefrom the rest of the spindle with aknife or saw. I use a knife to pareoff the excess and then hand sandto smooth each end.Add a coat of non-toxic oiland you have a completed rattle. Iused the Mahoney Walnut Oil finish,which works very well. The finishedbaby rattle is not too large, but itmeets the minimum size requirementfor baby toys.This completes the making ofthe rattle, but perhaps you would likea few specifications on the Sorbytools used to make this little item. Ipurchased my tools from Woodcraft,but I believe several other suppliersalso carry these tools. The beadingtools are available in five sizes fromWoodcraft: 1/8, 3/16, 1/4, 5/ 16, and3/8 inch diameter beads. The bladelength is 4-1/2 inches and the ashhandles measure 6-1/2 inches inlength, giving an overall tool lengthof about 11 inches. These tools allowthe making of excellent beadswith much less skill and experiencerequired. I like them because they’refaster and repeatable. A bead madewith the Sorby beading tool will alwaysbe near perfect if care is usedin the cutting process. The pricesvary on these tools depending onsize, but the set of five tools sold for$97.50 in Woodcraft’s 1996 catalog.If you have problems cutting consistentquality beads, these tools shouldhelp solve your problem.The ring cutting tools comein sets of right and left tool. Formaking baby rattles, I recommendthe 1/4” tools. The blades are fiveinches long and the ash handle is8-3/4 inches in length, making a respectablylong tool. The tools comewith full instructions for use. Evenif you’re an expert turner, I believethese ring cutting tools are a worthwhileaddition to your turning tools,if for no other reason than speed. Ican complete a loose ring with thesetools while I’m thinking about it usingonly a skew chisel.Note: In its original form, this articlewas published in the October1996 issue of <strong>More</strong> <strong>Woodturning</strong>. Ithas been updated here.<strong>More</strong> <strong>Woodturning</strong> February 2010 Page 27