Michael Mocho Demonstration 2009 Symposium of the AAW The ...
Michael Mocho Demonstration 2009 Symposium of the AAW The ...
Michael Mocho Demonstration 2009 Symposium of the AAW The ...

Create successful ePaper yourself
Turn your PDF publications into a flip-book with our unique Google optimized e-Paper software.
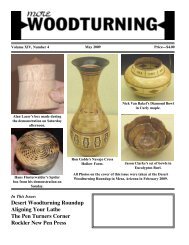
Volume XIV, Number7 August <strong>2009</strong> Price—$4.00Malcolm TibbettsDavid SpringettBill LuceRon GertonBinh PhoWilmington Area Woodturners<strong>Michael</strong> <strong>Mocho</strong>In This Issue:<strong>Michael</strong> <strong>Mocho</strong> <strong>Demonstration</strong><strong>2009</strong> <strong>Symposium</strong> <strong>of</strong> <strong>the</strong> <strong>AAW</strong><strong>The</strong> Pen Turners CornerShape Shifter Eccentric ToolMore Woodturning August <strong>2009</strong> Page 1
Note: We now <strong>of</strong>fer subscriptioncopies as a Portable DocumentFile (*.PDF) that you can read onyour computer. You can archiveyour copies on your computer andsearch <strong>the</strong>m for subjects <strong>of</strong> interest.This method provides quickdelivery <strong>of</strong> <strong>the</strong> issue. This is also acost savings, because <strong>the</strong> electronicedition costs only $25.00 per year.This is a significant cost savingsfor foreign subscribers who have topay a great deal extra for postage.If interested, e-mail me at:fred@morewoodturning.netManufacturer’s <strong>of</strong> <strong>the</strong> Worlds Largest Range <strong>of</strong> FineWoodworking HandtoolsCROWN HAND TOOLS LTD.332-334 Coleford Road, DarnallSheffield, S9 5PH EnglandTEL: England 114 272 3366 FAX: 114 272 5252E-Mail: info@crowntools.ltd.uk Web Site: www.crownhandtools.ltd.ukPage 2 More Woodturning August <strong>2009</strong>
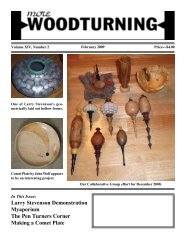
Contents<strong>Michael</strong> <strong>Mocho</strong> <strong>Demonstration</strong>..4<strong>AAW</strong> News: June <strong>2009</strong> <strong>AAW</strong> BoardLetter.............................................8<strong>The</strong> Making <strong>of</strong> an Old ButternutBowl—A “Reclamation” Project ........................................................11Questions and Answers from <strong>the</strong> Internet...........................................15Shape Shifter Tools....................15Newell posts from Douglas Fir............................................................18Carbide TipTurning Tools? ......18Thread Chasers..........................19Using a Wood Tap for Chucks...34Finish for Bark on a Bowl .......34<strong>The</strong> Penturner’s Corner............16<strong>The</strong> <strong>2009</strong> <strong>Symposium</strong> <strong>of</strong> <strong>the</strong> <strong>AAW</strong> .....................................................22Coming Events..........................30News in <strong>the</strong> Trade: What’s Happeningin Woodturning....................31<strong>The</strong> Sören Berger Thread Creator..............................................31Tormek Jigs - Now for BenchGrinders ....................................31Popular Ice Cream Scoop KitNow Available In Chrome.........32Diamond Grinding Wheels.......33Using two Opposed Bowl Steadiesas a Center Steady......................35Tip for using a Spindle Tap.......35Shape Shifter Eccentric Tool Test.....................................................36An Emmy-Winning Bowl?........39<strong>The</strong> Market Place......................39About <strong>the</strong> Cover:Our cover this month is photos <strong>of</strong>various pieces from <strong>the</strong> Instant Galleryor demonstration areas at <strong>the</strong><strong>AAW</strong> <strong>Symposium</strong> in Albuquerqueon June 26 through 28, <strong>2009</strong>. <strong>The</strong>rewas an estimated 800 items in <strong>the</strong>Instant Gallery. <strong>The</strong> event was awonderful experience besides all <strong>of</strong><strong>the</strong> demonstrations.EDITORALWow! Two months in a row, we’ve attended two wonderful symposiums.<strong>The</strong> <strong>AAW</strong> <strong>Symposium</strong> was a great symposium, although verylarge, it had many things to see besides <strong>the</strong> demonstrations. <strong>The</strong> InstantGallery was mind boggling and <strong>the</strong> o<strong>the</strong>r galleries were something verydifferent.At this point, we expect to stay home and attend to things in our area.<strong>The</strong> costs <strong>of</strong> <strong>the</strong>se symposiums are pretty steep by <strong>the</strong> time you considertransportation and hotels. Are <strong>the</strong>y worth it? I think so or I would not havespent <strong>the</strong> money to go. Hopefully <strong>the</strong>re will be some new advertisers andsome additional subscribers.Incidentally, our ongoing <strong>of</strong>fer <strong>of</strong> a CD-ROM <strong>of</strong> all issues published(a $95.00 value) in exchange for clubs sending in 10 subscriptions isworking fairly well. I believe that five clubs have responded by now andwe are hoping <strong>the</strong>re will be more. Please encourage your club membersto participate in this program.Fred Holder, Editor and PublisherTo Subscribe to More Woodturning:Check <strong>the</strong> Print Subscription Period Below:United States Canada O<strong>the</strong>r Countries__One Year/$35 __One Year/$48 __One Year/$68__Two Years/$70 __Two Years/$100 __Two Years/$105__Three Years/$105 __Three Years/$145 __Three Years/$205All amounts in US Dollars! We Accept Visa/MC.Electronic Version (PDF): For People receiving Electronic issues,new priceby year only: $25.00/One year. We need an e-mail for <strong>the</strong> electronic version.Because <strong>of</strong> <strong>the</strong> significant postage increase for outside <strong>the</strong> United States,recommend <strong>the</strong> Electronic Version for all Foreign Subscribers.Thank You!!Please Enter Your Name and Address Below:Name: _________________________________________________Address: _______________________________________________City: ______________________ State: ______ ZIP: ____________E-Mail for Electronic Subscribers: ____________________________Clip and Mail with Your Check, Cash, or Charge Card Information to:More Woodturning, PO Box 2168, Snohomish, WA 98291More Woodturning August <strong>2009</strong> Page 3
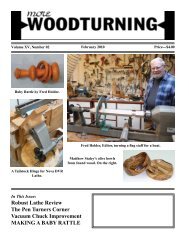
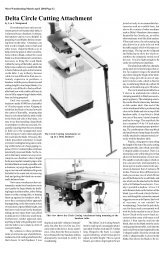
<strong>Michael</strong> <strong>Mocho</strong> <strong>Demonstration</strong>by Fred Holder<strong>Michael</strong> <strong>Mocho</strong> did an all daydemonstration for <strong>the</strong> Seattle Chapter<strong>of</strong> <strong>AAW</strong> on October 8, 2008 atJack McDaniel’s wonderful shop.Although I’ve gone to many symposiumsboth <strong>AAW</strong> and Utah Woodturning<strong>Symposium</strong>s, I had neverencountered him demonstrating.First, I would like to tell you a littlebit about <strong>Michael</strong> <strong>Mocho</strong> before goinginto <strong>the</strong> demonstration.<strong>Michael</strong> <strong>Mocho</strong> is a self-employedwoodworker/turner fromAlbuquerque, New Mexico. He hadconsiderable involvement in <strong>the</strong><strong>AAW</strong> <strong>Symposium</strong> <strong>2009</strong>. He hasbeen a full-time craftsman sinceMore Woodturning is published monthlyexcept April and October for $35.00 peryear by Fred and Mildred Holder at 19805Fales Road, Snohomish, WA 98296. MailingAddress is P. O. Box 2168, Snohomish WA98291-2168. Telephone: (360) 668-0976.E-Mail: fred@morewoodturning.net, WEBPage URL: http://www.morewoodturning.net. Periodicals Postage paid at Snohomish,Washington and at additional mailing <strong>of</strong>fice.More Woodturning is sold by subscriptionat $35.00 for one year and at a singlecopy price <strong>of</strong> $4.00 plus $1.50 postageand handling. Editorial material submittedfor publication must be accompaniedby a stamped, self-addressed envelope toensure return if it is not accepted for use.More Woodtunring uses materials frommany sources and many authors, <strong>the</strong> viewsexpressed herein are, <strong>the</strong>refore, those <strong>of</strong><strong>the</strong> authors and not necessarily those <strong>of</strong> <strong>the</strong>Publishers. More Woodturning receives anumber <strong>of</strong> products each year for evaluation,but accepts no responsibility for return <strong>of</strong>those products unless specifically requestedto do so, in advance!POSTMASTER: Send address changesto More Woodturning, P. O. Box 2168,Snohomish WA 98291-2168.USPS No. 0153871976 with extensive experiencein furniture design, woodturning,architectural millwork, patternmaking, and stringed musicalinstruments. He operates a smallshop in Albuquerque, New Mexicoproducing commissioned furniture,contract woodturning, and decorativecontainers for <strong>the</strong> gift market.He has completed residencies at <strong>the</strong>Arrowmont School <strong>of</strong> Craft, and<strong>the</strong> International Turning Exchangeprogram at <strong>the</strong> Woodturning Centerin Philadelphia. He teaches in <strong>the</strong>Fine Woodworking Program at <strong>the</strong>Santa Fe Community College. Hehas demonstrated at <strong>the</strong> <strong>AAW</strong> National<strong>Symposium</strong> and many localchapters, and also teaches at craftschools including Arrowmont and<strong>the</strong> John C. Campbell Folk School.He is known for his intricate containersthat <strong>of</strong>ten combine bentwood with turned, carved, and texturedcomponents, which have wonnumerous awards and are in manyprivate and public collections.Mildred and I attended hisdemonstration at Jack McDanielsshop and were impressed with hisskill and talent. He began <strong>the</strong> day’sdemonstration with <strong>the</strong> introduction<strong>of</strong> a number <strong>of</strong> techniques for texturing<strong>the</strong> surface <strong>of</strong> one’s work. Hetalked briefly before starting to turn.Meet <strong>Michael</strong> <strong>Mocho</strong> in Figure 1.<strong>The</strong> first thing that he turnedwas a piece <strong>of</strong> wood between centers,I believe this was hard maple orEastern maple. He turned <strong>the</strong> woodround and <strong>the</strong>n turned tenons onboth ends to be gripped by a chuck.He <strong>the</strong>n parted <strong>the</strong> wood into twopieces. One piece he mounted in achuck and trued up <strong>the</strong> face <strong>of</strong> <strong>the</strong>wood by taking thin slices <strong>of</strong>f <strong>of</strong> <strong>the</strong>end as shown in Figure 2. I’ve neverbeen able to slice <strong>of</strong>f a piece this thinwithout having it break up into smallpieces. This was impressive and wasearly in <strong>the</strong> demonstration.Figure 1. <strong>Michael</strong> <strong>Mocho</strong> at <strong>the</strong>beginning <strong>of</strong> his demonstration.Figure 2. Thin slice <strong>of</strong> woodtaken from <strong>the</strong> end <strong>of</strong> <strong>the</strong> piecemounted in <strong>the</strong> chuck.Once <strong>the</strong> surface <strong>of</strong> <strong>the</strong> end <strong>of</strong><strong>the</strong> piece was smooth. He <strong>the</strong>n laid<strong>the</strong> skew chisel on its side and using<strong>the</strong> tip <strong>of</strong> <strong>the</strong> tool, he did chatterwork on <strong>the</strong> surface. (See Figure3) This was a nice technique usingonly a skew chisel. He <strong>the</strong>n parted<strong>the</strong> piece <strong>of</strong>f so that he could pass itaround while going to <strong>the</strong> next step.<strong>The</strong> piece is shown in Figure 4.Page 4 More Woodturning August <strong>2009</strong>
make an indention in <strong>the</strong> wood <strong>of</strong><strong>the</strong> shape <strong>of</strong> <strong>the</strong> tip <strong>of</strong> <strong>the</strong> punchportion.la<strong>the</strong> rotating, he <strong>the</strong>n used an outsidethread chaser to make a number <strong>of</strong>concentric grooves in <strong>the</strong> surface <strong>of</strong><strong>the</strong> wood as shown in Figure 7.Figure 3. Doing chatter workwith <strong>the</strong> skew chisel lying on itside.<strong>Michael</strong> <strong>the</strong>n introduced ano<strong>the</strong>rgadget that he uses to dotexturing on endgrain wood. Thisgadget is shown in Figure 5. Itmounts in <strong>the</strong> tool rest banjo and isaligned with <strong>the</strong> wood and <strong>the</strong>n <strong>the</strong>punch in <strong>the</strong> piece is tapped on <strong>the</strong>end with something (a small hammeror <strong>the</strong> end <strong>of</strong> a turning tool) toFigure 4. Chatter work doneon <strong>the</strong> surface <strong>of</strong> a piece <strong>of</strong> endgrain wood with a skew chiselon its side.He <strong>the</strong>n mounted a chuckthat had two <strong>of</strong> <strong>the</strong> jaws removedso that he could grip a rectangularpiece <strong>of</strong> wood. (Figure 6) With <strong>the</strong>Figure 5. Ano<strong>the</strong>r form <strong>of</strong>texturing tool that he introducedfor texturing endgrain wood.[Continued on Next Page]More Woodturning August <strong>2009</strong> Page 5
<strong>Michael</strong> <strong>Mocho</strong> Continuedfrom Previous Pagepiece <strong>of</strong> wood to produce <strong>the</strong> patternshown in Photo 8.it screwed onto <strong>the</strong> tenon he hadthreaded.Figure 6. Making concentricgrooves in a piece <strong>of</strong> wood usingan outside thread chaser.Figure 8. This photo shows <strong>the</strong>effect created when <strong>the</strong> wood isshifted sideways and a secondset <strong>of</strong> concentric grooves aremade with <strong>the</strong> thread chaser.Figure 10. Applying <strong>the</strong> magicelixir to <strong>the</strong> area to be threaded.Figure 7. This photo shows <strong>the</strong>grooves that were made with <strong>the</strong>thread chaser.He demonstrated <strong>the</strong> texturingthat can be done using <strong>the</strong> RobertSorby spiraling and texturing toolbefore turning <strong>the</strong> piece <strong>of</strong> woodhe had mounted in <strong>the</strong> chuck intoa small box bottom with a threadedopening. He actually drilled <strong>the</strong> holein <strong>the</strong> box and <strong>the</strong>n sanded it with asmall mandrel with a slit cut in it tohold <strong>the</strong> sandpaper. <strong>The</strong> box bottomis shown in Figure 9.He <strong>the</strong>n shifted <strong>the</strong> wood sothat <strong>the</strong> center <strong>of</strong> rotation was shiftedsideways and made a second set<strong>of</strong> concentric grooves on <strong>the</strong> samePage 6 More Woodturning August <strong>2009</strong>Figure 9. Box top that has beenturned and threaded for a lid toscrew into.He <strong>the</strong>n showed how to makethreads with a hand held chaser in<strong>the</strong> hard maple without <strong>the</strong> threadscrumbling. While thread chasing,he coated <strong>the</strong> wood with a specialelixir (dish washing detergent),which seemed to work very well.Figure 10 shows him putting <strong>the</strong>detergent on <strong>the</strong> area to be threadedand Figure 11 shows him chasingthreads. He made a ring that healso threaded and showed howFigure 11. Chasing <strong>the</strong> actualexternal threads.He <strong>the</strong>n turned and threaded<strong>the</strong> lid for <strong>the</strong> box. Before parting<strong>of</strong>f, he drilled a hole in <strong>the</strong> top <strong>of</strong><strong>the</strong> lid to later accept a finial that hewould turn. Figure 12 shows <strong>the</strong> lidalmost turned. Figure 13 shows <strong>the</strong>lid screwed onto <strong>the</strong> box bottom andFigure 14 shows <strong>the</strong> lid removed and<strong>the</strong> texture that he had applied to <strong>the</strong>bottom <strong>of</strong> <strong>the</strong> lid.Finally, he <strong>the</strong>n turned a smallfinial out <strong>of</strong> walnut (I believe). (SeeFigure 15) It had a tenon that wouldfit into <strong>the</strong> hole he had drilled in<strong>the</strong> lid. Figure 16 shows <strong>the</strong> totallyturned box with <strong>the</strong> lid in place.Figure 17 shows a slightly tippedpicture <strong>of</strong> <strong>the</strong> box to show <strong>the</strong> textureon <strong>the</strong> lid.
<strong>the</strong> video camera. Finally Figure20 shows <strong>the</strong> sanding belt with acouple <strong>of</strong> pieces that have been finalshaped using this rig.Figure 12. Turning <strong>the</strong> outsideshape <strong>of</strong> <strong>the</strong> box lid.Figure 15. Turning <strong>the</strong> finial for<strong>the</strong> box.Figure 17. A slightly differentangle shot to show <strong>the</strong> textureon <strong>the</strong> top <strong>of</strong> <strong>the</strong> lid.Figure 13. <strong>The</strong> lid screwed onto<strong>the</strong> box.Figure 14. This photo shows <strong>the</strong>lid removed and <strong>the</strong> texture on<strong>the</strong> bottom side <strong>of</strong> <strong>the</strong> lid.Figure 16. <strong>The</strong> completed boxwith finial attached.Finally, <strong>Michael</strong> mounted hissanding rig on <strong>the</strong> la<strong>the</strong> and demonstratedhow it works (See Figure 18).This is a la<strong>the</strong> driven sanding beltsystem. <strong>The</strong> drive spindle is made <strong>of</strong>wood and has a Morse Taper turnedon one end and a place for <strong>the</strong> livetail center on <strong>the</strong> o<strong>the</strong>r end. An ovalblock <strong>of</strong> wood is attached to a turnedpiece that will fit into <strong>the</strong> tool-posthole in <strong>the</strong> la<strong>the</strong> banjo. This ovalpiece <strong>of</strong> wood is covered with asheet <strong>of</strong> cork, which is over coatedwith a graphite canvas, a very slickmaterial that will allow <strong>the</strong> sandingbelt to slide over it smoothly. Figure19 shows ano<strong>the</strong>r view captured byFigure 18. La<strong>the</strong> driven sandingbelt mechanism.Figure 19. Ano<strong>the</strong>r angle view <strong>of</strong><strong>the</strong> sanding belt mechanism.[Continued on Next Page]More Woodturning August <strong>2009</strong> Page 7
<strong>Michael</strong> <strong>Mocho</strong> Continuedfrom Previous PageFigure 20. A couple <strong>of</strong> piecesthat have been sanded to shapeon this rig.Overall, this was a day wellspent with a number <strong>of</strong> o<strong>the</strong>r woodturnerswatching a very experiencedturner demonstrating some <strong>of</strong> hismany skills. If you get a chanceto see a demonstration by <strong>Michael</strong><strong>Mocho</strong>, I recommend that you takeit. He did a good demonstration forus.<strong>AAW</strong> News: June <strong>2009</strong> <strong>AAW</strong> Board Letterby Jean LeGwinI am asking for your participationin our journal American Woodturner.<strong>The</strong> journal <strong>of</strong>fers manythings packaged neatly between twopaper covers: it records our history,showcases our work, discusses techniquesand tools for producing ourwork, <strong>of</strong>fers us projects to improveour skills, and critiques <strong>the</strong> work <strong>of</strong>our pr<strong>of</strong>essionals. It is a large andcomplex undertaking to try and satisfyour diverse membership.Our journal is a member drivenpublication and is dependent on yourparticipation not just as a reader, butalso as a contributor. We welcomeyour input in creating content thatrepresents interests <strong>of</strong> all segments<strong>of</strong> <strong>the</strong> membership. If you do notsee <strong>the</strong> type <strong>of</strong> articles or work thatyou think should be included in <strong>the</strong>Jean LeGwin <strong>AAW</strong> BoardMember & Publications Chair<strong>AAW</strong>journal, please write and let BettyScarpino or a board member know.Better yet, write an article yourselfon a subject that is near and dearEditor’s Note: I’m sure that most <strong>of</strong>our readers experience demonstrationssuch as <strong>the</strong> one by <strong>Michael</strong><strong>Mocho</strong>. I encourage you to takephotos as I did and consider writinga story about <strong>the</strong> demonstration. Ifeel it is good to share informationabout demonstrations and <strong>the</strong> demonstrators.Page 8 More Woodturning August <strong>2009</strong>“THE ELIMINATOR”Hollowing ToolELIMINATES:CATCHES,TEAR OUT,SHARPENINGAvailable in three sizes: 1/4, 3/8, 1/2 inch cutters. Tool shafts aremilled with flats for both right and left hand cutting.Available from: Packard Woodworks and Craft Supplies USAwww.jewelwood.com
“Turner’s Choice”Pr<strong>of</strong>essional Grade Wood StabilizerReduces shrinkage, drying cracks, dust, chipping, and torn grainIncreases cellular adhesion, aids smooth cutting <strong>of</strong> end-grainHelps produce long, curling chipsWater pro<strong>of</strong>s and prevents decayPer 1 gallon can $49.95 or $49.95 per gallonPer 5 gallon pail $199.95 or $39.95 per gallonPer 55 gallon drum $1500.00 or $27.27 per gallonPer 275 gallon tote $7500.00 or $27.27 per gallon1 and 5 gallon lots are shipped UPS. Drums and Totes via motorfreight.Terms: Credit Card, Prepayment via check, money order or BankWire.All shipments are F. O. B Houston, Texas 77386.To learn more about this dynamic product visit www.cedarcide.comTo order call 1-800-842-1464 or email dbateman@cedarcide.comFor product or Dealership Information email Scotty at:dryes@mindspring.comto you. If you believe that you arenot a writer, partner with someonewho can work with you to put yourthoughts and ideas on paper. Thatperson may be your spouse, a friend,or ano<strong>the</strong>r club member. If you havea project that you have developed,or a technique you would like toshare, take some step-by-step photos<strong>of</strong> your process and write a set<strong>of</strong> instructions that will allow o<strong>the</strong>rsto do <strong>the</strong> same. If you have anidea you would like to discuss withBetty before you proceed, she canbe reached at <strong>the</strong> following:Betty ScarpinoEditor, American Woodturner5246 Evanston Ave.Indianapolis, IN 46220317-254-1374editorscarpino@gmail.comShe will be happy to talk withyou about how you might translateyour idea into a publishable piece.Finally, many <strong>of</strong> us have madea jig to make a task easier, stumbledon a shortcut to speed up production,found interesting storage solutionsfor tools and o<strong>the</strong>r turning paraphernalia,made tools for a particulartask, and discovered general tips tohelp us in our shops and with ourturning. You get <strong>the</strong> idea. Pleaseshare those with <strong>the</strong> rest <strong>of</strong> us in ourTips section. Send your tip to JohnLucas by snail mail at or 529 1stAvenue North, Baxter, TN 38544.You may be rewarded with seeingit in print and a check for $35.Journal ResourcesFor those <strong>of</strong> you who are lookingfor more projects, I’d like toremind you that <strong>the</strong> <strong>AAW</strong> has somewonderful project books availablewith projects for all skill levels. Fivebooks are now available covering<strong>the</strong> period from 1987–2004.Like a bargain? Have a lookat <strong>the</strong> American Woodturner backNew Video:Reviewed in <strong>the</strong> February2006 issue <strong>of</strong> More Woodturning.“Relief CarvedEmbellishments for WoodProjects”Available in:DVD for $30.00 plus $3.00 S/HVHS for $20.00 plus $3.00 S/HOrder from: Tony Cortese20850 NW 13th Street, Dunnellon, FL 34431PH: 352-489-5652E-Mail: romeowoodturner@msn.comWeb Site: www.tonycortese.orgissue collection on CD. Every issue<strong>of</strong> <strong>the</strong> journal from 1986 to 2006 isavailable on <strong>the</strong> three-CD set. <strong>The</strong>ycontain an amazing amount <strong>of</strong> veryuseful information on tool making,projects <strong>of</strong> all types, techniques,articles on design, and much, muchmore. Each CD has a searchablePDF index that let’s you find a listing;click on any index entry and<strong>the</strong> article opens to that page. Itmakes finding that project you needincredibly easy. Everything is alsoprintable so you can print <strong>the</strong> pagesyou need and take out to <strong>the</strong> shop. At$32 each, you can have all <strong>the</strong> majorarticles from American Woodturnerat your fingertips.Jean LeGwin, <strong>AAW</strong> BoardMember & Publications Chair<strong>AAW</strong> Website: www.woodturner.orgEditor’s Note: Jean LeGuin’s piecehad extensive information on <strong>the</strong>EOG Auction, which has alreadyhappened.More Woodturning August <strong>2009</strong> Page 9
<strong>AAW</strong> JournalEditorial ProceduresAt present, <strong>the</strong> journal is publishedquarterly, which means thatarticles could be in our queue for upto one year before being published.<strong>The</strong> editor will attempt to keep eachauthor informed as to <strong>the</strong> status <strong>of</strong>his or her article. If you do not hearfrom <strong>the</strong> editor after a couple <strong>of</strong>months, please send an inquiry.We pay authors for featurearticles and for some news items.Experienced authors are paid morethan authors who are just beginning.Contributors receive onecomplimentary copy <strong>of</strong> AmericanWoodturner. Additional copies <strong>of</strong><strong>the</strong> journal, in which your articleappears, can be purchased for $3.75each, plus postage. Contact info@woodturner.org for ordering additionalcopies.Betty Scarpino, Editor, AmericanWoodturner5246 Evanston Ave.Indianapolis, IN 46220317-254-1374editorscarpino@gmail.comEditor’s Note: <strong>The</strong> above bit isfrom <strong>the</strong> Submission Guidelines forsubmitting articles for publicationin <strong>the</strong> <strong>AAW</strong> Journal. <strong>The</strong> editor islooking for good articles and tipson woodturning <strong>the</strong> same as youreditor. If you belong to <strong>the</strong> <strong>AAW</strong>, Istrongly urge you to contact Bettywith your idea and perhaps you willhave your article appear in <strong>the</strong> <strong>AAW</strong>Journal.<strong>The</strong> same situation exists with MoreWoodturning. We need good tips andarticles to help fill <strong>the</strong> pages <strong>of</strong> MoreWoodturning with material that isnot just written by your editor.Chinese BallToolsI have recently become a dealerfor <strong>the</strong> Crown Chinese Ball Tools andhave an inventory <strong>of</strong> sets and extrahandles on hand for immediate shipment.A set includes one handle, fourcutters, a tool to make a taperedhole, and a pamplet written by DavidSpringett. <strong>The</strong>se are priced at $125.00for each set.<strong>The</strong> handles include a woodenhandle and a metal piece to attach <strong>the</strong>cutters and ride on <strong>the</strong> ball. <strong>The</strong>se arepriced at $36.20 each. I recommendthree additional handles.Fred HolderPO Box 2168Snohomish, WA 98291360-668-0976Page 10 More Woodturning August <strong>2009</strong>
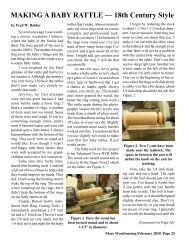
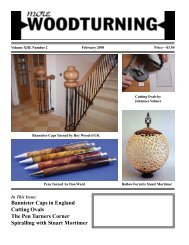
<strong>The</strong> Making <strong>of</strong> an Old Butternut Bowl—A “Reclamation” Projectby Bob Heltman, CMW, <strong>AAW</strong>Most turners who do demonstrationsuse sound wood, likehigh grade kiln dried, unless turninggreen. Many woodturners ingeneral want “good” wood and findproblems dealing with knots, cracks,odd inclusions, or partially decayedwood. Maybe it is because I was ababy in <strong>the</strong> Great De- pression priorto WWII, when you saved and madedo with what you had. Maybe it isalso that I like <strong>the</strong> rare beauty andchallenge coming from workingwith trees that nobody wants. Orfrom stump dumps, blow downs,etc. It seems like a proper frugality,<strong>the</strong> right thing to do. Ecologicallysound! That is what led to this storyabout <strong>the</strong> making <strong>of</strong> a sizeablebutternut salad bowl around 12”diameter.Lightening had hit my powerline between <strong>the</strong> water well andhouse. This led to a lot <strong>of</strong> diggingand rewiring by our friends at CaseElectric and Plumbing. Archie Caseand his Dad spent several longdays at that task, during which <strong>the</strong>ynoticed my collection <strong>of</strong> woodturnings.Mention was made <strong>of</strong> <strong>the</strong>ir oldbutternut (<strong>of</strong>ten called white walnut)tree that had been standing deadfor several years, and whe<strong>the</strong>r Iwanted any <strong>of</strong> <strong>the</strong> wood, and if I didwhe<strong>the</strong>r I’d make <strong>the</strong>m a bowl.Naturally I answered, “YES!”and in a few weeks a number <strong>of</strong> 4foot logs and a root ball showed upoutside my shop studio. Some <strong>of</strong> <strong>the</strong>wood looked downright awful, andbug holes abounded. Some lookedlike #6 shot had been fired at <strong>the</strong>tree. O<strong>the</strong>r holes fit a stout finger.Figure #1 shows <strong>the</strong> remaining butternutlogs.<strong>The</strong> bark had largely rottedaway leaving black staining. Twolarger bowl blanks rest on top, wi<strong>the</strong>nds sealed. Beauty from this!?From some <strong>of</strong> <strong>the</strong> trunk piecesthat were about 10” diameter I madeseveral intermediate sized bowls,and finished 2 to present to <strong>the</strong>Cases, leaving <strong>the</strong>m in a plastic sackhanging on <strong>the</strong>ir back door knob,which <strong>the</strong>y found and enjoyed duringThanksgiving. Figures #2 and #3show a remaining such bowl.For “white” walnut, much <strong>of</strong><strong>the</strong> heartwood seems to have takenon a darker semi-walnut coloring.A recessed rim means faster M&Mscooping!Fig. 1Fig. 2<strong>The</strong> wood shows very nicecolor and figure. Finish is severalsoaking coats <strong>of</strong> lacquer followedby paste wax and buffing.Fig. 3<strong>The</strong>n came <strong>the</strong> challenge withone <strong>of</strong> <strong>the</strong> bigger blanks chainsawedfrom just above <strong>the</strong> root ball. FirstI roughed out <strong>the</strong> piece and putit in a paper bag to season. Eventhough <strong>the</strong> wood was some- whatdried because it came from a longdead tree, rain water soaked it, andsome stresses were re- lieved just byhollowing to wall thickness about10% <strong>of</strong> diameter . In several moreweeks I mounted <strong>the</strong> dry blank andcontinued turning. Very large beetleor worm holes were encountered.<strong>The</strong>se I filled with EZ Poly WoodRebuilder®, which is a combinationglue, structural filler, and sealant.I colored it black with Tempura®black powder pigment. This gaveme a confident sense that <strong>the</strong> woodwould not fly apart or give o<strong>the</strong>rproblems as turning continued.Figure #4 shows <strong>the</strong> outside aftermore turning, tru- ing, and roughsanding. Note that <strong>the</strong> black EZ Polyhas been cut to surface level, and insome places more voids showed upat <strong>the</strong> filled edges. I can fill <strong>the</strong>seareas again with a bit more EZ Poly,[Continued on Next Page]More Woodturning August <strong>2009</strong> Page 11
Butternut Bowl Continuedfrom Previous Pageas it sticks to itself even months laterwith no “cold” joint.A quarter on <strong>the</strong> outer rim givesa sense <strong>of</strong> scale. Note <strong>the</strong> whitecenter area where decay has takenhold, leaving many small voids; seeFig #5 close-up.Fig. 4Fig. 5<strong>The</strong>re were a number <strong>of</strong> optionsat this point. One, I could apply lacquerto both fill <strong>the</strong> tiny voids and toprovide stiffness to <strong>the</strong> wood fibersduring <strong>the</strong> next phase <strong>of</strong> turning.Two, I could fill this area, and anysmall bug holes, with fine sandingdust and glue. I could use dust thatis whitish from this area, or from adarker area. <strong>The</strong> results would ei<strong>the</strong>rmake <strong>the</strong> lighter area more apparent,or cause it to blend with <strong>the</strong> darkerarea. It is a matter <strong>of</strong> artistic taste.Third, I could scrub in a thin coating<strong>of</strong> EZ Poly in its natu- ral light tan,or by adding powdered colors, evenlike red, to show stark contrast.At this point I stopped to pondermy options, and turned attentionto <strong>the</strong> inside. Ano<strong>the</strong>r reasonto work <strong>the</strong> outside and <strong>the</strong>n <strong>the</strong>inside, in damaged wood like this,is to uncover any more problemareas and determine if <strong>the</strong>y shouldbe dealt with by thinning on <strong>the</strong>inside vs. <strong>the</strong> outside <strong>of</strong> <strong>the</strong> vessel.Figure #6 shows <strong>the</strong> inside, withsome cuts having run from edgethrough inner center. And, <strong>the</strong> start<strong>of</strong> thinning at <strong>the</strong> edge is shown.This is where thinning shouldstart as it allows <strong>the</strong> greater mass<strong>of</strong> wood to exist toward <strong>the</strong> centerand middle to support <strong>the</strong> thinningedge. A quarters shows scale.Two EZ Poly filled voids areshown. <strong>The</strong> rim is undercut using<strong>the</strong> round carbide cutter toolsnow on <strong>the</strong> market, making suchcuts quite easy without bendingfar across <strong>the</strong> la<strong>the</strong> bed. On largerbowls this sort <strong>of</strong> rim also providesa better thumb grip when carrying<strong>the</strong> filled bowl. Depending on <strong>the</strong>shape <strong>of</strong> <strong>the</strong> outer rim, that areacan become a place for decorativegrooves, gold leafing, etc..Fig. 6After an evening’s reflection Idecided to fill <strong>the</strong> small voids withEZ Poly, adding sanding dust fromthis vessel. About 1/2 oz. <strong>of</strong> EZPoly was mixed with a teaspoonfull <strong>of</strong> light dust, and applied witha putty knife, using small strokesand pressing <strong>the</strong> mix into <strong>the</strong>voids firmly. Figure 8 shows whatit looked like at this point...a bitghastly.Figure 7. Shows my roundcarbide cutter coming up andunder <strong>the</strong> rim.I could have started sandingafter 2 hours, but waited until nextmorning. 60 grit on a 5” cush- ionedpad, in my drill, cut through <strong>the</strong> EZPoly easily. When wood began toshow I moved <strong>the</strong> sander onto more<strong>of</strong> <strong>the</strong> EZ Poly.<strong>The</strong> next step was touse finer grits andunveil what might be<strong>the</strong> final appearance.<strong>The</strong> next step was to use finergrits and unveil what might be <strong>the</strong>final appearance. Figure 9 showsthis as work in progress. <strong>The</strong> centerarea has been sanded down to 220grit. You can see <strong>the</strong> lighter coloredvoids. Two <strong>of</strong> <strong>the</strong> black EZ Polypatches have a coating <strong>of</strong> <strong>the</strong> lighterEZ Poly. <strong>The</strong> still unsanded EZ Polyis at top and left sides.<strong>The</strong> feel <strong>of</strong> <strong>the</strong> surface in <strong>the</strong>well sanded areas is very smooth.At this point I could finish sanding<strong>the</strong> whole outside and, if I like, apply<strong>the</strong> final finish, like lacquer. Icould also decide to turn and sandthrough <strong>the</strong> now firmed up decayedareas and see if better wood mightshow. <strong>The</strong> risk is that <strong>the</strong> decay willgo all <strong>the</strong> way through to <strong>the</strong> inside,Page 12 More Woodturning August <strong>2009</strong>
which is probable, leading to greaterproblems or a lost vessel.Figure #10 shows a coat <strong>of</strong>lacquer applied and buffed with aScotchbrite© pad. This leaves aninteresting effect and would raisediscussion with a potential buyer.A final coat <strong>of</strong> lacquer followed bybuffed wax is likely. Attention wasnext turned to bringing <strong>the</strong> inside<strong>of</strong> this bowl to proper form anddealing with uncovered imperfections.<strong>The</strong> next evening I had timeto commence hollowing <strong>the</strong> inside,starting at <strong>the</strong> rim area, <strong>the</strong>n workinginto <strong>the</strong> bowl’s depth. Sureenough, as Figure 11 shows, <strong>the</strong>rotted area was found (just beyond<strong>the</strong> tool rest). It appeared worsethan on <strong>the</strong> out- side <strong>of</strong> <strong>the</strong> bowl!Note <strong>the</strong> two EZ Poly patches. AsI brought wall thickness to about1/4” I had to be careful in this areaand refill <strong>the</strong> patched areas.Fig 10Where Turners Turn FirstTo assure even wall thickness, Iadjusted my caliper to <strong>the</strong> thicknessnear <strong>the</strong> rim, and <strong>the</strong>n slowly slid<strong>the</strong> caliper inward toward <strong>the</strong> centeruntil I felt resistance due to thickerwood. At that point I made a chalkmark. I continued moving <strong>the</strong> caliperinward, sensing <strong>the</strong> thickness,and stopped at about an inch and ahalf, again making a chalk mark. SeeFigure 12. <strong>The</strong> area between chalkmarks was for <strong>the</strong> next thinningcuts. By leaning <strong>the</strong> chalk againstINFORMATION AND RESOURCES FORWOODTURNERS WORLDWIDE[Continued onNext Page]Find articles, projects, new products, vendors, club listings,turner websites, courses and schools, discussion forum,books and videos and much more!WWW.WOODTURNINGONLINE.COMFig. 8Fig. 9WOODWORKERS’SEMPORIUMVICMARC5461 Arville StreetLas Vegas, NV, 89118Toll Free 800-779-7458Fax 702-871-0991Stuart Batty-Trent Bosch-Cindy DrozdaKeith Gotshall-Mike Mahoney-David Nittman-Richard RaffanAll reputed woodturners using Vicmarc la<strong>the</strong>s.....shouldn't you?www.woodworkersemporium.comMore Woodturning August <strong>2009</strong> Page 13
Continued from PreviousPage.<strong>the</strong> tool rest, touching one <strong>of</strong> <strong>the</strong>chalk marks at a time, and rotating<strong>the</strong> bowl by hand, a chalk circle wasformed which was easy to see whileturning. In this manner <strong>the</strong> bowl wasevenly thinned down to <strong>the</strong> area <strong>of</strong><strong>the</strong> base.Standing back, I examined <strong>the</strong>vessel inside and out to sense howit was coming along in general. Ididn’t like <strong>the</strong> appearance <strong>of</strong> <strong>the</strong>black EZ Poly fillings. So, I decidedto carve <strong>the</strong>m back below <strong>the</strong> surfacewith my Dremel Moto-Tool®and use a mix <strong>of</strong> brass key filingsalong with <strong>the</strong> blackened EZ Poly.Figure 13 shows Parts A and B <strong>of</strong><strong>the</strong> EZ Poly, along with <strong>the</strong> piles<strong>of</strong> brass filings and black paint pigmentpowder. This was mixed andpacked into <strong>the</strong> inside voids and ontop <strong>of</strong> <strong>the</strong> older carved away priorfillings. I also putty-knifed <strong>the</strong> mixinto <strong>the</strong> decayed surface with <strong>the</strong>small voids.Looking down into <strong>the</strong> bowl(Figure 15) shows <strong>the</strong> remarkablegrain pattern, <strong>the</strong> black filled voids,and to a much lesser degree <strong>the</strong>whitish area. One’s eye is caughtup in <strong>the</strong> intricacies <strong>of</strong> grain andvaried textures.Fig. 11Fig. 12Fig. 13<strong>The</strong> “pallet” was an old piece<strong>of</strong> plywood, <strong>of</strong>ten sanded betweenuses. <strong>The</strong> partly used foil pouch issealed with a paper clamp betweenapplications.<strong>The</strong> Results....and Let’s Review...Figure 14 shows a side view<strong>of</strong> <strong>the</strong> finished bowl. Size is 11 1/2”dia. by just over 6” tall. <strong>The</strong> shapewas governed by <strong>the</strong> large amount<strong>of</strong> especially bad wood that hadto be cut away in <strong>the</strong> bottom area.White fungus (tremella fuciformis)tends to bleach <strong>the</strong> wood. In thiscase <strong>the</strong>re was no evidence <strong>of</strong> <strong>the</strong>thin black lines that <strong>of</strong>ten evidence<strong>the</strong> outline <strong>of</strong> fungal colonies inspalted wood. So, we see <strong>the</strong> darkergrain in upper center, <strong>the</strong> voids filledwith black EZ Poly containing brasskey filings, and <strong>the</strong> whitish areastretching from bottom center andflowing toward <strong>the</strong> upper right.Fig.14Fig. 15<strong>The</strong> finish was several spraycoats <strong>of</strong> lacquer, followed by pastewax and buffing. This is a sturdybowl, and fine for serving salads orpresentation as a gift.Compared to starting with“sound and perfect” wood, usingdamaged and decayed woodpresents many challenges, someeven unexpected. Shrinkage will beuneven during curing from roughto final cuts. When making finalcuts, <strong>the</strong> decayed wood will tendto “chunk out” in which cases <strong>the</strong>area must be soaked in lacquer,superglue, EZ Poly or some o<strong>the</strong>rfiller, <strong>the</strong>n cut again <strong>The</strong> very finalcut needs a freshly sharpened tool,very light cuts, and even a lightangled scraping cut. Sanding will beuneven, with <strong>the</strong> sand paper tendingto cut more deeply into <strong>the</strong> s<strong>of</strong>tersemi-rotted wood.When finishing, be it oil, lacquer,wax or some combination<strong>the</strong>re<strong>of</strong>, <strong>the</strong> decayed area will soakup more <strong>of</strong> <strong>the</strong> finish, and needmore applications <strong>of</strong> <strong>the</strong> finishingproduct(s). This is hardly <strong>the</strong> sortPage 14 More Woodturning August <strong>2009</strong>
<strong>of</strong> project for a production turnerwho has to get a volume <strong>of</strong> bowls,vases, etc. done for a show orsimilar deadline. <strong>The</strong> time it takesto nurture a vessel made <strong>of</strong> damagedwood into final form and completionis best not counted. This kind<strong>of</strong> project has to be for <strong>the</strong> romance<strong>of</strong> wood, <strong>the</strong> challenges, and a lovefor <strong>the</strong> unusual. My typical easy toread signed bottom. !!Fig. 16Questions andAnswers from <strong>the</strong>InternetShape Shifter ToolsQuestion: This looks very interesting,but as usual, I’m reluctantto put out any bucks for tools (especiallyin this economy) without askingfor opinions from <strong>the</strong> group.www.shapeshiftertools.comSeems like a good way to go...Instead <strong>of</strong> buying an eccentric chuckor an insert for <strong>the</strong> chuck, this goeson <strong>the</strong> spindle and <strong>the</strong> your existingchuck(s) go on it. Has anyone triedone? Maybe Fred??—Mac[Continued on Page 18]Call or Write for your FREE Copy <strong>of</strong> our156 Page Color Catalog!Featuring:• Pen Kits and Supplies• Project Kits• Full Range <strong>of</strong> La<strong>the</strong>s• All Major Brands <strong>of</strong> Chucks• Turning Squares• Dymondwood• Henry Taylor, Hamlet and Sorby Toolsall at <strong>the</strong> best prices!Order Your Free Woodturners Catalog TodayCraft Supplies USA1287 E. 1120 S.Provo, Utah 84606 USATEL: 800-551-8876Overseas Telephone: 001-801-373-0919More Woodturning August <strong>2009</strong> Page 15
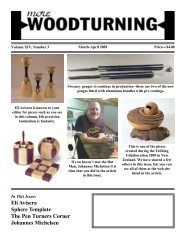
<strong>The</strong> Penturner’sCornerby Don WardI had hoped to meet severalreaders <strong>of</strong> this column at <strong>the</strong> <strong>AAW</strong><strong>Symposium</strong> in Albuquerque. Thatwish came true. Several readerssought me out and expressed<strong>the</strong>ir appreciation for <strong>the</strong> columnseach month. One gentleman evenconfessed he didn’t make pens butread <strong>the</strong> column and enjoyed it eachmonth. Thanks to all who spokewith me. I appreciate <strong>the</strong> effortand <strong>the</strong> words <strong>of</strong> appreciation andencouragement. And, to <strong>the</strong> gentlemanwho does not make pens.....Ithink you should give it a try and<strong>the</strong>n you will know <strong>the</strong> enjoymentwe get from making <strong>the</strong>m. I hopeall who attended had a great time.I did. I learned a lot from <strong>the</strong> o<strong>the</strong>rwoodturners and I definitely spenttoo much money on tools. I purchaseda captured hollowing system.I do turn o<strong>the</strong>r things than pens andhollow forms have always been <strong>the</strong>most fun for me. Now, I won’t haveto use my swan neck hollow toolany longer. Maybe after I’ve usedit I can write a tool review on how<strong>the</strong> system performs.Penturning at <strong>the</strong> <strong>AAW</strong>Although <strong>the</strong> <strong>AAW</strong> is notas supportive <strong>of</strong> penturning as anarea <strong>of</strong> woodturning as I think <strong>the</strong>yshould be (or maybe it’s just myperception) <strong>the</strong>re were penturningdemos. Barry Gross presented twodemos and did each one <strong>of</strong> <strong>the</strong>mtwice. Barry’s work can be found athttp://www.bgartforms.com BarryGross is an excellent penmaker. Heis quite <strong>the</strong> creative person also. Hehas made pens using several veryunique materials and designs. Some<strong>of</strong> <strong>the</strong> things he has embedded inclear resin include snake skin, cigarlabels, beer caps, fountain pennibs, abalone chips, diamond chips,shredded money, c<strong>of</strong>fee beans, andpictures. See Figure 1 for several <strong>of</strong>Barry Gross’s pens where uniquematerials have been cast in clearresin. But, I consider ano<strong>the</strong>r penBarry makes to be <strong>the</strong> most uniqueand beautiful <strong>of</strong> all <strong>of</strong> his work Hecast watch parts in clear acrylic.Figure2 shows one <strong>of</strong> Barry’s watchpens. <strong>The</strong> pen has over 100 smallwatch parts glued to <strong>the</strong> painted tubeand encapsulated in clear acrylic.This pen is one <strong>of</strong> <strong>the</strong> most beautifulpens I’ve seen. <strong>The</strong> idea andcreativeness <strong>of</strong> this pen surpassesany that I’ve seen!!One <strong>of</strong> Barry’s demonstrationswas entitled “Casting Acrylic PenBlanks”. Barry Gross explainedhow to cast acrylic pen blankswhere things are glued to <strong>the</strong> tubeand clear acrylic is cast over <strong>the</strong>m.He had an excellent presentationwhich covered all one would needto know to encapsulate things gluedto <strong>the</strong> tubes in clear resin. Barry hada PowerPoint presentation showing<strong>the</strong> materials needed along with <strong>the</strong>complete process. He even had ashort video showing how to get <strong>the</strong>air bubbles out <strong>of</strong> <strong>the</strong> acrylic. Hegave sources for <strong>the</strong> acrylic itselfalong with <strong>the</strong> o<strong>the</strong>r things neededfor casting such as paint for <strong>the</strong>tubes, weights for <strong>the</strong> tubes so <strong>the</strong>ydon’t float in <strong>the</strong> liquid acrylic, andmolds. I cast my own snake skinblanks and I learned several thingsfrom Barry. Barry also explainedhow to square <strong>the</strong> ends <strong>of</strong> acrylicblanks along with turning techniquesand tools for acrylics. Drillingspeeds and la<strong>the</strong> speeds werealso discussed.Barry’s o<strong>the</strong>r demonstrationwas entitled “Segmented Pens fromExotic Wood”. Once again Barryhad an excellent PowerPoint presentation.<strong>The</strong> slide show illustrated <strong>the</strong>steps required to make a pen fromsegment <strong>of</strong> exotic wood. Barry coveredsuch topics as wood choices,grain orientation, segment patternsand designs, layout and cutting <strong>the</strong>blanks, gluing, drilling, and turning.Several segmented pens were shownin <strong>the</strong> slide show and examples <strong>of</strong>segmented pens were on display.Figure 3 shows two <strong>of</strong> Barry’ssegmented pens. Again, Barry hadan excellent demonstration andimportant information was communicatedfor making segmented pens.Barry is an excellent communicator.Thanks Barry for teaching us greattechnique for both blank making andpen turning.Barry Gross is <strong>the</strong> author <strong>of</strong>over 60 articles, 3 penturning booksand two videos. His books andvideos are <strong>the</strong> best selling penturningbooks and videos Amazon. His“Penturning Workbook” is an excellentaddition your <strong>the</strong> turning libraryas is his “Learn to Turn” book.Special Interest NightFriday night included severalspecial interests meetings. One wasfor <strong>the</strong> penturners. Barry invitedAnthony Turchetta and me to sit ona panel with him at <strong>the</strong> penturningmeeting Friday evening. <strong>The</strong> roomwas full and I would estimate <strong>the</strong>rewere 50+ in attendance. I shouldhave counted heads and taken pictures.But, we were busy talking andanswering questions about all thingspenmaking. <strong>The</strong> questions were excellentand stimulating. I hope <strong>the</strong>[Continued on Page 20]Page 16 More Woodturning August <strong>2009</strong>
Editor’s Books for SaleBooks Written by <strong>the</strong> Editor <strong>of</strong> More WoodturningMaking <strong>the</strong> ChineseBallRevised 2008, by FredHolder.This revised booklet outlines Fred’strials and tribulations in conqueringthis project. Tells how to make<strong>the</strong> tools needed to use <strong>the</strong> CrownChinese Ball Tools. Booklet nowcontains 64 pages <strong>of</strong> information.Price is $10.00 including shipping.Order from: Fred Holder, PO Box2168, Snohomish, WA 98291.Telephone 360-668-0976.Price: $28.00, plus $5.00s/hPrice: $27.00, plus $5.00 s/hI have purchased 25 copies <strong>of</strong><strong>The</strong> Woodturner’s FAQ Book andhave <strong>the</strong>m available as signedcopies for $19.95 plus $5.00for shipping by Priority Mail(Washington State residentsplease add 8% for sales tax.)We accept cash, check, orMasterCard and Visa creditbook, which is “required readingfor all new turners” directlyfrom <strong>the</strong> author:Fred HolderMore WoodturningPO Box 2168Snohomish, WA 98296 USA“Two Books in One”a CD-ROMThis CD-ROM contains Fred’snewest book, “<strong>The</strong> Turning Process”and <strong>the</strong> above book “Making<strong>the</strong> Chinese Ball” on one CD-ROM.Both books are in PDF format andrequire Adobe Acrobat Reader toread <strong>the</strong>m on your computer. <strong>The</strong>Turning Process is a 105 pagebooklet designed for beginner tointermediate woodturners. It mighteven have something worthwhile forexperienced woodturners.Available by 9/10/2008Price for this CD-ROMis just $14.95 including postagewithin <strong>the</strong> United States.Order from: Fred Holder, PO Box2168, Snohomish, WA 98291.Telephone: 360-668-0976<strong>The</strong>se books seemedto be missing from most USSources. So I have purchased25 <strong>of</strong> each book for resale. Ifyou haven’t had an opportunityto purchase one, this isan opportunity to get a signedcopy. Books will be shippedby Priority Mail.Fred HolderMore WoodturningPO Box 2168Snohomish, WA 98291 USATEL: 360-668-0976Back Issues <strong>of</strong> More WoodturningAvailable on CD-ROMAnyone who owns a computer and likes to read More Woodturningon <strong>the</strong>ir computer or to archive it onto <strong>the</strong>ir computer, willbe pleased to learn that we now have all issues <strong>of</strong> More Woodturningever published in PDF format. While we <strong>of</strong>fer individual yearson a CD-ROM for $25.00, we have come up with a special pricewhich includes all issues published from October 1996 to <strong>the</strong> datethat <strong>the</strong> order is placed on a single CD-ROM for just $95.00. ThisMore Woodturning, PO Box 2168, Snohomish, WA 98291 USA.More Woodturning August <strong>2009</strong> Page 17
Q&A Continued from Page15Fred’s Response: I just learned<strong>of</strong> <strong>the</strong> tool today (June 8) when <strong>the</strong>inventor e-mailed me with his website address. I’m a little concernedabout it because <strong>the</strong> weight <strong>of</strong> <strong>the</strong>chuck rotating <strong>of</strong>f-center can bequite stressful to <strong>the</strong> la<strong>the</strong>. On hisweb site, he doesn’t list <strong>the</strong> spindlesizes that he is using: i.e., what sizespindle will it screw onto and whatis <strong>the</strong> spindle size for you to screwyour chuck onto. <strong>The</strong>re is no mention<strong>of</strong> <strong>the</strong>se sizes or whe<strong>the</strong>r <strong>the</strong>reare adapters available to make it fitdifferent la<strong>the</strong> spindles. We ownfour la<strong>the</strong>s: three with 1” x 8tpispindles and one with a 1-1/4” x8tpi. Probably our Nova G3 chuckis about <strong>the</strong> lightest that we own andit might work if one keeps <strong>the</strong> speeddown. I might be interested in doinga review on it, but <strong>the</strong>re are a lot <strong>of</strong>unanswered questions that one mayencounter with such a device.—Fred HolderLyle’s Response: I too amleery <strong>of</strong> this sort <strong>of</strong> tool. I have a realkeep-it-simple approach. It must bemeticulously machined to preventvibration. I always recommendwhen <strong>the</strong>re is something new likethis that you use it yourself beforeyou buy it. Use it at a symposium,borrow one from a friend that took<strong>the</strong> chance and buys every new toolthat comes out. Ask your tool junkyfriend how many tools are collectingdust under <strong>the</strong> bench cause <strong>the</strong>ydon’t work. Seeing somebody do ademonstration will not give you reallife hands-on experience. Can YOUmake it do <strong>the</strong> things it promisesto do?? Why would you want to<strong>of</strong>fset a pen mandrel?? <strong>The</strong>re is tolittle room for <strong>of</strong>f axis shaping with<strong>the</strong> pen mechanism and tubing in<strong>the</strong> way. I’m not a pen expert byany means. Can <strong>the</strong> mandrel besecurely twisted so you could do atriangle shaped pen with this?? Ican’t imagine trying to turn out on<strong>the</strong> end <strong>of</strong> a pen mandrel away from<strong>the</strong> support without a tailstock.—Lyle JamiesonNote: See <strong>the</strong> Review <strong>of</strong> this deviceon page 36 <strong>of</strong> this issue.Newell posts fromDouglas FirQuestion: I have a job involving6’’x6’’x8’ posts and <strong>the</strong> contractorhas decided <strong>the</strong>y must be dougfir or red cedar. <strong>The</strong> red cedar is anightmare (tearout and stability issues).Anyadvice before investingin <strong>the</strong> doug fir?RandyFred’s Response: I don’t doa lot <strong>of</strong> large spindle work, buthave turned a number <strong>of</strong> 5” and 6”newel posts. I’ve never had a la<strong>the</strong>that will turn an eight foot longspindle and have always specifiedto <strong>the</strong> customer that <strong>the</strong>y will beturned in three to four pieces andglued toge<strong>the</strong>r after turning. I’vealways made <strong>the</strong> customer furnish<strong>the</strong> wood and indicated that I wouldlike old growth fir that had been cutfor many years; i.e., salvaged woodfrom old constructions. This woodis easier to work and is dry. With<strong>the</strong> customer furnishing <strong>the</strong> wood<strong>the</strong>y can only complain about <strong>the</strong>quality <strong>of</strong> <strong>the</strong> turning not what <strong>the</strong>wood does after turning.If you must purchase <strong>the</strong> wood,try to get salvaged old growth Firthat has been removed from earlydays construction that is being demolishedto make room for newconstruction. It will be dry andwill generally be a better quality <strong>of</strong>wood. I have no idea what <strong>the</strong> woodwill cost, but if you let <strong>the</strong> customerpurchase <strong>the</strong> wood, you do not haveto worry about cost. Good luck withyour project.Fred HolderLyle’s Response: I am not intoproduction work but I have been approachedby architects to do specialprojects. I too have <strong>the</strong> contractorget <strong>the</strong> wood, prep <strong>the</strong> wood, andfinish <strong>the</strong> wood. I just do <strong>the</strong> turning.I would prefer <strong>the</strong> fir. It turnswell with sharp tools. If you havenot done a lot <strong>of</strong> 8 foot long pieces Iwould suggest you get some councilfrom someone with a lot <strong>of</strong> experiencewith <strong>the</strong> dangers. It is not aseasy as it looks. I always double <strong>the</strong>price I think I should charge and itworks out OK.Lyle JamiesonCarbide TipTurningTools?Question: I have been readingthreads on NC WoodWorker.netabout <strong>the</strong> Ci0 Easy Finisher (linkbelow). This is a carbide insert cuttingtool that at first glance looks tobe a very usable tool, especially fora novice turner like myself. It ain’tcheap (at $100 w/o handle, or about$135 for a kit), but that is <strong>the</strong> casefor any bowl gouge I’d buy. Giventhat I am also a novice sharpener,does this kind <strong>of</strong> tool make sense? Itis appealing to me right now. Is thissomething that I would ‘grow out<strong>of</strong>’ as I gain experience and hopefullydevelop more skill as a turner?Does anyone have experience withthis tool? How does it compare tosomething like <strong>the</strong> Sorby multi-tiptools? Once obvious difference is<strong>the</strong> square shaft on <strong>the</strong> Ci0 and <strong>the</strong>round one on <strong>the</strong> Sorby; as a nov-More Woodturning August <strong>2009</strong> Page 18
ice I would think <strong>the</strong> square shaftwould keep <strong>the</strong> cutting angle moreconsistent.HenryFred’s Response: I don’t own<strong>the</strong> Ci0 tool as yet; however, whileat <strong>the</strong> Desert Woodturning Rounupin Mesa Arizona in February, I purchased<strong>the</strong> Ci1 and Ci2 tools. I find<strong>the</strong>m very useful for rough turningand expect that <strong>the</strong>y would be easyfor a beginner to learn to use. I use<strong>the</strong> Ci1 for a lot <strong>of</strong> roughing work.I am pr<strong>of</strong>icient with all <strong>of</strong> <strong>the</strong> o<strong>the</strong>rturning tools, even <strong>the</strong> skew, as I’vebeen turning for 21 years and haveturned virtually all sorts <strong>of</strong> things.I did get to see <strong>the</strong> Ci0 tool work at<strong>the</strong> Utah Woodturning <strong>Symposium</strong>in <strong>the</strong> hands on/trade show area.When I first got <strong>the</strong> Ci1, I turneda bowl with it from start to finish,except that for <strong>the</strong> final cut inside,I did use a bowl gouge. I tried it onspindle work and found that it woulddo most spindle cuts except coves. Ialso turned a goblet with it at 3000rpm and it cut quite smooth at thatspeed. I had to use an Eliminatortool to turn <strong>the</strong> inside bottom <strong>of</strong> <strong>the</strong>goblet bowl. Here is where <strong>the</strong> Ci0would have come in handy.Whe<strong>the</strong>r you are an experiencedturner or a beginner, I believe<strong>the</strong>se tools are worth <strong>the</strong> money.<strong>The</strong>y eliminate <strong>the</strong> need for sharpening<strong>of</strong>ten and are easy to use. <strong>The</strong>ylook like scrapers, but that is where<strong>the</strong> difference ends. <strong>The</strong>y do not cutlike a scraper.I agree with o<strong>the</strong>rs, joining aclub if possible and getting someregular hands on woodturning trainingusing <strong>the</strong> conventional tools isvery good advise. However, <strong>the</strong>senew carbide tools are a good buyand will allow you to do things thatyou may currently be having troubledoing.Fred HolderLyle’s Response: You haveasked about <strong>the</strong> newest, hottest fadI have seen in a long time in <strong>the</strong>turning world. <strong>The</strong>se Easy Roughertools are selling like hot cakes. I seeyou call it an easy finisher. That itis not, Ill try to explain. I agree withmost <strong>of</strong> <strong>the</strong> points Fred presents.Look at Fred’s process. He roughedout <strong>the</strong> form and did <strong>the</strong> finish cutswith more efficient tools. For a beginner<strong>the</strong> easy rougher might be agood way to get your feet wet. ButI agree with your assumption thatyou will soon grow out <strong>of</strong> it whenyou learn to use <strong>the</strong> bowl gougeand spindle gouge. I disagree withFred’s assertion that it “does not cutlike a scraper”. It is a scraper and itcuts as a scraper. It is not designedto have bevel support and it hasno slicing/sheering action that <strong>the</strong>gouges do. So <strong>the</strong>y are a carbidescraper. Yes, that has <strong>the</strong> advantage<strong>of</strong> not needing to sharpen for a longwhile. But what happens whenit gets dull?? Do beginners have<strong>the</strong> tools or expertise to sharpencarbide?? Or you have to buy newtips when dull?? I want to make itperfectly clear <strong>the</strong>se tools are differenttechnology <strong>the</strong>n Hunter orEliminator tools. <strong>The</strong> Easy Rougheruses <strong>the</strong> old carbide cutters that havebeen used in <strong>the</strong> metal working industryfor decades. <strong>The</strong> old carbideis not as sharp as <strong>the</strong> new nanograincarbide in <strong>the</strong> Hunter/Eliminatortools. So <strong>the</strong> bottom line is <strong>the</strong> EasyRougher is a carbide scraper thateven new, does not get as sharp asHSS. <strong>The</strong> Hunter/Eliminator toolsused correctly can be used in a sheering/slicingmode with bevel supportand leave an unbelievable surfacebehind that needs little sanding. SeeJohn Lucas video clip on YouTubefor an example <strong>of</strong> its use in a bowlwww.hunterwoodturningtool.com/tutorials. I use <strong>the</strong> same new Huntercarbide in my boring bar system forhollow forms. <strong>The</strong> Easy Roughertool was designed to be a roughingout tool and does a good job at that.But people are leaping ahead andusing it as a finish tool. It will havesignificant end grain tear out. Its adull scraper. I dont want to have tosand all that damage. I’d ra<strong>the</strong>r beturning than sanding. My advice toa beginner is to put <strong>the</strong> $100.00 intoa basic turning class or get a clubmember to mentor you and learnto use <strong>the</strong> gouges. I can rough outwith a bowl gouge and do finishingcuts that I start sanding with 320 gritsandpaper.Lyle JamiesonThread ChasersQuestion: I was researchingcutting threads in wood on <strong>the</strong> internetand came across your nameat <strong>the</strong> bottom <strong>of</strong> this website.http://www.jamesriser.com/Machinery/chasers/making_chasers.htmlIt refers to you for a “well explained”technique for using threadchasers. Any and all help in this isappreciated.John HeavillFred’s Response: My book,“Making Screw Threads in Wood”,was published in 2001 by GMCPublications in England. I keep afew copies on hand that I sell for$28.00 plus $5.00 shipping andhandling. <strong>The</strong> book covers all techniquesfor making screw threads in[Continued on Page 34.]More Woodturning August <strong>2009</strong> Page 19
Pen Turner’s Corner Continuedfrom Page 16answers we gave were as good as <strong>the</strong>questions asked. Thanks to all whoattended and helped make <strong>the</strong> Fridayevening penturning meeting a success.I had several guys, and evena few ladies, stop me and commentpositively on <strong>the</strong> meeting. It was funfor <strong>the</strong> three <strong>of</strong> us and I hope thosewho attended found <strong>the</strong> time usefuland <strong>the</strong> information useful.VendorsA few vendors had pen relateditems for sale. Of course, many <strong>of</strong><strong>the</strong> wood sellers had pen blanksmade from <strong>the</strong>ir cut<strong>of</strong>fs. I did manageto land two nice snakewoodblanks. <strong>The</strong>y are long enough tomake 4 pens if I can cut <strong>the</strong>m judiciously.. <strong>The</strong>y were hiding underneathseveral o<strong>the</strong>r 1” spindles.I love snakewood. Of course <strong>the</strong>rewere <strong>the</strong> usual array <strong>of</strong> tools, sandingsupplies, finishing supplies,la<strong>the</strong>s, books, videos, wood andmost anything one would need tocontinue or begin woodturning.Woodcraft had a few pen kitsand blanks. Choice Woods hadseveral boxes <strong>of</strong> nice pen blanks,acrylic pen blanks, finishing suppliesand kits. That was about<strong>the</strong> extent <strong>of</strong> penturning suppliesexcept for one. I have reported onKallenshaan Woods <strong>of</strong> Las Vagasin a previous article. KallenshaanWood’s owner, Ken Nelsen, is <strong>the</strong>creator <strong>of</strong> <strong>the</strong> most unique and innovativelaser cut, inlay pen blankkits. Ken had his entire line <strong>of</strong> lasercut inlay kits for sale along with <strong>the</strong>pen kits needed for <strong>the</strong> various inlaykits. I turned a few pens for Ken at<strong>the</strong> symposium and assembled a fewalso. Some customers wanted <strong>the</strong>kits assembled and even a coupleFigure 1.. This photo showsseveral <strong>of</strong> Barry Gross’s penswhere unique materials havebeen cast in clear resin.Figure 2. This photo shows one <strong>of</strong> Barry’s watch pens.Figure 3. This photo shows two<strong>of</strong> Barry’s segmented pens.wanted to have <strong>the</strong> created blanksturned. Thanks Ken for allowingme to help out in this way. Ken hasbecome a good friend and I love hislaser inlay kits. He also engraveso<strong>the</strong>r things including pens, penboxes, and o<strong>the</strong>r objects. Ken canengrave on most any material exceptbare metal. Kallenshaan Woods’ inlaykits can be seen at http://www.kallenshaanwoods.com See Figure4 for a picture <strong>of</strong> Ken and his sonColin. Colin is sitting taking a picture<strong>of</strong> a newly completed pen. I’veshown pictures <strong>of</strong> <strong>the</strong> laser inlay kitsfrom Kallenshaan Woods in previousarticles. Be sure to take a lookat <strong>the</strong>Kallenshaan Woods websiteand consider <strong>the</strong> laser inlay kits fora special project. Or, contact KenFigure 4. This is a picture <strong>of</strong>Ken and his son Colin.for special projects needing lasercut pieces. Since <strong>the</strong> symposiumwas held in New Mexico it is onlyfitting that I show a picture <strong>of</strong> a penmade from <strong>the</strong>ir kokopelli inlay kitand also, a pen made from one <strong>of</strong>my favorite inlay kits, <strong>the</strong> Moonscape.See Figures 5 and 6 for <strong>the</strong>kokopelli pen and <strong>the</strong> moonscapepen respectively.Figure 5. Kokopelli Pen.Figure 6. Moonscape Pen.<strong>The</strong> Pen Maker’s Guild had<strong>the</strong> pen display from <strong>the</strong> Penturner’sRendezvous <strong>2009</strong>, held at <strong>the</strong> UtahSympoium, on display in <strong>the</strong> instantPage 20 More Woodturning August <strong>2009</strong>
gallery. <strong>The</strong>y were in cases andunder glass. Because <strong>of</strong> <strong>the</strong> glareon <strong>the</strong> glass I was not able to getany descent pictures <strong>of</strong> <strong>the</strong>m. <strong>The</strong>ycan be viewed at http://www.penmakersguild.comas soon as <strong>the</strong>yare uploaded to <strong>the</strong> website. I don’tknow when that will be but by <strong>the</strong>time this issue is published <strong>the</strong> displaypen pictures may be posted. Ifnot, check back periodically and youwill see some well done pens.That’s about <strong>the</strong> extent <strong>of</strong> penturningactivity at <strong>the</strong> <strong>2009</strong> <strong>AAW</strong><strong>Symposium</strong>. I had a great time. I satin on several excellent demonstrationsand hopefully learned a fewnew things I can use in my shop.SnakewoodI mentioned purchasing snakewoodblanks earlier. Snakewood isprone to cracking and for this reasonmany penturners, both <strong>the</strong> casualand <strong>the</strong> serious, shy away from usingsnakewood. Snakewood is one<strong>of</strong> my favorite woods and makesa stricking and beautiful pen. Ofcourse, <strong>the</strong> blanks need to have lots<strong>of</strong> those dark snakewood blotches.I very seldom purchase snakewoodunseen, except from vendors I knowwho only sell <strong>the</strong> best <strong>of</strong> blanks.Snakewood cannot be stabilized.Figure 7 is a picture <strong>of</strong> three snakewoodpens. <strong>The</strong> pens were not madeby me but I did repair <strong>the</strong> cracks.Figure 7. This is a picture <strong>of</strong>three snakewood pensHere’s <strong>the</strong> snakewood penstory about <strong>the</strong> pens in Figure 7.I received an email from a gentlemanin California who had threesnakewood pens. He love all three...and <strong>the</strong>y cracked. He contacted <strong>the</strong>maker and was told that snakewoodalways cracked and <strong>the</strong>re was nothinghe could do. <strong>The</strong>y could not berepaired. I do know <strong>of</strong> several snakewoodpens that have not cracked and<strong>the</strong> discussion to keep snakewoodfrom cracking will not fit here, evenif Mr. Holder allowed me to use <strong>the</strong>entire issue space for <strong>the</strong> discussion.Anyway, I was contacted about <strong>the</strong>snakewood delima and I told <strong>the</strong> fellowto send <strong>the</strong>m to me and I wouldrepair <strong>the</strong>m. He sent <strong>the</strong> pens to meand I repaired <strong>the</strong>m Now I have anew pen customer who owns several<strong>of</strong> my snakewood pens.How did I repair <strong>the</strong>m, youask? Well, if I told you I would haveto ..... Just kidding! Here is how Ihandle snakewood pens. I want <strong>the</strong>blanks to crack so I can repair <strong>the</strong>m.I have not had a snakewood pencrack again after making repairs.Knock on snakewood. A crackedand repaired snakewood pen isnicer than most any o<strong>the</strong>r pen. <strong>The</strong>repaired crack is <strong>of</strong>ten not noticeable.Follow along.First I drill <strong>the</strong> blanks and set<strong>the</strong>m on a shop shelf and forgetabout <strong>the</strong>m. I check <strong>the</strong>m in a fewweeks and see if <strong>the</strong> tubes will slideinto <strong>the</strong> drilled holes. If not, I ream<strong>the</strong>m with <strong>the</strong> proper drill bits andplace <strong>the</strong>m back on <strong>the</strong> shelf. I dothis for several iterations...maybethree or four. <strong>The</strong>n, I insert <strong>the</strong> tubesbut I do not glue <strong>the</strong>m. I trim andsquare <strong>the</strong> ends and rough turn <strong>the</strong>pens. Yes, you can turn a pen blankwithout <strong>the</strong> tubes glued inside. Justinsert <strong>the</strong> tubes and bushings andplace <strong>the</strong> blank on <strong>the</strong> mandrel.<strong>The</strong> bushings will hold pressureagainst <strong>the</strong> ends <strong>of</strong> <strong>the</strong> blanks andallow <strong>the</strong>m to be turned. I turn <strong>the</strong>mto about 1/32 inch larger than <strong>the</strong>bushings and to <strong>the</strong> final shape. I set<strong>the</strong>m on <strong>the</strong> shelf one more time andcheck <strong>the</strong>m if two or three weeks. Iream <strong>the</strong>m if needed. At this pointI glue in <strong>the</strong> tubes. Now comes <strong>the</strong>part that takes even more patience. Iplace <strong>the</strong> blanks with <strong>the</strong> tubes gluedinside back on <strong>the</strong> shelf and wait. Iwait for <strong>the</strong> blanks to crack. Sometimesit happens quickly and o<strong>the</strong>rtimes not so quickly. When <strong>the</strong>y docrack I move to <strong>the</strong> next step.<strong>The</strong> next step is <strong>the</strong> repair. Iplace <strong>the</strong> blanks back on <strong>the</strong> la<strong>the</strong>and do my final turning to <strong>the</strong> desireddiameter and final shape. NowI sand <strong>the</strong> blanks starting at 220 andpausing after 320 to collect sandingdust on <strong>the</strong> surface <strong>of</strong> <strong>the</strong> sandpaper.<strong>The</strong> dust is <strong>the</strong>n mixed with CA glueto make a CA/dust slurry. Usingslow speed on <strong>the</strong> la<strong>the</strong> I place <strong>the</strong>[Continued on Next Page.]More Woodturning August <strong>2009</strong> Page 21
Pen Turner’s Corner Continuedfrom Previous Page.dust laden sandpaper underneath<strong>the</strong> spinning blank. NOTE: Turn<strong>of</strong>f any dust extraction systems. Idrizzle CA over <strong>the</strong> top <strong>of</strong> <strong>the</strong> spinningblank while touching <strong>the</strong> dustto <strong>the</strong> blank. <strong>The</strong> CA will mix with<strong>the</strong> dust forming a slurry. <strong>The</strong> slurrymaneuvered over <strong>the</strong> surface <strong>of</strong> <strong>the</strong>blank making sure it gets into <strong>the</strong>crack(s). Spray a little acceleratorto set <strong>the</strong> CA glue. I now use myskew or scraper to remove <strong>the</strong> CAand dust mix from <strong>the</strong> surface <strong>of</strong><strong>the</strong> pen and start <strong>the</strong> sanding overagain with 220. Finish sanding andfinishing. <strong>The</strong>n assemble <strong>the</strong> pen. Iactually use this slurry on severalwoods with open grains. Pictures<strong>of</strong> this technique are included inmy CA finishing article if pictureswould help. <strong>The</strong> article can befound at http://www.RedRiverPens.com/articles . <strong>The</strong>re you have it.Out <strong>of</strong> Round PensThis topic has been discussedin previous articles. I’ve mentionedone solution to be turning pensbetween centers. I am currentlytesting <strong>the</strong> special bushings usedto turn pens between centers. I will<strong>The</strong> <strong>2009</strong> <strong>Symposium</strong> <strong>of</strong> <strong>the</strong> <strong>AAW</strong>by Fred Holder<strong>The</strong> 23rd Annual National<strong>AAW</strong> <strong>Symposium</strong> was held fromFriday June 26 through SundayJune 28, <strong>2009</strong> at <strong>the</strong> AlbuquerqueConvention Center, 401 2nd StreetNW Albuquerque, New Mexico.<strong>The</strong>re were approximately 1300people in attendance. <strong>The</strong>re were54 demonstrators who conducted150 demonstrations in <strong>the</strong>se rooms.Page 22 More Woodturning August <strong>2009</strong>share my experience and thoughtson this pen turning technique nextmonth. I’ll show pictures <strong>of</strong> <strong>the</strong>bushings and also <strong>of</strong> <strong>the</strong> process.Complete information on where toget <strong>the</strong>se special bushings will alsobe included. Some <strong>of</strong> you may evenhave <strong>the</strong> equipment to make <strong>the</strong>myourself.SWAT<strong>The</strong> Southwest Association <strong>of</strong>Turners, aka SWAT, will be having<strong>the</strong>ir annual symposium this fall. <strong>The</strong>dates are October 16-18, <strong>2009</strong>. <strong>The</strong>symposium location will be WichitaFalls, TX....yea, no travel expensesfor me! More information can befound at http://www.swaturners.orgI will be doing a demo about makingclosed end pens. We will alsohave a special hands-on area forpen making. Here is <strong>the</strong> info from<strong>the</strong> SWAT website: <strong>The</strong>re will betwo hands-on-areas at <strong>the</strong> SWAT<strong>Symposium</strong> this year. In additionto <strong>the</strong> regular hands-on-area wherenew turners can get some pointersor non-turners can get a first lesson,we will also have a hands-on-area forturning pens . Penturning is growingin popularity and <strong>the</strong> quality <strong>of</strong> <strong>the</strong>kits and <strong>the</strong> pens being made with<strong>The</strong> symposium had 15 rooms fordemonstrations and meetings and 14rotations, making it impossible to seeall <strong>of</strong> <strong>the</strong> demonstrations. In addition<strong>the</strong>re was a large instant gallery withover 800 pieces to view and a tradeshow area with almost 50 vendors.As was done in Richmond lastyear, a 3520 Powermatic and JetMini-La<strong>the</strong> were raffled with allmonies raised going into <strong>the</strong> <strong>AAW</strong>Emergency Relief Fund. Tickets<strong>the</strong>m are reaching new plateaus.Because <strong>of</strong> <strong>the</strong> growing popularity<strong>of</strong> making pens on <strong>the</strong> wood la<strong>the</strong><strong>the</strong> penturning hands-on-area willallow new or wannabe penturners tomake a first pen or seasoned turnersto make a pen or to get invaluableinformation on kits and making penon <strong>the</strong> wood la<strong>the</strong>. We will have penblanks ready to mount on <strong>the</strong> la<strong>the</strong>and turn. Two different kits will beavailable from various vendors andprepared blanks will be available in<strong>the</strong> penturning hands-on-area alongwith any needed tooling. <strong>The</strong> areawill be open during regular demonstrationtimes and also during anyfree time during <strong>the</strong> symposium’sregular hours. Experienced penturnerswill be available to assistand answer questions. Don Ward <strong>of</strong>Wichita Falls will be in charge <strong>of</strong> <strong>the</strong>penturning hands-on-area and willbe assisted by several competent andknowledgeable penturners. Comeby and make a pen or just stop andvisit. Don Ward, Hands On PenturningCoordinator.Send me your penturning questionsor comments. Comments aboutthis column or articles are alsowelcome. Email me at this address:don@RedRiverPens.com Do a goodturn daily!were 1 for $5, 5 for $20, and 15 for$50. Tickets were only sold on siteat <strong>the</strong> symposium with <strong>the</strong> drawingbeing held on Saturday night at <strong>the</strong>banquet. WMH Tool Group with<strong>the</strong>ir generous donations made thisraffle possible.<strong>The</strong> <strong>AAW</strong> local chapter, NewMexico Woodturners, hosted <strong>the</strong><strong>2009</strong> <strong>Symposium</strong>, and selected <strong>the</strong>Holland’s Rose organization as recipient<strong>of</strong> Return To <strong>The</strong> Community
gifts this year. Holland’s Rose is anall-volunteer organization dedicatedto providing affordable housing ando<strong>the</strong>r services to patients and familieswho must travel to Albuquerquefor medical care.Special <strong>Demonstration</strong>s andPresentations• <strong>The</strong> Spindle - This specialgallery, organized by <strong>the</strong> Pr<strong>of</strong>essionalOutreach Program(POP), represented <strong>the</strong> work <strong>of</strong>more than 50 invited woodturners,all pieces were auctionedat <strong>the</strong> symposium on Saturdayevening..• Believe It or Not: Thursday7:30pm Terry Martin andJacques Vesery put on a showlooking at famous artists as <strong>the</strong>ymight not want to be seen.• TWIRLINGS: was an exhibition<strong>of</strong> work by Gary KnoxBennett• Resident Artists - <strong>The</strong> residentartist program was in its secondyear. This year Jean-FrançoisEscoulen was <strong>the</strong> resident artistand was demonstrating on acontinuous basis throughout <strong>the</strong>symposium.• “Spirit <strong>of</strong> <strong>the</strong> Southwest” exhibition• Chapter Collaborative ChallengeDemonstrators and ResidentArtists<strong>The</strong>re were 54 people involvedin ei<strong>the</strong>r demonstrating or participatingin discussion groups.<strong>The</strong>y are: Garry Knox Bennett,Trent Bosch, Marilyn Campbell,Andrew Chen, Nick Cook, VirginiaDotson, Gorst DuPlessis, DavidEllsworth, Jean-Francois Escoulen(Resident Artist), Charles Faucher,J. Paul Fennell, Barry Gross,Mat<strong>the</strong>w Hill, Allen Hockenbery,Sherry Hockenbery, <strong>Michael</strong>Hosaluk, Peter Hromek, WilliamRay Hughes, Douglas Jones, EmmetKane, Deborah Kermode,Jerry Kermode, Bonnie Klein, PatKramer, John Lea, Bill Luce, MikeMahoney, Alain Mailland, Andre’Martel, Terry Martin, Larry Miller,<strong>Michael</strong> <strong>Mocho</strong>, Rolly Munro, DavidNittmann, Pascal Oudet, BinhPho, Chris Pytlik, Joe Ruminski,John Sauer, Merryll Saylan, BettyScarpino, Mark Sfirri, Steve Sinner,Bill Smith, David Springett, BillTilson, Kevin Wallace, <strong>Michael</strong>Werner, John Wessels, Steve White,Molly Winton, Andi Wolfe.Trade ShowAs usual, <strong>the</strong>re was a verylarge trade show and vendor areawith almost 50 vendors being represented.Instant GalleryInstant Gallery registerationbegan on Thursday afternoon andcontinued through Friday morning.Instant Gallery Critique was held onSaturday. One could pick up <strong>the</strong>irinstant gallery entries between 1:00p.m. - 3:00 p.m. on Sunday. Attendeescould have three pieces in <strong>the</strong>Instant Gallery and demonstratorscould have up to six pieces. <strong>The</strong>rewere approximately 800 pieces in<strong>the</strong> Instant Gallery.Special Interest Night (SIN)was held on Friday, June 26 from7:30 - 9:30pm This was an opportunityfor groups and individuals tohave panel discussions, meetings,and special presentations. <strong>The</strong> <strong>AAW</strong>provided <strong>the</strong> rooms and digitalprojector. Past year sessions haveincluded groups <strong>of</strong> Segmenters,Pen Turners, Box Makers, Collectors<strong>of</strong> wood Art, Educators, DisabledTurners, Ornamental Turners,WOW and more.Spouse and Significant O<strong>the</strong>rInformationThree packaged tours wereset up for <strong>the</strong> non-woodturning enthusiast/travelpartner. <strong>The</strong>se tourswere:Santa Fe TourAlbuquerque City TourTram TourSpouse Craft Room was setup to allow non-woodturners topractice <strong>the</strong>ir own crafts with o<strong>the</strong>rswhile your spouses were enjoying<strong>the</strong>irs.<strong>Symposium</strong> ScheduleThursday June 25, 3:00 to 7:00p.m. - Registration/Check-in(registration also on Friday,Saturday and Sunday, beginningat 7:45 am).Saturday June 27, 5:30 pm to 6:00PM - Social Hour, followed by<strong>the</strong> Food Affair/Auction Gala at7:30 PMFriday-Sunday: Rotational <strong>Demonstration</strong>s,Friday and Saturday,9 a.m.-5 p.m., Sunday 9a.m. - 3:15 p.m.Mildred and I arrived in Albuquerqueabout 1:30 pm and checkedinto our hotel before heading overto <strong>the</strong> Convention Center. Registrationwas to start at 3:00 pm and itwas an effortless task. It was alsoeasy to check in our items for <strong>the</strong>Instant Gallery at this early hour.[Continued on Next Page]More Woodturning August <strong>2009</strong> Page 23
<strong>AAW</strong> <strong>Symposium</strong> Continuedfrom Previous PageWe received a wonderful bookletcompiled and edited by Sharon Bierman<strong>of</strong> Columbus, Ohio and wassponsored by <strong>The</strong> Sanding Glove,who had booth #211. This was one<strong>of</strong> <strong>the</strong> best symposium booklets thatI’ve ever seen. Thanks Sharon foryour efforts.We explored <strong>the</strong> ConventionCenter to try to fix in our mindswhere everything was located and<strong>the</strong>n about 5:00 pm we found <strong>the</strong>Gallery Reception for <strong>the</strong> Spirit <strong>of</strong><strong>the</strong> Southwest, Spindles, and Twirlingby Garry Knox Bennett. Unfortunately,nei<strong>the</strong>r <strong>of</strong> us had brought ourcamera along and never did return tophotograph <strong>the</strong>se beautiful pieces.“<strong>The</strong> Spirit <strong>of</strong> <strong>the</strong> Southwest”was a juried exhibit that broughtout a diversity <strong>of</strong> relevant ideas and<strong>the</strong>mes about <strong>the</strong> Southwest, focusingon <strong>the</strong> geography, history, andculture <strong>of</strong> <strong>the</strong> area. Mildred was especiallyimpressed by <strong>the</strong> drums.“<strong>The</strong> Spindle” was a specialexhibit, international in nature andan invitational show featuring workby more than 40 artists. Each 12”or smaller spindle was a singularstatement <strong>of</strong> artistry, inventiveness,and vision. <strong>The</strong> proceeds from <strong>the</strong>auction <strong>of</strong> <strong>the</strong>se pieces went to supportfuture POP events, functions,and awards.<strong>The</strong> Garry Knox Bennett Exhibit,“Twirling”, was hard to conceiveas a woodturning exhibit,because he is not a woodturner buta furniture maker. Although some<strong>of</strong> <strong>the</strong> stuff was turned by peoplesuch as <strong>Michael</strong> Hosaluk, DavidEllsworth, and Mark Sfirri and <strong>the</strong>npossibly reworked by Garry, perhapsit could be called a woodturningexhibition.At 7:30 pm, we attended a specialpresentation by Jacques Veseryand Terry Martin. <strong>The</strong> presentationwas a bit <strong>of</strong> a put-on or perhaps aput-down. I felt that we might havebeen better <strong>of</strong>f to spend <strong>the</strong> eveningin our room studying <strong>the</strong> beautifullydone booklet.I felt that we mighthave been better <strong>of</strong>fto spend <strong>the</strong> eveningin our room studying<strong>the</strong> beautifully donebooklet.Friday morning, we arose toattend <strong>the</strong> Opening Ceremonies,which I believe was worth attending.Tom Joyce, a blacksmith that I knewmany years ago, gave a nice talkabout his career as a blacksmith andhad slides to show some <strong>of</strong> his workand <strong>the</strong> progression from simplehardware for doors and windows tocomplex projects including gatesand artwork <strong>of</strong> various sorts.After <strong>the</strong> Opening Ceremonies,Mildred and I split. She wentto watch some demonstrations andI visited <strong>the</strong> Trade Show area, <strong>the</strong>Instant Gallery, and Jean-FrancoisEscoulen (Resident Artist).Resident ArtistI checked in on Jean-FrancoisEscoulen several times during <strong>the</strong>symposium. For most <strong>of</strong> <strong>the</strong> <strong>Symposium</strong>,he worked on a piece that was<strong>the</strong>n auctioned <strong>of</strong>f after <strong>the</strong> greatfeed that we were given on Saturdaynight. Figures 1 and 2 show <strong>the</strong>progression <strong>of</strong> <strong>the</strong> piece. And Figure3 shows some <strong>of</strong> <strong>the</strong> pieces that hehad on display.Figure 1. Jean-FrancoisEscoulen, Resident Artist,working on <strong>the</strong> piece that wouldbe auctioned at <strong>the</strong> banquet.Figure 2. Escoulen nearlyfinished with <strong>the</strong> piece.Since we didn’t stay for <strong>the</strong>auction, I’m not sure what this orany <strong>of</strong> <strong>the</strong> o<strong>the</strong>r pieces sold for, butI understand that <strong>the</strong> pricing wasdown from <strong>the</strong> past because <strong>of</strong> <strong>the</strong>economy.Page 24 More Woodturning August <strong>2009</strong>
I purchased a few items including<strong>the</strong> 60 degree Raptor fromCraft Supplies and a piece <strong>of</strong> OsageOrange for possible Chinese Ballsin <strong>the</strong> future.Figure 3. Some <strong>of</strong> Escoulen’spieces that were on display at <strong>the</strong>resident artist’s work area.After watching Jean-Francoisfor awhile, I <strong>the</strong>n visited <strong>the</strong> TradeShow area. This was a large eventin itself. One could have spent allthree days just looking at tools andbuying <strong>the</strong>m.Trade ShowI spent some time handing outcopies <strong>of</strong> <strong>the</strong> July <strong>2009</strong> issue tovendors along with a new brochuredesigned for both subscriptions andfor advertising with <strong>the</strong> advertisingrates and requirements beingdescribed.I’m going to talk a bit about <strong>the</strong>Trade Show with a number <strong>of</strong> pictures<strong>of</strong> products that were new to me.Figure 4. Bill Rubenstein’sspecial drive center withremoveable bits to make it a twospur drive or a four spur drive.One heavy duty drive center.Figure 6. Mini-Monsterhollowing set up on a Jet MiniLa<strong>the</strong>.Figure 7. New Tormek Set up toallow <strong>the</strong> use <strong>of</strong> Tormek jigs ona dry grinder. I had to have one<strong>of</strong> <strong>the</strong>se and hope to get it set upand checked out for a review in<strong>the</strong> September-October issue.Figure 4. Bill Rubensteinwith a Stubby La<strong>the</strong> and hishollowing system. He gave mea demonstration <strong>of</strong> it and itscapabilities.Figure 5. Don Derry HollowingRig, which fits into <strong>the</strong> toolrest and provides stabilizedhollowing. Don does his cuttingon <strong>the</strong> far side <strong>of</strong> <strong>the</strong> hollowform.Figure 8. Robert Sorby toolhandle overall view. RobertSorby has started sellingunhandled tools and a specialtool handle to hold <strong>the</strong> tools.<strong>The</strong> handle comes with inserts tomake <strong>the</strong> handle fit three sizes <strong>of</strong>shaft.[Continued on Next Page]More Woodturning August <strong>2009</strong> Page 25
<strong>AAW</strong> <strong>Symposium</strong> Continuedfrom Previous Page.Figure 9. Robert Sorby New toolhandle viewed from <strong>the</strong> end toaccept <strong>the</strong> tool.sold later to raise money for <strong>the</strong> Holland’sRose organization, which wasa return to <strong>the</strong> community opportunity.I donated one <strong>of</strong> my ChineseBalls for this purpose.Now, I would like to talk a bitabout some <strong>of</strong> <strong>the</strong> demonstrationsthat we attended.<strong>Demonstration</strong>sI attended two <strong>of</strong> David Springett’sdemonstrations: 6-pointed Starin a Cube and Lattice Turning andSpheres & Turning Inside <strong>The</strong>m.David SpringettI didn’t get any good photographs<strong>of</strong> David’s Lattice Turningportion <strong>of</strong> <strong>the</strong> demonstrations, butFigure 11 shows a couple <strong>of</strong> hislattice pieces as well as some <strong>of</strong> hiso<strong>the</strong>r work.Figure 12. David Springettabout to turn a spiked star in acube.Figure 10. Robert Sorby newtool handle end has a removablethreaded plug for insertingweight into <strong>the</strong> handle if needed.That pretty much covered<strong>the</strong> new products that I viewed in<strong>the</strong> Trade Show area. I was reallyimpressed with <strong>the</strong> change <strong>of</strong> toolhandles for <strong>the</strong> Robert Sorby turningtools.Instant Gallery<strong>The</strong> instant gallery was so largethat I could only select a few piecesto use in this issue. Those pieces areused on <strong>the</strong> cover. As I understandit <strong>the</strong>re were over 800 pieces in <strong>the</strong>gallery. A number <strong>of</strong> those pieceswere items donated for <strong>the</strong> auctionon Saturday evening. <strong>The</strong>re was alsoa section where one could donate apiece to be sold by silent auction orPage 26 More Woodturning August <strong>2009</strong>Figure 11. David Springett’swork on display at <strong>the</strong> demo site.As shown in Figure 13, Daviduses a plug that fits <strong>the</strong> hole to hold<strong>the</strong> star stable while <strong>the</strong> o<strong>the</strong>r holesare cut. <strong>the</strong> center hole in <strong>the</strong> plugslips over <strong>the</strong> point <strong>of</strong> <strong>the</strong> star. <strong>The</strong>screw slightly to <strong>the</strong> side <strong>of</strong> center isfor inserting and removing <strong>the</strong> plug.David says that he uses <strong>the</strong> plugsover and over and had a sack full <strong>of</strong><strong>the</strong>m. For each hole, he selected aplug to fit it. For this demonstrationhe only did one hole in a cube thatwas already started.Figure 13. David Springett’schuck for for holding <strong>the</strong> cubewhile turning <strong>the</strong> star in <strong>the</strong>cube.Figure 14. Six point star inside aCube.
David began <strong>the</strong> second demonstrationthat I watched by makinga sphere from a prepared blank. Heused a sphere turning jig to make<strong>the</strong> balls round and <strong>the</strong>n sawed <strong>of</strong>f<strong>the</strong> long tenons, which he said hewould use to make ano<strong>the</strong>r sphere.He doesn’t like to waste wood.Figure 15. David Springett’sswinging jig to turn spheres.This was a simple jig thatanyone could make to simplify<strong>the</strong> turning <strong>of</strong> spheres.After making <strong>the</strong> sphere, Davidselected ano<strong>the</strong>r sphere with some <strong>of</strong><strong>the</strong> holes already done and workedon what would become a 12 pointstar in a sphere. Again, he only didone hole using a disc type plug ashe had for <strong>the</strong> star in a cube. Figure16 shows a completed piece.Woodturning Books For SaleWe are pleased to <strong>of</strong>fer <strong>the</strong> following books from Linden Publishing forsale through More Woodturning.Here are <strong>the</strong> titles we are <strong>of</strong>fering:• All Screwed up!: Turned Puzzles and Boxes Featuring Chased threadsby John Berkeley $24.95• 500 Wood Bowls $24.95• Beyond Basic Turning: Off-Center, Coopered, and Laminated Work,by Jack Cox $28.95• Chris Child’s Projects for Woodturners, by Chris Child $16.95• Decorating Turned Wood: <strong>The</strong> Maker’s Eye, by Liz and <strong>Michael</strong>O’Donnell $19.95• Fabulous Turned Wood Projects, by Hazeu Hiebert, et al $17.95• Richard Raffan Turning Guides, Slipcase Set, by Richard Raffan $59.95• Segmented Turning: A Complete Guide, by Ron Hampton $19.95• <strong>The</strong> Art <strong>of</strong> Segmented Wood Turning: A Step-by-Step Guide,by Malcolm Tibbetts $25.95• <strong>The</strong> Complete Illustrated Guide to Turning by Richard Raffan $39.95• <strong>The</strong> La<strong>the</strong> Book, by Ernie Conover $24.95• <strong>The</strong> Woodturner’s Workbook, by Ray Key $19.95• <strong>The</strong> Woodturner’s FAQ Book, by Fred Holder $19.95• Turn a Bowl: Getting Good Results <strong>the</strong> First Time Around,by Ernie Conover $19.95• Turned Boxes: 50 Designs, by Chris Stott $19.95• Turning Boxes with Richard Raffan: (revised and updated) $24.95• Turning Bowls with Richard Raffan, by Richard Raffan $24.95• Turning Boxes with Richard Raffan $24.95• Turning Green Wood, by <strong>Michael</strong> O’Donnell $17.95• Turning Pens and Pencils, by Kip Christensen & Rex Burningham $17.95• Turning Projects, by Richard Raffan $21.95• Turning Wood with Richard Raffan, by Richard Raffan $24.95• Wood for Woodturners by Mark Baker $19.95• Woodturning: A Foundation Course, by Keith Rowley $19.95• Woodturning: A Fresh Approach, by Robert Chapman $17.95• Woodturning Forms and Materials, by John Hunnex $19.95• Woodturning Projects, by Mark Baker $19.95• Woodturner’s Wooden Clock Cases by Tim Ashby $5.95Figure 16. David Springetts 12point star in a sphere.Pay shipping <strong>of</strong> $4.25 for <strong>the</strong> first book plus $1.00 for each additional book.Priority Mail is $6.50 for <strong>the</strong> first book and $1.00 for each additonal book.Foreign Customers please request a quote for shipping costs.Order three books and take a 10 percent discount on <strong>the</strong> order.Note: Discount does not apply to postage.Master Card and Visa Charge Cards AcceptedSend Orders to:More WoodturningP. O. Box 2168Snohomish, WA 98291-2168Telephone: 360-668-0976Fax: 360-668-1798More Woodturning August <strong>2009</strong> Page 27
<strong>AAW</strong> <strong>Symposium</strong> Continuedfrom Previous Page.David <strong>the</strong>n showed us a glassapple that he said a friend <strong>of</strong> hismanufactures. It had a small holegoing through each side. He saidhe would show us how to insert awooden arrow through that hole.Figure 17 shows <strong>the</strong> finished project.a CD-ROM that supposedly has agreat deal <strong>of</strong> information on it. Idon’t think ei<strong>the</strong>r <strong>of</strong> us has had anopportunity to give it a look see.<strong>The</strong>re were brief talks by JohnLea and Jon Sauer and <strong>the</strong>n SteveWhite as <strong>the</strong> president <strong>of</strong> <strong>the</strong> OrnamentalTurners International tookover for <strong>the</strong> rest <strong>of</strong> <strong>the</strong> evening. Hereare some <strong>of</strong> <strong>the</strong> photos that we tookduring <strong>the</strong> meeting.Figure 20. Ano<strong>the</strong>r <strong>of</strong> <strong>the</strong>many pieces shown during <strong>the</strong>meeting.Figure 17. David Springettsarrow piercing a glass apple.To do this project, David tookan arrow that was already made upthat <strong>the</strong> tip would not enter <strong>the</strong> hole.He brought a cup <strong>of</strong> water to a boiland stuck <strong>the</strong> tip <strong>of</strong> <strong>the</strong> arrow in itfor a bit and <strong>the</strong>n squeezed <strong>the</strong> tipuntil it was down to <strong>the</strong> thickness<strong>of</strong> <strong>the</strong> shaft. He inserted <strong>the</strong> arrowthrough <strong>the</strong> two holes in <strong>the</strong> glassapple. As <strong>the</strong> arrow tip cooled, itexpanded back to its original shapeand could no longer be removedfrom <strong>the</strong> apple.It was an interesting set <strong>of</strong>demonstrations and took care <strong>of</strong>Friday afternoon.Mildred and I came toge<strong>the</strong>ragain and had dinner at <strong>the</strong> littlediner on <strong>the</strong> ground floor. It was nota fantastic dinner, but was much lessexpensive that a dinner at <strong>the</strong> hotelwould have been. We <strong>the</strong>n spentsome time in <strong>the</strong> Instant Gallery and<strong>the</strong>n attended <strong>the</strong> Ornamental TurnersInternational meeting. Mildredjoined for <strong>the</strong> special price and gotFigure 18. Steve White,president <strong>of</strong> OrnamentalTurners International, during<strong>the</strong> introduction <strong>of</strong> <strong>the</strong> meeting.Figure 19. One <strong>of</strong> a number <strong>of</strong>pieces shown that were done bySteve Whites partner. This piecewas done on several machines asI understood <strong>the</strong> description.Figure 21. New frame tohold a pen when checking apattern. I believe this is beingmanufactured by Steve White’scompany.Figure 22. This photo shows abottle stopper being decoratedon Steve White’s Rose EngineLa<strong>the</strong>.Page 28 More Woodturning August <strong>2009</strong>
<strong>Michael</strong> Werner<strong>Michael</strong> Werner is a localwoodturner and artist, who is a fulltime teacher in <strong>the</strong> shop area <strong>of</strong> alocal school. Several years ago, Itaught a class on <strong>the</strong> skew chisel and<strong>Michael</strong> attended <strong>the</strong> class. <strong>The</strong> nextmonth he brought many skew turnedpieces to <strong>the</strong> club meeting. He hasmoved forward significantly sincethat time. One <strong>of</strong> his specialties isOff-Center/Multi-Center turnings.He said that recently he has returnedto doing some spindle work and thatwas <strong>the</strong> class I attended. <strong>The</strong> demowas called Crisp It Up! or BetterDetailed Turnings. Figure 23 shows<strong>Michael</strong> ready to turn.Figure 23. <strong>Michael</strong> Werner. In<strong>the</strong> background is a drawing <strong>of</strong><strong>the</strong> piece that he was going toturn during <strong>the</strong> demonstration.Figure 24. Top part <strong>of</strong> a piecelike <strong>Michael</strong> turned.This piece was similar to <strong>the</strong>piece that <strong>Michael</strong> turned during<strong>the</strong> demonstration. I had to leavebefore <strong>the</strong> demonstration was overso that I didn’t get a final shot <strong>of</strong> <strong>the</strong>piece he was demonstrating. Here is<strong>the</strong> bottom portion <strong>of</strong> <strong>the</strong> illustratedpiece:Figure 25. Bottom portion <strong>of</strong> <strong>the</strong>sample piece that <strong>Michael</strong> wasturning.<strong>Michael</strong> has become a verygood demonstrator in <strong>the</strong> some 10years that I’ve know him.<strong>Michael</strong> <strong>Mocho</strong>On Sunday morning, I sat inon <strong>Michael</strong> <strong>Mocho</strong>’s demonstration<strong>of</strong> “How to Hot Rod Your La<strong>the</strong>.”<strong>Michael</strong> is a full time turner in <strong>the</strong>Albuquerque area and does a greatdeal <strong>of</strong> different things.In this demonstration, he talksabout ways to customize and improve<strong>the</strong> performance <strong>of</strong> your la<strong>the</strong>with simple modifications, accessories,and innovative attachments thatwill greatly expand your creativecapabilities and help you work withmaximum efficiency and enjoyment.Apparently, <strong>Michael</strong> makes a goodmany <strong>of</strong> his tools and accessories. Iwas especially impressed with hismobile tool stand that is shown inFigure 26.Figure 26. <strong>Michael</strong> <strong>Mocho</strong>’smobile tool stand, which haslarge wheels to make it easy tomove around.Figure 27. Some <strong>of</strong> <strong>Michael</strong><strong>Mocho</strong>’s work on display during<strong>the</strong> demonstration.[Continued on Page 30]More Woodturning August <strong>2009</strong> Page 29
Coming Events11th Annual Rocky MountainWoodturning <strong>Symposium</strong>will be held on September 12-13th<strong>2009</strong> at <strong>The</strong> Ranch, Loveland,Colorado. Demonstrators include:Curt <strong>The</strong>obald, Trent Bosch, CindyDrozda, Allen Jensen, Joe Fleming,Criag Timmerman, Thomas Farrell,and John Giem. For more information,visit <strong>the</strong>ir website: rmwoodturningsymposium.com.Contact:Mike Davis at 970-484-9190 oremail mikeldavisllc@msn.com.* * *Turning Sou<strong>the</strong>rn Style XVwill be held on September 18 through20 in Helen, Georgia. <strong>The</strong> locationwill be <strong>the</strong> Unicoi State Park Lodgein <strong>the</strong> mountains <strong>of</strong> North Georgianear Helen. Featured demonstrators:Bill Grumbine, Art Liestman, & AlStirt. Also: Nick Cook, Joe Gettys,Wes Jones, and Dave Barriger. WebSite: http://www.gawoodturner.org/Email: Harvey Meyer at him1951@bellsouth.net.<strong>AAW</strong> <strong>Symposium</strong> Continuedfrom Page 29* * *Ohio Valley WoodturnersGuild will sponsor its 6th biennialsymposium “Turning <strong>2009</strong> on Oct16-18, <strong>2009</strong> in Cincinnati, Ohio.Featuring: David Ellsworth, Jean-François Escoulen, Bonnie Klein,Alan Lacer, Jon Magill, Stuart Mortimer,Jennifer Shirley & JacquesVesery. For more information check<strong>the</strong>ir Web Site: http://www.ovwg.org/.* * *North Carolina Woodturning<strong>Symposium</strong> will be held October23-25, <strong>2009</strong> in <strong>the</strong> GreensboroColiseum Special Events Center,Greensboro, NC. It will feature 63rotations by International, Nationaland Local area demonstrators. <strong>The</strong>demonstrator list includes: AllanBatty, Stuart Batty, Jimmy Clewes,Stuart Mortimer, Ray Key, NickCook, David Datwyler, Mark Gardner,John Jordan, and Chris Ramsey.For more details go to http://northcarolinawoodturning.com/and visitfrequently to keep up to date.* * *22nd Annual <strong>Symposium</strong>at Opryland will be held on January29 and 30, 2010 in Nashville,Tennessee. Featured demonstratorsinclude Trent Bosch, Frank Penta,Tania Radda, and Mark St. Leger.For more information about thisevent e-mail info@tnwoodturners.org or call 615-300-0363Coving ToolJimmy Clewes says, “<strong>The</strong> toolworks really well in a variety <strong>of</strong> situationsbut lends itself particularly wellto small detail work, finials etc andminiature turning.” For perfect covesevery time, visit <strong>the</strong> Home <strong>of</strong> <strong>the</strong> CovingTool at our website.www.jonathanhess.com.703-378-8508.Figure 28. A hollowing toolmade using a Dremel bit that isground to shape and epoxiedinto <strong>the</strong> end <strong>of</strong> <strong>the</strong> hollowing toolshaft.Figure 29. Router Jig used todecorate turnings.This routing jig slides on <strong>the</strong>la<strong>the</strong> bed and has a guide piece thatrides on <strong>the</strong> turning and controls <strong>the</strong>depth <strong>of</strong> cut into <strong>the</strong> turning. Figure30 shows this jig in use. I believe hesaid <strong>the</strong> router was purchased fromHarbor Freight, so <strong>the</strong> cost <strong>of</strong> makingit was minimal.Figure 30. <strong>The</strong> router jig beingused to decorate a turning.<strong>The</strong> <strong>AAW</strong> <strong>Symposium</strong> wasso large that I feel <strong>the</strong> rest <strong>of</strong> <strong>the</strong>event should be carried over to <strong>the</strong>next issue. I do not like to continuestories, but sometimes <strong>the</strong> amount<strong>of</strong> information makes it necessary. Ihope you have enjoyed it so far!!!Page 30 More Woodturning August <strong>2009</strong>
News in <strong>the</strong> Trade: What’s Happening inWoodturning<strong>The</strong> Sören BergerThread CreatorSoren Berger is making ano<strong>the</strong>rattempt with his Thread Creator. I’mnot exactly sure how it works, but<strong>the</strong> following information is fromhis web site.This new threader combinessimplicity and precision, <strong>the</strong> ThreadCreator enables everybody to createperfect threads with ease <strong>of</strong> use.• Two minute setup time on anysized la<strong>the</strong>• Non critical box blank preparation• Painless precut and finish cut <strong>of</strong>female thread.• Right sized male thread cut withjust <strong>the</strong> flip <strong>of</strong> <strong>the</strong> toggle.• One <strong>of</strong>f adjustment <strong>of</strong> threadfit.• No faster or simpler to usethreader on <strong>the</strong> market.<strong>The</strong> ease <strong>of</strong> use with this systemcan be experienced with <strong>the</strong> consistency<strong>of</strong> producing a high qualitythread on your art pieces; First timeand every time! This gives <strong>the</strong> artistat every skill level, <strong>the</strong> abilityto produce accurate, clean threadseasily and with no complex measurementsneeded.Soren has a special web site setup for this product where you canpre-order <strong>the</strong> tool. <strong>The</strong> web site is:http://sorenberger.com/. If it is asgood as he says, it may be worth investingin to make your boxes withthreaded lids easier to make.Tormek Jigs - Nowfor Bench GrindersTormek is introducing <strong>the</strong>Bench Grinder Mounting Set BGM-100 which makes <strong>the</strong> Tormek woodturningjigs also suitable for benchgrinders. This means that you canWoodturning Books For SaleWe are pleased to <strong>of</strong>fer Schiffer Woodturning Books for Sale throughMore Woodturning. Here are <strong>the</strong> titles we are <strong>of</strong>fering:• <strong>The</strong> Basics <strong>of</strong> Turning Spirals by Bill Bowers $14.95• Easy Turning Projects for <strong>the</strong> Smaller La<strong>the</strong>s by Bill Bowers $14.95• Great Turning Projects for <strong>the</strong> Smaller La<strong>the</strong> by Bill Bowers $14.95• Turning Threaded Boxes by John Swanson $14.95• Turning Wooden Jewelry by Judy Ditmer $12.95• Basic Bowl Turning with Judy Ditmer $12.95• Dick Sing Turns Miniature Birdhouses by Dick Sing $14.95• Turning Humidors with Dick Sing by Dick Sing $14.95• Pens From <strong>the</strong> Wood La<strong>the</strong> by Dick Sing $12.95• Dick Sing ReTurns: Unique and Unusual Pens from <strong>the</strong>Wood La<strong>the</strong> by Dick Sing $14.95• Wood La<strong>the</strong> Projects for Fun and Pr<strong>of</strong>it by Dick Sing $12.95• Useful Beauty: Turning Practical Items on a Wood La<strong>the</strong> by Dick Sing $12.95• Turning Bowls by Dick Sing (NEW) $14.95• Turning Ornaments and Eggs by Dick Sing (NEW) $14.95• Projects for <strong>the</strong> Mini La<strong>the</strong> by Dick Sing (NEW) $14.95• Turning Candlesticks by Mike Cripps $14.95• Turning Goblets by Mike Cripps $12.95• Turning Pens and Desk Accessories by Mike Cripps $12.95• Wood Turning for <strong>the</strong> Garden, Projects for Outdoors by <strong>Michael</strong> Cripps $12.95• Segmented Wood Turning, by William Smith $14.95• Mini La<strong>the</strong> Magic: Big Projects from a Small La<strong>the</strong>, by Ron Hampton $14.95• A Turner’s Guide to Veneer Inlays, by Ron Hampton $14..95Pay shipping <strong>of</strong> $5.00 for each book.Foreign Customers please request a quote for shipping costs.Order three books and take a 10 percent discount on <strong>the</strong> order.Master Card and Visa Charge Cards AcceptedSend Orders to:More WoodturningP. O. Box 2168Snohomish, WA 98291-2168[Continued on Next Page]More Woodturning August <strong>2009</strong> Page 31
News Continued from PreviousPageexactly replicate <strong>the</strong> edge angleson your bowl gouges, spindlegouges and skews whe<strong>the</strong>r you use aTormek machine or a bench grinder- or both. Water cooled sharpeninggives <strong>the</strong> finest bevel surface andan edge that lasts longer, but if youneed to remove a lot <strong>of</strong> steel for<strong>the</strong> initial shaping, it is done morequickly on a high speed grinder.<strong>The</strong> New Tormek System to useTormek jigs on Dry Grinders.<strong>The</strong> key to <strong>the</strong> Tormek system,<strong>the</strong> patented Turning Tool SetterTTS-100, can also be used on abench grinder since it automaticallycompensates for different wheeldiameters. So if you prefer to make<strong>the</strong> first rough shaping on a benchgrinder <strong>the</strong> shape can be exactlyreplicated when you make <strong>the</strong> finalsharpening on <strong>the</strong> larger Tormekstone.<strong>The</strong> Turning Tool Setter alsoincludes a pr<strong>of</strong>ile guide containingsuitable shapes for bowl gouges andskews, recommended by experiencedwood turners and recognizedwoodturning workshops, e.g. CraftsSupplies USA and DrechselstubeNeckarsteinach in Germany.With <strong>the</strong> Bench GrinderMounting Set BGM-100 you getall <strong>the</strong> hardware you need to use <strong>the</strong>patented Tormek woodturning jigson a bench grinder. You can mount<strong>the</strong> set on ei<strong>the</strong>r side <strong>of</strong> <strong>the</strong> grinder-or by using two sets - on both sides,and you get a versatile sharpeningsystem. <strong>The</strong> mounting set also includesa 50 page handbook on howto shape and sharpen all your turningtools and detailed drawings on howto make <strong>the</strong> wooden platform. Retailprice $56,99.For fur<strong>the</strong>r information:ge<strong>of</strong>f@tormek.comPictures: www.tormek.com/images* * *Popular Ice CreamScoop Kit NowAvailable In ChromeRockler Woodworking andHardware has upgraded one <strong>of</strong> itsmost popular turning products, introducinga new chrome version <strong>of</strong>its Classic Ice Cream Scoop Kit,Mike MahoneyNew VideoTo Orderwww.bowlmakerinc.coma premium hardware package forcrafting custom-handled scoops.<strong>The</strong> chrome kit joins <strong>the</strong> currentsolid brass version to givewoodturners two beautiful optionsfor one-<strong>of</strong>-a-kind projects. Bothkits include a scoop, ferrules anddetailed instructions for turning <strong>the</strong>handle and assembling <strong>the</strong> scoop.<strong>The</strong> finished scoops make excellentgifts or craft fair items, and haveconsiderable heirloom value. <strong>The</strong>yare good projects for a wide rangeD-Way Tools (www.d-waytools.com)Simply <strong>the</strong> finest La<strong>the</strong> tools availableBowl & Spindle Gouges, Beading tools,Hollowing tools, handles and tool rests.Made from M42 cobalt high-speed steelPhone: (360) 432-9509 Fax: (360) 432-3051Page 32 More Woodturning August <strong>2009</strong>
<strong>of</strong> turners, allowing woodworkersto be as creative and ambitious as<strong>the</strong>y like with <strong>the</strong> handle’s shape,style, and species <strong>of</strong> wood.While at <strong>the</strong> <strong>AAW</strong> <strong>Symposium</strong>,I met Andre at his booth and wastold that his shipment <strong>of</strong> diamondgrinding wheels had come in. I’vebeen using a 360 grit wheel with aplastic frame that was designed forpolishing rocks and I was warnednot to overheat it when sharpening.I ordered one <strong>of</strong> <strong>the</strong> 360 grit wheelsfrom Andre, which has a steel frameand should not create a problemfrom heat.I hope to have a full report on<strong>the</strong> diamond grinding wheel in <strong>the</strong>near future. If you wish to contactAndre, his contact information is:ANDRÉ MARTEL167 Rang des Ecossais St-Césaire,Québec, J0L-1T0 CanadaTEL: 450 293-2186E-Mail: amartel@netc.netWeb Site: www.public.netc.net/martel<strong>The</strong> new Rockler Ice CreamScoop in Chrome Finish.Rockler worked with one <strong>of</strong><strong>the</strong> biggest names in woodturning,Alan Lacer, to produce <strong>the</strong> kit.An accomplished turner, writer,instructor and demonstrator, Lacerhas worked in <strong>the</strong> craft for over 30years. He designed <strong>the</strong> kit specificallyfor Rockler.<strong>The</strong> new chrome-finishedClassic Ice Cream Scoop Kit (item22940) retails for $12.99. It isavailable at Rockler Woodworkingand Hardware stores nationwide,Rockler’s independent resellers,Rockler.com or from <strong>the</strong> Rocklercatalog. For store locations or a freecatalog, please visit www.rockler.com or call 1-800-279-4441.* * *Diamond GrindingWheelsSome time back, I orderedsome diamond grinding wheelsfrom Andre Martel in Canada. <strong>The</strong>finest that he had at that time was100 grit. So I purchased a 100grit, a 80 grit, and a 60 grit wheelto give <strong>the</strong>m a try. I wanted a finergrit wheel, but he was sold out at<strong>the</strong> time.VERMECCHUCK DRIVE DOG• For Vermec, Vicmarc, or small Nova Bonhamchucks• Held by chuck jaws for quick mounting andremoval• Domed surface allows alignment in variouspositions• Pins are Adjustable and Replaceable• Centre Pin is hardened•For Fur<strong>the</strong>r Information:Web: www.vermec.comEmail: vermec@netspace.net.au39 Dalton Street, Kippa-Ring QLD 4021 AUSTRALIAPh: +61 7 3284 3733 Fax: +61 7 32842733PROUDLY MADE IN AUSTRALIAMore Woodturning August <strong>2009</strong> Page 33
Q&A Continued from Page19wood and pretty well explains <strong>the</strong>use <strong>of</strong> hand thread chasers to makethreads in wood. I’ve written articleson thread chasing for More Woodturningmagazine, which I publish,and for Woodturning magazinepublished by GMC Publications inEngland.I do not make my own threadchasers, but own chasers made bymost <strong>of</strong> <strong>the</strong> manufacturers, plusmany that were war surplus inEngland after World War II. Ofall <strong>of</strong> <strong>the</strong> thread chasers that I’veused, <strong>the</strong> ones made by Ray Iles inEngland are <strong>the</strong> most comfortableto use. “Tools for Working Wood”imports <strong>the</strong>se chasers. <strong>The</strong>ir web siteis: .If you have specific questions,I may be able to help you.Fred HolderLyle’s Response: I applaudyour interest in hand chasing threads.It takes a bit <strong>of</strong> practice to master.When you see somebody like Fredor Allen Batty do it, it is like poetryin motion. But <strong>the</strong> tradition is beinglost with <strong>the</strong> threading machine attachmentsthat use revolving cuttersthat make it quick and easy. I triedhand chasing a few times and realizedI didn’t want to pay <strong>the</strong> dues toget good at it. So I can not be <strong>of</strong> anyhelp on <strong>the</strong> tools needed.Lyle JamiesonUsing a Wood Tap forChucksQuestion: I’m not gettingsuccessful results using a wood tapto make some chucks. I’m usingmaple and cutting face grain into apre-drilled 1-1/8 hole for a 1-1/4”finished threaded hole. I find turning<strong>the</strong> tap and advancing <strong>the</strong> tailstockquite a challenge so I stepped to <strong>the</strong>backside <strong>of</strong> <strong>the</strong> la<strong>the</strong> since my rightarm is stronger and use my left toadvance <strong>the</strong> tailstock.ChipFred’s Response: I use a tapwrench (or an end wrench that willfit <strong>the</strong> square part <strong>of</strong> <strong>the</strong> tap) on <strong>the</strong>tap and use <strong>the</strong> tailstock to help keepit aligned to tap <strong>the</strong> hole straight.<strong>The</strong> wood needs to be mounted with<strong>the</strong> grain perpendicular to <strong>the</strong> axis <strong>of</strong>rotation (i.e., bowl fashion). For a1”x 8 tpi spindle, I drill a hole that is1” in diameter to <strong>the</strong> depth <strong>of</strong> <strong>the</strong> unthreadedportion <strong>of</strong> <strong>the</strong> la<strong>the</strong> spindleand <strong>the</strong>n a 7/8” hole all <strong>of</strong> <strong>the</strong> waythrough <strong>the</strong> wood, or at least to <strong>the</strong>depth that <strong>the</strong> spindle will reach into<strong>the</strong> tapped hole.I use <strong>the</strong> same process for <strong>the</strong>1-1/4” x 8 tpi tap. Except I firstdrill a 1-1/4” hole to <strong>the</strong> depth <strong>of</strong><strong>the</strong> un-threaded portion <strong>of</strong> <strong>the</strong> la<strong>the</strong>spindle and <strong>the</strong>n a hole <strong>of</strong> 1-1/8” all<strong>of</strong> <strong>the</strong> way through for <strong>the</strong> threadedportion. You do not need to use <strong>the</strong>tail stock live center to push <strong>the</strong> tapinto <strong>the</strong> wood, its purpose is to helpyou keep <strong>the</strong> hole perpendicular to<strong>the</strong> face <strong>of</strong> <strong>the</strong> wood being tapped.I simply advance it occasionally tomake sure <strong>the</strong> tap is running true.<strong>The</strong> Beall Spindle taps workvery well and helps to make an excellentmounting to glue to a bowlblank or a hollow form blank orwooden faceplates.Incidentally, I always flood <strong>the</strong>threads with thin CA glue and run<strong>the</strong> tap through again after <strong>the</strong> gluehas set. This just provides bettersupport for <strong>the</strong> threads.Fred HolderLyle’s Response: Again,Fred’s vast knowledge surpassesmine. I have never tapped woodenthreads. I don’t have anything toadd on this oneLyle JamiesonFinish for Bark on aBowlQuestion: Recently a neighborcame over with a Boxelder burlabout 7” in diameter and asked if Icould turn a bowl from it and leaveall <strong>the</strong> bark on. I have been turningfor about 40 years (hobby, not pr<strong>of</strong>essional),and I never had anyoneask me to “leave all <strong>the</strong> bark on”.No problem turning <strong>the</strong> bowl, but:Should one finish <strong>the</strong> bark in anyway? Any suggestions, directionsor advice will certainly be appreciated.L.M. TaylorFred’s Response: I’ve neverhad anyone ask me to leave all <strong>of</strong><strong>the</strong> bark on, but if <strong>the</strong>y did, I wouldclean <strong>the</strong> dust <strong>of</strong>f <strong>of</strong> <strong>the</strong> bark with airor a s<strong>of</strong>t paint brush and <strong>the</strong>n finishwith a spray lacquer to seal <strong>the</strong> barkand hopefully get it to stay on <strong>the</strong>bowl as <strong>the</strong> years pass.Fred HolderLyle’s Response: I have a rulethat if I want <strong>the</strong> bark on, I haveall <strong>the</strong> bark. If a chunk falls <strong>of</strong>f itall goes. I have used a method <strong>of</strong>saturating <strong>the</strong> bark edge with CAglue as I go to “plasticize” it. <strong>The</strong>bark dries/shrinks at a different ratethan <strong>the</strong> wood so it is hard to keepit all on.As I turn <strong>the</strong> edge I use a gentlesheer scrape with <strong>the</strong> angle <strong>of</strong> <strong>the</strong>tool facing <strong>the</strong> bark to try not to liftit <strong>of</strong>f during <strong>the</strong> cut. I do <strong>the</strong> outside[Continued on Page 35]Page 34 More Woodturning August <strong>2009</strong>
Using two OpposedBowl Steadies as aCenter Steadyby Joel Rakower and Don LindsleyWhen doing deep hollowing itis <strong>of</strong>ten helpful to use a center steadyto keep <strong>the</strong> workpiece centered andto minimize vibration. But centersteadies tend to be expensive, andmany have an arm at “12 o’clock”that prevents using a laser guideduring <strong>the</strong> hollowing process.We suggest using two Onewaybowl steadies to proxy for a centersteady. As <strong>the</strong> name suggests, <strong>the</strong>bowl steady is designed to support<strong>the</strong> walls <strong>of</strong> a bowl as it is shapedand brought to final wall thickness.Typically it is mounted to <strong>the</strong> left<strong>of</strong> <strong>the</strong> bowl (as you face <strong>the</strong> headstock).Figure 1. Two Oneway bowlsteadies stacked so as to serveas a center steady for a hollowform.When hollowing, we simplyadd a second steady on <strong>the</strong> righthandside. Depending on <strong>the</strong> shape<strong>of</strong> <strong>the</strong> piece being hollowed, it maywork to mount <strong>the</strong> steadies side byside. You can also stack <strong>the</strong> steadiesas shown in Figure 1. To stack <strong>the</strong>m,you may have to use a bolt about ½”longer than <strong>the</strong> ones provided byOneway. <strong>The</strong> bolt is a U.S. standard½” x 13.An advantage <strong>of</strong> stacking isthat it is easier to align <strong>the</strong> steadieson ei<strong>the</strong>r side <strong>of</strong> <strong>the</strong> workpiece.Note that in Photo 1, <strong>the</strong>steadies are about as close toge<strong>the</strong>ras <strong>the</strong>y can get: <strong>the</strong> end <strong>of</strong> <strong>the</strong> upperbase butts up against <strong>the</strong> base for<strong>the</strong> post <strong>of</strong> <strong>the</strong> lower one. You canovercome this limitation by “scissoring”<strong>the</strong> two bases, such that <strong>the</strong>upper base can extend past <strong>the</strong> post<strong>of</strong> <strong>the</strong> lower one (Figure 2).Figure 2. <strong>The</strong> bowl steadieswith <strong>the</strong> bases “scissored” topermit moving <strong>the</strong> wheels closertoge<strong>the</strong>r. <strong>The</strong> laser spot from <strong>the</strong>hollowing system is visible on<strong>the</strong> left side <strong>of</strong> <strong>the</strong> photo.If you do this, you’ll also haveto pivot <strong>the</strong> arms on each post sothat wheels contact <strong>the</strong> workpiece atapproximately right angles. Figure2 shows <strong>the</strong> laser spot (but not <strong>the</strong>laser arm itself) <strong>of</strong> <strong>the</strong> hollowingsystem, illustrating how <strong>the</strong> pairedsteadies are compatible with thatsystem.<strong>The</strong> authors are members <strong>of</strong><strong>the</strong> Long Island Woodturners’ Association.Tip for using aSpindle Tapby Don LindsleyA spindle tap, such as <strong>the</strong> onemade by Beale, is used to cut threadsinto blocks <strong>of</strong> wood so that <strong>the</strong>ymay be mounted directly on <strong>the</strong>headstock <strong>of</strong> a la<strong>the</strong> without use <strong>of</strong>a faceplate. I have found it useful formaking jam chucks and home-madescrew chucks, among o<strong>the</strong>r items.To use <strong>the</strong> tap, you pre-bore ahole that is just larger than <strong>the</strong> rootdiameter <strong>of</strong> <strong>the</strong> tap, <strong>the</strong>n use <strong>the</strong> tapto thread <strong>the</strong> wood. As with any tap,you need to keep it coaxial with <strong>the</strong>hole in order to make clean, properlyaligned threads. Instructions suppliedwith <strong>the</strong> tap suggest mounting<strong>the</strong> wood block to <strong>the</strong> headstock <strong>of</strong>your la<strong>the</strong> using a 4-jawed chuck,and using a point center in <strong>the</strong>tailstock to keep <strong>the</strong> tap properlyaligned. Lock <strong>the</strong> headstock anduse a wrench to advance <strong>the</strong> tap into<strong>the</strong> pre-bored hole. To keep <strong>the</strong> tapaligned, you must simultaneouslyadvance <strong>the</strong> tailstock to keep <strong>the</strong>[Continued on Page 38]Q&A Continued from Page34first, apply <strong>the</strong> thin CA and take onefinal light sheer scrape again, andput more glue on <strong>the</strong> outside edge <strong>of</strong><strong>the</strong> bark again. Now on <strong>the</strong> insideas I sneak up on <strong>the</strong> wall thickness,repeat <strong>the</strong> process <strong>of</strong> double glue.This seems to stabilize <strong>the</strong> bark andhold it on. Finish sanding as youwould any o<strong>the</strong>r natural edge. Youcan put <strong>the</strong> same finish on <strong>the</strong> barkas you do for <strong>the</strong> rest <strong>of</strong> <strong>the</strong> bowl.Lyle JamiesonMore Woodturning August <strong>2009</strong> Page 35
Shape Shifter Eccentric Tool TestBy Fred HolderSome time back I received <strong>the</strong>following e-mail:“I am making a tool to do <strong>of</strong>fcenter work using a scroll chuck tohold <strong>the</strong> wood. I also have an accessoryfor <strong>the</strong> chuck that will make3,4,6 sided pens. Please look at myweb site www.shapeshiftertools.com. Any comments are welcome.Send me email or call 407 782-7019.“Thank you“Danny H<strong>of</strong>fman”Danny now tells me that hehas videos linked to his web siteshowing: pen turning, a three sidedbox, and a goblet with a crank shaftlooking stem.I asked Danny to write and articleabout his tool for publication inMore Woodturning, but he preferredthat I would write <strong>the</strong> article andsent me a tool to review and purchaseor return. <strong>The</strong> tool as receivedsells for $225.00 plus S/H, or youcan just purchase <strong>the</strong> ShapeShifterwithout <strong>the</strong> pen turning capabilityfor $175.00 plus S/H. Figure 1shows <strong>the</strong> complete tool with <strong>the</strong>pen adapter. <strong>The</strong> ShapeShifter hasa threaded recess on <strong>the</strong> back to accepta Nova Chuck Adapter and hasa 1” x 8 tpi threaded area to mountyour chuck.I own most <strong>of</strong> <strong>the</strong> o<strong>the</strong>r eccentricchucks and most <strong>of</strong> <strong>the</strong>muse ei<strong>the</strong>r a screw, a recess, or afaceplate to mount <strong>the</strong> wood to <strong>the</strong>device. Some shift <strong>the</strong> wood sidewayslike <strong>the</strong> ShapeShifter and sometilt it like <strong>the</strong> Escoulen Chucks, butI don’t believe any <strong>of</strong> <strong>the</strong>m allowmounting a chuck to <strong>the</strong> eccentricchuck. I was immediately concernedabout this operation because <strong>the</strong>re isPage 36 More Woodturning August <strong>2009</strong>Figure 1. <strong>The</strong> ShapeShifter device for mounting your chuck to <strong>the</strong>la<strong>the</strong> and shifting it <strong>of</strong>fcenter.no mechanism to counter-balance<strong>the</strong> weight <strong>of</strong> <strong>the</strong> chuck plus <strong>the</strong>weight <strong>of</strong> <strong>the</strong> wood mounted in <strong>the</strong>chuck. <strong>The</strong>refore, I proceeded withcaution.My first test was with <strong>the</strong> NovaG3 chuck, which is fairly light. Iturned several different pieces <strong>of</strong>wood to test its ability to shift <strong>the</strong>wood and I always kept <strong>the</strong> spindlespeed below 500 rpm. Since I <strong>of</strong>tenturn oval hammer handles betweencenters, I wondered if this devicewould allow turning pieces oval.Figure 2 shows <strong>the</strong> result. I wasable to do this by first <strong>of</strong>fsetting <strong>the</strong>ShapeShifter somewhat and marking<strong>the</strong> zero degree point on <strong>the</strong> wood. Iturned wood until it was sort <strong>of</strong> 1/2oval <strong>the</strong>n loosened <strong>the</strong> wood in <strong>the</strong>chuck and rotated <strong>the</strong> zero mark to180 degrees mark. I <strong>the</strong>n turned <strong>the</strong>wood until it was oval.Figure 2. This piece <strong>of</strong> wood wasturned with <strong>the</strong> la<strong>the</strong> runningat about 200 rpm and <strong>the</strong> woodwas cut with <strong>the</strong> EasyRougherCi1, which does not cut veryclean at this slow speed.I <strong>the</strong>n brought <strong>the</strong> ShapeShifterback to center, which is not easy todo because <strong>the</strong>re is no provision fordetermining centering. Many <strong>of</strong> <strong>the</strong>o<strong>the</strong>r <strong>of</strong>f-center chucks also lackthis ability, but some mechanism to
Figure 3. <strong>The</strong> Vicmarc chuck has been mounted to ShapeShifterand a piece <strong>of</strong> 5/8” square by 5” long wood has been mounted in <strong>the</strong>chuck and turned round.determine center would be handy.I mounted my Vicmarc chuck with<strong>the</strong> small jaws so that I could turnsome small pieces <strong>of</strong> wood. With<strong>the</strong> ShapeShifter set to center, Icould run <strong>the</strong> la<strong>the</strong> at a much higherrevolution to turn <strong>the</strong> square woodround as shown in Figure 3.on <strong>the</strong> piece <strong>of</strong> wood as shown inFigure 4.I <strong>the</strong>n remounted ano<strong>the</strong>r piece<strong>of</strong> 5/8” square by 5” long piece <strong>of</strong>wood and turned an eccentric finialto see how <strong>the</strong> chuck would workon this small wood. I was satisfiedwith <strong>the</strong> results. I had marked <strong>the</strong>wood and <strong>the</strong>n rotated it 90 degreesto obtain a rotating <strong>of</strong>fset similar toa crankshaft. See Figure 5.Figure 5. This photo shows <strong>the</strong>finial that was turned with eachstep being rotated 90 degrees.<strong>The</strong> finial is shown with a piece<strong>of</strong> similar wood.My next test was to turn a bowlwith an <strong>of</strong>fset hollow. I first drilled a1” hole and mounted <strong>the</strong> blank onto<strong>the</strong> jaws <strong>of</strong> my Vicmarc chuck andturned <strong>the</strong> outside. <strong>The</strong> wood wasdry and slightly cracked RussianOlive. Once <strong>the</strong> outside was turned,I switched to <strong>the</strong> Nova G3 chuck togrip <strong>the</strong> 2” tenon on <strong>the</strong> bottom <strong>of</strong><strong>the</strong> bowl. I <strong>the</strong>n shifted <strong>the</strong> Shape-Shifter and drew a line on <strong>the</strong> face<strong>of</strong> <strong>the</strong> bowl blank to show where<strong>the</strong> outside <strong>of</strong> <strong>the</strong> recess wouldfall. I found that I could not turnat speeds above 330 rpm with thissetting. With <strong>the</strong> diameter defined,I <strong>the</strong>n hollowed <strong>the</strong> recess as shownin Figure 6.[Contoinued on Next Page]Make 2-3 Bowls from 1 Blankwith My New BowlSawFigure 4. This photo shows some<strong>of</strong> <strong>the</strong> eccentric turnings on <strong>the</strong>piece <strong>of</strong> wood mounted in <strong>the</strong>chuck in Figure 3.Using <strong>the</strong> tail center as a marker,I shifted <strong>the</strong> piece <strong>of</strong>f-center sothat <strong>the</strong> tail center was just insidefur<strong>the</strong>st <strong>of</strong>fset <strong>of</strong> <strong>the</strong> wood and <strong>the</strong>nturned <strong>of</strong>f <strong>the</strong> very end <strong>of</strong> <strong>the</strong> pieceand <strong>the</strong>n several eccentric areasTurn Nested Bowls from 6” or 8” bowl blanks with a $39.95hand-held tool I call <strong>the</strong> Bowlsaw.See my website bowlsaw.com for details.Steussy Creations415-897-1457 334 A<strong>the</strong>rton Ave., Novato, CA 94945More Woodturning August <strong>2009</strong> Page 37
ShapeShifter Continued fromPrevious PageFigure 6. <strong>The</strong> bowl has beenhollowed and is ready forsanding.As a final decoration, I cut abead around <strong>the</strong> recess with a 1/8”Robert Sorby beading tool. <strong>The</strong>sanded and oiled bowl is shown stillon <strong>the</strong> la<strong>the</strong> in Figure 7. Figure 8 is<strong>the</strong> piece after it has been reverseturned in a Rim Chuck to finish <strong>the</strong>foot.Figure 8. <strong>The</strong> finished bowl after<strong>the</strong> bottom has been turned.Figure 9. ShapeShifter with penturning mandrel attached.Spindle Tap Continued fromPage 35point center in <strong>the</strong> indentation at<strong>the</strong> end <strong>of</strong> <strong>the</strong> tap’s shaft as <strong>the</strong> tapmoves into <strong>the</strong> wood. That’s notalways easy.It helps to use a spring-mountedpoint in <strong>the</strong> tailstock. I use aRobert Sorby Steb-Center, but anyspring-loaded point would do. Iplace <strong>the</strong> tap in <strong>the</strong> hole and bringup <strong>the</strong> tailstock, advancing it untilspring is compressed (see <strong>the</strong>photo). I use a wrench on <strong>the</strong> flats<strong>of</strong> <strong>the</strong> tap and turn <strong>the</strong> tap until <strong>the</strong>point <strong>of</strong> <strong>the</strong> Steb-Center has movedforward about as far as it can, and<strong>the</strong>n I advance <strong>the</strong> tailstock againto recompress <strong>the</strong> spring. Repeatuntil <strong>the</strong> tap reaches <strong>the</strong> bottom <strong>of</strong><strong>the</strong> pre-bored hole. I find this to bemuch easier than trying to advance<strong>the</strong> tailstock at <strong>the</strong> exact rate that <strong>the</strong>tap is feeding into <strong>the</strong> wood.Figure 7. <strong>The</strong> turned, sanded,and oiled bowl still on <strong>the</strong> la<strong>the</strong>.Figure 9 shows <strong>the</strong> Shape-Shifter with <strong>the</strong> pen turning mandrelattached. Since I don’t turn pens,this part <strong>of</strong> <strong>the</strong> system was notchecked by me. However, I’m sureit would work very well with a bit<strong>of</strong> practice.Figure 10. This is a selection <strong>of</strong>pens turned using ShapeShifter.<strong>The</strong> pens were turned by GeneCombs.If you do not own any <strong>of</strong> <strong>the</strong>eccentric chucks, <strong>the</strong> ShapeShifterwould allow you to do work with<strong>the</strong> wood held in your chuck thatmany <strong>of</strong> <strong>the</strong> o<strong>the</strong>r eccentric chuckson <strong>the</strong> market will do with <strong>the</strong> woodmounted onto a faceplate or a screwchuck.Spindle tap being supportedby a spring-loaded point in <strong>the</strong>tailstock.Editor’s Note: How many <strong>of</strong> ourreaders have simple tips such asthis one that could be written upand shared with <strong>the</strong> woodturningcommunity. I’m sure our readerswould appreciate your efforts. Thinkabout it, what do you do to simplifya particular operation?Page 38 More Woodturning August <strong>2009</strong>
An Emmy-Winning Bowl?by Don Lindsley<strong>The</strong> family <strong>of</strong> one <strong>of</strong> my customershas a tradition at Christmastime <strong>of</strong> drawing names to see whogives a present to whom. Herbro<strong>the</strong>r - a very successful NewYork City television producer - isnotoriously hard to please and quitevocal in expressing his displeasureif his standards aren’t met, so everyonein <strong>the</strong> family hopes not to drawhis name! But a few years backmy friend drew <strong>the</strong> bro<strong>the</strong>r’s name,and so had <strong>the</strong> challenge <strong>of</strong> findinga gift that he would like. She chosean end-grain natural-edge bowl inblack walnut. <strong>The</strong> bark was unusuallythick, so <strong>the</strong> bowl had a highlyirregular dark rim, <strong>the</strong>n a band <strong>of</strong>creamy sapwood, and an interior <strong>of</strong>dark, variegated heartwood.<strong>The</strong> family met in <strong>the</strong> bro<strong>the</strong>r’shome to exchange gifts, in <strong>the</strong> roomwhere he displayed his many trophies.When he opened his gift, myfriend held her breath, hoping tha<strong>the</strong> would not be disappointed withit. He stared at <strong>the</strong> bowl for a fewseconds, <strong>the</strong>n grabbed an EmmyAward statue <strong>of</strong>f a shelf, and gaveit to her to express his thanks. Apparentlyhe was more than pleasedwith <strong>the</strong> gift.Does that mean I can claim thatone <strong>of</strong> my bowls won an Emmy?!!Holland 4 Wheel Steady100% improvement over 3 wheelsteadies25% larger swing capacity, fits la<strong>the</strong>sizes, 12,14,16,18,20,24Easy to build <strong>of</strong> plywoodPlans for sale $20.00 + $2.00 s/hCustom Built $275.00 + s/hemail: wmhollan@optonline.netphone 631-281-0302<strong>The</strong> Market Place<strong>The</strong> first 10 words <strong>of</strong> classified advertisementsare free to subscribers, additionalwords are 20-cents per word, no minimum.On non-subscriber advertisements, price is20-cents per word with a minimum billing<strong>of</strong> $4.00.Beginning and advanced woodturningclasses. Call Ted Bartholomew 253-927-6855,Tacoma, WA.Sharpening Machine for all Woodworkers- <strong>The</strong> Big Tree Tools machine is a flatplaten belt and buff machine for woodworkers,which allows a wide range <strong>of</strong> belt grits to beused, and belt changes take only a few seconds.Now our Versa-Jig is included with every machineallowing you to sharpen all <strong>the</strong> hand toolsin your shop! <strong>The</strong> convenience and accuracyare unequaled. Visit bigtreetools.com to viewphotos, see our o<strong>the</strong>r tools and read articles onturning by Jon Siegel. See ad in this issue orcall 1.888.TURNINGSuper Glue 2 0z. $5.50, Thin, Medium.Thick, Accelerator 2oz. $3.00. acwtinc@ameritech.net.PAYPAL, VISA & MASTERCARD.LOGLAMPS.COM ARTISTIC & CUSTOMWOODTURNING, INC. 1-800-894-8123Make pens using your drill press with aVertila<strong>the</strong>. http://vertila<strong>the</strong>.freeyellow.comWoodturning on a VB36 La<strong>the</strong>, atHigher Manaton Farm. SW England. Web Site:www.turning-wood.comFaceplates: Straight from manufacture,heavy duty aluminum, brightly colored anodize,most common sizes. Visit our website:www.minkcrafts.com or call toll free (866)956-2200.<strong>The</strong> Burl Source. Large supply <strong>of</strong> AustralianBurl Caps, turning blanks, pen blanks,and large jarrah burl slabs. Check us out at www.<strong>the</strong>burlsource.com or call 801-942-2616.Emory’s Woodturning E-Books www.as<strong>the</strong>woodturns.com/books.html.Free Wet Grind/Hone Instant ChangeSharpening System Plans: http://www.DavidReedSmith.com.Maple Turning Blanks--PRICE $6-8PBF+S&H cut to size, call 360-942-3468 ore-mail: john@hamptonwoodcraft.com.Pen Finishing Kit: A must for all penturners! Obtain a scratch free remarkale shine onall surfaces including stabilized woods, acrylicsand solid surface materials using <strong>the</strong> new 2”x2”double sided foam backed sanding pads. Kit containsinstructions for use and seven color codedpads ranging from 300 to 12,000 grit. $13.95.BG Artforms. TEL: 888-717-4202.Easier, Faster Segmented Vessel Design,Web Site: www.segmentedturning.com.TEL: (805) 489-5309.Woodturning classes – Satisfactionguaranteed. Call Larry Miller 360-412-1583,Olympia, Washington”Cabochons for woodturners at www.yoyospin.com/cabWoodturning Instruction: Now that Ihave insurance through <strong>the</strong> <strong>AAW</strong> Craft WorkersInsurance Program, I can again <strong>of</strong>fer trainingin my shop. If interested in basic woodturninginstruction or specialized training such as <strong>the</strong>Chinese Ball, contact me at: 360-668-0976.Fred Holder.New Video--”Relief carved Embellishmentsfor Wood Projects”. DVD--$30.00plus $3.00 S/H. VHS $20.00 plus $3.00 S/H.Contact: Tony Cortese, 20850 NW 13th Street,Dunnellon, FL 34431. Ph 352-489-5652. E-mail:romeowoodturner@msn.com.NEW REDUCED PRICE: SimplifiedFluting with Al Caton. Video-$20.00 plus S&H$3.00. DVD-$30.00 plus S&H $3.00. Insturctionand inexpensive jigs for fluted works <strong>of</strong> art.Order from: Al Caton, PO Box 2360, Dunnellon,FL 34430. TEL: 352-465-0562. E-Mail: alcat@bellsouth.net.Making <strong>the</strong> Chinese Ball, Revised 2008,by Fred Holder. <strong>The</strong> revised booklet outlinesFred’s trials and tribulations in attempting toconquer this project. Tells how to make <strong>the</strong> toolsneeded to use <strong>the</strong> Crown Chinese Ball Tools.Booklet now contains 64 pages <strong>of</strong> information.Order from Fred Holder, PO Box 2168, Snohomish,WA 98291. Price is $10.00 includingshipping. Telephone 360-668-0976.Bowl Coring with <strong>the</strong> McNaughton. ADVD by Reed Gray (aka robo hippy). Everythingyou need to know about how to use thistool, from will it work on your la<strong>the</strong>, to <strong>the</strong> laserpointer system that is available. $30 includingshipping in <strong>the</strong> US. Contact Reed Gray 541-463-9634, or reedgray@comcast.net. (05-09)Limited quantities <strong>of</strong> Mountain Mahogany(curly leaf). Flat rate postal box (12x12 x5 1/2 inches) $50 and up depending onwhat you want. Green logs sections, or greenblanks, sealed, and plastic wrapped. ContactReed Gray 541-463-9634, or reedgray@comcast.net.(12-08)Turn Nested Bowls from 6” or 8” bowlblanks with a $39.95 hand-held coring tool I call<strong>the</strong> BowlSaw. Check bowlsaw.com for detailsor e-mail me at Steuss@aol.com. For questionscall 415-897-1457. Steussy Creations.Big Tree Tools, Inc.Innovative tools forwoodturnersSee our web site featuring our SharpeningSystem including <strong>the</strong> NEWVersa-Jig - sharpen all your tools onour system.bigtreetools.com1-888-turning (887-6464)PayPal acceptedMore Woodturning August <strong>2009</strong> Page 39
MANUFACTURER OF QUALITY WOODTURNING LATHES, CHUCKS AND ACCESSORIESMade in Australia<strong>The</strong> VL300 series la<strong>the</strong> has been designed to suitmost pr<strong>of</strong>essional wood turners. <strong>The</strong> electronicvariable speed drive gives up to 200% torque onlow rpm with a 2.2kW motor.<strong>The</strong> cast iron la<strong>the</strong> is mounted on a 5mm thicksteel plate stand, which has been designed with a700mm wide footprint for stability and rigidity.<strong>The</strong> stand also features wood shaving dischargechute and knee bar stop.Remote On/Off switchWith magnetic baseVL300 La<strong>the</strong> Specifications300mm Centre Height600mm500mmSwing Over BedDistance Between Centres24 Indexing HolesNo. 2 MTM33 x 3.5Taper RollerSpeeds30mm15mm75mmHeadstock & Tailstock SpindleSpindle Thread (O<strong>the</strong>rs Available)Spindle BearingsEVS 30-3000 rpmHole Through HeadstockHole Through TailstockQuill TravelPrecision machined face for bolt onextension bed or swing awaytailstock support.Swing Away Tailstock SupportV01125Check our website for <strong>the</strong> full range <strong>of</strong>La<strong>the</strong>s, Chucks and AccessoriesFor your nearest Vicmarc ® dealer please contact us:Phone: + 61 7 3284 3103 Fax: + 61 7 3283 4656Web: www.vicmarc.comEmail: vicmarc@vicmarc.comPage 40 More Woodturning August <strong>2009</strong>