ProQA Uninstall Instructions - Priority Dispatch Corporation
ProQA Uninstall Instructions - Priority Dispatch Corporation
ProQA Uninstall Instructions - Priority Dispatch Corporation
- No tags were found...

You also want an ePaper? Increase the reach of your titles
YUMPU automatically turns print PDFs into web optimized ePapers that Google loves.
Follow the following steps to uninstall <strong>ProQA</strong>:Select “Custom.”Select “Select All” then “Next.”© Page 2 of 5 3/29/2007
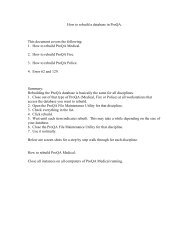
Select “Select All” then “Next.”Select “Finish” and the files will be removed, uninstalling <strong>ProQA</strong> from the machine.Once the process is completed Navigate to the C:\windows directory on a Windows XPmachine or the C:\WINNT directory on a Windows 2000 machine. Remove thefollowing files:© Page 4 of 5 3/29/2007
PROQA.INI (PROQAPOLICE.INI OR PROQAFIRE.INI)pqacfg.inipqafm.inipqaio.inipqaopm.inipqarsp.inipqaloc.iniThe PROQA.BAK (PROQAPOLICE.BAK OR PROQAFIRE.BAK) files do not need to bedeleted.These “ini” files are created when the applicable Utility is opened and are not removedby the uninstall process.This completes the uninstall process. The machine does not need to be restarted as<strong>ProQA</strong> does not write to the Windows Registry.<strong>ProQA</strong> may now be installed. When the installation has completed, follow yourscreenshots and set the Configuration Utility appropriately. Finally, copy the rspstd.defand abort.nae files and paste them into the C:\<strong>ProQA</strong>.win\Data directory, overwriting theexisting file.For additional assistance, contact <strong>Priority</strong> <strong>Dispatch</strong> Corp. Technical Support at866-777-3911.© Page 5 of 5 3/29/2007