20-20 manual - Mesa Boogie
20-20 manual - Mesa Boogie
20-20 manual - Mesa Boogie
- No tags were found...

You also want an ePaper? Increase the reach of your titles
YUMPU automatically turns print PDFs into web optimized ePapers that Google loves.
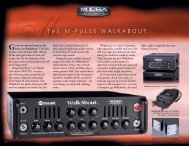
MESABOOGIE<strong>20</strong>/<strong>20</strong>Owner's ManualThe Spirit of Art in Technology1317 Ross Street Petaluma, CA 94954USA
Hello from the Tone Farm...YOU, the smart player and all around intuitive human, have put your trust in us to beyour amplifier company. This is something we do not take lightly. Our reward is thatwe've made a classic amplifier and by choosing this amplifier, you have become part ofthe MESA family...Welcome! Our goal is to never let you down. Your reward is that youare now the owner of the all new <strong>20</strong>/<strong>20</strong> power amp, bred of fine all tube ampheritage...benefiting from the many patented pioneering MESA/<strong>Boogie</strong> circuits that led tothe refinement of your new instrument. Feel confident, as we do, this product willinspire many hours of musical satisfaction and lasting enjoyment. It was built with youin mind, by players who know the value of a fine musical instrument and thecommitment it takes to make great music. The same commitment to quality, value andsupport we make to you...our new friend.
Your <strong>Mesa</strong>/<strong>Boogie</strong> Amplifier is a professional instrument. Please treat it with respect and operate it properly.USE COMMON SENSE AND ALWAYS OBSERVE THESE PRECAUTIONS:Do not expose amplifier to moisture, rain or water, direct sunlightor extremely high temperatures.Always insure that amplifier is properly grounded.Always unplug AC power cord before changing fuse or anytubes.When replacing fuse, use only same type and rating.Avoid direct contact with heated tubes.Insure adequate air circulation behind amplifier.Keep amplifier away from children.Be sure to connect to an AC power supply that meets the powersupply specifications listed on the rear of the unit.If there is any danger of lightning occurring nearby, remove thepower plug from the wall socket in advance.To avoid damaging your speakers and other playback equipment,turn off the power of all related equipment beforemaking the connections.Do not use excessive force in handling control buttons, switchesand controls.Remove the power plug from the AC mains socket if the unit is tobe stored for an extended period of time.Do not use solvents such as benzene or paint thinner to cleanthe unit. Wipe off the exterior with soft cloth.Be sure to have the warranty card filled out by the store at whichyou purchased this product and send back to <strong>Mesa</strong> Engineering.YOUR AMPLIFIER IS LOUD! EXPOSURE TO HIGH SOUND VOLUMES MAY CAUSEPERMANENT HEARING DAMAGE!No user serviceable parts inside. Refer service to qualified personnel. Always unplug AC power beforeremoving chassis.EXPORT MODELS: Always insure that unit is wired for proper voltage. Make certain grounding conformswith local standards.READ AND FOLLOW INSTRUCTIONS OF PROPER USAGE.
FRONT PANEL CONTROLS:<strong>20</strong>/<strong>20</strong> DYNA-WATT POWERPATENTED 4,713,6242A SBFUSEPRESENCE VOLUME POWERVOLUME PRESENCE HANDBUILT IN USA1A SB SB STANDBYEL-84 ALL TUBE STEREOPRESENCE:POWERPATENTED 4,713,624PRESENCEThese controls “open-up” the <strong>20</strong>/<strong>20</strong> producing brightness and sparkle for clean sounds at higher settingsor sizzle and edge when set high for distortion sounds. At lower PRES-ENCE Control settings you can darken and compress lead soundsmaking them warmer and fatter. Turning the PRESENCE Controls tozero “chokes the brights” completely, making the <strong>20</strong>/<strong>20</strong> great for jazzVOLUME PRESENCE EL-84 AVOLUMEclean sounds or round vocal lead work.VOLUME: These two potentiometers (pots) control the volume level of each side or channel of the <strong>20</strong>/<strong>20</strong>. Since there’sonly one Standby switch on this unit, these two controls may be used as channel muting controls.POWERPATENTED 4,713,624PRESENCEVOLUMENOTE: If only one speaker is to be used on one channel and nospeaker load is present on the other, always turn the unused channelsVOLUME Control to zero. To prevent oscillation (motorboatinglike sound) turn the PRESENCE Control of that channel all the wayup.VOLUMEPRESENCEEL-84 APOWER & STANDBY: These two toggles located next to the <strong>20</strong>/<strong>20</strong>’s left and right channel VOLUME Controls deliverA.C. Mains voltage and D.C. filament voltage. When powering up cold - make sure the STANDBY switch is in the Standbyposition when flipping the POWER switch to the ON position. Wait at least 30 seconds before flipping the STANDBY switchto the ON position. This procedure reduces shock on cold tubes and prolongs their tonefultube life. Remembering to use the STANDBY switch on set breaks also prolongs tube life.2A SBFUSENOTE: Power tube life varies depending on many factors i.e. how much you play, howVOLUME POWER 1A SB SB STANDBY VOLUMEyou treat your equipment etc. We’ve found that most discerning pro’s who use their gearfive to seven nights a week start noticing some tone loss somewhere around 8 months to a year. Some people, however,use the same set of power tubes for years with no complaints.We recommend changing your power tubes once a year if you play alot. This way you’re ensured of smooth operation andoptimum tone. Always use <strong>Mesa</strong> power tubes of matching color codes whenever possible. These are matched correctlywith each other and hammer tested and actually cost less than the so called matched competitors in most cases. Also, itkeeps your <strong>20</strong>/<strong>20</strong> warranty intact.PAGE 3
FRONT PANEL CONTROLS: (Continued)FUSE: This is the A.C.’s (Alternating Current) main fuse and provides protection from outside A .C. fluctuations as well as powertube failure damage. Should the fuse blow, replace it with the same rating in a Slo-Blo type package. The domestic U.S. versionrequires a 2 amp Slo-Blo fuse. A power tube short or failure is often the cause of a blown fuse...Followthe cold start procedure mentioned in the POWER & STANDBY switch section and watch theVOLUME2A SBFUSEPOWER 1A SB SB STANDBYVOLUMEpower tubes as you flip the STANDBY switch to the ON position. If a power tube is going bad oris arcing you will see it! Flip the STANDBY switch to Standby immediately and replace the faultypower tube and the fuse if necessary. If you see nothing abnormal as you lift the STANDBYswitch, it is possible that a power tube shorted temporarily and blew the fuse. If this is the case it may work again normally. To be extrasafe, you might want to replace just the adjacent tube or all power tubes in the “shotgun” troubleshooting tradition and save t hereplaced set as spares. Spare fuses are a must for the fabled cord bag along with your spare tubes. Always carry both for they couldbe worth their weight in gold someday.Now that we’ve reviewed the <strong>20</strong>/<strong>20</strong>’S Front Panel controls and found its simple layout to be easily digested, let’s move aft for a reviewof the Rear Panel connections.REAR PANEL:INPUTA B 8 OHMS4 OHMS 4 OHMS ABSLAVEINPUTS A / B: Located to the far left (when facing the unit from the rear) you’ll find two 1/4” insulated jacks. These are the inputsfor preamps and/or effects, depending on how you wire your system. You may drive the <strong>20</strong>/<strong>20</strong> with your preamp directly or chooseto come from the last effect in a chain and drive the power amp this way.Either way is fine and up to your preference.INPUT BA8 OHMS4 OHMS 4 OHMSASLAVEBSPEAKERS: These six jacks deliver the <strong>20</strong>/<strong>20</strong>’S incredible tone to your favorite speaker cabinets. One eight Ohm and two fourOhm jacks per channel are provided. Use one eight Ohm cabinet in the eight Ohm jack of each channel and two eight Ohm cabinetsinto the two four Ohm jacks per channel. Use one four Ohm cabinet into onefour Ohm jack (each channel). Use one sixteen Ohm cabinet into the eightOhm jack (each channel). Two sixteen Ohm cabinets connected with a “Y”AINPUT 8 OHMS 4 OHMS 4 OHMSABSLAVEBcable works even better in the eight Ohm jack, once again this would be thesame for each channel.Don’t forget: Duplicate the proper load for both channels: Turn its VOLUME Control to zero and its PRESENCE Control all theway up. It’s also best not to send signal to the unused channel input.PAGE 4
REAR PANEL: (Continued)SPEAKERS: (Continued) Speaker cabinets may be 4, 8 or 16 Ohms and can vary from one manufacturer to another. If you arenot sure of the impedance rating of your cabinet, you may need to remove the cabinet’s rear panel in order to verify the impedancerating of the speaker (s). <strong>Mesa</strong>/<strong>Boogie</strong> 4x12 and 4x10 cabinets come standard wired to 8 Ohms and are wired in series-parallel. Nomatter how unusual your speaker setup, it is always possible to get good performance from your <strong>20</strong>/<strong>20</strong>.SLAVE A / B: The <strong>20</strong>/<strong>20</strong> provides a pair of slave jacks that enable you to capture the sound of this magic little power section andinject it directly into outboard effects processors or other larger power amplifiers for higher output at larger venues. In either of thesescenarios the <strong>20</strong>/<strong>20</strong> becomes a tone generator that enables you to achieve the sound of a small amp cranked, in a one spacerackable format. Due to space considerations, the output levels are preset at the slave output jacks to provide an optimum level whenthe Front Panel VOLUME Controls are set to approximately 10:30, which is usually just past the onset of clip - depending on thestrength of the signal at the Inputs.This predetermined level of the Slave jacks should be well matched to most applications and some control of the signal level ispossible by adjusting the Front Panel VOLUME Controls. If you have an application where you are using the <strong>20</strong>/<strong>20</strong> at either superlow or extremely high for fully clipped sounds, you can call us and ask for a Product Specialist and he can figure out a signal strengthresistor network for your individual needs and can send the parts to you for a technician in your area to install. Most likely though, byworking with the <strong>20</strong>/<strong>20</strong>’s VOLUME Controls in conjunction with the input attenuators of the processor or power amp you are interfacingwith, a Slave level can be obtained that will work well for your situation. Please try this before calling us to modify your amp.NOTE: WARNING ! - A load must be connected at all times to the Speaker Outputs when using the Slave jacks. If you intend to usethe <strong>20</strong>/<strong>20</strong> as a tone generator only and do not want to listen to the live speaker outputs, connect a load resistor with a rating of at least40 watts (or greater if driven continuously into clip) and with a 4 or 8 Ohm impedance rating. Each channel must have a load resistorconnected to its proper speaker jacks. In most cases a speaker will deliver better sound and a tone you are more familiar with dueto the reactive nature of a speakers dynamic signature and natural compression. If you prefer this Slave sound, but don’t want to listento the live speaker simply put it in a box or hide it under the drum riser...etc.PAGE 5
TUBE LAYOUT and TASKS<strong>20</strong>/<strong>20</strong>REAR PANEL (cut-a-way view looking down from the top of unit)MESA12AX7AMESA12AX7AMESA12AX7AMESA12AX7AMESA12AX7AMESA12AX7AMESA12AX7AV7V6V5 V4 V3 V2 V1LEFTSIDE12AX7THESE 4 TUBESEL-8412AX7RIGHTSIDEV1 - A = Channel B Input StageV1 - B = Channel A Input StageTUBE ASSIGNMENTV5 =V6 =Power Tubes for Channel AV2 - A =V2 - B =Phase Inverter for Channel BV7 - A =V7 - B =Phase Inverter for Channel AV3 =V4 =Power Tubes for Channel BDIMENSIONS & SPECIFICATIONSWEIGHT: shipping weight <strong>20</strong> lbs.HEIGHT: 1 rack unit - 1 3/4 nchesDEPTH: 13 inches ( over all - including knobs )INPUT IMPEDANCE:POWER REQUIREMENTS: (from AC mains) 117 voltsPAGE 6PAGE 6
Parts Sheet - <strong>20</strong> / <strong>20</strong> - Front PanelLIGHTPt # 3956<strong>20</strong><strong>20</strong>/<strong>20</strong> DYNA-WATT POWERPATENTED 4,713,624POT Pt#POT Pt# 2A SBPOT Pt# POT Pt#592151 592151 592151 592151FUSEPRESENCE VOLUME POWER 1A SB SB STANDBY VOLUME PRESENCE HANDBUILT IN USAEL-84 ALL TUBE STEREOKNOBS (BOTH)SWITCHPt # 408111 Pt # 601073SWITCHKNOBS (BOTH)Pt # 601073 Pt # 408111FUSE CAPPt # 790347PAGE 8Parts Sheet - <strong>20</strong> / <strong>20</strong> - Rear PanelINPUT BA8 OHMS4 OHMS 4 OHMSASLAVEBALL JACKSPt# 613111
The Spirit of Art in Technology1317 Ross Street Petaluma, CA 94954USAPhone No. 707-778-6565 FAX No. 707-765-1503