
Create successful ePaper yourself
Turn your PDF publications into a flip-book with our unique Google optimized e-Paper software.
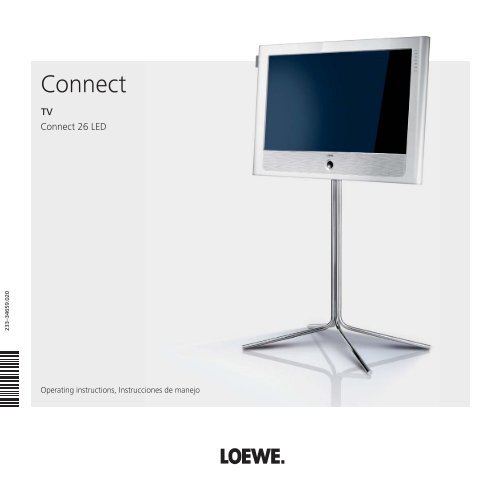
<strong>Connect</strong>TV<strong>Connect</strong> 26 LED233–34659.020Operating instructions, Instrucciones de manejo
Remote control – TV functions12345678910111213141516(1Radio only for DVB reception, provided the station broadcasts this.Otherwise switch-over to an audio input.(2The assignment of these keys can be changed (see page 85).The description refers to the standard setting.3332313029282726252423222120191817Functions of <strong>Loewe</strong> TV set1 Sound off/on ...........................................................................................................(page 32)2 LED display for current operating mode ..................................................................(page 85)3 Switch over to TV mode ....................................................................................(page 20; 85)4 Switch over to operate recorder (2 ...........................................................................(page 85)5 Timer overview on/off .............................................................................................(page 83)6 Set picture format ....................................................................................................(page 35)7 Electronic Programme Guide on/off ........................................................................(page 46)8 Teletext on/off .........................................................................................................(page 48)9 Menu on/off ............................................................................................................(page 12)10 V+/V– Volume louder/quieter ..................................................................................(page 32)11 Station list on ...........................................................................................................(page 30)in the menu: Confirm/call ........................................................................................(page 12)12 Green button: Teletext functions .............................................................................(page 36)13 Red button: Freeze on/off .......................................................................................(page 36)14 Select station down; in the menu/wizard (if available): Back ...................................(page 28)15 Direct recording16 Still frame on/off17 Still frame on18 Select station up19 Still frame off20 Blue button: Programme info on/off .......................................................................(page 36)21 Yellow button: Previous station ...............................................................................(page 36)22 In the menu / Lists: Select/Set ..................................................................................(page 12)23 P+/P– Select Station up/down .................................................................................(page 30)24 Close all displays ......................................................................................................(page 12)25 Status display on/off; in the menu: context-relevant Info on/off .......................(page 38; 15)26 PIP on/off (picture in picture) ...................................................................................(page 44)27 MediaPortal on/off ............................................................................................(page 14; 56)28 AV selection ............................................................................................................(page 31)29 Select station directly; in the menu: Enter numbers or letters ..................................(page 30)30 Set sound adjustment ..............................................................................................(page 32)31 Switch over to operate DVD player (2 .......................................................................(page 85)32 Switch over to radio mode (1 (2 .................................................................... (page 21; 50; 85)33 Switch on/off – to standby mode ............................................................................(page 21)english3 -
englishAcknowledgements<strong>Loewe</strong> Opta GmbHIndustriestraße 11D-96317 Kronachwww.loewe.dePrinted in GermanyDate of issue 06/10-1.0 TB/FP© <strong>Loewe</strong> Opta GmbH, KronachID: 1.5.0.0All rights including translation, technical modifications and errors reserved.- 4
For your safetyenglishFor your own safety and to prevent unnecessary damage to your device,read and comply with the following safety instructions:Proper use and environmental conditionsThis TV set is designed exclusively for reception and reproduction ofvideo and audio signals and is designed for living rooms or office facilities,and should not be operated in rooms with high humidity, such as abathroom, or sauna, or where there is a high concentration of dust (e.g.workshops). The manufacturer‘s warranty is only valid for use in the specifiedpermissible environment.If the set is used outdoors ensure that it is protected against moisture(rain, splashing water, or dew). High humidity and dust concentrationscause leak currents in the device, which can cause a shock hazard if thedevice is touched, or a fire.If you have brought the set into awarm environment from the cold,then wait for about 1 hour beforeswitching it on to avoid formation ofcondensation.Do not place any objects filled withliquids on top of the appliance. Protectthe appliance against drippingand splashing water.Candles or naked flames must be keptaway from the appliance at all timesto prevent it from catching fire.Never place the TV set in a position where it is exposed to vibrations. Thiscan lead to material overload.TransportingOnly transport the device in vertical position. Grasp the device on theupper and lower edges of the housing.If the set has to be put down during packing/unpacking, place the TVset with the entire front surface lying flat on a soft underlay such as ablanket or the felt from the packing material.The LCD screen is made of glass or plastic and can break if not handledproperly.Always wear rubber gloves to carry the TV set if the LCD screen is damagedand liquid crystal might be leaking out. In the case of skin contactimmediately wash thoroughly with water.Power supplyThe wrong voltage can damage the set. This equipment must only beconnected to a mains power supply which has the same voltage andfrequency as that specified on the rating plate. The mains plug of the TVset must be easily accessible so that the device can be disconnected fromthe mains at any time. When you unplug the mains plug, do not pull onthe cable rather pull on the plug housing. The cable in the mains plugcould be damaged and cause a short circuit the next time it is pluggedin.Lay out the mains cable in such a manner that it cannot be damaged.The mains cable must not be kinked or laid over sharp edges, steppedon or exposed to chemicals; The latter also applies for the entire equipment.A mains cable with damaged insulation can cause electrical shockand is a fire hazard.Air circulation and high temperaturesThe vent slots on the rear panel of the set must always be kept free.Please do not place newspapers or cloths on/over the TV.Ensure that there is at least 10cm free space on the sides andabove the set for air circulation,if the set is placed in a cabinetor on a shelf.Like any electronic device, yourTV set requires air for cooling.Obstruction of the air circulationcan cause fires.The set is suitable for differentinstallation solutions. See the10 cm 10 cm 10 cminstructions for assembly for the different installation solutions.Stand the TV set with the table or floor stand only on a level, sturdy,horizontal base. Particularly ensure that the set does not protrude to thefront when placed in or on pieces of furniture.Set up the device where it is not exposed to direct sunlight and where itis not exposed to additional warming through heating elements.Prevent metal items, needles, paper clips, liquids, wax, or similar items,from getting into the interior of the device through the vent slots in therear panel. Such objects can cause short circuits in the set, which couldpossibly cause a fire.If something should get into the interior of the set then immediatelyunplug the mains plug of the device and contact customer service formore information- 8
Operating convenienceOperating convenience with wizardsFor many settings your TV set has user guidance with wizards whichguide you through the settings step by step.englishOverview of wizardsInitial installationThe initial installation wizard helps you with the initial installation andconnection of any existing equipment (see page 22).Setting up the antennaYou enter in the antenna wizard which antenna signals are available toyou. The antenna wizard is called in initial installation (see page 22). Youcan also call the antenna wizard in the TV menu under <strong>Connect</strong>ions Antenna DVB Antenna DVB-S (1 or Antenna DVB-T.Search wizardIf you want to search for new stations after the initial installation, or if youhave set up your antenna for the first time, then you can handle this taskwith the help of the search wizard (see page 40). You will find the searchwizard in the TV menu under Settings Stations Search wizard.<strong>Connect</strong>ing sound componentsThe sound component wizard ensures that the components which reproducethe TV sound are correctly registered, connected and set. It isstarted automatically at the end of the initial installation wizard but canalso be called separately (see page 79). You will find the sound componentswizard in the TV menu under <strong>Connect</strong>ions Sound components.Programming and managing recordingsThe recording wizard helps you to programme a recoring with a VCR or DVDrecorder (see page 82).Software updateYou can download the latest software for your TV set from the <strong>Loewe</strong>Service site and update using a USB stick (see page 86).(1Equipment and upgrade options, see page 97.13 -
Operating convenienceenglishMediaPortalThis portal offers you accesses to central media, functions and contentsof your TV set. From all these you can save your own personal favouriteson this page to help you to call them simply and directly again later.Call MediaPortalDescription of the individual functions:TV:Here you call the TV mode of your TV set.See page 30 for further information.Radio digital:Here you call the DVB radio mode of your TV set.See page 50 for further information.MEDIA: Call MediaPortal.MEDIA PORTALTVIndexRECOMMENDATIONSRadio digitalMediaHomeMediaNetFilmtrailer.com Philharmonia O.. Discovery Ch..BBC World Ser..Classic Fm TalkSport Chill Capital FMMediaHome:MediaNet:Index:Here you have access to your personal memorymedia, e.g. to all memory media connected via USBor to networks with which your TV set is connected.See page 56 onwards for further information.Here you have access to music and video sourcesfrom the Internet. The menu item only appears if anetwork link is available.See page 56 onwards for further information.Here you have access to the index integrated in theTV set.See page 15 for further information.The individual media and the various functions are displayedat the top of the MediaPortal.The number of selectable items varies depending on theTV equipment, network connection, available media/media servers and connected appliances.The lower part of the MediaPortal contains the selectablerecommendations.Select menu item,OK call.- 14
OKOperating convenienceThe index in the TV setYou can start all wizards and many operating functions directly fromthis point. The complete function scope of the TV set can thus be easilyunderstood.Alphabetic sorting is preceded by the items Language, Energy efficiency,Integrated features and Repeat initial installation.Call indexMEDIA: Call MediaPortal.Select Index,OK call.You will see an info text for the highlighted keyword inthe info display.You can select your language for operating the TV set.The info displayThe info display shows a content-based info text for each menu item atthe top edge of the screen to aid you in making the settings. In conjunctionwith the index it makes a convenient control system.➠ A menu is displayed.The factory setting is that the info display is shown automaticallyfor each menu item. In this case you can temporarilyhide the info texts with the INFO button.The automatic info display can be hidden via a menusetting. Then it can be displayed temporarily by pressingthe INFO button.SETTINGSHere, you can search for stations automatically or manually as well as setthe menu language, timer functions, parental lock,on-screen displays, etc.englishINDEXLanguageEnergy efficiencyIntegrated featuresRepeat initial installation*Access codeAutomatic dimming - RoomAutomatic station programminga-zActivatePrevious/next letter P+P– If an OK symbol appears in the marked line, this functioncan be called directly with OK.Selecting a keywordEnter initial letters with the numeric buttons like with amobile phone keypad (see page 12).or go with:to the preceding / next letters,from line to line,P+/P– scroll backwards or forwards in whole pages.Example: You want to have the TV set switch off automatically ata specific time:Select the keyword Switch off Automatic, with OK youwill go to the setting.OKtionsTV MENUSettingsStation ...An INFO icon at the bottom right above the menu baralso tells you that an info text is available.If an info text over several pages is available the numberof available pages and P+P– Page is displayed in theInfo window. You can scroll through the individual infopages with P+ and P–.Permanently display or hide the automatic info displayOnce you have become familiar with how to operate the TV set, you canswitch off the automatic info display.➠ In normal TV mode, without other displays.MENU: Call TV menu. Select Settings,go to the menu line below. Select Miscellaneous,go to the menu line below. Select On-screen displays,go to the menu line below. Select Automatic info,go to the menu line below: yes / no.Picture Sound Recording15 -
Operating convenienceenglishTV menu – Overview diagramTV menuPicture Sound Recording<strong>Connect</strong>ionsPicture adjustmentContrastColour intensityColour temperatureBrightnessSharpnessDigital Noise Control (DNC)more...Image + ActiveAuto formatPicture formatMove picture up/down (1PC IN / HDMI display (2Sound effectsSound adjustmentHeadphone volumeLoudnessSound-picture synchronisationmore...Loudspeaker sound (1Headphone sound (1Auto volumeAV output signalMaximum volumemax. switch on volumeVolume adjustment forcurrent stationBalanceAuto speech detectionRecording wizardTimer listPre-record timePost record timeSound componentsAntenna DVBAV connecting settingsMiscellaneousSignal type at PC IN (2Digital Link PlusDecoder stations (3Remote TV switch onvia Digital LinkAssign digital audio inputSettingsStationsSearch wizardManual adjustmentChange stationsSelect/change favouritesParental lockTimer functionsSwitch off today onlySwitch off dailyOne-time reminderWake up Mon-FriWake up SatWake up SunWake up withWake up signal volumeLanguageMenu languageSubtitles (DVB)Audio (DVB)Energy efficiencyEco standardPremium modeShop modeMiscellaneousOn-screen displaysTime and dateSoftware updateCA module: xxx (1DVB settings(1Menu items appear depending on the signal source currently selected (DVB or analogue) and/or at definite presettings in the relevant menus. For individual details,see the corresponding chapter of the operating instructions.(2Menu item can only be selected if a valid signal is present at the PC IN/HDMI input.(3Menu item only available if a Decoder has been selected as Device at connection AV (see page 72).- 16
Operating convenienceRadio menu – Overview diagramRadio menuenglishSound Stations Timer functionsSound effectsSound adjustmentHeadphone volumeLoudnessmore...Auto volumeMaximum volumemax. switch on volumeVolume adjustment forcurrent stationBalanceAuto speech detectionSearch wizardManual adjustmentChange stationsSelect/change favouritesSwitch off today onlySwitch off dailyOne-time reminderWake up Mon-FriWake up SatWake up SunWake up withWake up signal volumeOther menus– Overview diagramMedia menuNetwork settingsNetwork accessAdaptersmore...Photo settingsMusic settingsVideo settingsSelect provider (1Station selectionData captureEPG menuoffon (only for DVB)on (for DVB + analogue)Switch on TV when markednoyesSortingcorresponding to station listchronologicallyTeletext menuStation selectionNewsflashRevealRecording wizardSettingsPreview pagesSub-title pagesPersonal text pagesCharacter setHiTextPage format17 -
OKOKInitial installationenglishSetting options for DVB-C reception:If you have not selected a DVB-C antenna in the antennaselection: Continue with Setting options for DVB-S reception(see right hand column).The normal DVB-C settings are derived from the selectionof the location and do not need to be changed.SettingsINITIAL INSTALLATION (DVB-C)Scrambled stations no yesSearch methodChannel searchStart frequency047.0 MHzNetwork IDnoneSymbol rate 1 (DVB-C) 6875Symbol rate 2 (DVB-C) 6900QAM modulation 1 64QAM modulation 2 256ProceedSetting options for DVB-S reception:If you have not selected a DVB-S antenna in the antennaselection: Continue with Setting options for all types ofreception on page 28.The normal DVB-S settings are derived from the selectionof the location and do not need to be changed in mostcases.SelectsatelliteinstallationINITIAL INSTALLATION (DVB-S)Select satellite installationSingle satellite2 satellites on 22 kHz switchbox2 satellites on toneburst switchMax. 4 satellites on DiSEqC multiswitchDiSEqC one cable communal systemother communal installationProceedBackOKEncryptedstationsSearchmethodStartfrequencyNetwork IDSymbol rateQAMmodulation Select and adapt settings for DVB-C reception.You can state whether coded stations are to be searchedfor in the search/update. Select yes to save all foundscrambled stations. However, these stations can only bereceived in connection with a CA module and the appropriateSmart Card. Handling of the CA module is describedon page 55.If a CA module with a SmartCard is already plugged in forthe station search, all the stations which this module candescramble are also saved when no is preset.If you want to run the station search independently ofthe channel grid, select frequency search for the searchmethod.The DVB stations are only searched for in the frequencyrange above the start frequency.Only change these defaults if you are familiar with othersymbol rates and types of modulation or if you have tospecify the network ID for your cable network. In thecase of small cable networks fed directly from the satellite,the rate of 6900 might have to be replaced by 6111.Your cable provider has the information you need.OK Proceed.Singlesatellite2 satelliteson 22 kHzswitchbox2 satelliteson toneburstswitchMax. 4satelliteson DiSEqCmultiswitchDiSEqCone cablecommunalsystemothercommunalinstallation Selecting the satellite system.Specify how you receive which satellite(s) (singlesatellite or type of satellite system). Ask your dealerif required.Reception of a single satellite via a connected LNC (LNB).See page 25 for settings.Reception of two different satellites with two LNCs (LNBs)which are connected to the TV set by a 22 kHz switchbox.See page 25 for settings.Reception of two different satellites with two LNCs (LNBs)which are connected to the TV set by a toneburst switch.See page 25 for settings.The TV set controls a DiSEqC multiswitch to which up tofour LNCs (LNBs) for different satellites are connected.See page 26 for settings.Select setting if the TV set is connected to a DiSEqCsingle-cable system (according to EN 50494). Several Satreceivers can be connected to one Sat cable. See page 26for settings.Select setting if the TV set is connected to a single-cablesystem (without DiSEqC). Several Sat receivers can beconnected to one Sat cable. Unlike a DiSEqC single-cablesystem there are restrictions in the range of certain receptionfrequencies in single-cable community systems. Seepage 27 for settings.OK Proceed(to the appropriate page of the satellite system).- 24
OKOKOKOKOKInitial installationSetting options for the satellite system (single satellite):Select singlesatelliteINITIAL INSTALLATION (DVB-S)Select single satelliteOKAstra1 19,2°E Hellas Sat2 39°EHot Bird 13°E Hispasat 30°WAstra2 28,2°E Intelsat10 02 1°WAstra3 23,5°E Intelsat901 18°WAtlantic Bird1 12,5 °W Nilesat 7°WAtlantic Bird2 8°W Pan Am Sat 43°WAtlantic Bird3 5°W Sirius2/3 5°EEurobird1 28,5°E Telekom2C 5°WEurobird 9A 9°E Telekom2D 8°WEutelsat W2 16°ETelestar12 12,5°WEutelsat W3A 7°EThor2/3 0,8°WEutelsat W4 36°E Türksat 42°EProceedSetting options for the satellite system (2 satellites on 22 kHz switchbox/ 2 satellites on toneburst switch):SatelliteselectionINITIAL INSTALLATION (DVB-S)Satellite selectionSatellite 1 Astra1 19,2°E ...Satellite 2 Hot Bird 13°EProceedBack Select Satellite 1 / Satellite 2, select satellites from list,OK Proceed.englishHigh bandLNBfrequencies Select satellite,OK Proceed.noINITIAL INSTALLATION (DVB-S)High bandyes (with 0/22 kHz)ProceedHigh band no / yes.Specify here whether the high band of the selectedsatellite is to be searched in addition to the lowband.OK Proceed.INITIAL INSTALLATION (DVB-S)LNB frequenciesLow band 9750 MHzHigh band 10600 MHzOK Proceed BackOKSet LNB frequencies.Normally, you do not need to change the values forhigh and low band, unless the LNC (LNB) of yoursatellite system uses a different oscillator frequency(important for the frequency display).OK Proceed.(with Setting options for DVB-S reception (continued)on page 27).BackLNBfrequencies(22 kHzswitchbox)LNBfrequencies(toneburstswitch)INITIAL INSTALLATION (DVB-S)LNB frequenciesASTRA1 19,2°E 9750 MHzHot Bird 13°E 9750 MHzProceedSet LNB frequencies.Normally, you do not need to change the values forhigh and low band, unless the LNC (LNB) of yoursatellite system uses a different oscillator frequency(important for the frequency display).OK Proceed.(with Setting options for DVB-S reception (continued)on page 27).BackINITIAL INSTALLATION (DVB-S)LNB frequenciesASTRA1 19,2°E Low band 9750 MHzASTRA1 19,2°E High band 10600 MHzHot Bird 13°E Low band 9750 MHzHot Bird 13°E High band 10600 MHzProceedBack25 -
OKOKOKOKOKOKInitial installationenglishSetting options for the satellite system(max. 4 satellites on DiSEqC multiswitch):SettingsDiSEqCmultiswitchINITIAL INSTALLATION (DVB-S)Repeat rate none 1 2Control voltage 13/18V on22kHz signalBandToneburstoffProceedBack Select and adapt settings for the DiSEqCmultiswitch.Setting options for the satellite system(DiSEqC one cable communal system):DiSEqC onecablecommunalsystemINITIAL INSTALLATION (DVB-S)Select DiSEqC single cable communal installationDELTA SUM-514DELTA SUM-516DELTA SUM-518DELTA SUM-918DELTA SUM-928KATHREIN EXR-551KATHREIN EXR-552KATHREIN EXR-501ProceedOK- 26Repeat rateControlvoltage22kHz signalToneburstSatelliteselectionLNBfrequenciesThe refresh rate determines how often a DiSEqCcommand is output. A refresh is only necessary withcascaded systems.The control voltage controls the switching of thepolarisation level (horizontal/vertical) in non-DiSEqCcapable components (e.g. control of single LNBs viaDiSEqC multiswitch).The 22kHz signal controls the switching between highand low band in the Band setting. The Position settingcontrols the selection of the satellites in non-DiSEqCcapable components.The Toneburst controls the selection of the satellites innon-DiSEqC but toneburst capable components with thePosition and Option settings.OK ProceedINITIAL INSTALLATION (DVB-S)Satellite selectionSatellite 1 Astra1 19,2°E ...Satellite 2 Hot Bird 13°ESatellite 3 Eutelsat W2 16°ESatellite 4 noneProceedBack Select Satellite 1 ... Satellite 4, select satellites from list,OK Proceed.INITIAL INSTALLATION (DVB-S)LNB frequenciesASTRA1 19,2°E Low band 9750 MHzASTRA1 19,2°E High band 10600 MHzHot Bird 13°E Low band 9750 MHzHot Bird 13°E High band 10600 MHzEutelsat W2 16°E Low band 9750 MHzEutelsat W2 16°E High band 10600 MHzProceedBackSet LNB frequencies.You do not normally need to change the values.OK Proceed.(with Setting options for DVB-S reception (continued)on page 27).SatelliteselectionLNBfrequenciesManualregistration(for socketANT SAT)Transmissionchannel /frequencyPIN protection Select DiSEqC single cable communal installation.OK Proceed.INITIAL INSTALLATION (DVB-S)Satellite selectionSatellite 1 Astra1 19,2°E ...Proceed Select satellites from list,OK Proceed.INITIAL INSTALLATION (DVB-S)LNB frequenciesLow band 9750 MHzHigh band 10600 MHzSet LNB frequencies.Normally, you do not need to change the values forhigh and low band, unless the LNC (LNB) of yoursatellite system uses a different oscillator frequency(important for the frequency display).OK Proceed. Select and adjust settings for the DiSEqC singlecable communal installation.Select the desired transmission channel and the correspondingtransmission frequency.If your system is designed for it, it is possible to protectyour used transmission data from use by other subscriberswith a PIN.OK Proceed.(with Setting options for DVB-S reception (continued)on page 27).BackOK Proceed BackOKINITIAL INSTALLATION (DVB-S)Manual registration (for socket ANT SAT)Transmission channel 1 2 3 4 5 6Transmission frequency 1284PIN protectionnoDefine/change PIN 0000Proceed
OKOKOKOKOKInitial installationSetting options for the satellite system(other communal installation):Select singlesatelliteINITIAL INSTALLATION (DVB-S)Select single satelliteOKAstra1 19,2°E Hellas Sat2 39°EHot Bird 13°E Hispasat 30°WAstra2 28,2°E Intelsat10 02 1°WAstra3 23,5°E Intelsat901 18°WAtlantic Bird1 12,5 °W Nilesat 7°WAtlantic Bird2 8°W Pan Am Sat 43°WAtlantic Bird3 5°W Sirius2/3 5°EEurobird1 28,5°E Telekom2C 5°WEurobird 9A 9°E Telekom2D 8°WEutelsat W2 16°ETelestar12 12,5°WEutelsat W3A 7°EThor2/3 0,8°WEutelsat W4 36°E Türksat 42°ESetting options for DVB-S reception (continued):Test receptionFIRST INSTALLATION WIZARDYou should now receive a picture and sound from the following satellite:ASTRA1 19,2°E C/N LevelIf not, please align your dish correctly. If however it is correctly aligned andyou have an older version you can proceed with .englishProceedLNBsettings Select satellite,OK Proceed.INITIAL INSTALLATION (DVB-S)LNB frequency9750 MHzSupply voltageoffProceedBackSettingsProceedAfter you have made the previous settings, you shouldreceive picture and sound of the selected satellites (onlypossible for Astra1 and HOTBIRD).OK Proceed.INITIAL INSTALLATION (ASTRA1 19,2°E)BackLNCfrequencySupply voltage Select and adapt settings.Normally, you do not need to change the values for highand low band, unless the LNC (LNB) of your satellitesystem uses a different oscillator frequency (importantfor the frequency display).If your set is connected to a single-cable system withoutexternal voltage supply, you can connect the antennasupply (13V or 18V / max. 450mA).OK Proceed.(with Setting options for all types of reception onpage 28).EncryptedstationsScrambled stations noSearch methodChannel searchSymbol rate 1 (DVB-S) 27500Symbol rate 2 (DVB-S) 22000Proceed Select and adapt settings.If several satellites are received, the following settingsmust be made for every satellite. The scope of the settingsmay differ depending on the selected satellite.You can state whether coded stations are to be searchedfor in the search/update. Select yes to save all foundscrambled stations. However, these stations can only bereceived in connection with a CA module and the appropriateSmart Card. Handling of the CA module is describedon page 55.If a CA module with a SmartCard is already plugged in forthe station search, all the stations which this module candescramble are also saved when no is preset.BackOKyesSearchmethodIf you want to run the station search independently ofthe channel grid, select frequency search for the searchmethod.Symbol ratesThe symbol rates are specified by the satellite providerand do not normally need to be changed.OK Proceed.27 -
OKOKOKInitial installationenglishSetting options for all types of reception:Favouredsignal sourceINITIAL INSTALLATIONFavoured signal sourceDVB-TDVB-CASTRA1 19,2°EAntenna/cable (analogue)OKInfoTV stationsFIRST INSTALLATION WIZARDThe automatic TV station search and sorting has ended.966 new TV station(s) has (have) been found.The number of found TV stations is displayed.OK Proceed.Overview ofsettings forstation searchProceedSelect favoured signal source.Select the signal source from a list, the station ofwhich is to be at the top of your station list (startingwith station slot 1).The listed signal sources depend on the selectedantennas and, if the set is equipped with a satellitetuner, the type of satellite system used and thereceived satellites.OK Proceed.BackFIRST INSTALLATION WIZARDYour TV set will perform the automatic search with the following settings:Location of your TV setSignal source(s)Installation satelliteFavoured signal sourceUnited KingdomAntenna/cable (analogue)DVB-TDVB-CDVB-SSingle satellite (ASTRA1 19,2°E)ASTRA1 19,2°EStructure TVstation listInforadio stationsStructure radiostation listFIRST INSTALLATION WIZARD: STRUCTURE OF TV STATION LISTThe TV stations found in the automatic search were divided into appropriatestation blocks according to the previously selected antenna cables (signalsources). The stations can only be reorganised later within these blocks. Theblock with the stations of your favoured signal source is at the top of thestation list.Signal sourceAssociated station numbersASTRA1 19,2°E 1- 900DVB-C 901-1300DVB-T 1301-1400Antenna/cable (analogue) 1401-1500The structure of the TV station list is displayed.OK Proceed.FIRST INSTALLATION WIZARDThe automatic radio station search and sorting has ended.336 new radio station(s) has (have) been found.The number of found radio stations is displayed.OK Proceed.FIRST INSTALLATION WIZARD:STRUCTURE OF RADIO STATION LISTThe radio stations found in the automatic search were divided into appropriatestation blocks according to the previously selected antenna cables(signal sources). The stations can only be reorganised later within these blocks.The block with the stations of your favoured signal source is at the top of thestation list.Start automatic searchYou will see a list of the selected settings. You can goback in steps with the button to make any changesto the settings.OK Start automatic search.The set now searches for TV and radio stations.The stations found in the automatic search are dividedinto the appropriate station blocks depending on thepreviously selected antenna cables (signal sources).Subsequently the stations can only be re-sorted withinthese blocks.➠ At the beginning of the station list you will find theblock with the stations of the preferred signal source.Any mixed sorting of stations from different signalsources is only possible with the favourites list.BackAge-relatedlockSignal source(s)Associated station numbersASTRA1 19,2°E 1- 300DVB-C 301-500DVB-T 501-700Antenna/cable (analogue) 701-900The structure of the radio station list is displayed.OK Proceed.INITIAL INSTALLATIONAge-related locknoProceedOKyes Select Age-related lock.You can specify an age limit for your TV set here.DVB broadcasts which have an appropriate ageidentification are locked and can only be watchedafter entering the access code (see page 52).OK Proceed.Backcontinued on next page - 28
OKOKInitial installationTime and dateSound playbackvia ...INITIAL INSTALLATIONTime and dateTime 09:19:14Date 26.02.2010ProceedSelect time / date.If no values or no correct values have been enteredfor the data and time, enter the correct values withthe numeric buttons here.OK Proceed.SOUND COMPONENTSSound playback via ...TV speakersSpeaker systemHiFi/AV amplifierSound projectorHiFi/AV amplifier or TV speakers (switchable)Sound projector or TV speakers (switchable)End of wizardSelect sound components.This selection indicates which sound componentsyou want to use to hear your TV sound. Dependingon the selection, the sound component wizard startswith which you can make further settings.The sound component wizard is described from page79 and can also be started at any time outside of firsttime operation (TV menu under <strong>Connect</strong>ions Sound components).OK End of wizard.Back0 - 9OKPositioning/aligning DVB-T antennaIf you are receiving one or more DVB-T stations with picture and soundinterference then you should change the installation location and alignmentof the antenna. Ask your dealer to tell you which channels are usedto broadcast the DVB-T stations in your region.➠ In normal TV mode, without other displays.A DVB-T station is received and selected.MENU: Call TV menu. Select Settings,go to the menu line below. Select Stations,go to the menu line below. Select Manual adjustment,OK call manual adjustment.SIGNAL SOURCESelect the area in which you want the broadcaster to search here. You can usethe button to automatically select station by station.MANUAL ADJUSTMENTSignal source DVB-T DVB-C DVB-S AnChannelE05Frequency 177.50 MHzBandwidth 7 MHzNameC/N 81Level 80BER 0 E-7StoreSearchenglishThe signal source is already on DVB-T due to the stationpreselection.Position and align the antenna in such a manner thatmaximum values for C/N and Level are obtained.Blue button: Start search.Search for DVB-T stations one after another and comparevalues for C/N and Level.Then position/align the antenna to the weakest stationso that maximum values for C/N and Level are obtained.The value for BER should be as low as possible.Thereafter perform an automatic search for all DVB-Tstations (see page 40).29 -
OKOKDaily operationenglishSelect stationSelecting stations with the P+/P– buttons of the remote controlP+/P– Station up/down.The status display with station title, progress bar, time andsound identification signal is shown briefly (see page 38).➠ If Favourites are selected, you can change to the correspondingstation in the Favorites list using P+/P– (seepage 31).➠ The symbols for the sound identification are describedon page 38.➠ If there are additional languages or DVB subtitles forDVB stations, then language and subtitle selection isshown below the station display.See also page 39: Selection possibilities for DVB stations.Selecting stations with the numeric buttons of the remote control1-digit stationsKeep the numeric button pressed for one second, thestation changes immediately.longor:Press the numeric button briefly, the station changes after2 seconds (changes immediately in case up to 9 stationsare stored).short short longall short2-digit and 3-digit stationsPress first (and second) numeric button briefly.Keep the last numeric button pressed for one second, thestation changes immediately.or:Press all the numeric buttons briefly, the station changesafter 2 seconds (changes immediately in case of up to 99or 999 stored stations).4-digit stationsPress all four numeric buttons, the station changes immediately.➠ If Favorites are selected, you can change to the correspondingstation in the Favorites list using thenumeric keys (see page 31). Maximum two-digit stationnumbers are possible.➠ If you select an unoccupied station slot, the next availablestation is switched to.Selecting stations with the station listInterActive➠ In normal TV operation, without further displays, nofavourites selected:SortingnumericallySortingalphabeticallyOK Call Station list.P+/P– Scroll in the pages of the station list. Jump to the next station block. Mark stations.or:Enter the number of the station with the numeric buttons.The marked station is shown as a small picture.OK The marked station is called.Blue button: Changes the sorting between numericallyand alphabetically..P+P–P+P–a-STATION LIST21:00-21:45 Urlaubsparadies - ToskanazHDMI2HDMI1PC INAVSAV0 VIDEO a-Switch to ...Select stationFavouritesSTATION LIST AVS BRCNN INT21:00-21:45 Urlaubsparadies - ToskanaSwitch to ...z Select stationFavourites Enter initial letters with the numeric buttons like with amobile phone keypad (see page 12).The first station for the specified letters is marked.Mark stations.OK The marked station is called..OKPIP scanChange stationsSort alphabetically DVD-RECD Vierte HDMI1HDMI2PIP scanChange stationsSort numericallyOK- 30
OKOKOKDaily operationSelecting stations with the favourites listsYou can save and call your favourite stations in 6 favourites lists (e.g. formultiple users). Each favourites list can contain up to 99 stations. Afterinitial installation, 10 stations from the station list are already stored inthe first list. Change the favourites list to suit your requirements (see Puttogether / change favourites lists on page 43).Selecting Audio/Video SourceSelecting AV source with the AV selection➠ In normal TV mode, without other displays:Call AV selection.english➠ In normal TV mode, without other displays:OK calls the station list.Red button: Calls the favourites list.FAVOURITESFavouriteList 1 Switch to ...P+/P– Scroll in the pages of the favourites list.Select station directly with numeric buttons. Or: Mark stations. Select other favourites list.OK The marked station is called.➠ Other favourites lists can only be selected if thesecontain stations.Red button: Back to the station list.Green button: Scan all stations of the currently selectedfavourites list.Yellow button: Change the Favourites lists, see page 43.Explanation of the favourites lists:The selection made with the red button (favourites list) is retained untilyou switch back to the station list with the red button.If favourites are selected, the name of the favourites list appears in thestatus display after the station name after changing stations.Explanation of the icons following station names: DVB-T station (digital terrestrial via antenna) DVB-C station (digital via cable) DVB-S station (digital via satellite) Coded stationv CI Plus coded station Locked station (see Parental lock on page 52) Select desired connection,OK switch over.If the selected AV source provides a signal (picture), itshould be visible now.For the VIDEO selection the set switches to programmeplace 0 (signal source antenna/cable (analogue), factorysetting channel E36). The TV set shows the signal of aprovider via antenna (see page 75). The channel can bechanged as required (see page 41).Selecting AV source with the station list➠ In normal TV mode, without other displays:OK Call the station list.If the favourites list is displayed, switch to thestation list first.The connections are always at the beginning of the listin numerical sorting.The connections are sorted into the list in alphabeticalorder in alphabetic sorting.P+P–AV SELECTIONHDMI2HDMI1PC INAVSAVVIDEOSwitch to ...HDMI2HDMI1PC INAVSAV0 VIDEO a-STATION LIST21:00-21:45 Urlaubsparadies - ToskanaSelect connection.OK Switch over.zSwitch to ...Select stationFavouritesOK PIP scanChange stationsSort alphabetically31 -
Daily operationenglishAdjusting the soundSwitching sound off/onSound off.Sound on: Press button again or set volume V+.Setting the volumeCall Sound adjustmentV+/V– Volume louder / quieter.The volume bar will be shown briefly if no other menuis displayed.Call Sound adjustment.Select sound adjustment by pressing several times.or: Select sound adjustment.Other sound settings in volume setting and sound adjustment➠ As long as the volume bar or the selection of the soundadjustment is still visible:Sound adjustment ...off Speech Classical Pop Custom music soundCall additional sound settings.Volume24 Select sound setting, go to the menu line below. Make changes.Sound effects Sound adjustment Headphone voluExplanations of the sound settings:Sound via Playback over the TV speakers, active speakers or an externalhi-fi amplifier.The selection active speakers or hi-fi/AV amplifier is onlypossible if these have been logged in in the audio componentwizard.The menu item Sound via does not appear if TV speakersor TV speakers + active subwoofer is set in the audiocomponents wizard.Sound effects Set sound effects Stereo, Panorama, 3D Surround. Panoramagives the stereo sound a virtual base widening. 3DSurround converts a stereo signal into a virtual surroundsignal.SoundadjustmentHeadphonevolumeLoudnessSound-picturesynchronisationmore ...Speech, Classical, Pop, Custom music, and Custom filmsound.Adjust the headphones volume.Proper boost of bass and treble tones at low volume.If the sound does not exactly match the picture, youcan correct it here. If you move to the left in the bar youdelay the sound in relation to the picture. If you move tothe right you accelerate it in relation to the picture. Thesound is adapted in time steps of 10ms each.The Sound-picture synchronisation menu item only appearsfor DVB stations.Call with OK (see next page).Sound settings via the TV menu➠ In normal TV mode, without other displays.MENU: Call TV menu. Select Sound,go to the menu line below. Select desired sound setting (right column), go to the menu line below. Make changes.- 32
Daily operationExplanations of the sound settings:more ...Loudspeaker/HeadphonesoundSelection possibility Mono/Stereo or Sound 1 or Sound2 for two-sound broadcasts separately for speakers andheadphones. Only available for analogue stations.englishAuto VolumeReduces volume differences, e.g. for advertisements thatare too loud.AV outputsignalYou can indicate here which sound is output via the AVsocket for dual sound programmes: Sound 1 (e.g. mainlanguage), sound 2 (e.g. foreign language), or sound 1+2(both simultaneously).MaximumvolumeDetermining the maximum volume that can be set.max. switch onvolumeVolumeadjustment forcurrent stationSpecify the volume that is set when switching on the TVset with the mains switch.If the volume is higher when switching the TV set to thestandby mode than specified here, then it is reducedautomatically to the fixed maximum switching on volumewhen it is turned on again.The volume can differ according to the individual stations.If the sound is too loud or too quiet in relation to otherstations, adjust the volume. When the menu is open, youcan select the stations one after another with P+/P– andadjust every single station conveniently.BalanceSet stereo balance so that the volume impression is identicalon the left and right.Auto speechdetectionIf the automatic speech detection is activated, the soundof the current programme is automatically output withoptimum comprehensibility when speech is detected.33 -
Daily operationenglishAdjusting the pictureMENU: Call TV menu. Select Picture,go to the menu line below.Select the desired picture function, go to the menu line below. Make changes.Explanations of the picture settings:PictureadjustmentContrastColour intensityColourtemperatureBrightnessSharpnessDigital NoiseControl (DNC)more ...Image+ ActiveAuto formatPicture formatMove pictureup/downTV MENUPicturePicture adjustmentPersonal settings (TV digital) ...Contrast Colour intensity Colour tYou can switch between three fixed picture setting variantsand the three personal picture values that you haveset here (see right hand column).The contrast setting depends on the brightness of theroom. The brighter the surroundings the higher thecontrast should be set.The power consumption of the TV set is directly dependenton the value set here (see also page 22).Set the colour intensity to suit your personal taste. Thecolours should appear natural.Here, you can give the TV picture a warmer or colder hueaccording to your personal taste.Set the brightness so that the black areas of the pictureonly just appear black.Here you can adjust picture sharpness to obtain the bestdefinition.With active DNC (Digital Noise Control) you can eliminateor reduce picture noise.Call with OK.Picture improvement on/off and demo mode for Image+Active.Automatic detection and setting of the picture format forCinemascope or widescreen movies.Set picture format (see page 35).Move picture vertically (see page 35).Presettings / Personal settings for picture adjustmentMENU: Call TV menu. Select Picture,go to the menu line below. Select Picture adjustment, go to the menu line below.TV MENUPicturePicture adjustmentPresettings (TV digital)Eco standard ...Personal settings (TV digital) Select Presettings or Personal settings. For presettings, go to the menu line below. Select the desired presetting for the picture.OK Confirm selection.Explanations for Picture adjustment:If you select Presettings, the picture settings for the signal input groupcurrently active are set to predefined values. See Glossary for an explanation:Signal input groups.Your own settings for contrast, colour intensity, colour temperature,brightness, sharpness and digital noise suppression are saved in thepersonal values. At the same time, you have your own personal valuesfor each signal input group.All picture and sound adjustments can be reset to the default values inone step for all signal input groups in the index of the TV set under Resetpicture/sound or Factory settings picture/sound.- 34
Daily operationSelecting the picture formatPress the Picture format button until the desired pictureformat is set or press to select the desired picture format.The Panorama picture format can be set betweenproportionally correct and format filling display. Blackbars are visible on the left and right of the picture inthe proportionally correct display.Switch: Keep the M button on the TV pressed, at thesame time, press the Picture format button on the remotecontrol briefly.Reset: Press the same button combination again.Move picture vertically➠ In normal TV mode without other displays.Move picture up/down.Picture format4:3 PanoramaCinema Zoom 16:9Bild Move vert. picture verschieben up/down2InterActiveTo show subtitles or news tickers which have been cutoff, the picture can be moved up or down in the pictureformats Panorama, Cinema and Zoom (not with highresolution signal) with the arrow buttons .englishExplanations of the picture formats:➠ The setting options depend on the transmitted picturecontent.16:9 Proportionally correct display of 16:9 broadcasts.4:3 Proportionally correct display of 4:3 broadcasts.Panorama Proportionally correct or format filling display (as-deliveredstate) of 4:3 broadcasts on the 16:9 screen. Station logoand subtitles remain visible.See above for switching the Panorama mode.Cinema Proportionally correct, format filling display of 4:3 broadcastson 16:9 screens. Station logo and subtitles usuallynot visible.Zoom Proportionally correct display. Maximum picture magnification.PALplus Is a 4:3-compatible 16:9 picture broadcast supplied bythe station which is detected automatically.If a high resolution video signal is displayed on the TV setor fed in via the interfaces PC IN, HDMI1 or HDMI2, thepicture formats 16:9 PC, 16:9 TV, 16:9 Zoom, 4:3 PC, 4:3TV and 4:3 Zoom can be set.In the PC formats, the complete picture content will beshown. In the TV formats a small part of the picture iscropped. This may be necessary to hide possible interferenceat the edge of the picture, which arises from thesignal supplied.35 -
OKDaily operationenglishButton functionsEvery operating mode of the TV set (TV, Radio, MediaPortal, Teletext, EPG andPIP) has its own menu and own functions for the coloured buttons.The function of the coloured buttons is shown at the bottom of the menusand wizards. Below, some of the function are listed which you need in TVmode for the daily handling of your TV set.Functions of the coloured buttons in TV modeInterActiveRed button: Freeze on/off.In TV broadcasting networks with interactive data services:Start application (see page 50).Functions of the coloured buttons in TV mode (continuation)Green button: Open the Teletext functions menu.Personal textpagesbtitlesTELETEXT FUNCTIONSPersonal text pages Select Personal text pages,OK call.PERSONAL TEXT PAGESarte 112 NewsZDF 200 SportARD 170 Wetter-------- --- ------------------ --- ------------------ --- ----------OKOKSubtitViewSubtitlesGreen button: Open the Teletext functions menu.You can select Subtitles and your Personal text pages viathe Teletext functions menu. The operation of subtitlesdepends on the station selected.Subtitles analogue stations:TELETEXT FUNCTIONSSubtitlesoff ...Personal text pages Select Subtitles,go to the menu line below. Select the size of the teletext subtitles,OK show teletext subtitles(display only if subtitles are available).END: Teletext subtitles off or select off in menu.Subtitles DVB stations:➠ If the DVB station does not provide any subtitles, themenu item Subtitles is greyed out and cannot beaccessed with OK.➠ The DVB subtitles can also be selected via the statusdisplay (see page 39). Select text page,OK view.➠ If only one text page is defined, no list will be shownand the Teletext page will be opened immediately. Todefine your personal text pages, see page 49.Yellow button: Go to the last viewed station.Use this button to quickly switch back and forth betweentwo stations.Blue button: Show programme info.The programme info of the following programme isdisplayed additionally for DVB stations.1 ARD Stereo14:30-15:15 Urlaubsparadies ToskanaUrlaubsparadies Toskana15:15-15:45 Reiseziele dieser ErdeÄgyptenPROGRAMME INFO 14:43OKDetailed infoProgramme previewTELETEXT FUNCTIONSSubtitles Select Subtitles,OK call.SUBTITLESSubtitles offEnglish [für Hörgeschädigte]777 [TTX] Select subtitle mode,OK show/hide subtitles.OKPersonal text pagesOKExplanation of the symbols in the programme information: Programme in 16:9 picture format Programme in high picture definition (HDTV) Programme with Dolby-Digital sound Broadcast of subtitles for the deaf and hard of hearing Programme with youth protection (see Parentallock - Age-related lock on page 52).The symbols may also appear in combinations.(1Equipment and upgrade options, see page 97.- 36
Daily operationPermanent display of timePress twice in rapid succession:Time is shown/hidden permanently.Operation without remote controlChanging the station on the TV setenglish+ / – Station up/down.Switching radio on or off or switching to radioRRadio on or switch between TV and Radio.The permanent display of the time can also be set in theTV menu under Settings Miscellaneous On-screendisplays Permanent clock display (see page 54).The display position of the time depends on the selectedsetting in the On-screen displays menu (ex-factory: bottom).See page 54 for how to change the display position.Calling the TV menu on the setM Call Direct control on TV set menu,DIRECT CONTROL ON TV SETOperating modeTV ...Key M: Keys -/+:– / + select function.M or R Go to the menu line below,– / + make changes.M Move up one menu line,– / + select other function.AV selection Volume Brightness ConExplanations of the settings:Operating Switch between TV and radio operation.modeAV selectionVolumeBrightnessContrastPicture formatStationSelect AV interface.Set volume.Set brightness.Set contrast.The power consumption of the TV set depends directlyon the value set here (see also page 22).Set picture format (see also page 35).Select station +/-.ServiceThe Service menu item is provided for service purposesby dealers only.37 -
Daily operationenglishStatus display➠ In normal TV mode, without other displays.INFO: Show status display. TEXT In the upper two lines, you will see the number and nameof the station, the title and transmission time of theprogramme currently showing (if available) and the soundidentification signal.The bar (if available) indicates the progress of the currentprogramme.If information about the current programme is available,this can be called by pressing the INFO button again; inthis case the button on the right is displayed.A menu (see page 39), the time and, if activated, the alarmtime and switch-off time appear at the bottom of thescreen depending on the DVB station.The status bar is also shown automatically every time youchange channels.The status bar is hidden automatically at the end of thedisplay time (see page 54 for setting).If you want to hide the status bar manually before the displaytime ends, you can only do this with the END button.Explanations of the symbols for sound identification/display:Transmitted audio signal: Mono audio transmission analogue Two-sound transmission (Sound1/Sound2) analogue 1+1 Two-sound transmission (Sound1/Sound2) digital Stereo sound transmission analogue Stereo sound transmission digital (PCM) Dolby Digital sound transmission (DD) dts sound transmission MPEG sound transmission Dolby Pro Logic II sound transmission Dolby Virtual Speaker Reference display Dolby Virtual Speaker Wide displayTransmitted audio channels: DD / dts 1.0 / mono DD / dts / MPEG 2.0 DD / dts 3.0 DD / dts 4.0 DD / dts 5.0 DD / dts 2.1 DD / dts 3.1 DD / dts 4.1 DD / dts 5.1- 38
Daily operationSelection possibilities for DVB stationsIn the status display additional selection possibilities can be offered forspecific programmes depending on the DVB programme provider.➠ If during the status display you press one of the colouredbuttons or the TEXT button then the associated selectionmenu will be displayed.➠ The selection line is also displayed automatically whena new broadcast with different options to the previousbroadcast begins or when you switch stations.The selection menus are only available as long as thestatus display is shown. However you can call them againby pressing the INFO button.Red button:Channel selection for multi-channel providersGreen button: Language/soundThe sound formats on offer and theirdesignations depend on the programmebeing broadcast.Other setting options for DVB stationsYou can make general presettings for DVB stations under TV menu Settings Miscellaneous DVB settings.SubtitlemodeAudiomodeDVB charactersetHere you can preset whether a subtitle is always to bedisplayed as soon as it is offered by the station. A specialsubtitle for impaired hearing can also be selected.Subtitles are not offered by all stations. Many stations onlybroadcast subtitles by teletext.Here you can preset whether you always want to hear aspecial sound for impaired sight as soon as it is offeredby the station.Select the DVB character set so that the title of the broadcastof your favourite received station or the texts of yourCA module are displayed correctly.englishYellow button: Time selectionBlue button: CA module selectionThe CA module selection only appearswhen two CA module are plugged in,which are both able to descramble theencrypted station.In this case, you can choose which of thetwo CA modules should descramble thestation.TEXT:SubtitlesThe subtitles available depend on theprogramme being broadcast39 -
Managing stationsenglishTV stationsVarious options for managing stations are available via the TV menu. Forexample the description for TV stations. For radio stations the same applies,except that the Radio menu is called in Radio mode (see also page 50).➠ Station management is not possible if a programmed timer recordingis still pending.➠ If at least one station is locked the access code must be entered beforeSearch/Update (see Parental lock on page 52).Search/update stations – Search wizardIn the search/update with the search wizard, new stations are searchedfor which have not yet been stored.➠ You have to repeat the initial installation (see page 22)and automatically search for new ones if you want todelete all the existing stations and automatically searchfor new ones.MENU: Call TV menu. Select Settings,go to the menu line below. Select Stations,go to the menu line below. Select Search wizard,go to the menu line below.In the upper info text the current search settings will nowbe displayed:SEARCH WIZARDYour TV carries out the update of the station list (search for new stations; deletestations no longer broadcast) with the following settings:Location of TV setUnited KingdomSignal sourceDVB-CExplanations of some search settings:Set location Select the country for country-specific defaults andstation sorting.Signal sourceAntenna/cable:TV/colourstandardEncryptedstationsDVB-TSearch methodDVB-CSettingsSelect antenna/cable (analogue), DVB-T, DVB-C or DVB-S (1here depending on which signal source you want to searchfor new stations.A configuration of DVB-T and DVB-S (1 antennas can alsobe called by the green button (see also page 23 and 24).With selection of set location the conventional TVstandard/colour standard is the default. This should onlybe changed if stations with other standards are to besearched.You can state whether coded stations are to be searchedfor in the search/update. Select yes then coded stationsare also searched for. However, these stations can onlybe received in connection with a CA module and the appropriateSmart Card. Ask your dealer which Smart Cardyou need to receive certain stations. Handling of the CAmodule is described on page 55.If you want to run the station search independently ofthe channel grid, select frequency search for the searchmethod.With the selection of set location the conventional settingswill be preset. Only change this if you know othersymbol rates and modulation types or if you have tospecify the network ID for your cable network (informationavailable from your cable network provider).If you want to run the station search independently ofthe channel grid, select frequency search for the searchmethod.- 40TV MENUSettingsStationSearch wizardChange search settingsStart search/updateIf you want to change these search settings: Select Change search settings,OKwizard prompts search settings.If you agree with these settings: Select Start search/update,OKstart search.Red button: Abort current search/update.OKDVB-SSettingsIf you want to run the station search independently ofthe channel grid, select frequency search for the searchmethod.The symbol rate is specified by the satellite provider andnormally does not need to be adjusted.(1Equipment and upgrade options, see page 97.
OKOKManaging stationsSearch for/update stations – handling of new and no longer found stationsThe number of new stations found is displayed after the automatic search/update has been completed.OK List of new stations foundSEARCH WIZARDAll statiNote: The newly found stations which you have already deletedSEARCH FOR/UPDATE STATIONNewly found stations OK ProceedMark/unmark stationP+P– Mark/unmark all Select station.Yellow button: Mark / unmark stationBlue button: Mark / unmark allOK saves the selected stations.Afterwards, a list of the stations which are saved butwhich are temporarily not broadcasting or no longer existis displayed, if available.The number of the memory location used is displayed infront of the station. Please select the stations you reallywant to delete.SEARCH WIZARDThe following stored stations were no longer found because they are notcurrently broadcasting a programme or no longer exist. Please mark thoseyou want to delete completely. Those not marked are retained.SEARCH FOR/UPDATE STATIONStations no longer found OK Search/update station – manual search / settings➠ If you want to adapt the parameters of an existing station, first selectthe appropriate station.MENU: Call TV menu. Select Settings,go to the menu line below. Select Stations,go to the menu line below. Select Manual adjustment,OKcall input box.You can enter or edit the station data in the followinglines:MANUAL ADJUSTMENTSignal source Antenna/cable (analogue) DVB-T DVB-C DVChannelS21Frequency 303.25 MHzNameKiKaTV standard B/GCol. standard AutomaticOr:Blue button: Starts Search and searches for next station.Red button: Stores station.➠ Only stations for the selected signal source can besaved which do not yet exist in the station list.➠ Stations which already exist in the station list for theselected signal source are displayed with their stationnumbers and names on a grey background. Thesestations can only be overwritten with the red button.Explanations of some search settings:Various settings are possible depending on the selected signal source.Some settings have already been explained in the initial installation (seepage 22 onwards).StoreSearchenglishProceedMark/unmark stationP+P– Mark/unmark all Select station.Yellow button: Mark / unmark stationBlue button: Mark / unmark allOK deletes the selected station.END: Exit the search wizard.Signal sourceChannelFrequencyTV stand.Col. standardSelection of range in which you want to search for thestation.Direct input of channel.Direct input of station frequency.Input of station TV standard.Ask your dealer in this regard.Input of the station colour standard.Ask your dealer in this regard.41 -
OKManaging stationsenglishChange, delete, move, rename, restore station➠ Change station can also be called via the station list (page 30).➠ If at least one station is locked the access code mustbe entered before changing stations start-up (seeParental lock on page 52).➠ In some TV broadcasting networks (e.g. FreeView) youare not allowed to move or rename stations. UseFavourites instead.Call TV menu. Select Settings,go to the menu line below. Select Stations,go to the menu line below. Select Change stations,OKcall list of stations.CHANGE STATIONS1 ARD2 ZDF3 SAT.14 D Vierte5 RTL6 VOX7 S-RTL8 N-TV9 DSF10 EinsPlus11 9Live12 RTL221:00 - 21:45 Urlaubsparadies - Toskana13 WDR 314 BR15 HR16 MDR 317 KIKA18 PHOENIX19 BR-ALPHA20 3SAT21 KABEL 1 Rename station➠ DVB stations for which the station name is also broadcastcannot be renamed. In this case, the Rename functionis hidden.Blue button: Starts Rename station.Under the 1st letter of the name you will see a line indicatingthe current input position.Input position one character to the right (also forblanks).Input position one character to the left.Enter the letters one after another with the numericbuttons on the remote control. Like using a mobile phonekeypad, press a numeric button until the desired characterappears. The available letters are printed respectively onthe buttons. Different special characters can be selectedwith button 1.Green button: Switch upper/lower case letters.Yellow button: Deletes the character before the inputposition.Blue button: Cancel rename.OK to save new name.Delete station- 42P+P– 0 - 9Select stationDeleteRestore stationsMoveIn this menu you can delete, move, rename or restorestations.or numeric buttons:Select the appropriate station.Scroll with P+/P– if necessary.Red button: Starts Delete station.Select several stations to be deleted if necessary,OK to execute the delete.Move station / Change order➠ Stations can only be resorted within the signal source block.Yellow button: Starts Move station. Mark several stations if needed,OK selection ended,Select insertion position from which the selectedstations are to be inserted,OK to execute the move.Restore stationsStations which have been deleted from the station list can be restored.Green button: Starts Restore stations.P+P– CHANGE STATIONSRestore deleted stations3satKIKAZDF RTLPhoenixBRalphaNDR FS HHRestoreCancel restoreSelect station,OKstation is restored.The restored station is sorted in according to its signalsource at the end of the respective signal block.OK 9Live VOX n-tvDSFRTL2KABEL1
Managing stationsPut together / change favourites listsEach favourites list can contain up to 99 stations. You can put togetherthe favourites lists to suit your requirements (e.g. topic lists). Other personsusing this TV set can create their own favourites lists.The favourites lists also have the advantage that the stations of differentsignal sources can be stored in the order you wish.Add station to favourites list➠ All stations (left column) must be selected.If not, change the list with .P+/P– Scroll in the pages of the station list if necessary.english➠ Change favourites can also be called via the favouriteslist (page 31).MENU: Call TV menu. Select Settings,go to the menu line below. Select Stations,go to the menu line below. Mark Select/change favourites,OKcalls list of all stations and last active favourites list.P+P–SELECT/CHANGE FAVOURITESAll stationsHDMI2HDMI1PC INAVSAV0 VIDEO 0 - 9 Select stationClear favourite listGreen button: Select the next favourites list.Rename favourites list➠ Favourites list (right column) must be selected.If not, change the list with .Blue button: Starts Rename favourites list.Numeric buttons: Enter new name (same procedure asfor rename station, see page 42).OK to save new name.OKStations of FAV.LIST1 1 Next favourite listSort alphabeticallyMark station or select station with the numeric buttons(for alphabetical station sorting enter the initialletter) which is to be transferred as a favourite to thefavourites list.OK transfers the station to the favourites list.The new station is inserted at the end of the favouriteslist. Proceed in the same manner with additionalstations.Delete station from favourites list➠ Favourites list (right column) must be selected.If not, change the list with .Mark station to be deleted.OK Removes the marked station from the favourites list.or:Red button: Starts Clear favourite list.OK confirms clear favourites list.Move / change order of stations in the favourites list➠ Favourites list (right column) must be selected.If not, change the list with .Mark station to be moved.Yellow button: Starts Move station.Select insertion position at which the markedstation is to be inserted.The insertion position can also be selected withthe numeric buttons.OK to execute the move.43 -
Picture in PictureenglishPicture in Picture (PIP)The concurrent display of two different images is referred to as Picturein Picture.A green frame around the PIP picture indicates that the station selectionaffects the PIP picture. A white frame means that the operation refersto the main picture. If the frame is blue, the station play is active in thePIP picture.Restrictions for the PIP mode:➠ The selection and combination options for main screen/PIP screenbasically depend on the number of receivers (tuners) of the TV set(see Equipment variants on page 97):➠ PIP operation is initially limited to AV-PIP (one station and one AVsource). If a satellite tuner is retrofitted, PIP operation from digitalsatellite picture and picture via antenna/cable (analogue) is additionallypossible.➠ Picture change and station selection is restricted during recording.Starting and ending PIP modeShow/hide PIP.Select the PIP picture➠ The frame is green,if not, press the green button.Select the station as usual.Your TV set distinguishes between two PIP displays:Split screen In this case the screen is divided in the middle and theadditonal PIP image is shown on the right side of thescreen. Both images are compressed horizontally andeach gets half of the screen.Small PIP In this case a small PIP image is inserted in the TV picture. 17.00-18.30 Flora & FaunaSelect the station for the main picture➠ The frame is white,if not, press the green button.Select the station as usual.Function of the coloured buttons➠ The frame is green,if not, press the green button.Red button: Freeze picture in PIP on / off.Yellow button: Switches contents of TV picture and PIPpicture.Blue button: Start/stop PIP scan in the PIP picture.- 44
OKElectronic Programme GuideenglishElectronic Programme Guide – EPGInterActiveEPG stands for Electronic Programme Guide and provides you withon-screen programme details. With the system, as with a printed programmeguide, you can learn about the current programme. In additionprogrammes can be sorted according to certain topics, memorised, andalso recordings can be programmed.Adjusting the programme list➠ The selection is at the top of the specifications,if not, press the blue button.Select Date, Time, Stations or Topics.Select defaults within the respective line.Starting and ending EPGEPG: Switch EPG on / off.➠ EPG is only available for DVB stations.➠ The first time you start EPG, an assistant will guide youthrough the necessary presettings.2 ZDFTEXT DetailP+P– DateTimeStationTopicsThe display of the programme guide is divided into twobranches. The specifications in the upper section limitthe scope of the stations displayed in the lower section.Blue button: Switches between the upper default linesDate, ..., Topics and the lower programme list.Switching and memorizing with the programme list➠ You are in the lower programme list,if not, press the blue button. Select station.OK View / Memorise.EPG (ELECTRONIC PROGRAMME GUIDE) Mon 01.03./16:05MON 01.03.now until 17.00 17.00 18.00 19.00allallarte 15:57-16:59 Charmed - Zauberhafte HexenOKDas Erste 16:00-16:10 TagesschauZDF 16:00-16:10 heute - in EuropaWDR Köln 16:00-16:15 WDR aktuellBayerisches... 16:00-16:05 Rundschauhr-fernsehen 16:00-16:30 Schlemmerreise SpanienMDR FERNS... 16:00-16:15 Hier ab vierNDR FS HH 16:00-16:30 Tipps und Trends - Der Verbraucher...SWR Fernse... 16:00-16:05 Baden-Württemberg aktuella-Viewz Select timeRecordingSelect date, ..., topicsView The programme is in progress. The TV set switches to themarked programme.Memorise The programme has not started yet and is memorised. A will appear in front of the station title. The TV will ask at thebeginning of a programme if it should change the channelor switch on from the stand-by mode if the correspondingoption of the EPG menu is activated (see page 47).➠ Programmes can also be noted by the timer overview(see page 83).MENU2 ZDFDateTimeStationTopicsEPG (ELECTRONIC PROGRAMME GUIDE) Mon 01.03./16:05Mon 01.03. Tue 02.03 Wed 03.03 Thu 04.03nowallallarte 15:57-16:59 Charmed - Zauberhafte HexenDas Erste 16:00-16:10 TagesschauZDF 16:00-16:10 heute - in EuropaWDR Köln 16:00-16:15 WDR aktuellBayerisches... 16:00-16:05 Rundschauhr-fernsehen 16:00-16:30 Schlemmerreise SpanienMDR FERNS... 16:00-16:15 Hier ab vierNDR FS HH 16:00-16:30 Tipps und Trends - Der Verbraucher...SWR Fernse... 16:00-16:05 Baden-Württemberg aktuellP+P– Change to programme listExample If you are searching for the next news, select today’s date,17:00 for example for the time, all for station and Newsfor topics. Then you get a list of all news programmesfrom 17.00 h onwards in the programme list below it.The type of list of programmes in the programme listdepends on the setting of the sorting in the EPG menu(page 47).Time entry If the line Time is selected, then you can enter the timeafter which the programmes will be displayed, via thenumeric buttons of the remote control. The broadcastsare sorted according to the order of the station list withinthe selected time window.Stations If a favourites list has been selected, only the programmesof stations from the favourites list are displayed in theprogramme list. A single station can be selected with“...”. The Select single station window is opened. Afterselection, only programmes of the selected single stationare displayed.Hint Before pressing the blue button to leave the upper selectionlines, select one of the preceding lines. If you thenswitch back to the programme list, you can change thismenu line with , without having to leave the programmelist. If you have marked Time, then you can enterthe time, after which the programmes will be displayed,with the numeric buttons of the remote control.MENU- 46
OKOKTeletextenglishTeletextYour TV set supports the two operating systems TOP Text and FLOF.Up to 2,000 pages are stored so that you have quick access.Starting and ending TeletextSwitch Teletext on / off.Page selection with the coloured buttonsRed button: Back to the previously viewed page.Green button: On to next page.Yellow button: To next topic.Blue button: To next range of topics.The coloured bars (for TOP) or the coloured text (for FLOF)in the second last line indicate which coloured buttons youcan use to page through topic areas and topics.Teletext page displays- 480 AV: Stop self changing pages.9: Enlarge page (press several times).PIP: Show / hide TV picture (full screen/split screen).100 100 ARDtext Do 07. 01. 10 14 : 14 : 42ARD TextPolitik: Die neuen Gesetzesentwürfe . . . . . . . . . . . . 120Wird auch der Nahverkehr teurer? . . . . . . . . . . . . . . 121Australien: Keine Zugeständnisse . . . . . . . . . . . . . . 122Tote bei Zugunglück in Schweden . . . . . . . . . . . . . 532Tennis: Auftaktmatch wurde abgebrochen . . . . . . . 204Formel 1: Neues Reglement für Motoren. . . . . . . . . 213Fussball: Heimsieg für den Meister . . . . . . . . . . . . 20413:00 ARD-Mittagsmagazin . . . . . . . . . . . . . . . . . 31214:00 TagesschauTagesschau . . . . 110/112 Kultur. . . . . . . . . . 500Wetter. . . . . . . . . . 170 Gesellschaft . . . . . 530Sport. . . . . . . . . . . 200/600 Lotto/Toto. . . . . . . 666TV Guide . . . . . . . 300/400 Wirtschaft. . . . . . . 700– + Inhalt tagesschauPage selection100 100 ARDtext Do 07.09.06 14:14:42ARD TextPolitik: Die neuen Gesetzesentwürfe. . . . . . . . . . 120Wird auch der Nahverkehr teurer?. . . . . . . . . . . . 121Australien: Keine Zugeständnisse . . . . . . . . . . . 122Tote bei Zugunglück in Schweden . . . . . . . . . . . 532Tennis: Auftaktmatch wurde abgebrochen . . . 204Formel 1: Neues Reglement für Motoren. . . . . . . 213Fussball: Heimsieg für den Meister . . . . . . . . . . . 20413:00 ARD-Mittagsmagazin . . . . . . . . . . . . . . . . 31214:00 TagesschauTagesschau . . . 110/112 Kultur . . . . . . . . . . 500Wetter. . . . . . . . . . . 170 Gesellschaft . . . . . 530Sport. . . . . . . . . 200/600 Lotto/Toto. . . . . . . 666TV Guide. . . . . . 300/400 Wirtschaft. . . . . . . 700– + Inhalt tagesschauPage selectionInterActiveAdditional page selection possibilitiesCall TOP table1st possibility:Call overview page 100.2nd possibility:Directly enter the page number.3rd possibility:➠ The page includes 3-digit page numbers.Mark desired page number.Tennis: Auftaktmatch wurde abgebrochen . . . . . . . 204Formel 1: Neues Reglement für Motoren. . . . . . . . . 213Fussball: Heimsieg für den Meister . . . . . . . . . . . . 20413:00 ARD-Mittagsmagazin . . . . . . . . . . . . . . . . . 31214:00 TagesschauTagesschau . . . . 110/112 Kultur. . . . . . . . . . 500Wetter. . . . . . . . . . 170 Gesellschaft . . . . . 530Sport. . . . . . . . . . . 200/600 Lotto/Toto. . . . . . . 666TV Guide . . . . . . . 300/400 Wirtschaft. . . . . . . 700– + Inhalt tagesschauPage selectionOK Call the page.4th possibility:➠ The page consists of several sub-pages (indicated bythe selection option on the last line). Page through sub-pages.➠ The table can only be called for stations with the TOPoperating system.OK Call TOP table.Mark topic area,select topic column, select topic,OK call the page.ViewpTV Guide . . . . . . . 300/400 Wirtschaft. . . . . . . 700– + Inhalt tagesschau1 2 3 4 5Politik: Die neuen Gesetzesentwürfe . . . . . . . . . . . . 120Wird auch der Nahverkehr teurer? . . . . . . . . . . . . . . 121Australien: Keine Zugeständnisse . . . . . . . . . . . . . . 122TOP Tote TABLE bei Zugunglück in Schweden . . . . . . . . . . . . . 532ARDTennis:TextAuftaktmatch wurde abgebrochenWetter. . . . . . . 204tagesschau Formel 1: Neues Reglement für Motoren. Vorhersage. . . . . . . . 213Wetter Fussball: Heimsieg für denOKMeister Staedte . . . . . . . . . . . . 204Sport 1Ballungsr.13:00 ARD-Mittagsmagazin . . . . . . . . . . . . . . . . .Fußball14:00 TagesschauReise312TV GuideARD Tagesschau heute . . . . 110/112 Kultur. . . . . . . . . . 500ARD Wetter. morgen . . . . . . . . . 170 Gesellschaft . . . . . 530Kultur Sport. . . . . . . . . . . 200/600 Lotto/Toto. . . . . . . 666TV Guide . . . . . . . 300/400 Wirtschaft. . . . . . . 700weitere ...– + Inhalt tagesschauView Seitenauswahl
TeletextProgramming timer recordings via Teletext➠ Teletext is started,if not, press the TEXT button.Call the programme pages of the current station.Green button: Go to the appropriate page.Select the desired programme,OK to programme the recording.Change the appropriate recording data in the followingmenu Timer data if necessary (see also page 82, “The directway to record”).OK Confirm.Changing teletext stationYou can change the teletext provider independently of the station youare watching.➠ The function is only available if a satellite tuner was retrofitted (seeupgrade possibilities on page 97).➠ Teletext is started, if not, press the TEXT button.P+/P– Select next/previous station.The TV set switches through all the stations in theStation list (see page 30) or the current Favouriteslist (see page 31) one after another.Or:MENU: Call Teletext menu.Select Station selection,OK call station. Select station as in the station list (page 30),OK call station.Teletext menuIn the Teletext menu you can activate messages, reveal pages and configurethe teletext with the Settings menu function.Starting the Teletext menu➠ Teletext is started, if not, press the TEXT button.MENU: Call the Teletext menu.Tagesschau . . . . 110/112 Kultur. . . . . . . . . . 500Wetter. . . . . . . . . . 170 Gesellschaft . . . . . 530TELETEXT Sport. . MENU . . . . . . . . . 200/600 Lotto/Toto. . . . . . . 666TV Guide . . . . . . . 300/400OKWirtschaft. . . . . . . 700Station selection Newsflash Reveal Recording wizard Settings– + Inhalt tagesschauS itExplanations of the Teletext menu functions:StationselectionNewsflashRevealRecordingwizardSettingsPreviewpagesSub-titlepagesPersonaltext pagesCharacter setHiTextPage format13:00 ARD-Mittagsmagazin . . . . . . . . . . . . . . . . . 31214:00 TagesschauhlYou can select the teletext of a different station here (seeleft hand column).The current page is hidden when you activate Newsflash.A symbol at the top left indicates that the function is active.If the contents of the message are updated and it isa small newsflash, this is displayed in the TV picture. If itis a full screen page, the symbol is displayed in blue andthe page can be called with the OK button.Shows concealed information, e.g. for quiz questions orVPS pages in the programme preview pages.A wizard for recording via teletext helps to programmean external recorder, see also left column.Other Teletext menu functions:Input of the first teletext programme preview page if thisdeviates from the factory setting (page 301).Input of the teletext subtitle pages for every station if thisdeviates from the factory setting (page 150).Define up to six teletext pages which can be opened laterfrom a list in the menu Teletext functions Personal textpages (in TV mode press green button, see page 36).Teletext character set can be switched to other languages(Russian, Greek, Polish and Turkish).Improved graphic representation of the Teletext.(Not offered by all stations.)Select side format for full screen visualisation of theTeletext (16:9 or 4:3).english49 -
OKTeletextDigital radioenglishInteractive data services(Digital teletext/MHEG-5)In some countries, the stations also transmit interactive data services withtheir programmes (e.g. Digital teletext/MHEG-5), whereby the functionsof individual keys are not available or only so to a limited extent.InterActive The symbol indicates which functions can differ for a loadedapplication.In the UK or Ireland, the teletext for DVB-T stations is transmitted as perthe MHEG-5 standard. It contains text, graphics, functions and links.➠ Available in e.g., UK, Ireland, New Zealand.➠ Digital teletext is not available when DVB subtitles are being displayed.The operation of these menus depends on the particular provider. Normallyafter a station is changed, the provider broadcasting the digitalteletext makes an introductory offer for this service on the screen viamenu selection. Follow these notes.If no message appears telling you how to switch to digital teletext afterswitching to another station, press the TEXT key. If a selection for DVBsubtitles is available, this item must be hidden before.Radio modeThe TV set can receive digital radio stations via DVB.In addition you can play the sound from an external device through theTV set via the audio/AV inputs of the TV set (see page 51).➠ The AUDIO button has been preset for radio operation in the factory.To change the configuration see page 85.Radio mode onPress AUDIO button on the remote control.Or:R on the operating ring on the TV set.You see and information window about the currently setstation.Station listScreen off/onInterActiveRADIO DIGITAL 12:45 12:10 - 13:30 Informationen am MittagBerichte, Interviews, MusikVolume 30Previous stationDepending on the provider’s respective offer, you can use thebuttons and the OK button, the coloured buttons, the END/TEXT button and sometimes even the numeric buttons.If you want to close the digital teletext, just select a different station usingthe P+/P– buttons or follow the menu prompts on the screen.Station switching➠ The selection of the stations / favourites is the sameas the procedure in TV mode (see pages 30 and 31).Press P+/P– or the numeric buttons of the remote control.Or:+ / – on the TV set operating ring.Or:OK Call station list / favourites.Setting the volumeV+/V– Volume louder / quieter.Other sound settings are the same as for the volume settingin TV mode (see page 32).Sound adjustmentCall Sound adjustment.Other settings as for TV mode (see page 32).- 50
OKDigital radioSwitching the screen on/offRed button: Switch off the screen.The LED display on the TV set (see page 10) changes fromgreen to orange.Switch on the screen with the remote control:Red button, AUDIO button or OK button (station list isopened).Switch on the screen on the TV set:Press R on the TV set operating ring.Audio playback from external devicesYou can play the sound of external AV devices (e.g. MP3 players, DVDplayers) in radio mode.<strong>Connect</strong>ing an external appliance (e.g. MP3 player)<strong>Connect</strong> the output (jack) of the MP3 player to the cinch audio in socketsL/R (white/red) of the TV set.MP3 playerTV setenglishRadio menuIn the Radio menu, you can set the sound, search for and store radiostations (automatically or manually), change stations and set switch off/alarm functions.The settings are made as described in TV mode.Call Radio menu➠ Radio mode switched on,if not, press the AUDIO button.MENU: Call the Radio menu.RADIO MENUSoundSound effects ...StationsSwitch off radio modePress TV button on the remote control.Or:R on the operating ring on the TV set.EPG – Electronic Programme Guide (radio)You can also use an electronic programme guide for the DVB radio stationsif the radio stations provide programme information.Starting and ending EPG➠ Radio mode switched on,if not, press the AUDIO button.EPG: Switch EPG on / off.Timer functions➠ The EPG functions in radio mode are the same as inTV mode. Read from page 46 onwards for further information.Select AV input➠ Radio mode switched on,if not, press the AUDIO button.OK Open station list.The AV inputs are listed before the first radio station ina numerically sorted list.STATION LISTa-AUDIO DIGITAL INAUDIO INHDMI2HDMI1AVSAV Switch to ...z Select stationFavouritesOKAUDIO IN L/R<strong>Connect</strong>ion example of an MP3 player PIP scanChange stationsSort alphabetically➠ The selection of the AV inputs is the same as in TVmode (see page 31).Start playback on the external device after selecting theAV input.51 -
Other settingsenglishParental lockYou can select and set various security options to prevent unauthorised useof the TV set and to protect your children from unsuitable programmes.Defining the access code (PIN)MENU: Call TV menu. Select Settings,go to the menu line below. Select Parental lock,go to the menu line below.Define a four digit access code (PIN) the first timeyou open it. The numbers appear in plain text. Notethe access code (PIN) well.OK Confirm the access code (PIN).The Parental lock menu is opened.TV MENUSettingsParental lockLock all stationsImmediately ...Lock single stationsAge-related lockThe four-digit access code (PIN) must be entered whenthe parental lock is opened in future. It appears encrypted(****) when entering for security reasons.Explanations of setting possibilities in the Parental lock menu:Lock allstationsLock singlestationsAge-relatedlockChangeaccess codeDeactivateResetThe TV set is locked immediately the menu is exited. Allprogrammes can then only be watched after entering theaccess code. The lock can be activated both Immediatelyand for a Daily defined period.The lock remains active until it is switched off in the menu.You can lock / unlock individual or all of the stations inthe station list specifically.The lock remains active until it is switched off in the menu.Some DVB stations also broadcast an age classification.If the age set here is below the broadcast age limit, theprogramme can only be watched after entering the accesscode.You can change your access code at any time. Enter thenew access code in place of the old one.All set parental locks (locked stations, age-dependentlocks) are cancelled. The current secret code is deleted.When the parental lock is reactivated all the previousparental locks are set again automatically.All currently set parental locks are finally cancelled. Thesecret code is deleted.TV MENUSettingsParental lockAccess code****Please enter PINCode numberThe code number cancels all entered PINs. It can be used for example ifyou have forgotten your PIN. You will find a note about the code numberon page 99. Remove this from the manual and keep it in a safe place.0 - 9Protection of minors for CI Plus programmesYouth-protected broadcasts of programme providers with CI Plusencoding possibly require you to enter the secret number (PIN) of theCA module.We recommend selecting the secret number of the TV set according tothe secret number of the CA module, since the secret number of the CAmodule cannot be changed. This means that you must only rememberone secret number.- 52
Other settingsTimer functionsThis menu offers you convenient alarm services. Programmed alarms arealso active when the TV set has been switched off to standby.If the TV set switches on from the standby mode by alarm, a screenmessage appears. If this is not confirmed within 5 minutes with the OKbutton, the TV switches back off automatically for safety reasons.The TV set can also be switched off automatically at certain times. A screenwarning appears one minute before automatic switch off. The automaticswitch off can be interrupted by pressing any button.Call Timer functionsMENU: Call TV menu. Select Settings,go to the menu line below. Select Timer functions,go to the menu line below. Select the desired setting.Explanations of setting possibilities in the Timer functions menu:Switch offtoday onlySwitch offdailyOne-timereminderWake upMon-FriWake up SatWake upSunTV MENUSettingsTimer functionsSwitch off today onlyno ...Switch off daily One-time reminder Wake upThe set switches to the standby mode automatically atthe specified time.If a time is specified which has already passed on thesame day, the set switches off at this time the next day.The set regularly switches to the standby mode automaticallyevery day at the specified time.The set alerts you once today at the specified time.If a time was specified which has already passed on thesame day, the alarm is saved for the next day.The set regularly alerts you from Monday to Friday atthe set time.The set alerts you regularly every Saturday at the specifiedtime.The set alerts you regularly every Sunday at the specifiedtime.Explanations of setting possibilities in the Timer functions menu:Wake upwithWake upsignalvolumeLanguageSpecify whether the TV set switches on in the event of analarm from the standby mode in TV or radio mode withthe respectively last active station.Set the desired volume of the alarm tone. The alarmtone is emitted as a continuous tone as a guide duringthe setting.Specify the language for all menus in the TV set in the language menu.The language for the DVB subtitles and the film language can be set forDVB programmes.Call languageMENU: Call TV menu. Select Settings,go to the menu line below. Select Language,go to the menu line below.TV MENUSettingsLanguageMenu languageSubtitle (DVB) Select the desired setting.Audio (DVB)Explanations of setting possibilities in the Language menu:MenulanguageSubtitles (DVB)Audio (DVB)OKYou can change the menu language here. The menulanguage can be changed with the index (siehe Seite 15).If subtitles are provided by the DVB station, you can setyour desired language in advance here. If this is includedin the range of languages of the station, it will be shownautomatically.You can also specify an alternative language under thismenu item, in case your chosen language is not offeredby the stationSpecify your desired film language in advance here.If this is included in the range of languages of the station,it will be shown automatically.You can also specify an alternative language under thismenu item, in case your chosen language is not offeredby the station.53 -english
Other settingsenglishOn-screen displaysYou can select different settings in this menu which affect the on-screendisplays.Call On-screen displaysMENU: Call TV menu. Select Settings,go to the menu line below. Select Miscellaneous,go to the menu line below. Select On-screen displays,go to the menu line below.TV MENUSettingsMiscellaneousOn-screen displaysOn-screen display time7 s Select the desired setting.On-screen display position Volume AutomatiTime and dateIf you receive a station with teletext after switching on the TV, the timeand date are recorded automatically. The date may have to be enteredmanually for some stations.Enter the time and date manually if you receive station without teletext.Call Time and dateMENU: Call TV menu. Select Settings,go to the menu line below. Select Miscellaneous,go to the menu line below. Select Time and date,go to the menu line below.TV MENUSettingsMiscellaneousTime and dateTime14:32:21Deviation from Universal Time Date Beginning ofExplanations of setting possibilities in the On-screen displays menu:On-screendisplay timeOn-screendisplay positionVolumeAutomaticinfoPermanentclock displayAutomatichint afterswitch toHDMIHere you set the duration of the display, e.g. for thevolume or the station display when changing stations.The duration can be set between 2 and 9 seconds.You can select between an upper and a lower display positionso that other displays (subtitles) are not concealed.Here you set whether or not the change in the volumeshould also be displayed visually on the screen.Select yes here if you want to be able to see the additionalhelp permanently in the upper part of the screenwhile navigating the menu. Also see page 15 for furtherinformation.The time can be displayed permanently with this menuitem or by pressing the button twice in quick succession(see also page 37). It is always visible as long as no otherdisplay is made.If you switch to an HDMI programme place to whicha Digital Link HD-capable device is connected (see alsopage 77), a reference to the adapted function of the remotecontrol always appears when yes is set. Select the desired setting.Explanations of setting possibilities in the Time and date menu:Time Enter the time (00:00 to 23:59) with the numeric buttonsof the remote control.Deviation fromUniversal TimeDateBeginning ofdaylight-savingtimeEnd ofdaylight-savingtimeThe current time at the Greenwich Meridian 0 is to beunderstood as world time. The time shift in relation tothis time must be given in hours (–11 to +13) (with thebuttonsor the numeric buttons on the remote control).Summer time is ignored.Enter the date (day.month.year) with the numeric buttonson the remote control.Enter the date on which the time is switched over tosummer time if it deviates from the automatically calculateddate.Enter the date on which the summer time ends if it deviatesfrom the automatically calculated date.- 54
Coded StationsConditional Access module (CA module)In order to receive coded digital stations, a Conditional Access module(CA module) and a Smart Card must be inserted in the CI slot of yourTV set (see page 11).The CA module and the Smart Card are not part of the TV set’s scopeof delivery. They are usually available from your dealer. <strong>Loewe</strong> does notprovide any guarantee for the functioning of the CA module.The TV set must first recognise and set up the CA module during initialoperation. Therefore, it can take up to a minute until decoding startsduring initial operation.Inserting the Smart Card into the CA modulePush the Smart Card into the CA module as far as it goes so that the sidewith the gold coloured contact chip is facing the side of the CA modulemarked with the provider’s logo. Note the direction of the arrow printedon the Smart Card.Searching for encrypted stations➠ The search wizard must only be started if the settingoption no has been selected during first installation inthe search for encrypted stations and no CA-modulewas inserted.MENU: Call TV menu. Select Settings,go to the menu line below. Select Stations,go to the menu line below. Select Search wizard,go to the menu line below.Select Change search settings,OKwizard guides you through the search settings.See page 40 for a description of the search settings.englishInserting the CA module in the CI slot➠ Switch off the TV set’s mains switch.Remove the cover from the rear of the set.Calling CA module information➠ This menu is only available for digital stations and whena CA module is plugged in.MENU: Call TV menu.Select CA module: xxx,OKcall information.The content of this menu depends on the provider of theCA module.The CA module information can also be called up in theTV menu under Settings Other CA module: xxx (xxxcorresponds to the CA module provider).EjectorbuttonCarefully insert the CA module in the CI slot with thecontact side forward.If you are standing in front of the TV set (display) thenthe logo on the CA module must be pointing to the rear.Do not use force. Make sure the module is not twistedin the process. If the CA module is correctly installed, theejector button protrudes a little further.Replace the cover.Removing the CA module➠ Switch off the TV set’s mains switch.Remove the cover from the rear of the set.Press in the ejector button on the appropriate moduledrawer, the module is released.Remove the module from the set.Replace the cover.55 -
Media+englishGeneral information on Media+The MediaPortal gives you access to photos, videos and music from yourpersonal storage media, e.g. from storage media connected via USB andfrom media servers in your home network to which your TV set is connected.You also have access to video sources and music from the Internet.➠ Please follow the information in the right column for the Internetfunctions.MEDIA PORTALTVIndexRECOMMENDATIONSRadio digitalMediaHomeMediaNetMediaNetThe MediaNet functions (Internet radio and Internet video) require yourTV set to have a functional Internet connection (see page 58 onwards andglossary page 101). To use these Internet functions, we recommend registeringyour TV set at our website at http://www.loewe-uk.com (under Support Register now). Simply follow the steps in the registration process.To register, you will need to have the MAC address of your TV set to hand.You can find this in your TV’s index under Integrated features – MAC address.➠ Some of the Internet functions described below may not be available(see also MediaUpdate chapter below). The general availability and rangeof Internet functions are entirely dependent on the provider. <strong>Loewe</strong> hasno influence over the long-term availability of individual offers.➠ The content shown in the Recommendations area may change fromtime to time without prior notice.Filmtrailer.com Philharmonia O.. Discovery Ch..BBC World Ser..Classic Fm TalkSport Chill Capital FM<strong>Connect</strong>ing the TV set to your networkTo receive media via media servers in your home network or via theInternet, you have to integrate your TV set in your home network. Aconnection example can be found on page 19.The TV sets are provided with a standard network configuration ex works(automatic assignment of the IP address via UPnP/DLNA). The TV set cannormally have a wired connection to your home network without anyproblems when using these default settings. For integration in specialnetworks (see also right column), please make corresponding settings inthe Media menu (see page 58).Your <strong>Loewe</strong> TV set supports the UPnP AV standard for data playback inthe home network. You can find more detailed information on this inthe technical data on page 94 and in the glossary from page 101 onwards.Help for configuration problems<strong>Loewe</strong> cannot provide any support for PC hardware and software ornetwork components owing to the diverse configuration options withhome networks.Please contact the administrator of your home network and/or specialistdealer for support when setting up and for maintenance of networkconnections, storage media, media server software and network devices,e.g. routers.MediaUpdate - additional functionsAdditional functions in the MediaPortal are planned, particularly for <strong>Loewe</strong>Media+. You can update your TV set yourself. You can find new softwareversions as well as further, up-to-date information on this subject underMediaUpdate on the website http://www.loewe-uk.com.You can find notes on carrying out a software update on page 86.- 56
Media+Accessing your mediaMEDIA: Call MediaPortal.Playing music and videos, displaying imagesThe windows for playing music and videos and for displaying photos arecomparable for all cases irrespective of the media source. The relevantplayers are therefore grouped together:englishMEDIA PORTALTVIndexRadio digitalMediaHomeMediaNetMediaMusic (including Internet radio): see page 68.MediaPhoto: see page 70.MediaVideo: see page 71.RECOMMENDATIONSFilmtrailer.com Philharmonia O.. Discovery Ch..BBC World Ser..Classic Fm TalkSport Chill Capital FM Mark desired function,OK call function.MediaHome: see page 62.MediaNet: see page 65.Quit mediaCall MediaPortal and select other function (see leftcolumn).Or:Press TV or AUDIO button for changing to TV or radiomode (1 .Oder:Press END button in the MediaPortal main level to changeto the last active operating mode (TV, radio).(1The AUDIO key can be assigned another function (see page 85).57 -
Media+englishMedia menuThe Media menu is used for making settings to your network adapterand the various types of media (photo, music, video).➠ MediaPortal is open.MENU: Call / close Media menu.MEDIA MENUNetwork settings Photo settings Music settings Video settingNetwork accessExplanation of the setting possibilities in Network settings menuNetworkaccessYou can activate or deactivate the network settings ofyour TV set here.MEDIA MENUNetwork settingsNetwork access Adapters more ...On (wired only) ...Select Network access, go to the menu line below.Select the type of access required. Select desired menu item, go to the menu line below. Select the desired setting,OK call.Network settings: see right column.Photo settings: see page 61.Music settings: see page 61.Video settings: see page 61.On (wired only): Access to the network possible via anetwork cable.off deactivates the network adapter of your TV set.OK Adopt access type.Adapters You can change the settings of the installed and connectednetwork adapter(s) step by step here using anassistant.accessMEDIA MENUNetwork settingsAdapters more ... Network accessSelect Adapters,OK call overview of the installed network adapters.Select required network adapter,OK Change adapter settings.(1Only for TV sets with WLAN functionality, see table on page 97.- 58
OKMedia+Configuration of a wired adapter (e.g. LAN adapter)You will see an overview of the current settings for theselected network adapter (for an explanation of the points,see right column).NETWORK ADAPTER WIZARD: BUILT-IN ADAPTER (WIRED)Current adapter settings:IP configurationmanualIP address 192.168.2.123Subnet mask 255.255.255.0Gateway 192.168.2.1DNS server 1 192.168.2.1DNS server 2 192.168.2.1Additional adapter data:MAC address 00:09:82:11:99:11ProceedOK Proceed.Explanation of the adapter settings for wired adapter (e.g. LAN adapter):IPconfigurationThe current assignment method for the IP address ofyour TV set.IP address Your current IP address.Subnet mask Your current subnet-mask IP address.Gateway (only for IP configuration manual)Your manually set gateway IP address.DNS server 1 (only for IP configuration manual)Your manually set first DNS server IP address.DNS server 2 (only for IP configuration manual)Your manually set second DNS server IP address.MAC address Indicates the MAC address fixed in the hardware of yourTV set.english Select type of IP configuration.manual: Enter your fixed static IP address manually (seebelow).DHCP: Automatic configuration of the IP address viaDHCP server.UPnP: Automatic configuration of the IP address viaseveral protocols according to UPnP specification(including DHCP).OK Proceed.If manual has been selected under IP configuration: Enter IP, Subnet mask, Gateway and DNS serveraddresses in succession with the numeric keys onthe remote control.OK Proceed.You will now see an updated overview of the settings forthe network adapter.OK End of wizard.59 -
Media+englishExplanation of the setting possibilities in Network settings menu(continued)more ... This menu contains settings which have to be changedless frequently.aptersMEDIA MENUNetwork settingsmore ... Network access AdaptersSelect l more ... ,OK call further networking settings.Select desired setting,or numeric buttons: Perform changes.Numeric buttons: Enter characters (procedure same asRename stations, see page 42).Host name: Give your TV set a name so that it can beuniquely identified in the network.Use proxy server: Indicate whether your network accessis to be direct or via a proxy server.➠ A proxy server is not necessary for most home networks.➠ Contact your home network administrator if you areunclear about the proxy server settings.Proxy server name:(only available if Use proxy server yes)Indicate the name or IP address of the proxy server used.Proxy port:(only available if Use proxy server yes)Indicate the network port number.MENU: Quit Further networking settings menu.- 60
Media+Explanation of the setting possibilities in the Photo settings menu➠ The menu can only be opened when a photo is displayed (see page 70).Go to ... Skip to a definite picture or to the start/end of the currentfolder.Picture settings You can carry out the picture settings for the photo displayhere. The settings correspond to the picture settings inTV mode (see page 34).englishExplanation of the setting possibilities in the Music settings menu➠ The menu can only be opened when the Music Player is displayed(see page 68).Sound settings You can carry out the audio settings for playing musichere. The settings correspond to the audio settings in TVmode (see page 32).Explanation of the setting possibilities in the Video settings menu➠ The menu can only be opened when the Video Player is displayed(see page 71).Picture settings You can make the picture settings for playing videoshere. The settings correspond to the picture settings inTV mode (see page 34).61 -
Media+englishMediaHomeAll data in the immediate environment of the TV set is displayed in MediaHome.This includes both storage media directly connected to the TVset (e.g. USB sticks) as well as data provided in your home network (e.g.from a media server on a PC or a network hard drive).➠ MediaPortal is open.MEDIA PORTALMediaCenter A <strong>Loewe</strong> MediaCenter connected to your home network.TwonkyMediaWMP11USBExamples with media servers in your home network. Theexact designation depends on the media server used.Example for a USB memory medium at the USB port ofyour TV set. The exact designation depends on the relevantstorage medium.➠ Please also observe the notes on page 86 regarding USBsticks!TVIndexRadio digitalMediaHomeMediaNetOK Open marked media source. The available contentis displayed.RECOMMENDATIONSFilmtrailer.com Philharmonia O.. Discovery Ch..BBC World Ser..Classic Fm TalkSport Chill Capital FM Mark MediaHome,OK activate.MEDIA HOMEMediaCenter TwonkyMedia WMP11USBUnmounting USB storage mediaYou should unmount USB storage media properly afteruse before removing them from the TV set. This avoidsa loss of data.➠ A USB storage medium is marked in MediaHome.Green button: Unmount USB storage medium beforeremoving it.➠ Once unmounted, the USB storage medium cannotbe used again until it is reinserted!Unmount medium before removing Mark desired d media source.➠ The points shown here depend on the devicesavailable/used.- 62
Media+englishPlaying/displaying data from USB storage mediaIf a USB storage medium is selected as a source (see page 62), the followingspecial features apply for actions and the media overview:The uppermost folder level is divided into three fixed categories:Musicwith the subfolders Titles, Artists, Albums, Categories, Files (seebelow).PhotoVideoPlaying files from the home networkWhen using a media server in your home network as a source (see page 62),the names of the folders displayed are specified by the media server.For further operation, see General navigation in the media overview onpage 63.TWONKY MEDIA (NETWORK)MusicPhotoVideoOKTitlesArtistsAlbumsThe original folder structure of the USB storage medium is retainedin the media overview for Photo and Video. For playing Music, theavailable titles are prepared and offered in the above subfolders.Subfolders in Music modeTitles:The music titles found on the USB storage mediumare sorted by title name.Artists: The music titles found on the USB storage mediumare sorted by the respective artist.Albums: The music titles found on the USB storage mediumare sorted by album name.Categories: The music titles found on the USB storage mediumare sorted by their respective musical categories(e.g. Jazz, Classical, Pop, Rock) and displayed correspondingly.Files:The music titles found on the USB storage mediumwill be shown without being especially sorted (inorder of file name).:/Elements 3Example: Overview of a media server with the name Twonky Media- 64
Media+englishVideo podcast➠ MediaPortal is open.MEDIA PORTAL➠ The names of the folders in the Video podcast area are fixed by theprovider vTuner and are adopted for display on the TV.For further operation, see General navigation in the media overview onpage 63.TVRadio digitalMediaHomeMediaNetIndexRECOMMENDATIONSVideo podcast by locationThe available video podcasts are sorted by country and offered correspondingly(see left column).Filmtrailer.com Philharmonia O.. Discovery Ch..BBC World Ser..Classic Fm TalkSport Chill Capital FMVideo podcast by genreThe available video podcasts are sorted by genre and offered correspondingly. Mark MediaNet,OK activate.VIDEO PODCASTSMEDIA NETInternet radio Video podcast Web TVVideo Podcasts by locationOKVideo Podcasts by ge...:/AlternativeAnimalsArts-CultureArts-InterviewBusinessCars-TransportationChristianClassicalComedyComicsCommentaryElements 2 Mark Video podcast,OK activate.VIDEO PODCASTSOKVideo Podcasts by loc...Video Podcasts by genreAfricaEuropeMiddle EastNorthern AmericaOceania:/Elements 2- 66
Media+Web TV➠ MediaPortal is open.MEDIA PORTAL➠ The names of the folders in the Web TV area are fixed by the providervTuner and are adopted for display on the TV.For further operation, see General navigation in the media overview onpage 63.englishTVRadio digitalMediaHomeMediaNetIndexRECOMMENDATIONSWeb TV by locationThe available Web TV videos are sorted by country and offered correspondingly(see figure in left column below).Filmtrailer.com Philharmonia O.. Discovery Ch..BBC World Ser..Classic Fm TalkSport Chill Capital FMWeb TV by genreThe available Web TV videos are sorted by genre and offered correspondingly. Mark MediaNet,OK activate.WEB-TVMEDIA NETInternet radio Video podcast Web TVWeb-TV by locationWeb-TV by genre:/OKMusic TVTV CollegeTV GovernmentTV Live BroadcastTV NewsTV On DemandTV PublicTV ReligiousTV ShoppingTV SportsTV VarietyElements 2 Mark Web TV,OK activate.WEB-TVWeb-TV by locationWeb-TV by genreOKAfricaAsiaCaribbeanCentral AmericaEuropeInternet onlyMiddle EastNorth AmericaOceaniaSouth America:/Elements 267 -
Media+englishMediaMusic➠ A music title is highlighted in the media overview.Play music files➠ A music title is highlighted.OK Play music title.LOEWE_USB (USB)AlbumsAmmonia AvenueEveEye In The SkyGaudiI RobotPyramidStereotomyTales Of Mystery And Ima...The Turn Of A Friendly CardVulture CultureTitlePrime TimeLet Me Go HomeOne Good ReasonSince The Last GoodbyeDon't Answer MeDancing On A HighwireYou Don't BelievePipelineAmmonia Avenue...Artists/Alan Parsons Project/Ammonia Avenue/ Elements 9OKMUSIC PLAYER"Dark Diamond"Artist:Elton JohnAlbum: Songs From The West Coast OK backRepeat title/all/offScreen off/onRandom on/offPAUSE button: Pause current playback.OKListenOK Play highlighted music title (see right column).PLAY button:If playback is paused:Continue paused playback.For playback in progress:Play title from the beginning.short: Playback previous / next title.long: Rewind/fast forward.OK Return to the overview without ending the currentplayback.STOP button: End playback and return to overview.- 68
Media+Explanation of the symbols in the playback windowThe symbols at the top right show you information about the currentplayback.Playback Pause Rewind Fast-forward_ Replay current title Replay all titles in the current folder Random play activatedThe bar behind the playtime shows you how far the music file has beenplayed.englishFunction of coloured buttons during music playbackRed button: Switch screen off/on.Green button: Repeat individual title / all titles /Repeat off.Yellow button: For music files from local mediaRandom play of files in currently selectedfolder on / off.for Internet radio:Change to the last radio station listenedto.69 -
P+P–Media+englishMediaPhoto➠ A picture is selected in the media overview.LOEWE_USB (USB)PhotoMusicVideo<strong>Loewe</strong>_1_highres<strong>Loewe</strong>_2_highres<strong>Loewe</strong>_3_highres<strong>Loewe</strong>_4_highres<strong>Loewe</strong>_5_highres<strong>Loewe</strong>_6_highres<strong>Loewe</strong>_7_highres<strong>Loewe</strong>_8_highres<strong>Loewe</strong>_9_highres<strong>Loewe</strong>_10_highres<strong>Loewe</strong>_11_highres Elements 106OKSlide showPLAY button: Start slide show.➠ from photo overview: Start slide show with markedpicture.➠ in full screen mode: Start slide show with displayedpicture.OKViewPage OK View marked picture in full screen mode (see below).2 / 106 Slide show PLAY button: Start slideshow (see right column).PAUSE button: Pause slide show.PLAY button: Continue slide show.Full-screen modeSTOP button: End slide show and return to overview.➠ A picture has been selected.OK Go to / close full screen mode.Show previous / next picture. Rotate picture by 90 degrees to the left/right.END: Quit full-screen mode and return to overview.- 70
P+P–Media+MediaVideo➠ A video is selected in the media overview.LOEWE_USB (USB)PhotosMusicVideosvideo1.avivideo2.avivideo2.wmvvideo3.avivideo4.avivideo5.avivideo6.avivideo6.wmvvideo7.avivideo8.avivideo9.avi Elements 17OKWindYou can fast-forward/rewind videos to search for desired scenes.Rewind at double speed.Press again for four times speed.Fast-forward at double speed.Press again for four times speed.PLAY button: Continue playback.➠ In the case of Internet videos, please wait until theseare buffered in the memory. This can take a fewseconds, depending on the bit rate of the film andinternet speed.englishOKViewPage OK Play highlighted video (see right column).Information on high-resolution films in generalDue to technical limitations (e.g. interference, limited bandwidth), interruptionsto playback up to and including complete termination of theplayback may occur when playing high definition film material (HD films)on 720p format or above (1280 x 720 resolution or above).Video status barThe video status bar provides you with further information about thecurrent playback.INFO: Display/hide status bar/file information/contextinformation.Pressing the INFO button the first time will show the videostatus bar. Pressing a second time shows the file informationfor the video. Pressing the INFO button again showsthe context information with operating instructions. Thedisplayed information is hidden again by pressing again.Playback➠ A video is selected.VIDEO PLAYER"Flower Exhibition"Playtime: 02:13 (04:26)OK Play highlighted video.END: Close displayed content.PAUSE button: Pause current playback.PLAY button:Continue paused playback.STOP button: Stop current playback and return to overview.Explanation of status bar symbolsThe symbols (in the status bar top right) show you information aboutthe current playback.Playback Pause Rewind (double or four times speed) Fast-forward (double or four times speed)The bar behind the playtime shows you how far the video has been played.(1Only for devices with WLAN functionality, see page 97.71 -
External devicesenglish<strong>Connect</strong>ions menuSettings for the connection of external appliances are made in this menu.Calling the connections menuMENU: Call TV menu. Select <strong>Connect</strong>ions,go to the menu line below.TV MENU<strong>Connect</strong>ionsSound componentsOKAntenna DVB AV connecting settings MiscelAV connection settingsIn the AV connection settings menu the parameters for the AV and AVSconnection sockets can be adapted.Calling AV connection settingsMENU: Call TV menu. Select <strong>Connect</strong>ions,go to the menu line below. Select AV connecting settings,go to the menu line below. Select the desired setting.Explanations of setting possibilities in the <strong>Connect</strong>ions menu:SoundcomponentsAntenna DVBAV connectingsettingsMiscellaneousThe sound components wizard helps you to configure thecomponents which are used to reproduce the TV sound.You will find a description of the sound componentswizard on page 79.Here you can set the parameters of the DVB-T and theDVB-S (1 antenna with the antenna wizard. The settingoptions of the DVB antennas are described in the firsttime operation routine (from page 22).See right column for explanations.See page 73 for explanations. Select the desired setting.Explanations of setting possibilities in the AV connecting settings menu:Device atconnection AVAV standardSignal typeTV MENU<strong>Connect</strong>ionsAV connecting settingsDevice at connection AVNo device ...AV standard Signal type Allow switchinIndicate here whether a set and, if yes, which one is connectedto the AV socket.You set the AV standard of the connected appliance toAV or AVS here.Normally you leave the setting on Automatic. If thestandard of the connected appliance is not detectedautomatically, select the right standard.Ask your dealer or consult the operating manual of theconnected appliance if necessary.You set the signal type of the device connected to AVor AVS here. Normally, you should leave the setting atAutomatic; otherwise select a suitable signal type. Youcan find out more from your dealer.AllowswitchingvoltageRGB fade-inat AVIf this function is activated and you switch an AV device(not at AVS) that outputs a switching voltage to playback,its picture and sound will be played immediately on allTV station slots.If this function is activated, pictures from RGB-capableAV equipment connected to AV are shown immediatelyon all station places.In some appliances it may be additionally necessary toset the allow switching voltage menu item to yes to getthe external picture.(1Equipment and upgrade options, see page 97.- 72
External devices<strong>Connect</strong>ions – MiscellaneousVarious settings (e.g. Digital Link, Decoder etc.) in connection with externalappliances are made in this menu.Calling up other settings for connectionsMENU: Call TV menu. Select <strong>Connect</strong>ions,go to the menu line below. Select Miscellaneous,go to the menu line below.englishat PC INTV MENU<strong>Connect</strong>ionsMiscellaneousDigital Link PlusStart transmissionDecoder stationsRemote TV switch on via Dig Select the desired setting.Explanations of setting possibilities in the Miscellaneous menu:Signal typeat PC INDigitalLink PlusDecoderstationsRemote TVswitch on viaDigital LinkAssign digitalaudio inputHere you set the signal type of the appliance connectedto PC IN. Menu item can only be selected if a valid signalis present at the PC IN input.With this function the station data of the TV set canbe transmitted to a connected Digital Link Plus capablerecorder. Only the station data of analogue TV stationscan be transmitted.Here you can identify analogue stations with encodedcontent as decoder stations and set the mode of the soundencoding of encoded audio signals, so that these areautomatically decoded by a decoder connected to AV.Menu item only available if a Decoder has been selectedas Device at connection AV (see page 72).Here you can select whether the TV set is to switch onautomatically from Standby mode, if a tape / disc is to beplayed or a screen menu displayed from Digital Link HDor Digital Link Plus-enabled devices which are connectedto HDMI or AV inputs (see also page 74 and 76).You can assign the digital audio input socket (AUDIODIGITAL IN) to an AV input (AV, HDMI, PC IN etc.) here(see page 81).73 -
OKExternal devicesenglishDevices to the connections AV/AVSAn additional appliance such as a DVD player, VCR/DVD recorder etc.can be connected to the TV set at the Euro-AV socket AV (see page 11).The AV input AVS (see page 11) offers the possibility of connecting a digitalcamera or a Camcorder for example.The AV sockets can process different signal types. Which signal type youraccessory device provides can be found in the operating manual of theappropriate device.Owing to the large number of AV devices available on the market, we canonly mention a few examples for the connection of accessory equipmentto the AV sockets here.<strong>Connect</strong>ing a DVD player to the TV set➠ A DVD player has been selected in the TV Menu under <strong>Connect</strong>ions AV connecting settings Device at connection AV (see also page 72).Switch off all equipment before connecting.<strong>Connect</strong> the Euro-AV output of the DVD player to the AV socket of theTV set.Use a fully equipped Euro-AV cable (available from your dealer) for this.TV setIf the sound of the device connected to an AV socket is to be transmitteddigitally, a cinch cable must be plugged between the coaxial digitaloutput of the accessory equipment and the AUDIO DIGITAL IN socket ofthe TV set. In addition, the digital audio input must be assigned to theappropriate AV socket.The digital audio input can be assigned to the appropriate AV socket bythe TV menu <strong>Connect</strong>ions Miscellaneous Assign digital audio input(see page 81).DVD playerAVAVRemote TV switch on via Digital LinkYou can select whether the TV set is to switch on automatically fromStandby mode if a disc is played or a screen menu displayed on a DigitalLink Plus-enabled device connected to AV.You can find the settings in the TV Menu under <strong>Connect</strong>ions Other Remote TV switch on via Digital Link (see also page 73).<strong>Connect</strong>ion example of a DVD playerPlayback from AV deviceIf the device at AV supports the Digital Link Plus functionality or if in theTV menu <strong>Connect</strong>ions AV connecting settings Allow switchingvoltage yes, the TV set will automatically switch to the correspondingAV input after starting the replay at the AV device.The AV input can also be called manually, however.Call AV selection.AV SELECTIONHDMI2HDMI1PC INAVSAVVIDEOSwitch to ...Select AV,OK switch over.Start playback on the connected device.- 74
OKOKExternal devices<strong>Connect</strong>ing a DVD recorder to the TV set➠ A DVD recorder has been selected in the TV Menu under <strong>Connect</strong>ions AV connecting settings Device at connection AV (see also page 72).Switch off all equipment before connecting.<strong>Connect</strong> the Euro-AV output of the DVD recorder to the AV socket ofthe TV set.Use a fully equipped Euro-AV cable (available from your dealer) for this.If you want to receive and record analogue stations with the receiver(tuner) built into the recorder, the recorder must be looped into theaerial cable.<strong>Connect</strong> the DVD recorder as shown in the connection example below.TV set<strong>Connect</strong>ing Camcorder/cameraSwitch off all equipment before connecting.<strong>Connect</strong> the AV output of the camcorder to the sound input socketsAUDIO IN L (white) and AUDIO IN R (red) and the AVS connection of theside AV sockets of the TV set.Use the AV cable enclosed with the camcorder for this.Some camcorders only supply an FBAS signal instead of an S-Video signalat the AV output. In this case use the VIDEO IN input (yellow).TV setenglishRTVANT INDVD recorderAVAUDIO IN L/RANT OUTAVANT TVCamcorderAVS<strong>Connect</strong>ion example of a camcorder➠ If you want to record DVB stations with an external recorder, theinternal receiver of the TV set must be used (see Timer recording withexternal devices on page 84).Playback from AV deviceCall AV selection.AV SELECTIONHDMI2HDMI1PC INAVSAVVIDEO<strong>Connect</strong>ion example of a DVD recorderPlayback from AV deviceCall AV selection.AV SELECTIONHDMI2HDMI1PC INAVSAVVIDEOSwitch to ...Select AVS,OK switch over.Start playback on the connected device.Switch to ...Select AV,OK switch over.Start playback on the connected device.75 -
OKExternal devicesenglishDevices to the HDMI connectionsThe HDMI connections (High Definition Multimedia Interface) allow thetransmission of digital video and audio signals from a player (e.g. DVDplayer, DVD recorder, Blu-ray player, game console or Set-Top-Box) viaa single cable.The digital video and audio data are transmitted without data compressiondigitally and therefore lose none of their quality.A maximum of five devices can be connected in cascade to every HDMIsocket. The devices are arranged in the AV menu and in the station listbelow the appropriate HDMI socket. If the respective device sends its owndevice name, this appears in place of the connection name.Your TV set can show 24p films, which are output from a connectedHDMI player (e.g. <strong>Loewe</strong> BluTech Vision Interactive) optimally (see glossary,page 101).Digital video signals from a DVI player can be also be reproduced by theHDMI connection using a DVI/HDMI adapter cable. The sound must bepiped in additionally. However, the sound must then be supplied additionally.HDMI and DVI both use the same copy protection method HDCP.<strong>Connect</strong>ing the deviceSwitch off all equipment before connecting.<strong>Connect</strong> the device by an HDMI cable (Type A, 19-pole) to one of theHDMI sockets of the TV set.An HDMI device is connected to the side HDMI socket (e.g. camcorder)in the same way as shown in the figure.Blu-ray playerHDMITV setPlayback from the deviceIf the device at HDMI supports the Digital Link HD functionality, the TV setwill automatically switch to the corresponding HDMI input after startingthe replay at the HDMI device.The HDMI input can also be called up manually:Call AV selection.AV SELECTIONHDMI2HDMI1PC INAVSAVVIDEOSwitch to ...Select HDMI socket.With Digital Link HD-capable devices the devicename may possibly appear in place of the connectionname.OK Switch over.Start playback on the connected HDMI device. The bestpossible format for the picture is detected and set automatically.Remote TV switch on via Digital LinkYou can select whether the TV set is to switch on automatically fromStandby mode if a disc is played or a screen menu displayed on a DigitalLink HD-enabled device connected to HDMI.You can find the settings in the TV Menu under <strong>Connect</strong>ions Other Remote TV switch on via Digital Link (see also page 73).HDMI1<strong>Connect</strong>ion example of an HDMI device (e.g. Blu-ray Player)If a DVI/HDMI adapter cable is used, the corresponding sound can bepiped through the AUDIO IN (analogue) or AUDIO DIGITAL IN (digital)socket on the TV set (see also page 81).- 76
OKExternal devicesAdjust Geometry (only possible with certain signals)This allows you to shift the picture (horizontally and vertically) so that itfills the entire screen.➠ When connecting a PC to an HDMI socket of the TV set, set the outputsignal at your PC beforehand so that it corresponds to one of thesignals in the table on page 92.MENU: Call TV menu. Select Picture,go to the menu line below. Select more ...,OKcall. Select PC IN / HDMI display,go to the menu line below.MENU TVPicturePC IN / HDMI displayPicture horizontal66Select the desired setting, go to the menu line below.Make settings.Picture verticalDigital Link HDDigital Link HD (HDMI CEC)The Digital Link HD (HDMI CEC) system operation allows <strong>Loewe</strong> televisionsets to transmit the remote control signals via the HDMI connection of aTV set to compatible HDMI devices, such as e.g. <strong>Loewe</strong> AudioVision. Youcan therefore set up a concealed CEC capable HDMI device.Concealed installation of HDMI devicesFor this, first assign the HDMI CEC function with Code 22 to the requireddevice button (REC, DVD or AUDIO) as described on page 85.Now assign the Digital Link HD function to the used HDMI device.Assign HDMI device➠ The CEC capable HDMI device is connected to one ofthe HDMI sockets of the TV set and switched on.Press required button for 5 seconds.A selection menu appears on the TV set.HINTHere you select the device which you want to switch over your remote controlto with the AUDIO key. After confirming the selection with OK all remote controlcommands are passed on to the selected device via the TV set in future whenyou press this key.englishSELECT HDMI DEVICE FOR KEYAudioVisionNo deviceAdoptAUDIOOK Select required device from the list.OK Adopt.From now on, the commands of the remote control arecommunicated from the TV set to the HDMI device, ifthe corresponding device button (REC, DVD or AUDIO)has been pressed previously.77 -
OKExternal devicesenglishDevices to the PC IN connectionYou can connect a PC to the PC IN socket for example and thus use theTV screen as a monitor.➠ When connecting a PCs or accessory device to the PC IN socket of theTV set, set the output signal on your PC first so that it matches one ofthe signals in the table on page 92.<strong>Connect</strong>ing the deviceSwitch off all equipment before connecting.<strong>Connect</strong> the device to the TV set’s PC IN socket with a VGA cable.<strong>Connect</strong> the analogue audio signal of the PC to the AUDIO IN jack onthe TV set with a stereo cable.TV setPlayback from the deviceCall AV selection.AV SELECTIONHDMI2HDMI1PC INAVSAVVIDEOSwitch to ...Select PC IN socket,OK switch over.PC picture adjustment (only possible with certain signals)In this menu you can set the position (vertical, horizontal) and the phaselength of your PC.Alternatively, connect the digital audio output of the PC or accessory equipmentto the AUDIO DIGITAL IN socket of the TV set with a cinch cable.The digital audio input can be assigned to the PC IN socket by TV menu <strong>Connect</strong>ions Miscellaneous Assign digital audio input (see page 81).If your PC has an HDMI interface, you can also connect the PC via theHDMI socket to your TV set (see page 76).Depending on the version of the HDMI connection on the PC, the audiosignal is also transmitted via the HDMI connection.If this is not the case, connect the analogue or digital sound as describedabove. See the appropriate operating manual for further informationabout the version of the HDMI interface on your PC..- 78PCAUDIOVGAPC INAUDIOIN<strong>Connect</strong>ion example of a PCMENU: Call TV menu. Select Picture,go to the menu line below. Select more ...,OKcall. Select PC IN / HDMI display,go to the menu line below.TV MENUPicturePC IN / HDMI displayPicture horizontal66Select the desired setting, go to the menu line below.Make settings.Picture verticalSet Signal type at PC IN (only possible with certain signals)MENU: Call TV menu. Select <strong>Connect</strong>ions,go to the menu line below. Select Miscellaenous,go to the menu line below.Phase positionSelect and set Signal type at PC IN:RGB or Ycc / YppThe colours will not be shown correctly if the wrongstandard is set.
OKExternal devicesSound components wizardThe sound components wizard helps you to configure the componentsused to play the TV sound.You can also connect a digital HiFi/AV amplifier in addition to the TVspeakers.The sound components wizard is preset to playback via TV speakers atthe factory.englishCalling up Sound components wizardMENU: Call TV menu.Select <strong>Connect</strong>ions, go to the menu line below.Select Sound components.OK calls the sound components wizardSOUND COMPONENTSSound playback via ...TV speakers HiFi/AV amplifier or TV speakers (switchable)ProceedOKSelect the desired playback device.Explanations of the setting possibilities:TV speakers The sound is played over the built-in TV speakers.HiFi/AVamplifierHiFi/AVamplifier orTV speakers(switchable)The sound is played by a connected digital audio amplifier.The TV speakers can be used as centre speakers.The sound is played by a connected digital audio amplifier.The TV speakers can be used as centre speakers. In the soundmenu playback can be switched between the TV speakersand the external audio amplifier with Sound via... .79 -
OKExternal devicesenglish<strong>Connect</strong>ing audio amplifiersThe Sound Component Wizard allows the configuration of differentaudio amplifiers (digital stereo and surround amplifiers) with differentdigital sound formats (Dolby Digital, dts, MPEG and Stereo/PCM). See theoperating manual of the audio amplifier for more information.MENU: Call TV menu.Select <strong>Connect</strong>ions, go to the menu line below.Select Sound components.OK calls the sound components wizard<strong>Connect</strong>ing digital audio amplifiersContinuation of the left column above ...<strong>Connect</strong> the digital audio output of the TV set AUDIO DIGITAL OUT withthe digital audio input of the amplifier via a cinch cable:Digital amplifierDIGITAL INTV setMark the HiFi/AV amplifier.OK Proceed.Continue: right column.Explanations of the setting possibilities:HiFi/AVamplifier orTV speakers(switchable)SoundformatsType ofamplifierTV loudsp. ascentre speakerSOUND COMPONENTSSound playback via ...TV speakers HiFi/AV amplifier or TV speakers (switchable)ProceedSelect setting when an amplifier is connected and the TVspeakers are not used. After a HiFi/AV amplifier is registeredin the sound menu, the sound can be switchedbetween the TV speakers and the amplifier with Soundvia... .Specify sound formats which can be decoded with thedigital amplifier (see operating manual of the used amplifier).Select either stereo or surround amplifier.For every connected surround amplifier, select whetherthe TV loudspeakers are to be used as centre speaker.If so, establish a connection between the centre outputof the amplifier and the centre input of the TV setCENTER IN with a cinch cable.Attention: Do not use the centre speaker connection ofthe amplifier, use the centre pre-amp output instead!OKAUDIODIGITALOUTSound formats, amplifier type and other settings, see explanations of thesetting possibilities (left hand column).- 80
External devicesAssignment of the digital audio inputTV setIn order to be able to hear the digital sound of an external device connectedto an AV input, an AV input can be assigned to the digital audioinput socket AUDIO DIGITAL IN. When switching to this AV input, thedigital audio signal applied to the AUDIO DIGITAL IN input is passed onto the digital audio output socket AUDIO DIGITAL OUT. You will thenhear the digital sound of the assigned AV input instead of the analoguesound if available.DVD playerDIGITALOUTAVenglish<strong>Connect</strong>ing devices to the digital audio inputFor the digital audio playback from an external device, e.g. the DVD player,you have to feed the digital audio signal to the TV set.The external, digital audio signal can be played through an externallyconnected, digital audio amplifier. This must be logged into the Soundcomponent wizard (see page 80).AVAUDIODIGITALIN➠ If an external audio amplifier or <strong>Loewe</strong> Individual SoundProjector is used, this must be registered in the soundcomponents wizard (see page 80).MENU: Call TV menu.Select <strong>Connect</strong>ions, go to the menu line below.Select Miscellaneous, go to the menu line below.Select Assign digital audio input, go to the menu line below.Select AV input.noTV MENU<strong>Connect</strong>ionsMiscellaneousAssign digital audio inputto AVto AVS to HDMI1 to HDMI2To connect a DVD player to the digital audio input of theTV set for example, connect the digital output socket ofthe DVD player (DIGITAL OUT) via a cinch cable to theAUDIO DIGITAL IN socket on the TV set.<strong>Connect</strong>ion example for a DVD player, see right handcolumn.Audio connection in HDMI/DVI devicesExternal devices with DVI connectionIf an external device with DVI interface is connected via a HDMI/DVIadapter to one of the HDMI sockets of the TV set, you can connect thedigital sound of the external device to the digital audio input socketAUDIO DIGITAL IN.The assignment of the digital audio input to the corresponding HDMIsocket of the TV set takes place as described in the column on the left.If you want to use the analogue sound of the external device, connectit to the AUDIO IN socket.External devices with HDMI connectionIf external devices with an HDMI interface are connected to one of theHDMI sockets of the TV set, no assignment of the audio input is necessarybecause the digital transmission of picture and sound takes place via asingle connection in HDMI.Serial interface (RS-232C) (retrofittable)You can connect a home network system of different manufacturers (e.g.AMX, Crestron) to your TV set via the RS-232C interface.Please consult your dealer for configuration of the RS-232C interface andfurther information about the different home networking systems.81 -
OKOKExternal devicesenglishThe direct way to recordYou can programme timer recordings for connected recorders. The recordingwizard is integrated at several places for programming a recording.Programming a timer recording with the EPG➠ You are in EPG mode; if not, press the EPG button.2 ZDFTEXT DetailP+P– DateTimeStationTopicsEPG (ELECTRONIC PROGRAMME GUIDE) Mon 01.03./16:05MON 01.03.now until 17.00 17.00 18.00 19.00allallarte 15:57-16:59 Charmed - Zauberhafte HexenOKDas Erste 16:00-16:10 TagesschauZDF 16:00-16:10 heute - in EuropaWDR Köln 16:00-16:15 WDR aktuellBayerisches... 16:00-16:05 Rundschauhr-fernsehen 16:00-16:30 Schlemmerreise SpanienMDR FERNS... 16:00-16:15 Hier ab vierNDR FS HH 16:00-16:30 Tipps und Trends - Der Verbraucher...SWR Fernse... 16:00-16:05 Baden-Württemberg aktuella-Viewz Select time Mark the desired broadcast.RecordingSelect date, ..., topicsRECORD button: Call Timer data (see right hand column).MENUEntering the Timer dataAfter selecting the station you wish to record, timer datawill be displayed.The setting options for the timer data differ dependingon the recorder selection, whether an analogue or DVBstation is to be recorded or via which route (EPG, Teletext)the recording has been programmed.Change Timer data if required or,OK confirm.Setting possibilities in the Timer data menu:Date Day of recording.Recording time Time of recording.TIMER DATA17:15 BrisantRecorderAVStation01 Das ErsteDate 22.01.10Recording time 17:15 until 17:45Auto time controlnoRecording typeonce onlyconfirmOKProgramming a timer recording via teletext➠ You are in teletext mode; if not, press the TEXT button.302 302 ARDtext Do 05. 10. 06 09: 36 : 42Do 05. 10. 06 Das Erste14.00 Tagesschau14.10 In aller Freundschaft UT . . . . . . . . . . . 316Zweite Begegnung (D, 2005)15.00 Tagesschau15.10 Sturm der Liebe (221) . . . . . . . . . . . . . 31716.00 Tagesschau UT16.10 Eisbär, Affe & Co. . . . . . . . . . . . . . . . 31817.00 Tagesschau um fünf UT17.15 Brisant . . . . . . . . . . . . . . . . . . . . . . . 31917.47 Tagesschau17.55 Verbotene Liebe . . . . . . . . . . . . . . . . 32018.20 Marienhof . . . . . . . . . . . . . . . . . . . . . 32118.50 Das Geheimnis meines . . . . . . . . . . . . 322Vaters (19)19.20 Das Quiz mit Jörg Pilawa . . . . . . . . . . 384bis 19.50 UhrAuto timecontrolVPS Use VPS data for analogue stations, yes/no (1 .Use automatic time control, yes/no (2 .The recording is performed precisely at the time, even ifthe beginning/end time of the programme provider haschanged.Recording type Select once only, Mo–Fri, daily or weekly.300 303– + Jetzt im TV ARD morgenSelect programmeOK RecordRECORD button: Call the programme pages of the currentstation.Green button: Go to the appropriate page.Select desired broadcast,OK calls Timer data (see right hand column).- 82(1only available with some analogue stations.(2only available when recording via EPG.
External devicesProgramming the timer with the timer overviewAll programmed recordings, marked programmes and copy orders (1 arelisted in the timer overview. You can also programme new recordings andmark other programmes with the timer overview.New entry: Programme timer recording manually➠ Timer list is opened.Red button: Call New timer entry.englishCall Timer list. NEW TIMER ENTRYRecordingSelect Recording,OK call.OKRECORDING WIZARDOKVia EPGMemoVia teletextManualSelect Manual.For programming a timer recording Via EPG or ViaTeletext see page 82.OK Call Station selection.Red button:Green button:Yellow button:Blue button:New entry (see right hand column).Change recording.Delete recording.Delete memo.Select station.OK Call Timer data.Entry of the timer data see page 82.After confirming the timer data the new recording istransferred to the timer overview.Explanation of the symbols in the timer list:Record Repeated recording (daily, weekly or Mon-Fri) Marked programme (see page 46)New entry: Memorize programme using the timer overview➠ Timer list is opened.Red button: Call New timer entry.ordingNEW TIMER ENTRYMemoOKRecoSelect Memo.OK EPG is opened.Note desired programme as described in Switching andmemorizing with the programme list (Seite 46).83 -
External devicesOperating <strong>Loewe</strong> equipmentUsing the remote control for the TV mode of the TV setPress the TV button, the display above it will light forapprox. 5 seconds.Using the remote control for a <strong>Loewe</strong> recorderPress the REC button, the display above it will light forapprox. 5 seconds.Using the remote control for a <strong>Loewe</strong> playerPress the DVD button, the display above it will light forapprox. 5 seconds.Using the remote control for the radio mode of the TV setPress the AUDIO button, the display above it will light forapprox. 5 seconds.As long as a button is pressed, the display of the selected operating modelights up (TV – REC – DVD – AUDIO). This allows you to check which operatingmode the remote control is set to every time you press a button.The factory setting of the buttons is described above (see also table inright hand column). The assignment of the buttons can be changed tosuit the existing accessory devices (see right hand column).Setting the remote control for other <strong>Loewe</strong> devicesYou can operate various <strong>Loewe</strong> devices with the remote control. Thedevice keys REC – DVD – AUDIO can be reassigned to operate various<strong>Loewe</strong> devices.Press the required device buttons and the Stop buttonsimultaneously for 5 sec. until the corresponding LEDdisplay flashes twice.Then enter the two-digit device code from the list below.Device Code Factory setting<strong>Loewe</strong> ViewVision 8106 H 10<strong>Loewe</strong> Viewvision, Centros 21x2 12<strong>Loewe</strong> ViewVision DR+ DVB-T 13 REC<strong>Loewe</strong> Auro 2216 PS/8116 DT 14<strong>Loewe</strong> BluTech Vision 15<strong>Loewe</strong> Soundprojector 17<strong>Loewe</strong> TV - Digital radio 19 AUDIO<strong>Loewe</strong> Mediacenter 20<strong>Loewe</strong> BluTech Vision Interactive 21 DVDHDMI CEC mode 22<strong>Loewe</strong> AudioVision 24<strong>Loewe</strong> Individual Sound Projector SL 25Apple IR codes 26Resetting to factory setting 99englishThe associated LED display flashes twice.➠ The codes shown here only apply for direct operation of the accessorydevice.➠ For operation of the connected accessory device via the TV set, e.g.with concealed installation (Code 22), see page 77. The remote control’ssignal is transmitted from the TV set to the accessory device withconcealed installation.85 -
OKOKSoftware updateenglishBasic informationIt is possible to update the software on your TV set. Current softwareversions can be downloaded from the <strong>Loewe</strong> Internet site and installedon your set using a USB stick.USB stickRequirements of USB stickUSB sticks tested by <strong>Loewe</strong> and compatible in type and format can beordered from the <strong>Loewe</strong> dealer using the article no. 90437.950.If you would like to use your own USB stick, please follow these tips/conditions: Formatting in FAT32. Only 1 partition. Do not use encrypted USB sticks. Do not use USB sticks which simulate a CD ROM drive. There may be no hidden files on the device. For some types of device, the construction of the USB stick is significant.Maximum dimensions in mm: 70x20x9 If in doubt, the USB stick should be formatted as “FAT32” without“extended attributes”.DownloadSoftware download from the <strong>Loewe</strong> Internet siteYou can download new software for your TV set from our homepage.To do this register on our homepagehttp://www.loewe-uk.com (under Support Registration).Simply follow the steps in the registration process.After the successful registration process and subsequent login to thehomepage you have to register your set (have the article number and serialnumber ready – both of these are on a label stuck to the back of the set).Then you will get a list of downloadable contents for your TV set includingthe software for your TV set. Download the data and unpack all the filesin this ZIP archive into the main directory of your USB stick.Then carry out the software update as described below..Software updateIn the software update (package update) all the software releases in theTV are scanned and updated as required.To do this, insert the USB stick with the downloaded software into theUSB port on the TV set (see connections page 11).Calling Software updateMENU: Call TV menu. Select Settings,go to the menu line below. Select Miscellaneous,go to the menu line below. Select Software update,OK Call Software update Wizard.The versions of the current software package aredisplayed.SOFTWARE UPDATE WIZARDCurrent software package: V1.2.0.0TV base softwareV10.1.0.8DVB softwareV10.2.0.92DVB bootloaderV1.0.0.0WiFi softwareV0.0.11.0FRC softwareV10.4.21.0MSP softwareV8.103.0.0MPEG encoder softwareV8.22.102.0Standby processor software V1.0.0.0You can now search for new software. Please select the software type and startthe search with the button.ProceedOKProceed.The TV set searches for a new software package onthe USB stick.If a new software version is available after the search, thefollowing on-screen message appears (see page 87).If several different software packages are found on theUSB stick, the latest software package is always used.If no new software package was found in the search:OKExit wizard.- 86continued on the next page
OKOKSoftware updateNew software package foundSOFTWARE UPDATE WIZARDSoftware package: current V1.2.0.0 new V1.5.0.0If you want to load the new software now please pressstop it with .. Otherwise you canenglishProceedOKProceed.OKStart loading software.END: Exit wizard.Load new software packageSOFTWARE UPDATE WIZARDThe software package is about to be loaded.TV base software V10.4.0.17 1/5The loading process may take up to 50 minutes. Please do not switch off theTV set with the mains switch during this time.A bar shows you the progress of the download. This processcan take up to 50 min. Do not turn your set off duringthis time!You will be informed at the end of the update.After finishing loading:Switch the TV off and back on at the mains switch.87 -
TroubleshootingenglishProblem Possible cause RemedyAll menus are displayed in the wronglanguage.The menu language was set incorrectly.Set the menu language:Press the MEDIA button in TV mode. In the MediaPortal,highlight the last menu item (Index) in the upper half andcall up with OK. Mark the first key word and call it withOK. Then select the language and confirm it with OK.In the TV menu, <strong>Connect</strong>ions cannot becalled (displayed in grey).The control functions of the <strong>Loewe</strong>Recorder and the Timer are not workingor are not working properlyGeneral problems when connectingexternal devices via an AV input.A timer recording is in progress.a) The Digital Link function is not activated ornot possible in the recorder.b) EURO-AV cable is not connected.a) The AV standard is set incorrectly.b) The signal type is set incorrectly.Wait until the timer recording ends or delete thetimer recording (page 83).a) Activate Digital Link in the recorder (see operatinginstructions of the recorder).b) <strong>Connect</strong> EURO-AV cable (page 75).a) Set the correct standard (page 72).b) Set the correct signal type (page 72).If AV standard or AV signal is set to “Automatic”then this can cause errors to be detected withsignals that do not comply with standards. In thiscase standard and signal must be set according tothe information in the operating manual of theexternal device.The connection of a decoder does notfunction or does not function properly.a) The signal is not decoded because the correctdecoder stations are not selected in the menu.b) The sound is missing in decoder mode becausethe wrong decoder sound is assigned in themenu.a) Select the right decoder stations in the menu (TVmenu <strong>Connect</strong>ions Miscellaneous Decoderstations Select decoder station(s) (see page 73).b) Select the right sound code (always, never, automatic)in the menu (TV menu <strong>Connect</strong>ions Miscellaneous Decoder stations Sound encodig),see also decoder instructions.Digital Link Plus does not work.With Teletext various characters aredisplayed incorrectly.Errors occurred when running a CAmodule.a) EURO-AV cable is not fully wired (pin 10 notwired).b) Some recorders can only adopt stationsduring the initial installation of the TV set.The wrong character set has been set in theTeletext menu.a) Replace the EURO-AV cable.b) Restore the recorder to the as-delivered state(see recorder’s operating manual).Set the right character set: Select Teletext menu Settings Character set Standard or theappropriate character set.Switch the TV set off. Remove the CA-module fromthe TV set. Wait a few seconds. Reinsert the CAmodule.Switch the TV set on again.- 88
TroubleshootingProblem Possible cause RemedyNo sound via the external digital audioamplifier.a) The external digital audio amplifier does notsupport the selected sound format (DolbyDigital, dts, MPEG).b) TV set and external digital audio amplifier arenot connected with each other.a) Set PCM stereo on the DVD player in thesound selection. For DVB stations on the TVset switch to stereo in the Status display(INFO) – Language/sound (green button).b) <strong>Connect</strong> AUDIO DIGITAL OUT from the TV setto a digital input of the external digital audioamplifier and select the appropriate input tothis.englishA programmed recording was not made.Recording of analogue stations with VPS data:The programme to be recorded was not (no longer)in the programmes offered by the station via VPS.Recording of DVB stations with automatic timecontrol:The provider deleted the programme from theEPG data, for example due to a programmechange.The stations are exclusively responsible for thetransmission of VPS data (for analogue stations)or for the use of the automatic time control (forDVB or MHEG-5 stations). The availability of theappropriate data cannot be guaranteed.89 -
TroubleshootingenglishProblem Possible cause RemedyYour TV set is not assigned an IP address ifyou require the IP assignment type DHCP.a) No DHCP server is working on your network. Set up a DHCP server.Assign the IP addresses for the TV setmanually or via UPnP/DLNA.Despite video or music file being played back,no sound can be heard.Although the file is visible on the mediaserver, it is not displayed in the MediaPortal.A media file that is displayed can not beplayed back.a) The TV set is set to mute or the volume hasbeen turned down too far.b) An audio device that does not exist or that isnot connected is registered in the TV menuunder <strong>Connect</strong>ions Sound components (e.g.HiFi/AV amplifier).The file is not made available by your mediaserver.The format of the file is not supported (see alsolimitations in section File formats supported onpage 94).a) Increase the volume by pressing the V+button on the remote control for longer.This will also cancel any mute setting.b) <strong>Connect</strong> up the audio device and switch iton.In the Sound components wizard changeback to TV speakers.Change to your media server. For this, read thesection Media server software on page 94.No remedy.- 90
Technical dataGeneral dataType<strong>Connect</strong> 26 LEDArticle number50428xxxDimensions for device without stand (W x H x D) in cmDimensions for device with stand (W x H x D) in cm68.4 x 45.6 x 9.468.4 x 50.5 x 20.3Weight for device without stand (approx.) in kgWeight for device with stand (approx.) in kg9.911.4Display technologyFull-HD LCD with Edge-LED backlightScreen diagonal (in cm) / Picture format 66 / 16:9Resolution (in pixels) / Motion Response1920 x 1080 / 50 HzContrast (static / dynamic) 1,200 : 1 / 8,000 : 1Viewing angle (horizontal / vertical) 178° / 178°Power consumption (EN 62087:2009) –Power consumption „On“ (W) without / with DR+Power consumption in standby mode (W)Power consumption when the set is turned off (W)540.50Ambient temperature (Celsius) 5° – 35°Relative humidity (non-condensing) 20 – 80%Air pressure800 – 1114 hPa (0 – 2000 m above sea level)english91 -
Technical dataenglishElectrical dataChassis designation: SL 121Power supply:220 V – 240 V/50–60 HzTuner: VHF/UHF/cable/hyperband/satellite (1Range:45 MHz to 860 MHz(Antenna/cable analogue/DVB-C/T/T2 (1 )950 MHz to 2150 MHz (DVB-S/S2) (1Station storage locationsincl. AV and radio: 5000TV standards:(analogue)(digital)B/G, I, L, D/K, M, NDVB-T/T2 (1 , DVB-C, DVB-S (1 / S2 (1Colour standards:SECAM, PAL, NTSC,NTSC-V, PAL-V (60 Hz)Sound standards:Mono/Stereo/Dual-channel/Nicam B/G, I, LDolby Digital, Dolby Virtual Speaker, DTSAudio output power(music/sine):2 x 10 W / 2 x 5 WTeletext: TOP/FLOF Level 2.5Page memory: 2000Signals via PC IN / HDMIThe following table lists the compatible signals which your TV set canshow via the PC IN connection and the HDMI connections (HDMI1,HDMI2).Set the output signal on your PC, HDMI or DVI device so that it matchesone of the signals in the table.Format Horizontal x Vertical Image <strong>Connect</strong>ionfrequency480i60 720 x 480i 60Hz PC IN, HDMI576i50 720 x 576i 50Hz PC IN, HDMI480p60 720 x 480p 60Hz PC IN, HDMI576p50 720 x 576p 50Hz PC IN, HDMI1440 x 480p 60Hz HDMI1440 x 576p 50Hz HDMI720p50 1280 x 720p 50Hz PC IN, HDMI720p60 1280 x 720p 60Hz PC IN, HDMI1080i50 1920 x 1080i 50Hz PC IN, HDMI1080i60 1920 x 1080i 60Hz PC IN, HDMI1080p24 1920 x 1080p 24Hz PC IN, HDMI1080p25 1920 x 1080p 25Hz PC IN, HDMI1080p30 1920 x 1080p 30Hz PC IN, HDMI1080p50 1920 x 1080p 50Hz HDMI1080p60 1920 x 1080p 60Hz HDMIVGA 640 x 480 60Hz PC IN, HDMISVGA 800 x 600 60Hz PC IN, HDMIXGA 1024 x 768 60Hz PC IN, HDMIWXGA 1360 x 768 60Hz PC IN, HDMISXGA 1280 x 1024 60Hz PC IN, HDMI(1Equipment and upgrade options, see page 97.- 92
Technical data<strong>Connect</strong>ions (max. equipment)Designation Type Function / SignalHDMI (2x)Digital Video/Audio INType A 19pole Standard 1.3:Digital video and audioD-SUB 15-polePC/STB video signalEURO-AVVideo IN:Video OUT:Audio IN:Audio OUT:Y/C (S-VHS/Hi 8)CVBS (VHS/8 mm)RGBCVBS (VHS/8 mm)Y/C (S-VHS/Hi 8)L/RL/REthernet (8P8C) LAN: Network interfaceUSB USB 2.0: Multimedia files/software updateJack 3,5 mm Audio IN: L/RCinch (grey) Digital Audio OUT (SPDIF): Digital audioCinch (grey) Digital Audio IN (SPDIF): Digital audioCinch (grey) Audio IN: max. 2Vrms: CentreMini-DINService/L-LinkIEC socket 75 Ohm/5 V/80 mA: Antenna/cable/DVB-T/CF socket (1 75 Ohm 13/18 V/450 mA: ANT-SAT DVB-S/S2RJ12 (1 Data I/O: serial interfaceenglishCI slot Common Interface: Slot for CA moduleJack 3,5 mmHeadphones 32–2000 OhmCinch (white/red) Audio IN: L (white) / R (red)Cinch (yellow) Video IN: CVBS (VHS/8 mm)Mini-DINVideo IN: Y/C (S-VHS/Hi 8)CVBS (VHS/8 mm)(1Equipment and upgrade options, see page 97.93 -
Technical dataMediaHomeenglishFile formats supportedPictures: JPG➠ Picture files may not exceed a size of 10 MB.Music: MP3, WAV (without ADPCM), WMA 9 (compressed), flacVideo: AVI (DivX, Xvid, MPEG4), MPEG 1/2/4, WMV 9, Xvid, VOB, H.264(with AAC-LC sound)➠ In individual cases it is possible that media files can not be played backdue to the numerous available technical design and editing options.Ethernet (wired network)Standards supported: 10 Mbit/sec Ethernet (10Base-T), 100 Mbit/sec FastEthernet (100Base-T)Supported home network standardUniversal Plug and Play Audio / Video (UPnP AV)Media server softwareTo play multimedia contents from devices in your home network, yourequire media server software which makes the relevant files availableto you. Handling of individual files depends on the technical propertiesand also on the media server software used.On our homepage at http://www.loewe-uk.com you can download a testversion of the TwonkyMedia Media server. With your TV set you have simultaneouslyacquired the option if obtaining a free license for this mediaserver. Alternatively to that, you can also use other media software suchas the Windows Media Player (WMP) as of version 11.For communication with your PC, certain port addresses of the networkconnection are required. They may not be blocked by a firewall if thereis one, otherwise this could cause serious connection errors.Windows Media Player 11 requires the port addresses 1900 and the blockof 10280 up to and including 10284 (all for UDP) as well as 2869 and10243 (both for TCP). For TwonkyMedia the port addresses 1030, 1900and 9080 (all for UDP) and 9000 (for TCP) must be available.Other ports to be kept free depend on the operating system you are using.Contact your network administrator about configuring the firewall.- 94
AccessoriesUpgrade Kits / Conversion Kits / CablesenglishUpgrade kit DVB-S2 Single (Art.No. 70622.080):You can receive digital satellite and HDTV stations with the upgrade kit.The tuner is integrated in the TV set and is operated with the remotecontrol/menu control.The retrofit possibilities for your set can be found in the table on page 97.Conversion kit DVB-T2/C Single (Art.No. 70913.080):With the DVB-T2/C Single conversion kit you add the Standard DVB-T2to the reception possibilities of your TV set.The Standard DVB-T2 is not available in all countries at the momentThe retrofit possibilities for your set can be found in the table on page 97.Upgrade kit USB extension (Art.No. 70167.080):To ensure easy accessibility of the USB connection or enable USB sticksto be inserted with a large casing, the TV set can be connected to aUSB extension.This upgrade kit is available from your Technical Customer Service (seeservice addresses on page 108).Upgrade kit RJ12 (Art.No. 71025.080):A home networking system can be connected to the TV set via the RJ12(RS232C) interface.The retrofit possibilities for your set can be found in the table on page 97).Subject to availability.- 96
AccessoriesEquipment variantsThe equipment of the individual set variants and their upgrade/conversion possibilities is listed in the table below.Set variants<strong>Connect</strong> 26 LEDenglishDVB-T/C SingleDVB-T2/C Single (URS)Art.No. 70913.080DVB-S2 Single (ARS)Art.No. 70622.080RJ12 (ARS)Art.No. 71025.080ex factoryavailable / optional as an upgrade kit (ARS) / conversion kit (URS)TV set equipmentThe precise features are listed in the Integrated features item in the indexof the TV set (see page 15).97 -
AccessoriesenglishSetup possibilitiesTable StandInstruction for wall installationPlease not the following points when using a wall holder:See the disassembly sketch. Place the TV set on a soft underlay on atable as shown.Remove the four screws. Remove the Table Stand.IMPORTANT: The bottom two screws must be screwed back in afterwardsto stabilise the set:Floor Stand C 22/26Wall Mount Flex 26 S<strong>Connect</strong> 26Table Stand (delivery status)Floor Stand C 22/26Wall Mount Flex 26 S (see note in right-hand column)Now mount the wall holder as described in the installation instructions.- 98
EnvironmentEnvironmental protectionEnergy consumptionYour TV set is equipped with an eco-standby power supply. In the standbymode, the power consumption drops to low power (see Technical dataon page 91). If you want to save even more energy then switch the deviceoff with the mains switch. But please note that the EPG (electronic programmeguide) data may be lost and any programmed timer recordingsare not made by the TV set.The power consumed by the TV set during operation depends on theenergy efficiency preset in the initial installation (see page 22) or the settingin the TV menu (see page 34).If you activate the automatic dimming (see page 34), your TV picture willadapt to the ambient brightness. This reduces the power consumptionof the TV set.englishPackaging and boxYou have made a decision to purchase a high-quality technical productwith a long service life. For disposal of the packaging, in accordance withnational legislation we have paid a fee to a commissioned recycler to pickup the packaging from the dealer. Nevertheless we recommend keepingthe original box and packaging material on hand so that the device canbe transported with optimal protection if necessary.The setThe EU directive 2002/96/EC regulates the proper wayto recycle, handle and utilise used electronic devices.Old electronic devices consequently must be disposed ofseparately. Please do not dispose of this device in normalhousehold trash!You may return your used set free of charge at designatedrecycling centres or at your specialist dealer whenever you purchase anew, comparable set. Additional details about return (also for non EUcountries) are available from your local municipal authorities.BatteriesThe batteries supplied as initial equipment do not containany pollutants such as cadmium, lead, or mercury.Used batteries should no longer be disposed of in the domesticwaste according to the Battery Ordinance. Disposeof your batteries at no charge in the collection containerswhich are set up for this purpose in retail stores.✄The code number cancels an accesscode and thus the parentallock. Please keepin a safe place.99 -
Legal notesenglishTrademarksManufactured under licence from Dolby Laboratories. “Dolby”, “ProLogic” and the double-D symbol are trademarks of Dolby Laboratories.Manufactured under license under U.S. Patent #’s: 5,451,942; 5,956,674;5,974,380; 5,978,762; 6,487,535 & other U.S. and worldwide patentsissued & pending. DTS and DTS Digital Surround are registered trademarksand the DTS logos and Symbol are trademarks of DTS, Inc. © 1996-2007DTS, Inc. All Rights Reserved.The screen font “<strong>Loewe</strong>L2700” is based on the “Tavmjong Bah Arev(tavmjong.free.fr)” font, which in turn is based on “Bitstream Vera”.Bitstream Vera is a trademark of Bitstream Inc.This product contains software which was developed by third partiesand / or software which is subject to GNU General Public License (GPL)and/or GNU Lesser General Public License (LGPL). You can pass on andmodify them in accordance with Version 2 of the GNU General PublicLicense or optionally every later version which is published by the FreeSoftware Foundation.<strong>Loewe</strong> publishes this programme WITHOUT ANY GUARANTEE OR SUP-PORT especially without an implicit guarantee of MARKET MATURITY orAPPLICABILITY FOR A CERTAIN PURPOSE. Details can be found in theGNU General Public License. You can order the software from <strong>Loewe</strong>Customer Service.You can download the GNU General Public License here:http://www.gnu.org/licenses/.This set contains a software which is based partly on the work of theIndependent JPEG Group.DivX and the corresponding DivX logos are registered trademarks ofDivX, Inc.This product includes software developed by the OpenSSL Project for usein the OpenSSL Toolkit (http://www.openssl.org/).This software is provided by the OpenSSL project “as is“ and any expressedor implied warranties, including, but not limited to, the implied warrantiesof merchantability and fitness for a particular purpose are disclaimed. In noevent shall the OpenSSL project or its contributors be liable for any direct,indirect, incidental, special, exemplary, or consequential damages (including,but not limited to, procurement of substitute goods or services; lossof use, data, or profits; or business interruption) however caused and onany theory of liability, whether in contract, strict liability, or tort (includingnegligence or otherwise) arising in any way out of the use of this software,even if advised of the possibility of such damage.This product includes cryptographic software written by Eric Young (eay@cryptsoft.com).This product includes software written by Tim Hudson (tjh@cryptsoft.com).- 100
Glossary0-924p movie display: Films released on Blu-ray Disc support presentation of24p cinema films. The Blu-ray player transfers the original film format tothe television with 24 frames per second. The DMM (DigitalMovieMode)set in the factory calculates and inserts additional intermediate pictures,which suppress film jerking typical for the cinema, thereby providing fora smooth motion sequence.AActive antenna: An antenna with its own power supply or amplificationwhich can improve the reception is areas with a poor coverage.Administrator: Person who administers the network, i.e. takes care ofsetting up and maintaining all components belonging to the network.Automatic time control: Similar to VPS for analogue stations the automatictime control monitors the start and end times of programmes from DVBstations. If these times deviate from the data programmed in the timerdata the running time of the recording is adapted automatically. Theautomatic time control is not supported by all DVB stations.AVI: Abbreviation for Audio Video Interleave, a video container file formatdeveloped by Microsoft. A single AVI video file can contain several audio,video and text data streams (thus the name container format).AV socket: Socket for audio and video signals.AV sources: Audio/video source.AVS: Audio/video sockets on the side of the TV set (cinch and mini-DIN).BBand: Name for a transmission range.Blu-ray Disc: The follow-up format of DVD. The contents of about fiveDVDs fit onto one Blu-ray Disc (abbreviated BD). Therefore, the Blu-raydisc provides enough space for high-resolution images and multi-channelsound formats.BMP: Abbreviation for Bitmap, a grid graphics format designed for MicrosoftWindows and OS/2 that is wide spread and therefore supported byalmost every popular graphics software package without any problems.CCA module: The Conditional Access module contains the coding systemand compares the transmitted code with the one on the Smart Card. Ifthey match, the appropriate stations or programmes are decoded.CEC: Abbreviation for Consumer Electronics Control. CEC provides universalcomponent control functions for entertainment electronics devices(e.g. System standby, One Touch Play). CEC is also known as Digital LinkHD at <strong>Loewe</strong>.Cinch cable: Cable for transmitting audio or video.CI slot: See Common Interface.Client: Also referred to as network client; describes an end device suchas your TV set that is connected to the network and gets data from a(media) server to make it accessible to the user.Common Interface: The Common Interface (CI slot) is a standardisedinterface. By inserting suitable decoding modules (CA modules) and aSmart Card coded digital programmes can be used.Common Interface Plus: CI Plus is an advanced development of the CommonInterface standard. CI Plus slots are in principle downward compatibleto the previous CI standard, i.e. CA modules and Smart Cards accordingto the past CI standard can continue to be used in CI Plus slots, as far asthe programme provider permits this. Additionally, extended regulationsapply however to CI Plus.Component IN: <strong>Connect</strong>ion in which the video signal is transmitted viathree separate cinch connections. It is made up of the brightness signal“Y“ and the colour difference signals “Pb“ and “Pr“. YPbPr is the originalanalogue version of the digital YCbCr in which video data saved on theDVD as well as transmitted via satellite, cable or antenna in DVB arecolour coded.Conditional Access module: See CA module.DDecoder: Analogue, coded TV signals are passed through a decoder andmade visible again.DHCP: Abbreviation for Dynamic Host Configuration Protocol. DHCP allowsautomatic assignment of IP addresses with the aid of a DHCP server.DHCP server: Network service which takes care of automatic assignmentof IP addresses to clients.Digital Link: System for controlling recorders (for video and DVD recordersfrom <strong>Loewe</strong>) via the Euro AV sockets of the <strong>Loewe</strong> TV set with concealedsetup. Controlling the recorder for timer recordings.Digital Link HD: System for controlling devices via the HDMI connectionof the <strong>Loewe</strong> TV set in the case of concealed installation.Digital Link Plus: System for controlling recorders according to protocol50. For analogue stations the station and timer data are transmitted viathe EURO-AV socket to the recorder. The timer recording is executedexclusively by the recorder. There is a different designation with differentmanufacturers.DivX: Video Codec which allows even large files to be relatively highlycompressed in their file size without having to tolerate important qualitylosses.DNS: Abbreviation of Domain Name System. Readable names (e.g. www.loewe-int.de) are assigned to numerical IP addresses. DNS servers areresponsible for the resolution of readable addresses into the correspondingIP addresses.english101 -
GlossaryenglishD (continue)Dolby Digital: Digital multi-channel audio. The digital standard for highquality home movie systems. The individual channels are broadcast separatelyin this standard. The three front channels right, left and centre,the two surround channels right and left and the external subwooferchannels are called a 5:1 signal.Dolby Pro Logic: Analogue multi-channel audio. Converts a Dolbycodedstereo signal into a surround sound. This usually contains fourchannels (front left, centre, front right, surround channel). A specialsubwoofer channel is not generated in this method.Dolby Pro Logic II: Analogue multi-channel audio. Dolby Pro Logic II is afurther development of Dolby Pro Logic. This method generates a 6-channelspatial sound from a stereo or Pro-Logic signal (front left, centre, frontright, surround left, surround right, subwoofer).Dolby Surround: Analogue multi-channel audio system that brings fouraudio channels down to two audio tracks with the aid of a matrix coding.Dolby Virtual Speaker: The Dolby Virtual Speaker technology simulates thesurround playback of a real 5.1-channel playback with only two speakers.DRM: Digital Rights Management. Processes to control copyright protecteddata. To be used correctly, DRM protected contents require notonly a DRM capable device but also the possession of a license issuedby the provider (to be paid for).DTS: Digital Theater Systems; Digital multi-channel audio.DVB-C/-S/-T: Digital Video Broadcasting stands for digital television.Technical DVB is the standardised process for transmitting digital content(television, radio, multi-channel audio, room sound, EPG, Teletext, andother supplemental services) through digital technology. C stands fortransmission via cable, S for distribution via satellite and T for terrestrialor antenna distribution.DVD: Abbreviation of Digital Video Disk and later Digital Versatile Disk.DVD preceiver: Combi-device of DVD player and radio without integratedamplifier.DVI: Digital Visual Interface, is an interface for transmitting digital videoand graphic data (without audio).Dynamic contrast ratio: Here the light intensity of the display is adaptedin case of a high black portion in the picture. The so-called backlightsare dimmed automatically and the contrast ratio increases temporarily,i.e. dynamically.EElectronic Programme Guide: See EPG.EPG: Electronic Programme Guide is the electronic variant of a printedTV guide. Using the EPG you can watch the TV programme of the TVstation, transfer the appropriate data. The list of programmes containsthe title, beginning and end and duration of the programme. In additionbrief descriptions of the content of the programmes is also displayed.Ethernet: Cable linked data net technology for local networks (LANs). Alsocovers standards for e.g. plug connectors and transfer speeds.Euro AV socket: Interface for connecting video devices to a TV set. Thissocket is also referred to as Scart socket.FFLOF: Full Level One Facilities. Teletext system in which names andnumbers of the jump destinations are transmitted in the bottom lineon every page. This guides the reader to related topics for example. Aninformation about which pages exist and which pages have sub-pagesis not available in FLOF.GGateway: Transfer into another network; in this case connection fromhome network to internet.The network device is usually used as the standard gateway whichproduces this connection. The DSL router generally also represents theinternet gateway.HHDCP: High-bandwidth Digital Content Protection. Coding system providedfor the DVI and HDMI interfaces for secure transmission of audioand video data.HDMI: High Definition Multimedia Interface is a newly developed interfacefor full digital transmission of audio and video data.HDTV: High Definition Television is an umbrella term that covers a numberof high resolution television standards.HD-Ready: A quality seal that is awarded to products that are capable ofdisplaying high-definition television (HDTV).High band and Low band: Transmission ranges for satellites.Host: Computer that the server services are provided from, i.e. that makesdata available. Refer also to media server.IID3 tags: Additional information for MP3 and WMA audio files. Informationabout the singer, title, album and album cover can be saved hereamong other things. These data are edited on the PC by an ID3 tag editor.IP address: IP addresses (Internet Protocol Addresses) are used to identifydevices in an Internet Protocol (IP) network. IP addresses are made up offour groups of numbers of three digits each.IR-Link: The IR-Link function allows the operation of accessory deviceswith concealed installation made by other manufacturers via the <strong>Loewe</strong>TV set. The infrared sensor required for this is available as an accessoryand can be connected to the IR-Link connection of the TV set.- 102
GlossaryJJPEG/JPG: Joint Photographic Experts Group is a committee which hasdeveloped a standard method for the compression of digital photos. Thismethod JPEG (JPG for short), named after the committee, is a commonlyused graphic format for photos.LLAN: Abbreviation for Local Area Network. Mainly used as a designationfor networks with wiring (Ethernet).LCD: Liquid Crystal Display.LCN: Logical Channel Numbers. In stations with LCN, the channel locationnumber belonging to the station is also transmitted by the provider.The stations are sorted according to these channel location numbers.L-Link: Intelligent system connection between <strong>Loewe</strong> devices for theautomatic exchange of information. Makes the operation of TV and<strong>Loewe</strong> system components even more convenient.LNB/LNC: The crucial electronic component of a satellite antenna isreferred to as an LNB (Low Noise Block Converter). It is mounted in thefocal point of a parabolic antenna. The designation LNC (Low NoiseConverter) indicates that conversion to lower intermediate frequencytakes place. The supplemental block in the LNB refers to the fact that awhole frequency range (a block) is converted in each case.MMAC address: Hardware address of a network adapter, e.g. the networkcard in the PC. It is permanently assigned by the manufacturer and isused to uniquely identify devices in networks.Mbit/sec: Information about the transfer rate in networks in megabits,i.e. millions of characters per second. The transmission speed in wirednetworks is 10 Mbit/sec or 100 Mbit/sec (Fast Ethernet).Media server: Stands for the device which multimedia contents are storedon, but is also the name for the service provided by the device that makesthis data available to the network.MHEG-5: Digital teletext standard of the Multimedia and Hypermedia ExpertGroup. At the moment only available in United Kingdom and Ireland.Modulator: Transmitter in the video or DVD recorder so that the devicescan receive signals via the tuner of the TV device.Mono: Single-channel audio.MPEG: Digital compression process for video.MP3: Data format for compressed audio files.Multimedia contents: Videos, music files and photos are grouped togetherunder this term.NNAS: Abbreviation for Network Attached Storage. The term describes ahard disk which is independently linked to the network (i.e. without a PC).Network ID: NID refers to the so-called programme ID number, also knownas network ID – a number between 0 and 8191. This specification isnecessary in specific cable networks of some countries. Then only DVBsignals of this station network are searched for.NICAM: Audio standard. Is used in Denmark, England, France, Sweden,and Spain.NTSC: American colour standard.PPage Catching: For teletext, refers to going to and calling a pagenumber.PAL: European standard.PCM: Pulse Code Modulation for digital sound.Picture in Picture: See PIP.PIP: Picture in Picture; a function which displays two pictures on thescreen.Pixel: Denotes both the smallest unit of a digital graphic grid and itsdisplay on a screen with grid control.Pixel error: A pixel error is a defective pixel, usually on an LCD. Pixel errorsmay be caused by production errors. They are expressed for example bya constantly lit pixel or a constantly black pixel. Single defective pixelshowever are excluded from a guarantee.PNG: Abbreviation for Portable Network Graphics, a freely available gridgraphics format for loss-free compression.Port: A port is part of a network address (or also IP address). It allowsassignment of data packages to various services which are running onone device under the same network address.Powerline: Powerline refers to a type of wired network connection inwhich data can be transmitted via the domestic power supply using theoptionally available adapters.Progressive JPEG: Progressive JPEGs are built up gradually. The quality ofthe picture increases progressively during the loading process.ProScan/Progressive Scan: Progressive Scan (abbr. PS) or full picturemethod is a technique in the picture build-up of monitors, TV sets,beamers, and other display devices in which the output device is notsent line interlaced half pictures – unlike in the interlace technique – butreal full pictures.english103 -
GlossaryenglishRRGB: Colour signals red, green and blue.Router: Device for connecting up several networks, e.g. home networkand internet.SSatellite tuner: Receiver for satellite programmes.SDTV: Standard Definition TeleVision.SECAM: French colour standard.Set-Top-Box: Set-Top-Box (STB for short) refers to a device in entertainmentelectronics which is connected to another device, usually a TV set,and offers the user additional functional options.Signal input groups: Depending on the applied signal, the signal sourcesare divided into different groups. All signal input groups with their correspondingsignal types and the possible inputs are listed below.TV analogue:Signal type: FBAS, YC, RGB-SD (480i/576i), Component-SD (480i/576i)Input: Tuner analogue, AV, AVSTV digital:Signal type: DVB-SD, HDMI-SD (480i/576i)Input: Tuner digital, HDMI1, HDMI2HD analogue:Signal type: RGB-HD (video mode: e.g.1920x1080, 1280x720),Component-HD (video modes: e.g. 1920x1080, 1280x720)Input: PC INHD digital:Signal type: DVB-HD, HDMI-HDInput: Tuner digital, HDMI1, HDMI2PC:Signal type:Input:RGB(PC modes: e.g. 800x600, 1024x768, 1280x1024, 1360x768)PC INPhotoViewer:Input: USBSignal strength: Strength of the received antenna signal.Signal quality: Quality of the incoming antenna signal.Smart Card: The Smart Card is an electronic chip card issued by the respectiveprogramme provider or by the certification-free Pay-TV operators. Itcontains the code which is decoded by the CA module.Static contrast ratio: Describes the difference between the brightest anddarkest picture display.Stereo: Dual-channel audio.Switch: Device for connecting several computers to a network.Switch voltage: Video devices specify this voltage to switch the TV deviceto playback.Symbol rate: Describes the transmission speed for data transmission.TTerrestrial: In data transmission a wireless transmission that does not usesatellites as intermediate station is referred to as terrestrial.TFT: Thin Film Transistor. One widely distributed application is control ofliquid crystal flat screens, for which a signal transistor is used for eachpixel. This design of display is also referred to as active matrix, howeverit is frequently also referred to as TFT display.TOP: Table of Pages. Teletext system in which the individual pages aredivided into topics. The blocks stand for a higher hierarchy level (e.g.News, Sport, Programmes) and the groups for the level below (e.g. Home/Abroad, Football/Tennis). Abbreviations can be assigned to the pageswhich are displayed in colour on the bottom line and can be selectedwith the four coloured buttons on the remote control. Information is alsotransmitted about which pages exist and which of them have sub-pages.Tuner: Another term for receiver.UUPnP AV: Abbreviation for Universal Plug and Play Audio / Video. Is usedto control network devices from all manufacturers. Has become a widespread standard for home networking.USB: Universal Serial Bus. Serial bus system for connecting external devices(USB card reader, USB stick).VVGA: PC interface for connecting a monitor.VPS: The Video Programming System (VPS) is a signal which some (butnot all) analogue TV stations transmit in the blanking gap. The signal isused by video and DVD recorders when recording programmes to reactto delays in start time, programme changes and excesses of the plannedprogramme time.WWired network: see LAN.WMA: Abbreviation for Windows Media Audio, Microsoft’s own audiodata format. The contents are compressed as in MP3 files.WMV: Abbreviation for Windows Media Video, Microsoft own videodata format.- 104
GlossaryYYcc/Ypp: Colour standards for Set-Top-Boxes.YCbCr: Digital colour model, see COMPONENT IN.YPbPr: Analogue colour model, see COMPONENT IN.english105 -
Indexenglish0-924p format ................................................76AAccess code ...............................................52Adjusting the picture ..................................34Adjusting the sound ...................................32Alarm ........................................................53Allow switching voltage .............................72Antenna DVB .............................................72Assign digital audio input ...........................73Audio adjustment ......................................32 .........................................80AUDIO button ..................................... 21, 85Auto format ...............................................34Automatic speech detection .......................33AV audio signal ..........................................33AV standard ...............................................72BBalance ......................................................33Batteries ....................................................20Blu-ray player .............................................76Brightness ..................................................34Button functions ........................................36CCamcorder .................................................74CA module ................................................55CA module selection ..................................39Change favourites lists ...............................43Add station ............................................43Delete station .........................................43Move station ..........................................43Rename list ............................................43Change station ..........................................42Delete station .........................................42Move station ..........................................42Rename station ......................................42Restore station .......................................42CI slot ........................................................55Cleaning and care ........................................9Code number .............................................52Coloured buttons .......................... 36, 39, 48Colour intensity ..........................................34Colour temperature....................................34<strong>Connect</strong>ing antennas .................................19<strong>Connect</strong>ing the TV Set ...............................19<strong>Connect</strong>ions ..............................................11Contrast .....................................................34Control unit ...............................................10Copy protection .........................................84DData capture ..............................................47Decoder .....................................................73Decoder stations ........................................73Device at connection AV ............................72Digital audio input .....................................81Digital camera ............................................74Digital Link HD (HDMI CEC) ........................77Digital Link Plus ................................... 73, 84Digital Noise Control ..................................34Digital teletext ...........................................50Display .......................................................21DVB character ser ......................................39DVB subtitles .............................................36DVD button ...............................................85DVD player ................................................76DVD recorder .............................................76DVI/HDMI ..................................................76EEncrypted stations ............. 23, 24, 27, 40, 55 ................................. 15, 22Environmental protection ...........................99EPG ...........................................................46FFactory settings picture/sound ....................34Favorites ....................................................31First installation wizard ...............................22FLOF ..........................................................48GGame console ............................................76HHDMI .........................................................76HDMI CEC .................................................77Headphone volume....................................32Help ...........................................................15IIndex in the TV set .....................................15Info display ................................................15Installing the TV set ....................................18Interactive data services .............................50LLanguage ................................ 15, 22, 53, 88Language/sound ........................................39Last station ................................................36LNC/LNB ....................................... 25, 26, 27Logical Channel Number ............................23Loudness ...................................................32MMains switch....................................... 10, 21Manual station search ................................41Maximum volume ......................................33Max. switch on volume ..............................33MediaAccess ....................................................57Overview ................................................57Quit .......................................................57MediaHome ...............................................62Media menu ..............................................58MediaMusic ...............................................68MediaNet ..................................................65MediaPhoto ...............................................70Full-screen mode ....................................70Rotate picture ........................................70Slide show ..............................................70MediaPortal ...............................................14MediaUpdate .............................................56MediaVideo ...............................................71Wind ......................................................71Memorise ..................................................46Menu operation .........................................12Mobile phone keypad ................................12Move picture vertically ...............................35Muting ......................................................32NNumeric buttons ........................... 12, 15, 30OOn/Off button ............................................10On-screen displays .....................................54Overview diagram ......................................16- 106
IndexPPage selection ............................................48Parental lock ..............................................52PC IN .........................................................78Personal text pages ............................. 36, 49Picture .......................................................34Picture adjustment .....................................34Picture format ..................................... 34, 35Cinema ..................................................35PALplus ..................................................35Panorama ...............................................35Zoom .....................................................35Picture in Picture ........................................44PIN ............................................................52PIP .............................................................44Programme info .........................................36RRadio menu ........................................ 17, 51Radio mode ........................................ 21, 50REC button ................................................85Recording ..................................................82Recording wizard .......................................82Remote control ............................... 3, 20, 85Remote TV switch on via Digital Link ..........73Repeat initial installation ............................22Reset picture/sound ...................................34RGB fade-in at AV ......................................72RS-232C interface ......................................81SSafety ......................................................8, 9Scope of delivery ..........................................7Search wizard ............................................40Selecting Audio/Video Source ....................31Select satellite installation ...........................24Select station .............................................30with the favourites lists ...........................31with the numeric buttons of theremote control .....................................30with the P+/P- buttons of theremote control .....................................30with the station list .................................30Serial interface ...........................................81Set Covers ..................................................18Set-Top-Box ...............................................76Sharpness ..................................................34Signal type .................................................72Signal type at PC IN ...................................73Small PIP ............................................. 44, 45Smart Card.................................................55Software download ...................................86Software update ........................................86Sound ........................................................32Sound adjustment ......................................32Sound components wizard .........................79Sound effects .............................................32Sound off ..................................................32Sound-picture synchronisation ...................32Sound via ...................................................32Split screen ......................................... 44, 45Standby mode ...........................................21Station list ..................................................30Station search/update ................................40Status display .............................................38Subtitles .............................................. 36, 39Switching off .............................................21Switching on ..............................................21Switch on TV when marked .......................47TTeletext ......................................................48Teletext functions .......................................36Teletext subtitles ........................................36Time ..........................................................37Time and date ............................................54Timer data .................................................82Automatic time control...........................82Date .......................................................82Recording time .......................................82Recording type .......................................82VPS ........................................................82Timer functions ..........................................53Timer list ....................................................83Timer recordings ........................................82TOP ...........................................................48TOP table ...................................................48TV button ........................................... 20, 85TV menu ....................................................16TV set equipment .......................................97UUPnP..........................................................56USB stick ....................................................86VVideo podcastVideo podcast by genre ..........................66Video podcast by location ......................66Videotext subtitles .....................................49Volume ......................................................32Volume adjustment ....................................33VPS times ...................................................49WWeb TVWeb TV by genre....................................67Web TV by location ................................67english107 -
Service<strong>Loewe</strong> Austria GmbHParkring 121010 Wien, ÖsterreichTel +43 - 1 22 88 633 - 0Fax +43 - 1 22 88 633 - 90Email: loewe@loewe.co.at<strong>Loewe</strong> Opta GmbH,Customer Care CenterIndustriestraße 1196317 Kronach, DeutschlandTel +49 1801–22256393Fax +49 9261–99500Email: ccc@loewe.deEISAGOGIKI EMBORIKI ELLA-DOS S.A.321 Mesogion Av.152 31 Chalandri-Athens, HellasTel +30 - 210 672 12 00Fax +30 - 210 674 02 04Email: christina@bose-onkyo.grA CappellaAusros Vartu 5, Pasazo skg.01129 Vilnius, LithuaniaTel +370 - 52 12 22 96Fax +370 - 52 62 66 81Email: info@loewe.ltAvitech Co. SRL1/II Pipera Tunari St.007190 Voluntari, Ilfov, RomaniaTel +40 - 21 200 64 64Fax +40 - 21 200 64 65Email: andrei.silisteanu@avitech.roInternational DynamicsAustralasia Pty Ltd.129 Palmer StreetRichmond 3121, Victoria,AustraliaTel +61 - 3 - 94 29 08 22Fax +61 - 3 - 94 29 08 33Email: mail@internationaldynamics.com.au<strong>Loewe</strong> Opta Benelux NV/SAUilenbaan 842160 Antwerpen, BelgiëTel +32 - 3 - 2 70 99 30Fax +32 - 3 - 2 71 01 08Email: ccc@loewe.beDarlington ServiceKn. Klementina Street, bl. 193Tel +359 - 2 955 63 99Fax +359 - 2 955 63 99Email: sac@audio-bg.comTelion AGRütistrasse 268952 Schlieren, SchweizTel +41 - 44 732 15 11Fax +41 - 44 732 15 02Email: lgelpke@telion.chHADJIKYRIAKOS & SONS LTD.121 Prodromos Str., P.O Box215871511 Nicosia, CyprusTel +357 - 22 87 21 11Fax +357 - 22 66 33 91Email: savvas@hadjikyriakos.com.cyBASYS CS SPOL. S.R.OSodomkova 8/147810200 Praha 10 - Hostivar, Tel +420 2 34 70 67 00Fax +420 2 34 70 67 01Kjaerulff1 Development A/SC.F. Tietgens Boulevard 195220 Odense SØ, DenmarkTel +45 - 66 13 54 80Fax +45 - 66 13 54 10Email: loewe@loewe.dkGaplasa S.A.Conde de Torroja, 2528022 Madrid, EspañaTel +34 - 917 48 29 60Fax +34 - 913 29 16 75Email: loewe@maygap.comTEDRA TRADING OYKuusemetsa 3Saue 76506, EstoniaTel +372 - 50 14 817Fax +372 - 67 09 611<strong>Loewe</strong> Opta France SAS13 rue du Dépôt,Parc del l‘Europe, BP 1001067014 Strasbourg Cédex, FranceTel +33 - 3- 88 79 72 50Fax +33 - 3- 88 79 72 59Email: loewe.france@loewe-fr.comKarevox OyMuseokatu 3600100 Helsinki, FinlandTel +358 - 9 44 56 33Fax +358 - 9 44 56 13<strong>Loewe</strong> UK LimitedCentury Court, Riverside WayRiverside Business Park, Irvine,AyrshireKA11 5DJ, UKTel +44 - 1294 315 000Fax +44 - 1294 315 001Email: enquiries@loewe-uk.comBasys Magyarorszagi KFTTó park u.9.2045 Törökbálint, MagyarTel +36 - 2341 56 37 (121)Fax +36 - 23 41 51 82Email: basys@mail.basys.huPlug&PlayBednjanska 8, 10000 ZagrebHrvatska (Kroatia)Tel +385 1 4929 683Fax +385 1 4929 682Email: loewe@loewe.hr<strong>Loewe</strong> Italiana S.r.L.Largo del Perlar, 1237135 Verona (VR), ItaliaTel +39 - 045 82 51 611Fax +39 - 045 82 51 622Email: info@loewe.itClear electronic entertainment(2009) Ltd13 Noah Mozes St.Agish Ravad BuildingTel Aviv 67442, IsraelTel +972 - 3 - 6091100Fax +972 - 3 - 6961795Email: yossi@pioneer-il.comOrigo LtdUnit 23 Magna DriveMagna Business Park, City WestDublin 24, Republic of IrelandTel +353-1-4666700Fax +353-1-4666708Email: service@origo.ieSALEM AGENCIES & SERVICES CO.Hamad Al Haqueel Street,Rawdah, JeddahKingdom of Saudi ArabiaTel +966 (2) 665 4616 ext: 666Fax +966 (2) 660 7864Email: hkurkjian@aol.comDONEO CO. LTD34/36 Danny Cremona StreetHamrun, HMR02, MaltaTel +356 - 21 - 22 53 81Fax +356 - 21 - 23 07 35Email: info@doneo.com.mtSOMARA S.A.377, Rue Mustapha El Maani20000 Casablanca, MoroccoTel +212 - 22 22 03 08Fax +212 - 22 26 00 06Email: somara@somara.maPCE. PREMIUM CONSUMERELECTRONICS asOstre Kullerod 53241 Sandefjord, NorgeTel +47 - 33 48 33 48Fax +47 - 33 44 60 44Email: oddgunnar@loewe.noInternational Dynamics (NZ)Pty LtdPO Box 109 317, NewmarketAuckland, New ZealandTel +64 9 379 0179Fax +64 9 379 0279Email: enquiries@internationaldynamics.co.nzMayro Magnetics Portugal, Lda.Rua Professor Henrique de BarrosEdifício Sagres, 2º. C2685-338 Prior Velho, PortugalTel +351 - 21 942 78 30Fax +351 - 21 942 78 30Email: geral.loewe@mayro.ptDSV TRADING SAPlac Kaszubski 881-350 Gdynia, PolskaTel +48 - 58 - 6 61 28 00Fax +48 - 58 - 6 61 44 70Email: market@dsv.com.plService Center <strong>Loewe</strong>ul. Verkhnaya Maslovka, d. 29125083 Moscow, Tel +7 - 495 612 50 43Fax +7 - 495 612 47 10Email: service@atc.ruKjaerulff 1 ABRidbanegatan 4, Box 9076200 39 Malmø, SverigeTel +46 - 4 06 79 74 00Fax +46 - 4 06 79 74 01Email: sweden@kjaerulff1.comBaSys Czech & Slovak s.r.o.Stará Vajnorská 17/A831 04 Bratislava, SlovakiaTel + 421 2 49 10 66 18Fax + 421 2 49 10 66 33Email: loewe@basys.skENKAY ELEKTRONIK SAN. VeTic. Ltd. Sti.Alemdag Cad: Site Yolu No.: 1081230 Ümraniye/ Istanbul, TürkiyeTel +90 - 216 634 44 44Fax +90 - 216 634 39 88Email: mhatipog@enkaygroup.comDubai Audio CenterP.O. Box 32836, Sheik Zayed RoadDubai, UAETel +971 - 4 343 14 41Fax +971 - 4 343 77 48Email: dacdubai@emirates.net.aeTHE SOUNDLAB (PTY) LTDP.O. Box 31952, Kyalami 1684Republic of South AfricaTel +27 - 1 14 66 47 00Fax +27 - 1 14 66 42 85Email: loewe@mad.co.za© by <strong>Loewe</strong> Opta 200110108