Dynasty Shocker Board Instructions - Mcarterbrown.com
Dynasty Shocker Board Instructions - Mcarterbrown.com
Dynasty Shocker Board Instructions - Mcarterbrown.com

Create successful ePaper yourself
Turn your PDF publications into a flip-book with our unique Google optimized e-Paper software.
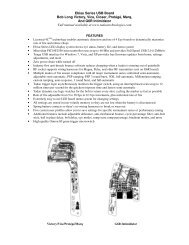
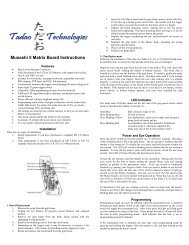
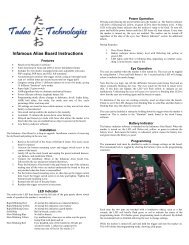
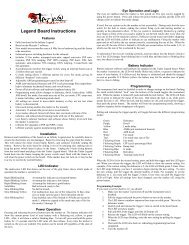
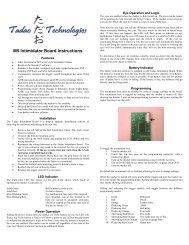
Eye OperationThe eyes are always enabled when the marker is first turned on. To toggle the eyes on and off push and release thepower button quickly. The led will change from a solid blue to a blinking blue to indicate the eyes are disabled. Ifat any time the eyes be<strong>com</strong>e <strong>com</strong>pletely blocked while they are enabled the rate of fire will be capped to preventadditional chopping.ProgrammingWhile the marker is turned off, push the side mounted switch on the circuit board. This will initiate theprogramming mode, showing solid green on the programming LED located on the backside of the board.Pulling and releasing the trigger quickly will toggle between the different programming modes:Green - debouncePurple - dwellOrange - loader delayBlue - AMBRed - ABS dwellWhite - back pulseWhile the led is lit for the desired setting you would like to change, press and hold the trigger until the led goes out.When you release the trigger, the led will show the current setting by blinking. For instance, if the current settingfor debounce is 5, the led will blink green 5 times. Once the led stops blinking, you have 2 seconds to beginentering the new setting.To enter the new setting, pull the trigger the desired number of times. For instance, to set the debounce to 2, youwould pull the trigger 2 times.After all settings have been changed to the desired amounts, turn the marker off using the power button.Programming Example:If you wanted to set the dwell to 12, you would:1. Make sure the marker is powered off.2. Open the left side of the grips.3. Push the side mounted programming switch.4. The programming led shows green. This is the debounce mode.5. Pull and release the trigger one time quickly to switch to the dwell mode. The led is showing purple.6. Pull and HOLD the trigger until the led turns off.7. Release the trigger. The led will blink out the current setting.8. When the led stops blinking, enter the new setting by pulling the trigger 12 times.9. Wait until the led turns back on, indicating programming has <strong>com</strong>pleted.10. Turn the marker off using the power button.SettingsDebounce – An adjustable number of microcontroller cycles after each trigger pull and release where the state of thetrigger switch must remain consistent before the software starts looking for additional trigger activity. Setting thistoo low may cause trigger bounce, leading to falsely generated shots. The default is 5 and may be set from 1 to 50.
Dwell: This is the amount of time that the solenoid is energized during each firing cycle. If you experience drop offor your bolt will not cycle <strong>com</strong>pletely then turn the dwell up. Greater efficiency and faster firing rates are achievedby lowering the dwell. The default is 10 milliseconds and may be set from 1 to 20.Loader Delay: This adds a slight delay after the eye has seen a ball and the bolt is cycled, causing the gun to fire. Ifnot using force fed loaders it may be necessary to increase this setting to prevent chopping. A setting of 1essentially means no loader delay, which is the fastest. The default is 1 and may be set from 1 to 50.AMB: This setting allows the user to adjust the anti-mechanical bounce feature. Mechanical bounce occurs with theshocker due to the kick generated during each shot and can cause the marker to “run away”, firing even after thetrigger has been let go. AMB helps stop markers from going full auto when the trigger is pulled very slowly. Thedefault is 10 and may be set from 1 to 25. A setting of 1 disables AMB.ABS Dwell: This setting adjusts how much additional dwell time is added when an anti-bolt stick shot takes place.If a marker is left sitting for 10 seconds, the next shot fired will be ABS enabled, and will add the ABS Dwell settingto the Dwell to ensure that there is no low shot. Depending on your bolt setup this shot may have a slightly highervelocity. The default is 5 milliseconds additional dwell and may be set from 1 to 10. A setting of 1 disables ABS.Back Pulse: This is the delay after the dwell time before another shot can begin when the eyes are disabled. Whenthe eyes are turned on, the rate of fire is unlimited. To calculate the rate of fire while the eyes are disabled, you canuse this formula:1000 / (dwell + back pulse)For instance, if your dwell is 10 and your back pulse is 50, your maximum rate of fire while the eyes are turned offis 16.67 balls per second.The default is 50 milliseconds and may be set from 20 to 100.Additional NotesForce shot feature– in the event that the eyes are enabled, the breech is empty, and the user wants to fire a clearingshot, a force shot can be initiated by pulling and holding the trigger for ½ second. This is useful with force fedloaders that sometimes push a ball slightly into the detents where the eyes are unable to see it. After force firing thenext ball will load and operation can continue as normal.A tip for setting the debounce and AMB – Although AMB is meant as a safety feature to stop run-away markers,it also has the unfortunate side effect of hiding bounce. To test your marker for bounce, shoot it as fast as possiblewith a single finger. If you have bounce you’ll see and hear double shots for individual pulls. This means you needto turn up your debounce. The slow pull test in use by some judges is not realistic for finding guns that have thedebounce set too low.A tip for setting the dwell and ABS dwell – Lower dwell times will decrease the sound output and increase theefficiency of a <strong>Shocker</strong>. Try turning down the dwell 1 millisecond at a time until the marker will no longer cycle,then go back up. Now shoot with paint over a chronograph. After setting it around 290-300 feet per second, watchthe consistency while shooting slow, and see if there is drop off while shooting fast. If you experience greater than a20 feet per second swing or you have drop off while shoot fast, increase the dwell until this goes away. Your ABSdwell time is the additional dwell time added when an ABS shot occurs. If you leave your marker on and not firingfor 10 seconds, ABS will kick in for the next shot, adding the ABS dwell time to the existing dwell setting. Forinstance, if the dwell is set to 8 milliseconds and the ABS dwell is set to 5 milliseconds, an ABS shot will fire with a13 millisecond dwell time. Additional shots will use the 8 millisecond dwell time until the marker has not been firedfor another continuous 10 seconds. This setting is adjustable so you can tune it to fit your particular marker. Some<strong>Shocker</strong>s don’t experience bolt stick, while others have it horribly. It is re<strong>com</strong>mended to try the default setting at 5milliseconds. If you encounter bolt stick even when the ABS kicks in, up the setting until it goes away. Stock bolts
will almost always fire a slightly higher velocity shot with ABS, but the HE and Evolve bolts will not if their o-ringsare in good condition.