Installation Instructions - Clarion Bathware
Installation Instructions - Clarion Bathware
Installation Instructions - Clarion Bathware
- No tags were found...

You also want an ePaper? Increase the reach of your titles
YUMPU automatically turns print PDFs into web optimized ePapers that Google loves.
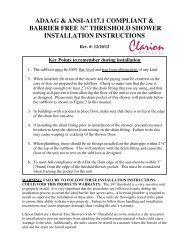
INSTITUTIONAL BARRIER FREESHOWER INSTALLATIONRev. #: 1/3/13Key Points to remember during installation1. The subfloor must be 100% flat, level and free from obstructions of any kind.2. When installed, the drain of the shower and the piping must be centered on thecore or box out prepared in the subfloor. Check to make sure that the core isdrilled deep enough (At least 2”) for the drain fitting that you are using, and thatnothing will prevent it from allowing the floor of the unit to rest on the subflooras designed. Please note that the drain pocket of this shower will protrude belowthe subfloor as shown in Figure 2 in this manual.3. In buildings with a poured in place floor, make sure that there is no lip at the edgeof the drain box out area.4. If installing the drain fitting prior to installation of the shower, precautions mustbe taken to keep the shower from resting on the drain fitting. Failure to do thismay cause warping or cracking of the shower floor.5. When plumbing, there should be no fittings installed on the drain pipe within 2 ½”of the top of the subfloor. This will interfere with the drain fitting and cause thefloor of the unit not to rest on the subfloor as designed.WARNING: FAILURE TO FOLLOW THESE INSTALLATION INSTRUCTIONSCOULD VOID THIS PRODUCTS WARRANTY. The barrier-free threshold is a verysensitive unit to properly install. It is very important that the procedures are followed exactlyduring the installation process to create the ideal barrier free access area. A licensed plumber isrequired to install or supervise the installation of these units. These units are thoroughly tested inthe plant to ensure their ability to drain water properly. Failure to follow these handling andinstallation instructions may cause improper drainage, thus voiding the unit’s warranty.<strong>Clarion</strong> <strong>Bathware</strong>’s Barrier Free Showers are to be stored in a dry area prior to installation toprevent moisture from attacking the reinforcement material which could cause warpage to theunit. Additionally, the units cannot be stored in a manner where the bottom of the unit and thedrain are forced upward.To maintain an ADAAG or ANSI A117.1 compliant barrier-free condition, the following unitsmust be installed in a 1½” recess. These units are: MP3837BF, MP3940BFCD, andMP3940BFKD. All other <strong>Clarion</strong> <strong>Bathware</strong> 2” barrier-free units must be installed in a 2” recessto maintain a barrier-free condition. *** If you do not need to meet ADAAG or ANSI A117.1accessibility requirements, you do not need to recess these units.
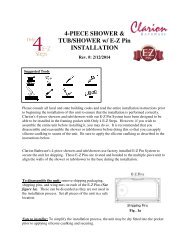
Unit PreparationRemove all factory-shipping packaging and braces. On the bottom of the back wall there is apiece of OSB board for shipping purposes. This needs to be cut down so that it will not interferewith leveling the shower stall properly. To do this, set a circular saw to cut a 7/16” deep cut. Cutthe OSB that extends past the bottom of the unit. Use caution when cutting, there are woodblocks that are secured with metal staples on the inside edge of the board. ***This boardshould not be removed until the unit is ready to be installed. Removal of the board beforeinstallation may void the warranty.***Figure 1 & 2Frame a square and plumb pocket to dimension of the unit. The floor of the pocket must beprepared perfectly flat and level to obtain proper drainage. If there are any obstructions, you willneed to chisel or cut the concrete out to create a surface that allows for proper slope to the drain.Depending upon the core opening in the concrete slab, the installer may find it necessary to corea larger and/or deeper opening permitting adequate clearance for the drain. An 8” core at least2” deep may be desirable. If the core cut is larger than 8” x 8” or 8” diameter, we recommendback filling the core cut, sloping the fill to the drain. This will assure that the area of the flooraround the drain receives proper support.For ADA Compliant 36” Transfer Showers: The front edge of the seat must be no more than3” [76mm] from the compartment entry. To achieve this with <strong>Clarion</strong> <strong>Bathware</strong>’s units, the frontgelcoat surface of the unit must be no more than 1-1/2” [38mm] from the finished wall in front ofthe shower. This will need to be taken into consideration when framing the pocket. (See Figure1.1 & Figure 1.2)Pocket dimensions and drain location can be obtained from your retailer or atwww.clarionbathware.com/search (1) enter model number of the unit then click search,(2) select the product picture, (3) select product cut sheet pdf at bottom right of the page.
Figure 3Install the drain and make sure that it is sealed properly and not leaking. Test fit the unit into theframed pocket. Check that the drain is not resting on anything which can force the unit floorupwards. Level and plumb the unit. Attach the front two vertically flanges with one fastener.Using a pencil mark all flanges on the studding. This will assist when setting the unit into thebedding compound. Remove the unit and prepare a bedding compound for the unit to be set into.**FOAM SHOULD NEVER BE USED AS A BEDDINGMATERIAL FOR BARRIER-FREE SHOWERS. **A proper bedding compound would be cement slurry, thin mortar mix, setting type drywallcompound, or lightweight gypsum plaster. Although all the listed products are acceptable,<strong>Clarion</strong> <strong>Bathware</strong> recommends using lightweight gypsum plaster for optimal results. In additionto being a user friendly product to use it also has a slow curing time and a compression rating ofabout 700 PSI. Two brands of this plaster to look for are Gold Bond Gypsolite Plaster and USGypsum Structo-Lite Plaster.Mix the bedding compound to a manageable consistency. Ifthe bedding material is too thick it may not spread out properlyand can cause the unit floor to be forced up. If the beddingmaterial is too thin it may seep out from under the unit. Thiscan cause improper support of the unit floor. After mixing thebedding material to a consistency of “cool-whip”, place it ontothe floor in mounds keeping in mind the area around the drainwill be thinner due to the slope of the shower floor. Placingthe bedding material in mounds reduces waste and overapplication which may cause the unit to drain improperly ornot at all. When the unit is set onto the mounds, they willspread out easier than trying to completely cover the entirefloor. Small void areas of 2”-3” are not a problem as theshower floor has sufficient strength to bridge them.
Figure 4Set the unit in the bedding compound. Align the flanges of the unit with the pencil marks.Check that the unit is plumb and level then attach each vertical flange with a fastener so that theunit won’t shift. Check the floor of the shower for high spots that could restrict the waterdrainage. High spots in the bedding compound under the floor can be worked out by applyingpressure to the area. Install the header for the top nailing flange. The threshold of the unitshould be fairly flat with no depressions. A slight rise is acceptable as long as proper slope to thedrain is maintained. When the unit is plumb and level, and the slope to the drain is assured,finish securing the flanges with galvanized nails or screws. (In an application where the unit isinstalled over wall board and will be installing a <strong>Clarion</strong> <strong>Bathware</strong> Trim Kit, for best resultsyour fasteners will need to be flush with the nailing flange. <strong>Clarion</strong> <strong>Bathware</strong> recommendscentering and counter sinking a corrosion resistance fastener on the nailing flange. Raisedfasteners will result in a problematic finishing process of the trim kit.)Final Notes:A floor-leveling agent can be used to smooth the transition between the shower unit and thefloor. A smooth transition between the shower unit and the floor is a requirement for ADAcompliance. We recommend Feather Finish for all vinyl applications or grout for tileinstallations.You can finish off your new unit with a variety of materials which are accepted by local buildingcodes. Some ideas are tile, drywall caulking, drywall mud, plaster, wood or plastic trim.Clean your new tub with a liquid detergent and warm water.Do not use any abrasive cleaners such as scouring powder or liquid abrasive cleaners.
IF A BEDDING MATERIAL IS USED UNDER A UNIT; CEMENT SLURRY, THIN MORTAR MIX,PLASTER OF PARIS, OR A COMPARABLE FLOOR FILLING COMPOUND THAT IS NOT WATERSOLUBLE ARE PROPER BEDDING COMPOUNDS. WATER SOLUBLE MATERIALS, FOAM ANDOTHER EXPANDING MATERIALS ARE NEVER TO BE USED AS A BEDDING COMPOUND.IF YOU HAVE ANY QUESTIONS REGARDING INSTALLATION OF YOUR CLARION BATHWAREPRODUCT, PLEASE CALL OUR CUSTOMER SERVICE DEPARTMENT AT 1 (800) 576-9228 EXT. #818OR BY E-MAIL AT CUSTOMERSERVICE@CLARIONBATHWARE.COMJOB SITE INSTALLATION OF OWNER SUPPLIED ACCESSORIESAll <strong>Clarion</strong> <strong>Bathware</strong> units purchased with supplied grab bars are custom reinforced at the factory toaccommodate the mounting of said bars.Any grab bars installed on a <strong>Clarion</strong> <strong>Bathware</strong> unit at the job site must have proper reinforcement (woodsupport and backing plates) at all mounting areas and should comply with ANSI A117.1, Uniform FederalAccessibility Standards (UFAS) and ASTM F446 specifications for grab bars in the bathing area.Job-site installation of third party supplied grab bars is entirely at the risk and full responsibility of theowner. Any damage to <strong>Clarion</strong> <strong>Bathware</strong> units or the property during or after grab bar installation, or anyinjuries due to improper installation remain the sole responsibility of said owner and cannot be attributed to<strong>Clarion</strong> <strong>Bathware</strong>, Inc.***WE SUGGEST THAT THE CUSTOMER AVOIDS USING A BATH MAT IN THE UNIT, AS ITCOULD CAUSE WATER STAINS OR BLISTERING TO THE FINISH SURFACE OF THE UNIT.CLARION BATHWARE PRODUCTS ARE CERTIFIED TO MEET NAHB STANDARDS, HUD/FHA, BOCA,HUD UM-73A, ANSI Z124.1 AND ANSI Z124.2. FOR DETAILS, REQUEST NAHB RESEARCH CENTERCONFIRMATION.44 Amsler Avenue Shippenville, PA 16254(814) 226-5374 (800) 576-9228Customer Service: Ext. #818Fax: (814) 226-0730www.clarionbathware.com
CLARION BATHWARE44 Amsler AvenueShippenville, PA 16254Phone (800) 576-9228 Fax (814) 226-5568Customer Service: Ext.#818WARRANTYPLEASE READ YOUR WARRANTY VERY CAREFULLYAll merchandise is guaranteed for a period of three (3) years from the date of initial acceptanceof the product by the contractor or the owner against defects in material and workmanship in themerchandise. All claims must have proof of purchase.If within the warranty period any such product shall prove defective in material defects,manufacturing defects, or labor defects it shall be repaired or replaced at the manufacturer’soption.EXCLUSIONS:1) This warranty shall not apply to incorrect operating procedures, breakage or damagescaused by fault, carelessness, negligence, abuse, misuse, misapplication, impropermaintenance, alteration, or modification of the unit by or for the buyer, as well aschemical or natural corrosion, fire, act of god, or any other casualty.2) The buyer of the product covered by the present warranty is entirely responsible for itsproper installation and connection. <strong>Clarion</strong> <strong>Bathware</strong> neither installs nor supervises orcontracts for the installation and consequently cannot be held responsible for it.3) This warranty does not apply to units or equipment not installed and connected inaccordance with manufacture’s instructions and in conformity with all local and statecodes for such installations.4) CLARION BATHWARE IS NOT LIABLE FOR INCIDENTAL ORCONSEQUENTIAL DAMAGE, LOSS OF TIME, INCONVENIENCE,INCIDENTAL EXPENSES, LABOR OR MATERIAL CHARGES OR ANYOTHER COSTS RELATED TO THE APPLICATION OF THE PRESENTWARRANTY OR IN CONNECTION WITH REMOVAL ORREPLACEMENT OF EQUIPMENT OR TUB.5) All <strong>Clarion</strong> <strong>Bathware</strong> modules have slip-resistant textured floors. The use of “suction-cup”bathmats can cause surface damage.6) <strong>Clarion</strong> <strong>Bathware</strong> makes no express warranty and no warranty of merchantability. Nowarranty of fitness for particular purposes or any other warranty implied or statutory for itsproducts other than specified above.“Clearly A Difference”