Tuning your Hoyt Avalon Plus
Tuning your Hoyt Avalon Plus
Tuning your Hoyt Avalon Plus
- No tags were found...
Create successful ePaper yourself
Turn your PDF publications into a flip-book with our unique Google optimized e-Paper software.
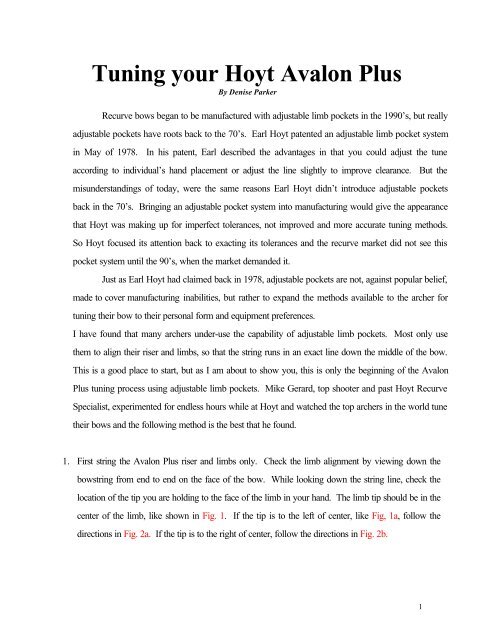
CWCCWCCWCWCWCCWCCWCWFig. 2aFig. 2bFig. 2a - Viewing from the rear or bowstring side, loosen the center set screw. Then loosen thescrew on the right side of the riser by turning counterclockwise and tighten the opposing screw(left side) by turning it clockwise an equal amount. Make adjustments in small increments (1/8to ¼ turn at a time). Tighten center set screw after adjustments.Fig. 2b - Viewing from the rear or bowstring side, loosen the center set screw. Then loosen thescrew on the left side of the riser by turning counterclockwise and tighten the opposing screw(right side) by turning it clockwise an equal amount. Make adjustments in small increments (1/8to ¼ turn at a time). Tighten center set screw after adjustments.3
At this point most archers stop the aligning process assuming that alignment is perfect. Theproblem with stopping at this point is that stabilizers are often not perfect, and alignment gaugesmeasure from the outside edges of the limbs, not the exact center.3. The next step is to center the string through the “true center” of the bow. The true centerof the <strong>Avalon</strong> <strong>Plus</strong> bow is about .41” outside the sight window. So in order to get the stringaligned in the true center of the riser, you must get the string as close to this point as possible. Ihave found that half the width of the string (using a standard of 18 strand Fast Flight) and a23XX Easton arrow shaft’s diameter actually equals .41” the exact distance needed from thesight window to the string. So in order to align the string to the true center of the riser, place the23XX arrow shaft under the clicker and right above the plunger hole, it is critical that the arrowlies completely flat along the sight window. Then, extend the arrow out until it runs along thestring, while the arrow is still lying flat against the window. The arrow should be placedbetween the sight window and the string. From there adjust the screws together (top andbottom) until the arrow is just touching the string on the outside as in Fig. 4. For right handers, ifyou want to move the string in towards the arrow, move the adjustments like Fig. 2b. If youwant to move the string away from the arrow make the adjustments in Fig. 2a. Left-handedarchers will be just the opposite.4. Then re-check to see that the string is still centered in the riser and the tips are in themiddle of the limbs. Shoot a few arrows and re-check once everything is settled. The mostimportant concerns are that the bowstring just touches the edge of the arrow pressed flushagainst the riser, and that the string is centered through the top and bottom of the riser or in astraight line.5
From here you have a great place to start the rest of <strong>your</strong> tuning process. What youhave done is aligned the bow to its most natural and consistent place to shoot. I have found thebow to be the most forgiving with this set-up. Any bow is consistent, the key is to make it asforgiving as possible. You can then play with the adjustment screws just slightly to the left or tothe right (make sure you move the top and bottom together) to see if grouping improves. Mostof the time the bow shoots best with the string where we placed it in this exercise, but thebeauty of adjustable limb pockets is that it can be adjusted exactly to <strong>your</strong> form. So start ofwith centering as we did, then just slightly move the limb pockets to the left and right togetherand see what happens to <strong>your</strong> groups. If you run into trouble, go through the above processagain and start over.Many people ask why it is important to know the true center of the bow and the effectsof shooting a bow out of true center. If the string is not aligned in the true center, many timesthe archer will get a false read on their bare shaft test. They can shoot a bare shaft and thearrow looks much too weak or too stiff. Only to find out, when they moved their string to thetrue center, the arrow tuned much differently. The strings placement can drastically affect thetune, and to avoid tuning <strong>your</strong> bow to the wrong arrow shaft, use the above method.As I mentioned in the first of this article, adjustable pockets have been around a long time andanyone who is afraid of them simply doesn’t understand the benefits. Just as the plunger andtiller adjusting gave archers more ways to fine-tune their bows, so does adjustable limb pockets.6


