TCS splinting
TCS splinting
TCS splinting
- No tags were found...

You also want an ePaper? Increase the reach of your titles
YUMPU automatically turns print PDFs into web optimized ePapers that Google loves.
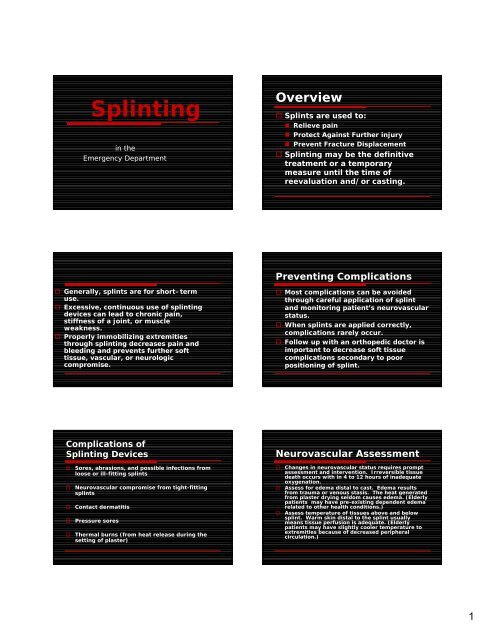
Splintingin theEmergency DepartmentOverview Splints are used to:• Relieve pain• Protect Against Further injury• Prevent Fracture Displacement Splinting may be the definitivetreatment or a temporarymeasure until the time ofreevaluation and/or casting.Preventing Complications Generally, splints are for short–termuse. Excessive, continuous use of <strong>splinting</strong>devices can lead to chronic pain,stiffness of a joint, or muscleweakness. Properly immobilizing extremitiesthrough <strong>splinting</strong> decreases pain andbleeding and prevents further softtissue, vascular, or neurologiccompromise. Most complications can be avoidedthrough careful application of splintand monitoring patient’s neurovascularstatus. When splints are applied correctly,complications rarely occur. Follow up with an orthopedic doctor isimportant to decrease soft tissuecomplications secondary to poorpositioning of splint.Complications ofSplinting DevicesSores, abrasions, and possible infections fromloose or ill-fitting splintsNeurovascular compromise from tight-fittingsplintsContact dermatitisPressure soresThermal burns (from heat release during thesetting of plaster)Neurovascular AssessmentChanges in neurovascular status requires promptassessment and intervention. Irreversible tissuedeath occurs with in 4 to 12 hours of inadequateoxygenation.Assess for edema distal to cast. Edema resultsfrom trauma or venous stasis. The heat generatedfrom plaster drying seldom causes edema. (Elderlypatients may have pre-existing dependent edemarelated to other health conditions.)Assess temperature of tissues above and belowsplint. Warm skin distal to the splint usuallymeans tissue perfusion is adequate. (Elderlypatients may have slightly cooler temperature toextremities because of decreased peripheralcirculation.)1
Neurovascular AssessmentThe 5 Ps1.Pain Pain on passive motion,unrelenting pain, or pain out ofproportion should be furtherinvestigated because it maysignify compartment syndrome. Sudden increase in pain maysignify thrombus formation.Neurovascular AssessmentThe 5 Ps (continued)2. Pallor Pink skin indicates arterialpressure is normal. Whitish color signifies decreasedarterial supply. Bluish color signifies venousstasis.Neurovascular AssessmentThe 5 Ps (continued)3. Pulse Palpate distal pulse of splintedextremity when possible. Notepresence and strength of pulse. Assess capillary refill by pressing onthe toenail or fingernail, release, andnote pinking of nail. Nail should pinkup in 3 seconds or less. Weak or absent pulse may indicatedecreased circulation to splinted area.Neurovascular AssessmentThe 5 Ps (continued)4. Paresthesia Assess for numbness, tingling, orabnormal sensations. Paresthesia may indicate nervedamage and/or development ofcompartment syndrome.Neurovascular AssessmentThe 5 Ps (continued)Where to Begin5. Paraplegia Assess for motion. Paraplegia may indicate nervedamage or/and development ofcompartment syndrome.Assess pt health status, includingconditions affecting wound healing(diabetes, peripheral vascular disease,malnutrition, age…)Assess pt understanding of upcomingsplint application.Assess condition of tissues to be insplint, circulation (pulse, color, skintemp) to extremities, range of motion,and sensation.2
Basic Principles of Splinting Note presence of skin breakdown,bruising, rash, and/or irritation. Assess patient pain status andgive analgesic per MD order. Assess extent to which patientwill be able to use splintedextremity. The extremity should be exposedcompletely before the splint is applied. Skin lesions should be cleaned,repaired, and dressed before the splintis applied. The patient’s ability to remove theirclothes with the splint in place shouldbe taken into account before the splintis applied. The joints above and below a fractureshould be immobilized. Fractures shouldn’t be splintedcircumferentially in an acutesituation, especially if the patienthas impaired sensation, excessiveswelling, or circulatoryinsufficiency. Neurovascular status should beevaluated before and after theapplication of a splint.Splints alwaysshould be ofappropriate size andshape. (OCL shouldbe wide enough tocover approximately1/3 to ½ of thecircumference of theextremity, it shouldnot overlap.)The heel and elbows andall bony prominencesshould be paddedadequately: paddingshould be placed betweenthe digits to preventmaceration; extra paddingshould be placed over thefracture site.Maceration can occurwhen the skin is wet ordamp. The skin softens,turns white, and can easilyget infected with bacteriaor fungi. Stockinette and padding should be appliedevenly and smoothly to prevent waddingand lumping. To prevent stiffness and loss of function,the involved joints should be splinted in aposition that considers soft tissuestructures. Inspect condition of skin around edges ofcast. If skin irritation is evident, petal the edgeof the cast by overlapping strips of tapeover the edge- this area is susceptible topressure and friction.3
OCL Splints Older adults may have reducedsensation and be less able to detectcompression. Slings or crutches may used for addedsupport and to prevent weight-bearingor usage or the extremity becauseengaging in these activities mayincrease pain or swelling and/or causethe splint to break. Most children can learn to use crutchesby the time they are six to seven. OCL splints are plaster splints made from gauzethat contains plaster of Paris. Plaster of Paris has multiple roles of open-weavecotton, saturated with calcium sulfate crystals(gypsum.) When water is added, the gypsum re-crystallizesand hardens in a heat-releasing reaction. All plaster of Paris products generate heat duringthe set reaction To minimize the risk of burns, the water should becool or room temperature only and foam side ofOCL should be placed toward patient, not plasterside. The plaster splint will set in two to eight minutes,but won’t reach maximum strength for 24 hours.The most basic splintshould consist of a layerof stockinet, with orwithout padding, andlayer of OCL.Additional padding forbulk and a final layer Acebandage are wrappedaround the plaster tohold everything in place.The final layer shouldnever be wrapped tootightly.The bandage should betaped, rather thanpinned to prevent injuryfrom pins.OCL (continued)The ED stocks 3, 4, or6 inch OCL. Selectproper width.If applicable, tracetemplate on flannelside and cutaccordingly.Templates available inthe ED are TeardropThumb Spica, andBoxer Splints. Cut OCL stripslightly longerthan necessaryto fold backedges away fromthe patient’s skinto create asmooth edge. A barrier should bebetween patient’sskin and splint. Place a stockinetteon the extremityto be splinted. Thestockinette shouldextend beyond theproximal and distaledges of the areato be splinted.4
Wrap extremity with padding todecrease risk of further tissuetrauma. Padding should be wrappedaround the extremity in distalto proximal fashion. Eachturn should overlap theprevious one by 50 percent.Care should be taken to avoidwrinkles because they cancreate pressure points. The padding should extend 2to 3 cm beyond the area to besplinted.Stockinette should extendbeyond the proximal anddistal edges of the padding. Use roomtemperature orcool, clean waterin a CLEAN bucketfor eachapplication. Pass splint thoughwater. DO NOTSOAK.Remove as muchexcess water aspossible using the rolland squeeze method(foam to the outside asyou roll.) Splint shouldbe drip free. Stretchsplint lengthwise toremove wrinkles andstraighten plaster.Put foam side down ontowel. To laminate,press firmly and runpalms over flannel untilsmooth. This bondsplaster layers makingthe splint strong.Flare newly exposedplaster edges towardflannel, away from thepatient.Apply damp OCL to theinjured extremity. Moldthe OCL to the extremityin the proper position.Foam side of OCL shouldbe toward patient skin,not flannel or plasterside. Do not fold ordouble OCL to increasethickness of splint.Instruct patient theymay experience warmthduring the splintapplication process. An ace wrap isthen wrappedaround theextremity, distalto proximal. Secure ace wrapwith tape, notpins. Fold thestockinette overthe edge of theplaster. Handle OCL splinted extremity with palms onlyuntil cast is dry. Fingers can causeindentations that can lead to pressure areasunder splint. Place damp splint on cloth-covered pillows toprevent deformation or pressure points as itsets. (Pillows prevent splint from hardening inundesirable position.) Don’t apply ice to the plaster, place to the sideof the plaster to avoid indentions which canlead to pressure areas under splint.5
Sling If patient reports pain, numbness,irritation or burning sensation,remove the splint immediately. Inspect the affected area at once.Burn injury may result from impropersplint application.Used to immobilizeand support thearm, shoulder, andelbow joints.Never wear thesupport over anopen woundPosition the elbowin the pocket of thesling. The wrist and¾ of the handshould be supportedwithin the pocket.Sling and SwathInstruct patient toplace the thumb inthumb loop. This willhelp keep the arm inthe sling and providemore comfort for thepatient.Place shoulder strapsover oppositeshoulder, feedthrough the D-ringand secure. Handshould be slightlyelevated above theelbow. Mostly used for shoulderand humeral injuries. The sling supports theweight for the arm andthe swath holds the armagainst the chest tominimize shouldermotion. Ensure wrist is supportedby the sling. A barrier of clothingshould be placed in theaxilla before the splint isapplied to preventmaceration.Cock Up SplintsUsed for temporaryfracture <strong>splinting</strong>, insevere sprains orstrains, tendonitis orfor other injuries ordiseases which imposethe risk of flexiondeformity. Also can beused following castremoval at the time offracture union.Place stockinette onextremity beforeapplying splint toprevent skinbreakdown.Position splint so thecontoured stay is onthe palmar side offorearm placing thewrist in dorsiflexion.Secure Velcro straps.Extra Length of strapsmay be trimmed off.6
Finger InjuriesFinger SplintsFinger injuries are oftenmisdiagnosed andmistreated.Improper treatment and/or<strong>splinting</strong> can lead todeformities, dysfunction,chronic pain and stiffness.Fingers have 3 hinged joints(thumb has 2.)• Distal interphalangeal(DIP)• Proximal interphalangeal(PIP)• Metacarpophalangeal (MCP)The joints sit in volar plates(collateral ligamentsattached to dense fibrousconnective tissue) whichprovide joint stability Most commondislocated joint inthe body is the PIPjoint of the finger. Severity of injury isoftenunderestimated. The direction of thedislocation isusually dorsal.Dorsal PIP jointdislocation can injurethe volar plate orcause an avulsionfracture of the middlephalanax.After PIP is reduced,joint should besplinted by buddytaping the injured PIPjoint in 30 degreeflexion. Hyperextension ofa finger joint, suchas a dorsaldislocation, caninjure the volarplate.IncorrectCorrectThe most common closedtendon injury of thefinger is Mallet Finger, anextensor tendon injury atthe DIP joint.Usually caused by anobject (like a ball)striking the finger,creating a forceful flexionof an extended DIP.• The extensor tendonmay be stretched,partially torn, orcompletely rupturedor separated by adistal phalanxavulsion fracture.Splint the DIP joint in aneutral or slighthyperextension positioncontinuously for six weeks.• Patients should not even takesplint off to shower.• Patients should not flex DIPjoint during treatment, ifflexed, the <strong>splinting</strong> periodmust restart every timeflexion occurs.• PIP joint should remainmobileNecrosis of the skin can occuris the DIP joint isoverextended during<strong>splinting</strong>.Important to stress follow upwith orthopedic doctor in 1-2days.Contour of splint isplaced under DIPjoint to slightlyhyperextend thejoint.7
Knee Immobilizer Used forimmobilization ofthe knee joint,post-operatively,or after injury.Contour of splint shouldbe here, over DIP joint.Improper technique. Thecontour of the splint is overthe finger pad, not theDIP joint.Undo Velcro straps and layimmobilizer flat exposingthe interior.Position leg over center ofthe immobilizerWrap center panel aroundlegPlaces side panels inproper position and attachVelcro (side panels may beremoved and adjusted forproper fit.)Place straps throughbuckles and secure Velcrostraps working fromcenter of the leg out.Cut off excess of Velcrostraps if desired.Walking BracesMay be called“Post-op Boot,”“Blue Boot,” or“Fracture Boot.”Used for acute anklesprains, soft tissueinjuries of the lowerleg, stress fractures ofthe lower leg, stablefractures of the footand ankle, and/orstable fractures of thedistal tibia and fibula.Place stockinette overextremity to prevent skinbreakdown.Loosen straps and removeliner from boot.Place foot in liner andsecure with Velcro straps.Make sure the heel fitssnugly in to the back ofthe liner.The patient’s toesshouldn’t hang over theedge of the boot. Patientsshould have ½ inch ofextra space from end ofboot.Wrap and fasten the legportion of the liner, makingsure they are snug from topto bottom. Some trimming ofthe liner may be necessary toaccomplish optimum fit.Spread the uprights usingboth hands and step into theboot, aligning uprights withthe midline of the ankle. Ifuprights have plastic linerremove them now to affixupright to liner.secure boot straps , startingat the toes and working upthe legTrim off excess length ofstraps for patient safety.8
Air Cast Splint Prevents inversionor eversion of theankle whileallowing freeflexion/extension. Used for acuteankle sprain orprevention ofrecurrent anklesprains.First place stockinetteon extremity toprevent skinbreakdown or ensureace wrap is betweenAircast splint and skin.Peel up the heelstraps, adjust width,and press back inplace.Place round edge ofheelpad under heeland align brace withthe ankle.Secure straps frombottom to top, thenput on a lace shoe.Squeeze brace sidestogether with onehand while tighteningstraps from bottom totop.Tighten forcomfortable support.If patient feels pinchingor uneven pressure, addor remove air.Insert tube 1 ½ inchesinto valve located on topof either side of Aircastsplint.Remove a small amountof air by gentlysqueezing the side of theAircast splint.Add a small amount ofair by blowing into thetube. (Too much air willreduce support.)Med-Surg ShoeUsed to treat a varietyof post-op, trauma,and wound problems.Reduces plantarpressure on the heeland forefoot.If patient doesn’t havea sock, use ace wrapor stockinette toprevent skinbreakdown.Trim off excess lengthof straps for patientsafety.Buddy Taping Used for phalangealfractures of the toes. A small sheet ofwadding is placedbetween the toes toprevent maceration. The fractured toe issecured to theadjacent toe withadhesive strips. Always use paper tapeagainst patient’s skin,then may use silk tapeover paper tape.9
Discharge TeachingInform pt to call for:• Numbness or tingling• Inability to move fingers or toes in extremity• Cold, pale fingers or toes• Excess pain that does not subside with decrease activity• Increased swelling combined with less motionPressure within a splinted extremity may increase edema andlead to compartment syndrome (More common with casts.)• Occurs when pressure within the muscle compartment increases asa result to edema, bleeding, or decreased venous return. The fasciacovering the muscle group acts as a tourniquet directing thepressure to structures within the compartment: nerves, bloodvessels, and muscle tissue.• Neurovascular assessments are used to determine development ofcompartment syndrome.Urgent evaluation is recommended for pts with a high level ofpain, rapid onset of swelling, coldness, or numbness in theinjured foot, inability to bear weight, or a complicatingconditions (such as diabetes.)Instruct that rest , ice, and elevation of affected extremitywill help reduce swelling.Instruct the patient to use ice to the area four times aday for 15 to 20 minutes at a time. Patients may placeice in a zip lock bag as long as they have a towel orwash cloth, or some barrier between their skin and theice. Patients should never fall asleep with an ice bagon.Instruct patient to elevate the injured extremity abovethe heart. This enhances venous return and decreasededema.Patients should be instructed to use or wear splint asdirected.Follow up with orthopedic physician 2-3 days afterinjury is extremely important to ensure correct positionof splint and schedule therapy if needed.At home patients should daily:• Inspect splint and petal rough edges to reduce risk oftrauma to underlying skin and need for splint changes.• Inspect daily for foul odor, which indicates skinexcoriation or infection under the splint.• Inspect skin daily for pressure or friction area.• Inspect splint for cracks or changes in alignment.Patient must keep plaster of Paris dry when bathing.Splinted extremity must not be submerged becausecast absorbs water, loses structural integrity andcrumbles if becomes wet.Patient should notify MD of any complications, suchas; fever, unrelieved pain, foul odor, or feeling thatcast is too tight or rubbing skin.Thank You10