Návod k použití HS FLAMINGO ESPO I - Nářadí PEDDY.cz
Návod k použití HS FLAMINGO ESPO I - Nářadí PEDDY.cz
Návod k použití HS FLAMINGO ESPO I - Nářadí PEDDY.cz
- No tags were found...

You also want an ePaper? Increase the reach of your titles
YUMPU automatically turns print PDFs into web optimized ePapers that Google loves.
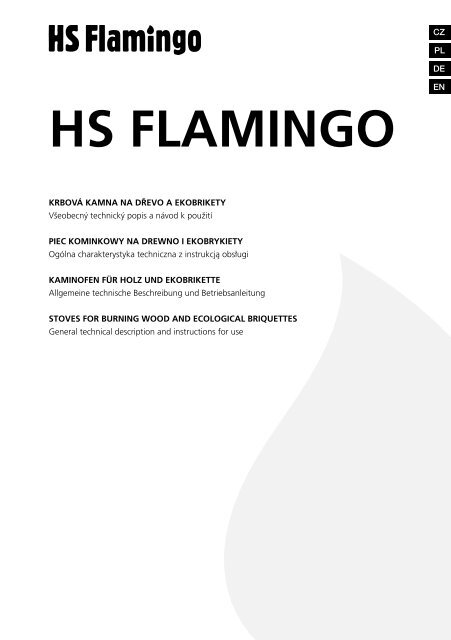
CZPLDEENStali jste se majiteli krbových kamen značky <strong>HS</strong> Flamingo.Děkujeme Vám za důvěru, kterou jste projevili zakoupením našeho výrobku. Přečtěte si prosím pečlivě tento návod k obsluze,který Vás informuje o funkci a manipulaci s kamny. Vyvarujete se tak nebezpečí vzniku škod a prodloužíte životnost kamen.ZAPOJENÍ A PRVNÍ UVEDENÍ DO PROVOZU NECHTE VŽDY NA KVALIFIKOVANÉ OSOBĚ,KTERÁ MÁ PŘÍSLUŠNÉ OPRÁVNĚNÍ A ZNALOST PLATNÝCH NOREM!Správnou obsluhou šetříte palivo a chráníte životní prostředí.Záruku na naše kamna poskytujeme pouze tehdy, dodržíte-li pokyny v návodu na instalaci a obsluhu.<strong>Návod</strong> a list s technickými údaji pečlivě uschovejte,budete si tak moci na počátku každé topné sezóny opět osvěžit znalosti potřebné pro správnou obsluhu Vašich kamen.21. TECHNICKÁ SPECIFIKACEKrbová kamna jsou určena k vytápění obytných místností, rekreačních zařízení i pracovních míst, kde je záměrem zvýšení tepelné pohody, ke které přispívá i vjemz pohledu na plamen.1.1. Konstrukční provedeníKamna jsou konstruována na spalování dřeva, ekobriket a uhelných briket. Prohřívacím systémem v kamnech není možné spalovat uhlí a koks.Kamna jsou svařena z ocelových plechů, tloušťky 2 - 5 mm. Ve střední části kamen je spalovací komora, jejíž čelní strana je tvořena přikládacími dvířky. Ve dvířkáchje usazeno velkoplošné speciální sklo, které odolává vysokým teplotám až 800 °C. Spalovací prostor je obložen šamotovými tvarovkami. Tvarovky nejsou spojenyžádnou výmazovou hmotou. Na dně spalovací komory je jednoduchý litinový rošt. Před roštem je umístěna zábrana proti vypadávání paliva a jeho sesouvání na čelnísklo. Spodní část krbových kamen je využita jako zásobník paliva. Kamna jsou řešena jako dvouplášťová s vertikálním odvodem spalin. Průměr kouřovodu je 150 mm.Ovládací prvky kamen jsou z nerezu. Opláštění kamen je provedeno z ocelového plechu a keramických dlaždic.Upozornění: Krbová kamna nemají charakter stáložárného topidla a jsou určena k periodickému – přerušovanému (dočasnému ) provozu.2. SPALOVACÍ PROCES2.1. Množství paliva a nastavení spalovacího procesuSpalování dřeva a ekobriket v krbových kamnech je systém prohřívacím, což znamená, že spalování probíhá v celé sázce paliva naráz. Pro zajištění optimálníchpodmínek snadného podpalu a následného rozhoření je nutné pod hořící palivo, přes rošt, přivést dostatečné množství vzduchu - označený jako primární (P), který jevždy regulovatelný. Se vzrůstající teplotou spalin se začínají uvolňovat plynné složky paliva, které by bez dalšího přívodu vzduchu nevykonali žádnou práci v podobětepelné energie, proto je nutné přivést další vzduch do úrovně výšky plamenů, kde proces spalování těchto plynných složek může dále probíhat, tím většinou zanikápožadavek na potřebu přívodu vzduchu primárního, naopak vzniká požadavek na přívod vzduchu sekundárního (S).Přívod sekundárního vzduchu, který je zpravidla regulovatelný, zkvalitňuje jak spalování, tak i napomáhá k samočinnému čištění skla dvířek. Při správném množstvío poměru vzduchů přivedených do správných míst spalovací komory se účinnost spalování zvýší a tím se snižuje emise škodlivých plynů do ovzduší. Rozmístěníregulátorů přívodů vzduchů je znázorněno na schématu v technickém listě, který je součástí každé dodávky krbových kamen. Společně se sekundárním přívodem setaké reguluje terciální vzduch, který je předehříván přes zadní část kamen a vstupuje po bocích v horní části spalovací komory.Dosažený tepelný výkon topidla je závislý na množství spáleného paliva za určitý časový úsek, jeho kvality a účinnosti spalovacího procesu. Podle tabulky č. 2výhřevností paliv si můžete udělat představu o dosažitelném výkonu při spálení 1 kg dřeva za hodinu při jeho 20 % vlhkosti. Dále platí, že vzrůstající vlhkostí palivataké výrazně klesá jeho výhřevnost.V podmínkách zkušebny byla odzkoušena regulovatelnost topidla v rozmezí 20 - 100% jmenovitého výkonu. Regulace výkonu byla provedena pomocí tahu komínaa množstvím paliva. V praxi se kamna většinou regulují pomocí regulátorů vzduchů, zejména primárním přívodem vzduchu. Přesné nastavení spalovacího procesupomocí regulátorů nelze jednoznačně definovat. Je ovlivněno řadou faktorů - vlhkostí paliva, druhem paliva, tahem komína, venkovními tlakovými podmínkami atd.Proto si spalovací proces, (intenzitu a kvalitu plamene), musíme doregulovat podle stávajících podmínek.Schopnost účinně seřídit spalovací proces se zvýší s Vašimi zkušenostmi při používaní kamen. Podrobnější tabulka s nastavením regulátorů pro přívod vzduchu jesoučástí technického listu, kde jsou uvedeny skutečné hodnoty, která byly odzkoušeny v daných zkušebních podmínkách ve státní zkušebně.Níže uvedená tabulka č. 1 slouží jen jako všeobecná informace pro regulaci přívodu vzduchu.Palivo Množství paliva Primární vzduch Sekundární vzduch Terciální vzduchregulovatelný regulovatelný neregulovatelnýDřevěná polena2 - 3 polena(2-3 kg)Uzavřen nebo podlepotřeby otevřen dle danýchspalovacích podmínek,regulace hořeníUzavřen nebo podlepotřeby otevřen dle danýchspalovacích podmínek,regulace oplachu sklaMaximálně otevřen,sekundární spalováníTypy spalování dřeva:- Po každém zátopu v kamnech ponechejte regulátor primárního vzduchu otevřen raději déle, docílíte tím lepšího rozhoření paliva.- Před přiložením paliva je vhodné plně zavřít regulátor primárního vzduchu.- Při spalování dřeva bezpodmínečně dbejte na to, aby bylo dřevo suché a maximální vlhkostí 20%.2.2. PalivoV krbových kamnech je možné spalovat štípané dřevo a brikety z lisovaného dřeva. Vlhkost spalovaného dřeva by měla být menší než 20%, optimálně 10%. Zdeplatí pravidlo, čím menší obsah vody v palivu, tím je jeho výhřevnost vyšší. Doporučená vlhkost dřeva se docílí skladováním po dobu alespoň dvou let ve větranémpřístřešku. Obsah vody v briketách musí být definován výrobcem briket. Brikety je nutno skladovat v suchém prostředí, jinak hrozí nebezpečí rozpadnutí. Doporučenávelikost kusového dřeva pro skladování a spalování by měla být v průměru 3 - 6 cm a délce 20 - 35 cm.
3V krbových kamnech je zakázáno spalovat uhlí a koks. Jako palivo nikdy nepoužívejte hořlavé kapaliny nebo odpady typu: tapety, dřevotřískové desky, umělé hmoty,napouštěné dřevo nebo samotné hobliny, piliny. Spalování takovýchto materiálů škodí nejen životnímu prostředí, ale také zkracuje životnost kamen, nadto můžedojít i k poškození kamen - komína.Pozn. Kůru, která se nachází na dřevěných polenech, je samozřejmě také možno spalovat.Tabulka č. 2Výhřevnost některých druhů dřeva při 20% vlhkostiDruh dřeva Výhřevnost kWh/plm Výhřevnost kWh/1kg Hmotnost kg/plmSmrk, jedle 1957 4,0 485Modřín 2461 4,0 610Borovice 2280 4,0 565Dub, buk 2743 3,8 726CZPLDEEN3. BEZPEČNOST PROVOZU3.1. Všeobecná ustanoveníPro provozování a instalaci krbových kamen je nutno dodržovat zásady požární ochrany obsažené v ČSN 06 1008.Spotřebič smí být používán v normálním prostředí dle ČSN 33 2000-3. Při změně tohoto prostředí, kdy by mohlo vzniknout i přechodné nebezpečí požáru nebovýbuchu (např. při lepení lina, PVC, při práci s nátěrovými hmotami apod.), musí být kamna včas, před vznikem nebezpečí, vyřazena z provozu. Dále je kamna možnépoužívat až po důkladném odvětrání prostoru, nejlépe průvanem.3.2. Bezpečná vzdálenost kamen od hořlavých hmotJsou-li kamna umístěna v prostoru s hořlavými předměty (třídy hořlavosti B,C1 a C2) je nutno dodržet bezpečnou vzdálenost 800 mm od čelní strany kamen vostatních směrech 200mm.Bezpečná vzdálenost kouřovodu od obložení zárubní dveří apod., umístěných staveb. konstrukcí z hořlavých hmot a od instalace potrubí včetně jeho izolace jemin. 200mm. Od ostatních částí konstrukcí z hořlavých hmot min. 400mm (ČSN 061008). Jedná se o stavební hmoty o stupni hořlavosti B, C1, C2 podle ČSN 730823 (viz. tab. č. 3).Jsou-li kamna provozována v prostoru s hořlavými stavebními hmotami o stupni C3, je nutno bezpečnou vzdálenost od těchto hmot zdvojnásobit.3.3. Pokyny pro bezpečný provozK zatápění a topení nesmí být používány žádné hořlavé kapaliny! Dále je zakázáno spalovat jakékoliv plasty, dřevěné materiály s různými chemickými pojivy (dřevotřískyatd.) a také domovní netříděný odpad se zbytky plastů aj.Kamna musí obsluhovat pouze dospělé osoby! Ponechat děti u kamen bez dozoru dospělých je nepřípustné. Povrch kamen je zahřátý, zejménaprosklené plochy, dotykem si můžete způsobit těžké popáleniny.Provoz kamen vyžaduje občasnou obsluhu a dozor. Pro bezpečné ovládání regulátorů a pro manipulaci s uzávěry dvířek je potřeba použít ochranné rukavice. Na kamnaje zakázáno během provozu, a dokud jsou teplá, odkládat jakékoli předměty z hořlavých hmot, které by mohli způsobit požár. Do rozehřáté pícky s keramickýmobkladem nepokládejte žádné nádoby se studenou kapalinou, hrozí prasknutí obkladu. Dbejte na zvýšenou opatrnost při manipulaci s popelníkem a při odstraňováníhorkého popela, protože hrozí nebezpečí popálení. Horký popel nesmí přijít do styku s hořlavými předměty – např. při sypání do nádob komunálního odpadu.Kamna smí být provozována pouze podle tohoto návodu. Na kamnech není přípustné provádět žádné neoprávněné úpravy.Tabulka č. 3Informace o stupni hořlavosti některých stavebních hmotStav hořlavosti stavebníchhmot a výrobkůA - nehořlavéB - nesnadno hořlavéC1 - těžce hořlavéC2 - středně hořlavéC3 - lehce hořlavéStavební hmoty zařazené do stupně hořlavostižula, pískovec, betony těžké pórovité, keramické obkladačky, speciální omítkaakumín, heraklit, lihnos, itavérdřevo listnaté, překližka, sirkoklit, tvrzený papír, umakartdřevotřískové desky, solodur, korkové desky, pryž, podlahovinydřevovláknité desky, polyester, polyuretan4. INSTALACE KRBOVÝCH KAMEN A JEJICH NAPOJENÍ NA KOMÍNUpozornění: Při montáži krbových kamen musí být dodrženy všechny místní předpisy, včetně předpisů, které se týkají národních a evropských norem pro tento druhspotřebičů.4.1. Připojení kamen ke komínu nebo komínové vložcePřipojení krbových kamen na komínový průduch smí být provedeno pouze se souhlasem kominického podniku v souladu s ČSN 70 4201, nebo dle platných předpisůpro tento druh spotřebičů v zemích, kde jsou instalovány. Pro názornost nahlédněte do přílohy č. 2.Pro zajištění správné funkce kamen je nutné, aby byl zaručen správný tah komína v hrdle kouřovodu.Údaj o minimálním tahu je vždy uveden v technickém listě pro příslušný typ kamen. Nedostatečný tah komína způsobuje špatnou funkci kamen, nadměrné začazovánískla a nadměrné zanášení kouřových cest. Dochází ke snížení celkového tepelného výkonu kamen. V případě, že přikládáme a komín nemá dobré tahové
CZPLDEENpřesahy na obou stranách pláště. Jako poslední nasaďte prostřední dlaždici (nebo tu, která se o plášť opírá dvěma stranami).Upozornění: Dojde-li během provozu, vlivem dilatací materiálů k samovolnému vypadnutí obkladu, je vhodné přítlačnou sílu pružiny zvětšit přiměřeným napružením.8. ZÁRUKA A SERVIS8.1. VšeobecněPři dodržení všech pravidel instalace, obsluhy a údržby uvedených v tomto návodu k obsluze, ručí výrobce (dodavatel), firma <strong>HS</strong> Flamingo s.r.o. 60 měsíců oddoby převzetí uživatelem za to, že výrobek bude mít po celou dobu záruky vlastnosti stanovené technickými normami, tímto návodem a údaji na výrobním štítku.6Záruka 24 měsíců je poskytnuta na:Ostatní komponenty (pokud jsou součástí zařízení), jako např. patentní zámek, šrouby a svorníky, pružiny, ventilátory, tištěné obvody, spínač, elektrické kabelovékoncovky, drát, elektrické pláště atd.Opotřebitelné předměty, které jsou v přímém styku s ohněm: desky topeniště, rošt topeniště, ventilace, polínková bariéra, těsnící šňůry.8.2. Záruční podmínkyZáruka se vztahuje na bezplatnou opravu kamen, respektive reklamovaných dílů či částí, které vznikly příčinou vadného materiálu nebo vadou v dílenském zpracování.Při neoprávněných požadavcích na záruční opravu přecházejí takto vzniklé náklady k tíži majitele (objednatele).8.3. Záruční a pozáruční servisZáruční a pozáruční servis v České republice zajišťuje výrobce firma <strong>HS</strong> Flamingo s.r.o., pomocí svého servisního oddělení se sídlem na adrese:Lhůta pro vyřízení reklamace je určena zákonem 47/92 Sb. a zák. 34/1996 Sb.,§ 19 ve znění pozdějších předpisů8.4. ZárukaV případě, že se vyskytne v záruční době na Vašich kamnech funkční vada nebo vada povrchové úpravy, neopravujte si ji nikdy sami. Záruční a pozáruční opravyzařizuje výrobce, na kterého je možné nakontaktovat se přímo nebo prostřednictvím jeho obchodních zástupců. Výrobce nepřebírá záruku za škody a vady kamennebo jejich částí, které byly způsobeny:- špatnou volbou výkonu kamen pro daný prostor (přetápění nebo nedotápění prostoru)- nedodržením příslušných platných stavebně právních předpisů- chybnou instalací a napojením zařízení- nedostatečným nebo příliš silným tahem z komína (připojení musí být dle platných norem)- provedenými úpravami nebo jinými, zejména dodatečnými změnami ohniště nebo odvodu spalin- při zásahu nebo změnách na zařízení, způsobených osobami, které k tomu nejsou výrobcem zmocněny- nedodržením pokynů v návodu k obsluze- při dodatečném zabudování náhradních dílů a doplňků, které nejsou výrobkem firmy <strong>HS</strong> Flamingo s.r.o.- <strong>použití</strong>m nevhodných paliv- špatnou obsluhou, přetížením zařízení a následným poškozením konstrukce topidla (např. propálení clon usměrňovačů tahu, deformace konstrukce kamen)- neodbornou manipulací, násilným mechanickým poškozením- nedostatečnou péčí či <strong>použití</strong>m nevhodných čistících prostředků- neodvratnou událostí (povodně atd.)8.5. Jak reklamovatPři reklamaci je nutno udat svou přesnou adresu, telefonní číslo a popsat závadu. Reklamace bude řešena pouze tehdy, pokud bude přiložen řádně vyplněný záručnílist s datem prodeje a s razítkem prodejny nebo prodejní paragon (případně faktura). Při nákupu si ve vlastním zájmu vyžádejte čitelně vyplněný záruční list. Ozpůsobu a místě opravy bude po posouzení závady rozhodnuto v servisním oddělení a dále budou navržená opatření konzultována s majitelem zařízení. Pro výměnuvýrobku nebo zrušení kupní smlouvy platí příslušné ustanovení Občanského zákoníku a reklamačního řádu.9. BALENÍ KRBOVÝCH KAMEN – LIKVIDACE ODPADUKrbová kamna jsou dodávána na dřevěné transportní podlážce. Kamna jsou proti povětrnostním vlivům chráněna PE folií a papírovou krabicí. Stabilizace a soudržnostcelého obalu pro skladování a pro dopravu je zaručena <strong>použití</strong>m kovové případně plastové pásky.Likvidace obalu: Dřevěné latění a podlážku použijte k topení. Ocelovou pásku odevzdejte do sběrny kovových odpadů. PE povlak a papírovou krabici předejte krecyklaci.Likvidace kamen: V případě likvidace krbových kamen odložte šamot, sklo, těsnící šňůry a keramiku do tuhého komunálního odpadu a plechový korpus popřípaděostatní kovové části odevzdejte do sběrny kovových odpadů.9.1. Zvláštní příslušenství na objednávku1. Kouřovody <strong>HS</strong> <strong>FLAMINGO</strong>2. <strong>Nářadí</strong>, koše, paravany3. Odlučovací nádoba Amphora (vysavač popela)4. Podpalovač5. Čistič krbových skel6. Čistič komínů7. Lopatka8. Uhlák
79.2. Vytypované náhradní dílyNěkteré náhradní díly, které lze objednat:1. Šamotové tvárnice2. Popelníková zásuvka3. Sklo přikládacích dvířek4. Litinový rošt5. Těsnící šňůry6. Lepidlo na těsnící šňůru7. Obklady pláště8. Ozdobné prvky (tyčky, kličky, regulátory)CZPLDEEN10. ES PROHLÁŠENÍ O SHODĚ A CE CERTIFIKÁTES prohlášení o shodě bylo vydáno ke všem výrobkům na základě protokolu o počáteční zkoušce typu dle EN 13 240:2005 + A2 a CE certifikátu. Protokol o počátečnízkoušce typu a CE certifikát je v souladu se směrnicí Rody č. 89/106E<strong>HS</strong> (odpovídá nařízení vlády č. 190/2002 Sb.) a vystavila jej modifikovaná osoba:Strojírenský zkušební ústav, s.p. ES 1015, AO 2002 Hudcova 56 b., 621 00 BrnoVýrobce prohlašuje, že krbová kamna, zde uvedená, splňují požadavky stanovené směrnicí 89/106 E<strong>HS</strong> (odpovídá nařízení vlády č. 190/2002 Sb.) za podmínekobvyklého, výrobcem určeného <strong>použití</strong>, je bezpečný.Výrobce přijal opatření, kterým zabezpečuje shodu všech výrobků uvedených na trh s technickou dokumentací a se shodnými požadavky.11. PŘÍLOHYOdstupové bezpečnostní vzdálenosti kamen v prostoruPříklad umístění ochranné clony palivového spotřebiče a kouřovoduSeznam náhradních dílůPříklady správného e nesprávného připojení kouřovodu do otvoru v komínové vložce (komínu) Technický list krbových kamenProstup kouřovodu stěnou z hořlavých materiálůPřímé napojení palivového spotřebiče na komín a odstup od stěnyPopis regulace přívodu vzduchůNákres šamotové výplně spalovací komoryCertifikátyZáruční list
CZPLDEENJesteście nabywcami pieca kominkowego marki <strong>HS</strong> Flamingo. Dziękujemy za zaufanie okazane przez kupno naszego produktu. Prosimy o uważne prze<strong>cz</strong>ytanieniniejszej instrukcji, w której podano informacje o działaniu i obsłudze pieca, w celu zapobiegania ewentualnym uszkodzeniom i przedłużenia jego żywotności.Właściwa obsługa urządzenia osz<strong>cz</strong>ędza paliwo i chroni środowisko naturalne.Gwarancja jest ważna tylko wtedy, jeżeli przestrzegano zasady określone w instrukcji montażu i obsługi.Nasze produkty objęte są gwarancją tylko wtedy, jeżeli przestrzegano zasady określone w niniejszej instrukcji montażu i obsługi. Instrukcję obsługi razem z kartątechni<strong>cz</strong>ną należy starannie przechowywać w celu późniejszego wykorzystywania jako źródła podstawowych informacji.1. SPECYFIKACJA TECHNICZNA8Piece kominkowe przezna<strong>cz</strong>one są do ogrzewania obiektów mieszkalnych i rekreacyjnych w celu zwiększenia komfortu cieplnego.1.1. Konstrukcja pieca kominkowegoPiec przezna<strong>cz</strong>ony jest do opalania drewna, ekobrykietów i brykietów węglowych. W piecu nie można spalać węgla i koksu.Piec zgrzany jest z blach stalowych o grubości od 2 do 5 mm. W <strong>cz</strong>ęści centralnej znajduje się komora spalania; w przedniej ścianie komory osadzone są drzwi<strong>cz</strong>kido ładowania paliwa. Drzwi<strong>cz</strong>ki wyposażone są w jednolitą szybę żaroodporną, która wytrzymuje temperaturę 800 °C. Komora spalania wyłożona jest kształtkamiszamotowymi. Żadna z kształtek nie jest łą<strong>cz</strong>ona za pomocą masy wykładzinowej. Na dnie komory spalania zamontowany jest pojedyn<strong>cz</strong>y ruszt żeliwny. Przedrusztem znajduje się płotek zabraniający wysypywaniu się rozżarzonego paliwa z komory spalania. Część dolna pieca kominkowego została wykorzystana jakozasobnik paliwa. Piec wykonano jako dwupłasz<strong>cz</strong>owy z pionowym wypływem powietrza o średnicy <strong>cz</strong>opucha 150 mm. Elementy sterujące zostały wykonane ze stalinierdzewnej, natomiast jego obudowa z blachy stalowej i płytek cerami<strong>cz</strong>nych.Uwaga: Piec kominkowy nie jest dostosowany do pracy ciągłej, przezna<strong>cz</strong>ony jest do pracy przerywanej (<strong>cz</strong>asowej).2. PROCES SPALANIA2.1. Ilość paliwa i dobór mocy cieplnej urządzeniaSpalanie drewna i ekobrykietów w piecu kominkowym przebiega za jednym razem w całym załadunku paliwa. W celu zapewnienia jak najlepszych warunków dlałatwego rozpalenia paliwa trzeba najpierw pod ruszt doprowadzić tzw. powietrze pierwotne (zawsze z możliwością regulacji). Wraz ze wzrastającą temperaturąspalin za<strong>cz</strong>ynają się uwalniać <strong>cz</strong>ąste<strong>cz</strong>ki gazu, które bez kolejnego dopływu powietrza nie mogłyby się przetworzyć w energię cieplną. Dlatego trzeba do wysokościpłomieni doprowadzić kolejne powietrze, tzw. powietrze wtórne.Dopływ regulowanego powietrza wtórnego ulepsza proces spalania, jak również pomaga w samoo<strong>cz</strong>ysz<strong>cz</strong>aniu szyby żarodopornej. Odpowiednia ilość powietrzadoprowadzanego do właściwych miejsc w komorze spalania zwiększa skute<strong>cz</strong>ność procesu spalania i obniża emisję szkodliwych substancji. Rozmiesz<strong>cz</strong>enie prepustnicpowietrza zostało przedstawione na schemacie zawartym w karcie techni<strong>cz</strong>nej, która jest dostar<strong>cz</strong>ana wraz z piecem kominkowym.Osiągana moc cieplna urządzenia grzew<strong>cz</strong>ego zależy od ilości paliwa spalonego przez ustalony okres <strong>cz</strong>asu, jego jakości oraz skute<strong>cz</strong>ności procesu spalania. Tabelanr 2 podaje informacje o mocy cieplnej osiąganej z 1 kg drewna o wilgotności 20 % spalanego przez <strong>cz</strong>as 1 godziny. Należy pamiętać, że wraz ze wzrastającąwilgotnością obniża się wydajność paliwa.W warunkach laboratoryjnych zostały przeprowadzone badania regulacji urządzenia grzew<strong>cz</strong>ego w zakresie od 20 do 100 % mocy nominalnej. Regulację mocyprzeprowadzono za pomocą ciągu kominowego i paliwa. W praktyce piec reguluje się za pomocą przepustnic powietrza, i to przede wszystkim przepustnicąpowietrza pierwotnego. Odpowiedni dobór mocy cieplnej nie można określić jednozna<strong>cz</strong>nie. Wchodzi tutaj w grę mnóstwo <strong>cz</strong>ynników: wilgotność paliwa, gatunekdrzewa, ciąg kominowy, warunki atmosfery<strong>cz</strong>ne itp. Dlatego trzeba proces spalania (siłę i jakość płomieni) dostosowywać do aktualnych warunków.Umiejętność doboru odpowiedniej mocy cieplnej narasta wraz z Państwa doświad<strong>cz</strong>eniem przy eksploatacji urządzenia. Sz<strong>cz</strong>egółowe informacje razem z zasadamiregulacji dostępu powietrza zawiera tabela w karcie techni<strong>cz</strong>nej, w której można znaleźć wartości rze<strong>cz</strong>ywiste ustalone na podstawie badań przeprowadzonych wlaboratorium państwowym. Przyto<strong>cz</strong>ona niżej tabela nr 1 służy wyłą<strong>cz</strong>nie do podania informacji ogólnej doty<strong>cz</strong>ącej regulacji dostępu powietrza.Tabela nr 1Paliwo Ilość paliwa Primární vzduch Sekundární vzduch Terciální vzduchZ możliwością regulacji Z możliwością regulacji Nie można regulowaćDřevěná polena2 - 3 polena(2-3 kg)Uzavřen nebo podlepotřeby otevřen dle danýchspalovacích podmínek,regulace hořeníUzavřen nebo podlepotřeby otevřen dle danýchspalovacích podmínek,regulace oplachu sklaMaksymalnieotworzonaZasady spalania drewna:- Zawsze po zapaleniu się paliwa należy pozostawić przepustnicę powietrza pierwotnego przez chwilę odsłoniętą, gdyż ułatwia to rozpalenie paliwa.- Przed nałożeniem paliwa zaleca się maksymalnie zamknąć przepustnicę powietrza pierwotnego- W trakcie procesu spalania należy obowiązkowo zadbać o to, by wilgotność drewna nie przekra<strong>cz</strong>ała 20 %.- W celu jak najlepszego wykorzystania wydajności wymiennika zaleca się ładowanie i utrzymywanie paliwa na ruszcie.2.2. PaliwoPiec kominkowy przezna<strong>cz</strong>ony jest do opalania polan drewnianych i brykietów drzewnych. Wilgotność drewna używanego do opalania nie powinna przekra<strong>cz</strong>ać 20% (najlepiej 10 %). Z reguły im mniejsza jest wilgotność paliwa, tym większa jest jego wydajność. Zalecaną wilgotność osiąga drewno sezonowe 2 lata po wyrębie,które jest przechowywane pod zadaszeniem. Zawartość wody w brykietach powinna być deklarowana przez producenta. Brykiety należy przechowywać w suchympomiesz<strong>cz</strong>eniu, w przeciwnym razie mogą ulegać rozpadowi. Producent zaleca stosować polana o średnicy od 3 do 6 cm i długości od 20 do 35 cm. Zabrania sięspalania w urządzeniu węgla i koksu! Nie zaleca się stosować do opalania cie<strong>cz</strong>y łatwopalnych lub odpadów, takich jak: tapety, płyty wiórowe, tworzywa sztu<strong>cz</strong>ne,drewno nasycone, wióry i trociny. Spalanie ww. materiałów stwarza zagrożenie dla środowiska i ma negatywny wpływ na żywotność urządzenia. Ponadto możedoprowadzić do uszkodzenia pieca lub komina.Uwaga: Można o<strong>cz</strong>ywiście również spalać korę znajdującą się na polanach drewnianych.
9Tabela nr 2Gatunek drzewaWartość opałowa kWh/m 3Wartość opałowakWh/1kgMasa kg/m 3Świerk, jodła 1957 4,0 485Modrzew 2461 4,0 610Sosna 2280 4,0 565Dąb, buk 2743 3,8 726Wartość opałowa niektórych gatunków drzewa o wilgotności 20 %CZPLDEEN3. BEZPIECZEŃSTWO PRZY OBSŁUDZE PIECA KOMINKOWEGO3.1. Zasady ogólneInstalacja i eksploatacja urządzenia powinna spełniać wymagania bezpie<strong>cz</strong>eństwa pożarowego określone w normach obowiązujących na tereniePolski.Urządzenie grzew<strong>cz</strong>e można eksploatować w warunkach normalnych wg norm obowiązujących na terenie posz<strong>cz</strong>ególnego kraju. W przypadku zmiany warunków,takiej jak niebezpie<strong>cz</strong>eństwo wybuchu pożaru lub eksplozja (naprz. pod<strong>cz</strong>as klejenia linoleum, PVC oraz przy pracy z lakierami), piec przed powstaniem takiegoniebezpie<strong>cz</strong>eństwa powinien być wycofany z eksploatacji. Piec można używać tylko w pomiesz<strong>cz</strong>eniach z odpowiednią wentylacją, najlepiej grawitacyjną.3.2. Bezpie<strong>cz</strong>na odległość pieca od materiałów palnychPiec usytuowany w pomiesz<strong>cz</strong>eniu z materiałami palnymi (klasa palności B, C1 i C2) powinien być od takich materiałów oddalony 800 mm od strony przedniejurządzenia i 200 mm od pozostałych stron.Czopuch powinien być oddalony od krawędzi drzwi<strong>cz</strong>ek, konstrukcji budowlanych z materiałów palnych oraz przewodów łą<strong>cz</strong>nie z izolacją min.200mm. Od innych <strong>cz</strong>ęści konstrukcji z materiałów palnych min. 400mm . Chodzi o materiały budowlane o klasie palności B, C1, C2 (patrz tab. nr 3) Jeżeli pieceksploatowany jest w pomiesz<strong>cz</strong>eniu, w którym znajdują się również materiały budowlane o klasie palności C3, należy dwukrotnie przedłużyć bezpie<strong>cz</strong>ną odległośćpieca od takich materiałów.3.3. Zasady bezpie<strong>cz</strong>nego użytkowaniaZabrania się spalania w urządzeniu cie<strong>cz</strong>y łatwo palnych! Zabrania się również spalania wszelkich materiałów z tworzywa sztu<strong>cz</strong>nego, drewna nasą<strong>cz</strong>onego spoiwem(płyty wiórowe), jak też niesortowanymi odpadami domowymi itp.Piec powinny obsługiwać tylko osoby dorosłe! Dzieci mogą przebywać w pobliżu pieca tylko pod opieką dorosłych. Należy pamiętać, że piec, przede wszystkimpowierzchnie szklane, są gorące. Dotknięcie takich powierzchni może spowodować oparzenia.Użytkowanie pieca wymaga obługi i nadzoru. W celu zapewnienia bezpie<strong>cz</strong>eństwa przy obsłudze przepustnic powietrza i otwieraniu drzwi<strong>cz</strong>ek należy założyćrękawice ochronne. Pod<strong>cz</strong>as użytkowania nie wolno kłaść na piec żadnych przedmiotów z materiałów palnych mogących spowodować pożar. Do rozgrzanego piecaz wyłożeniem cerami<strong>cz</strong>nym nie wolno wkładać żadnych pojemników z zimną cie<strong>cz</strong>ą – grozi to pęknięciem wykładziny.Z powodu niebezpie<strong>cz</strong>eństwa oparzenia należy zachować sz<strong>cz</strong>ególną ostrożność przy manipulowaniu popielnikiem i usuwaniu gorącego popiołu. Gorący popiół niemoże wejść w kontakt z materiałami palnymi – naprz. przy jego wsypywaniu do pojemników na odpady komunalne.Piec kominkowy należy użytkować zgodnie z niniejszą instrukcją obsługi. Wszelkie przeróbki urządzenia we własnym zakresie są zabronione.Tabela nr 3Klasyfikacja ogniowa niektórych wyrobów budowlanychKlasa palności materiałówbudowlanych i elementówbudowlanychA - niepalneB - niezapalneC1 - bardzo trudno palneC2 - średnio palneC3 - łatwo palneRodzaje materiałów budowlanychgranit, piaskowiec, beton, cegły, bloki cerami<strong>cz</strong>ne, specjalne materiały tynkiarskieakumina, heraklit, lignos, itaverdrewno z drzew liściastych, Sirkolit, papier utwardzany, (Umakart), sklejkapłyty wiórowe, Solodur, płyty korkowe, guma, wykładziny podłogowe płytypilśniowe,Poliestry, Poliuretanpłyty pilśniowe, Poliestry, Poliuretan4. INSTALACJA PIECA KOMINKOWEGO I JEGO PODŁĄCZENIE DO KOMINAUwaga: Pod<strong>cz</strong>as instalacji piecu kominkowego należy przestrzegać zasady określone w przepisach lokalnych łą<strong>cz</strong>nie z tymi, które doty<strong>cz</strong>ą państwowych lub europejskichnorm obowiązujących dla tego typu urządzeń.4.1. Podłą<strong>cz</strong>enie pieca do komina lub wkładu kominkowegoPodłą<strong>cz</strong>enie pieca kominkowego do przewodów kominowych powinno być wykonane przez uprawnionego kominiarza, i to zgodnie z normami obowiązującymina terenie danego kraju (patrz załą<strong>cz</strong>nik nr 2).W celu zabiezpe<strong>cz</strong>enia sprawnego działania pieca należy sprawdzić ciąg kominowy w <strong>cz</strong>opuchu.Wartości minimalnego ciągu kominowego podano w karcie techni<strong>cz</strong>nej urządzenia. Zbyt słaby ciąg ma negatywny wpływ na sprawność działania pieca i powodujenadmierne zadymienie szyby i niedrożność przewodów kominowych. Powoduje on również obniżenie mocy cieplnej urządzenia. Pod<strong>cz</strong>as ładowania może dojść do
CZPLDEENwydostania się spalin do pomiesz<strong>cz</strong>enia. W takim wypadku zalecamy sprawdzenie przewodów kominowych przez uprawnionego kominiarza i przeprowadzanie naurządzeniu okresowych prac konserwacyjnych. Jeżeli ciąg kominowy jest zbyt wysoki i przekra<strong>cz</strong>a 20 Pa, należy zamontować w przewodzie kominowym odpowiedniąklapę ciągową (naprz. rura spalinowa z klapą). Nadmierny ciąg kominowy powoduje zbyt intensywne spalanie, większe zużycie paliwa i może doprowadzićdo uszkodzenia grzejnika.4.2. Podłą<strong>cz</strong>enie pieca do przewodu kominowegoZalecamy podłą<strong>cz</strong>enie pieca do niezależnego przewodu kominowego. Do wspólnego przewodu kominowego piec można podłą<strong>cz</strong>yć tylko przy przestrzeganiuobowiązujących norm. Nie wolno podłą<strong>cz</strong>ać pieca do urządzeń gazowych.4.3. Zasady instalacji i bezpie<strong>cz</strong>eństwa przewodu kominowego10Długość przewodów kominowych nie powinna przekra<strong>cz</strong>ać 1,5 m. Rury spalinowe i kolano należy złą<strong>cz</strong>yć z zachodzeniem min. 50 mm i zadbać o to, by rury zachodziływ kierunku ciągu. Wylot spalin do komina należy wyposażyć w łą<strong>cz</strong>nik metalowy o odpowiedniej średnicy. Przewód kominowy powinien być wyprowadzanydo kanału kominowego pod kątem ok. 10°.4.4. Usytuowanie pieca w pomiesz<strong>cz</strong>eniuPrzed rozpo<strong>cz</strong>ęciem instalacji pieca kominkowego należy sprawdzić nośność podłogi (sufitu) z uwzględnieniem typu i masy urządzenia grzew<strong>cz</strong>ego. Piec powinienbyć zainstalowany na podłożu niepalnym o własnościach termoizolacyjnych, którego krawędzie oddalone są od urządzenia po stronach bo<strong>cz</strong>nych i w tyłu min. o100 mm i po stronie przedniej min. o 300 mm. W przypadku zastosowania podkładki metalowej, jej grubość powinna wynosić min. 2 mm (patrz załą<strong>cz</strong>nik nr 1).Uwaga: W celu późniejszej konserwacji urządzenia, przewodu kominowego i komina należy wokół pieca pozostawić odpowiednią przestrzeń.5. INSTRUKCJA OBSŁUGI5.1. Uruchomienie piecaPrzed pierwszym uruchomieniem pieca należy usunąć z szyby wszelkie nalepki i wyjąć akcesoria z popielnika lub paleniska, co doty<strong>cz</strong>y również zabezpie<strong>cz</strong>eń transportowych.Według rysunku na karcie techni<strong>cz</strong>nej należy sprawdzić, <strong>cz</strong>y są prawidłowo osadzone przepustnice powietrza, kształtki szamotowe lub płotek (możliwe,że pod<strong>cz</strong>as transportu lub instalacji opuściły prawidłową pozycję). W razie stwierdzenia jakiejkolwiek wady należy ich poprawić. W przeciwnym wypadku wkładkominkowy może działać nieprawidłowo.Do wykoń<strong>cz</strong>enia powierzchni pieca kominkowego użyto farby żaroodpornej, która się utwardza po pierwszym rozpaleniu i przejściowym zmięknięciu. W faziezmięknięcia należy uważać, by nie uszkodzić powierzchni lakierowanej ręką lub innym przedmiotem. Po pierwszym rozpaleniu należy utrzymywać słaby płomieńi spalać mniejszą ilość paliwa przy niższej temperaturze. Wszystkie materiały muszą przyzwy<strong>cz</strong>aić się do obciążenia cieplnego. Ostrożne rozpalenie zapobiegnapowstawaniu pęknięć w kształtkach szamotowych, uszkodzeniom lakieru i deformacjom w konstrukcji wkładu. Ewentualny przykry zapach znika w trakcie utwierdzaniafarby, zalecamy więc intensywną wentylację pomiesz<strong>cz</strong>enia.Należy przemieścić zwierzęta domowe lub ptaki znajdujące się w pobliżu.5.2. Rozpalanie i palenieW celu łatwiejszego rozpalenia paliwa należy nałożyć na ruszt 2 – 3 mniejsze polana drewniane, przykryć ich papierem lub wlożyć rozpałkę, następnie nałożyć chrustlub wióry drewniane, mniejsze kawałki drewna i w końcu grubsze polana. Zalecamy nałożenie większej ilości paliwa (do wysokości 2/3 wyłożenia cegłą szamotową).Poprzez załadunek większej ilości paliwa można zabezpie<strong>cz</strong>yć dostate<strong>cz</strong>ny <strong>cz</strong>as spalania potrzebny do ogrzania komina i jego sprawnego działania. Należy maksymalnieotworzyć przepustnicę powietrza pierwotnego. Niekiedy dla ułatwienia rozpalenia paliwa zaleca się obniżyć dopływ powietrza wtórnego. Po rozpaleniu drzwi<strong>cz</strong>kipaleniska muszą zostać zamknięte. Jak tylko paliwo się rozpali, za pomocą przepustnic powietrza należy nastawić spokojne, ra<strong>cz</strong>ej lekko stłumione spalanie.Dane doty<strong>cz</strong>ące regulacji płomienia i spalania podano w karcie techni<strong>cz</strong>nej i tabeli nr 1.Uwaga: Przed rozpaleniem należy każdorazowo sprawdzić, <strong>cz</strong>y ruszt nie jest zaniesiony popiołem. W takim razie należy zepchnąć popiół pogrzeba<strong>cz</strong>em do popielnika.Drzwi<strong>cz</strong>ki paleniska (komory spalania) powinny być zawsze zamknięte. Wyjątki stanowią uruchamianie pieca, ładowanie paliwa i usuwanie popiołu.Po każdej dłuższej przerwie w pracy pieca należy przed ponownym rozpaleniem sprawdzić drożność i <strong>cz</strong>ystość przewodu kominowego, komina i paleniska.5.3. Załadunek paliwaW celu zapobiegania wydostawania się spalin do pomiesz<strong>cz</strong>enia pod<strong>cz</strong>as ładowania paliwa zalecamy: W <strong>cz</strong>asie ok. 5 do 10 sekund przed otwarciem drzwi<strong>cz</strong>ek paleniskanależy maksymalnie otworzyć przepustnicę powietrza pierwotnego, następnie lekko otworzyć drzwi<strong>cz</strong>ki do ładowania, po<strong>cz</strong>ekać przez kilka sekund i dopierowtedy drzwi<strong>cz</strong>ki otworzyć zupełnie. Po otwarciu drzwi<strong>cz</strong>ek do ładowania należy postępować ostrożnie, gdyż grozi to mwypadnięcie resztek rozżarzonego paliwa.Po ukoń<strong>cz</strong>eniu ładowania należy ponownie zamknąć drzwi<strong>cz</strong>ki paleniska. Po rozpaleniu paliwa (bez dymiącego płomienia) ustawić przepustnicę w pierwotnej pozycji(ew. ją zamknąć). Pod<strong>cz</strong>as ładowania należy dbać o to, by paliwo nie przekra<strong>cz</strong>ało wysokość wyłożenia szamotowego (vermikulitowego). Wielkość załadunkupowinna odpowiadać zużyciu paliwa za godzinę (patrz kartę techni<strong>cz</strong>ną). Przegrzewanie grozi niebezpie<strong>cz</strong>eństwem uszkodzenia pieca.Uwaga: Nadmiernemu przenikaniu spalin do pomiesz<strong>cz</strong>enia zapobiega ładowanie paliwa dopiero po wypaleniu poprzedniego załadunku do warstwy zapłonowej.5.4. Zewnętrzny dopływ powietrza do spalaniaW celu zapewnienia prawidłowego spalania potrzebny jest dopływ świeżego powietrza. Pod<strong>cz</strong>as spalania drewna piec zużytkuje niemal 15m3 świeżego powietrzaw ciągu jednej godziny. Izolacja termi<strong>cz</strong>na nowo<strong>cz</strong>esnych budynków mieszkalnych może okazać się ważnym problemem. Kolejne problemy stwarzają wentylatorylub inne urządzenia cieplne działające w pomiesz<strong>cz</strong>eniu.W ten sposób obniża się jakość procesu spalania, które doprowadzane jest kopceniem i powstawaniem osadu w przewodach kominowych. Dostate<strong>cz</strong>ną ilość powietrzamożna zabezpie<strong>cz</strong>yć poprzez otwarcie okien lub drzwi do sąsiedniego pokoju. Jednak lepiej jest razem z instalacją grzejnika zabezpie<strong>cz</strong>yć dopływ powietrzaza pomocą kratki wentylacyjnej.5.5. Użytkowanie pod<strong>cz</strong>as okresu przejściowego i przy zmieniających się warunkach atmosfery<strong>cz</strong>nychPod<strong>cz</strong>as okresu przejściowego, ew. przy wyższych temperaturach powietrza przekra<strong>cz</strong>ających 15°C , w desz<strong>cz</strong>owe i wilgotne dni lub przy gwałtownych porywachwiatru, może dojść do osłabienia ciągu kominowego (wyciągu spalin z wkładu), w wyniku <strong>cz</strong>ego spaliny nie są w pełni odprowadzane. Dlatego piec kominkowy
11musi być w tych okresach użytkowany z jak najmniejszą ilością paliwa, żeby można było przy otworzeniu dopływu powietrza uregulować spalanie i ciąg kominowy.5.6. Czystość szybyNa <strong>cz</strong>ystość szyby ma wpływ, opró<strong>cz</strong> stosowania odpowiedniego paliwa, dostate<strong>cz</strong>nego dopływu powietrza do spalania (zwłasz<strong>cz</strong>a wtórnego)oraz odpowiedniego ciągu kominowego, również sposób, w jaki jest piec kominkowy obsługiwany. Wzwiązku z tym zalecamy wkładać do pieca tylko jeden załadunek tak, by paliwo było w palenisku równomiernie rozłożone i maksymalnie oddalone od szyby. Doty<strong>cz</strong>yto również brykietów (odległość między nimi powinna wynosić od 5 do 10 mm). W razie zanie<strong>cz</strong>ysz<strong>cz</strong>enia szyby pod<strong>cz</strong>as ogrzewania zalecamy zwiększenie intensywnościspalania otwierając przepustnicę powietrza pierwotnego.CZPLDEEN5.7. Usuwanie popiołuW zależności od intensywności i <strong>cz</strong>asu spalania należy zepchnąć pogrzeba<strong>cz</strong>em popiół przez ruszt do popielnika i opróźnić go. Najlepiej zrobić to, gdy piec jestzimny. Należy upewnić się, <strong>cz</strong>y popielnik nie jest przepełniony. Nagromadzony popiół odcina dopływ powietrza pod ruszt. UWAGA: Przed opróźnieniem popielnikanależy sprawdzić, <strong>cz</strong>y w środku nie pozostały resztki rozżarzonego paliwa, które mogłyby w pojemniku spowodować pożar. Popiół ze spalonego drewna możnawykorzystać jako nawóz naturalny.6. CZYSZCZENIE I KONSERWACJA6.1. Czysz<strong>cz</strong>enie grzejnikaPiec kominkowy w zimnym stanie należy minimalnie raz w roku (po sezonie grzew<strong>cz</strong>ym) lub <strong>cz</strong>ęściej wy<strong>cz</strong>yścić. W ramach <strong>cz</strong>ysz<strong>cz</strong>enia należy usunąć osad w przewodachkominowych, palenisku i na przepustnicach powietrza. Należy również naprawić, najlepiej poprzez ich wymianę, wypadnięte <strong>cz</strong>ęści wyłożenia szamotowego.Całość wyłożenia należy sprawzdać również w trakcie sezonu grzew<strong>cz</strong>ego. Sz<strong>cz</strong>eliny między posz<strong>cz</strong>ególnymi kształtkami szamotowymi służą jako dylatacja cieplnazapobiegająca pękaniu kształtek i w żadnym wypadku nie jest zalecane jakiekolwiek wypełnianie sz<strong>cz</strong>elin, naprz. zaprawą, jak to robiono w przypadku starszychpieców na paliwa stałe.Popękane kształtki szamotowe nie tracą właściwości użytkowych, jeżeli nie wypadną zupełnie!Do <strong>cz</strong>ysz<strong>cz</strong>enia szyby można używać zwykłych preparatów do <strong>cz</strong>ysz<strong>cz</strong>enia płyt i piekarników, suchej szmatki lub gazet, <strong>cz</strong>y też specjalnego preparatu do <strong>cz</strong>ysz<strong>cz</strong>eniaszyb kominkowych. Szybę należy <strong>cz</strong>yścić tylko wtedy, gdy nie jest gorąca. Do <strong>cz</strong>ysz<strong>cz</strong>enia powierzchni lakierowanych nie wolno używać wody. Zalecamy użyciegąbki lub miękkiej szmatki flanelowej.6.2. Pożar w kominieW przypadku powstania pożaru w komine należy natychmiast ugasić ogień w piecu usuwając resztki rozżarzonego paliwa do pojemnika niepalnego. Następnienależy wezwać straż pożarną.6.3. Czysz<strong>cz</strong>enie płytek cerami<strong>cz</strong>nychPłytki cerami<strong>cz</strong>ne należy <strong>cz</strong>yścić suchą lub lekko nawilżoną szmatką. Przy <strong>cz</strong>ysz<strong>cz</strong>eniu piec powinien być zimny.6.4. Taśma usz<strong>cz</strong>elniającaJako usz<strong>cz</strong>elnienie szyby, drzwi<strong>cz</strong>ek lub innych <strong>cz</strong>ęści pieca zastosowano specjalną taśmę usz<strong>cz</strong>elniającą ze szkła cerami<strong>cz</strong>nego, która wytrzymuje nawet wysokietemperatury. Stan usz<strong>cz</strong>elnienia należy okresowo sprawdzać i w przypadku jego uszkodzenia wymienić.Po upływie <strong>cz</strong>asu usz<strong>cz</strong>elnienie się wyrabia i traci swoje właściwości. Dlatego zalecamy każde 3 miesiące sprawdzić usz<strong>cz</strong>elnienie szyby w konstrukcji drzwi<strong>cz</strong>ek iewentualne dokręcenie szyby za pomocą uchwytów mocujących.6.5. Części zamienneW razie konie<strong>cz</strong>ności należy używać wyłą<strong>cz</strong>nie oryginalnych <strong>cz</strong>ęści zamiennych zalecanych przez producenta w pkt. 9.2. Posz<strong>cz</strong>ególne <strong>cz</strong>ęści zamienne zostałyopisane w karcie techni<strong>cz</strong>nej, która jest dostar<strong>cz</strong>ana wraz z urządzeniem.7. NAJCZĘSTSZE USZKODZENIA7.1. Pęknięcie (wypadnięcie) kształtek szamotowychNajpierw trzeba podkreślić, iż popękane kształtki szamotowe nie tracą właściwości użytkowych, dopóki całkowicie nie wypadną, dlatego nie ma konie<strong>cz</strong>ności ichnatychmiastowej wymiany! W przypadku wymiany należy <strong>cz</strong>ęści te zamówić bezpośrednio u swojego sprzedawcy lub na adresie producenta, podając przy tym typ inumer seryjny pieca. Następnie za pomocą karty techni<strong>cz</strong>nej (załą<strong>cz</strong>onej do urządzenia) ustalić numer kształtki szamotowej, którą należy wymienić.Sposób wymiany: Wymiany kształtek bo<strong>cz</strong>nych należy dokonać w ten sposób, że zdejmują się uchwyty mocujące szamot i wyjmuje się uszkodzoną kształtkę. Niekiedytrzeba wyjąć również żeliwny ruszt z kształtkami szamotowymi na dnie. Ponowny montaż przeprowadza się w odwrotnej kolejności, nie zapominając o ułożeniuwszystkich kształtek w pierwotnej pozycji (patrz kartę techni<strong>cz</strong>ną).Uwaga: Nie wolno rozpalać pieca w przypadku wypadnięcia nawet małej <strong>cz</strong>ęści wyłożenia komory spalania, gdyż grozi to niebezpie<strong>cz</strong>eństwem przepalenia konstrukcjipieca.7.2. Rozbita szybaSzybę wykonano ze specjalnego szkła cerami<strong>cz</strong>nego o wysokiej odporności termi<strong>cz</strong>nej. Nie wolno stosować zwykłe szkło!Sposób wymiany: Wymieniając szybę nie trzeba demontować całych drzwi<strong>cz</strong>ek, wystar<strong>cz</strong>y tylko odkręcić uchwyty mocujące i szybę wyjąć. Przyponownym montażu szyba powinna równomiernie przylegać do powierzchni drzwi<strong>cz</strong>ek. Powierzchnię przylegania między szybą i drzwi<strong>cz</strong>kami należy usz<strong>cz</strong>elnićtaśmą usz<strong>cz</strong>elniającą. Jeżeli taśma usz<strong>cz</strong>elniająca nie jest uszkodzona, można jej użyć ponownie. Uchwyty pod<strong>cz</strong>as ponownego monta u dokręcać z wy<strong>cz</strong>uciem irównomiernie, aby nie doszło dopęknięcia nowej szyby wskutek nadmiernego dokręcenia.7.3. Pęknięcie płyty bo<strong>cz</strong>nejPod<strong>cz</strong>as transportu, użytkowania oraz w innych sytuacjach może dojść do uszkodzenia płytek obłożenia pieca. Płytki lub panele z blachy są mocowane do obudowy
139.1. Dodatkowe akcesoria na zamówienie1. Czopuchy2.Zestawy, kosze, parawany3. Szuflada do rusztu,4. Rozpałka w spray5. Preparat do <strong>cz</strong>ysz<strong>cz</strong>enia szyb kominkowych6. Środek do <strong>cz</strong>ysz<strong>cz</strong>enia kominów7. Łopatka8. Pojemnik na śmiecieCZPLDEEN9.2. Wybrane <strong>cz</strong>ęści zamienneCzęści zamienne na zamówienie:1. Bloki szamotowe2. Szuflada popielnika3. Szyba drzwi<strong>cz</strong>ek do ładowania paliwa4. Ruszt żeliwny5. Taśmy usz<strong>cz</strong>elniające6. Klej do taśmy usz<strong>cz</strong>elniającej7. Obłożenie płasz<strong>cz</strong>a8. Elementy dekoracyjne (drągi, klamki, regulatory)10. DEKLARACJA ZGODNOŚCI WE I CERTYFIKAT CEDeklaracja zgodności WE została wydana dla wszystkich produktów na podstawie przeprowadzonych wstępnych badań typu wg normy EN 13240:2005 + A2 oraz certyfikatu CE. Sprawozdanie ze wstępnych badań typu oraz certyfikat CE są w zgodzie z Dyrektywą Rady 89/106/EWG i zostały wystawioneprzez jednostkę notyfikowaną:Strojírenský zkušební ústav, s.p. ES 1015, AO 2002 ul. Hudcova 56 b., CZ-621 00 Brno (Czechy)Producent oświad<strong>cz</strong>a, że ww. piec kominkowy jest bezpie<strong>cz</strong>ny i spełnia wymogi określone przez Dyrektywę 89/106/EWGdla zamierzonego zakresu stosowania.Producent podjął działania w celu zabezpie<strong>cz</strong>enia zgodności wszystkich produktów wprowadzanych do obrotu.
CZPLDEENIhr seid Besitzer von Kaminofen von der Marke <strong>HS</strong> Flamengo geworden. Wir danken fűr eur Vertrauen, welches ihr durch den Einkauf eueres Erzeugnis ausgedrűckthabt. Lest bitte sorgfälltig diese Betriebsanleitung, welche euch űber Fumktion und Manipulation mit dem Kaminofen informiert. So vermeidet euch dieSchadenentsctehung und verläng Lebensdauer des Kaminofens.Durch richtige Bedienung spart ihr die Triebstoff und schűtzt die Umwelt.Garantie fűr unsere Ofen gewähren wir nur dann, wenn ihr die Anweise in Anleitung fűr Installation und Bedienung einhaltet.Garantie fűr unsere Erzeugnise gewöhren wir nur in solchem Falle, wenn ihr die Anweise in dieser Anleitung fűr Inatllation und Bedienug angegebene einhalten.Anleitung und Schrán mit technischen Angaben bewahrt sotgfälltig auf, so könnt ihr auf dem Anfang jeder Heizsaison wieder die nötige Kenntnise fűr richtigeBedienung ihres erfrischen.1. TECHNISCHE SPEZIFIKATION14Kombinerter Kaminofen ist zim Heizen von Wohnräume, Rekreationsanlage sowohl auch den Arbeitsplätze geignet wo Absicht die Erhöhung vonWarmbequemheit steht, wozu Empfing aus Einsicht in Ofen beiträgt.1.1 KonstruktionsdurchfűhrungOfen ist zur Verbrennung von Holz, Ekobrikette und Kohlbrikette geignet. Mit dem Durchwärmungssystem des Ofens kann man nicht Kohl undKoks verbrennen.Ofen ist von Stahlbleche von Dicke 2-5 mm geschweisst. In Mittenteil des Ofen ist die Verbrennungkammer, deren vorne Siete besteht aus Zuladungstűrschen. InTűrchen ist grossräumiges spezieles Glas, welche ist fűr Temperatur bis rund 800C beständig. Verbrennungsraum ist mit den Schamottfitting umgelegt. Fittinge sinddurch keine Löschbitmasse verbunden. Auf Boden den Verbrennungskammer gibt es einfaches Gussgitter. Vom Gitter ist Hinderniss gegen dem Triebstofabfall undseine niedereschleifen auf Stirnfenster. Unterer Teil des Ofens ist als Triebstofreservoir ausgenűtzt. Ofen ist als Doppeldeckel mit dem vertikál Rauchgassenabzuggelöst. Rauchrohrdurchschnitt ist 150 mm. Lenkungselemente sind rostfrei. Ofenbedeckung ist von Stahlblech und keramischen Fliesen ausgefűhrt.Beachtung : Kaminofen ihat keinen Charakter von stammbrann Hezvorrichtung und ist zum periodischen-unterbrochenem Betrieb geignet.2. VERBRENNUNGSPROZESS2.1. Triebstoffmenge und EInstellung des VerbrenungsprozessesVerbrennung von Holz und Ekobrikette im Kaminofen ist der Systém als durchheizend, was heisst, das Verbrennung luft in ganzer Triebstoffeinsetzung auf einmaldurch. Fűr Besicherung von idealen Bedingungen der einfachen Unterbrennung ung folgender Verbrennung ist nűtig unter brenneder Triebstoff, űber den Rost, dienachträgliche Luftmenge zufűhren – als primar gezeichnet, welches jedesmal regullierbar ist. Mit steigender Temperatur fangen die Gasbestandteile der Triebstofffreisetzen an, welche ohne witerer Luftzufűhrung keine weitere Arbeit im Gestalt von Warmenergie tun wűrden., darum ist dei Zufűhrung von weiteres Luftes inNiveau der Flammen zufűhren, wo der Prozess von Verbrennung diesel Gasbestandteile weiter verlaufen kann, dadurch meistens verfällt das Ansuchen von Primarluftzufuhr,umgekehrt entsteht das Ansuchen auf Zufuhr von Luft sekundär.Zufuhr von sekundären Luftes, welcher meistens regullierbar ist, vergűttert Verbrennung, sowieso hilft auch der atomatischen Reinigung des Tűrchenglases. Beirichtiger Menge von Verhältnis der Lűfte in den richtigen Plätze der Kamer zugefűhrt steigt die Wirksamkeit von der Verbtrennung und damit erniedrigt sich dieEmission von schädlichen Gasen ins Luft. Platzierung von Regulator der Luftzufuhr ist auf Schéma im technischen Schein gezeigt, welcher der Bestandteil jederLieferung von Kaminofen ist.Erreichte Wärmeleistung ist von der Menge von verbrannter Triebstoff abhängig ist und in sicherer Zeitabschnitt, ihrer Gűte unf Wirksamkeit des Verbrennungprozesses.Nach der Tabelle Nr.2 der Verwärmeheit der Triebstoffe könnt ihr Vorstellen von erreichbarer Leistung bei Verbrennung von 1 kg Holz in einer Stunde bei seiner20% Feuchtigkeit. Weiter gilt,dass mit steigender Feictigkeit von Holz sich aussernd ihr Verwärmeheit erniedrigt.In Bedingungen von Prűfungstelle wurde die Regulierbarkeit von Warmanlage in Grenze von 20-100% der Namenleistung geprűft. Leistungsregulation wurdedurch Schnorsteinabzug und Triebstoffmenge durchgefűhrt. In Praxis ist Ofen meistens mit Hilfe der Regulátorem der Lűfte. Insbesondere durch primar Luftzufuhr.Pűnktliche Einstellung kann man mit Hilfe der Regulátore eindeutig definieren. Sie ist mit ganzer Reihe der Faktoren beinflusst – Triebstoffeutigkeit, Triebstoffart,Abzug des Schnorsteines, ausseren Pressbedingungen usw. Darum műssen wir deen Verbrennungsprozess (Intensität und Qualität des Flammes) nach den stehendenBedingungen regullieren.Fähigkeit der wirksamen Einstellung von Verbrennungsprozess erhöht sic hmit euren Erfahrungen mt Ofenverwendung. Ausfűhrlichere Tabelle mit der Einstellungvon Regulátorem des Luftzufuhres ist der Bestandteil von technischen Schein, wo die wirkliche Angaben gegeben sind, welche in gegebenen Bedingungen vonStaatsprűfungstelle geprűft wurden. Nieder gegebene Tabelle Nr.1 dient nur als allgemeine Auskunft fűr Regulation des Luftzufuhre.Tabelle Nr.1Palivo Množství paliva Primární vzduch Sekundární vzduch Terciální vzduchregulovatelný regulovatelný neregulovatelnýDřevěná polena2 - 3 polena(2-3 kg)Uzavřen nebo podlepotřeby otevřen dle danýchspalovacích podmínek,regulace hořeníUzavřen nebo podlepotřeby otevřen dle danýchspalovacích podmínek,regulace oplachu sklaMaximálně otevřen,sekundární spalováníType der Verbrennung von Holz :- Nach jeder Verbrennung in Ofen lasst den Regulátor von Primarluft lieber länger geöffnet, so erwinnt ihr bessere Verbrennung der Triebstoff.- Vor dem Zuladen der Triebstoff ist passend den Regulator der Primarluftes völlig zu schlieben.- Bei der Holzverbrennung passt ihr unbedingt darauf, das Holz trockem wäre und Feutigkeit höchstens 20% betragen wűrde.- Fűr optimale Ausnűtzung der Tauscherleistung ist am besten zuladen und während der Brennung Triebstoff im Rostraum halten.2.2. TriebstoffKaminofen kann man Stűckholz und Brikette aus Pressholz verbrennen. Feutigkeit des verbrannten Holzes sollte kleiner als 20% werden, optimal10%. Hier gilt Regel, je minder Wasserinhalt im Holz, desto ist seine Wärmerheit höher. Empfohlene Feutigkeit wird durch Lagerung von mindestens zwei Jahre imventilliertem Abdach. Wasserinhalt in Brikette muss vom Brikettenhersteller definiert. Brikette sind in der frockem Imwelt zu lagern, sonnst bedroht das Abfallengefa-
15hr. Empfohlene Grosse von Stűckenholz fűr Lagerung und Verbrennung sollte im Durchschnitt von 3-6 cm und Länge von 20-35 cm. Im Kaminofen ist Verbrennungvon Kohl und Koks verbíren. Verwendet ihr keine Brennbare Flűssigkeiten oder Abfälle zur Verbrennung von Type : Tapetten, Spanplattenbretter, Kunststoffe,konserviertes Holz oder eigene Abfälle. Verbrennung diesel Materiale schadet nicht nur der Umwelt aber auch verkűrzt Lebensdauer von Ofen, daneben kann dasauch zur Ofenbeschädigung – Schnorrstein hinzufűhren.Hinweis : Rinde, welche sic han den Holzstűcke befindet, ist selbstverständlich auch zu verbrennenTabelle Nr.2Holzart Heizwert kWh/Gm Heizwert kWh/1kg Gewicht kg/GmFichte, Tanne 1957 4,0 485Lärche 2461 4,0 610Kiefer 2280 4,0 565Eiche, Buche 2743 3,8 726CZPLDEENHeizwert von einigen Holzarte bei der Feutigkeit von 20% (Gm - Gasmesser (m3))3. VERKEHRSSICHERHEIT3.1. Allgemeine VerordnungenBeim Verkehr und Installation von Kaminofen muss man die Grundsätze der Gegenbrannschutz im Normen des entsprechenden Staats enthält. Der Verbraucher darfin Normalumwelt wervendet nach Normen des entsprechenden Staats werden. Beim Wechseln dieser Umwelt, wenn das űbergängliche Gefahr der Brannentstehungoder Explosion (z.B. beim PVC Kleben, bei Arbeit mit Strichstoffe usw.), dann musst Kaminofen in der Zeit, vor der Gefahrenstehung, aus dem Betriebt gesetztwerden. Weiter kann man Ofen erst nach dem grűndglichen Ablűften des Raumes, bestens mit Luftzug.3.2. Sichere Entfernung von BrannstoffeIst Kaminofen im Raum mit brennbaren Gegenstände palziert (Brannklassen B,C1 und C2) ,dann muss man die sichere Entfernung 800 mm von vorne Ofenseite,in anderen Richtungen 200 mm einhalten.Siche Weite von Rauchrohr von Belegung der Tűrrahme usw. Von plazierten Baukonstruktionen, Brennmassenkonstruktionen und von Rohrleitungsinstallationeinschliesslich ihrer Isolation beträgt ist niedrigstens 200 mm. Von weiteren Konstruktion von brennbaren Stoffe niedrigstens 400 mm. Es handelt sich um Baustoffevon Brennbarkeitstuffe B, C1 nach der ČSN 73 0823 (Siehe Tab. Nr.3. Ist Ofen imRaum mit brennbaren Baustoffe um Stuffe 3 betriebt, dann ist nötig die sichereWeite von diesel Stoffe verdopplen.3.3. Anweise fűr sicheren VerkehrZur Zűndung und Heizung darf man keine brennbare Flűssigkeiten verwenden! Weiter ist auch verboten, irgendwelche Plaste, holzene Materiale mit verschiedenenchemischen Klebestoffe verbrennen und auch Hausabfall von Plastreste usw. Kamin dűrfen nur erwachsene Persone bedienen! Es ist nicht zulässig die Kinder beiKaminofen ohne Elternanscicht lassen. Ofen Oberfläche ist erwärmt, insbesondere die Glasfläche, Anrűhrung kann auch schwere Brannverletzungen bewirken.Ofenverkehr bedarf die zeitge Bedienung und Ansicht. Fűr sichere Lenkung der Regulátore und fűr Manipulation mit Schliessern der Tűrchen sind die Schutzhandschuhebedarf. Auf Ofen ist es verboten, während im Betrieb und erwärt ist irgendwelche Gegenstande aus Brannstoffe abzulegen, welche den Brann bewirkenkönnten. In geheizten Ofen mit keramischenr Belegung stellt keine Gefäse mit kalte Wasser, es bedroht Bersten der Belegung.Bewahrt die erhöhte Vorsichtigkeit bei der Manipulation mit Aschenbecher und bei Beseitigung von Weissem Asch, es bedroht das Gefahr derAbbrennung. Heisser Asch darf nicht im Kontakt mit brennbaren Gegenstände kommen. – z.B. beim Einwerfen des Hausabfalles.Ofen kann nur in Enklang mit dieser Anweisung betriebt sein. Auf Ofen sind keine unberechtigte Regelungen zulässigTabelle Nr.3Auskűnfte von Brannbarkeitstuffe von einigen BaustoffeBrannbarkeitsbestand vonBaustoffe und ErzeugniseA - unbrennbarB - uneonfach brennbarC1 - schwer brennbareC2 - durchschnitlich brennbareC3 - leicht brennbareBaustoffe in den Brennbarkeitstuffe eingereihtGranit, Sandstein, Betone schwere undichte, Ziegeln, keramische Belegungen,speziele FassadeAkumín, Heraklit, Lihnos, ItavérBlattholz, Düse, Sulfolit, gehartetes Papier, UmakartBretter, Solodur, Korbretter, Gummi, Bodenstoffe, Holzfaser Bretter, Polyesther,PolyurethanHolzfaser Bretter, Polyesther, Polyurethan4. INSTALLATION VON KAMINOFEN UND SCHLIESSUNG ZUM SCHNORSTEINBeachtung: bei der Montage von Kaminofen műssen alle örtliche Vorschrifte eihaltet werden, einschliesslihc der Vorschrifte, die den nationalenund europäischen Normen fűr diesel Verbrauschersart betreffen.4.1. Einschluss von Kaminofen zum Schnorstein oder SchnorsteineinlageEinschluss von Kaminofen an den Schorsteindurchzug darf nur mit der Zustimmung von Schnorsteinbetrieb und im Einklang mit Normen des entsprechenden Staats,oder nach geltenden Vorschrifte fűr dieser Verbauchersart in Länder, wo sie installert sind, durchgefűhrt werden. Als Beispeil sieht Beihänge Nr.2.Zur Besicherung der richtigen Ofenfunktion ist nötig, dass der richtige Zug von Schornstein in Műndung verhaftet wűrdeAngabe des mindesten Zátes ist jedesmal in technischem Schrán fűr den zuständigen Ofentype angegeben. Ungenűgend Schornsteinabzug verursacht die schlechte
CZPLDEENOfenfunktion, űbermässige Verschmutzung von Glas und űbermässige Verstopfung von Rauchwege. Dazu kommt es zur Erniedrigung von sämtlichen Heizlestungdes Ofens. Im Falle, dass wir zuladen und Schornstein hat nicht genűgend Zugbedingungen, kann auch das passieren, dass Exhalationen in raum entfliehen. Ausdiesem Grund empfehlen wir die regelmässige Kontrolle von Schornsteiner nach der Norme des entsprechenden Staats und regeůlmässige Verfűhrung von Unterhaltdes Heizgerätes. In Fällen, wenn der Schornsteiabzug zu hoch ist und űberreicht 20 Pa ist passend die Schornsteinklappe zu installieren (z.B. Rauchrohre mit Klappe).Zu hoch Abzug kann Quelle von Schwierigkeiten beim Betrieb werden, z.B. zu intensiever Verbrennung von Triebstoff un kann auch zur dauernen Beschädigungdes Heizgerätes hinzufűhren.4.2. Einschluss von Ofen an den SchornsteindurchzugWir empfhelen an den selbstständigen Durchzug einzuschliessen. Zum gemeinsamen Durchzug kann man nur dann Ofen einschlissen, wenn er die VorschrifteGrundsätze der Norme des entsprechenden Staats einhalten wird. Ofen kann man nicht auf den gemeinsamen Durchzug mit Gasverbraucher einschliessen.164.3. Anweise fűr Installation und Besicherung des RauchrohresAuszugsműndung verbindet mit dem Schornstein in der kűrzesten Weg als möglich so, dass die Länge von Rauchwege höchstens 1,5 m lang wäre. Rauchrohre undBiegung bindet am engstens mit Überschuss cca 50 mm und passt dabei auf das, dass di Bindungen jedesmal einklanglich mit Verbrannstrahlung gesetzt werden.Öffnung in Schornstein besetzet mit metallischen Verband von entsprechenden Durchschnitt. Rauchrohr sollte in der Richtung von Schornleitung in Winkel voncca 10 steigen.4.4. Installation (Setzung) von Ofen in den RaumVor der Installation von Ofen ist nötig die Prűfung der Tragföhigheit des Bodens (Zimmerdecke) durchfűhren, ob es die Bedingungen von Tragfähigkeit fűr denzuständig Ofentype erfűllt. Ofen muss an thermoisolations Unterlage installiert werden, welche den Profil um 100 mm in Seiten und 300 mm in Vorne űberreicht.Wenn es die Blechunterlage verwendet wird, dann es die Dicke von niedrigstens 2 mm. Als Muster seht Beilage Nr.1.Beachtung : fűr Möglichkeit der Verbrauchersreinigung, Rauchrohre und Schornsteines ist zu den einfachen Zutritt genűgenden Raum rund Ofen zu lassem5. BETRIEBSANLEITUNG5.1. Erste Einzetzung von Kamionofen in den BetriebVor ester Eisetzungen von Kamin in den Betrieb ist bedarf die zufällige Aufklebungen von Glas, Tűrchen, die Zubehűrteile von Aschbecher resp. Aus Brannplatz, dasgilt auch fűr eventuele Transportsicherungselemente. Nach dem bild aus technischem Schein kontrolliert, ob die frei gelegte Blende richtig gesetzt sind, schamottZiegeln oder Sperrung (es ist auch möglich, dass während Transport oder Installierung sie aus der richtigen Lage auscheschwungen sind). Wenn ihr eine solche Panneerstellen, dann fűhrt ihre Verbesserung durch, anders wird die richtige Funktion des Heizgerätes bedrohtFűr Flachenzubereitung von Kaminofen ist die brannbeständige Farbe verwendet, welche sich beim ersten Beheiz veweicht – jukr űbergänglich – und dann verhartetsich schnell. Bei Phase der Verweichung beachtet auf erhöhtes Gefahr von beschädigun mit Handanrűhrung oder von einem Gegenstand.Bei der ersten Beheizungmuss Ofen mit kleine Flamm „verbrannt“, durch Verbrennung von kleinerer Menge der Triebstoff und bei niederer Temperatur. Alle Materiale műssen zur Thermobelastunggewöhnen. Durch vorsichtige Verheizung vermeidet de Berstentstehung in Schamottziegeln, Lackbeschädigung und Deformation von Materiale derOfenkonstruktion. Zufällige Stink bei Verhartung der Farbe verschwindet bald – wir empfehlen instensive Lűftung des Raumes, am besten durch LuftzugSind in diesem Raum einige Haussiere oder Vogle, platziert es si auf űbergängliche Zeit um.5.2. Brennung ung HeizungFűr mehr einfache Brennung legt zuerst auf Bennplatzboden, resp. an Rost 2 bis 3 kleinere Holzstűcke, darauf Papier oder gebiligte Unterzűndern, dann Krost oderHolzgesiegen, Kleinholz und erst dann die grössere Holzstűcke. Triebstoff ladet von grösseren Menge (cca bis 2/3 der Höhe vo Schamottziegelung). Durch Laden vongrösseren Menge besichert ih die Langere Zeit der Brennung fűr erwärmung des Schornsteinkörpers und dadurch auch seine richtige Funktion. Regulator des PrimaluftesMaximumniveau. Manchmal ist fűr bessere Brennung der Triebstoff passend auch Zufuhr von Sekundarluft reduzieren. Nach der Brennung műssen die Tűrchengeschlossen werden. Jeweils wird Triebstoff ordnungsmässig bebrennen mit Hilfe von Regulátore des Zufuhrlutes, stellt ihr die stille, eher gedampfte Verbrennung.Fűr Einstellung des Flamme und der Verbrennung könnt auch die Anordung des technischen Scheines oder von Tabelle Nr.1 verwenden.Beachtung: vor jeder Beheizung kontrolliert, ob der Rost verschmutzt ist , den űberträglichen Asch beseitigt vom Rost. Tűrchen des Zűndplatzes (Brennkammer)műssen immer geschlossen werden, ausser der Betriebeinsetzung, Triebstoffergänzung und Aschbeseitigung. Bei jedem Betriebsunterbruch des Ofens ist nötig vorweiterem Betriebstezung und Bebrenung die Kontrolle der Durchgänglichkeit und Sauberkeit der Rauchrohren, Schornstein und Brannraum von Ofen5.3. Zuladung der TriebstoffUm die Entfliehung von den Rauchgase in den Raum während der Zuladung vermeiden empefhlen wir : annährend 5 bis 10 Sekunden vo dem Öffnen der Brennungtűrchenöffnet völlig den Luftregulator, dann die Zuladungstűrchen zuerst mild öffnen, ein Paar Sekunden wattem auf Absaugung der Exhalaten in den Schornsteinund erst danach öffnet die Tűrchen auf völlig. Nach dem Öffnen von Zuladungstűrchen ist immer nötig die erhöhte Aufmerksamkeit bewahren, es bedroht Gefahrvon Ausfallen von heissen Stűmpfen. Nach der Zuladung von Triebstoff machen wir die Tűrchen wieder zu. Nach der Verbrennung von Triebstoff (ohne rauchendenFlamm) Kehrt den Regulator wieder in die ursprűngliche Lage zurűck (eventuell schliesst ihn). Bei der Zuladung bewahrt, dass Triebstoff nicht Niveau von eigenemBrannraum űberreicht. Menge der zugeladeten Triebstoff sollte dem informativen Stundenverbrauch fűr angegebenes Heizgerät entsprechen (Siehe technischenSchein). Bei der Überheizung kann auch dauernde Beschädigung von Kaminofen eintretten.Beachtung : Übermässige Entfliehung von Exhalaten in den Raum vermeidet ihr so, dass ihr Triebstoff regelmässig nach ihremAusbrennung auf heissen Grund zuladet.5.4. Aussere Zufűhrung von BrannluftFűr den Brannprozess muss die genűgende Menge des frischen Luftes besichert werden. Beim Brennen der Triebstoff verbraucht Ofen bis 15 m3Luft pro Stunde. Bei Neubauten kann ihre Isolierbarkeit von ausserer Umwelt (Plastfenstern u.a.) sehr hoch. Weitere Probleme können dieLuftabzűgern oder andere Warmanlage bewirken, welche im Raum oder im Ofenraum tätig sind.Bedeutend erschrenkt sich dadurch des Brannprozesses mit Teerung und Verschmutzung von rauchwege kann auch zu Rajchem bei der Zuladung im Raum. GenűgendeLuftzufuhr besichert mit geöffneten Fenstern oder Töre in den neben Raum, bestens ventillierten.Mehr passend ist aber gleichzeitig mit der Installation vonHeizgerät Ventilationsloch fűr Luftzufuhr besichert, mit der ventilierende Regulationsgitter, welche muss stetst gegen die Verstopfung besichert werden.
175.5. Verkehr während űbergehenden Zeitabschnitt und bei verschlechtenen klimatischen BedingungenIn den űbergehenden Zeitabschnitt oder bei höheren ausser Temperaturen űber 15oC, bei regenden und feuchten Tage,bei plötzlichem Stosswind kann nach denUmständen zum Verslechten des Schornszteinabzuges (Ofenabzug), also die Exhalate sind nicht völlig abgezogen werden. Darum muss Ofen in diesem Zeitabschnittmit kleinester Triebstoffmenge so betrieben, dass mit dem Öffnen von Luftzufuhr die Brennung und Shornsteinabzug verbessert könnte.5.6. GlassauberkeitAuf die Sauberkeit von Glas Bewahrung hat der Einfluss neben der Benűtzung von passender Triebstoff, genűgenden Brannluftzufuhr (insbesondere sekundar Luft)und entsprechenden Schornsteinzug auch Weise, in welcher Kaminofen bedient wird. In diesel Zusammenhang empfehlen wir nur eine Schicht der Triebstoff zuladenund zwar so, dass Triebstoff am angemessen plaziert im Brannplatz wäre und dass es am weitestens von Glas wäre. Das gleiche gilt auch fűr Brikette (Ferne vonden 5 bis 10 mm). Im Falle der Glasverschmutzung beim Heizen empfehlen eir die Brannintenstität zu vergrössern durch Öffnen von primar Luftregulator, wodurchsich Glas meisten selbständig reinigt.CZPLDEEN5.7. AschverleerungNach der Länge und Intensität der Heizung ist nötig mit Hilfe des Schűrhakens den Asch űber den Rost in den Aschbecher niederzuklopfen und den Aschbecherverleeren. Fűr diese Ausgabe ist den Kaltstand meist passend. Bewahrt das, dass der Aschbecher nicht űbergefűhlt wűrde. Gesammelten Asch verhindert demLuftzufuhr unter den Rost. ACHTUNG : vor der Verleerung des Aschbechers kontrolliert, dass er keine heizende Reste enthält, welche den Brann in Abfallgefasverursachen können. Asch von dem gebranntem Holz kann auch als Dűngemittel verwendet werden.6. REINIGUNG UND UNTERHALT6.1. Reinigung von HeizgerätKaminofen in kaltem Stand ist nötig mindestens einmal jährlich (nach der Heizsaison), zufällig auch öfter, zu reinigen. Bei Reinigung ist bedarf die Sedimente zu inRauchrohre, Brannräume und auf Blenden fűr Regelung des Zuges zu beseitigen. Reparieren, bestens durch Tausch auch die abgefallen Teile der Schamottziegelung.Vollständigkeit der Schamottziegelung ist nötig auch während der Heizesaison zu fosgen. Einzelne Loche unter den Schamottziegeln dienen als die Warmdilatationund verhinder dem Bersten von Ziegeln und es ist nicht passend diese Loche irgendwie auszufűllen, wie es beim älteren Heizgerät fűr feste Triebstoffe nötig war.Geberstene Schamottziegeln verlieren nicht ihre Funktionsfähigkeit, bis sie nicht völlig ausfallen werden!Fűr Glasreinigung kann man läufende Mitteln fűr Gasherdreinigung und Backofen verwenden, frockem weichen Tuch oder auch Zeitung, eventuell den speziellenMittel auf Kaminofenreinigung, z.B. Mittel von dem Ofenhersteller. Glas muss grundsätzlich im kalten Stand gereinigt werden. Auf Reinigung von Lackteile derFlache des Heizgerätes verwendet nie Wasser, passend ist Schwamm oder weichen Flaneltuch zu verwenden.6.2. Brann im SchornsteinIm Falle des Brannes im Schornstein ist es nötig den Feuer im Ofen sofort löschen durch Abgrabung von brennenden Reste der Triebstoff mit Hilfe von Schaufel inpassendem unbrennbaren Gefas und die Feuerwehr anzurufen (158) oder Linie 112.6.3. Reinigung der Keramik und KachelFűr Reinigung von keramischen Ziegeln empfehlen wir nur den frockem, hxchsten mild gefeuchten Tuch verwenden. Reinigung fűhrt nur im kaltenStand durch.6.4. Dichtungschnure und BänderZur Dichtung von Besitzflächen von Tűrchen und Gläser (eventuell von anderen Ofenteile) ist spezieler glaskeramisch Dichtungschnur (Band) verwendet, welche istgegenűber hohen Temperaturen beständig. Wir empfehlen den Dichtungstand periodisch kontrollieren und bei der Verlust von Funktionsfähigkeit es zu tauschen.Neue Dichtung wird nach sichere Zeit niedersetzen und darum wir empfehlen, dass annährend nach drei Monate der Verwendung wird Dichtung von bezogenemGlas auf Tűrkonstruktion kontrolliert und eventuell durch empfinflicher Zuziehung von Glashaltern beseitigt wird.6.5. ErsatzteileIm Falle der Notwendigkeit benutzt nur die originale Ersatzteile vom Hersteller emfpfohlene siehe Absatz 8.2. Getippte Erstazteile. Identifikation vom Erstazteil fűhrtmit Hilfe des technischen Scheines durch – Bestandteil der Ofenlieferung.7. HÄUFIGSTE PANNEN7.1. Geberstene (ausgefallene) Schamott- (vermikulit) Ziegel im VerbrennungsraumZuerst muss amn betonnen, das die geberstene Schamotzigelen ihre Funktionsfähigkeit nicht verlieren, bis sie völlig ausfallen. Darum ist es auch nicht nötig sie gleichaustauschen! Im Austauschfalle von könnt ihr diese Teile direkt beim Verkäufer oder auf Hestellersadresse so bestellen, das ihr den Type und Seriennummer angeben,weiter vom technischen Schrán (Bestandteil der Ofenlieferung) sicher Ziegelnummer, welche ihr austauschen braucht.Austauschvorgang: Austausch von Seitenziegeln ist so durchfűhren nötig, dass die Haltern werden niedergezogen und die beschädigte Schamottziegel wirdausgenommen. Manchmal muss man auch den Rost mit Schamottziegeln auf Boden ausnehmen. Rűckmontage ist zu umgekehrter Weise zu durchfűhren, vergisttnicht alles in den ursprűnglichen Stand und richtige Lage zu setzen! Dazu wird euch die Bebildung im technischen schrán dienen.Beachtung : Heizt ihr im Ofen nicht in solchem Falle, dass nur ein Teil der Belegung von Verbrennungraum fällt ab. Es bedroht Gefahr vonDurchbrennung von Ofenkonstruktion.7.2. Zerbrochen GlasTűrchenglas ist aus der speziellen glaskeramischen Masse mit hoher Warmbeständigkeit hergestellt. Übliiches Taffelglas kann man nicht verwenden!Austauschvorgang: beim Glastauschen muss man nicht ganzes Tűrchen ausmontieren, es reicht nur die Glashaltern abschrauben und ausnehmen. Bei der Rűckmontagemuss Glas gleichmässig nach ganzem Umfang auf Glasfläche besetzen. Sitzfläche unter dem Glas und Tűrchen muss mit Dichtungschnur gesetz werden.Dichtungschnur, wenn es nicjt beschädigt ist, kann auch wieder benutzt werden. Haltern bei der Rűckmontage ziehen wir vorsichtig zu, dass es keine Beschädigungpassiert – Bersten des Glases.
CZPLDEEN7.3. Geberstene SeitenziegelBeim Transport, Betrieb aber auch durch andere Begebenheit kann die Bedeckung von Ofenziegel beschädigt werden. Ziegeln, eventuell dieBlechpanel sind in der Bedeckung durch Presse von spezielen Haltungsfedern gehaltet.Demontage: Ziegel durch knopfen mit Handflache schiebt in Randlage űber (links oder rechts) . Passt auf, dass Ziegel fällt nicht herunter und wird sich nicht durchEinfluss von Tätigkeit der Haltungsfeder. Demontage beginnt bei der Mittelziegel. Oder bei der, welche unterstűtzt sich in zwei Seiten.Montage: Montage beginnt mit utere oder oberer Ziegel. Montierter Ziegel schiebt in gedűrftem Platz (von fechte oder links) und dann tragt die Kraft von Haltungsfederűber. Danach ist das gűnstigste , wenn Ziegel, besten beidenhändig durch Ziehen befestet beim Ofenrand und mit folgenden milden Schlagen űberschiebtdiese Ziegel in richtige Lage setzt. Ziegel montiert symetriích – mit gleichen Überreichungen auf beiden Seite. Als letzte setzt die Mittelziegel.Beachtung: tritt während dem Betrieb, mit Einflus von Dilatationen der Materiale zum selbstswilligen Abfallen der Belegung, dann ist es passend die Druckkraft vonFeder durch angemessener Ziehung vergrössern.188. GARANTIE UND SERVIS8.1. AllgemeinBeim Einhalten von alln Insatlationsregeln, Bedienug und Untehalt in diesel Anleitung angegebenen, verhaftet der Hersteller (Lieferant) Firma <strong>HS</strong> Flamengo G.mb.H.60 Monate von Moment der Übernahme dafűr, dass Erzeugnis wird in ganzer Garantiezeit die von technischen Normen gesetzte Eigenschaften, von dieselAnleitung gegebenen.8.2. GarantiebedingungenHaftung betrifft auf die kostenlose Reparatur von Ofen, eventuel den reklamierten Teile, welche aufgrunde den defekten Material oder Panne in Werkverarbeitungentstanden worden. Bei den unberechtigten Anforderungen fűr garantierte Reparatur kommen so enstandene Schaden und Auflagen dem Besitzer (Bestseller) zuLast.8.3. Garantie und nach der Garantie ServisGarantie und nach der Garantie Servis in Tschechischer Republik ist von Firma <strong>HS</strong> Flamengo besichert, mit Hilfe von Servisabteilung mit Sitz aufFrist fűr Reklamationserledigung ist vom Gesetze des entsprechenden Staates.8.4. GarantieIm Falle, dass es im Fristueit eine Panne entsteht, die ihrem Ofen oder Flachzubereitun von Ofen betrifft, repariert es nie selbst! Garantie und nach der GarantieReparature erledigt der Hersteller, auf welchem kann man sich wenden direkt oder mit Vermittlung von seiner Handlesvertretern. Hersteller nimmt keine Haftungfűr die Schaden und Defekte der Ofen oder seiner Teile űber, welche bewirkt wurden :- durch schlechte Leistungswahl von Ofen fűr en gegebenen Raum (Überheizung oder Mionderheizung des Raumes)- mit Uneinhaltung von zuständigen geltenden baugerechtlichen Vorschrifte.- durch falsche Instalation und Einschluss des Gerätes.- durch ungenűgenden oder zu starkem Zug von Schornstein (Einschluss muss den gegebenen Normen entsprechen).- durch aufgefűhrten Zubereitungen oder durch anderen, insbesondere nachträglichen Wechseln von Brannraum oder Abzug.- beim Einsatz oder Wechseln auf Gert, von solche Personen bewirkten, welche dazu nicht vermächtigt wurden.- bei Uneinhaltung von Anweise in Anleitung gegebenen.- beim nachträglichen Einbauen von Ersatzteile und Ergänzungen, welche keinem Erzeugnis von <strong>HS</strong> Flamengo sind.- durch Benutzung von unpassenden Triebstoffe.- durch falsche Bedienung, Überlastung des Gerätes und folgender Beschädigung von Konstruktion des Heizgerätes (z.B. Durchbrennung denRichtungsblende von Zug, Deformation von Ofenkonstruktion).- durch unfachliche Manipulation, gewältigem mechanischer Beschädigung.- durch ungenűgende Pflege oder mit Benutzung von unpassende Reinigungsmitteln.- durch unabwendbare Begebenheit (Hochwasser)8.5. Wie kann man reklamierenBei der Reklamation ist nötig seine volle Adrese, Telefonnummer anzugeben und die Panne beschreiben. Reklamation wird nur dann gelösen sein, wenn der ordnungsmässigausgefűlt Garantieschein mit Verkaufsdatum und Stempel der Verkaufsstelle, oder Verkaufsschein, vorgelegt wird (oder Faktur). Beim Kauf fordert imeigenen Interess lesebar ausgefűllten Garantieschein. Über Art und Ort der Reparatur wird nach der Pannebewertung in der Servisabteilung gelösen werden undweiter werden die Zubereitungen entweorfene mit dem Gerätbesitzerkonsultiert. Fűr Tauschen des erzeugniss oder Ablösung des Verkaufsvertrages gelten zuständige Anordnungen des bűrgerlichen Gesetzbuches und Reklamationsordnung.9. PACKEN VON KAMINOFEN – ABFALLVERNICHTUNGKaminofen ist auf den holzener Transportboden geliefert und mit Schutzlattung gerűstet. Ofen ist gegen den Gewitteeinflűsse mit PE Folie und paperschachtengeschutzt. Stabilisierung un Zusammenfestung von ganzer Verpackung fűr Lagerung und Transport ist durch Benutzung von metallische event. Plastischen Bandbescichert.Verpackungsvernichtung: Holzener Lattung und Unterlage benutzt zur Heizung. Stahlener Band gebt in Abfallsammlungstelle ab. PE Folie und paperschachen gebtzut Rezyklation ab.Ofenvernichtung: Im Falle der Vernichtung von Kaminofen legt den Schamott, Glas, Keramik und Dichtungsschnure in den festen Komunalabfall und den Blechkorpusevent. Andere metallische Teile gebt nach Sammlunhgstelle ab9.1. Sonderzubehör auf Auftrag1. Rauchrohre
192. Werkzeug, paravane, körbe3. Abschliessgefas (Aschsauger)4. Unterzűnder5. Kaminglasreiniger6. Schornsteinreiniger7. Schaufel8. Koulet9.2. Ausgetippe ErsatzteileCZPLDEENEinige Ersatzteile, welche sind zu bestellen1. Schamottziegeln2. Aschbecher stecker3. Glas der Zuladungstűrchen4. Eisengitter5. Dichtungsschnure6. Dichtungsschnureklebstoff7. Belegung von Mantel8. NGEVerschönungselemente (Stifte, Sefeln, Regulátore)10. ES ÄUSSERUNG ÜBER DEM EINKLANG UND CE ZERTIFIKATES Äusserung űber dem Einklang wurde fűr alle Erzeugnise aufgrunde Protokol von Eintragsprűfung des Types nach der EN 13 240:2005 A2 und CE Zertifikatausgestellt. Protokol von Eintragsprűfung des Types und CE Zertifikat ist im Einklang mit Richtlinie der Rat Nr. 89/106 EWR (entspricht der Anordnung der RegierungNr. 190/2002 Smlg.) und sind von modifizierter Person ausgestellt :Maschinenbauprűfungsinstitut, s.p. ES 1015, AO 2002 Hudcova 56b, 621 00 BrnoHersteller erklärt hierdurch, dass Kaminofen, hier angegeben, die Anforderungen von Richtlinie 89/106 EWR erfűllen.(es entspricht den Anordnungen der Regierung Nr.190/2002 Smlg) Unetr den Bedingungen von gewöhnlicher Benutzung ist sicher.Hersteller hat die Beistellungen angenommen, durch welchen er Einklang von allen Erzeugnise auf dem Markt eingefűhrten mit technischerBeurkundung und mit gleichen Anforderungen besichert.
CZPLDEENYou have become an owner of fire stove with brand called <strong>HS</strong> Flamingo. Thank you for your trust which you have demonstrated by purchasing our product. Readplease these instructions for use thoroughly where you can find information on functions and operation of the stoves in order to avoid risk of damages and toextend the service life of the stove.With correct manipulation you can save fuels and protect the environment.We shall grant the guarantee to our stoves only if the instructions for installation and manipulation have been respected.We shall grant the guarantee to our stoves only if the instructions for installation and manipulation indicated herein have been respected. Please, keep these instructionsand the document with technical data in a safe place so you can refresh your knowledge necessary for correct operation of your stove at the beginningof each heating season.201. TECHNICAL SPECIFICATIONThe combined fire stove is determined for heating living rooms, recreational facilities as well as working places, where it is intended to increase thermal comfort andwhich is also supported by sensations while watching flames.1.1. Construction designThe stoves are designed for burning wood, ecological briquettes and carbon briquettes. It is not possible to burn coal or coke in the burning system of the stoves.The stoves are welded from steel plates 2-5 mm thick. In the central part of the stove there is a combustion chamber of which the front side is formed by stokingdoor. In the stoking door is embedded large glass resistant to temperatures up to 800 °C. The combustion chamber is encased by fireclay fittings. The fittings arenot connected to any coating material. On the bottom of the combustion chamber there is a simple cast iron fire grate. In front of the fire grate is placed a barrieragainst falling of fuel out and its sliding on the front glass. The lower part of the fire stove is determined for storage of fuel. The stove is designed as double casingwith vertical conduct of flue gases outlet. Diameter of the flue gas pipe is 150 mm. Manipulation elements of the stove are made of stainless. The casing of thestove is made of steel plate and ceramic tiles.Caution: The fire stoves are not designed for permanent heating but for periodic – intermittent (temporary) operation.2. PROCESS OF COMBUSTION2.1. Quantity of fuels and setting up the process of combustionThe combustion of wood and ecological briquettes in the fire stove is based on heating-through system, which means that the combustion takes its course throughall the load of fuel. In order to find out optimum conditions of kindling and subsequent burning up it is necessary to ensure sufficient inlet of air under the burningfuel, through the grate – the air indicated as primary which is always reusable. With increasing temperature of combustion gases are released gas components ofthe fuel, which do not effectuate work in form of thermal energy without other inlet of air, therefore it is necessary to fetch in more air in the level of flames wherethe process of combustion of such gas components can further take its course. In that case there is usually no need for inlet of primary air, but in contrary, there isa need for inlet of secondary air.The inlet of secondary air, which is generally regulable, improves the quality of combustion as well as it facilitates self-cleaning of the glass embedded in the door.With correct quantity of proportion of air fetched in the right spot of the combustion chamber, the efficacy of the combustion is increased and on the other hand theemission of harmfull gases into the environment is decreased this way. Allocation of air inlet regulators is illustrated on the scheme in the document with technicaldata, which makes part of each delivery of fire stove.Achievable thermal power of the heating unit depends on quantity of combusted fuel within a time, its quality and efficacy of the combustion process. According tothe chart No. 2 regarding calorific value of fuels you can have an idea about achievable output with combustion of 1 kg of wood in one hour with its 20% moisture.Further it is proved that with increasing moisture of fuel its calorific value decreases.At the conditions of testing room, the regulability of heating unit was tested within the range of 20 - 100% of nominal power. Regulation of power was executedthrough the use of flue in chimney and by quantity of fuel. In practice, the stoves are generally regulated by air regulators, especially by primary air inlet. It is notpossible to define exact setting up of the combustion process through the use of the regulators with definiteness. It is affected by many factors – fuel moisture,type of fuel, draught of chimney, outdoor pressure conditions etc. Therefore it is necessary to regulate the combustion process (intensity and quality of flames) withregard to actual conditions.The ability to set up the combustion process effectively will get improved with your increasing experience with use of the stove. More detailed chart regarding thesetting up of inlet air regulators makes part of the technical document, in which are indicated real values, which were observed during trials at testing conditions inthe state laboratory. The following chart No.1 serves as a general information for air inlet regulation.Chart No. 1Types of wood combustion:Palivo Množství paliva Primární vzduch Sekundární vzduch Terciální vzduchregulovatelný regulovatelný neregulovatelnýDřevěná polena2 - 3 polena(2-3 kg)Uzavřen nebo podlepotřeby otevřen dle danýchspalovacích podmínek,regulace hořeníUzavřen nebo podlepotřeby otevřen dle danýchspalovacích podmínek,regulace oplachu sklaMaximálně otevřen,sekundární spalováníAt each lighting up of fuel in the stove, keep the regulator of primary air opened rather longer in order to kindle the fuel better. At stoking up the fuel, you areadvised to fully close the regulator of primary air.At combustion of wood, it is necessary to ensure that the wood is dry with maximum moisture of 20%.In order to achieve optimum output of exchanger, it is advisable to stoke fuel continuously and to keep the fuel on area of the grate during the burning process.2.2. Fuel
21In the fire stove it is possible to burn wood in pieces and briquettes made of pressed wood. The moisture of burned wood should be lower than 20%, optimally10%. There is rule saying that as lower the content of water in fuel is, as higher the calorific value is achieved. Recommended moisture of the wood can be achievedby storage at a ventilated shed for a period of two years at least. The content of water in briquettes shall be indicated by the manufacturer of the briquettes. It isnecessary to store the briquettes in a dry place, otherwise there is a risk of their decomposition. Recommended size of pieces of wood is aprox 3-6 cm and 20 - 35cm long. It is forbidden to burn coke and coal in the fire stove. As a fuel do not use flammable liquids or waste such as: wallpapers, chipboards, plastics, impregnatedwood or separate use of wood shavings or sawdust. The combustion of such materials is harmfull not only to environment but also it shortens the service life of thefire stove, and further, the stove -chimney might get damaged. Note: obviously it is also possible to burn the bark on wooden chunks.Chart No.2Calorific value of selected types of wood with 20% moisture (scm- solid cubic meter (m3))CZPLDEENType of wood Calorific value kWh/scm Calorific value kWh/1kg Weight kg/scmSpruce, fir 1957 4,0 485Larch 2461 4,0 610Pine 2280 4,0 565Oak, beech 2743 3,8 7263. SAFETY OF OPERATION3.1. General provisionsAt the operation and installation of the fire stove it is necessary to respect the principles of fire prevention contained in national norm.The heating unit can be used under normal conditions in accordance to national norm. If the conditions are changed there can be some temporary risk of fire orexplosion (for example at gluing linoleum, PVC, at work with coating materials, etc.). The fire stove must be temporarily set out of service. Further, the fire stovemust be used only after thorough ventilation of the room, preferable by draught.3.2. Safe distance of the fire stove from combustible materialsIf the fire stove is placed in a room with combustible objects (within the categories of inflammability B,C1 and C2), it is necessary to keep safe distance of 800 mmfrom the front side of the fire stove and in other directions 200mm.Safe distance of the flue gas ducting from door casing etc, placed constructions, constructions of inflammable materials and from installation of waterpipingincluding its insulation. From other parts of constructions made of inflammable materials it is at least 400mm. It concerns the building materials with classificationof inflammability B, Cl, C2 according to the chart No. 3.If the stove is operated in place with the material of C1 category, then the safe distance shall be prolonged.3.3. Instructions for save operationNo inflammable liquids shall be used for lighting up and burning! Further, it is forbidden to burn any plastics, wooden materials with different connective chemicals(chipboards, etc.) and also house, not selected, waste including pieces of plastics and so on.The fire stove must be attended by adults only! It is forbidden to leave children without supervision of adults by the fire stove. The surface of the stove is heated up,especially the areas of glass, with a touch you could get seriously burned.The operation of the stove demands for regular attendance and supervision. For safe controlling of the regulators and for manipulation for the stoking door it isnecessary to use protective gloves. It is forbidden to, during the operation and if heated, lay aside any object of inflammable materials which can provoke fire. Donot put any vessel with cold liquid in to the heated stove with ceramic casing in order to prevent rupture of the casing.Pay particular attention while manipulating with the ashtray and when removing the hot ash, in order to prevent the risk of burning. Hot ash shall not come intocontact with inflammable objects – for instance while disposing hot ash into the vessels for municipal waste.The stove shall be operated only in accordance with the present instructions. It is forbidden to make any unauthorized modifications.Chart No. 3Information on degree of inflammability of selected building materialsDegree of inflammability ofbuilding materials and productsA - non inflammableB - hardly inflammableC1 - inflammable with difficultiesC2 - medium inflammableC3 - easily inflammableBuilding materials qualified according to thedegree of inflammabilityGranite, sandstone, heavy aerated concrete, bricks, ceramic tiles, special plastersacumin, heraclit, lihnos, itaverDeciduous wood, plywood, sirkoklit, herkolite, formicaChipboards, solodur, cork slabs, rubber, floor coveringyWood fibre slabs, polyester, polyurethan4. INSTALLATION OF THE FIRE STOVE AND ITS CONNECTION TO CHIMNEYCaution: At the installation of the fire stove it is necessary to respected all the local norms, including national and european standards for this kind ofappliance.4.1. Connection of the stove to chimney or to chimney insertConnection of the fire stove to chimney outlet can be realized only with consent of chimneyers enterprise in accordance national standards, or in accordance withvalid legal norms regarding this kind of appliances in countries where installed. For illustration see the attachment No. 2.In order to ensure correct functionality of the stove it is necessary to ensure correct draught of chimney in neck of the flue gas pipe.Data on minimum draught is always indicated in technical documents for respective type of stove. Insufficient draught of chimney causes bad functionality of thestove, excessive sooting of glass and excessive clogging of the flue gas ducting. The total thermal output of the stove is decreasing. If we are stoking and the chimney
CZPLDEENhas not good draught conditions, the flue gases might get off into the room. Therefore we recommend regular revisions provided by a chimneyer from a professionalenterprise in accordance with national standards and to ensure a regular maintenance of the heating unit. When the draught in chimney is too strong and exceeds20 Pa, in such case it is advisable to install a chimney clack-valve (for example flue gas pipe with clack-valve). Excessive draught might be the cause of difficulties atthe operation, for example too intensive combustion, high consumption of fuels and it can also lead to permanent damage of the heating unit.4.2. Connection of the stove to chimney air holeWe recommend to have connected the fire stove with a separate chimney air hole. It is possible to connect the stove to a joint chimney air hole only if the provisionsof national standard been respected. The stove can not be connected to a joint air hole together with a gas appliance.4.3. Instructions for installation and setting up the flue gas ducting22Connect the outlet neck with the chimney in the shortest possible way so the length of flue gas ducting is maximum 1,5 m. Join the flue gas pipes and elbow-pipefirmly with an overlap of min. 50mm and make sure that the joints are set up in direction of flue gas flow. Furnish the input hole into the chimney with a metalshrunk ring of corresponding diameter. The flue gas pipe should rise under the angle of aprox.10°.4.4. Installation (setup) of the stove in space (room)Before installation of the fire stove, it is necessary to check on bearing capacity of the floor (ceiling) if it fulfils the conditions of bearing for the respective type ofstove in dependence on its weight. The stove must be installed on heat-insulation fireproof ground-sheet, which should overlap the ground-projection of the stoveon sides and behind at least by 100 mm and in front by 300mm. If a metal ground-sheet is used, it should be min. 2 mm thick. For illustration have a look at theattachment No. 1.Caution: in order to have the possibility to clean the appliance, it is necessary to leave sufficient space for access to the flue gas pipes and chimney.5. SERVICE INSTRUCTIONS5.1. First time setting the fire stove into serviceBefore setting the stove into service for the first time, it is necessary to remove eventual labels from the glass, door, accessory parts in ashtray, resp. from the fireplace,this applies also to eventual shipping safety. Check up, according to the picture on the technical document, if the screens freely laid for drought direction, fireclayfittings and the barrier are placed correctly (it is possible that during the transport or installation of the stove they slided into wrong position). If you may find anydefect of setup, set it into the right position, otherwise the correct functionality of the heating unit might be at risk.For the superficial treatment of the fire stove was used a fireproof paint which gets hardened after temporary softening at the first service operation. At the softeningphase, there is an enhanced risk of damage on the paint by hand or some object. With the first use of the stove, it is advised to kindle the fuel with small flames, withsmaller quantity of fuel at a lower temperature. All the materials must get used to the heat burden. With a careful kindling up you can prevent eventual occurrenceof cracks in fireclay bricks, damage on the paint and material deformation of the stove construction. Possible odour at the paint hardening shall disappear soon – weadvise to ventilate the room intensively, preferable with an air drought.If there are any pets of birds in the room, relocate them to some other place for a temporary period of time.5.2. Kindling and heatingFor easy kindling, at first put on the bottom of the fireplace resp. on the grate, 2 or 3 small wooden chunks, on them paper or approved fire-lighters, then somebrushwood or wooden chips, small pieces of wood and at the end thicker chunks. Load the fuel in a good quantity (aprox. up to 2/3 height of fireclay brickwork).With loading bigger quantity of fuel you will ensure sufficient time of burning in order to warm up the chimney and its correct functionality. Open the regulatorof the primary air at maximum. Sometimes, it is advised to regulate also inlet of secondary air for better kindling. After the kindling, the door of fireplace must beclosed. As soon as the fuel gets burned through the use of the regulators of air inlets, you may set up calm, rather damped combustion. For setting up the flamesand combustion you can follow the provisions indicated in the technical document of the chart. No.1Caution: Before every heating it is necessary to check up if the grate is not sooted, and remove the excessive ash with ash-hook.The door to the fireplace (combustion chamber) must be always closed, with an exception of setting the stove into the service, loading with fuels and removal of ash.After each longer discontinuation of the service operation of the stove, it is necessary to check up the throughput and cleanness of the flue gas ducting, chimneyand the combustion chamber of the stove before its repeated kindling.5.3. Fuel loadingIn order to prevent the release of flue gases into the room at loading we advise you to: fully open the primary air regulator approximately 5 - 10 seconds beforeopening the door to the fireplace, then wait few seconds for suction of the flue gases into the chimney and then you can fully open the door. After opening thestoking door, it is always necessary to be careful; there is a risk of a firebrand to fall out. After loading the stove you can close the door. As soon as the fuel getsburned (without sooty flames) put the regulator into the original position (eventually close it). When loading the stove, make sure that the fuel does not exceed thelevel of the fireclay brick-work in the combustion chamber. The quantity of stoked fuel should correspond to informative consumption per hour for a given heatingunit (see the technical document). When overheated, there is a risk of permanent damage of the stove.Caution: You can prevent the excessive release of the flue gases into the room by loading the stove after the fuel is burned out to a griddle-hot base.5.4. External inlet of combustion airIt is necessary to ensure sufficient quantity of fresh air for the combustion process. At wood burning, the stove consumes up to 15m3 of fresh air per hour. Newhouses are rather more insulated from external ambient (windows of plastics). Other difficulties can be caused by air suction units or other thermal appliances whichare in service in the room or space together with the stove.With this, the quality of the combustion process is particularly lowered along with sooting of flue gas pipes, and at stoking process the smoke might be released intothe room. You can ensure sufficient air inlet by opened windows or door to next, better ventilated room. Preferably, at the installation of the stove you are advisedto ensure a ventilation air inlet with regulation grid which is secured against clogging.5.5. Operation during transition period of time and at unfavourable climatic conditionsIn the transition period, resp. at higher external temperatures above 15°C, in rainy and wet days, at strong gust wind, according to the actual circumstances thedraught in the chimney (stove) can be deteriorate, so the flue gases are not fully exhausted. Therefore it is advised that in such period the stove is in service at
23minimum fuel loading in order to improve the combustion and draught in chimney by opening the air inlets.5.6. Cleanness of the glassTo keep the transparent window clean, it is necessary to use appropriate fuels, ensure sufficient inlet of combustion air (particularly the secondary air) and correspondingdraught in the chimney as well as the correct way of servicing the fire stove. In this regard we recommend to stoke the fuel in one layer only so the fuel isproportionally spread in the fireplace and to keep the fuel distant from the glass. The same applies to briquettes (distance among them 5 to 10 mm). If the glass getsunpurified, we advise you to increase the intensity of the combustion by opening the primary air regulator so the glass should get cleaned itself.5.7. Removal of ashCZPLDEENAccording to the time and intensity of heating, it is necessary to remove ash by fire-hook through the grid into the ashtray and then to empty the ashtray. The mostconvenient way is to remove the ash when the stove is cold. Make sure, that the ash tray does not get overfilled. Cumulated ash prevents the access of air inletunder the grate. ATTENTION: before emptying the ashtray make sure that it does not contain any griddle-hot pieces which might cause fire in the waste vessel. Theash from burned wood can be used as fertilizer.6. CLEANING AND MAINTENANCE6.1. Cleaning the heating unitIt is necessary to clean the cold fire stove at least once a year (after the heating season), eventually more often. At cleaning it is necessary to remove settlements influe gas pipes, combustion chamber and on screens for draught direction. To repair, preferable to replace, the missing parts of the fireclay brick work. The completenessof fireclay brick-work must be controlled also during the heating season. The gaps between the fireclay fittings serve as thermal dilation which prevents theircracking, so it is not advisable to fill them (for example by coating materials) as it was usage with old type of heating units for solid fuels.The fireclay fittings are functional even if cracked. This does not apply if they fall out!For cleaning the glass, you can use ordinary agents for cleaning cookers and ovens, dry soft towel or newspaper, eventually special cleaning agent determined forfire stove glass, for example from the manufacturer of the fire stove. The glass must be cleaned only if cold. Do not ever use water for cleaning varnished parts ofthe heating unit; it is advisable to use a foam sponge or soft flannel towel.6.2. Fire in the chimneyIn case of occurrence of a fire in the chimney, it is necessary to extinguish the fire immediately by removing the burning pieces of fuel with a shovel into the appropriatefireproof vessel and to call immediately the firemen (line 158) or the integrated rescue system on line 112.6.3. Cleaning ceramic and tilesFor cleaning ceramic tiles it is advised to use only dry or slightly damped towel. The cleaning must be done only if cold.6.4. Sealing cords and stripesFor sealing the seating areas of doors and glass (eventually other parts of the stove) was used a special glass-ceramic cord (stripe), which is resistant to high temperatures.We recommend you to check up the sealing continuously and to replace it with new if it lost its functionality.After a certain time of use the new sealing gets settled and therefore we advise to check up after three months of its use whether the glass fits to the door construction,and if unclamped to tighten it carefully by glass holders.6.5. Spare partsIn case of necessity, you are advised to use only original spare parts recommended by the manufacturer, see Section 9.2. Recommended spare parts. You can identifythe spare part according to the technical document which is attached to the delivery of the fire stove.7. FREQUENT DEFECTS7.1. Cracked (missing) fireclay fitting in the combustion chamberFirst of all, it is necessary to mention that cracked fireclay fittings do not loose their functionality, if not missing, so it is not necessary to replace them! In case ofreplacement, you can order these parts directly at your manufacturer or at the address of the manufacturer indicating the type and serial number of the fire stove,further, indicate the number of fireclay brick which you need to replace according to the technical document (attached to each delivery of the fire stove).How to replace: the side fittings must be replaced in the following way: first remove the holders of the fireclay and then pull out the defective fireclay fitting.Sometimes it is also necessary to pull out the cast iron grate with fireclay fittings on the bottom. The placing of new fittings is analogical in reverse way, do notforget to assembly all the parts into the original positions, which you can check with the illustrations in the technical document. Caution: Do not put the stove intooperation if the lower part of casing of the combustion chamber has fallen out. There is a risk of damages on the construction of the stove by burning through.7.2. Broken glassThe door glass is made of a special glass-ceramic material with resistance to high temperatures. It is not possible to use ordinary glass!How to replace it: It is not necessary to dismantle entire door, it is sufficient to unscrew the holders of the glass and to take the glass out. At the installation of anew glass it is necessary to settle the glass appropriately in the door. The contact area between the door and glass must be fixed by a sealing stripe. The sealingstripe can be reused if not damaged. The glass holders must be tighten up very carefully and proportionally in order to prevent the rupture of the glass by excessivetightening up.7.3. Ruptured side tileThe tiles of the stove casing may be damaged at transport, operation or at other circumstance. The tiles or metal sheet panels are fixed in the casingby pressure of special holding springs.Disassembly: Move the tile with tapping by surface of your palm on side (right or left).Be careful so the tile does not fall down and is not damaged by springing up. Start to disassembly the central tile, or such tile which is in contact with casing bytwo sides.Assembly: Start the assembly by bottom or upper tile. Insert the assembled tile into the required place (from right of left) and overcome the strength of the fixing
CZPLDEENspring. In order to repress the spring it is advisable to press the tile, preferably by both hands, behind the edge of the stove and move the tile with soft strokes bypalm into the right position (for repressing the springs it sometimes necessary to use force). Install the tile symmetrically – with identical overlaps on both sides ofthe casing. As the last one put the central tile (or that one which touches the casing by two sides).Caution: If during the operation of the stove, by dilation of materials, falls out any tile itself, it is advised to enhance the clamping strength of the springs byappropriate springing.8. GUARANTEE AND SERVICE8.1. Generally24If the rules and instructions for installation, operation and maintenance indicated herein have been respected, the manufacturer (supplier) firm <strong>HS</strong> Flamingo s.r.o.guarantee that for period 60 months from the moment of handing over to the user, the product shall have the qualities determined by technical standards, by thepresent instructions and data indicated on production label.8.2. Guarantee conditionsThe guarantee applies to free repair of the stove, respectively repair of the claimed parts or components, where the defects were caused by defective material orproduction defect. At unjustified complaints for repairs within the guarantee, such costs shall be sustained by the owner (customer).8.3. Service in period of guarantee and posterior serviceThe service within the guarantee period and posterior service in the Czech Republic is ensured by the manufacturer, the company <strong>HS</strong> Flamingo s.r.o., through itsservice department with its seat at:The period for resolving the complaint is determined by the national acts.8.4. GuaranteeIf during the guarantee period occurs in your stove any functional defect or a defect of superficial treatment, you are advised to not repair it yourself. The repairs withinthe guarantee period or posterior repairs shall be carried out by the manufacturer, which you can contact directly or through its sales agents. The manufacturerdoes not grant its guarantee to damages and defects on the stoves or its parts, which were caused by:- incorrect set up of the output of the stove for a given room (overheating or insufficient heating of the room)- not respecting the respective legal norms regarding edification- incorrect installation and assembly of the devices- insufficient or strong draught in the chimney (connection must be realized according to the valid legal norms)- realization of alterations or other, particularly additional, modifications of the fireplace or outlet of the flue gases- intervents or modification of the unit by unauthorized persons- not respecting rules and service instructions- if additionally installed spare parts or accessories, which are not product of the firm <strong>HS</strong> Flamingo s.r.o- using inappropriate fuels- incorrect servicing, overloading and subsequent damage on the construction of the heating unit- (For example burning the screens for draught directions, deformation of the stove construction)- unprofessional manipulation, violent mechanical damage- insufficient care of use of inappropriate cleaning agents- vis maior (floods etc.)8.5. How to claim the goodsAt filing a complaint, it is necessary to indicate your exact address, phone number and to describe the defect. The claim shall be resolved only if the guaranteecertificate correctly filled including the date of purchase and stamp of the store or the sales slip (ev. invoice) is presented. At the purchase you are advised to fill inthe guarantee certificate legibly. On method and place of repair in order to judge the defect shall be decided in the service department and further, the proposedmeasures shall be consulted with the owner of the unit. To the replacement of the product or to cancellation of the purchase contract apply the respective provisionsof the Civil Code and complaint rules.9. PACKAGING OF THE FIRE STOVES – WASTE DISPOSALThe fire stoves are delivered on wooden transport mat and are furnished with protective wooden crate. The fire stove is protected against climatic influences by PEfoil and paper box. Stabilization and compatibility of whole packaging for storage and transport is ensured by use of metal or plastic stripe.Disposal of the packaging: The wooden crate and mat can be used for heating. The steel stripe shall be brought to the collection point of metal scrap. The PE foiland paper box shall be handed over for recycling.Disposal of the fire stove: In case of disposal of the fire stove you are advised to dismantle the fireclay fittings, glass and sealing stripes and ceramics to solid municipalwaste, and the metal corpus, or other metal parts to collection point for metal scrap9.1. Special accessories at order1. Flue gas2. Tools, baskets, screens3. Separation vessel (ash exhauster)4. Fire-lighter5. Agent for stove glass6. Cleaner of chimneys7. Shovel
258. Coal-scuttle9.2. Recommended spare partsSome of the spare parts which can be ordered:1. Fireclay fittings2. Ashtray drawer3. Glass on stoking door4. Cast iron grate5. Sealing stripes6. Glue for sealing stripes7. Casing8. Decorative elements (sticks, twirls, regulators)CZPLDEEN10. EC DECLARATION ON CONFORMITY AND CE CERTIFICATEThe EC declaration on conformity has been issued to all the products on the basis of protocol on initial trial of the type according to the standard EN13 240:2005 + A2 and CE certificate. Protocol on initial trial of the type and the CE certificate is conform with the EC directive No. 89/106EEC (corresponding togovernment regulation No. 190/2002 Coll.) and it was issued by: Strojírenský zkušební ústav, s.p. ES 1015, AO 2002 Hudcova56 b., 621 00 BrnoThe manufacturer declares that the fire stoves indicated herein fulfill the requirements for safety determined in the Directive No.89/106 EEC (corresponding to thegovernment regulation No. 190/2002 Coll.) and that, under conditions of ordinary use given by the manufacturer, are save.The manufacturer has taken such measures in order to ensure conformity of all the products placed on the market with the technical documentation and withidentical requirements.
CZPLDEENPŘÍLOHA, ZAŁĄCZNIK, BEIHANG, ANNEXODSTUPOVÉ BEZPEČNOSTNÍ VZDÁLENOSTI KAMEN V PROSTORU / BEZPIECZNA ODLEGŁOŚĆ PIECA KOMINKOWEGO W POMIESZCZENIUSICHERHEITSABTRITTWEITEN VON OFEN IM RAUM / SAFETY DISTANCES OF FIRESTOVE IN SPACE26MINIMÁLNÍ VZDÁLENOSTIMINIMALNA ODLEGŁOŚĆNIEDRIGSTE ENTFERNUNGMINIMUM DISTANCESA > = 800 mmB > = 200 mmPŘÍKLAD UMÍSTĚNÍ OCHRANNÉ CLONY PALIVOVÉHO SPOTŘEBIČE A KOUŘOVODU (rozměry v mm) / PZYKŁADOWE ZASTOSOWANIE EKRANUKOMINKOWEGO (rozmiary w mm) / BEISPIEL DER PLATZIERUNG VON SCHUTZBLENDE DES TRIEBSTOFFVERBRAUCHERS UND RAUCHROHREXAMPLE OF PLACING OF PROTECTIVE SCREEN OF FUEL UNIT AND FUEL GAS PIPE (sizes in mm)1 - ochranná clona palivového spotřebiče a kouřovodu chránící okolníhořlavé stavební konstrukce před jejich tepelnými účinky2 - přikládací a popelníkový otvor1 - przykładowe zastosowanie ekranu chroniącego konstrukcje budowlane zmateriałów palnych2 - otwór służący do ładowania paliwa i umiesz<strong>cz</strong>enia popielnika1 - Schutzblende von Triebbstoffverbrauceh und Rauchrohre schűtzende dieumgehende brennbare Baukonstruktionen vor ihren Warmwirkungen2 - Zuladungs- und Aschbecher Öffnung1 - protection screen of fuel unit and fuel gas pipe protecting surroundinginflammable building structures against their thermal effects2 - enclosing and ashtray outletSeznam náhradních dílů / Lista <strong>cz</strong>ęści zamniennych / Ersatzteil ListeList of spare partsPozice / Pozycja / Position Název dílu Nazwa elementu lub <strong>cz</strong>ęści Teilname Name1 Dvířka Drzwi<strong>cz</strong>ki Türchen Door2 Šamot Szamot Schamott Fireclay3 Popelník popielnik Aschbecher Ashtray4 Víko Pokrywa Verdeck Lid5 Clona Ekran kominkowy Blende Screen6 Dlaždice malá Płytka mała Ziegel - klein Small tile7 Dlaždice celá Płytka zwykła Ziegel - ganz Entire tile8 Zábrana Płotek Hemmumg Barrier9 Rošt Ruszt Rost Grate
27CZPLDEENPŘIPOJENÍ KOUŘOVODU DO OTVORU V KOMÍNOVÉ VLOŽCEPODŁĄCZENIE PRZEWODU KOMINOWEGO DO OTWORU WE WKŁADZIE KOMINOWYMEINSCHLUSS DER RAUCHROHRE IN ÖFFNUNG IN SCHORNSTEINBELAG / CONNECTION OF GAS FLUE PIPE INTO OUTLET IN CHIMENY INSERT1 – wkładka cerami<strong>cz</strong>na (metalowa)2 – metalowa wkładka kominowa3 – płasz<strong>cz</strong> kominowy4 – <strong>cz</strong>opuch metalowy5 – otwór we wkładzie kominowym6 – odgałęzienie do wkładu kominowego7 – nakładka kominowa umocowana do wkładu kominowegoza pomocą pasków metalowych8 – sz<strong>cz</strong>elina dylatacyjna między kształtką i płasz<strong>cz</strong>em kominaPRAWIDŁOWO – patrz c, d, NIEPRAWIDŁOWO – patrz a, b1 – Wand2 – Rauchrohre3 – Deckplatte (unbrennbare, unmetallisch)4 – Roserei5 – Schutzrohre (unbrennbbare. Inmetallisch)6 – Isolationseinlage (unbrennbare, z.B. Glasfaser )7 – Isolationseinlage (unbrennabre, z.B. Ofenklei)ČSN O6 1008 : 19971 – keramická (kovová) vložka2 – kovová komínová vložka3 – komínový plášť4 – kovový kouřovod5 – otvor v komínové vložce6 – přitmelená odbočka ke komínové vložce7 – kovová příložka upevněná k vložce kovovými pásky8 – dilatační mezera mezi tvarovkou a pláštěm komínaSPRÁVNĚ – viz. c, d ŠPATNĚ – viz. a, bKomentář k ČSN 73 4201 : 20021 – wall2 – flue gas ducting3 – cover plate (fire-resistant, non metalic)4 – rose5 – protective pipe (fire-resistant, non metalic)6 – insulating filling I (fire-resistant, i.e. fibreglass)7 – insulating filling II (fire-resistant, i.e. stoveclay)ČSN 06 1008 : 1997
CZPLDEENTechnický list / Informacja techni<strong>cz</strong>na / Technische Auskűnfte / Technical informationDosažený tepelný výkon (100 %) / Moc cieplna (100 %) /Erreichte Wärmeleistung (100 %)Achievable thermal output (100 %)Maximální dávka paliva / Maksymalny załadunek paliwa / Höchste Triebstoffgabe/ Maximum fuel loadPrůměrná teplota spalin v kouřovodu / Średnia temperatura spalin w przewodzie kominowym /Durchschnittemperatur von Rauchagasein RauchrohreAverage temperature of combustions gases in flue gas ductingHmotnostní průtok suchých spalin / Wagowy przepływ spalin/Gewichtdurchfluss von trockenenGase / Weight flow of dry combustions gasDřevo / Drewno / Holz / WoodEkobrikety / Ekobrikiety / Ekobrikette /Ecological pellets9,01 kW2,68 kg/h.261 °C8,7 g/sEnergetická účinnost / Wydajność energety<strong>cz</strong>na / Energetische Wirksamkeit / Energy efficacy 78,36 %Průměrná koncentrace CO 2/ Średnia koncentracja CO 2/ Durschnittkomzentration von CO 2/9,02 %Average concentration of CO 2Koncentrace CO při 13% O 2/ Koncentracja CO przy 13% O 2/ Koncentration von CO bei 13% O 2/0,0932 %Concentration of CO at 13% O 228Zkoušeno dle ČSN EN 13240/A2:2005 (A. 4.7, A. 4.8, A. 4.9) / Badania wg ČSN EN 13240/A2:2005 (A. 4.7, A. 4.8, A. 4.9) / Nach den ČSN EN13240/A2:2005 (A. 4.7, A. 4.8, A. 4.9) geprűft / Tested according to ČSN EN 13240/A2:2005 (A. 4.7, A. 4.8, A. 4.9)PROSTUP KOUŘOVODU STĚNOU Z HOŘLAVÝCH MATERIÁLŮ (rozměry v mm) / PRZEJŚCIE PRZEWODU KOMINOWEGO PRZEZ ŚCIANĘ Z MATERIAŁÓWPALNYCH (rozmiary w mm) / DURCHGANG VON RAUCHROHR DURCH WAND VON BRENN-BAREN MATERIALPENETRATION OF FLUE GAS PIPE IN WALL OF INFLAMMABLE MATERIALS (sizes in mm)1 – ściana2 – <strong>cz</strong>opuch3 – pokrywa (niepalna, niemetalowa)4 – rozeta5 – rura ochronna (niepalna, niemetalowa)6 – materiał izolacyjny I (niepalny, naprz. włókno szklane)7 – materiał izolacyjny II (niepalny, naprz. glina zduńska)norma ČSN 06 1008 : 19971 – Wand2 - Rauchrohre3 – Deckplatte (unbrennbare, unmetallisch)4 - Roserei5 - Schutzrohre (unbrennbbare. Inmetallisch)6 -Isolationseinlage (unbrennbare, z.B. Glasfaser )7 -Isolationseinlage (unbrennabre, z.B. Ofenklei) ČSN O6 1008 : 19971 – stěna2 – kouřovod3 – krycí deska (nehořlavá, nekovová)4 – růžice5 – ochranná roura (nehořlavá, nekovová6 – izolační výplň I (nehořlavá, např. skelné vlákno)7 – izolační výplň II (nehořlavá, např. kamnářská hlína)ČSN 06 1008 : 19971 – wall2 – flue gas ducting3 – cover plate (fire-resistant, non metalic)4 – rose5 – protective pipe (fire-resistant, non metalic)6 – insulating filling I (fire-resistant, i.e. fibreglass)7 – insulating filling II (fire-resistant, i.e. stove-clay)ČSN 06 1008 : 1997PŘÍMÉ NAPOJENÍ PALIVOVÉHO SPOTŘEBIČE NA KOMÍN A ODSTUP OD STĚNYBEZPOŚREDNIE PODŁĄCZENIE URZĄDZENIA GRZEWCZEGO DO KOMINA I ODLEGŁOŚĆOD ŚCIANY / DIREKTEINSCHLUSS VON TRIEBSTOFFVERBRAUCHER AN SCHORNSTEIN UND WANDABTRITTDIRECT CONNECTION OF FUEL UNIT TO CHIMNEY AND DISTANCE FROM WALL
29 Popis regulace / Opis regulacji /Regulationsbeschreibung / Descritpion of regulationCZPLA - regulace a průchod primárního vzduchu (P)B - regulace a průchod sekundárního vzduchu (S)C - průchod terciálního vzduchu- neregulovatelnýD - externí přívod vzduchuA – regulacja i przepływ powietrza pierwotnego (P)B – regulacja i przepływ powietrza wtórnego (S)C –przepływ powietrza trzeciego(bez możliwości regulacji)D – zewnętrzny dopływ powietrzaDEENA – Regulation und Durchgang von primar Luft (P)B - Regulation und Durchgang von sekundar Luft (S)C - Durchgang von terciar Luft – unregelbarD - extern LuftzufuhrA – regulation and output of the primary air (P)B - regulation and output of the secondary air (S)C – outlet of tertiary air- non regulableD – external air inputŠAMOT / SZAMOT / SCHAMOTT / FIRECLAY22223311114Rošt44Ruszt41111334 DESKA 30x70x3003 DESKA 30x80x2602 DESKA 30x230x3001 DESKA 30x145x3004 BLAT 30x70x3003 BLAT 30x80x2602 BLAT 30x230x3001 BLAT 30x145x30022223311114Grate44Rost41111334 DESKA 30x70x3003 DESKA 30x80x2602 DESKA 30x230x3001 DESKA 30x145x3004 ZIEGEL 30x70x3003 ZIEGEL 30x80x2602 ZIEGEL 30x230x3001 ZIEGEL 30x145x300
CZPLDEENZÁRUČNÍ LISTZÁRUČNÝ LIST / KARTA GWARANCYJNA / WARRANTY / GARANTIESCHEINNaše záruka je 60 měsíců a počítá se od data dodávky přepravní společností nebo od data prodeje. Záruka během této doby platí na všechny vadydílů plynoucí z výroby. Jsme zodpovědní pouze za bezplatnou výměnu vadných dílů po našem ověření. Jestliže se ukáže, že výměna těchto dílů je přílišnákladná, vyhrazujeme si právo vyměnit zařízení, přičemž toto rozhodnutí můžeme učinit sami. V případě, že není možné opravit výrobek na místě,má kupující povinnost zaslat výrobek výrobci či výhradnímu prodejci na opravu.PLATNOSTKupující určený za těchto podmínek uznává, že obdržel oznámení o instalaci a používání a souhlasí, že se mu z bezpečnostních důvodů přizpůsobí.Tato záruka je platná, jen když se zařízení používá podle pravidel a doporučení uvedených v návodu k instalaci a <strong>použití</strong>, který je dodán se zařízením.30Záruka na 2 roky je poskytnuta na ostatní komponenty (pokud jsou součást zařízení): rošt, clona (deflektor), klička, sklo, šamot.——————————————————————————————————————————————————————————————Nasza gwarancja na wszystkie <strong>cz</strong>ęści, które dostar<strong>cz</strong>amy wynosi 60 miesięcy i li<strong>cz</strong>y się od daty dostawy przez firmę dostaw<strong>cz</strong>ą lub daty sprzedaży.Gwarancja w tym okresie obowiązuje na wszystkie wady wypływające z produkcji. Odpowiadamy tylko za bezpłatną wymianę wadliwych <strong>cz</strong>ęści ponaszym sprawdzeniu. Jeśli stwierdzi się, że wymiana tych <strong>cz</strong>ęści jest zbyt droga, zastrzegamy sobie prawo do zmiany urządzenia przy <strong>cz</strong>ym decyzjętaką możemy podjąć sami.PŁATNOŚĆKupujący określony w tych warunkach uznaje, że otrzymał oświad<strong>cz</strong>enie na temat instalacji i zgadza się z tym, że ze względów bezpie<strong>cz</strong>eństwadostosuje się do nich.Gwarancja ta obowiązuje tylko kiedy urządzenie używane jest zgodnie z regułami i zaleceniami w instrukcji instalacji i stosowania, dostar<strong>cz</strong>onej wrazz urządzeniem.Gwarancja 2 lata udzielona jest na pozostałe komponenty (jeżeli wchodzą w skład urządzenia) np. zamek patentowy, śruby i zaciski, sprężyny, wentylatory,obwody usz<strong>cz</strong>elniające, włą<strong>cz</strong>nik, końcówki kablowe, drut, płasz<strong>cz</strong>e elektry<strong>cz</strong>ne, ruszt, klu<strong>cz</strong>e, regulacja elektroni<strong>cz</strong>na, szkło.——————————————————————————————————————————————————————————————Unsere Garantie für alle von uns gelieferte Teile beträgt 60 Monate und wird vom Lieferdatum der Transportfirma oder vom Verkaufsdatum gezählt.Die Garantie während dieser Zeit gilt für alle Produktionsfehler gültig sein. Wir sind nur für kostenlosen Austausch von fehlerhaften Teilen verantwortlich,und zwar nach unserer Prüfung. Falls es nachgewiesen wird, dass Austausch von diesen Teilen zu teuer ist, behalten wir uns Recht vor, dieAnlage auszutauschen, dabei diese Entscheidung können wir selbst treffen.GÜLTIGKEITDer unter diesen Bedingungen bestimmte Käufer gesteht, die Anweisungen zur Installation und Benutzung bekommt zu haben, und er ist damiteinverstanden, ihr aus Sicherheitsgründen anzupassen.Diese Garantie ist gültig unter Bedingung, dass die Anlage nach Regelungen und Empfehlungen in dieser Installation- und Bedienungsanleitung, diemit der Anlage geliefert ist, benutzt wird.Die 2 Jahre Garantie wird für andere Komponenten (falls die der Teil der Anlage sind) gewährt, wie z.B. Patentschloss, Schrauben und Bolzen, Feder,Ventilators, Leiterplatten, Schalter, elektrische Kabelendstücke, Draht, elektrische Schirmungen, Rost, Klinken, elektronische Steuerung und Glas.——————————————————————————————————————————————————————————————The warranty for all parts is 60 months and is counted from the day of delivery by the transport company or from the day of the sale. The warrantyapplies to all defects resulting from the manufacture. We are responsible only for free replacement of failed parts after verification. If the replacementof parts would be too expensive, we reserve the right to replace whole unit; the decision could be done by us.VALIDITYThe buyer acknowledges reception of installation instructions and use and acknowledges to follow it due to safety reasons.This warranty is valid only if the appliance is used according to rules and recommendations given in the instruction manual for installation and use,which is delivered with the unit.Two year warranty is granted for other components (if they are part of the unit), like the lock, bolts and pins, springs, ventilators, circuit boards,switch, electric cable terminals, wire, electric insulation, grate, folds, electronic regulation, glass.——————————————————————————————————————————————————————————————
31Datum nákupu (počátek záruční lhůty):Data zakupum(po<strong>cz</strong>ątek okresu gwarancyjnegoPurchase date (warranty start) / EinkaufsdatumInköpsdatum (garanti start)CZPLDEAdresa prodejce:Adres sprzedawcyVendor addressAdresse des VerkäufersLeverantör adressENDatum opravyDate of repair / Datum der ReparaturDatum för reparationDaty naprawyPodpisSignatureUnterschriftSignaturZávada - zpùsob odstraněníDefect - a method of removing / Defekt - ein Verfahren zur EntfernungDefekt - en metod för att avlägsnaWada - metoda usuwaniaDatum opravyDate of repair / Datum der ReparaturDatum för reparationDaty naprawyPodpisSignatureUnterschriftSignaturZávada - zpùsob odstraněníWada - metoda usuwaniaDefect - a method of removing / Defekt - ein Verfahren zur Entfernung / Defekt - en metod för att avlägsnaDatum opravyDaty naprawyDate of repair / Datum der Reparatur / Datum för reparationPodpisSignatureUnterschriftSignaturZávada - zpùsob odstraněníWada - metoda usuwaniaDefect - a method of removing / Defekt - ein Verfahren zur Entfernung / Defekt - en metod för att avlägsna
CZPLDEENTyp výrobku:Product / Producttyp / ProduktMelandNarvikVegaStavanger32EspoAmosEvenesNelyTanaVýrobek zkontroloval:Produkt skontrolowałUnit checked by / Das Produkt wurde vom.....GeprüftKontrollera enhetenDatum výstupní kontroly:Data kontroli wyjściowejCheckout date / Ausgangsprüfungsdatum / Kassa datumVýrobní číslo:Numer seryjny / Serial numberProduktionsnummer / Serienummer
33CZPLDEEN
Výrobce / Producer<strong>HS</strong> Flamingo, s.r.o., třída Osvobození 65, CZ - 550 01 BroumovTel.: +420 491 422 647, Fax: +420 491 521 140E-mail: info@hsflamingo.<strong>cz</strong>, Internet: www.hsflamingo.<strong>cz</strong>Contacts for importers:tel.: +420 491 615 680 / +420 731 616 756 | e-mail: export@hsflamingo.<strong>cz</strong>