J124 Owner Guide.pdf - J/Owners
J124 Owner Guide.pdf - J/Owners
J124 Owner Guide.pdf - J/Owners
- No tags were found...
Create successful ePaper yourself
Turn your PDF publications into a flip-book with our unique Google optimized e-Paper software.
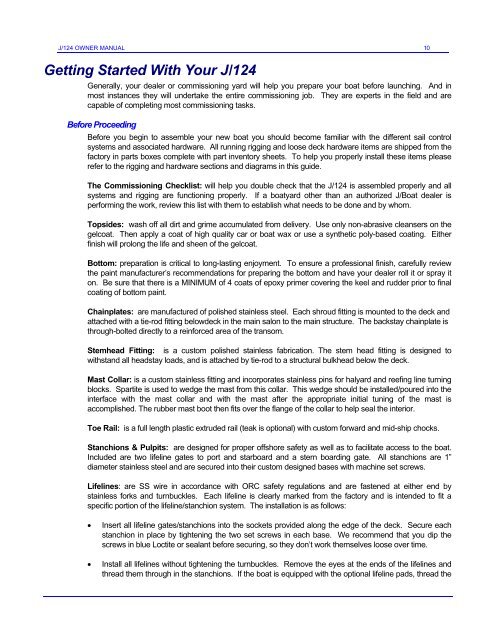
J/124 OWNER MANUAL 10Getting Started With Your J/124Generally, your dealer or commissioning yard will help you prepare your boat before launching. And inmost instances they will undertake the entire commissioning job. They are experts in the field and arecapable of completing most commissioning tasks.Before ProceedingBefore you begin to assemble your new boat you should become familiar with the different sail controlsystems and associated hardware. All running rigging and loose deck hardware items are shipped from thefactory in parts boxes complete with part inventory sheets. To help you properly install these items pleaserefer to the rigging and hardware sections and diagrams in this guide.The Commissioning Checklist: will help you double check that the J/124 is assembled properly and allsystems and rigging are functioning properly. If a boatyard other than an authorized J/Boat dealer isperforming the work, review this list with them to establish what needs to be done and by whom.Topsides: wash off all dirt and grime accumulated from delivery. Use only non-abrasive cleansers on thegelcoat. Then apply a coat of high quality car or boat wax or use a synthetic poly-based coating. Eitherfinish will prolong the life and sheen of the gelcoat.Bottom: preparation is critical to long-lasting enjoyment. To ensure a professional finish, carefully reviewthe paint manufacturer’s recommendations for preparing the bottom and have your dealer roll it or spray iton. Be sure that there is a MINIMUM of 4 coats of epoxy primer covering the keel and rudder prior to finalcoating of bottom paint.Chainplates: are manufactured of polished stainless steel. Each shroud fitting is mounted to the deck andattached with a tie-rod fitting belowdeck in the main salon to the main structure. The backstay chainplate isthrough-bolted directly to a reinforced area of the transom.Stemhead Fitting: is a custom polished stainless fabrication. The stem head fitting is designed towithstand all headstay loads, and is attached by tie-rod to a structural bulkhead below the deck.Mast Collar: is a custom stainless fitting and incorporates stainless pins for halyard and reefing line turningblocks. Spartite is used to wedge the mast from this collar. This wedge should be installed/poured into theinterface with the mast collar and with the mast after the appropriate initial tuning of the mast isaccomplished. The rubber mast boot then fits over the flange of the collar to help seal the interior.Toe Rail: is a full length plastic extruded rail (teak is optional) with custom forward and mid-ship chocks.Stanchions & Pulpits: are designed for proper offshore safety as well as to facilitate access to the boat.Included are two lifeline gates to port and starboard and a stern boarding gate. All stanchions are 1”diameter stainless steel and are secured into their custom designed bases with machine set screws.Lifelines: are SS wire in accordance with ORC safety regulations and are fastened at either end bystainless forks and turnbuckles. Each lifeline is clearly marked from the factory and is intended to fit aspecific portion of the lifeline/stanchion system. The installation is as follows:• Insert all lifeline gates/stanchions into the sockets provided along the edge of the deck. Secure eachstanchion in place by tightening the two set screws in each base. We recommend that you dip thescrews in blue Loctite or sealant before securing, so they don’t work themselves loose over time.• Install all lifelines without tightening the turnbuckles. Remove the eyes at the ends of the lifelines andthread them through in the stanchions. If the boat is equipped with the optional lifeline pads, thread the


