Marvac Fig. 501 (PV Valve) - Safety Systems UK Ltd
Marvac Fig. 501 (PV Valve) - Safety Systems UK Ltd
Marvac Fig. 501 (PV Valve) - Safety Systems UK Ltd
- No tags were found...

You also want an ePaper? Increase the reach of your titles
YUMPU automatically turns print PDFs into web optimized ePapers that Google loves.
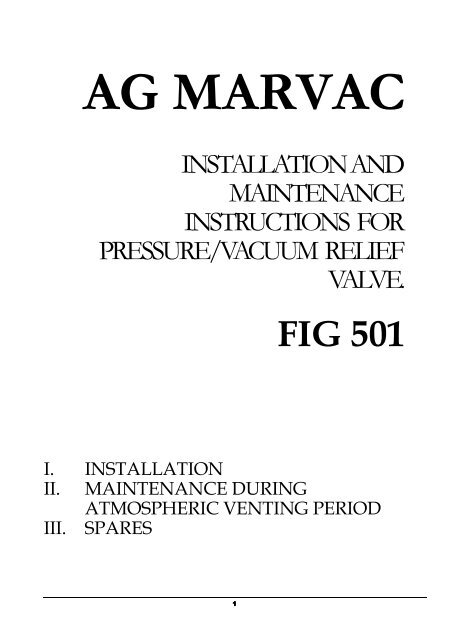
AG MARVACINSTALLATION ANDMAINTENANCEINSTRUCTIONS FORPRESSURE/VACUUM RELIEFVALVE.FIG <strong>501</strong>I. INSTALLATIONII. MAINTENANCE DURINGATMOSPHERIC VENTING PERIODIII. SPARES1
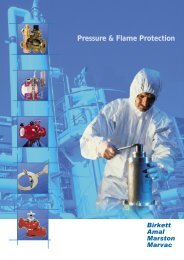
READ THIS FIRST<strong>Safety</strong> PrecautionsREAD AND UNDERSTAND THIS INSTRUCTION MANUAL BEFORE INSTALLING,OPERATING OR PERFORMING MAINTENANCE ON A.G. MARVAC <strong>501</strong> PRESSURE/VACUUM RELIEF VALVE. FOLLOW ALL PRECAUTIONS AND WARNINGS NOTEDHEREIN WHEN INSTALLING, OPERATING OR PERFORMING MAINTENANCE ON THISEQUIPMENT.<strong>Safety</strong> Precaution DefinitionsCAUTIONDamage to equipment may result if this precaution is disregarded.WARNINGDirect injury to personnel or damage to equipment that can cause injury to personnel may result if this precautionis not followed.NOTEThis manual is issued for guidance only and does not effect our standard terms and conditionsand our Product Limited Warranty, all of which are available upon request.2
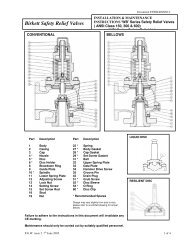
PARTS LIST3
INSTALLATION<strong>501</strong> Pressure/Vacuum Relief valves must be mated with the appropriate flange.1/ These valves must be gasketed and bolted to a flat machined horizontal flange.bolts to be tightened uniformly to ensure a good seal.2/ The exhaust pipework which is to be gasketed and bolted to the horizontal flange mustnot be supported by the valve, i.e. these valves are not designed to carry any externalloads.3/ This valve does not contain any internal packing. Therefore internal checks shouldnot be necessary.4/ It is recommended that carbon steel & cast iron valves be given a coat of paintimmediately after installation is complete. Apply paint to external surfaces only.M A I N T E N A N C E : ( D U R I N G A T M O S P H E R I C V E N T I N GP E R I O D . )WARNINGRelief valve must be isolated from tank pressure before servicing. All gas must be blocked and pressure safelyvented.Wear appropriate gloves and/or breathing apparatus if hazardous vapours are present.1/ Remove cover (item 4) inspect o’ring for damage and replace if necessary.2/ Remove pallet assembly to inspect pallet seating for wear and replace if necessary.3/ To replace damaged/worn items from pallet assembly (see recommended spares)a) remove nut from pallet stem, remove support disc, diaphragm & backing discb) clean pallet surface and threadsc) replace with new partsd) reassemble in reverse order4/ Inspect valve seat (item 3) for wear and regrind or replace where necessary5/ Clean seating surface thoroughly with suitable solvent and apply a thin smear oflight spindle oil.6/ Generally clean inside of valve, remove all foreign matter and repaint exterior wherepossible to prevent corrosion.4
7/ Replace pallet (with lead disc if fitted.)8/ Replace valve cover & replace sealing washers if necessary, secure with screws.CAUTIONThe end of the pallet stem must engage the stem guide in the cover to ensure correct seating and valve operation.NOTE: The efficiency of the valve depends on maintaining good seatingsurfaces, therefore, maintenance periods should be adjusted to suit serviceconditions.SPARESWhen spare parts are required the customer should quote the valve size, serial number, theitem number and the material of the parts required.The valve size and serial number can be obtained from the valve identification label. The itemnumber and description can be obtained from the arrangement on page 3.Care should be taken to quote the correct material as the materials quoted are for nonhazardous conditions.RECOMMENDED SPARES1. Item 6 Nitrile O’Ring2. Item 7 Sealing Washers3. Item 12 Spacer Disc (Non Asbestos Fibre)4. Item 13 Diaphragm Backing Disc (Non Asbestos Fibre)5. Item 14 Diaphragm P.T.F.E.5

![ES139[IOM Fig 785 Marvac Emergency Relief Vent]](https://img.yumpu.com/43585698/1/190x245/es139iom-fig-785-marvac-emergency-relief-vent.jpg?quality=85)