TECHNICAL SPECIFICATION – TS21 - OneSteel Australian Tube Mills
TECHNICAL SPECIFICATION – TS21 - OneSteel Australian Tube Mills
TECHNICAL SPECIFICATION – TS21 - OneSteel Australian Tube Mills
Create successful ePaper yourself
Turn your PDF publications into a flip-book with our unique Google optimized e-Paper software.
AT M p r e c i s i o n t u b e<br />
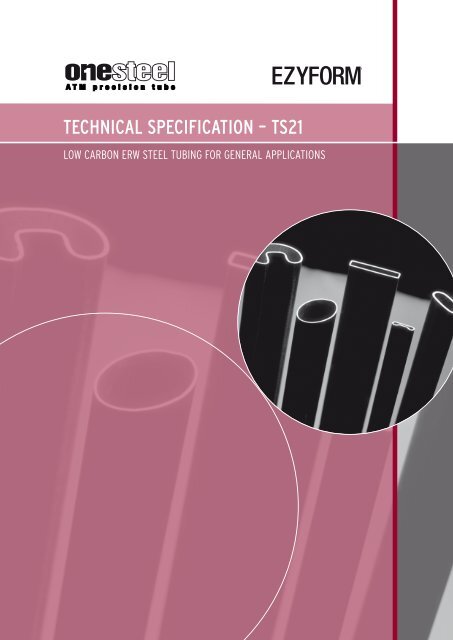
<strong>TECHNICAL</strong> <strong>SPECIFICATION</strong> <strong>–</strong> <strong>TS21</strong><br />
LOW CARBON ERW STEEL TUBING FOR GENERAL APPLICATIONS
<strong>TS21</strong><br />
LOW CARBON ERW STEEL TUBING FOR GENERAL APPLICATIONS<br />
(EzyFORM TM )<br />
Issue 8 January 2011, Originator: Product Manager Precision <strong>Tube</strong><br />
1.0 Scope 1<br />
2.0 References 1<br />
3.0 Definitions 1<br />
4.0 Designation 1<br />
5.0 Information to be Supplied by the Purchaser 2<br />
6.0 Requirements 2<br />
6.1 <strong>Tube</strong> Condition 2<br />
6.2 Chemical Composition 2<br />
6.3 Mechanical Properties 3<br />
6.4 Surface Finish 4<br />
6.5 <strong>Tube</strong> Dimensions and Wall Thickness 5<br />
6.6 Length 7<br />
6.7 Height of Weld Upset 9<br />
6.8 End Condition 9<br />
6.9 End Welds (Cross Welds) 10<br />
6.10 Straightness 10<br />
6.11 Non-Circular <strong>Tube</strong> - Other Features 11<br />
6.12 Rust Prevention 12<br />
6.13 Packaging 13<br />
7.0 Control 13<br />
PAGE<br />
AT M p r e c i s i o n t u b e<br />
TABLE OF CONTENTS
<strong>TS21</strong> 1<br />
Issue 8 January 2011, Originator: Product Manager Precision <strong>Tube</strong><br />
1.0 Scope<br />
This specification covers the technical requirements for the production and supply of low<br />
carbon ERW (electric resistance welded) steel tubing supplied in the As Formed Condition with<br />
a commercial quality or bright quality surface finish and with the internal weld upset (fin) not<br />
removed. This product is intended for use in furniture and other general applications requiring<br />
ductile tubing and is generally denoted as EzyForm.<br />
Note: 1. Tubing in the As Formed condition with a black surface finish and produced from black (hot-rolled) strip for<br />
general applications, is covered in;<br />
TS11 Black (Hot Rolled) ERW Steel Tubing.<br />
2. Tubing in other steel grades, which is supplied with specified tensile properties or specific chemistries for<br />
structural and mechanical purposes, is covered in;<br />
TS22 ERW Steel Tubing with Specified Mechanical Properties (Hi-Lite ® ).<br />
3. Tubing supplied in the As Formed condition with special requirements in relation to fin cutting, dimensional<br />
tolerances, mechanical tests and/or other additional requirements, is covered in;<br />
TS31 Low Carbon ERW Steel Tubing with Special Requirements.<br />
4. Tubing in the As formed condition intended for use in fluid carrying applications which require an eddy<br />
current test is covered in;<br />
TS41 Low Carbon ERW Steel Tubing for Fluid Carrying Applications.<br />
2.0 References<br />
ATM Precision <strong>Tube</strong> Customer Information Handbook <strong>–</strong> Standard Terminology.<br />
3.0 Definitions<br />
Terms used in this specification are defined in the ATM Precision <strong>Tube</strong> Customer Information<br />
Handbook Standard Terminology.<br />
4.0 Designation<br />
Tubing ordered to this specification shall be designated as:<br />
(i) <strong>TS21</strong> EzyForm Commercial for tube supplied with a Commercial Quality (CQ) surface<br />
finish, or<br />
(ii) <strong>TS21</strong> EzyForm Bright for tube supplied with a Bright Quality (BQ) surface finish.<br />
AT M p r e c i s i o n t u b e
<strong>TS21</strong> 2<br />
Issue 8 January 2011, Originator: Product Manager Precision <strong>Tube</strong><br />
5.0 Information to be Supplied by the Purchaser:<br />
The purchaser should supply the following information at the time of an enquiry and/or order.<br />
(a) Dimensions of cross section (diameter/non circular size and wall thickness).<br />
(b) Length required (in mm) and type (ML, NSML, CL) - refer to clause 6.6.<br />
(c) Designation ie. <strong>TS21</strong> EzyForm.<br />
(d) Surface finish ie Commercial Quality (CQ) or Bright Quality (BQ) - refer to clause 6.4.<br />
(e) Quantity and delivery instructions.<br />
6.0 Requirements<br />
6.1 <strong>Tube</strong> Condition<br />
Tubing shall be supplied in the As Formed condition ie as produced ex the weldmill.<br />
6.2 Chemical Composition<br />
The cast analysis of the steel used shall conform to the following:<br />
TABLE 1 : <strong>TS21</strong> STANDARD CHEMISTRY<br />
Guaranteed Maximum (%) Typical (%)<br />
Carbon (C) 0.10 0.060<br />
Phosphorous (P) 0.040 0.015<br />
Manganese (Mn) 0.45 0.20<br />
Silicon (Si) <strong>–</strong> 0.0050<br />
Sulphur (S) 0.040 0.010<br />
Alumium (Al) <strong>–</strong> 0.035<br />
Note: 1. The selection of the actual steel grade shall be at the option of <strong>OneSteel</strong> unless otherwise<br />
negotiated and specified on the order.<br />
2. For special applications, alternative chemical compositions can be negotiated in some cases,<br />
and would be supplied to TS22 HiLite ® .<br />
AT M p r e c i s i o n t u b e
<strong>TS21</strong> 3<br />
Issue 8 January 2011, Originator: Product Manager Precision <strong>Tube</strong><br />
6.3 Mechanical Properties<br />
6.3.1 Tensile Test<br />
Tubing in the As-Formed condition shall conform to the following tensile properties:<br />
TABLE 2 : MECHANICAL PROPERTIES<br />
D/t Ratio < 15 15 ≤ D/t < 25 25 ≤ D/t < 35 ≥ 35<br />
yield Strength MPa (min) 300 275 250 200<br />
Tensile Strength MPa (min) 310 300 290 280<br />
Elongation % (min) 15 20 25 30<br />
where: D = outside diameter or equivalent round<br />
t = nominal wall thickness<br />
Note: 1. For special applications, alternative mechanical properties can be negotiated in some cases,<br />
and would be supplied to TS22 HiLite ® .<br />
6.3.2 Flare Test<br />
Both circular and non-circular tube shall be capable, with suitable end preparation, of<br />
being expanded over a cone or pyramid shaped drift expander until metal failure with no<br />
evidence of radial fracture of the weld zone, ie fracture of the weld zone along a radial<br />
line from the tube centre to the outside surface is not acceptable.<br />
A ductile/shear (45˚) fracture of the weld zone or fracture of the parent metal is<br />
acceptable.<br />
D<br />
60 o<br />
AT M p r e c i s i o n t u b e
<strong>TS21</strong> 4<br />
Issue 8 January 2011, Originator: Product Manager Precision <strong>Tube</strong><br />
6.3.3 Flattening Tests<br />
Circular tube shall be capable of being flattened without cracking between two parallel<br />
plane surfaces with the weld located at 90˚ and 0˚ to the direction of flattening until the<br />
distance between the surfaces is half the nominal outside diameter of the tube.<br />
Before<br />
After<br />
D<br />
2<br />
0 o<br />
Weld<br />
D D<br />
Weld<br />
Note: 1. These tests are not applicable to non-circular tube.<br />
6.4 Surface Finish<br />
<strong>Tube</strong> shall be supplied with a commercial quality (CQ) surface finish or a bright quality<br />
(BQ) surface finish, the requirements of which are:<br />
TABLE 3 : CQ AND BQ SURFACE FINISH <strong>–</strong> EZYFORM<br />
Feature Bright Quality (BQ) (1) Commercial Quality (CQ)<br />
Coil Break<br />
(Creases in Strip)<br />
Pitting<br />
O.D. Scarfing<br />
Other Surface<br />
Marking (2)<br />
D<br />
2<br />
The surface shall be free of visual evidence<br />
of coil break.<br />
Isolated pits not exceeding 0.05 mm deep<br />
shall not be cause for rejection.<br />
The external weld flash shall be cleanly<br />
removed to produce a smooth surface free<br />
of tool chatter marks.<br />
Surface marking up to 0.05 mm deep shall<br />
not be cause for rejection. (3)<br />
90 o<br />
Weld<br />
Weld<br />
Coil break up to 0.10 mm deep shall not be<br />
cause for rejection.<br />
Isolated pits not exceeding 0.15 mm deep<br />
shall not be cause for rejection.<br />
The external weld flash shall be cleanly<br />
removed. Tool chatter marks up to 0.10 mm<br />
deep shall not be cause for rejection.<br />
Surface marking up to 0.10 mm deep shall<br />
not be cause for rejection. (3)<br />
Note: 1. Bright quality is suitable for applications where the surface finish is an important feature<br />
(eg. for subsequent plating). The amount of polishing required prior to plating will depend<br />
upon the standard of finish required.<br />
2. Other surface marking includes longitudinal roll marks, chop marks (quarter moon shaped<br />
roll marks), indentations due to metal pick up on weldmill tooling, scratches, reeler<br />
straightening marks, handling marks and weld burn (low frequency welding only).<br />
3. Notwithstanding the above table of possible defects, the overall appearance of the tube<br />
shall be consistent with good workmanship.<br />
AT M p r e c i s i o n t u b e
<strong>TS21</strong> 5<br />
Issue 8 January 2011, Originator: Product Manager Precision <strong>Tube</strong><br />
6.5 <strong>Tube</strong> Dimensions and Wall Thickness<br />
6.5.1 Outside Diameter <strong>–</strong> Circular <strong>Tube</strong><br />
Circular tube shall be supplied to the following dimensional tolerances:<br />
TABLE 4 : OUTSIDE DIMENSIONAL TOLERANCES<br />
Outside Diameter, D (mm)<br />
Maximum Permissible Variation in<br />
Outside Diameter, v (mm)<br />
D ≤ 16 ± 0.10<br />
16 < D ≤ 25 ± 0.15<br />
25 < D ≤ 50 ± 0.20<br />
50 < D ≤ 75 ± 0.25<br />
75 < D ≤ 100 ± 0.30<br />
100 < D ≤ 125 ± 0.35<br />
D ± v<br />
Note: 1. If the wall thickness is less than 2.5% of the diameter, the above extreme tolerances shall<br />
be increased to 1.5 times the values shown.<br />
2. Due to the possible distortion of the tube on cutting, the outside diameter tolerance does not<br />
apply for a distance of 25mm from the end of mill lengths (MLs) or non standard mill lengths<br />
(NSMLs) ie. on tube cut to length on the weldmill - refer to clause.<br />
3. For special applications, tighter tolerances can be negotiated in some cases and would be<br />
supplied to TS31 Ezyform.<br />
4. As Formed ERW tube may change shape near the end of the tube due to the effects of<br />
welding and cutting when the tube is cut to the final required length.<br />
AT M p r e c i s i o n t u b e
<strong>TS21</strong> 6<br />
Issue 8 January 2011, Originator: Product Manager Precision <strong>Tube</strong><br />
6.5.2 Outside Dimensions - Non-Circular <strong>Tube</strong><br />
TABLE 5 : OUTSIDE DIMENSIONAL TOLERANCES <strong>–</strong> NON CIRCULAR TUBE<br />
Dimension,<br />
a (mm)<br />
Squares<br />
Maximum Permissible Variation in Diameter, v (mm)<br />
Rectangles<br />
Long Side<br />
Other Shapes<br />
Long Side Short Side<br />
a ≤ 20 ± 0.15 ± 0.15 ± 0.15 ± 0.30<br />
20 < a ≤ 40 ± 0.20 ± 0.20 ± 0.20 ± 0.40<br />
40 < a ≤ 60 ± 0.25 ± 0.25 ± 0.25 ± 0.50<br />
60 < a ≤ 80 ± 0.30 ± 0.30 ± 0.30 ± 0.60<br />
80 < a ≤ 100 ± 0.35 ± 0.35 ± 0.35 ± 0.70<br />
100 < a ≤ 120 ± 0.40 ± 0.40 ± 0.40 ± 0.80<br />
a ± v<br />
a ± v<br />
Note: 1. In the case of rectangles the tolerance shown for the long side shall also be applied to the<br />
short side.<br />
(eg. the tolerances for 5025 rectangular tube shall be 50.0 ± 0.25mm x 25.0 ± 0.25mm).<br />
2. Due to the possible distortion of the tube on cutting, the tolerance shown does not apply for<br />
a distance of 25mm from the end of mill lengths (MLs) or non standard mill lengths (NSMLs)<br />
ie. on tube cut to length on the weldmill - refer to clause 6.8.<br />
3. For special applications, tighter tolerances can be negotiated in some cases and would be<br />
supplied to TS31 Ezyform.<br />
4. As Formed ERW tube may change shape near the end of the tube due to the effects of welding<br />
and cutting when the tube is cut to the final required length.<br />
b ± v<br />
AT M p r e c i s i o n t u b e
<strong>TS21</strong> 7<br />
Issue 8 January 2011, Originator: Product Manager Precision <strong>Tube</strong><br />
6.5.3 Wall Thickness<br />
Tubing shall be supplied to the wall thickness tolerances as set out below:<br />
TABLE 6 : WALL THICKNESS TOLERANCES<br />
Wall Thickness,<br />
t (mm)<br />
Maximum Permissible Variation in Wall Thickness,<br />
v (mm)<br />
t ≤ 1.0 ± 0.10<br />
1.0 < t ≤ 1.6 ± 0.15<br />
1.6 < t ≤ 2.0 ± 0.20<br />
2.0 < t ≤ 3.0 ± 0.25<br />
3.0 < t ≤ 4.0 ± 0.30<br />
4.0 < t ≤ 5.0 ± 0.35<br />
5.0 < t ≤ 6.0 ± 0.40<br />
t ± v<br />
t ± v<br />
Note: 1. As localised thickening may occur, the above plus variations do not apply to the weld area as<br />
indicated by the width of the heat affected zone.<br />
2. For special applications, tighter tolerances can be negotiated in some case and would be<br />
supplied to TS31 Ezyform.<br />
6.6 Length<br />
6.6.1 Mill Lengths<br />
Unless otherwise specified on the order, tubing shall be supplied in mill lengths (ML) of<br />
6100 mm (6.1 metres), or by arrangement, tubing can be supplied ex the weldmill as a<br />
non-standard mill length (NSML) within the length range 4000 to 8000 mm eg. 5850<br />
mm NSML. In both cases, a length tolerance of plus 50 mm minus Nil shall apply.<br />
t ± v<br />
AT M p r e c i s i o n t u b e
<strong>TS21</strong> 8<br />
Issue 8 January 2011, Originator: Product Manager Precision <strong>Tube</strong><br />
6.6.2 Cut Lengths<br />
By arrangement, tubing can be supplied as cut lengths (CL). The tolerances applicable to<br />
length are:<br />
TABLE 7 : CUT LENGTH TOLERANCES<br />
Cut Length, CL<br />
(mm)<br />
Max. Permissible Variation in<br />
Cut Length, v (mm)<br />
CL ≤ 1000 ± 0.10<br />
1000 < CL ≤ 2000 ± 0.15<br />
2000 < CL ≤ 4000 ± 0.20<br />
4000 < CL ≤ 6000 ± 0.25<br />
CL > 6000 ± 0.30<br />
CL +<br />
-<br />
Note: 1. The tube length shall be taken to be the measured distance between two parallel plates in<br />
contact with each end of the tube. This could vary from the overall length measured along<br />
the outside of the tube using a micrometer, vernier or similar device due to the tolerance<br />
for end squareness.<br />
6.6.3 End Squareness<br />
End squareness shall be expressed as the maximum deviation that can be measured<br />
between the end of the tube and a straight edge in contact with the end of the tube<br />
and at right angles to the tube axis. The maximum allowable out of squareness shall be<br />
0.05 mm per 10 mm of O.D. (equivalent to 0.3˚). End squareness shall apply only to cut<br />
lengths up to 1000 mm.<br />
O.D.<br />
Deviation 0.05mm per 10mm of O.D.<br />
AT M p r e c i s i o n t u b e
<strong>TS21</strong> 9<br />
Issue 8 January 2011, Originator: Product Manager Precision <strong>Tube</strong><br />
6.7 Height of Weld Upset<br />
The external weld upset shall be removed completely ie. flush with the outside surface<br />
of the tube. The internal weld upset or fin is not normally removed and the height may<br />
measure up to 1.0 mm or 50% of the nominal wall thickness whichever is the greater.<br />
This condition is designated Normal Fin (NF).<br />
By arrangement, tube with other than Normal Fin conditions may be supplied. This tube<br />
would be designated as TS31.<br />
6.8 End Condition<br />
6.8.1 Mill Lengths<br />
t<br />
<strong>Tube</strong> shall be supplied with shear or saw cut mill ends that may have a small shear<br />
dimple or burrs.<br />
6.8.2 Cut Lengths<br />
Cut lengths can be supplied with the following specific end conditions:<br />
(a) As Cut<br />
<strong>Tube</strong> ends will be as cut by shear, saw, laser or lathe and some cutting burr could remain.<br />
(b) Deburred<br />
Safe to handle and no dimensional evidence of burr on the outside or inside of the tube.<br />
The aim is to completely remove the external and internal burr with minimum stock<br />
removal. Unless otherwise specified, there may be evidence of a burr on the end face.<br />
Tool chatter is to be avoided but shall not be cause for rejection (workmanship).<br />
(c) Chamfer<br />
The tube end shall be tool cut on the external and/or internal surface of the tube end to<br />
the following dimensions (unless otherwise negotiated and specified on the order).<br />
Angle of Chamfer = 30˚± 5˚<br />
Min. Length of Chamfer = 0.10 mm<br />
Max. Length of Chamfer = 2.10 mm<br />
Stock removal <strong>–</strong> at least 50% of nominal wall thickness shall remain after internal and/or<br />
external chamfering. Tool chatter <strong>–</strong> shall be avoided but shall not be cause for rejection<br />
(workmanship).<br />
AT M p r e c i s i o n t u b e
<strong>TS21</strong> 10<br />
Issue 8 January 2011, Originator: Product Manager Precision <strong>Tube</strong><br />
Note: 1. Cut lengths specified as Deburred may be supplied in the Chamfered condition.<br />
2. Other specific end finishing requirements can be supplied subject to enquiry.<br />
t<br />
30 ± o<br />
5 o<br />
min = 0.10mm<br />
max = 2.10mm<br />
≥ 0.5 t<br />
6.9 End Welds (Cross Welds)<br />
<strong>Tube</strong>s containing the cross welds used to join the end of one coil of strip to the next shall<br />
not be included in the consignment.<br />
6.10 Straightness<br />
For lengths greater than or equal to 1000 mm the straightness tolerance shall be as<br />
shown in the table below, which assumes the tube to be bent in a constant radius,<br />
measured against a straight edge.<br />
For lengths less than 1000 mm the straightness tolerance shall be 1.0 mm maximum<br />
deviation.<br />
TABLE 8 : STRAIGHTNESS TOLERANCES<br />
Length (mm) 1,000 2,000 3,000 4,000 5,000 6,000 6,100 7,000 8,000<br />
Tolerance (mm) 1.0 1.1 2.5 4.4 6.9 10.0 10.3 13.6 17.8<br />
Length<br />
By arrangement, tube with other straightness tolerances can be supplied in some cases.<br />
AT M p r e c i s i o n t u b e
<strong>TS21</strong> 11<br />
Issue 8 January 2011, Originator: Product Manager Precision <strong>Tube</strong><br />
6.11 Non-Circular <strong>Tube</strong> <strong>–</strong> Other Features<br />
6.11.1 Corner Radii<br />
Corner radii differ for each size and wall thickness combination. Typical corner radii<br />
information can be supplied on request.<br />
6.11.2 Weldline Location<br />
Due to the configuration of the weldmill rolls, the weldline will normally be equidistant<br />
from the opposite corners ie. the weldline will be on or adjacent to a corner in the case of<br />
squares and on the longer face in the case of rectangles, ovals and flat sided ovals.<br />
6.11.3 Twist<br />
No action is normally taken to control the exact location of the weldline. However, where<br />
weldline location is a critical feature this should be the subject of an enquiry and would<br />
be supplied to TS31.<br />
The tolerances for twist of non-circular tubing are shown in the table below:<br />
TABLE 9 : TWIST TOLERANCE<br />
Largest Dimension,<br />
a (mm)<br />
Twist Tolerance in 1 metre,<br />
v (mm)<br />
a ≤ 12.7 0.9<br />
12.7< a ≤ 38.1 1.4<br />
38.1 < a ≤ 63.5 1.7<br />
63.5 < a ≤ 101.6 2.1<br />
d<br />
a<br />
V<br />
AT M p r e c i s i o n t u b e
<strong>TS21</strong> 12<br />
Issue 8 January 2011, Originator: Product Manager Precision <strong>Tube</strong><br />
6.11.4 Squareness <strong>–</strong> Square and Rectangular <strong>Tube</strong><br />
Maximum out of square of adjacent sides shall be 0.10 mm in 10 mm face width<br />
(equivalent to 0.6˚).<br />
O<br />
0.6 Maximum<br />
O<br />
0.6 Maximum<br />
6.11.5 Flatness <strong>–</strong> Square, Rectangular and Flat Sided Oval <strong>Tube</strong><br />
The actual dimensional variation across any face shall not exceed half of the total outside<br />
Straight Edge<br />
dimensional tolerance as set out in clause 6.5.2.<br />
6.12 Rust Prevention<br />
6.12.1 Standard Rust Prevention<br />
Concavity Straight Edge<br />
Straight Edge<br />
Convexity<br />
Concavity Convexity<br />
The tube shall be coated with a light, readily removable, temporary rust preventative,<br />
designed to withstand corrosion when stored in normal conditions under cover for at<br />
least three months from time of delivery.<br />
Straight Edge<br />
6.12.2 No Added Oil<br />
By arrangement, tube can be supplied with no temporary rust preventative added.<br />
Note: 1. The possibility of corrosion of tube in this state will be greater, and instances of corrosion shall<br />
not be cause for rejection.<br />
2. Residual oils from the manufacturing process may be present.<br />
6.13 Packaging<br />
Standard packaging for mill lengths and some cut lengths is batten-strapped, rectangular<br />
or hexagonal packs.<br />
Note: 1. By arrangement, other packaging options may be available. For example, stillages may be used<br />
to supply cut lengths, and large diameter tubing may be supplied in crates.<br />
2. Standard pack sizes for mill lengths are described in the Dimensions and Properties section<br />
of the ATM Precision <strong>Tube</strong> Customer Information Handbook. Different pack sizes shall be the<br />
subject of agreement between the customer and the supplier.<br />
AT M p r e c i s i o n t u b e
<strong>TS21</strong> 13<br />
Issue 8 January 2011, Originator: Product Manager Precision <strong>Tube</strong><br />
7.0 Control<br />
This specification is not to be reproduced without the authority of the originator.<br />
Holders of this specification should determine its validity prior to use.<br />
AT M p r e c i s i o n t u b e
<strong>Tube</strong> Products 14<br />
Technical specifications are also available for the<br />
following Precision Tubing products:<br />
TS 11 EzyForm - Hot-rolled, low carbon ERW steel tubing for general applications<br />
TS 21 EzyForm - Low carbon ERW steel tubing for general applications<br />
TS 22 Hi-Lite ® - ERW steel tubing with specified mechanical properties<br />
TS 23 VHS ® - Mild carbon heat treated ultra high strength ERW steel tubing<br />
TS 28 Hi-Form ® - Low carbon ERW Aluminised steel tubing for use in automotive exhaust<br />
systems<br />
TS 30 Galvatube ® - Premium low carbon ERW steel tubing for general applications<br />
TS 31 EzyForm - Low carbon ERW steel tubing with special requirements<br />
TS 40 Readi<strong>Tube</strong> ® - Low carbon galvanised ERW steel tubing for general applications<br />
TS 41 EzyForm - Low carbon ERW steel tubing for fluid carrying applications<br />
TS 50 <strong>Tube</strong>color ® - Premium powder coated ERW steel tubing<br />
TS 60 Painted Readi<strong>Tube</strong> ® - Powder coated ERW steel tubing<br />
<strong>OneSteel</strong> has a range of other Technical Specifications<br />
for products and/or applications not listed above.<br />
Please contact <strong>OneSteel</strong> Direct for further Information<br />
or visit our website www.onesteel.com<br />
AT M p r e c i s i o n t u b e
AT M p r e c i s i o n t u b e<br />
ONESTEEL DIRECT<br />
Freecall 1800 178 335<br />
Website www.onesteel.com<br />
Freefax 1800 101 141<br />
Email onesteeldirect@onesteel.com<br />
This publication has been prepared by <strong>OneSteel</strong> Market <strong>Mills</strong>, (<strong>OneSteel</strong> Manufacturing<br />
Pty Limited ABN 42 004 561 325). Please note that the specifications and technical data<br />
are subject to change without notice and to ensure accuracy users of this publication<br />
are requested to check the information to satisfy themselves and not to rely on the<br />
information without first doing so. Unless required by law the company cannot accept<br />
any responsibility for any loss, damage or consequence resulting from the use of this<br />
publication. Photographs shown are representative only of typical applications, current<br />
at November 2010. This brochure is not an offer to trade and shall not form any part of<br />
the trading terms in any transaction. Issue 8 January 2011. Copyright 2011. <strong>Tube</strong>color ® ,<br />
Hi-Form ® , Hi-Lite ® , Readi<strong>Tube</strong> ® , VHS ® and Galvatube ® are registered Trademarks of<br />
<strong>OneSteel</strong> Trading Pty Limited ABN 50 007 519 646. DuraGal ® is a registered Trademark of<br />
<strong>OneSteel</strong> <strong>Australian</strong> <strong>Tube</strong> <strong>Mills</strong> Pty Limited ABN 21 123 666 679. TS1129.<br />
DISTRIBUTED BY


