Operating Instructions SMVector - Frequency Inverter - alexandris.gr
Operating Instructions SMVector - Frequency Inverter - alexandris.gr
Operating Instructions SMVector - Frequency Inverter - alexandris.gr
Create successful ePaper yourself
Turn your PDF publications into a flip-book with our unique Google optimized e-Paper software.
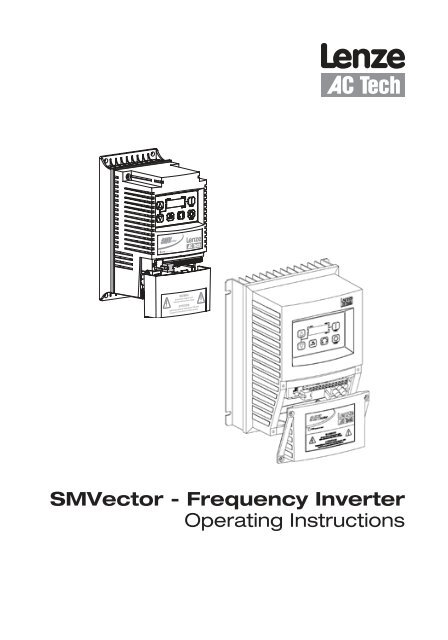
<strong>SMVector</strong> - <strong>Frequency</strong> <strong>Inverter</strong><strong>Operating</strong> <strong>Instructions</strong>
Contents1 Safety Information................................................................32 Technical Data.......................................................................62.1 Standards and Application Conditions.....................................................62.2 Ratings......................................................................................................62.2.1 NEMA 1 (IP 31) Ratings.............................................................................62.2.2 NEMA 4X (IP65) Ratings...........................................................................82.3 SMV Type Number Designation................................................................93 Installation...........................................................................103.1 Dimensions and Mounting.......................................................................103.1.1 NEMA 1 (IP31).........................................................................................103.1.2 NEMA 4X (IP65).......................................................................................113.2 Electrical Installation................................................................................123.2.1 Power Connections.................................................................................123.2.2 Fuses/Cable Cross-Sections...................................................................153.2.3 Control Terminals....................................................................................164 Commissioning...................................................................174.1 Local Keypad & Display..........................................................................174.2 Drive Displays and Modes of Operation.................................................184.3 Parameter Setting....................................................................................184.4 Electronic Pro<strong>gr</strong>amming Module (EPM)..................................................184.5 Parameter Menu......................................................................................194.5.1 Basic Setup Parameters..........................................................................194.5.2 I/O Setup Parameters..............................................................................224.5.3 Advanced Setup Parameters..................................................................264.5.4 PID Parameters.......................................................................................294.5.5 Vector Parameters...................................................................................314.5.6 Network Parameters................................................................................324.5.7 Diagnostic Parameters............................................................................335 Troubleshooting and Diagnostics.....................................355.1 Status/Warning Messages.......................................................................355.2 Drive Configuration Messages................................................................365.3 Fault Messages.......................................................................................37Copyright © 2006 AC Technology CorporationAll rights reserved. No part of this manual may be reproduced or transmitted in any form without written permission from ACTechnology Corporation. The information and technical data in this manual are subject to change without notice. AC TechnologyCorporation makes no warranty of any kind with respect to this material, including, but not limited to, the implied warranties ofits merchantability and fitness for a given purpose. AC Technology Corporation assumes no responsibility for any errors that mayappear in this manual.All information given in this documentation has been carefully selected and tested for compliance with the hardware and softwaredescribed. Nevertheless, discrepancies cannot be ruled out. AC Technology does not accept any responsibility nor liability fordamages that may occur. Any necessary corrections will be implemented in subsequent editions. This document is printed inthe United StatesSV01D
About These <strong>Instructions</strong>This documentation applies to the SMV frequency inverter and contains important technical data regarding theinstallation, operation, and commissioning of the inverter.These instructions are only valid for SMV frequency inverters with software revision 20(see drive nameplate).Please read the instructions before commissioning.A B CD E FType:ESV751N04TXBId-No: 00000000INPUT: 3 (3/PE)400/480 V2.9/2.5 A50-60 HZOUTPUT: 3 (3/PE)0 - 400/460 V2.4/2.1 A0.75 KW/1HP0 - 500 HZFor detailed informationrefer to instructionManual: SV01000000000000000000ESV751N04TXB000XX## ##A B C D E FCertifications Type Input Ratings Output Ratings Hardware Version Software VersionScope of delivery• 1 SMV <strong>Inverter</strong>with EPM installed (see Section 4.4)• 1 <strong>Operating</strong> <strong>Instructions</strong>ImportantAfter receipt of the delivery, check immediately whether the items delivered match theaccompanying papers. Lenze-AC Tech does not accept any liability for deficienciesclaimed subsequently.Claim:• visible transport damage immediately to the forwarder.• visible deficiencies /incompleteness immediately to your Lenze-AC TechrepresentativeSV01D
Safety Information1 Safety InformationGeneralSome parts of Lenze-AC Tech controllers can be electrically live and some surfaces can be hot. Non-authorized removalof the required cover, inappropriate use, and incorrect installation or operation creates the risk of severe injury topersonnel or damage to equipment.All operations concerning transport, installation, and commissioning as well as maintenance must be carried out byqualified, skilled personnel who are familiar with the installation, assembly, commissioning, and operation of variablefrequency drives and the application for which it is being used.InstallationEnsure proper handling and avoid excessive mechanical stress. Do not bend any components and do not change anyinsulation distances during transport, handling, installation or maintenance. Do not touch any electronic componentsor contacts. This drive contains electrostatically sensitive components, which can easily be damaged by inappropriatehandling. Static control precautions must be adhered to during installation, testing, servicing and repairing of this driveand associated options. Component damage may result if proper procedures are not followed.WARNING!Drives must not be installed where subjected to adverse environmental conditions such as:combustible, oily, or hazardous vapors or dust; corrosive chemicals; excessive moisture;excessive vibration; direct sunlight or extreme temperatures. Contact Lenze-AC Tech formore information.This drive has been tested by Underwriters Laboratory (UL) and is an approved component in compliance with UL508CSafety Standard. This drive must be installed and configured in accordance with both national and internationalstandards. Local codes and regulations take precedence over recommendations provided in this and other Lenze-ACTech documentation.The <strong>SMVector</strong> drive is considered a component for inte<strong>gr</strong>ation into a machine or process. It is neither a machine nora device ready for use in accordance with European directives (reference machinery directive and electromagneticcompatibility directive). It is the responsibility of the end user to ensure that the machine meets the applicablestandards.Electrical ConnectionWhen working on live drive controllers, applicable national safety regulations must be observed. The electricalinstallation must be carried out according to the appropriate regulations (e.g. cable cross-sections, fuses, protectiveearth [PE] connection). While this document does make recommendations in regards to these items, national and localcodes must be adhered to.The documentation contains information about installation in compliance with EMC (shielding, <strong>gr</strong>ounding, filters andcables). These notes must also be observed for CE-marked controllers. The manufacturer of the system or machine isresponsible for compliance with the required limit values demanded by EMC legislation.ApplicationThe drive must not be used as a safety device for machines where there is a risk of personal injury or material damage.Emergency Stops, over-speed protection, acceleration and deceleration limits, etc must be made by other devices toensure operation under all conditions.The drive does feature many protection devices which are aimed at protecting the drive and the driven equipment bygenerating a fault and shutting the drive and motor down by removing power. Mains power variances can also result inshutdown of the drive. When the fault condition disappears or is cleared, the drive can be configured to automaticallyrestart, it is the responsibility of the user and/or OEM and/or inte<strong>gr</strong>ator to ensure that the drive is configured for safeoperation.SV01D
Safety InformationExplosion Proof ApplicationsExplosion proof motors that are not rated for inverter use lose their certification when used for variable speed. Due tothe many areas of liability that may be encountered when dealing with these applications, the following statement ofpolicy applies:AC Technology Corporation inverter products are sold with no warranty of fitness for a particular purpose or warrantyof suitability for use with explosion proof motors. AC Technology Corporation accepts no responsibility for any direct,incidental or consequential loss, cost or damage that may arise through the use of AC inverter products in theseapplications. The purchaser expressly a<strong>gr</strong>ees to assume all risk of any loss, cost or damage that may arise from suchapplication.OperationSystems including controllers must be equipped with additional monitoring and protection devices according to thecorresponding standards (e.g. technical equipment, regulations for prevention of accidents, etc.). The controller may beadapted to your application as described in this documentation.Safety NotificationsDANGER!• After the controller has been disconnected from the supply voltage, live componentsand power connection must not be touched immediately, since capacitors could becharged. Please observe the corresponding notes on the controller.• Please close all protective covers and doors prior to and during operation.• Do not cycle input power to the controller more than once every two minutes.All safety information given in these <strong>Operating</strong> <strong>Instructions</strong> has the same layout:Signal Word! (characterizes the severity of the danger)Note (describes the danger and informs on how to proceed)IconWarning of hazardouselectrical voltageSignal WordsDANGER!Warns of impending danger.Consequences if disregarded:Death or severe injuries.Warning of a general danger WARNING! Warns of potential, very hazardous situations.Consequences if disregarded:Death or severe injuries.Warning of damage toequipmentSTOP!Warns of potential damage to material andequipment.Consequences if disregarded:Damage to the controller/drive or its environment.Information NOTE Designates a general, useful note.If observed, then using the controller/drivesystem is made easier.SV01D
Safety InformationSafety Notifications in accordance with EN 61800-5-1:DANGER!Hazard of Electrical ShockCapacitors retain charge for approximately 180 seconds after power is removed. Allowat least 3 minutes for discharge of residual charge before touching the drive.WARNING!• This product can cause a d.c. current in the PE conductor. Where a residualcurrent-operated (RCD) or monitoring (RCM) device is used for protection in case ofdirect or indirect contact, only an RCD or RCM Type B is allowed on the supply sideof this product.• Leakage Current may exceed 3.5mA AC. The minimum size of the PE conductorshall comply with local safety regulations for high leakage current equipment.• In a domestic environment, this product may cause radio interference in which casesupplementary mitigation measures may be required.NOTEControl and communications terminals provide reinforced insulation when the drive isconnected to a power system rated up to 300V rms between phase to <strong>gr</strong>ound (PE) andthe applied voltage on Terminals 16 and 17 is less than 150VAC between phase and<strong>gr</strong>ound.Safety Notifications in accordance with UL:Note for UL approved system with inte<strong>gr</strong>ated controllers: UL warnings are notes which apply to UL systems. Thedocumentation contains special information about UL.Warnings!• Suitable for use on a circuit capable of delivering not more than 200,000 rmssymmetrical amperes, at the maximum voltage rating marked on the drive.• Use minimum 75 °C copper wire only.• Shall be installed in a pollution de<strong>gr</strong>ee 2 macro-environment.SV01D
Technical Data2 Technical Data2.1 Standards and Application ConditionsConformity CE Low Voltage (73/23/EEC) & EMC (89/336/EEC) DirectivesApprovals UL508C Underwriters Laboratories -Power Conversion EquipmentInput voltage phase imbalance < 2%Humidity< 95% non-condensingTransport -25 … +70°CTemperature rangeStorage-20 … +70°COperation -10 … +55°C (with 2.5%/°C current derating above +40°C)Installation height 0 - 4000m a.m.s.l. (with 5%/1000 m current derating above 1000m a.m.s.l.)Vibration resistance acceleration resistant up to 1.0gEarth leakage current> 3.5 mA to PEEnclosure IP31/NEMA 1 IP65/NEMA 4X IP54/NEMA 12Protection measures against2.2 Ratings2.2.1 NEMA 1 (IP 31) Ratings120VAC Doubler / 240VAC ModelsTypePower[Hp/kW]short circuit, earth fault, phase loss, over voltage, under voltage,motor stalling, over temperature, motor overloadMainsOutput CurrentVoltage (1) (2)I in(120V) I in(240V) I nCLim maxESV251N01SXB 0.33 / 0.25 120 V Single-phase (1/N/PE)(90 … 132 V)6.8 3.4 1.7 200 24ESV371N01SXB 0.5 / 0.37 OR9.2 4.6 2.4 200 32ESV751N01SXB 1 / 0.75240 V Single-phase (2/PE)(170 … 264 V)16.6 8.3 4.2 200 52240VAC ModelsTypePower[Hp/kW]MainsOutput CurrentVoltage (1) (2)I in1~ (2/PE) I in3~ (3/PE) I nCLim maxWattsLossWattsLossESV251N02SXB 0.33 / 0.25 240 V Single Phase (2/PE) 3.4 - 1.7 200 20ESV371N02YXB 0.5 / 0.375.1 2.9 2.4 200 27ESV751N02YXB 1 / 0.75 240 V Single-phase (2/PE) 8.8 5.0 4.2 200 41ESV112N02YXB 1.5 / 1.1OR240 V Three-phase (3/PE)12.0 6.9 6.0 200 64ESV152N02YXB 2 / 1.5 (170 … 264 V)13.3 8.1 7.0 200 75ESV222N02YXB 3 / 2.2 17.1 10.8 9.6 200 103SV01D
Technical DataTypePower[Hp/kW]ESV112N02TXB 1.5 / 1.1MainsOutput CurrentVoltage (1) I in1~ (2/PE) I in3~ (3/PE) I nCLim max(2)ESV152N02TXB 2 / 1.5 - 8.1 7.0 200 75ESV222N02TXB 3 / 2.2 240 V Three-phase (3/PE) - 10.8 9.6 200 103(170 V … 264 V)WattsLoss- 6.9 6.0 200 64ESV402N02TXB 5 / 4.0 - 18.6 16.5 200 154ESV552N02TXB 7.5 / 5.5 - 26 23 200 225ESV752N02TXB 10 / 7.5 - 33 29 200 274480VAC ModelsTypePower[Hp/kW]ESV371N04TXB 0.5 / 0.37MainsOutput CurrentVoltage (1) I inI nCLim max(3)400V 480V 400V 480V 400V 480VESV112N04TXBESV152N04TXBESV222N04TXBESV402N04TXB1.5 / 1.12 / 1.53 / 2.25 / 4.0400 V Three-phase (3/PE)(340 … 440 V)OR480 V Three-phase (3/PE)(340 … 528 V)4.24.76.110.63.64.15.49.33.54.05.59.43.03.54.88.2175175175175200200200200485787128WattsLoss1.7 1.5 1.3 1.1 175 200 23ESV751N04TXB 1 / 0.75 2.9 2.5 2.4 2.1 175 200 37ESV552N04TXB 7.5 / 5.5 14.2 12.4 12.6 11.0 175 200 178ESV752N04TXB 10 / 7.5 18.1 15.8 16.1 14.0 175 200 208600VAC ModelsTypePower[Hp/kW]ESV751N06TXB 1 / 0.75MainsOutput CurrentVoltage (1) I inI nCLim max(2)ESV222N06TXB 3 / 2.2 600 V Three-phase (3/PE) 4.4 3.9 200 68ESN402N06TXB 5 / 4.0 (425 … 660 V)6.8 6.1 200 101WattsLoss2.0 1.7 200 37ESV152N06TXB 2 / 1.5 3.2 2.7 200 51ESV552N06TXB 7.5 / 5.5 10.2 9 200 148ESV752N06TXB 10 / 7.5 12.4 11 200 172(1) <strong>Frequency</strong> Range: 48 Hz … 62 Hz(2) Current Limit (CLim) is a percentage of the output current, I n. CLim maxis the maximum setting for P171.(3) Current Limit (CLim) is a percentage of the output current, I n. CLim maxis the maximum setting for P171.For 480VAC models, the CLim maxvalue in the 480V column of the table is used when P107 is set to 1.The CLim maxvalue in the 400V column is used when P107 is set to 0.STOP!• For installations above 1000m a.m.s.l., derate I nby 5% per 1000m, do not exceed 4000m a.m.s.l.• Operation above 40°C, derate I nby 2.5% per °C, do not exceed 55°C.• Carrier <strong>Frequency</strong> (P166):- If P166=2 (8 kHz), derate I nto 92% of drive rating- If P166=3 (10 kHz), derate I nto 84% of drive ratingSV01D
Technical Data2.2.2 NEMA 4X (IP65) Ratings240VAC ModelsTypePower[Hp/kW]ESV371N02SFC 0.5 / 0.37MainsOutput CurrentVoltage (1) I in1~ (2/PE) I in3~ (3/PE) I nCLim max(2)WattsLoss5.1 - 2.4 200 26 (5)ESV751N02SFC 1 / 0.75 8.8 - 4.2 200 38240 V Single Phase (2/PE)ESV112N02SFC 1.5 / 1.1 (Inte<strong>gr</strong>al Filters) 12.0 - 6.0 200 59 (5)ESV152N02SFC 2 / 1.5 13.3 - 7.0 200 69 (5)ESV222N02SFC 3 / 2.2 17.1 - 9.6 200 93 (5)ESV371N02YXC 0.5 / 0.37 240 V Single-phase (2/PE) 5.1 2.9 2.4 200 26ESV751N02YXC 1 / 0.75 OR8.8 5.0 4.2 200 38ESV112N02YXC 1.5 / 1.1 240 V Three-phase (3/PE) 12.0 6.9 6.0 200 59ESV152N02YXC 2 / 1.5 (170 … 264 V)(No Filters)13.3 8.1 7.0 200 69ESV222N02YXC 3 / 2.2 17.1 10.8 9.6 200 93480VAC ModelsTypePower[Hp/kW]MainsOutput CurrentVoltage (1) I inI nCLim max(3)400V 480V 400V 480V 400V 480VWattsLossESV371N04T_C (4) 0.5 / 0.37 400 V Three-phase (3/PE) 1.7 1.5 1.3 1.1 175 200 21 (5)ESV751N04T C (4) 1 / 0.75 (340 … 440 V) 2.9 2.5 2.4 2.1 175 200 33 (5)ESV112N04T C (4) 1.5 / 1.1 OR4.2 3.6 3.5 3.0 175 200 42 (5)ESV152N04T C (4) 2 / 1.5 480 V Three-phase (3/PE)(340 … 528 V)4.7 4.1 4.0 3.5 175 200 50 (5)ESV222N04T C (4) 3 / 2.2 6.1 5.4 5.5 4.8 175 200 78 (5)600VAC ModelsTypePower[Hp/kW]MainsOutput CurrentVoltage (1) I inI nCLim max(2)WattsLossESV751N06TXC 1.0 / 0.752.0 1.7 200 31600 V Three-phase (3/PE)ESV152N06TXC 1.5 / 1.1 (425 … 660 V)3.2 2.7 200 43ESV222N06TXC 3.0 / 2.2 4.4 3.9 200 57(1) <strong>Frequency</strong> Range: 48 Hz … 62 Hz(2) Current Limit (CLim) is a percentage of the output current, I n. CLim maxis the maximum setting for P171.(3) Current Limit (CLim) is a percentage of the output current, I n. CLim maxis the maximum setting for P171.For 480VAC models, the CLim maxvalue in the 480V column of the table is used when P107 is set to 1.The CLim maxvalue in the 400V column is used when P107 is set to 0.(4) The 11th digit of the Type number shown as a blank “_” is either an “F” = inte<strong>gr</strong>al EMC filter or an “X” = no filter.(5) For models with inte<strong>gr</strong>al filters (those with an “F” in the 11th digit of the Type number) add 3 watts to the rated“Watts Loss” value.STOP!• For installations above 1000m a.m.s.l., derate I nby 5% per 1000m, do not exceed 4000m a.m.s.l.• Operation above 40°C, derate I nby 2.5% per °C, do not exceed 55°C.• Carrier <strong>Frequency</strong> (P166):- If P166=1 (6 kHz), derate I nto 92% of drive rating- If P166=2 (8 kHz), derate I nto 84% of drive rating- If P166=3 (10 kHz), derate I nto76% of drive ratingSV01D
Technical Data2.3 SMV Type Number DesignationThe table herein describes the Type numbering desgination for the <strong>SMVector</strong> <strong>Inverter</strong> models.ESV 152 N0 2 T X BElectrical Products in the <strong>SMVector</strong> SeriesPower Rating in kW:251 = 0.25kW (0.33HP) 402 = 4.0kW (5HP)371 = 0.37kW (0.5HP) 552 = 5.5kW (7.5HP)751 = 0.75kW (1HP) 752 = 7.5kW (10HP)112 = 1.1kW (1.5HP)152 = 1.5kW (2HP)222 = 2.2kW (3HP)Installed Communication Module:C0 = CANopenD0 = DeviceNetR0 = RS-485 / ModBusN0 = Communications not installedInput Voltage:1 = 120 VAC (doubler output) or 240 VAC2 = 240 VAC4 = 400/480 VAC6 = 600 VACInput Phase:S = Single Phase Input onlyY = Single or Three Phase InputT = Three Phase Input onlyInput Line FilterF = Inte<strong>gr</strong>al EMC FilterX = Without EMC FilterEnclosure:B = NEMA 1 (IP31)C = NEMA 4X (IP65)D = NEMA 12 (IP54)SV01D
Installation3 Installation3.1 Dimensions and Mounting3.1.1 NEMA 1 (IP31)s24 X #1018 lb-in4 X M520 Nm( )b1bs1s1TypeESV251~~~~~BESV371~~~~~BESV751~~~~~BESV112~~~~~BESV152~~~~~BESV222~~~~~Baa1ain (mm)3.90(99)3.90(99)ESV402~~~~~B 3.90(99)a1in (mm)3.10(79)3.10(79)3.10(79)b2bin (mm)7.50(190)7.50(190)7.50(190)b1in (mm)7.00(178)7.00(178)7.00(178)cb2in (mm)0.25(6)0.25(6)0.25(6)cin (mm)4.35(110)5.45(138)5.80(147)s1in (mm)0.6(15)0.6(15)0.6(15)s2s2in (mm)2.0(50)2.0(50)2.0(50)V0102mlb (kg)2.0(0.9)2.8(1.3)3.2(1.5)ESV552~~~~~BESV752~~~~~B5.12(130)4.25(108)9.83(250)9.30(236)0.25(6)6.30(160)0.6(15)2.0(50)6.0(2.0)WARNING!Drives must not be installed where subjected to adverse environmental conditions such as:combustible, oily, or hazardous vapors or dust; corrosive chemicals; excessive moisture;excessive vibration; direct sunlight or extreme temperatures. Contact Lenze-AC Tech formore information.10 SV01D
Installation3.1.2 NEMA 4X (IP65)s24 x #8-3210 lb-in4 x M4( 1.2 Nm)b1bs1s1aa1b2cs2V0123Typeain (mm)a1in (mm)bin (mm)b1in (mm)b2in (mm)cin (mm)s1in (mm)s2in (mm)mlb (kg)ESV371N02YXC 6.28 (160) 5.90 (150) 8.00 (203) 6.56 (167) 0.66 (17) 4.47 (114) 2.00 (51) 2.00 (51) 2.9 (1.32)ESV751N02YXC 6.28 (160) 5.90 (150) 8.00 (203) 6.56 (167) 0.66 (17) 4.47 (114) 2.00 (51) 2.00 (51) 2.9 (1.32)ESV112N02YXC 6.28 (160) 5.90 (150) 8.00 (203) 6.56 (167) 0.72 (18) 6.27 (159) 2.00 (51) 2.00 (51) 5.1 (2.31)ESV152N02YXC 6.28 (160) 5.90 (150) 8.00 (203) 6.56 (167) 0.72 (18) 6.27 (159) 2.00 (51) 2.00 (51) 5.3 (2.40)ESV222N02YXC 7.12 (181) 6.74 (171) 8.00 (203) 6.56 (167) 0.72 (18) 6.77 (172) 2.00 (51) 2.00 (51) 6.5 (2.95)ESV371N04TXC 6.28 (160) 5.90 (150) 8.00 (203) 6.56 (167) 0.66 (17) 4.47 (114) 2.00 (51) 2.00 (51) 3.0 (1.36)ESV751N04TXC 6.28 (160) 5.90 (150) 8.00 (203) 6.56 (167) 0.66 (17) 4.47 (114) 2.00 (51) 2.00 (51) 3.0 (1.36)ESV112N04TXC 6.28 (160) 5.90 (150) 8.00 (203) 6.56 (167) 0.72 (18) 6.27 (159) 2.00 (51) 2.00 (51) 5.2 (2.36)ESV152N04TXC 6.28 (160) 5.90 (150) 8.00 (203) 6.56 (167) 0.72 (18) 6.27 (159) 2.00 (51) 2.00 (51) 5.2 (2.36)ESV222N04TXC 6.28 (160) 5.90 (150) 8.00 (203) 6.56 (167) 0.72 (18) 6.27 (159) 2.00 (51) 2.00 (51) 5.3 (2.40)ESV751N06TXC 6.28 (160) 5.90 (150) 8.00 (203) 6.56 (167) 0.66 (17) 4.47 (114) 2.00 (51) 2.00 (51) 3.0 (1.36)ESV152N06TXC 6.28 (160) 5.90 (150) 8.00 (203) 6.56 (167) 0.72 (18) 6.27 (159) 2.00 (51) 2.00 (51) 5.3 (2.40)ESV222N06TXC 6.28 (160) 5.90 (150) 8.00 (203) 6.56 (167) 0.72 (18) 6.27 (159) 2.00 (51) 2.00 (51) 5.3 (2.40)ESV371N02SFC 6.28 (160) 5.90 (150) 8.00 (203) 6.56 (167) 0.66 (17) 4.47 (114) 2.00 (51) 2.00 (51) 3.5 (1.59)ESV751N02SFC 6.28 (160) 5.90 (150) 8.00 (203) 6.56 (167) 0.66 (17) 4.47 (114) 2.00 (51) 2.00 (51) 3.5 (1.59)ESV112N02SFC 6.28 (160) 5.90 (150) 8.00 (203) 6.56 (167) 0.72 (18) 6.27 (159) 2.00 (51) 2.00 (51) 5.7 (2.58)ESV152N02SFC 6.28 (160) 5.90 (150) 8.00 (203) 6.56 (167) 0.72 (18) 6.27 (159) 2.00 (51) 2.00 (51) 5.9 (2.68)ESV222N02SFC 7.12 (181) 6.74 (171) 8.00 (203) 6.56 (167) 0.72 (18) 6.27 (159) 2.00 (51) 2.00 (51) 6.5 (2.96)ESV371N04TFC 6.28 (160) 5.90 (150) 8.00 (203) 6.56 (167) 0.66(17) 6.77 (172) 2.00 (51) 2.00 (51) 3.5 (1.59)ESV751N04TFC 6.28 (160) 5.90 (150) 8.00 (203) 6.56 (167) 0.66 (17) 4.47 (114) 2.00 (51) 2.00 (51) 3.6 (1.63)ESV112N04TFC 6.28 (160) 5.90 (150) 8.00 (203) 6.56 (167) 0.72 (18) 6.27 (159) 2.00 (51) 2.00 (51) 5.7 (2.58)ESV152N04TFC 6.28 (160) 5.90 (150) 8.00 (203) 6.56 (167) 0.72 (18) 6.27 (159) 2.00 (51) 2.00 (51) 5.7 (2.58)ESV222N04TFC 6.28 (160) 5.90 (150) 8.00 (203) 6.56 (167) 0.72 (18) 6.27 (159) 2.00 (51) 2.00 (51) 5.8 (2.63)WARNING!Drives must not be installed where subjected to adverse environmental conditions such as:combustible, oily, or hazardous vapors or dust; corrosive chemicals; excessive moisture;excessive vibration; direct sunlight or extreme temperatures. Contact Lenze-AC Tech for moreinformation.SV01D11
Installation3.2 Electrical Installation3.2.1 Power ConnectionsDANGER!Hazard of electrical shock! Circuit potentials are up to 600 VAC above earth <strong>gr</strong>ound.Capacitors retain charge after power is removed. Disconnect power and wait at leastthree minutes before servicing the drive.STOP!• Verify mains voltage before connecting to drive.• Do not connect mains power to the output terminals (U,V,W)! Severe damage to the drive will result.• Do not cycle mains power more than once every 2 minutes. Damage to the drive will result.Mains and Motor Terminations12 lb-in (1.3 Nm)0.25 in (6mm)3.2.1.1 Mains Connection to 120VAC Single-Phase SupplyESV...N01S...PE L1 L2 NPE L1 N3.2.1.2 Mains Connection to 240VAC Single-Phase SupplyESV...N01S...PE L1 L2 NESV...N01S...PE L1 L2 NPE L1 L2PE L1 NESV...N02Y...(2/PE AC)PE L1 L2 L3ESV...N02Y...(1/N/PE AC)PE L1 L2 L3PE L1 L2PE L1 NESV...N02S...(2/PE AC)PE L1 L2ESV...N02S...(1/N/PE AC)PE L1 L2PE L1 L2PE L1 N12 SV01D
Installation3.2.1.3 Mains Connection to Three-Phase SupplyESV...N02Y...ESV...N02T...ESV...N04T...ESV...N06T...(3/PE AC)PE L1 L2 L3PE L1 L2 L33.2.1.4 Motor ConnectionPESPESPESPESU/ T1 V/ T2 W/ T3 PEPEPES = Protective EarthShieldingPESM3~PEWARNING!Leakage current may exceed 3.5 mA AC. The minimum size of the protective earth(PE) conductor shall comply with local safety regulations for high leakage currentequipment.3.2.1.5 Installation Recommendations for EMC ComplianceFor compliance with EN 61800-3 or other EMC standards, motor cables, line cables and control or communicationscables must be shielded with each shield/screen clamped to the drive chassis. This clamp is typically locatedat the conduit mounting plate.Motor cable should be low capacitance (core/core
Installation3.2.1.6 NEMA 4X (IP 65) Input Terminal BlockFor NEMA 4X models with an inte<strong>gr</strong>ated EMC filter, the input terminal block is located on the right-hand side ofthe SMV inverter in the NEMA 4X (IP 65) enclosure. The Single and Three Phase models are illustrated herein.Refer to para<strong>gr</strong>aph 3.2.3 Control Terminals for pin out information.Single Phase (2/PE) with FilterL1UVWPEL2Three Phase (3/PE) with FilterL1U V WPEL2L314 SV01D
Installation3.2.2 Fuses/Cable Cross-SectionsNOTEObserve local regulations. Local codes may supersede these recommendations120V1~(1/N/PE)240V1~(2/PE)240V3~(3/PE)400Vor 480V3~(3/PE)600V3~(3/PE)RecommendationsTypeFuseMiniature circuitorInput Power WiringFuseBreaker (3)(L1, L2, L3, PE)breaker (1)(N. America) [mm²] [AWG]ESV251N01SXB M10 A C10 A 10 A 1.5 14ESV371N01SXB M16 A C16 A 15 A 2.5 14ESV751N01SXB M25 A C25 A 25 A 4 10ESV251N01SXB, ESV251N02SXBESV371N01SXB, ESV371N02YXBM10 A C10 A 10 A 1.5 14ESV371N02SFCESV751N01SXB, ESV751N02YXBESV751N02SFCM16 A C16 A 15 A 2.5 14ESV112N02YXB, ESV112N02SFC M20 A C20 A 20 A 2.5 12ESV152N02YXB, ESV152N02SFC M25 A C25 A 25 A 2.5 12ESV222N02YXB, ESV222N02SFC M32 A C32A 32 A 4 10ESV371N02YXB, ESV751N02YXBESV371N02YXC, ESV751N02YXCM10 A C10 A 10 A 1.5 14ESV112N02YXB, ESV152N02YXBESV112N02TXB, ESV152N02TXBM16 A C16 A 12 A 1.5 14ESV112N02YXC, ESV152N02YXCESV222N02YXB, ESV222N02TXBESV222N02YXCM20 A C20 A 20 A 2.5 12ESV402N02TXB M32 A C32 A 32 A 4.0 10ESV552N02TXB M40 A C40 A 35 A 6.0 8ESV752N02TXB M50 A C50 A 45 A 10 8ESV371N04TXB ...ESV222N04TXBESV371N04TXC ...ESV222N04TXCM10 A C10 A 10 A 1.5 14ESV371N04TFC ESV222N04TFCESV402N04TXB M16 A C16 A 20 A 2.5 14ESV552N04TXB M20 A C20 A 20 A 2.5 14ESV752N04TXB M25 A C25 A 25 A 4.0 10ESV751N06TXB ...ESV222N06TXBESV751N06TXC ...ESV222N06TXCM10 A C10 A 10 A 1.5 14ESV402N06TXB M16 A C16 A 12 A 1.5 14ESV552N06TXB M16 A C16 A 15 A 2.5 14ESV752N06TXB M20 A C20 A 20 A 2.5 12(1) Installations with high fault current due to large supply mains may require a type D circuit breaker.(2) UL Class CC or T fast-acting current-limiting type fuses, 200,000 AIC, preferred. Bussman KTK-R, JJN or JJS or equivalent.(3) Thermomagnetic type breakers preferred.Observe the following when using Ground Fault Circuit Interrupters (GFCIs):• Installation of GFCI only between supplying mains and controller.• The GFCI can be activated by:- capacitive leakage currents between the cable screens during operation (especially with long, screened motor cables)- connecting several controllers to the mains at the same time- RFI filtersSV01D15
Installation3.2.3 Control TerminalsNOTEControl and communications terminals provide reinforced insulation when the drive isconnected to a power system rated up to 300V rms between phase to <strong>gr</strong>ound and theapplied voltage on Terminals 16 and 17 is less than 150VAC between phase and <strong>gr</strong>ound.Terminal Description Important1 Digital Input: Start/Stop input resistance = 4.3kΩ2 Analog Common5 Analog Input: 0...10 VDC input resistance: >50 kΩ6 Internal DC supply for speed pot +10 VDC, max. 10 mA25 Analog Input: 4...20 mA input resistance: 250Ω4 Digital Reference/Common +15 VDC / 0 VDC, depending on assertion level11 Internal DC supply for external devices +12 VDC, max. 50 mA13A Digital Input: Configurable with P12113B Digital Input: Configurable with P122input resistance = 4.3kΩ13C Digital Input: Configurable with P12314 Digital Output: Configurable with P142 DC 24 V / 50 mA; NPN30 Analog Output: Configurable with P150…P155 0…10 VDC, max. 20 mA16AC 250 V / 3 ARelay output: Configurable with P14017DC 24 V / 2 A … 240 V / 0.22 A, non-inductive4.5 lb-in(0.5 Nm)0.25 in (6 mm)AWG 26…16(
Commissioning4 Commissioning4.1 Local Keypad & DisplayAUTOFWDREVRUNSTOPV0105RUNSTART BUTTON:In Local Mode (P100 = 0, 4), this button will start the drive.STOP BUTTON: stops the drive, regardless of which mode the drive is in.STOPWARNING!When JOG is active, the STOP button will not stop the drive!ROTATION:In Local Mode (P100 = 0, 4), this selects the motor rotation direction:- The LED for the present rotation direction (FWD or REV) will be on- Press R/F; the LED for the opposite rotation direction will blink- Press M within 4 seconds to confirm the change- The blinking direction LED will turn on, and the other LED will turn offWhen rotation direction is changed while the drive is running, the commanded direction LED will blink until thedrive is controlling the motor in the selected direction.MODE:Used to enter/exit the Parameter Menu when pro<strong>gr</strong>amming the drive and to enter a changed parameter value.UP AND DOWN BUTTONS:Used for pro<strong>gr</strong>amming and can also be used as a reference for speed, PID setpoint, or torque setpoint.When the s and t buttons are the active reference, the middle LED on the left side of the display will be on.INDICATING LEDsFWD/REV LEDs: Indicate the present rotation direction. See ROTATION above.AUTO LED: Indicates that the drive has been put into Auto mode from one of the TB13 inputs (P121…P123 setto 1…7).Also indicates that PID mode is active (if enabled).RUN LED: Indicates that the drive is runnings t LED: Indicates that the s t are the active reference.NOTEIf the keypad is selected as the auto reference (P121…P123 is 6) and the correspondingTB-13 input is closed, then the AUTO LED and s t LEDs will both be on.SV01D17
Commissioning4.2 Drive Displays and Modes of OperationSpeed Mode DisplayIn the standard mode of operation, the drive frequency output is set directly by the selected reference (keypad, analo<strong>gr</strong>eference, etc.). In this mode, the drive display will show the drive’s output frequency.PID Mode DisplayWhen the PID mode is enabled and active, the normal run display shows the actual PID setpoint. When PID mode is notactive, the display returns to showing the drive’s output frequency.Torque Mode DisplayWhen the drive is operating in Vector Torque mode, the normal run display shows the drive’s output frequency.4.3 Parameter SettingStatus/Fault messagesStoP60.0CLErrF.AFF.UFMPASS0225MP194 = 000060 sChange Parametersp100p104p5414.4 Electronic Pro<strong>gr</strong>amming Module (EPM)M15 s20.012.0MV0106The EPM contains the drives operational memory. Parameter settings are stored in theEPM and setting changes are made to the “User settings” in the EPM.An optional EPM Pro<strong>gr</strong>ammer (model EEPM1RA) is available that allows:• An EPM to be copied directly to another EPM.• An EPM to be copied to the memory of the EPM Pro<strong>gr</strong>ammer.• Stored files can be modified in the EPM Pro<strong>gr</strong>ammer.• Stored files can be copied to another EPM.EPM Modulein SMV DriveAs the EPM Pro<strong>gr</strong>ammer is battery operated, parameter settings can be copied to an EPM and inserted into a drivewithout power being applied to the drive. This means that the drive will be fully operational with the new settings onthe next application of power.Additionally, when the drives parameter settings are burned into an EPM with the EPM Pro<strong>gr</strong>ammer, the settings aresaved in two distinct locations; the “User settings” and the “OEM default settings”. While the User settings can bemodified in the drive, the OEM settings cannot. Thus, the drive can be reset not only to the “factory” drive defaultsettings (shown in this manual), but can be set to the Original Machine settings as pro<strong>gr</strong>ammed by the OEM.While the EPM can be removed for copying or to use in another drive, it must be installed for the drive to operate (amissing EPM will trigger an 1 fault).18 SV01D
Commissioning4.5 Parameter Menu4.5.1 Basic Setup ParametersCodePossible SettingsNo. Name Default SelectionIMPORTANT1 Start Control Source 0 0 Local Keypad Use RUN button on front of drive to start1 Standard ReferenceSource1 Terminal Strip Use start/stop circuit wired into the terminalstrip. Refer to Section 3.2.32 Remote Keypad Only Use RUN button on optional Remote Keypadto start3 Network Only • Start command must come from network(Modbus, CANopen, etc)• Requires optional communicationmodule (refer to the network moduledocumentation).• Must also set one of the TB-13 inputs to 9(Network Enable); refer to P121...P1234 Terminal Strip or Local Keypad Allows start control to be switched betweenterminal strip and local keypad using one ofthe TB-13 inputs. See note below.5 Terminal Strip or Remote Keypad Allows start control to be switched betweenterminal strip and optional remote keypadusing one of the TB-13 inputs. See note below.WARNING!P100 = 0 disables TB-1 as a STOP input! STOP circuitry may be disabled if parametersare reset back to defaults (see P199)NOTE• P100 = 4, 5: To switch between control sources, one of the TB-13 inputs (P121...P123) must be set to 08 (Control Select);TB-13x OPEN (or not configured): Terminal strip controlTB-13x CLOSED: Local (P100 = 4) or Remote (P100 = 5) keypad• P100 = 0, 1, 4: Network can take control if P121...P123 = 9 and the correspondingTB-13x input is CLOSED.• The STOP button on the front of the drive is always active except in JOG mode.• An fault will occur if the Assertion Level switch (ALsw) position does notmatch the P120 setting and P100 is set to a value other than 0.0 0 Keypad (Local or Remote) Selects the default speed or torque reference1 0-10 VDCwhen no Auto Reference is selected using theTB-13 inputs2 4-20 mA3 Preset #14 Preset #25 Preset #36 NetworkSV01D19
CommissioningCodePossible SettingsNo. Name Default SelectionIMPORTANT1 Minimum <strong>Frequency</strong> 0.0 0.0 {Hz} P103 • P102, P103 are active for all speed1 Maximum <strong>Frequency</strong> 60.0 7.5 {Hz} 500references• When using an analog speed reference, alsosee P160, P161NOTE• P103 cannot be set below Minimum <strong>Frequency</strong> (P102)• To set P103 above 120 Hz:- Scroll up to 120 Hz; display shows (flashing).- Release s button and wait one second- Press s button again to continue increasing P103WARNING!Consult motor/machine manufacturer before operating above rated frequency. Overspeeding the motor/machine maycause damage to equipment and injury to personnel!11Acceleration Time 1Deceleration Time 120.020.00.00.0{s}{s}36003600• P104 = time of frequency change from 0 Hzto P167 (base frequency)• P105 = time of frequency change fromP167 to 0 Hz• For S-ramp accel/decel, adjust P106Example: if P103 = 120 Hz, P104 = 20.0 s and P167 (base frequency) = 60 Hz; the rate of frequency change from 0 Hzto 120 Hz = 40.0 s1 S-Ramp Inte<strong>gr</strong>ationTime07 (1) Line VoltageSelection0.0 0.0 {s} 50.0 • P106 = 0.0: Linear accel/decel ramp• P106 > 0.0: Adjusts S-ramp curve forsmoother ramp1* 0 Low (120, 200, 400, 480VAC) * The default setting is 1 for all drives exceptwhen using “reset 50” (Parameter P199,selection 4) with 480V models. In this case,1 High (120, 240, 480, 600VAC) the default setting is 0.1 Motor Overload 100 30 {%} 100 P108 = motor current rating x 100SMV output ratingExample: if motor = 3amps and SMV = 4amps,then P108 = 75%NOTEDo not set above rated motor current as listed on the motor dataplate. The motor thermaloverload function of the SMV is UL approved as a motor protection device. If the linepower is cycled, the motor thermal state is reset to cold state. Cycling power after anoverload fault could result in significantly reducing the motor life.P1 Motor Overload Type 0 0 Speed CompensationIr100%11 No Speed Compensation60%030 fV0108(1) Any changes to this parameter will not take effect until the drive is stopped20 SV01D
CommissioningCodePossible SettingsNo. Name Default Selection1 Start Method 0 0 NormalIMPORTANT1 Start on Power-up Drive will automatically start when power isapplied.2 Start with DC Brake When start command is applied, drive willapply DC braking according to P174, P175prior to starting the motor3 Auto Restart Drive will automatically restart after faults, orwhen power is applied.4 Auto Restart with DC Brake Combines settings 2 and 35 Flying Start/Restart #1 • Drive will automatically restart after faults,or when power is applied.• After 3 failed attempts, drive will AutoRestart with DC brake.• P110 = 5: Performs speed search, startingat Max <strong>Frequency</strong> (P103)6 Flying Start/Restart #2• P110 = 6: Performs speed search, startingat the last output frequency prior to faultingor power loss• If P111 = 0, a flying START is performedwhen a start command is applied.NOTE• P110 = 0, 2: Start command must be applied at least 2 seconds after power-up;fault will occur if start command is applied too soon.• P110 = 1, 3…6: For automatic start/restart, the start source must be the terminalstrip and the start command must be present.• P110 = 2, 4…6: If P175=999.9, dc braking will be applied for 15s.• P110 = 3…6: Drive will attempt 5 restarts; if all restart attempts fail, drive displays(fault lockout) and requires manual reset.• P110 = 5, 6: If drive cannot catch the spinning motor, drive will trip into . fault.WARNING!Automatic starting/restarting may cause damage to equipment and/or injury to personnel! Automatic starting/restartingshould only be used on equipment that is inaccessible to personnel.1 Stop Method 0 0 Coast Drive’s output will shut off immediately upona stop command, allowing the motor to coastto a stop1 Coast with DC Brake The drive’s output will shut off and then the DCBrake will activate (see P174, P175)2 Ramp The drive will ramp the motor to a stopaccording to P105 or P126.3 Ramp with DC Brake The drive will ramp the motor to 0 Hz and thenthe DC Brake will activate (see P174, P175)1 Rotation 0 0 Forward Only If PID mode is enabled, reverse direction is1 Forward and Reversedisabled (except for Jog).SV01D21
Commissioning4.5.2 I/O Setup ParametersCodePossible SettingsNo. Name Default Selection1 Assertion Level 2111TB-13A InputFunctionTB-13B InputFunctionTB-13C InputFunction1 Low2 HighIMPORTANTP120 and the Assertion Level switch must bothmatch the desired assertion level unless P100,P121…P123 are all set to 0. Otherwise anfault will occur.0 0 None Disables input1 AUTO Reference: 0-10 VDC For frequency mode, see P160...P161,2 AUTO Reference: 4-20 mAFor PID mode, see P204…P205,For vector torque mode, see P3303 AUTO Reference: Preset For frequency mode see P131...P137,For PID mode, see P231…P233,For torque mode see, P331…P3334 AUTO Reference: MOP Up • Normally open: Close input to increase ordecrease speed, PID setpoint or torque5 AUTO Reference: MOP Down setpoint.• MOP Up is not active while in STOP6 AUTO Reference: Keypad7 AUTO Reference: Network8 Control Select Use when P100 = 4, 5 to switch betweenterminal strip control and local or remotekeypad control.9 Network Enable Required to start the drive through thenetwork.10 Reverse Rotation Open = Forward Closed = Reverse11 Start ForwardSee note for typical circuit12 Start Reverse13 Run ForwardSee note for typical circuit14 Run Reverse15 Jog Forward Jog Forward speed = P13416 Jog Reverse Jog Reverse speed = P135Active even if P112 = 017 Accel/Decel #2 Refer to parameters P125, P12618 DC Brake See P174; close input to override P17519 Auxiliary Ramp to Stop Normally closed: Opening input will ramp driveto STOP according to P127, even if P111 is setto Coast (0 or 1).20 Clear Fault Close to reset fault21 External Fault . Normally closed circuit; open to trip22 Inverse External Fault . Normally open circuit; close to tripWARNING!Jog overrides all STOP commands! To stop the drive while in Jog mode, the Jog input must be deactivated or a faultcondition induced.22 SV01D
CommissioningCodePossible SettingsNo. Name Default SelectionIMPORTANTNOTE• When input is activated, settings 1...7 override P101.• When TB-13A...TB-13C are configured for Auto References other than MOP, TB-13C overrides TB-13B, and TB-13Boverrides TB-13A. Any other Auto Reference will have priority over MOP.• Settings 10...14 are only valid in Terminal Strip mode (P100 = 1, 4, 5).• If Start/Run/Jog Forward and Start/Run/Jog Reverse are both activated, drive will STOP.• If Jog input is activated while the drive is running, the drive will enter Jog mode; when Jog input is deactivated, drivewill STOP.• An fault will occur if the Assertion Level switch (ALsw) position does not match the P120 setting and anyof the digital inputs (P121...P123) are set to a value other than 0.• An I fault will occur under the following conditions:- TB-13A...TB-13C settings are duplicated (each setting, except 0 and 3, can only be used once).- One input is set to “MOP Up” and another is not set to “MOP Down”, or vice-versa.- One input is set to 10 and another input is set to 11…14.- One input is set to 11 or 12 and another input is set for 13 or 14.• Typical control circuits are shown below:- If any input is set to 10, 12 or 14, P112 must be set to 1 for Reverse action to function.Run / Stopwith DirectionP121 = 101 4 13AStart Forward /Start ReverseP121 = 11, P122 = 121 4 13A 13BRun Forward /Run ReverseP121 = 13, P122 = 141 4 13A 13BSTOPRUNFWDREVSTOPFWDREVRUNFWDRUNREV1 Acceleration Time 2 20.0 0.0 {s} 3600 • Selected using TB-13A...TB-13C (P121...1 Deceleration Time 2 20.0 0.0 {s} 3600P123 = 17)• For S-ramp accel/decel, adjust P1061 Deceleration Timefor Auxiliary Rampto Stop20.0 0.0 {s} 3600 • Selected using TB-13A...TB-13C (P121...P123 = 19).• For S-ramp accel/decel, adjust P106• Once executed, this ramp time has priorityover P105 and P126.1 Preset Speed #1 0.0 0.0 {Hz} 5001 Preset Speed #2 0.0 0.0 {Hz} 5001 Preset Speed #3 0.0 0.0 {Hz} 5001 Preset Speed #4 0.0 0.0 {Hz} 5001 Preset Speed #5 0.0 0.0 {Hz} 5001 Preset Speed #6 0.0 0.0 {Hz} 5001 Preset Speed #7 0.0 0.0 {Hz} 500PRESETSPEED13A 13B 13C1 X -- --2 -- X --3 -- -- X4 X X --5 X -- X6 -- X X7 X X XSV01D23
CommissioningCodePossible SettingsNo. Name Default SelectionIMPORTANT1 Relay Output0 0 None Disables the outputTB-16, 171 Run Energizes when the drive is running2 Reverse Energizes when reverse rotation is active3 Fault De-energizes when the drive trips, or poweris removed4 Inverse Fault Energizes when the drive trips5 Fault Lockout P110 = 3...6: De-energizes if all restartattempts fail6 At Speed Energizes when output frequency =commanded frequency7 Above Preset Speed #6 Energizes when output freq. > P1368 Current Limit Energizes when motor current = P1719 Follower Loss (4-20 mA) Energizes when 4-20 mA signal falls below2 mA10 Loss of Load Energizes when motor load drops below P145;see also P14611 Local Keypad Control Active12 Terminal Strip Control Active13 Remote Keypad Control Active14 Network Control Active15 Standard Reference ActiveEnergizes when the selected source is activefor start controlEnergizes when P101 reference is active16 Auto Reference Active Energizes when Auto Reference is activatedusing TB-13 input; refer to P121...P12317 Sleep Mode Active Refer to parameters P240...P24218 PID Feedback < Min. Alarm Energizes when PID feedback signal < P21419 Inverse PID Feedback < Min. Alarm De-energizes when PID feedbacksignal < P21420 PID Feedback > Max Alarm Energizes when PID feedbacksignal > P21521 Inverse PID Feedback > Max Alarm De-energizes when PID feedback signal >P21522 PID Feedback withinMin/Max Alarm range23 PID Feedback outsideMin/Max Alarm range24 ReservedEnergizes when PID feedback signal is withinthe Min/Max Alarm range; see P214, P215Energizes when PID feedback signal is outsidethe Min/Max Alarm range; see P214, P21525 Network Activated Requires optional communication module(refer to the network module documentation).24 SV01D
CommissioningCodePossible SettingsNo. Name Default Selection1 TB-14 Output 0 0...23 (same as P140)1 Loss of LoadThresholdIMPORTANT24 Dynamic Braking For use with Dynamic Braking option25 Network Activated Requires optional communication module(refer to the network module documentation).0 0 {%} 200 P140, P142 = 10: Output will energize ifmotor load falls below P145 value longer thanP146 time1 Loss of Load Delay 0.0 0.0 {s} 240.01 TB-30 Output 0 0 None 2-10 VDC signal can be converted to 4-20 mA1 0-10 VDC Output <strong>Frequency</strong> -10 VDC Output <strong>Frequency</strong>3 0-10 VDC Load4 2-10 VDC Load5 0-10 VDC Torque6 2-10 VDC Torque7 0-10 VDC Power (kW)8 2-10 VDC Power (kW)9 Network Controlledwith a total circuit impedance of 500 WRequires optional communication module(refer to the network module documentation).1 TB-30 Scaling:<strong>Frequency</strong>60.0 3.0 {Hz} 2000 If P150 = 1 or 2, sets the frequency at whichoutput equals 10 VDC1 TB-30 Scaling: Load 200 10 {%} 500 If P150 = 3 or 4, sets the Load (as a percentof drive current rating) at which output equals10 VDC.1 TB-30 Scaling:Torquep155 TB-30 Scaling:Power (kW)100 10 {%} 1000 If P150 = 5 or 6, sets the Torque (as a percentof motor rated torque) at which output equals10 VDC1.0 0.1 {kW} 200.0 If P150 = 7 or 8, sets the power at whichoutput equals 10 VDCSV01D25
Commissioning4.5.3 Advanced Setup ParametersCodePossible SettingsNo. Name Default Selection1 Speed at Minimum 0.0 -999.0 {Hz} 1000fSignalP161IMPORTANT1 Speed at MaximumSignal60.0 -999.0 {Hz} 10000V(4mA)10V(20mA)refP160V0111NOTE• P160 sets the output frequency at 0% analog input• P161 sets the output frequency at 100% analog input• P160 or P161 < 0.0 Hz: For scaling purposes only; does not indicate oppositedirection!• P160 > P161: Drive will react inversely to analog input signal1 Analog Input Filter 0.01 0.00 {s} 10.00 Adjusts the filter on the analog inputs (TB-5and TB-25) to reduce the effect of signal noise1 TB-25 Loss Action 0 0 No Action • Selects the reaction to a loss of the 4-201 FaultmA signal at TB-25.• Signal is considered lost if it falls below 22 Go to Preset when TB-25 is:mASpeed reference: P137• Digital outputs can also indicate a loss ofPID feedback source: P1374-20 mA signal; refer to P140, P142PID setpoint reference: P233Torque reference: P3331 Carrier <strong>Frequency</strong> See 0 4 kHz • As carrier frequency is increased, motorNotes1 6 kHznoise is decreased• Observe derating in Section 2.2.2 and 2.2.32 8 kHz• Automatic shift to 4 kHz at 120% load2 10 kHz• NEMA 4X (IP65) Models: Default = 0 (4kHz)• NEMA 1 (IP31) Models: Default = 1 (6kHz)7 (1) Base <strong>Frequency</strong> 60.0 10.0 {Hz} 15001 Fixed Boost 0.0 {%} 30.0V0112NOTE• P167 = rated motor frequency for standard applications• P168 = default setting depends on drive rating1 Accel Boost 0.0 0.0 {%} 20.0 Accel Boost is only active during acceleration(1) Any changes to this parameter will not take effect until the drive is stopped26 SV01D
CommissioningCodePossible SettingsNo. Name Default SelectionIMPORTANT17 Slip Compensation 0.0 0.0 {%} 10.0 Increase P170 until the motor speed nolonger changes between no load and full loadconditions.7 (1) Current Limit 200 30 {%} CLim max• When the limit is reached, the drivedisplays , and either the accelerationtime increases or the output frequencydecreases.• Digital outputs can also indicate when thelimit is reached; refer to P140, P142.• Refer to Section 2.2 for CLim max17 DC Brake Voltage 0.0 0.0 {%} 30.0 Setting is a percent of the nominal DC busvoltage.p175 DC Brake Time 0.0 0.0 {s} 999.9NOTECONFIRM MOTOR SUITABILITY FOR USE WITH DC BRAKINGDC Brake voltage (P174) is applied for the time specified by P175 with the followingexceptions:• If P111=1, 3 and P175=999.9 the brake voltage will be applied continuously until arun or fault condition occurs.• If P110=2, 4…6 and P175=999.9, brake voltage will be applied for 15s• If P121…P123=18 and the corresponding TB-13 input is CLOSED, brake voltage willbe applied until the TB-13 input is OPENED or a fault condition occurs.17 Display <strong>Frequency</strong>Multiplier0.00 0.00 650.00 • Allows frequency display to be scaled• P178 = 0.00: Scaling disabled• P178 > 0.00: Display = Actual <strong>Frequency</strong> XP178Example: If P178 = 29.17 and actual frequency = 60 Hz, then Drive displays 1750 (rpm)17 Run Screen Display 0 0 {Parameter Number} 599 • 0 = Normal Run Screen, this displaydepends on mode of operation.Refer to Section 4.2.• Other selections choose a diagnosticparameter to display (P501…P599).1 Skip frequency 1 0.0 0.0 {Hz} 500 • Drive will not run in the defined skip range;1 Skip frequency 2 0.0 0.0 {Hz} 500used to skip over frequencies that causemechanical vibration1 Skip frequency 0.0 0.0 {Hz} 10.0 • P181 and P182 define the start of the skipbandwidthranges• P184 > 0 defines the bandwidth of bothranges.NOTEBandwidth (Hz) = f s(Hz) + P184 (Hz) f s= P181 or P182Example: P181 = 18 Hz and P184 = 4 Hz; skip range is from 18 to 22 Hz(1) Any changes to this parameter will not take effect until the drive is stoppedSV01D27
CommissioningCodePossible SettingsNo. Name Default SelectionIMPORTANT1 Password 225 0000 9999 • Must enter password to access parameters• P194 = 0000: Disables password1 Clear Fault History 0 0 No Action1 Clear Fault History1 Pro<strong>gr</strong>am Selection 0 Operate from User settings1 Operate from OEM settings Refer to Notes 1, 2 and 32 Reset to OEM default settings Refer to Note 13 Reset to 60 Hz default settings • Refer to Note 4• Parameters are reset to the defaults listedin this manual.• For P199=4, the following exceptions apply:- P103, P152, P161, P167 = 50.0 Hz4 Reset to 50 Hz default settings - P304 = 50 Hz;- P305 = 1450 RPM- P107 = 0 (480 V drives only)5 Translate Refer to Note 5WARNING!Modification of P199 can affect drive functionality! STOP and EXTERNAL FAULT circuitrymay be disabled! Check P100 and P121...P123Note 1If the EPM does not contain valid OEM settings, a flashing GF will be displayed whenP199 is set to 1 or 2.Note 2When P199 is set to 1, the drive operates from the OEM settings stored in the EPMModule and no other parameters can be changed ( will be displayed if attempted).Note 3Auto Calibration is not possible when operating from OEM Settings.Note 4Reset 60 and Reset 50 will set the Assertion Level (P120) to “2” (High). P120 may needto be reset for the digital input devices being used. An fault may occur if P120 andthe Assertion switch are not set identically.Note 5If an EPM that contains data from a previous compatible software version is installed:• The drive will operate according to the previous data, but parameters cannot bechanged ( will be displayed if attempted)• To update the EPM to the current software version, set P199 = 5. The parameters cannow be changed but the EPM is incompatible with previous software revisions.28 SV01D
Commissioning4.5.4 PID ParametersCodePossible SettingsNo. Name Default SelectionIMPORTANT2 PID Mode 0 01DisabledNormal-acting• Normal-acting: As feedback increases,motor speed decreases• Reverse-acting: As feedback increases,2 Reverse-actingmotor speed increases• PID mode is disabled in Vector Torque mode(P300 = 5)NOTETo activate PID mode, one of the TB-13 inputs (P121...P123) must be used to selectthe Auto Reference that matches the desired PID setpoint reference. If the selected PIDsetpoint reference uses the same analog signal as the PID feedback (P201), an Ifault will occur.Example: The desired PID setpoint reference is the keypad (s and t). Set TB-13x = 6(Auto Reference: Keypad):• TB-13x = closed: PID mode is active• TB-13x = open: PID mode is disabled and the drive speed will be controlled by thereference selected in P101.PID Feedback Source 0 0 4-20 mA (TB-25) Must be set to match the PID feedback signal1 0-10 VDC (TB-5)PID Decimal Point 1 0 PID Display = XXXX Applies to P204, P205, P214, P215, P231...1 PID Display = XXX.X2 PID Display = XX.XX3 PID Display = X.XXX4 PID Display = .XXXXP233, P242, P522, P5232 Feedback atMinimum SignalFeedback atMaximum Signal0.0 -99.9 3100.0 Set to match the range of the feedback signalbeing used100.0 -99.9 3100.0Example: Feedback signal is 0 - 300 PSI;P204 = 0.0, P205 = 300.02 Proportional Gain 5.0 0.0 {%} 100.0 Used to tune the PID loop:p2 Inte<strong>gr</strong>al Gain 0.0 0.0 {s} 20.0• Increase P207 until system becomesunstable, then decrease P207 by 10-15%Derivative Gain 0.0 0.0 {s} 20.0 • Next, increase P208 until feedback matchessetpoint• If required, increase P209 to compensatefor sudden changes in feedbackNOTE• Derivative Gain is very sensitive to noise on the feedback signal and must be usedwith care• Derivative Gain is not normally required in pump and fan applications2 PID Setpoint Ramp 20.0 0.0 {s} 100.0 • Time of setpoint change from P204 to P205or vice versa.• Used to smooth the transition from one PIDsetpoint to another, such as when using thePreset PID Setpoints (P231...P233)SV01D29
CommissioningCodePossible SettingsNo. Name Default SelectionIMPORTANT2 Minimum Alarm 0.0 P204 P205 Use with P140, P142 = 18...232 Maximum Alarm 0.0 P204 P2052 Preset PID Setpoint#1Preset PID Setpoint#2Preset PID Setpoint#30.0 P204 P205 TB-13A activated; P121 = 3 andP200 = 1 or 20.0 P204 P205 TB-13B activated; P122 = 3 andP200 = 1 or 20.0 P204 P205 TB-13C activated; P123 = 3 andP200 = 1 or 22 Sleep Threshold 0.0 0.0 {Hz} 500.0 • If drive speed < P240 for longer than P241,2 Sleep Delay 30.0 0.0 {s} 300.0output frequency = 0.0 Hz; drive display =2 Sleep Bandwidth 0.0 0.0 B max• P240 = 0.0: Sleep mode is disabled.• P200 = 0…2: Drive will start again whenWhere: B max= |(P205 - P204)|speed command is above P240• P242 > 0.0: Drive will restart when the PIDfeedback differs from the setpoint by morethan the value of P242 or when the PIDloop requires a speed above P240.30 SV01D
Commissioning4.5.5 Vector ParametersCodePossible SettingsNo. Name Default SelectionIMPORTANT0 (1) Drive Mode 0 0 Constant V/Hz Constant torque V/Hz control for generalapplications1 Variable V/Hz Variable torque V/Hz control for centrifugalpump and fan applications2 Enhanced Constant V/Hz For single or multiple motor applications that3 Enhanced Variable V/Hzrequire better performance than settings 0 or1, but cannot use Vector mode, due to:• Missing required motor data• Vector mode causing unstable motoroperation4 Vector Speed For single-motor applications requiring higherstarting torque and speed regulation5 Vector Torque For single-motor applications requiring torquecontrol independent of speedNOTETo configure the drive for either Vector mode or Enhanced V/Hz mode:• P300 = 4, 5:- Set P302...P306 according to motor nameplate- Set P399 = 1- Make sure motor is cold (20° - 25° C) and apply a Start command- Display will indicate for about 40 seconds- Once the calibration is complete, the display will indicate ; apply anotherStart command to actually start the motor- If an attempt is made to start the drive in Vector or Enhanced V/Hz mode beforeperforming the Motor Calibration, the drive will display and will notoperate• P300 = 2, 3: Same as above but only need to set P302…P3040 (1) Motor Rated Voltage 0 {V} 6000 (1) Motor Rated Current 0.0 {A} 500.00 (1) Motor Rated60 0 {Hz} 1000<strong>Frequency</strong>(1)Motor Rated Speed 1750 300 {RPM} 65000• Default setting = drive rating• Set to motor nameplate dataSet to motor nameplate data0 (1) Motor Cosine Phi 0.80 0.40 0.99NOTEIf motor cosine phi is not known, use one of the following formulas:cos phi = motor Watts / (motor efficiency X P302 X P303 X 1.732)cos phi = cos [ sin 1 (magnetizing current / motor current) ]1 (1) Motor StatorResistance1 (1) Motor StatorInductance0.00 0.00 {W} 64.00 • Will be automatically pro<strong>gr</strong>ammed by P399• Changing these settings can adversely0.0 0.0 {mH} 2000affect performance. Contact factorytechnical support prior to changing.Torque Limit 100 0 {%} 400 When P300 = 5, sets the maximum outputtorque.(1) Any changes to this parameter will not take effect until the drive is stoppedSV01D31
CommissioningCodePossible SettingsNo. Name Default SelectionPreset TorqueSetpoint #1Preset TorqueSetpoint #2Preset TorqueSetpoint #3IMPORTANT100 0 {%} 400 TB-13A activated; P121 = 3 andP300 = 5100 0 {%} 400 TB-13B activated; P122 = 3 andP300 = 5100 0 {%} 400 TB-13C activated; P123 = 3 andP300 = 5(1) Current Loop P Gain 0.25 0.00 16.0(1)Current Loop I Gain 65 12 {ms} 9990(1)Speed LoopAdjustmentMotor Autocalibration0.0 0.0 {%} 20.0Changing these settings can adversely affectperformance. Contact factory technical supportprior to changing.0 0 Calibration Not Done • If P300 = 2...5, motor calibration mustbe performed, but motor data must bepro<strong>gr</strong>ammed first.1 Calibration Enabled• An alternating / will occur if:- motor calibration is attempted with P300= 0 or 12 Calibration Complete- motor calibration is attempted beforepro<strong>gr</strong>amming motor dataNOTETo run the Auto Calibration:- Set P302...P306 according to motor nameplate- Set P399 = 1- Make sure motor is cold (20° - 25° C)- Apply a Start command- Display will indicate for about 40 seconds- Once the calibration is complete, the display will indicate ; applyanother Start command to actually start the motor- Parameter P399 will now be set to 2.(1) Any changes to this parameter will not take effect until the drive is stopped4.5.6 Network ParametersCodePossible SettingsNo. Name Default SelectionNetwork Protocol0 Not Active1 Remote Keypad2 Modbus RTU3 CANopen4 DeviceNet5 Ethernet6 Profibus1 … Module Specific ParametersIMPORTANTThis parameter will only display the selectionfor the module that is installed.Refer to the Reference Guide specific to themodule installed.32 SV01D
Commissioning4.5.7 Diagnostic ParametersCodeNo.PNameFault HistorySoftware versionDrive IDInternal CodeDisplay Range(READ ONLY)DC Bus Voltage 0 {VDC} 1500Motor Voltage 0 {VAC} 1000IMPORTANT• Displays the last 8 faults• Format: n.xxxwhere: n = 1..8;1 is the newest faultxxx = fault message (without the .)• Refer to Section 5.3Format: x.yzA flashing display indicates that the Drive ID stored in theEPM does not match the drive model it is plugged into.Alternating Display: xxx-; -yyLoad 0 {%} 255 Motor load as % of drive’s output current rating.Refer to Section 2.2.Motor Current 0.0 {A} 1000 Actual motor currentTorque 0 {%} 500 Torque as % of motor rated torque(vector mode only)kW 0.00 {kW} 650.0kWh 0.0 {kWh} 9999999 Alternating display: xxx-; yyyy when value exceeds 9999Heatsink Temp 0 {°C} 150 Heatsink temperature0-10 VDC Input 0.0 {VDC} 10.0 Actual value of signal at TB-54-20 mA Input 0.0 {mA} 20.0 Actual value of signal at TB-25TB-5 Feedback P204 P205 TB-5 signal value scaled to PID feedback unitsTB-25 Feedback P204 P205 TB-25 signal value scaled to PID feedback unitsAnalog Output 0 {VDC} 10.0 Refer to parameters P150…P155Actual Output<strong>Frequency</strong>Network SpeedCommandTerminal andProtection StatusKeypad Status0 {Hz} 500.00 {Hz} 500.0 Command speed if (Auto: Network) is selected as thespeed sourceIndicates terminal status using segments of the LEDdisplay. (Refer to Section 4.5.7.1)Indicates keypad button status using segments of theLED display. (Refer to Section 4.5.7.2)Total Run Time 0 {h} 9999999 Alternating display: xxx-; yyyy when value exceeds 9999Total Power On Time 0 {h} 9999999SV01D33
Commissioning4.5.7.1 Terminal and Protection Status DisplayParameter P530 allows monitoring of the control terminal points andcommon drive conditions:An illuminated LED segment indicates:• the protective circuit is active (LED 1)• the Logic Assertion Switch is set to High (+)• input terminal is asserted (LED 2)• output terminal is energized (LED 4)• the Charge Relay is not a terminal, this segment will be illuminatedwhen the Charge Relay is energized (LED 4).Current Limit DiagnosticLogic Assertion SwitchInput (1)Input (13B)RelayOutput (14)Charge RelayInput (13C)Input (13A)Protection Diagnostic4.5.7.2 Keypad Status DisplayParameter P531 allows monitoring of the keypad pushbuttons:An illuminated LED segment indicates when the button is depressed.34 SV01D
Troubleshooting and Diagnostics5 Troubleshooting and Diagnostics5.1 Status/Warning MessagesLStatus / Warning Cause RemedyDC-injection brake activeDrive ID warningMotor Auto-calibration is beingperformedAn EPM that contains valid data froma previous software version has beeninstalledDC-injection brake activated• activation of digital input(P121...P123 = 18)• automatically (P110 = 2, 4...6)• automatically (P111 = 1, 3)The Drive ID (P502) stored on the EPMdoes not match the drive model.See P300, P399An attempt was made to changeparameter settingsDeactivate DC-injection brake• deactivate digital input• automatically after P175 time hasexpired• Verify motor data(P302…P306) and perform AutoCalibration.• Set drive mode (P300) to 0 or 1• Reset the drive (P199 to 3 or 4) andrepro<strong>gr</strong>am.Parameter settings can only bechanged after the EPM data isconverted to the current version (P199= 5)L Current Limit (P171) reached Motor overload • Increase P171• Verify drive/motor are proper size forapplicationDecel OverrideThe drive has stopped decelerating If drive trips into fault:to avoid tripping into fault, due to • Increase P105, P126excessive motor regen (2 sec max). • Install Dynamic Braking optionErrorInvalid data was entered, or an invalidcommand was attemptedL Fast Current Limit Overload Verify drive/motor are proper size forapplicationf Flying Restart Attempt after Fault P110 = 5,6OEM Settings Operation warningOEM Defaults data warningFault LockoutPID Deceleration StatusAn attempt was made to changeparameter settings while the driveis operating in OEM Settings mode(P199 = 1)An attempt was made to use (or resetto) the OEM default settings (P199 =1 or 2) using an EPM without validOEM data.In OEM Settings mode, making changesto parameters is not permittedInstall an EPM containing valid OEMDefaults dataThe drive attempted 5 restarts after a • Drive requires manual resetfault but all attempts were unsuccessful • Check Fault History (P500) and(P110 = 3...6)correct fault conditionPID setpoint has finished its ramp butthe drive is still decelerating to a stop.SV01D35
Troubleshooting and DiagnosticsStatus / Warning Cause RemedyI PID Mode Active Drive has been put into PID Mode. Referto parameter P200.L Sleep Mode is active Refer to parameters P240...P242Start PendingPID Mode disabled.Output frequency = 0 Hz(outputs U, V, W inhibited)The drive has tripped into a fault andwill automatically restart (P110 = 3...6)Drive has been taken out of PID Mode.Refer to parameter P200.Stop has been commanded from thekeypad, terminal strip, or network5.2 Drive Configuration MessagesTo disable Auto-Restart, set P110= 0...2Apply Start command (Start Controlsource depends on P100)When the Mode button is pressed and held, the drive’s display will provide a 4-digit code that indicates how the driveis configured. If the drive is in a Stop state when this is done, then the display will also indicate which control sourcecommanded the drive to Stop (the two displays will alternate every second).Configuration DisplayFormat = x.y.zzx = Control Source:y = Mode:zz = Reference:= Local Keypad= Terminal Strip= Remote Keypad= Network= Speed modeP = PID modet = Vector Torque modeC = Keypad s t= 0-10 VDC (TB-5)1 = 4-20 mA (TB-25)J = Jogn = NetworkO = MOPP1 = Preset 1...7Example:• = Local Keypad Start control, Speed mode, Keypad speed reference• t = Terminal Strip Start control, PID mode, 0-10 VDC setpoint reference• .p = Network Start control, Vector Torque mode, Preset Torque #2 referenceStop Source DisplayFormat = x = Stop command came from Local Keypad= Stop command came from Terminal Strip= Stop command came from Remote Keypad= Stop command came from Network36 SV01D
Troubleshooting and Diagnostics5.3 Fault MessagesThe messages below show how they will appear on the display when the drive trips. When looking at the Fault History(P500), the . will not appear in the fault message.Fault Cause Remedy (1)High Temperature fault Drive is too hot inside • Reduce drive load• Improve coolingL Assertion Level fault • Assertion Level switch is changedduring operation• P120 is changed during operation• P100 or P121...P123 are set to avalue other than 0 and P120 doesnot match the Assertion LevelSwitch.Personality fault Drive Hardware • Cycle PowerControl faultIncompatible EPM faultAn EPM has been installed that is eitherblank or corruptedAn EPM has been installed that containsdata from an incompatible parameterversion• Make sure the Assertion Level switchand P120 are both set for the typeof input devices being used, prior tosetting P100 or P121...P123.Refer to Section 3.2.3 and P120.• Power down and install EPM with validdata• Reset the drive back to defaults (P199= 3, 4) and then re-pro<strong>gr</strong>am• If problem persists, contact factorytechnical supportDynamic Braking fault Dynamic braking resistors are overheating • Increase active decel time(P105, P126, P127).• Check mains voltage and P107External fault• P121…P123 = 21 and that digital inputhas been opened.• P121…P123 = 22 and that digital inputhas been closed.• Correct the external fault condition• Make sure digital input is set properlyfor NC or NO circuitEPM fault EPM missing or defective Power down and replace EPMInternal faultsContact factory technical supportInvalid message received • A network message was received whilein Remote Keypad mode• A remote keypad message wasreceived while in Network modeL Loss of 4-20 mA signal fault 4-20 mA signal (at TB-25) is below 2 mA(P163 = 1)OEM Defaults data faultDrive is powered up withP199 =1 and OEM settings in the EPM arenot valid.Only the remote keypad or the networkcan be connected at one time; see P100Check signal/signal wireInstall an EPM containing valid OEMDefaults data or change P199 to 0.f F High DC Bus Voltage fault Mains voltage is too high Check mains voltage and P107Decel time is too short, or too much regenfrom motorIncrease active decel time(P105, P126, P127) or install DynamicBraking option(1) The drive can only be restarted if the error message has been resetSV01D37
Troubleshooting and DiagnosticsFault Cause Remedy (1)LDigital InputConfiguration fault (P121...P123)More than one digital input set for thesame functionOnly one digital input configured for MOPfunction (Up, Down)PID mode is entered with setpointreference and feedback source set to thesame analog signalOne of the digital inputs (P121…P123) isset to 10 and another is set to 11…14.One of the digital inputs (P121…P123)is set to 11 or 12 and another is set to13 or 14.PID enabled in Vector Torque mode (P200= 1 or 2 and P300 = 5)Each setting can only be used once (exceptsettings 0 and 3)One input must be set to MOP Up, anothermust be set to MOP DownChange PID setpoint reference (P121…P123) or feedback source (P201).Reconfigure digital inputsPID cannot be used in Vector Torque modeRemote keypad fault Remote keypad disconnected Check remote keypad connectionsL Low DC Bus Voltage fault Mains voltage too low Check mains voltageNo Motor ID faultAn attempt was made to start the drivein Vector or Enhanced V/Hz mode prior toSee P300…P399 for Drive Mode setupand calibration.performing the Motor Auto-calibrationModule communication fault Communication failure between drive and Check module connectionsNetwork Module.Network FaultsRefer to the module documentation. forCauses and Remedies.Output fault:Transistor faultOutput short circuitAcceleration time too shortSevere motor overload, due to:• Mechanical problem• Drive/motor too small for applicationBoost values too highExcessive capacitive charging current fromthe motor cableCheck motor/motor cableIncrease P104, P125• Check machine / system• Verify drive/motor are proper size forapplicationDecrease P168, P169• Use shorter motor cables with lowercharging current• Use low capacitance motor cables• Install reactor between motor and drive.Failed output transistorContact factory technical supportO Output fault: Ground fault Grounded motor phase Check motor and motor cableExcessive capacitive charging current ofthe motor cableUse shorter motor cables with lowercharging currentMotor Overload fault Excessive motor load for too long • Verify proper setting of P108• Verify drive and motor are proper sizefor application(1) The drive can only be restarted if the error message has been reset38 SV01D
Troubleshooting and DiagnosticsFault Cause Remedy (1)Flying Restart faultController was unable to synchronize with Check motor / loadthe motor during restart attempt; (P110= 5 or 6).Single-Phase fault A mains phase has been lost. Check mains voltageStart faultStart command was present when powerwas applied (P110 = 0 or 2).(1) The drive can only be restarted if the error message has been reset.• Must wait at least 2 seconds afterpower-up to apply Start command• Consider alternate starting method(Refer to parameter P110).SV01D39
AC Technology Corporation630 Douglas Street • Uxbridge, MA 01569 • USASales: 800 217-9100 • Service: 508 278-9100www.actech.com(SV01D)


