
Create successful ePaper yourself
Turn your PDF publications into a flip-book with our unique Google optimized e-Paper software.
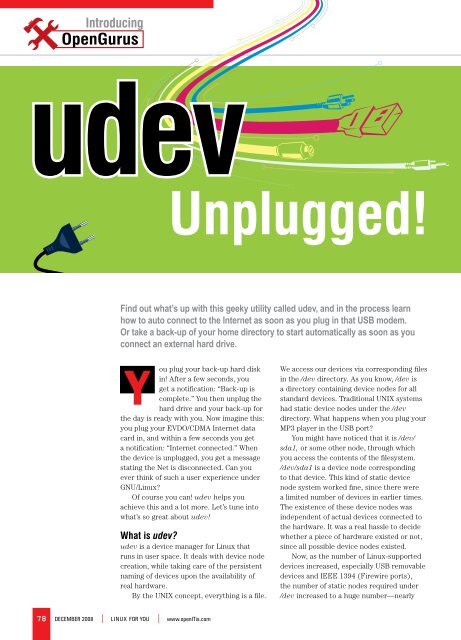
IntroducingudevUnplugged!Find out what’s up with this geeky utility called udev, and in the process learnhow to auto connect to the Internet as soon as you plug in that USB modem.Or take a back-up of your home directory to start automatically as soon as youconnect an external hard drive.ou plug your back-up hard diskYin! After a few seconds, youget a notification: “Back-up iscomplete.” You then unplug thehard drive and your back-up forthe day is ready with you. Now imagine this:you plug your EVDO/CDMA Internet datacard in, and within a few seconds you geta notification: “Internet connected.” Whenthe device is <strong>unplugged</strong>, you get a messagestating the Net is disconnected. Can youever think of such a user experience underGNU/Linux?Of course you can! udev helps youachieve this and a lot more. Let’s tune intowhat’s so great about udev!What is udev?udev is a device manager for Linux thatruns in user space. It deals with device nodecreation, while taking care of the persistentnaming of devices upon the availability ofreal hardware.By the UNIX concept, everything is a file.We access our devices via corresponding filesin the /dev directory. As you know, /dev isa directory containing device nodes for allstandard devices. Traditional UNIX systemshad static device nodes under the /devdirectory. What happens when you plug yourMP3 player in the USB port?You might have noticed that it is /dev/sda1, or some other node, through whichyou access the contents of the filesystem./dev/sda1 is a device node correspondingto that device. This kind of static devicenode system worked fine, since there werea limited number of devices in earlier times.The existence of these device nodes wasindependent of actual devices connected tothe hardware. It was a real hassle to decidewhether a piece of hardware existed or not,since all possible device nodes existed.Now, as the number of Linux-supporteddevices increased, especially USB removabledevices and IEEE 1394 (Firewire ports),the number of static nodes required under/dev increased to a huge number—nearly78December 2008 | LINUX For You | www.openITis.com
Introducing18,000—and it became unmanageable. Also, if some devicenodes that corresponded to a connected device did notexist under /dev, you had to Google for the major andminor number for the device, and create the device nodemanually, using the mknod command. Since each devicehas its unique major and minor numbers, this was a prettytough situation!As a result, a pseudo RAM-based filesystem sysfs,mounted under /sys, was introduced. Users now couldcheck whether a device existed or not, by looking intothe directory tree of devices under /sys. Still, this wasn’ta satisfactory solution, since either of the devices werestatically built, or we had to create the device nodesmanually, using major and minor numbers for thecorresponding device.Give the following tree command a try:[slynux@gnubox ~]$ tree /sys/class/Since our area of interest is making life easier withudev, let’s move on to hacking udev.udev runs in the memory all the time as a daemonand listens to kernel messages. The kernel always sends amessage whenever it notices a hardware change. You canobserve it by running the dmesg command. The followingis the dmesg output when I connect an external hard disk:# dmesg | tailsd 5:0:0:0: [sdb] Attached SCSI disksd 5:0:0:0: Attached scsi generic sg2 type 0kjournald starting. Commit interval 5 secondsEXT3 FS on sdb, internal journalEXT3-fs: recovery complete.EXT3-fs: mounted filesystem with ordered data mode.••••So, let’s take a look at the duties of udev:Listen to kernel messages. If some device is connected,create its device nodes according to the order in whichit is connected. udev has the ability to identify eachof the devices uniquely. Device nodes are created onlywhen the device is connected.Removal of device nodes when the device is <strong>unplugged</strong>.Create symlinks for device nodes, and executecommands upon udev events.Follow the udev rules. The udev daemon is controlledby a set of user-specified rules.Consider the following scenario, with which I’ll tryto elaborate the usefulness of udev. Let’s suppose youhave two printers—one an inkjet and the other a lasercolour printer. Usually, the one that is connected first isdesignated as /dev/lp0 and the second one /dev/lp1. Howdo you understand which one is laser and which one isinkjet? Is it by looking at which one is switched on first?udev is brilliant in solving such nonsense. What if youare able to get /dev/laser for the laser printer and /dev/dotmat for the dot matrix printer. udev can identify eachof the devices uniquely by specifying certain parametersthrough udev rules.Rules explained!The behaviour of udev on handling each of the devicescan be controlled by using udev rules. Most of the newerdistros ship with a number of default udev rules meantfor hardware detection. When deciding how to name adevice and which additional actions to perform, udevreads a series of rule files. These files are kept in the /etc/udev/rules.d directory, and they all must have the .rulessuffix. In a rules file, lines starting with “#” are treated ascomments. Every other non-blank line is a rule and rulescannot span multiple lines. The default rules file can beseen at /etc/udev/rules.d/50-udev-default.rulesA rule consists of a combination of matching keys forthe device and the action to be done on matching thedevice. In other words, a rule explains how to find thespecific device and what to do when it is found.The following is the basic syntax of a rule:KEY1=”value”, KEY3=”value”, KEY4==”value”...SYMLINK+=”link”The following line is a simple udev rule. It tells theudev daemon to create /dev/cdrom and /dev/cdrom0softlinks to /dev/hdc whenever it finds /dev/hdc.KERNEL==”hdc”, SYMLINK+=”cdrom cdrom0”It is to be remembered that we can specify multiplerules for a single device and it can be written in multiple.rules files. When a device is plugged in or <strong>unplugged</strong>,the udev daemon looks through all the .rules files in the/etc/udev/rules.d directory until all matching rules areread and executed.The following are some of the keys or parametersthat can be used for device matching and the actions ina udev rule:• BUS: matches the bus type of the device; examples ofthis include PCI, USB or SCSI.• KERNEL: matches the name the kernel gives thedevice.• ID: matches the device number on the bus; forexample, the PCI bus ID or the USB device ID.• PLACE: matches the topological position on the bus,such as the physical port a USB device is plugged in to.• SYSFS_filename, SYSFS{filename}: allows udev tomatch any sysfs device attribute, such as the label,vendor, USB serial number or SCSI UUID. Up to fivedifferent sysfs files can be checked in a single rule,with all of the values being required in order to matchthe rule.• PROGRAM: allows udev to call an external programand check the result. This key is valid if the programreturns successfully. The string returned by thewww.openITis.com | LINUX For You | December 2008 79
IntroducingTable 1: Operations for udev keysOperatorprogram additionally may be matched with theRESULT key.• ATTR: different attributes for the device like size,product ID, vendor, etc.• RESULT: matches the returned string of the lastPROGRAM call. This key may be used in any rulefollowing a PROGRAM call.• RUN: it can be set to some external program that canbe executed when a device is detected.• SYMLINK: for creating symlinks for the matchingdevice.• ACTION: permits two match conditions ‘add’ and‘remove’ when a new device is added or removed.In addition to this, Table 1 lists different operators youcan use with each of the keys.Now the question is: how do we collect informationabout devices?Writing a rule is, in turn, matching the device byspecifying unique bytes about the device. The uniqueinformation about the device can be grabbed from sysfs:[slynux@gnubox tmp]$ cat /sys/block/sda/sda1/size14336000Meaning== For matching. Eg: KERNEL==”ttyUSB0”= Setting a parameter. Eg: NAME=”my_disk”+= Adding to list. Eg: SYMLINK+=”cd1 cd2”Here I have retrieved an attribute size for the devicesda1. Now I can use ATTR{size}==”14336000” to matchthe device /dev/sda1.To make the job easier, we have a udev utility calledudevinfo, which can be used to collect details aboutdevices and write rules in a very handy way. The followingis the udevinfo output for the same /dev/sda1:Now the match is ready! You can even create a symlinkfor the device as /dev/musicdrive:KERNEL==”sda1” , SUBSYSTEM==”block” , ATTR{dev}==”8:1”, 2048” ,SYMLINK+=”musicdrive”Alternatively, you can use the following to obtaininformation about any device name:# udevinfo -a -p `udevinfo -q path -n /dev/devicename`Setting up an automatic Internet connectionI depend on BSNL EVDO/CDMA for Internet access. I haveconfigured the dialling by using the wvdial PPP utility,and I issue the wvdial command to connect under Fedora9. I found it interesting to write udev rules to auto connectInternet whenever I plug in the EVDO USB modem.Here’s how to get started: first, plug in the EVDOdevice in the USB port; second, run the dmesg commandat a terminal prompt. I received the following dmesgoutput:usb 6-2: New USB device found, idVendor=05c6, idProduct=6000usb 6-2: New USB device strings: Mfr=1, Product=2, SerialNumber=0usb 6-2: Product: ZTE CDMA Techusb 6-2: Manufacturer: ZTE, IncorporatedBut there was no suitable kernel module loaded tocreate /dev/ttyUSB0, which is the device node for thecorresponding device. You might try manually loading theUSB serial module specifying the Product ID and vendorID parameters—that is, idVendor=05c6, idProduct=6000.Run the following command as the root user:/sbin/modprobe usbserial product=0x6000 vendor=0x05c6Executing the dmesg command again brings up thefollowing:# udevinfo -a -p /sys/block/sda/sda1looking at device ‘/devices/pci0000:00/0000:00:1f.2/host0/target0:0:0/0:0:0:0/block/sda/sda1’:KERNEL==”sda1”SUBSYSTEM==”block”DRIVER==””ATTR{dev}==”8:1”ATTR{start}==”2048”ATTR{size}==”14336000”ATTR{stat}==” 190 59 2162 1655 30 31 488 8360 1652 2491”As you can see, it returned a lot of information aboutthe device. We will take some of the above lines to make audev rule:KERNEL==”sda1” , SUBSYSTEM==”block” , ATTR{dev}==”8:1”, 2048”usb 6-2: configuration #1 chosen from 1 choiceusbserial_generic 6-2:1.0: generic converter detectedusb 6-2: generic converter now attached to ttyUSB0As you can see, this time /dev/ttyUSB0 is created andmade available. [Actually when the module usbserial isloaded using the modprobe command, it is required tomanually create /dev/ttyUSB0 using the mknod command.But there is a default udev rule that creates the device.]Now we have to dial wvdial as the root in orderto connect. How do we transform this manual processto a udev rule? Run the following command to collectappropriate parameters to match the device:udevinfo -a -p $(udevinfo -q path -n /dev/ttyUSB0)Now, create a file called /etc/udev/rules.d/100-bsnl.80December 2008 | LINUX For You | www.openITis.com
Introducingrules and enter the following rules in it:ATTRS{idVendor}==”05c6” , ATTRS{idProduct}==”6000”, RUN+=”/sbin/modprobe usbserial product=0x6000 vendor=0x05c6”,SYMLINK+=”netdevice”ACTION==”add”, SUBSYSTEM==”tty”,KERNEL==”ttyUSB0”,ATTRS{idVendor}==”05c6” , ATTRS{idProduct}==”6000”, RUN+=”/usr/bin/evdo_connect”ACTION==”remove”, SUBSYSTEMS==”usb”, KERNEL==”ttyUSB0”, RUN+=”/usr/bin/msg_connection”The first rule instructs udevd to listen to devices withparameters idVendor=05c6 and idProduct=6000. If found,load the corresponding usbserial kernel module. Thesecond rule instructs udevd to execute the evdo_connectscript when the above parameters match for a newlyadded device /dev/ttyUSB0. ACTION=”add” means, whenthe device was added.The parameter value for RUN is an executablecommand. But it should be noted that the executableshould be something that runs finite times rather thansomething that contains an infinite loop or infiniteconditions./usr/bin/evdo_connect is made to run for a finitenumber of times by sending wvdial and msg_connectionto the background.Now, create two files. In the first file named /usr/bin/evdo_connect enter the following text:#!/bin/bash/usr/bin/wvdial &/usr/bin/msg_connection con &…and in the second file named /usr/bin/msg_connection, enter the following:#!/bin/bashuser=slynux ; # Specify the user to which notification is to be shownif [ $# -eq 0 ];thenDISPLAY=:0 su $user -c ‘notify-send -u critical “InternetDisconnected :(“’ ;elsewhile true;doif [[ -n $(/sbin/ifconfig ppp0 2>&1 | grep “inet addr”) ]];thenDISPLAY=:0 su $user -c ‘notify-send “Connected to Internet :)”’ ;exit 0;fisleep 1;Figure 1: ‘Connected to Internet’ notificationFigure 2: ‘Internet disconnected’ notificationdonefiIn this script, we have used the notify-send utility todisplay messages to the user. notify-send comes defaultwith Fedora 9. You may have to install it separately onUbuntu or other distributions.Now, set executable permissions to both the scriptssince udev is going to execute them upon finding thedevice:# chmod +x /usr/bin/evdo_connect# chmod +x /usr/bin/msg_connectionVoila! The auto dialling is configured and ready to run.As soon as I plug or unplug EVDO now, I get notificationsas shown in Figures 1 and 2, in real time.The procedure is the same while using any othermobile/CDMA Net connection. You have to modify theudev rules slightly, according to your device parameters.Auto syncing a back-up driveLet’s look at a typical problem: I have a back-up hard drive.I used to back up my home directory everyday in this harddisk. This is normally done manually so, again, let’s useudev to automate the procedure. Again, as we did with theEVDO modem, first plug in the external hard drive. Thenwww.openITis.com | LINUX For You | December 2008 81
Introducingrun dmesg to identify the device. The following is thedmesg output in my case:usb-storage: device scan completescsi 7:0:0:0: Direct-Access HITACHI_ DK23DA-20 00J2 PQ: 0 ANSI: 0sd 7:0:0:0: [sdb] 39070079 512-byte hardware sectors (20004 MB)sd 7:0:0:0: [sdb] Write Protect is offsd 7:0:0:0: [sdb] Mode Sense: 03 00 00 00sd 7:0:0:0: [sdb] Assuming drive cache: write throughsd 7:0:0:0: [sdb] 39070079 512-byte hardware sectors (20004 MB)sd 7:0:0:0: [sdb] Write Protect is offNow, collect suitable keys to match the device usingthe following command:# udevinfo -a -p $(udevinfo -q path -n /dev/sdb) | moreThe output in my case was:looking at device ‘/devices/pci0000:00/0000:00:1d.7/usb2/2-1/2-1:1.0/host7/target7:0:0/7:0:0:0/block/sdb’:KERNEL==”sdb”SUBSYSTEM==”block”DRIVER==””ATTR{dev}==”8:16”ATTR{range}==”16”ATTR{removable}==”0”ATTR{size}==”39070079”ATTR{capability}==”12”ATTR{stat}==” 51 285 456 340 1 0 89 0 278 349”looking at parent device ‘/devices/pci0000:00/0000:00:1d.7/usb2/2-1/2-1:1.0/host7/target7:0:0/7:0:0:0/block’:KERNELS==”block”SUBSYSTEMS==””DRIVERS==””Figure 3: Back-up completed notificationSUBSYSTEM==”block”, ATTR{removable}==”0”, ATTR{size}==”39070079”,SYMLINK+=”backupdisk”, RUN+=”/usr/bin/backup”We have an action script /usr/bin/backup, which iscalled when a match is found. Write a bash script with thefollowing contents:#!/bin/bashbackup_dir=/home/slynux # Specify the directory to backupuser=slynux # The user to whom which the message is to be displayedmount /dev/backupdisk /mnt/backups;rsync -a $backup_dir /mnt/backups/$(date +%d-%m-%Y)/ ;umount /mnt/backups ;DISPLAY=:0 su $user-c ‘notify-send “Backup Complete”’;Notice that the script mounts the external disk under /mnt/backup. So, make sure you create that directory as well.Following this, make the script executable as follows:# chmod +x /usr/bin/backuplooking at parent device ‘/devices/pci0000:00/0000:00:1d.7/usb2/2-1/2-1:1.0/host7/target7:0:0/7:0:0:0’:KERNELS==”7:0:0:0”SUBSYSTEMS==”scsi”DRIVERS==”sd”ATTRS{device_blocked}==”0”ATTRS{type}==”0”ATTRS{scsi_level}==”0”ATTRS{vendor}==”HITACHI_”ATTRS{model}==”DK23DA-20 “Now formulate a matching rule as the following andwrite to a rule file [we’ll call it /etc/udev/rules.d/100-backupdisk.rules ]:That’s it! Now, every time you connect the externaldisk, it starts the back-up procedure using rsyncautomatically. Once the procedure ends, you will get apop-up notification on your desktop as well (Figure 3).You can tweak around a bit to make this back-up driveencrypted as well. However, I’ll leave you to try it outyourself.So, that’s all for now. Have fun with udev, and happyhacking!By: <strong>Sarath</strong> <strong>Lakshman</strong> is an 18 year old hacker and freesoftware enthusiast from Kerala. He loves working on theGNU/Linux environment and contributes to the PiTiVi videoeditor project. He is also the developer of SLYNUX, a distrofor newbies. He is currently studying at Model EngineeringCollege, Cochin. He blogs at www.sarathlakshman.info82December 2008 | LINUX For You | www.openITis.com