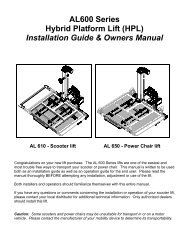
HPL700 Manual - Joerns
HPL700 Manual - Joerns
HPL700 Manual - Joerns

You also want an ePaper? Increase the reach of your titles
YUMPU automatically turns print PDFs into web optimized ePapers that Google loves.
<strong>Joerns</strong> ® Lifting and RepositioningHoyer ® <strong>HPL700</strong> and <strong>HPL700</strong> WSCThis manual contains important safety andmaintenance instructions. Please read it carefullybefore using your patient lifter and refer to it asoften as needed for safe and efficient use.If you have any questions regarding the safe useand/or assembly, maintenance or specificationsof your patient lifter, you should call <strong>Joerns</strong>Healthcare toll-free at 800.826.0270.For service and repair, remember your authorizedHoyer dealer is able to provide the assistanceyou need. Save this manual for future reference.For non-homecare lifters, your maintenancedepartment should keep this manual.Caution: For patient use, refer to the separatemanual, “How to Use a Patient Lifter.” If you didnot receive a copy or need additional copies,contact <strong>Joerns</strong> Healthcare at 800.826.0270.Warning: Using other manufacturers’ partsand accessories on Hoyer ® products is unsafeand may result in serious injury to patient and/or attendant. Use only Hoyer parts. Hoyerlifter parts are NOT interchangeable with othermanufacturers’ products. Replace any worn partsimmediately.Equipment Identification: The unit’s identificationnumber (specification, model, serial number)appears on a silver nameplate attached to the sideof the lift base.Receipt of Equipment: Upon receipt of theequipment, verify it against the packing list toensure it is complete and inspect the equipmentfor possible damage due to shipping. If there isany damage, DO NOT use the equipment andnotify the carrier immediately to file a claim.Provide complete information concerning damageclaims or shipping errors to your supplier. Includeall equipment identification numbers and grouppart numbers (if any) as described above in“Equipment Identification” section along with a fulldescription of damaged goods.Important PrecautionsWarning: Do not attempt to use this equipmentwithout understanding this manual.To ensure safe operation, read carefully the entiremanual before installing, operating or servicingthis equipment.If anything is not completely understood, pleasecontact your supplier for more details. Failure tocomply with warnings in this manual may resultin injury.Keep this manual with the lift and refer to it asrequired. Contents of this manual are subjected tochange without prior notice to users.Important information is highlighted by the followingterms, which appear throughout the manual. Payparticular attention to the information provided underthese headings.Warning: Important safety information for hazardsthat might cause serious injury.Caution: Information for preventing damage tothe product.Note: Information to which you should payspecial attention.Additional copies of this manual can be obtainedfrom your supplier. Please quote the productmodel number.Warning: Your lift is for transferring patients only. Donot use the lift for any other purpose.Warning: Always carry out the daily check list beforeusing the lift.Warning: Hoyer floor lifts are specifically designedfor Hoyer slings and accessories. Slings andaccessories designed by any other manufactureris prohibited and will void <strong>Joerns</strong> Healthcare’swarranty. Use only Hoyer slings and accessories tomaintain user safety and product utility.Warning: Hoyer floor lifts are intended to be usedfor persons within the specified weight limit indicatedfor the lift. Do not attempt to lift more than the weightlimit indicated.2
<strong>Joerns</strong> ® Lifting and RepositioningHoyer ® <strong>HPL700</strong> and <strong>HPL700</strong> WSCWarning: Before attempting a transfer, the usermust be assessed by a qualified professional.Warning: Hoyer ® lifts must be used by qualifiedcaregivers with proper training to work with theperson to be transferred.Warning: Only trained and qualified caregiversshould transfer a person. Do not attempt to use thelift if you have not been properly trained to do so.Warning: Always plan carefully before attempting totransfer a person.Warning: Do not use a sling that is notrecommended for the lift.Warning: Never use a damaged, torn orfrayed sling.Warning: Always place the sling around the useraccording to the sling user instructions.Warning: Follow lifting procedures outlined in the“How to Use a Patient Lifter” manual, available uponrequest.Warning: Use all controls and safety features onlyaccording to the rules specified in this manual.Never attempt to force a control or button on the lift.Warning: Do not store the lift in a shower, bath orother area with high humidity.Warning: IMPORTANT: Keep all components of thelift clean and dry, and have electrical and mechanicalsafety checkpoints done as instructed in the“Maintenance” section of this manual.Warning: Do not attempt to maneuver the lift bypushing on the mast, motor shaft, boom or user.Warning: Avoid violent shock duringtransportation.Warning: Do not touch or use a lift with bareconductors or a damaged power cord. Electricallylive equipment can cause injury or electrocution.If the lift or charger has any exposed or damagedwires, contact your local dealer immediately.Warning: Do not splash or expose electric parts ofthe device to water or moisture.Warning: Check nameplate for voltage andcycle requirements. These requirements differby country. Do not attempt to use the lift in anarea that has different voltage andcycle requirements.Warning: Batteries may explode, leak and causepersonal injury if not disposed of properly.Warning: Do not place or store the battery underdirect sunlight or near a heat source.Warning: Do not dispose of in fire.Warning: Do not short the battery terminals.Warning: Do not incinerate.Warning: Flush with water if electrolyte from thebattery comes in contact with skin or eyes.Warning: Batteries must be recycled or disposedof according to local law regulations. Whenreturning batteries, insulate their terminals withadhesive tape, etc. Otherwise the residualelectricity in used batteries may cause fireor explosion.Warning: Always maneuver the lift with thehandle provided.Warning: Do not push a loaded lift at speeds whichexceed a slow walking pace (2.6 ft/sec.).Warning: Inspect all precautionary labels on theequipment. Order and replace all labels that cannotbe easily read.3
<strong>Joerns</strong> ® Lifting and RepositioningHoyer ® <strong>HPL700</strong> and <strong>HPL700</strong> WSCTable of ContentsImportant Precautions................................................................................................................................ 2Specifications.............................................................................................................................................. 56-Point Spreader BarWeightElectrical SpecificationsElectrical Shock ProtectionDegree of Shock ProtectionIntroduction................................................................................................................................................. 5Assembly and Preparation......................................................................................................................... 6Carton ContentsAssembly InstructionsAlways Check the Following Before OperationOperation..................................................................................................................................................... 8Operating Controls6-Point Spreader Bar System.................................................................................................................... 9ConnectionRemovalCharging Instructions................................................................................................................................. 10Maintenance Schedule and Daily Check List........................................................................................... 11Maintenance, Inspection and TestingLifter Maintenance Checklist..................................................................................................................... 12Warranty....................................................................................................................................................... 144
<strong>Joerns</strong> ® Lifting and RepositioningHoyer ® <strong>HPL700</strong> and <strong>HPL700</strong> WSCSpecificationsSafe Working Load............................... 700 lbs 227kgMaximum Overall Length....................... 56" 1423mmMinimum Overall Length........................ 55" 1397mmMaximum Overall Height........................ 81" 2058mmMinimum Overall Height.................... 57.75" 1467mmHeight at Maximum Reach...................46.5" 1181mmReach at Maximum Height.................... 28.5" 724mmReach at Minimum Height........................ 27" 686mmMaximum Reach*................................ 37.75" 959mmTurning Radius....................................... 62" 1575mmLegs Open - External Width...............46.25" 1175mmLegs Open - Internal Width............... 42.25" 1073mmLegs Closed - External Width............... 27.5" 699mmLegs Closed - Internal Width................. 23.5" 597mmOverall Height of Legs.............................4.5" 114mmGround Clearance................................. 0.625" 16mmFront Twin Casters....................................... 3" 76mmRear Braked Casters................................. 4" 102mmMaximum Sound Level................................64 dB (A)Operating forces of the controls meet therequirements of ISO 10535*Reach = Center of spreader bar to the front of the mast6-Point Spreader Bar (measurementto top of location pins)Cradle Maximum Height........................ 69" 1753mmCradle Minimum Height...................... 23.25" 591mmWeightMast, Base, Boom Assembly, Cradle .143.4 lbs. 65kgPower Pack.............................................. 6.6 lbs. 3kgTotal...................................................... 150 lbs. 68kgBase Assembly ....................................... 83 lbs 38kgMast and Boom (not including battery). 40.4 lbs 18kg6-Point Spreader Bar................................. 20 lbs 9kgAll measurements are within a +5/-5% tolerance.Electrical SpecificationsBatteries..2x12 volt Rechargeable sealed lead acid typeBattery Capacity.............................3.2 Ampere HoursCharger Rated Input............... 110-240 VAC 50/60Hz____Charger Rated Output........29.5 VDC ........ 19WMAXI.D. Label Symbol DefinitionAttention, Consult accompanying documentsSafe Working LoadType B Applied PartsClass II EquipmentElectric Shock ProtectionCharger........................................................Class IILift ........................................Internal Power SourceDegree of Shock ProtectionCharger........................................................ Type BLift ................................................................ Type BIntended Operating Environment.......... >+5°
<strong>Joerns</strong> ® Lifting and RepositioningHoyer ® <strong>HPL700</strong> and <strong>HPL700</strong> WSCAssembly and PreparationWarning: The Hoyer ® <strong>HPL700</strong> is heavy andwill need to be lifted with care. You may needassistance to lift the Hoyer <strong>HPL700</strong> from thecarton.Carton ContentsPlace the carton in a clear working area and opencarefully. The carton contains:• Hoyer <strong>HPL700</strong> Lift• Product Documents• Hand Control• Battery Pack (2)• Charging Lead• Desk Top Charger/Stand• Covers and hardware (2)• 6-Point Spreader BarFigure 1Assembly InstructionsRemove all the parts from the carton and placeon the floor, taking care to protect the finish fromdamage.1. Place the chassis in a clear space and applythe rear brakes (Figure 1).2. Remove the 5/8" bolt that connects the mast(in its shipping position) to the base. Removethe 3/8" carriage bolt as well (Figure 2). Donot discard these nuts and bolts as they areneeded for assembly.3. Lift the mast assembly from the base. Theassembly needs to be rotated and positionedclose to vertical so the handle is to the rear ofthe lift (Figure 3).Warning: Do not damage the cord that runsfrom the mast to the base. This can lead to theleg spreader actuator not functioning.4. Position the mast assembly into the basesocket. Full engagement of the mast isindicated by alignment of the 5/8" bolt holebetween the mast and the base (Figure 3).Warning: Avoid trapping fingers. Keep fingersaway from the end of the mast when insertinginto the base socket.Figure 2Step 5Step 45. Insert 5/8" bolt and nut removed in Step 2, andtorque to 90 ft-lb (122 N-M).Step 6Figure 36
<strong>Joerns</strong> ® Lifting and RepositioningHoyer ® <strong>HPL700</strong> and <strong>HPL700</strong> WSC6. Insert the 3/8" carriage bolt and nut removed inStep 2, and torque to 20 ft-lb (27 N-M).7. Attach the front and rear covers (Figures 4 and5), using the screws provided.8. Remove the key ring fastener from the boomactuator mounting bracket. Remove the pin(Figure 5).9. Carefully remove the orange tie from the lifteractuator that is attached to the mast (Figure 5).10. Align the upper end of the lifter actuator andboom actuator mounting bracket (Figure 6).Insert the pin. Install the key ring fastener.11. To connect the spreader bar to the boom, seeinstructions on page 9.Always Check the Following BeforeOperationSteps 8, 9Step 7• The mast is securely bolted into place per Steps 5and 6.• The red emergency stop is located on the frontof the control box. Twist clockwise for normal liftoperation (on).• The legs of the lift open and close satisfactorily(This is done via the hand control) (Figure 6).• Push the up and down buttons on the handcontrol and confirm the boom raises and lowers(Figure 7).Figure 5BoomControlLegControlStep 10Figure 6ForwardDirection of travelFigure 7Step 7Figure 47
<strong>Joerns</strong> ® Lifting and RepositioningHoyer ® <strong>HPL700</strong> and <strong>HPL700</strong> WSCOperationRead carefully the “Important Precautions” sectionbefore attempting to use the lift.Warning: The Hoyer ® lift is not intended to bea transport device. Patients in the lift should betransferred for short distances only (example: bedto chair or toilet).Warning: Do not attempt to maneuver the lift bypulling on the mast, boom, actuator or patient.Caution: Have someone assist you whenattempting to transfer a patient.Always carry out the daily checklist before eachlift use.Operating Controls1. Leg AdjustmentThe legs on the Hoyer <strong>HPL700</strong> are electricallyadjustable for width. The legs can be openedto enable access around armchairs orwheelchairs. For transferring and negotiatingnarrow doorways and passages, the lift legsshould be in the closed position. Electricleg adjustment is achieved by pressing theappropriate buttons on the hand control. Thelegs will be locked whenever the hand controlswitch is released.2. Casters and BrakingThe lift has two braked casters which can beapplied for parking. When lifting, the castersshould be left free and un-braked (the onlyexception is when lifting a patient from thefloor). The lift will then be able to move tothe center of gravity of the lift. If the brakesare applied it is the patient that will swingto the center of gravity and this may provedisconcerting and uncomfortable.3. Raising and Lowering the BoomThe movement of the boom is achieved by apowerful electric actuator which is controlledby a simple hand control unit. The handcontrol has two buttons with directionalarrows UP («) and DOWN (»). The actuatorstops automatically at the limit of travel inboth directions. The hand control plugs into asocket at the base of the control box.4. Emergency StopThe red Emergency Stop Button is located onthe front of the control box and is activated bypressing in. This will cut all power to the lift andcan be reset by twisting the button counterclockwiseand releasing.5. Electrical Emergency Down/UpEmergency lower (down) and raise (up) buttonsare provided at the front of the control box. Thisis operated by inserting the tip of a ballpoint pen,or similar object into the button highlighted «».This will bring the boom up or down should thehand control fail.6. Mechanical Emergency DownIn the case of a complete electrical failure,the electric actuator is fitted with mechanicallowering device (RED TRIGGER). This will onlyoperate when the lift is under load. The devicemust be pulled upwards to activate, and theboom will descend slowly.Caution: Mechanical emergency down is to beused for emergency purposes only. Repeateduse may cause permanent damage to theactuator.7. BatteriesThe batteries are protected from deep dischargeby a LOW VOLTAGE ALARM. This will soundwhen the batteries need recharging and thehand control is being operated. It will notsound independently of the hand control beingoperated. DO NOT IGNORE THIS WARNINGALARM. Complete the lifting operation andplace the battery on charge (see charginginstructions).8. SlingsThe Hoyer <strong>HPL700</strong> has a 6 point spreader bar.The 6 point system uses slings with webbingloops which allow positioning adjustment byselecting different colored straps.Loop Strap Slings: Hoyer Quick Fit and FullBack Slings.Warning: Never exceed the rated weightcapacity of the sling or the lift. Check thecapacity of the sling and the lift prior toperforming a transferThe 6 point system attaches to the spreader barhooks via loop straps. Each sling is suppliedwith instructions. Please study the instructionguide before use.8
<strong>Joerns</strong> ® Lifting and RepositioningHoyer ® <strong>HPL700</strong> and <strong>HPL700</strong> WSC6-Point Spreader Bar SystemFollow these instructions exactlyYour Hoyer ® <strong>HPL700</strong> lift uses 6-point spreader bar.The removal of this system is completed easily bythe use of a quick-release pin. This is done quicklyand easily, but you must read the following safetyinstructions to ensure the spreader bar is safelylocked into position before use.<strong>HPL700</strong>WSC:Place a plastic washer on each side of scalehousing, align holes, align these items within theend of the boom, and install the pin sleeve. Insertthe quick release pin fully into the sleeve until itlocks into position (Figure 10 and 11). You mustcheck that the pin is securely fitted.Warning: Do not attempt to disassemble kingpinfrom the 6-point spreader bar. This applies tospreader bar with or without scale.ConnectionTo connect, place the spreader bar on a solidsurface such as a table and lower the boom for easeof attachment (Figure 8).<strong>HPL700</strong>:Insert the pin sleeve through end of the boom andthe kingpin of the spreader bar (Figure 9).Figure 9Once aligned in the boom slot reinsert the quickrelease pin fully into the sleeve until it locks intoposition (Figure 11). YOU MUST CHECK THAT THEPIN IS SECURELY FITTED.To do this, press your finger into the barbed end. Ifthe pin remains stationary, the lift is safe to use.Figure 10Figure 8Figure 119
<strong>Joerns</strong> ® Lifting and RepositioningHoyer ® <strong>HPL700</strong> and <strong>HPL700</strong> WSCRemovalCaution: Be sure to support the weight of thespreader bar before removing pin.To detach pin, depress the spring barb (using a flatscrewdriver or similar) and pull the pin out.Support the 6-point spreader bar, and then pullthe pin sleeve in the opposite direction, removingit completely from the boom. This will release thespreader bar completely.Charging InstructionsThe batteries are located in the power pack andare charged with a desktop charger.Charging Instructions for the Hoyer ®<strong>HPL700</strong>When the power pack needs charging it isremoved from the lift and attached to the charger.Caution: Keep the batteries fully charged. Placethe battery on charge whenever it is not in use. If itis more convenient to do so, place on charge everynight. The charger will not allow the batteries toovercharge.Caution: Never run the batteries completely flat. Assoon as the audible warning sounds, complete thelifting operation and place the power pack on charge.Caution: Never store the power pack for longperiods without regular charging throughout thestorage period.Warning: Always make sure the charger isunplugged before connecting or disconnecting thepower pack.Warning: Never leave the power pack plugged in tothe charger with the charger unplugged.Warning: Do not charge an electric lift in a bathroomor shower room.1. Remove the power pack from the lift. The packis retained by a simple latch at the top of thepower pack. Lift the latch and the power packwill be released.2. Fit the power pack to the charger. The locationand latching of the power pack to the chargeris the same system as used on the lift.3. Plug the charger cord into a suitable outlet.4. Charging is automatic and will fully chargethe batteries over a period of eight to twelvehours. Note: Even if the charger is left pluggedin for extended periods, it will not allow thebatteries to overcharge.5. To return the lift to service, remove the powerpack from the charger. Fit the power pack tothe lift and make sure the latch holding thepack in place is fully engaged. “Click” in place.The charging of Hoyer electric lifts is simpleand straightforward, but it is important to followthe charging instructions closely. Please payparticular attention to the following points, theywill help you avoid problems with dischargedbatteries.10
<strong>Joerns</strong> ® Lifting and RepositioningHoyer ® <strong>HPL700</strong> and <strong>HPL700</strong> WSCMaintenance Schedule andDaily Check ListAll Hoyer ® products are designed for minimummaintenance; however, some safety checks andprocedures are required. A schedule of DAILY tasksare detailed below. Daily checks and a six monthservice, inspection, and test will ensure a lift is keptin optimum safe working condition. A list of spareparts is available upon request.The LOAD TEST and certification should only becarried out by qualified personnel or an authorizedservice agent / dealer.DAILY CHECK LIST: <strong>Joerns</strong> Healthcare stronglyrecommends the following checks be carried out ona daily basis and before using lift.• Make sure the lift moves freely on its casters.• Make sure the spreader bar is free to rotate andswing.• Ensure the spreader bar is firmly attached to theboom.• Examine the sling hooks/clips on the spreader barfor excessive wear.• Make sure the legs open and close correctly.• Operate the hand control to confirm the boomraises and lowers satisfactorily.• Check the operation of the emergency stop button.• Examine slings for fraying or other damage. DONOT use any sling if damaged.• Confirm the lift is not giving a low battery alarmwhen the hand control is operated. If the alarmsounds, DO NOT use, and place on chargeimmediately.<strong>Joerns</strong> Healthcare has an established networkof reputable distributors and dealers who will bepleased to handle all of your purchasing, warranty,repair and maintenance requirements.Our products are guaranteed for a period of 24months from the date of manufacture or 24 monthsfrom the date of purchase if commissioned by anauthorized dealer. This guarantee covers the lift’smajor structure, actuator and control box.We recommend that all of our products areprepared by your dealer and are supported bythem for future servicing. The dealer or distributoroperates the warranty program, so it is importantto keep a record of their name, address, andtelephone number so they can be contactedshould any problem arise.If you are in doubt where your lift was purchased,<strong>Joerns</strong> Healthcare can trace the supplier if youprovide the serial number of the lift.Remember: Contact your distributor for purchases,warranty, repairs, servicing and certifiedmaintenance.Maintenance, Inspection and Testing<strong>Joerns</strong> Healthcare recommends a thoroughinspection and test of the Hoyer <strong>HPL700</strong> lift andlifting accessories, slings, scales, etc. is carried outon a regular basis. Inspection frequency varies withlocation so you must check with your dealer or localgovernment agency on how often an inspectionis required. The examination and test should beconducted according to the recommendationsand procedures. <strong>Joerns</strong> Healthcare recommendsmaintenance, inspection and certified testing iscarried out by authorized service agent / dealersonly.11
<strong>Joerns</strong> ® Lifting and RepositioningHoyer ® <strong>HPL700</strong> and <strong>HPL700</strong> WSCLifter Maintenance ChecklistTo be Inspected by UserInitiallyBeforeeach use6 months12Spreader BarCheck the spreader bar for freedom of rotation and swing. Check for wear on the central ✔ ✔pivot. Check for firm attachment to the boom.BoomCheck the attachment of the boom to the mast. Make sure there is only minimal side ✔ ✔movement of the boom and the boom is free to rotate on the boom bearing.MastCheck the operation of the mast-locking device. Make sure the mast fully engages into the ✔ ✔socket. Check the bottom actuator.ActuatorThe actuator should require no maintenance other than checking for correct operation andlistening for unusual noise.Power PackCheck the function of the emergency stop button and emergency down/up. ✔ ✔BatteriesThe batteries are housed in the power pack and should not require maintenanceother than the regular charging as detailed in the charging instructions. Check that theconnections remain clean.Leg AdjustmentCheck that the legs operate in both full extensions (inward/outward). ✔ ✔CastersCheck all casters for firm attachment to the legs. Check for free rotation of the caster and ✔ ✔the wheels.CleaningClean with ordinary soap and water and/or any hard surface disinfectant. Harsh chemicalscleaners or abrasives should be avoided as these may damage the surface finish of thelift. Avoid wetting any of the electrical parts.Load TestThe load test should be carried out in accordance with the manufacturer’s test procedures.It is strongly recommended the testing is carried out by an authorized dealer.Base and WheelsEnsure base is even and level (all four wheels are on the floor). ✔ ✔SlingsCheck for wear and fraying.✔LubricationLubricate pivot joints, including mast and boom connections, spreader bar joint (only ifrequired), and leg pivot points.Hand SetEnsure plugged fully into controller. ✔ ✔Quick Release PinEnsure the pin is fitted before lifting, by pressing the barbed end (Figure 11, page 9). ✔ ✔✔✔✔✔✔
<strong>Joerns</strong> ® Lifting and RepositioningHoyer ® <strong>HPL700</strong> and <strong>HPL700</strong> WSCTo be Inspected by UserInitiallyBeforeeach use6 monthsFastenersCheck that all fasteners are properly retained (Bolts have nuts, pins have clips, etc.) ✔ ✔Base ComponentsInspect components internal to the base (remove the rear cover and tip the lift on its side).All bolts are tightPins are retainedLeg actuator mechanism moves freely (not binding or obstructed)There is no excessive wear on any component✔✔✔✔13
<strong>Joerns</strong> ® Lifting and RepositioningHoyer ® <strong>HPL700</strong> and <strong>HPL700</strong> WSC<strong>Joerns</strong> Healthcare Warranty Programfor Hoyer ® <strong>HPL700</strong> LiftsThis Warranty covers <strong>HPL700</strong> Lifts only. Lifts notcovered under this warranty include, but are notlimited to: Advance-H, HML400, HPL600WB,HPL600WBSC, HPL402, C-HLA, all HoyerPro(and variations).<strong>HPL700</strong> Lifts are guaranteed for a period of two(2) years from the date of delivery against defectsin materials and workmanship under normal useand service. This warranty includes all mechanicaland electrical components (excluding DC Batteriesand casters).Steel structural components and mechanicalcomponents on lifts are covered under warrantyfor a period of two (2) years from the date ofdelivery.Damage caused by use in unsuitableenvironmental conditions or failure to maintainthe product in accordance with user and serviceinstructions is not covered. Any alteration,modification, or repair unless performed by orauthorized in writing by <strong>Joerns</strong> Healthcare will voidthis warranty.PartsAn <strong>HPL700</strong> Lift contains various parts that wearfrom normal use. These parts, such as DCbatteries and casters are not covered under thetwo-year warranty but are covered for 90 daysafter date of delivery.<strong>Joerns</strong> Healthcare’s obligation under thiswarranty is limited to supplying replacementparts, servicing, or replacing, at its option, anyproduct which is found by <strong>Joerns</strong> Healthcare to bedefective.Warranty replacement parts are covered by theterms of this warranty until the product’s originalwarranty period expires.When requested by <strong>Joerns</strong> Healthcare, partsmust be returned for inspection at the customer’sexpense. Credit will be issued only afterinspection.ServiceMost service requests can be handled by thefacility Maintenance Department with assistancefrom the <strong>Joerns</strong> Healthcare Product ServiceDepartment.Most parts requested can be shipped next day airat the customer’s expense.Should a technician be required, one will beprovided by <strong>Joerns</strong> Healthcare, at our discretion.Only the <strong>Joerns</strong> Healthcare Product ServiceDepartment can dispatch authorized technicians.This warranty is extended to the original purchaserof the equipment.<strong>Joerns</strong>Healthcarewww.joerns.com • email: info@joerns.comPost Acute, Acute, HomeCare5001 <strong>Joerns</strong> DriveStevens Point WI 54481(P) 800.826.0270(F) 800.457.8827VA/Government7027 Hayvenhurst AvenueVan Nuys, CA 91406(P) 800.966.6662(F) 800.232.9796Canadian Office1000 Clarke Road, Suite 6London, ON Canada N5V 3A9(P) 866.546.1151(F) 519.451.8662© 2009 <strong>Joerns</strong> Healthcare Inc. • 6110086 RevB • 10-0028