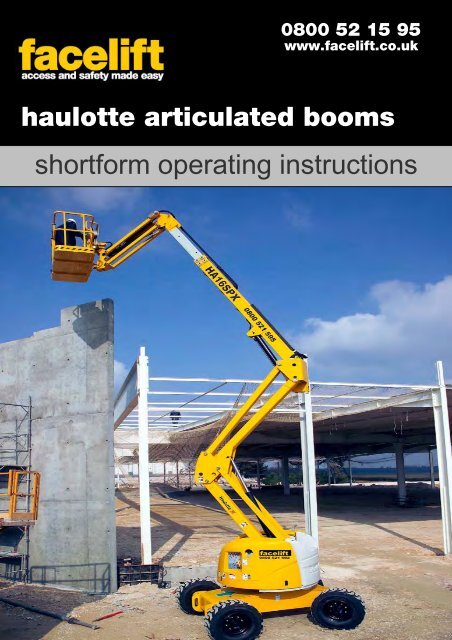
Haulotte Articulated Booms - Facelift
Haulotte Articulated Booms - Facelift
Haulotte Articulated Booms - Facelift

Create successful ePaper yourself
Turn your PDF publications into a flip-book with our unique Google optimized e-Paper software.
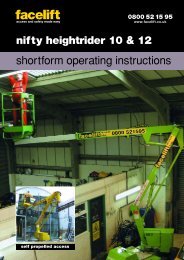
B0800 52 15 95www.facelift.co.ukhaulotte articulated boomsshortform operating instructions
SAFETY TIPSALWAYS• Inspect your machine before use.• Check all operations including ground controls.• Check ground conditions.• Check clearance from overhead obstructions (powercables, building projections etc).• Plan your task/job.• Use sole boards under your outriggers at all timesregardless of ground conditions.• Stabilise and level machine before use.• Wear a safety harness connected to a suitableanchorage point inside the platform.• Operate all controls smoothly.• Warn other people that you are there by means offlashing lights, sign and cones.• MAKE SAFETY YOUR No.1 PRIORITY.NEVER• Use an unsafe machine.• Use an access platform to hoist loads like a crane.• Overload cage/platform.• Operate in strong winds (Check manufacturer’srecommendation).• Rest the cage on a structure or object to gainextra support.• Attach your safety harness to a structure outside ofthe platform.• Throw or drop anything from the platform.• Use boxes, ladders or stand on handrails to gain additionalheight, if you can’t reach, you need a bigger machine.• Let an untrained person operate the access platform.• Take unnecessary risks (hospitals and graveyards arefull of dead heroes!)In the unlikely event that your machine develops a faultplease contact the <strong>Facelift</strong> Tech Team on 01444 881100CONTENTSGeneral Safety Instructions................................ 3Daily Checks ..................................................... 5Starting Up ........................................................ 9Emergency Procedures....................................... 112
Operation and maintenanceDAILY CHECKS. 4 2.2.1 - Working area• Ensure that the machine is on a level, stable floor, able to bear theweight of the machineCaution !See table of characteristics formaximum authorised tilt.Photo 6: Slew pin1• Make sure that no obstables can hinder movement:- travel (moving the machine)- turntable slewing- telescoping and lifting: see "working area" diagram.4.2.2.2 -General appearance• Ensure that the turntable rotation blocking pin has been removed(Ref. 1 , Photo :Slew pin, ).• Visually inspect the whole machine: pay particular attention to paintchips or battery acid leaks.• Check that all bolts, nuts, connections and hoses are tight, that thereare no oil leaks, and that no electric wires have become damaged ordisconnected.• Check the boom and platform: no visible damage, no traces of wearor deformation.• Check that there are no leaks, traces of wear, impact or scratches,rust or foreign matter on the cylinder rods.• Check that there are no leaks from the wheel reducers.• Pump and hydraulic unit: no leaks, all components tight.• Check that the wheel reducers have not become disconnected.• Check the tightness of the wheel nuts and the extent of wear on thetyres.Caution !These machines are not insulatedand must not be started up nearelectric wires.4.2.2.3 -Electricity• Check that the battery terminals are clean and tight: loose or corrodedterminals may result in a power loss.• Respect the safety instructions provided by the battery manufacturer• Check that the platform control panel supply cable is in good condition.• Check that the emergency stops are working correctly.• Check that the tilt detector works properlyby tilting the support plate. Beyond the maximumauthorised tilt value, it should sound an alarm if the machine isunfolded.5
Operating and maintenance instructionsTo reduce the risks of serious falls, operators must respect thefollowing instructions:• Hold the guardrail firmly when lifting or driving the platform.• Remove any traces of oil or grease from the platform steps, floor orguardrails.• Wear personal protective equipment suited to working conditions andconform to local regulations, particularly when working in hazardousareas.• Never disable the limit switches of the safety devices.• Avoid contact with stationary or moving obstacles.• Do not increase the platform operating height by means of ladders orother accessories.• Never use the guardrails to climb into or out of the platform (use thesteps provided).• Never climb on the guardrails when the platform is up.• Avoid driving the machine at high speed in narrow or congested areas.• Never use the machine without putting in place the platform safety baror closing the safety gate.• Never climb on the covers.Caution !Never use the platform as a crane,hoist or lift.Never use the machine to pull ortow.Never use the boom as a ram orthruster or to lift the wheels.To reduce the risks of tipping over, operators must follow theseinstructions:• Never disable the limit switches of the safety devices.• Never move the control handles from one direction to the other withoutstopping in the «O» position. (To stop when travelling, graduallymove the handle to «O», keeping your foot down on the pedal.).• Do not exceed the maximum load or the number of occupants allowedin the platform.• Spread the load and if possible place in the centre of the platform.• Check that the ground resists the pressure and load per wheel.• Avoid contact with stationary or moving obstacles.• Do not drive the platform at high speed in narrow or congested areas.• Do not drive the platform in reverse gear (poor visibility).• Do not use the machine with a congested platform.• Do not use the machine with equipment or objects hanging from theguardrails or boom.• Do not use the machine with items liable to increase the wind load(e.g. panels).• Never carry out maintenance on the machine with the platform raised,without first installing the required safety provisions (overhead crane,crane).• Perform the daily checks and monitor the machine’s good working orderduring periods of use.• Protect the machine from any uncontrolled intervention when it is notin operation.NOTE :Do not tow the unit. (The equipement is not designed for towing.Transport of the unit should be carried out using a vehiclebuilt for this purpose).6
4.3.2 - "Platform" control panelPhoto 3 and 43 451518 461 2 3171678 9 10 11 12 1314NB:The manipulators are equipped with a "fail-safe" safety contact.1- Orientation and boom lifting manipulator2- Arm lifting manipulator3- Travel and BACK steering manipulator4- Power light indicator5- Starter switch6- Horn7- Low, medium, high selector switch8- FRONT steering switch9- Differential blocking switch10- Jib switch11- Platform rotation switch12- Telescope switch13- Compensation switch14- Emergency stop button15- Fault light indicator16- Backup pump17- 220 V single phase - 16 A plug18- Platform overload indicator4.3.3 - Checks before using the machine• Ensure that the ground under the machine is flat, stable and can bearthe weight of the machine• Ensure that no obstacles can obstruct machine movements:- travel (movement of the whole machine).- turntable rotation- telescoping and lifting:• Carry out a visual inspection of the machine: pay particular attentionto flaking paint or acid leaking from the battery.• Check that all bolts, screws, connections and hoses fit tightly, that thereare no oil leaks, and that no electrical connections have becomedamaged or disconnected.• Check the arms, boom, jib and platform: there should be no visible damage,no traces of wear or deformation.7
• Check that there are no leaks, traces of wear, blows or scratches, rustor foreign bodies on the cylinder rods.• Check that there are no leaks from the wheel reducing gears.• Pump and hydraulic unit: no leaks, all components tight.• Check that the reducing gears have not become disconnected.• Check the tightness of the wheel nuts and the extent of tyre wear.• Check that the battery terminals are clean and tight: if they becomeloose or corroded, power may be lost.• Check the electrolyte level in the batteries: the level should be approximately10 mm above the plates; add distilled water if necessary.Caution!Follow the safety instructions suppliedby the battery manufacturer• Check that the main control panel power cable is in good condition.• Check that the emergency stops work correctly.Caution!This type of machine is not insulatedand must not be used close toelectricity lines.• Check that the air filter is clean - see motor manual.• Check levels of:-motor oil: gauge top up if necessary(see motor manual).- hydraulic oil (boom Photo 5, ) top up if necessary by filling gvia the cap (1).- diesel level: the min. and max. levels can be checked when thecover is closed, using the two light indicators. Top up if necessary(cap Ref.2 Photo 5,).Caution!To top up fluid levels, use only theproducts recommended in theconsumables chapter.• Check the hydraulic filter clogging indicator (Ref. 2 Photo 4, ).If the red indicator is visible, replace the filter cartridge• Check that the tilt detector is working correctly by angling thesupport plate. Beyond an angle of 5°, an alarm should soundPhoto 41212345Photo 58
Operation and maintenanceSTARTING UPIMPORTANT:Only start up after all the operations described in the previous chapter havebeen carefully carried out.To become familiar with the machine, carry out the first few manoeuvres atground level, keeping the machine in its transport configuration:counterweight at the front, boom lowered.Caution !the steering wheels, the travel andsteering controls work in theopposite direction.REMINDER:The main operation station is in the platform. In normal use,the "turntable" operating station is a standby or emergencystation and is only used if absolutely necessary.4.3.1 - Operations from the ground4.3.1.1 -Motor ignition• Make sure that the emergency stop button is pulled out.• Put the operating station selection key switch in the "groundcontrol" position. In this position, the "platform" controlpanel controls are cancelled.• The motor oil pressure and battery charge light indicatorsare on. The air filter clogging light indicator is off.• Press the ignition button. The motor starts, the light indicatorsgo off.NB :If the motor fails to start, cut the contact by pressing the emergencystop and start the operation again.• Leave the motor to warm up, while you check proper operation of thehour counter, motor and pump.4.3.1.2 -Movement testsCaution !Make sure that no obstacles caninterfere with machine movements.• Test the lifting movement in the upwards and downwards movements• Stop boom lowering in the horizontal position.• Then test the turntable slew movements in both directionsRand telescope in/out movements then lowerthe boom completely.• Then test the compensation movement in both directions• THE COMPENSATION COMMAND IS ACTIVE BELOW ATHRESHOLD OF 8.2 FT ONLY4.3.1.3 -Switch to "platform" control• Put the key selector switch,in the "platform" position (green rectangle).• Check proper operation of the tilt sensor4.3.2 - Operations from the platformNB :When you want to move the machine, the boom must be9
Operation and maintenanceraised a few metres to prevent the basket trailing on theground.Climb in the basket, respecting the maximum load instructions anddistributing the load evenly around the platform if necessary.Caution !MAXIMUM LOAD:HA16SPX basket 1800x800:230 kg (including 2 people).NB :If maximum load is nearly reached, the buzzer will sound. Ifthe maximum limit is exceeded, all machine movements aredisabled (except basket rotation), and load must be removed.There is no load restriction with the reach.4.3.2.1 -Control station test• Before any movement, make sure that the green light indicatoris on, showing that machine power is on and that the selector switchis in the "platform" position• Make sure that the emergency stop button is unlocked.• Check that the buzzer works properly.4.3.2.2 -Movement tests• The corresponding manipulator or selector switch must be selected tomake a movement.• Activate the "fail-safe" safety device and the required manipulator.• The speed and the angle of tilt of the manipulators make the movementgradual.• If the floor is not horizontal, correct the platform position with the correspondingselector switch.• Test the telescoping and basket rotation movements, using the correspondingselector switch.• Test the steering movement of the rear axle using the selector switchon the handle of the travel manipulator.• Machine in the folded position, try the three travel speeds, by activatingthe speed selector switch.• The direction of movement is shown by the coloured arrows.• Then test the compensation movement in both directionsWork can now be started.• THE COMPENSATION COMMAND IS ACTIVE BELOW ATHRESHOLD OF 8.2 FT ONLY4.3.3 - Stopping the machineAfter using the machine, it is important to restore the machine to its idleposition, i.e. folded, with the turntable control panel key in the stop positionand remove the key to avoid all risk of use.10
Operation and maintenanceEmergency ProceduresCaution !Only a skilled operator mayperform emergency or rescueoperations.3.2.6.1 - RescueIf the operator in the platform ceases to be able to control movement inspite of flawless machine operation. A skilled operator on the ground canuse the turntable control panel with the diesel main power source to bringthe operator in the platform back to the ground.3.2.6.2 - EmergencyCaution !Use of the emergency unit isexclusively reserved for rescuingpersonnel if the main hydraulicpower supply fails. Any other usemay cause damage.A standby electropump set controlled from either the platform or theturntable can be used in the event of failure of the main pump.If an operating incident prevents the operator in the platform from comingback down to the ground, a skilled operator can do so using the electricpump and the electric controls on the turntable control panel.Instructions:• Turn the key to the "turntable station" position• Activate the switch controlling the emergency unit• Activate the switches corresponding to the movements required11
Operation and maintenance3.2.6.3 -Manual emergency systemIf the diesel motor works, in the event of failure of the turntable and platformcontrol panels, movements can be controlled using the mechanical levers,and pushing the manual control of the electrovalve on the generaldistribution block.Manual emergency operation help labelPhoto 1:Manual emergency operation23 4 5 6• Manual emergency operation for turntable slewing: (Distributor no 3 ,Photo :Manual emergency operation)Instructions:- Remove the cover,- Grasp the lever, (Ref 1, Photo :Manual emergency operation)1- Position the lever on distributor no3, (Ref 1, Photo :Manualemergency operation,)- Press the manual control of the electrovalve, (Ref 2, Photo1: Manual emergency operation)- While pressing the manual control,* Pull the lever for turntable slewing to the left (as seen from thebasket).* Push the lever for turntable slewing to the right (as seen fromthe basket.• Manual emergency operation for arm movements: (Distributor no 4,Photo :Manual emergency operation)Instructions:- Remove the cover,- Grasp the lever, (Ref 1, Photo :Manual emergency operation)- Position the lever on distributor no4, (Ref 1, Photo :Manualemergency operation)- Press the electrovalve’s manual control, (Ref 2, Photo :Manualemergency operation)- While pressing the manual control,* Pull the lever to raise the arm.* Push the lever to lower the arm.• Manual emergency operation for boom movements: (Distributor no 5,Photo :Manual emergency operation)Instructions:- Remove the cover,12
- Grasp the lever, (Ref 1, Photo :Manual emergency operation,page 12)- Position the lever on distributor no. 5, (Ref 1, Photo :Manualemergency operation, page 12)- Press the electrovalve manual control, (Ref 2, Photo :Manualemergency operation, page 12)- While pressing the manual control,* Pull the lever to raise the boom.* Push the lever to lower the boom.Photo 2:Distribution block on/offabcdefghijCaution !Two people are required to performtelescoping, steering, basketrotation and compensationmovements.• Manual emergency operation for the other movements: (Distributorno. 6, Photo :Manual emergency operation, page 12)Telescoping movement:Instructions:• Remove the cover,• Position the lever on distributor no. 6, (Ref 1, Photo :Manual emergencyoperation, page 12)• At the same time, press the electrovalve’s manual control, (Ref 2,Photo :Manual emergency operation, page 12) and the distributor correspondingto the telescoping movement distirbutor (Distributor «a»and «f», Photo :Distribution block on/off)- Telescope extension* Pull the lever* Press the manual control (Ref 2, Photo :Manual emergencyoperation, page 12)* Press distributor «a»- Telescope retration* Pull the lever* Press the manual control (Ref 2, Photo :Manual emergencyoperation, page 12)* Press distributor «f»Steering movement :Instructions:• Remove the cover,• Grasp the lever, (Ref 1, Photo :Manual emergency operation, page13
Basket rotation movement:Instructions:• Remove the cover,• Grasp the lever, (Ref 1, Photo :Manual emergency operation, page12)• Position the lever on distributor no.6, (Ref 1, Photo :Manual emergencyoperation, page 12)• At the same time, press the electrovalve manual control, (Ref 2, Photo:Manual emergency operation, page 12) and the distributor correspondingto basket rotation movement (Distributor «d» and «i», Photo:Manual emergency operation, page 12 )- Basket rotation movement to the rightt* Push the lever* Press the manual control (Ref 2, Photo :Manual emergencyoperation, page 12)* Press distributor «d»- Basket movement to the left* Push the lever* Press the manual control (Ref 2, Photo :Manual emergencyoperation, page 12)* Press d istributor «i»Compensation movement :Instructions:• Remove the cover,• Grasp the lever, (Ref 1, Photo :Manual emergency operation, page12)• Position the lever on distributor no.6, (Ref 1, Photo :Manual emergencyoperation, page 12)• At the same time, press the electrovalve manual control, (Ref 2, Photo:Manual emergency operation, page 12) and the distributor correspondingto the compensation movement (Distributor «b» and «g»,Photo :Manual emergency operation, page 12).- Downward compensation movement* Push the lever* Press the manual control (Ref 2, Photo :Manual emergencyoperation, page 12)* Press distributor «b»- Upward compensation movement* Push the lever12)• Position the lever on distributor no. 6, (Ref 1, Photo :Manual emergencyoperation, page 12)• At the same time, press the electrovalve manual control, (Ref 2, Photo:Manual emergency operation, page 12) and the distributor correspondingto the steering movement required (Distributor «e» and «j»,Photo :Distribution block on/off, page 13)- Basket movement to the right* Push the lever* Press the manual control (Ref 2, Photo :Manual emergencyoperation, page 12)* Press distributor «e»- Basket movement to the left* Push the lever* Press the manual control (Ref 2, Photo :Manual emergencyoperation, page 12)* Press distributor «j»14
* Press the manual control (Ref 2, Photo :Manual emergencyoperation, page 12)- Press distributor «g»jib movement:Instructions:• Remove the cover,• Grasp the lever, (Ref 1, Photo :Manual emergency operation, page12)• Position the lever on distributor no. 6, (Ref 1, Photo :Manual emergencyoperation, page 12)• At the same time, press the electrovalve manual control, (Ref 2, Photo:Manual emergency operation, page 12) and the distributor correspondingto the jib (Distributor «c» and «h», Photo :Manual emergencyoperation, page 12).- Downward jib movement* Push the lever* Press the manual control (Ref 2, Photo :Manual emergencyoperation, page 12)* Press distributor «c»- Upward jib movement* Push the lever* Press the manual control (Ref 2, Photo :Manual emergencyoperation, page 12)- Press distributor «h»Notes15
faceliftaccess and safety made easy0800 072 55 72www.facelift.co.ukoperator training centreWhen hiring accessequipment we stronglyrecommend takingadvantage of one of ouroperator training courses.As <strong>Facelift</strong> is an accreditied IPAF (Independent PoweredAccess Federation) training centre you can be sure that yourstaff will be trained to a high standard and receive aninternationally recognised qualification.Courses can take place on your own premises or at one ofour training centres, situated in Hickstead, Iver, Southampton,Liverpool, Birmingham and Basildon.We can train your personnel on anyof the following equipment:(1a) Static VerticalVertical Personnel Platform (static)(1b) Static BoomSelf Propelled Boom with outriggers, Trailer/Pusharound, Vehicle Mounted Platform up to 26m andVehicle Mounted Platform over 26m*(3a) Mobile VerticalScissor Lifts, Vertical Personnel Platform (mobile)(3b) Mobile BoomSelf Propelled BoomSpecialist MachinesSpider*The one day course covers site safety, practical demonstration,sole usage, site risks and includes a theory test* Two day courses are required for the Spider and VehicleMounted Platforms over 26mSuccessful candidates are issued with the IPAF PAL card,widely accepted by both the CITB and Health And SafetyExecutive.For further information or to arrangea training course contact us today on:0800 072 55 72 or training@facelift.co.ukWe also run the following courses:MEWPs for ManagersLoading and UnloadingHarness Use and InspectionPASMA Aluminium Tower TrainingBLMA Ladder Training