ATC stability control - Swift Owners Club
ATC stability control - Swift Owners Club
ATC stability control - Swift Owners Club
- No tags were found...

Create successful ePaper yourself
Turn your PDF publications into a flip-book with our unique Google optimized e-Paper software.
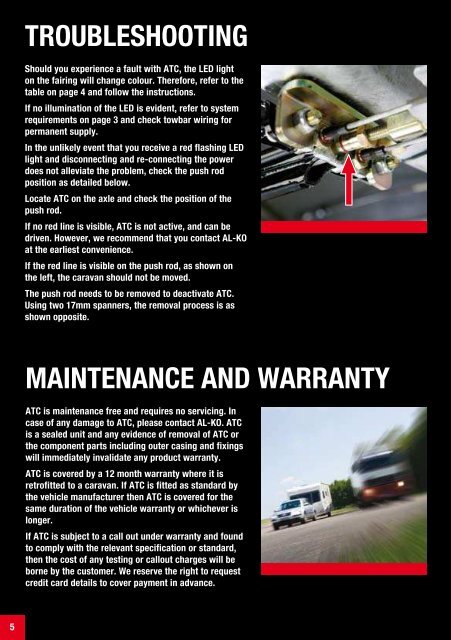
TROUBLESHOOTINGShould you experience a fault with <strong>ATC</strong>, the LED lighton the fairing will change colour. Therefore, refer to thetable on page 4 and follow the instructions.If no illumination of the LED is evident, refer to systemrequirements on page 3 and check towbar wiring forpermanent supply.In the unlikely event that you receive a red flashing LEDlight and disconnecting and re-connecting the powerdoes not alleviate the problem, check the push rodposition as detailed below.Locate <strong>ATC</strong> on the axle and check the position of thepush rod.If no red line is visible, <strong>ATC</strong> is not active, and can bedriven. However, we recommend that you contact AL-KOat the earliest convenience.If the red line is visible on the push rod, as shown onthe left, the caravan should not be moved.The push rod needs to be removed to deactivate <strong>ATC</strong>.Using two 17mm spanners, the removal process is asshown opposite.REMOVAL OF PUSH ROD:Using a 17mm spanner, slacken locking nut on push rod awayfrom Bowden cable abutment as directed above.MAINTENANCE AND WARRANTY<strong>ATC</strong> is maintenance free and requires no servicing. Incase of any damage to <strong>ATC</strong>, please contact AL-KO. <strong>ATC</strong>is a sealed unit and any evidence of removal of <strong>ATC</strong> orthe component parts including outer casing and fixingswill immediately invalidate any product warranty.<strong>ATC</strong> is covered by a 12 month warranty where it isretrofitted to a caravan. If <strong>ATC</strong> is fitted as standard bythe vehicle manufacturer then <strong>ATC</strong> is covered for thesame duration of the vehicle warranty or whichever islonger.If <strong>ATC</strong> is subject to a call out under warranty and foundto comply with the relevant specification or standard,then the cost of any testing or callout charges will beborne by the customer. We reserve the right to requestcredit card details to cover payment in advance.Unscrew push rod from brake rod and slide it from the guidetube. Remove the locking nut from push rod using two 17mmspanners.Re-apply the removed locking nut onto brake rod thread tosecure ball nut as shown above. <strong>ATC</strong> is now deactivated.5 6