FlexPendant Operators Manual 3HAC16590 ... - Technology
FlexPendant Operators Manual 3HAC16590 ... - Technology
FlexPendant Operators Manual 3HAC16590 ... - Technology
- No tags were found...

Create successful ePaper yourself
Turn your PDF publications into a flip-book with our unique Google optimized e-Paper software.
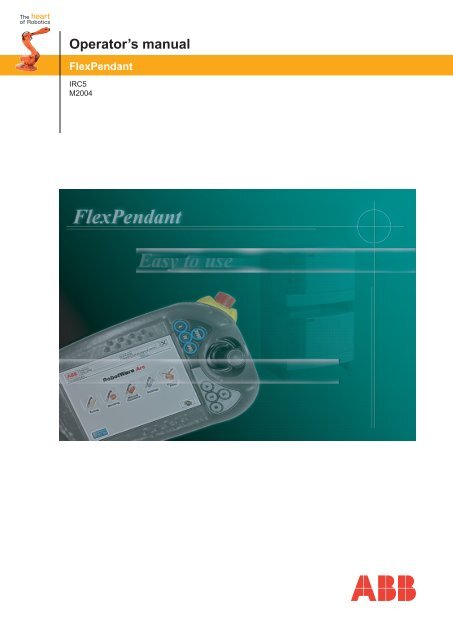
Operator’s manual<strong>FlexPendant</strong>IRC5M2004
Operator’s manualIRC5 with <strong>FlexPendant</strong>M2004Document ID: 3HAC 16590-1Revision: B
The information in this manual is subject to change without notice and should not beconstrued as a commitment by ABB. ABB assumes no responsibility for any errors thatmay appear in this manual.Except as may be expressly stated anywhere in this manual, nothing herein shall beconstrued as any kind of guarantee or warranty by ABB for losses, damages to personsor property, fitness for a specific purpose or the like.In no event shall ABB be liable for incidental or consequential damages arising fromuse of this manual and products described herein.This manual and parts thereof must not be reproduced or copied without ABB’s writtenpermission, and contents thereof must not be imparted to a third party nor be used forany unauthorized purpose. Contravention will be prosecuted.Additional copies of this manual may be obtained from ABB at its then current charge.© Copyright 2005 ABB All right reserved.ABB Automation Technologies ABRoboticsSE-721 68 VästeråsSweden
Table of ContentsOverview . . . . . . . . . . . . . . . . . . . . . . . . . . . . . . . . . . . . . . . . . . . . . . . . . . . . . . . . . . . . . . . . . . . . . . . . . . . . . 9Product documentation, M2004 . . . . . . . . . . . . . . . . . . . . . . . . . . . . . . . . . . . . . . . . . . . . . . . . . . . . . . . . . . . 111 Safety 131.1 About the Safety chapter . . . . . . . . . . . . . . . . . . . . . . . . . . . . . . . . . . . . . . . . . . . . . . . . . . . . . . . . . . . . . 131.2 Applicable safety standards for IRC5. . . . . . . . . . . . . . . . . . . . . . . . . . . . . . . . . . . . . . . . . . . . . . . . . . . . 141.3 Safety terminology . . . . . . . . . . . . . . . . . . . . . . . . . . . . . . . . . . . . . . . . . . . . . . . . . . . . . . . . . . . . . . . . . 151.3.1 Safety signals, general . . . . . . . . . . . . . . . . . . . . . . . . . . . . . . . . . . . . . . . . . . . . . . . . . . . . . . . . . . 151.3.2 DANGER. . . . . . . . . . . . . . . . . . . . . . . . . . . . . . . . . . . . . . . . . . . . . . . . . . . . . . . . . . . . . . . . . . . . . 171.3.2.1 DANGER - Make sure that the main power has been switched off! . . . . . . . . . . . . . . . . 171.3.2.2 DANGER - Moving manipulators are potentially lethal! . . . . . . . . . . . . . . . . . . . . . . . . . 181.3.2.3 DANGER - Manipulator without axes’ holding brakes are potentially lethal! . . . . . . . . . 191.3.3 WARNING. . . . . . . . . . . . . . . . . . . . . . . . . . . . . . . . . . . . . . . . . . . . . . . . . . . . . . . . . . . . . . . . . . . . 201.3.3.1 WARNING - The unit is sensitive to ESD! . . . . . . . . . . . . . . . . . . . . . . . . . . . . . . . . . . . 201.3.4 What is an emergency stop? . . . . . . . . . . . . . . . . . . . . . . . . . . . . . . . . . . . . . . . . . . . . . . . . . . . . . . 221.3.5 What is a safety stop? . . . . . . . . . . . . . . . . . . . . . . . . . . . . . . . . . . . . . . . . . . . . . . . . . . . . . . . . . . . 231.3.6 What is safeguarding? . . . . . . . . . . . . . . . . . . . . . . . . . . . . . . . . . . . . . . . . . . . . . . . . . . . . . . . . . . 241.3.7 Enabling device and hold-to-run buttons . . . . . . . . . . . . . . . . . . . . . . . . . . . . . . . . . . . . . . . . . . . . 251.4 How to deal with an emergency. . . . . . . . . . . . . . . . . . . . . . . . . . . . . . . . . . . . . . . . . . . . . . . . . . . . . . . 261.4.1 Stop the system. . . . . . . . . . . . . . . . . . . . . . . . . . . . . . . . . . . . . . . . . . . . . . . . . . . . . . . . . . . . . . . . 261.4.2 Release the robot holding brakes . . . . . . . . . . . . . . . . . . . . . . . . . . . . . . . . . . . . . . . . . . . . . . . . . . 271.4.3 Extinguishing fires . . . . . . . . . . . . . . . . . . . . . . . . . . . . . . . . . . . . . . . . . . . . . . . . . . . . . . . . . . . . . 281.4.4 Recover from emergency stops . . . . . . . . . . . . . . . . . . . . . . . . . . . . . . . . . . . . . . . . . . . . . . . . . . . 291.4.5 Return to the programmed path . . . . . . . . . . . . . . . . . . . . . . . . . . . . . . . . . . . . . . . . . . . . . . . . . . . 301.5 Working in a safe manner . . . . . . . . . . . . . . . . . . . . . . . . . . . . . . . . . . . . . . . . . . . . . . . . . . . . . . . . . . . 311.5.1 Overview . . . . . . . . . . . . . . . . . . . . . . . . . . . . . . . . . . . . . . . . . . . . . . . . . . . . . . . . . . . . . . . . . . . . 311.5.2 For your own safety . . . . . . . . . . . . . . . . . . . . . . . . . . . . . . . . . . . . . . . . . . . . . . . . . . . . . . . . . . . . 321.5.3 Handling of <strong>FlexPendant</strong> . . . . . . . . . . . . . . . . . . . . . . . . . . . . . . . . . . . . . . . . . . . . . . . . . . . . . . . . 331.5.4 Safety tools . . . . . . . . . . . . . . . . . . . . . . . . . . . . . . . . . . . . . . . . . . . . . . . . . . . . . . . . . . . . . . . . . . . 341.5.5 Safety in manual reduced speed and manual full speed mode . . . . . . . . . . . . . . . . . . . . . . . . . . . . 351.5.6 Safety in automatic mode . . . . . . . . . . . . . . . . . . . . . . . . . . . . . . . . . . . . . . . . . . . . . . . . . . . . . . . . 362 Welcome to <strong>FlexPendant</strong> 372.1 About the Welcome to <strong>FlexPendant</strong> chapter . . . . . . . . . . . . . . . . . . . . . . . . . . . . . . . . . . . . . . . . . . . . . . 372.2 What is a <strong>FlexPendant</strong>? . . . . . . . . . . . . . . . . . . . . . . . . . . . . . . . . . . . . . . . . . . . . . . . . . . . . . . . . . . . . . . 382.3 What is an IRC5 controller? . . . . . . . . . . . . . . . . . . . . . . . . . . . . . . . . . . . . . . . . . . . . . . . . . . . . . . . . . . . 422.4 What is RobotStudio Online?. . . . . . . . . . . . . . . . . . . . . . . . . . . . . . . . . . . . . . . . . . . . . . . . . . . . . . . . . . 432.5 When to use the <strong>FlexPendant</strong> and RobotStudio Online . . . . . . . . . . . . . . . . . . . . . . . . . . . . . . . . . . . . . .442.6 Buttons on the controller . . . . . . . . . . . . . . . . . . . . . . . . . . . . . . . . . . . . . . . . . . . . . . . . . . . . . . . . . . . . . 473 Get started 493.1 About the Get started chapter . . . . . . . . . . . . . . . . . . . . . . . . . . . . . . . . . . . . . . . . . . . . . . . . . . . . . . . . . . 493.2 Connections . . . . . . . . . . . . . . . . . . . . . . . . . . . . . . . . . . . . . . . . . . . . . . . . . . . . . . . . . . . . . . . . . . . . . . 503.2.1 Connecting a <strong>FlexPendant</strong> . . . . . . . . . . . . . . . . . . . . . . . . . . . . . . . . . . . . . . . . . . . . . . . . . . . . . . . 503.2.2 Disconnecting a <strong>FlexPendant</strong> . . . . . . . . . . . . . . . . . . . . . . . . . . . . . . . . . . . . . . . . . . . . . . . . . . . . . 513.2.3 Connecting a PC to the service port . . . . . . . . . . . . . . . . . . . . . . . . . . . . . . . . . . . . . . . . . . . . . . . . 523.2.4 Set up the network connection . . . . . . . . . . . . . . . . . . . . . . . . . . . . . . . . . . . . . . . . . . . . . . . . . . . . 543.3 Action scenarios . . . . . . . . . . . . . . . . . . . . . . . . . . . . . . . . . . . . . . . . . . . . . . . . . . . . . . . . . . . . . . . . . . . 563.3.1 About the Action Scenarios chapter . . . . . . . . . . . . . . . . . . . . . . . . . . . . . . . . . . . . . . . . . . . . . . . . 563.3.2 System start up . . . . . . . . . . . . . . . . . . . . . . . . . . . . . . . . . . . . . . . . . . . . . . . . . . . . . . . . . . . . . . . . 573.3.3 Jogging . . . . . . . . . . . . . . . . . . . . . . . . . . . . . . . . . . . . . . . . . . . . . . . . . . . . . . . . . . . . . . . . . . . . . . 593.3.4 Using RAPID programs . . . . . . . . . . . . . . . . . . . . . . . . . . . . . . . . . . . . . . . . . . . . . . . . . . . . . . . . . 613.3.5 Working with inputs and outputs . . . . . . . . . . . . . . . . . . . . . . . . . . . . . . . . . . . . . . . . . . . . . . . . . . 633
Table of Contents3.3.6 Backup and restore. . . . . . . . . . . . . . . . . . . . . . . . . . . . . . . . . . . . . . . . . . . . . . . . . . . . . . . . . . . . . 643.3.7 Running in production . . . . . . . . . . . . . . . . . . . . . . . . . . . . . . . . . . . . . . . . . . . . . . . . . . . . . . . . . . 653.3.8 Granting access for RobotStudio Online . . . . . . . . . . . . . . . . . . . . . . . . . . . . . . . . . . . . . . . . . . . . 663.3.9 Upgrading. . . . . . . . . . . . . . . . . . . . . . . . . . . . . . . . . . . . . . . . . . . . . . . . . . . . . . . . . . . . . . . . . . . . 673.3.10 Installing software options . . . . . . . . . . . . . . . . . . . . . . . . . . . . . . . . . . . . . . . . . . . . . . . . . . . . . . 683.3.11 Shutting down . . . . . . . . . . . . . . . . . . . . . . . . . . . . . . . . . . . . . . . . . . . . . . . . . . . . . . . . . . . . . . . 693.3.12 General procedure when trouble shooting . . . . . . . . . . . . . . . . . . . . . . . . . . . . . . . . . . . . . . . . . . 704 Navigating and handling <strong>FlexPendant</strong> 714.1 About the Navigate and handle <strong>FlexPendant</strong> chapter . . . . . . . . . . . . . . . . . . . . . . . . . . . . . . . . . . . . . . . 714.2 Overview, personalizing the <strong>FlexPendant</strong> . . . . . . . . . . . . . . . . . . . . . . . . . . . . . . . . . . . . . . . . . . . . . . . . 724.3 The ABB menu . . . . . . . . . . . . . . . . . . . . . . . . . . . . . . . . . . . . . . . . . . . . . . . . . . . . . . . . . . . . . . . . . . . . 734.3.1 HotEdit . . . . . . . . . . . . . . . . . . . . . . . . . . . . . . . . . . . . . . . . . . . . . . . . . . . . . . . . . . . . . . . . . . . . . 734.3.2 <strong>FlexPendant</strong> Explorer. . . . . . . . . . . . . . . . . . . . . . . . . . . . . . . . . . . . . . . . . . . . . . . . . . . . . . . . . . . 754.3.3 Inputs and outputs, I/O. . . . . . . . . . . . . . . . . . . . . . . . . . . . . . . . . . . . . . . . . . . . . . . . . . . . . . . . . . 764.3.4 Jogging . . . . . . . . . . . . . . . . . . . . . . . . . . . . . . . . . . . . . . . . . . . . . . . . . . . . . . . . . . . . . . . . . . . . . . 774.3.5 Production window . . . . . . . . . . . . . . . . . . . . . . . . . . . . . . . . . . . . . . . . . . . . . . . . . . . . . . . . . . . . 794.3.6 Program data . . . . . . . . . . . . . . . . . . . . . . . . . . . . . . . . . . . . . . . . . . . . . . . . . . . . . . . . . . . . . . . . . 804.3.7 Program editor . . . . . . . . . . . . . . . . . . . . . . . . . . . . . . . . . . . . . . . . . . . . . . . . . . . . . . . . . . . . . . . . 824.3.8 Backup and restore. . . . . . . . . . . . . . . . . . . . . . . . . . . . . . . . . . . . . . . . . . . . . . . . . . . . . . . . . . . . . 834.3.9 Calibration . . . . . . . . . . . . . . . . . . . . . . . . . . . . . . . . . . . . . . . . . . . . . . . . . . . . . . . . . . . . . . . . . . . 844.3.10 Control panel . . . . . . . . . . . . . . . . . . . . . . . . . . . . . . . . . . . . . . . . . . . . . . . . . . . . . . . . . . . . . . . . 864.3.11 Event log menu . . . . . . . . . . . . . . . . . . . . . . . . . . . . . . . . . . . . . . . . . . . . . . . . . . . . . . . . . . . . . . 874.3.12 Lock the screen . . . . . . . . . . . . . . . . . . . . . . . . . . . . . . . . . . . . . . . . . . . . . . . . . . . . . . . . . . . . . . 894.3.13 System info. . . . . . . . . . . . . . . . . . . . . . . . . . . . . . . . . . . . . . . . . . . . . . . . . . . . . . . . . . . . . . . . . . 914.3.14 Restart . . . . . . . . . . . . . . . . . . . . . . . . . . . . . . . . . . . . . . . . . . . . . . . . . . . . . . . . . . . . . . . . . . . . . 924.3.15 Logout . . . . . . . . . . . . . . . . . . . . . . . . . . . . . . . . . . . . . . . . . . . . . . . . . . . . . . . . . . . . . . . . . . . . . 934.4 The status bar menu. . . . . . . . . . . . . . . . . . . . . . . . . . . . . . . . . . . . . . . . . . . . . . . . . . . . . . . . . . . . . . . . 944.4.1 Operator window . . . . . . . . . . . . . . . . . . . . . . . . . . . . . . . . . . . . . . . . . . . . . . . . . . . . . . . . . . . . . . 944.4.2 Status bar . . . . . . . . . . . . . . . . . . . . . . . . . . . . . . . . . . . . . . . . . . . . . . . . . . . . . . . . . . . . . . . . . . . . 954.5 The QuickSet menu . . . . . . . . . . . . . . . . . . . . . . . . . . . . . . . . . . . . . . . . . . . . . . . . . . . . . . . . . . . . . . . . 964.5.1 The Quickset menu . . . . . . . . . . . . . . . . . . . . . . . . . . . . . . . . . . . . . . . . . . . . . . . . . . . . . . . . . . . . 964.6 Basic procedures . . . . . . . . . . . . . . . . . . . . . . . . . . . . . . . . . . . . . . . . . . . . . . . . . . . . . . . . . . . . . . . . . . 974.6.1 Using the soft keyboard . . . . . . . . . . . . . . . . . . . . . . . . . . . . . . . . . . . . . . . . . . . . . . . . . . . . . . . . . 974.6.2 Messages on the <strong>FlexPendant</strong> . . . . . . . . . . . . . . . . . . . . . . . . . . . . . . . . . . . . . . . . . . . . . . . . . . . . 994.6.3 Scrolling and zooming on the <strong>FlexPendant</strong> . . . . . . . . . . . . . . . . . . . . . . . . . . . . . . . . . . . . . . . . . 1004.6.4 Filtering data . . . . . . . . . . . . . . . . . . . . . . . . . . . . . . . . . . . . . . . . . . . . . . . . . . . . . . . . . . . . . . . . 1014.6.5 Process applications . . . . . . . . . . . . . . . . . . . . . . . . . . . . . . . . . . . . . . . . . . . . . . . . . . . . . . . . . . . 1024.6.6 How to logout and login. . . . . . . . . . . . . . . . . . . . . . . . . . . . . . . . . . . . . . . . . . . . . . . . . . . . . . . . 1035 Jogging 1055.1 Introduction to jogging. . . . . . . . . . . . . . . . . . . . . . . . . . . . . . . . . . . . . . . . . . . . . . . . . . . . . . . . . . . . . . 1055.2 Jogging concept . . . . . . . . . . . . . . . . . . . . . . . . . . . . . . . . . . . . . . . . . . . . . . . . . . . . . . . . . . . . . . . . . . 1065.2.1 Restrictions to jogging . . . . . . . . . . . . . . . . . . . . . . . . . . . . . . . . . . . . . . . . . . . . . . . . . . . . . . . . . 1065.2.2 Coordinated jogging. . . . . . . . . . . . . . . . . . . . . . . . . . . . . . . . . . . . . . . . . . . . . . . . . . . . . . . . . . . 1075.3 Basic settings for jogging . . . . . . . . . . . . . . . . . . . . . . . . . . . . . . . . . . . . . . . . . . . . . . . . . . . . . . . . . . 1085.3.1 Selecting mechanical unit . . . . . . . . . . . . . . . . . . . . . . . . . . . . . . . . . . . . . . . . . . . . . . . . . . . . . . 1085.3.2 Selecting motion mode. . . . . . . . . . . . . . . . . . . . . . . . . . . . . . . . . . . . . . . . . . . . . . . . . . . . . . . . . 1105.3.3 Selecting tool, work object, and payload . . . . . . . . . . . . . . . . . . . . . . . . . . . . . . . . . . . . . . . . . . . 1125.3.4 Setting the tool orientation . . . . . . . . . . . . . . . . . . . . . . . . . . . . . . . . . . . . . . . . . . . . . . . . . . . . . . 1135.3.5 Jog axis by axis . . . . . . . . . . . . . . . . . . . . . . . . . . . . . . . . . . . . . . . . . . . . . . . . . . . . . . . . . . . . . . 1145.3.6 Jog in base coordinates. . . . . . . . . . . . . . . . . . . . . . . . . . . . . . . . . . . . . . . . . . . . . . . . . . . . . . . . . 1165.3.7 Jog in world coordinates . . . . . . . . . . . . . . . . . . . . . . . . . . . . . . . . . . . . . . . . . . . . . . . . . . . . . . . 1174
Table of Contents5.3.8 Jog in work object coordinates . . . . . . . . . . . . . . . . . . . . . . . . . . . . . . . . . . . . . . . . . . . . . . . . . . . 1195.3.9 Jog in tool coordinates . . . . . . . . . . . . . . . . . . . . . . . . . . . . . . . . . . . . . . . . . . . . . . . . . . . . . . . . . 1205.3.10 Locking the joystick in specific directions. . . . . . . . . . . . . . . . . . . . . . . . . . . . . . . . . . . . . . . . . 1225.3.11 Incremental movement for precise positioning . . . . . . . . . . . . . . . . . . . . . . . . . . . . . . . . . . . . . 1245.3.12 How to read the exact position . . . . . . . . . . . . . . . . . . . . . . . . . . . . . . . . . . . . . . . . . . . . . . . . . . 1265.3.13 Quickset menu, Mechanical unit . . . . . . . . . . . . . . . . . . . . . . . . . . . . . . . . . . . . . . . . . . . . . . . . 1285.3.14 Quickset menu, Increment . . . . . . . . . . . . . . . . . . . . . . . . . . . . . . . . . . . . . . . . . . . . . . . . . . . . . 1326 Programming and testing 1336.1 Before you start programming . . . . . . . . . . . . . . . . . . . . . . . . . . . . . . . . . . . . . . . . . . . . . . . . . . . . . . . . 1336.2 Programming concept . . . . . . . . . . . . . . . . . . . . . . . . . . . . . . . . . . . . . . . . . . . . . . . . . . . . . . . . . . . . . 1346.2.1 The structure of a RAPID application . . . . . . . . . . . . . . . . . . . . . . . . . . . . . . . . . . . . . . . . . . . . . 1346.3 Data types . . . . . . . . . . . . . . . . . . . . . . . . . . . . . . . . . . . . . . . . . . . . . . . . . . . . . . . . . . . . . . . . . . . . . . . 1366.3.1 Viewing data in specific tasks, modules, or routines . . . . . . . . . . . . . . . . . . . . . . . . . . . . . . . . . . 1366.3.2 Creating new data instance. . . . . . . . . . . . . . . . . . . . . . . . . . . . . . . . . . . . . . . . . . . . . . . . . . . . . . 1376.3.3 Editing data instances . . . . . . . . . . . . . . . . . . . . . . . . . . . . . . . . . . . . . . . . . . . . . . . . . . . . . . . . . . 1396.4 Tools. . . . . . . . . . . . . . . . . . . . . . . . . . . . . . . . . . . . . . . . . . . . . . . . . . . . . . . . . . . . . . . . . . . . . . . . . . . . 1426.4.1 Creating a tool . . . . . . . . . . . . . . . . . . . . . . . . . . . . . . . . . . . . . . . . . . . . . . . . . . . . . . . . . . . . . . . 1426.4.2 Defining the tool frame . . . . . . . . . . . . . . . . . . . . . . . . . . . . . . . . . . . . . . . . . . . . . . . . . . . . . . . . 1456.4.3 Editing the tool data . . . . . . . . . . . . . . . . . . . . . . . . . . . . . . . . . . . . . . . . . . . . . . . . . . . . . . . . . . . 1486.4.4 Editing the tool declaration . . . . . . . . . . . . . . . . . . . . . . . . . . . . . . . . . . . . . . . . . . . . . . . . . . . . . 1506.4.5 Deleting a tool . . . . . . . . . . . . . . . . . . . . . . . . . . . . . . . . . . . . . . . . . . . . . . . . . . . . . . . . . . . . . . . 1516.4.6 Setup for stationary tools . . . . . . . . . . . . . . . . . . . . . . . . . . . . . . . . . . . . . . . . . . . . . . . . . . . . . . . 1526.5 Work objects . . . . . . . . . . . . . . . . . . . . . . . . . . . . . . . . . . . . . . . . . . . . . . . . . . . . . . . . . . . . . . . . . . . . . 1546.5.1 Creating a work object . . . . . . . . . . . . . . . . . . . . . . . . . . . . . . . . . . . . . . . . . . . . . . . . . . . . . . . . . 1546.5.2 Defining the work object coordinate system . . . . . . . . . . . . . . . . . . . . . . . . . . . . . . . . . . . . . . . .1556.5.3 Editing the work object data. . . . . . . . . . . . . . . . . . . . . . . . . . . . . . . . . . . . . . . . . . . . . . . . . . . . . 1586.5.4 Editing the work object declaration . . . . . . . . . . . . . . . . . . . . . . . . . . . . . . . . . . . . . . . . . . . . . . . 1596.5.5 Deleting a work object . . . . . . . . . . . . . . . . . . . . . . . . . . . . . . . . . . . . . . . . . . . . . . . . . . . . . . . . . 1606.6 Payloads . . . . . . . . . . . . . . . . . . . . . . . . . . . . . . . . . . . . . . . . . . . . . . . . . . . . . . . . . . . . . . . . . . . . . . . . 1616.6.1 Creating a payload . . . . . . . . . . . . . . . . . . . . . . . . . . . . . . . . . . . . . . . . . . . . . . . . . . . . . . . . . . . . 1616.6.2 Editing the payload data . . . . . . . . . . . . . . . . . . . . . . . . . . . . . . . . . . . . . . . . . . . . . . . . . . . . . . . . 1626.6.3 Editing the payload declaration . . . . . . . . . . . . . . . . . . . . . . . . . . . . . . . . . . . . . . . . . . . . . . . . . . 1636.6.4 Deleting a payload . . . . . . . . . . . . . . . . . . . . . . . . . . . . . . . . . . . . . . . . . . . . . . . . . . . . . . . . . . . . 1646.7 Programming. . . . . . . . . . . . . . . . . . . . . . . . . . . . . . . . . . . . . . . . . . . . . . . . . . . . . . . . . . . . . . . . . . . . . 1656.7.1 Handling of programs. . . . . . . . . . . . . . . . . . . . . . . . . . . . . . . . . . . . . . . . . . . . . . . . . . . . . . . . . . 1656.7.2 Handling of modules . . . . . . . . . . . . . . . . . . . . . . . . . . . . . . . . . . . . . . . . . . . . . . . . . . . . . . . . . . 1686.7.3 Handling of routines . . . . . . . . . . . . . . . . . . . . . . . . . . . . . . . . . . . . . . . . . . . . . . . . . . . . . . . . . . . 1726.7.4 Handling of instructions . . . . . . . . . . . . . . . . . . . . . . . . . . . . . . . . . . . . . . . . . . . . . . . . . . . . . . . . 1766.7.5 Example: Add movement instructions . . . . . . . . . . . . . . . . . . . . . . . . . . . . . . . . . . . . . . . . . . . . .1816.8 Advanced programming. . . . . . . . . . . . . . . . . . . . . . . . . . . . . . . . . . . . . . . . . . . . . . . . . . . . . . . . . . . . 1826.8.1 Mirroring a program, module, or routine . . . . . . . . . . . . . . . . . . . . . . . . . . . . . . . . . . . . . . . . . . . 1826.8.2 Modifying positions . . . . . . . . . . . . . . . . . . . . . . . . . . . . . . . . . . . . . . . . . . . . . . . . . . . . . . . . . . . 1846.8.3 Moving the robot to a programmed position . . . . . . . . . . . . . . . . . . . . . . . . . . . . . . . . . . . . . . . . 1866.8.4 Aligning tools . . . . . . . . . . . . . . . . . . . . . . . . . . . . . . . . . . . . . . . . . . . . . . . . . . . . . . . . . . . . . . . . 1876.8.5 Editing instruction expressions and declarations . . . . . . . . . . . . . . . . . . . . . . . . . . . . . . . . . . . . . 1886.8.6 Hiding declarations in program code . . . . . . . . . . . . . . . . . . . . . . . . . . . . . . . . . . . . . . . . . . . . . . 1916.8.7 Deleting programs from memory . . . . . . . . . . . . . . . . . . . . . . . . . . . . . . . . . . . . . . . . . . . . . . . . . 1926.8.8 Deleting programs from hard disk . . . . . . . . . . . . . . . . . . . . . . . . . . . . . . . . . . . . . . . . . . . . . . . . 1946.8.9 Activating mechanical units . . . . . . . . . . . . . . . . . . . . . . . . . . . . . . . . . . . . . . . . . . . . . . . . . . . . . 1956.9 Testing . . . . . . . . . . . . . . . . . . . . . . . . . . . . . . . . . . . . . . . . . . . . . . . . . . . . . . . . . . . . . . . . . . . . . . . . . . 1966.9.1 How to use the hold-to-run function . . . . . . . . . . . . . . . . . . . . . . . . . . . . . . . . . . . . . . . . . . . . . . 1966.9.2 Running the program from a specific instruction. . . . . . . . . . . . . . . . . . . . . . . . . . . . . . . . . . . . . 1985
Table of Contents6.9.3 Running a specific routine . . . . . . . . . . . . . . . . . . . . . . . . . . . . . . . . . . . . . . . . . . . . . . . . . . . . . . 2006.9.4 Quickset menu, Run Mode. . . . . . . . . . . . . . . . . . . . . . . . . . . . . . . . . . . . . . . . . . . . . . . . . . . . . . 2016.9.5 Quickset menu, Step Mode . . . . . . . . . . . . . . . . . . . . . . . . . . . . . . . . . . . . . . . . . . . . . . . . . . . . . 2036.9.6 Stepping instruction by instruction . . . . . . . . . . . . . . . . . . . . . . . . . . . . . . . . . . . . . . . . . . . . . . . 2056.9.7 Quickset menu, Speed . . . . . . . . . . . . . . . . . . . . . . . . . . . . . . . . . . . . . . . . . . . . . . . . . . . . . . . . . 2086.10 Service routines . . . . . . . . . . . . . . . . . . . . . . . . . . . . . . . . . . . . . . . . . . . . . . . . . . . . . . . . . . . . . . . . . 2096.10.1 Running a service routine. . . . . . . . . . . . . . . . . . . . . . . . . . . . . . . . . . . . . . . . . . . . . . . . . . . . . . 2096.10.2 Battery shutdown service routine. . . . . . . . . . . . . . . . . . . . . . . . . . . . . . . . . . . . . . . . . . . . . . . . 2116.10.3 Calibration Pendulum, CalPendulum service routine . . . . . . . . . . . . . . . . . . . . . . . . . . . . . . . . 2126.10.4 Service Information System, ServiceInfo service routine . . . . . . . . . . . . . . . . . . . . . . . . . . . . . 2136.10.5 LoadIdentify, load identifiction service routine. . . . . . . . . . . . . . . . . . . . . . . . . . . . . . . . . . . . . 2147 Running in production 2197.1 Starting programs . . . . . . . . . . . . . . . . . . . . . . . . . . . . . . . . . . . . . . . . . . . . . . . . . . . . . . . . . . . . . . . . . . 2197.2 Stopping programs . . . . . . . . . . . . . . . . . . . . . . . . . . . . . . . . . . . . . . . . . . . . . . . . . . . . . . . . . . . . . . . . . 2217.3 Using multitasking programs . . . . . . . . . . . . . . . . . . . . . . . . . . . . . . . . . . . . . . . . . . . . . . . . . . . . . . . . . 2227.4 Returning the robot to the path. . . . . . . . . . . . . . . . . . . . . . . . . . . . . . . . . . . . . . . . . . . . . . . . . . . . . . . . 2247.5 Operating modes . . . . . . . . . . . . . . . . . . . . . . . . . . . . . . . . . . . . . . . . . . . . . . . . . . . . . . . . . . . . . . . . . 2257.5.1 Present operating mode . . . . . . . . . . . . . . . . . . . . . . . . . . . . . . . . . . . . . . . . . . . . . . . . . . . . . . . . 2257.5.2 About the automatic mode . . . . . . . . . . . . . . . . . . . . . . . . . . . . . . . . . . . . . . . . . . . . . . . . . . . . . . 2277.5.3 About the manual mode . . . . . . . . . . . . . . . . . . . . . . . . . . . . . . . . . . . . . . . . . . . . . . . . . . . . . . . . 2287.5.4 Start up in automatic mode . . . . . . . . . . . . . . . . . . . . . . . . . . . . . . . . . . . . . . . . . . . . . . . . . . . . . 2297.5.5 Start up in manual mode . . . . . . . . . . . . . . . . . . . . . . . . . . . . . . . . . . . . . . . . . . . . . . . . . . . . . . . 2317.5.6 Running programs in automatic mode . . . . . . . . . . . . . . . . . . . . . . . . . . . . . . . . . . . . . . . . . . . . . 2327.5.7 Running programs in manual mode . . . . . . . . . . . . . . . . . . . . . . . . . . . . . . . . . . . . . . . . . . . . . . . 2337.5.8 Switching from manual to automatic mode . . . . . . . . . . . . . . . . . . . . . . . . . . . . . . . . . . . . . . . . . 2347.5.9 Switching from automatic to manual mode . . . . . . . . . . . . . . . . . . . . . . . . . . . . . . . . . . . . . . . . . 2357.5.10 Switching to manual full speed mode . . . . . . . . . . . . . . . . . . . . . . . . . . . . . . . . . . . . . . . . . . . . 2368 Handling inputs and outputs, I/O 2378.1 Inputs and Outputs, I/O . . . . . . . . . . . . . . . . . . . . . . . . . . . . . . . . . . . . . . . . . . . . . . . . . . . . . . . . . . . . . 2378.2 Simulating and changing signal values . . . . . . . . . . . . . . . . . . . . . . . . . . . . . . . . . . . . . . . . . . . . . . . . . 2388.3 Viewing signal group . . . . . . . . . . . . . . . . . . . . . . . . . . . . . . . . . . . . . . . . . . . . . . . . . . . . . . . . . . . . . . . 2398.4 Safety I/O signals . . . . . . . . . . . . . . . . . . . . . . . . . . . . . . . . . . . . . . . . . . . . . . . . . . . . . . . . . . . . . . . . . . 2409 Handling the event log 2439.1 Accessing the event log . . . . . . . . . . . . . . . . . . . . . . . . . . . . . . . . . . . . . . . . . . . . . . . . . . . . . . . . . . . . . 2439.2 Deleting log entries . . . . . . . . . . . . . . . . . . . . . . . . . . . . . . . . . . . . . . . . . . . . . . . . . . . . . . . . . . . . . . . . 2449.3 Saving log entries . . . . . . . . . . . . . . . . . . . . . . . . . . . . . . . . . . . . . . . . . . . . . . . . . . . . . . . . . . . . . . . . . . 24510 Systems 24710.1 About systems . . . . . . . . . . . . . . . . . . . . . . . . . . . . . . . . . . . . . . . . . . . . . . . . . . . . . . . . . . . . . . . . . . . 24710.2 Memory and file handling . . . . . . . . . . . . . . . . . . . . . . . . . . . . . . . . . . . . . . . . . . . . . . . . . . . . . . . . . 24810.2.1 What is “the memory”? . . . . . . . . . . . . . . . . . . . . . . . . . . . . . . . . . . . . . . . . . . . . . . . . . . . . . . . 24810.2.2 The structure of the main computer RAM memory contents . . . . . . . . . . . . . . . . . . . . . . . . . . 24910.2.3 File handling. . . . . . . . . . . . . . . . . . . . . . . . . . . . . . . . . . . . . . . . . . . . . . . . . . . . . . . . . . . . . . . . 25210.3 Restart procedures. . . . . . . . . . . . . . . . . . . . . . . . . . . . . . . . . . . . . . . . . . . . . . . . . . . . . . . . . . . . . . . 25310.3.1 Restart overview. . . . . . . . . . . . . . . . . . . . . . . . . . . . . . . . . . . . . . . . . . . . . . . . . . . . . . . . . . . . . 25310.3.2 Using the boot application . . . . . . . . . . . . . . . . . . . . . . . . . . . . . . . . . . . . . . . . . . . . . . . . . . . . . 25410.3.3 Restart and use the current system (warm start) . . . . . . . . . . . . . . . . . . . . . . . . . . . . . . . . . . . . 25710.3.4 Restart and select another system (X-start) . . . . . . . . . . . . . . . . . . . . . . . . . . . . . . . . . . . . . . . . 25810.3.5 Restart and delete the current system (C-start) . . . . . . . . . . . . . . . . . . . . . . . . . . . . . . . . . . . . . 25910.3.6 Restart and delete programs and modules (P-start) . . . . . . . . . . . . . . . . . . . . . . . . . . . . . . . . . . 26010.3.7 Restart and return to default settings (I-start) . . . . . . . . . . . . . . . . . . . . . . . . . . . . . . . . . . . . . . 2616
Table of Contents10.3.8 Restart from previously stored system data (B-start) . . . . . . . . . . . . . . . . . . . . . . . . . . . . . . . . . 26210.3.9 Reflashing firmware and <strong>FlexPendant</strong> . . . . . . . . . . . . . . . . . . . . . . . . . . . . . . . . . . . . . . . . . . . .26310.4 Backup and restore systems . . . . . . . . . . . . . . . . . . . . . . . . . . . . . . . . . . . . . . . . . . . . . . . . . . . . . . . 26510.4.1 What is saved on backup? . . . . . . . . . . . . . . . . . . . . . . . . . . . . . . . . . . . . . . . . . . . . . . . . . . . . . 26510.4.2 Backup the system . . . . . . . . . . . . . . . . . . . . . . . . . . . . . . . . . . . . . . . . . . . . . . . . . . . . . . . . . . . 26710.4.3 Restore the system . . . . . . . . . . . . . . . . . . . . . . . . . . . . . . . . . . . . . . . . . . . . . . . . . . . . . . . . . . . 26810.4.4 Important when performing backups! . . . . . . . . . . . . . . . . . . . . . . . . . . . . . . . . . . . . . . . . . . . .26910.5 Configuring systems . . . . . . . . . . . . . . . . . . . . . . . . . . . . . . . . . . . . . . . . . . . . . . . . . . . . . . . . . . . . . 27010.5.1 Configuring system parameters . . . . . . . . . . . . . . . . . . . . . . . . . . . . . . . . . . . . . . . . . . . . . . . . . 27011 Calibrating 27311.1 How to check if the robot needs calibration. . . . . . . . . . . . . . . . . . . . . . . . . . . . . . . . . . . . . . . . . . . . . 27311.2 Updating revolution counters . . . . . . . . . . . . . . . . . . . . . . . . . . . . . . . . . . . . . . . . . . . . . . . . . . . . . . . . 27411.3 Loading calibration data using the <strong>FlexPendant</strong>. . . . . . . . . . . . . . . . . . . . . . . . . . . . . . . . . . . . . . . . . . 27611.4 Editing motor calibration offset . . . . . . . . . . . . . . . . . . . . . . . . . . . . . . . . . . . . . . . . . . . . . . . . . . . . . . 27711.5 Fine calibration procedure on <strong>FlexPendant</strong> . . . . . . . . . . . . . . . . . . . . . . . . . . . . . . . . . . . . . . . . . . . . . 27811.6 Serial Measurement Board memory. . . . . . . . . . . . . . . . . . . . . . . . . . . . . . . . . . . . . . . . . . . . . . . . . . . 28011.7 4 points XZ calibration. . . . . . . . . . . . . . . . . . . . . . . . . . . . . . . . . . . . . . . . . . . . . . . . . . . . . . . . . . . . . 28312 Changing <strong>FlexPendant</strong> settings 28512.1 Changing brightness and contrast. . . . . . . . . . . . . . . . . . . . . . . . . . . . . . . . . . . . . . . . . . . . . . . . . . . . . 28512.2 Switching between left and right handheld <strong>FlexPendant</strong> . . . . . . . . . . . . . . . . . . . . . . . . . . . . . . . . . . . 28612.3 Changing date and time . . . . . . . . . . . . . . . . . . . . . . . . . . . . . . . . . . . . . . . . . . . . . . . . . . . . . . . . . . . . 28812.4 Configuring Most Common I/O . . . . . . . . . . . . . . . . . . . . . . . . . . . . . . . . . . . . . . . . . . . . . . . . . . . . . . 28912.5 Changing language . . . . . . . . . . . . . . . . . . . . . . . . . . . . . . . . . . . . . . . . . . . . . . . . . . . . . . . . . . . . . . . . 29012.6 Editing programmable keys . . . . . . . . . . . . . . . . . . . . . . . . . . . . . . . . . . . . . . . . . . . . . . . . . . . . . . . . . 29112.7 Editing supervision settings . . . . . . . . . . . . . . . . . . . . . . . . . . . . . . . . . . . . . . . . . . . . . . . . . . . . . . . . . 29312.8 Configuring view settings. . . . . . . . . . . . . . . . . . . . . . . . . . . . . . . . . . . . . . . . . . . . . . . . . . . . . . . . . . . 29512.9 Changing background image . . . . . . . . . . . . . . . . . . . . . . . . . . . . . . . . . . . . . . . . . . . . . . . . . . . . . . . . 29712.10 Calibrating the touch screen . . . . . . . . . . . . . . . . . . . . . . . . . . . . . . . . . . . . . . . . . . . . . . . . . . . . . . . . 29813 Descriptions of terms and concepts 29913.1 About the Descriptions of terms and concepts chapter . . . . . . . . . . . . . . . . . . . . . . . . . . . . . . . . . . . .29913.2 What is the robot system?. . . . . . . . . . . . . . . . . . . . . . . . . . . . . . . . . . . . . . . . . . . . . . . . . . . . . . . . . . . 30013.3 What are robots, manipulators and positioners?. . . . . . . . . . . . . . . . . . . . . . . . . . . . . . . . . . . . . . . . . . 30113.4 What is a tool? . . . . . . . . . . . . . . . . . . . . . . . . . . . . . . . . . . . . . . . . . . . . . . . . . . . . . . . . . . . . . . . . . . . 30213.5 What is the tool center point?. . . . . . . . . . . . . . . . . . . . . . . . . . . . . . . . . . . . . . . . . . . . . . . . . . . . . . . . 30313.6 What is a work object? . . . . . . . . . . . . . . . . . . . . . . . . . . . . . . . . . . . . . . . . . . . . . . . . . . . . . . . . . . . . . 30413.7 What is a coordinate system? . . . . . . . . . . . . . . . . . . . . . . . . . . . . . . . . . . . . . . . . . . . . . . . . . . . . . . . . 30513.8 What is a RAPID application? . . . . . . . . . . . . . . . . . . . . . . . . . . . . . . . . . . . . . . . . . . . . . . . . . . . . . . . 31113.9 What is a data array? . . . . . . . . . . . . . . . . . . . . . . . . . . . . . . . . . . . . . . . . . . . . . . . . . . . . . . . . . . . . . . 3127
Table of Contents8
OverviewOverviewAbout this manualUsageThis manual contains instructions for daily operation of IRC5 based robot systems using a<strong>FlexPendant</strong>.This manual should be used during operation.Who should read this manual?This manual is intended for:• operators• product technicans• service technicans• robot programmersHow to read the operator’s manualThe operator’s manual is structured in the following chapters.Chapter Title Content1 Safety Safety instructions and warnings.2 Welcome to <strong>FlexPendant</strong> Descriptions of the <strong>FlexPendant</strong> and theFlexController.3 Get started Descriptions of connections and step-by-stepinstructions to the most common tasks4 Navigating and handlingthe <strong>FlexPendant</strong>Descriptions of the <strong>FlexPendant</strong>’s user interface andbasic procedures.5 Jogging Procedures for jogging.6 Programming and testing Procedures for programming and testing, includingdescriptions of some concepts for programming.7 Running in production Procedures for running in production.8 Handling inputs and Procedures for handling I/O.outputs, I/O9 Handling the event log Procedures for the event log.10 Systems Procedures for restart, backup, restore, andconfiguring systems.11 Calibrating Procedures for calibrating the robot system.12 Changing <strong>FlexPendant</strong>settings13 Descriptions of terms andconceptsProcedures for changing the settings for the<strong>FlexPendant</strong>.Descriptions of terms and concepts used in robotics.3HAC 16590-1 Revision: BContinues on next page9
OverviewContinuedPrerequisitesThe reader should:• be familiar with the concepts described in Getting started - IRC5 and RobotStudioOnline.• be trained in robot operation.ReferencesReferenceDocument IDProduct manual, procedures - IRC5 3HAC 021313-001Product manual, references - IRC5 3HAC 021313-001Getting started - IRC5 and RobotStudio Online 3HAC 021564-001Operator’s manual - RobotStudio Online 3HAC 18236-1Trouble shooting manual - IRC5 3HAC 020738-001Technical reference manual - System parameters 3HAC 17076-1RAPID reference manual - RAPID overview 3HAC 16580-1RAPID reference manual - Instructions 3HAC 16581-1RAPID reference manual - Functions and data types 3HAC 16581-1RAPID reference manaul - RAPID kernel 3HAC 16585-1Application manual - Additional axes 3HAC 021395-001Application manual - Engineering tools 3HAC 020434-001Application manual - Motion coordination and supervision 3HAC 18154-1Application manual - Motion functions and events 3HAC 18152-1Application manual - MultiMove 3HAC 021272-001Calibration pendulum instruction 3HAC 16578-1Instructions for levelmeter calibration 3HAC 022907-001RevisionsRevisionDescription- First issued. IRC5 M2004. Released with RobotWare 5.04.A Second edition. Released with RobotWare 5.05.B Third edition. Released with RobotWare 5.06.Organization of chapters restructured to task orientation.103HAC 16590-1 Revision: B
Product documentation, M2004Product documentation, M2004GeneralHardware manualsThe robot documentation may be divided into a number of categories. This listing is based onthe type of information contained within the documents, regardless of whether the productsare standard or optional. This means that any given delivery of robot products will not containall documents listed, only the ones pertaining to the equipment delivered.However, all documents listed may be ordered from ABB. The documents listed are valid forM2004 robot systems.All hardware, robots and controller cabinets, will be delivered with a Product manual whichis divided into two parts:Product manual, procedures• Safety information• Installation and commissioning (descriptions of mechanical installation, electricalconnections and loading system software)• Maintenance (descriptions of all required preventive maintenance proceduresincluding intervals)• Repair (descriptions of all recommended repair procedures including spare parts)• Additional procedures, if any (calibration, decommissioning)Product manual, reference information• Reference information (article numbers for documentation referred to in Productmanual, procedures, lists of tools, safety standards)• Part list• Foldouts or exploded views• Circuit diagramsRobotWare manualsThe following manuals describe the robot software in general and contain relevant referenceinformation:• RAPID Overview: An overview of the RAPID programming language.• RAPID reference manual part 1: Description of all RAPID instructions.• RAPID reference manual part 2: Description of all RAPID functions and data types.• Technical reference manual - System parameters: Description of systemparameters and configuration workflows.3HAC 16590-1 Revision: BContinues on next page11
Product documentation, M2004ContinuedApplication manualsSpecific applications (e.g. software or hardware options) are described in Applicationmanuals. An application manual can describe one or several applications.An application manual generally contains information about:• The purpose of the application (what it does and when it is useful)• What is included (e.g. cables, I/O boards, RAPID instructions, system parameters)• How to use the application• Examples of how to use the applicationOperator’s manualsThis group of manuals is aimed at those having first hand operational contact with the robot,i.e. production cell operators, programmers and trouble shooters. The group of manualsinclude:• Getting started - IRC5 and RobotStudio Online• Operator’s manual - IRC5 with <strong>FlexPendant</strong>• Operator’s manual - RobotStudio Online• Trouble shooting manual for the controller and robot123HAC 16590-1 Revision: B
1 Safety1.1. About the Safety chapter1 Safety1.1. About the Safety chapterIntroduction to safetyThis chapter describes safety principles and procedures to be used when a robot or robotsystem is operated.It does not cover how to design for safety nor how to install safety related equipment. Thesetopics are covered in the Product <strong>Manual</strong>s supplied with the robot system.3HAC 16590-1 Revision: B13
1 Safety1.2. Applicable safety standards for IRC51.2. Applicable safety standards for IRC5Health and safety standardsThe robot complies fully with the health and safety standards specified in the EEC’sMachinery Directives.The ABB robots controlled by the IRC5 conforms to the following standards:StandardEN ISO 12100-1EN ISO 12100-2EN 954-1EN 775EN 60204EN 61000-6-4 (option)EN 61000-6-2DescriptionSafety of machinery, terminologySafety of machinery, technical specificationsSafety of machinery, safety related parts of control systemsManipulating industrial robots, safetyElectrical equipment of industrial machinesEMC, generic emissionEMC, generic immunityStandardIEC 204-1IEC 529DescriptionElectrical equipment of industrial machinesDegrees of protection provided by enclosuresStandardISO 10218ISO 9787DescriptionManipulating industrial robots, safetyManipulating industrial robots, coordinate systems and motionsStandardANSI/RIA 15.06/1999ANSI/UL 1740-1998(option)CAN/CSA Z 434-03(option)DescriptionSafety requirements for industrial robots and robot systemsSafety standard for robots and robot equipmentIndustrial robots and robot systems - General safetyrequirements143HAC 16590-1 Revision: B
1 Safety1.3.1. Safety signals, general1.3 Safety terminology1.3.1. Safety signals, generalGeneralDanger levelsThis section specifies all dangers that may arise from performing the work detailed in themanual. Each danger is detailed in its own section consisting of:• A caption specifying the danger level (DANGER, WARNING or CAUTION) and thetype of danger.• A brief description of what will happen if the operator/service personnel do noteliminate the danger.• An instruction of how to eliminate the danger to facilitate performing the activity athand.The table below defines the captions specifying the danger levels used throughout thismanual.Symbol Designation SignificationdangerwarningDANGERWARNINGELECTRICALSHOCKWarns that an accident will occur if the instructionsare not followed, resulting in a serious or fatal injuryand/or severe damage to the product. It applies towarnings that apply to danger with, for example,contact with high voltage electrical units, explosionor fire risk, risk of poisonous gases, risk of crushing,impact, fall from height etc.Warns that an accident may occur if the instructionsare not followed, that can lead to serious injury,possibly fatal, and/or great damage to the product. Itapplies to warnings that apply to danger with, forexample, contact with high voltage electrical units,explosion or fire risk, risk of poisonous gases, risk ofcrushing, impact, fall from height etc.The electrocution or electrical shock symbolindicates electrical hazards which could result insevere personal injury or death.Electrical shockcautionCAUTIONWarns that an accident may occur if the instructionsare not followed, that can result in injury and/ordamage to the product. It also applies to warnings ofrisks that include burns, eye injury, skin injury,hearing damage, crushing or slipping, tripping,impact, fall from height etc. Furthermore, it applies towarnings that include function requirements whenfitting and removing equipment, where there is a riskof damaging the product or causing a breakdown.3HAC 16590-1 Revision: BContinues on next page15
1 Safety1.3.1. Safety signals, generalContinuedSymbol Designation SignificationELECTROSTATICDISCHARGE (ESD)The electrostatic discharge (ESD) symbol indicateselectrostatic hazards which could result in severedamage to the product.Electrostatic discharge(ESD)NOTENote symbols alert you to important facts andconditions.NoteTIPTip symbols direct you to specific instructions, whereto find additional information or how to perform acertain operation in an easier way.Tip163HAC 16590-1 Revision: B
1 Safety1.3.2.1. DANGER - Make sure that the main power has been switched off!1.3.2. DANGER1.3.2.1. DANGER - Make sure that the main power has been switched off!DescriptionWorking with high voltage is potentially lethal. Persons subjected to high voltage may suffercardiac arrest, burn injuries or other severe injuries. To avoid these dangers, do not proceedworking before eliminating the danger as detailed below.EliminationStep Action Info/Illustration1. Switch off the main switch on the ControlModule.2. Switch off the main switch on the DriveModule.xx0400000978• A: main switch, control moduleen0400001017• A: main switch, drive module3HAC 16590-1 Revision: B17
1 Safety1.3.2.2. DANGER - Moving manipulators are potentially lethal!1.3.2.2. DANGER - Moving manipulators are potentially lethal!DescriptionAny moving manipulator is a potentially lethal machine.When running the manipulator, it may perform unexpected and sometimes irrationalmovements. However, all movements are performed with great force and may seriouslyinjure any personnel and/or damage any piece of equipment located within the manipulatorworking range.EliminationStep Action Info/Illustration1. Before attempting to run the manipulator,make sure all emergency stop equipment iscorrectly installed and connected.2. If possible, use the hold-to-run buttonwhenever possible.The hold-to-run button is used in manualmode, not in automatic mode.3. Make sure no personnel are present withinthe manipulator working range beforepressing the start button.Emergency stop equipment such asgates, tread mats, light curtains, etc.How to use the hold-to-run function isdetailed in section How to use thehold-to-run function on page 196.183HAC 16590-1 Revision: B
1 Safety1.3.2.3. DANGER - Manipulator without axes’ holding brakes are potentially lethal!1.3.2.3. DANGER - Manipulator without axes’ holding brakes are potentially lethal!DescriptionSince the manipulator arm system is quite heavy, especially on larger manipulator models, itis dangerous if the holding brakes are disconnected, faulty, worn or in any way rendered nonoperational.For instance, a collapsing IRB 7600 arm system may kill or seriously injure a person standingbeneath it.EliminationStep Action Info/illustration1. If you suspect that the holding brakes are nonoperational,secure the manipulator arm system bysome other means before working on it.2. If you intentionally render the holding brakes nonoperationalby connecting an external voltage supply,the utmost care must be taken!NEVER stand inside the manipulator working areawhen disabling the holding brakes unless the armsystem is supported by some other means!Weight specifications etc.may be found in the Product<strong>Manual</strong> of each manipulatormodel.How to correctly connect anexternal voltage supply isdetailed in the Product<strong>Manual</strong> of each manipulatormodel.3HAC 16590-1 Revision: B19
1 Safety1.3.3.1. WARNING - The unit is sensitive to ESD!1.3.3. WARNING1.3.3.1. WARNING - The unit is sensitive to ESD!DescriptionESD (electro static discharge) is the transfer of electrical static charge between two bodies atdifferent potentials, either through direct contact or through an induced electrical field. Whenhandling parts or their containers, personnel not grounded may potentially transfer high staticcharges. This discharge may destroy sensitive electronics.EliminationStep Action Note/Illustration1. Use a wrist strap Wrist straps must be tested frequently toensure that they are not damaged and areoperating correctly.2. Use an ESD protective floor mat. The mat must be grounded through a currentlimitingresistor.3. Use a dissipative table mat. The mat should provide a controlled dischargeof static voltages and must be grounded.Location of wrist strap buttonThe wrist strap button is located on the computer unit in the control module as shown in theillustration below.Axx0400001061Awrist strap button20Continues on next page3HAC 16590-1 Revision: B
1 Safety1.3.3.1. WARNING - The unit is sensitive to ESD!ContinuedAssemble the wrist strapThe picture illustrates how the ESD wrist strap is assembled in the controller.xx0400001055ABCThe strap is fastened to a button on the side of the control module.When not used, the wrist strap is placed on the power supply unit.Power supply unit3HAC 16590-1 Revision: B21
1 Safety1.3.4. What is an emergency stop?1.3.4. What is an emergency stop?Definition of emergency stopAn emergency stop is a state that overrides any other robot control, disconnects drive powerfrom the robot’s motors, stops all moving parts and disconnects power from any potentiallydangerous functions controlled by the robot system.An emergency stop state means that all power is disconnected from the robot except for themanual brake release circuits. You must perform a recovery procedure in order to return tonormal operation.The robot system can be configured so that the state results in either:• an uncontrolled stop, immediately stopping the robot’s action by disconnecting powerfrom its motors• a controlled stop, stopping the robot’s action with power available to its motors so thatthe robot path can be maintained. When completed, power is disconnected.Controlled stops are preferred since it minimizes the actions needed to return the robot systemback to production. Please consult your plant or cell documentation to see how your robotsystem is configured.Classification of stopsThe safety standards that regulates automation and robot equipment defines categories inwhich each type of stop applies:If the stop is.....then it is classified as...uncontrolledcategory 0 (zero)controlled category 1Emergency stop devicesIn a robot system there are several emergency stop devices that can be operated in order toachieve an emergency stop. There are emergency stop buttons available on the <strong>FlexPendant</strong>and on the control module. There can also be other types of emergency stops on your robot,consult your plant or cell documentation to see how your robot system is configured.223HAC 16590-1 Revision: B
1 Safety1.3.5. What is a safety stop?1.3.5. What is a safety stop?Definition of safety stopsAn emergency stop is a state that overrides any other robot control, disconnects drive powerfrom the robot’s motors, stops all moving parts and disconnects power from any potentiallydangerous functions controlled by the robot system.A safety stop means that only the power to the robot’s motors is disconnected. There is norecovery procedure. You need only to restore motor power to recover from a safety stop.The robot system can be configured so that the state results in either:• an uncontrolled stop, immediately stopping the robot’s action by disconnecting powerfrom its motors• a controlled stop, stopping the robot’s action with power available to its motors so thatthe robot path can be maintained. When completed, power is disconnected.Controlled stops are preferred since it minimizes the actions needed to return the robot systemback to production. Please consult your plant or cell documentation to see how your robotsystem is configured.Classification of stopsThe safety standards that regulates automation and robot equipment defines categories inwhich each type of stop applies:If the stop is.....then it is classified as...uncontrolledcategory 0 (zero)controlled category 13HAC 16590-1 Revision: B23
1 Safety1.3.6. What is safeguarding?1.3.6. What is safeguarding?DefinitionSafeguarding are safety measures consisting of the use of safeguards to protect persons fromhazards which cannot reasonably be removed or sufficiently eliminated by design.A safeguard prevents hazardous situations by stopping the robot in a controlled manner whena certain safeguarding mechanism such as a light curtain is activated.Safeguarded spaceThe safeguarded space is the space guarded by the guards. For example, a robot cell issafeguarded by the cell door and its interlocking device.Interlocking devicesEach present guard has an interlocking device which, when activated stops the robot. Therobot cell door has an interlock that stops the robot when the door is opened. The only wayto resume operation is to close the door.Safeguarding mechanismsA safeguarding mechanism consists of a number of guards connected in series. When a guardis activated, the chain is broken and the machine operation is stopped regardless of the stateof the guards in the rest of the chain.243HAC 16590-1 Revision: B
1 Safety1.3.7. Enabling device and hold-to-run buttons1.3.7. Enabling device and hold-to-run buttonsEnabling deviceHold-to-run buttonThe enabling device is a manually operated constant pressure push-button which, whencontinuously activated in one position only, allows potentially hazardous functions but doesnot initiate them. In any other position, hazardous functions are stopped safely.The enabling device is of a specific type where you must press the push-button only half-wayto activate it. In the fully in and fully out positions, robot operation is impossible.The hold-to-run button allows movement when actuated manually and immediately stops anymovement when released. The hold-to-run button can only be used in manual mode.How to operate the hold-to-run buttons is detailed in section How to use the hold-to-runfunction on page 196.3HAC 16590-1 Revision: B25
1 Safety1.4.1. Stop the system1.4 How to deal with an emergency1.4.1. Stop the systemOverviewStop the system immediately if:• there are any personnel in the robot working area, while the robot is working• the robot causes harm to personnel or mechanical equipmentThe <strong>FlexPendant</strong> emergency stop buttonxx0300000449AEmergency stop buttonThe controller emergency stop buttonxx0300000450AEmergency stop buttonOther emergency stop devicesThe plant designer may have placed additional emergency stop devices in convenient places.Please consult your plant or cell documentation to find out where these are placed.263HAC 16590-1 Revision: B
1 Safety1.4.2. Release the robot holding brakes1.4.2. Release the robot holding brakesOverviewThe robot’s brakes may be manually released as long as power is available. As long as thecontroller's power switch is in its on position, power is available and applied even if thesystem is in emergency state.Battery powerIn case of a plant or cell power outage the brake system may be powered by a battery. Howto connect the battery is different for each robot model. This is detailed in the Product <strong>Manual</strong>delivered with the robot.Brake release buttonsBrake release buttons are placed differently depending on robot type, this is detailed in theProduct <strong>Manual</strong>.Always learn where the buttons are placed on robot models you work with.PrecautionsBefore releasing the brakes verify:• which way will the arm go?• how will an entangled object be affected?A minor damage can easily become serious if the consequences are not considered.DANGER!Releasing the brakes is a hazardous action that may cause injury and damage property. It mustbe done with great care and only when absolutely necessary.Releasing brakesStepAction1. If necessary, use an overhead crane, fork lift or similar to secure the robots arms.2. Make sure the robot is powered.3. Once more, make sure that damage to entangled objects is not extended whenbrakes are released.4. Press the appropriate brake release button to release the brake.3HAC 16590-1 Revision: B27
1 Safety1.4.3. Extinguishing fires1.4.3. Extinguishing firesPrecautionsIn case of a fire always make sure both you and your coworkers are safe before performingany fire extinguishing activities. In case of injury always make sure these are treated first.Select fire extinguisherAlways use carbon dioxide extinguishers when extinguishing fires in electrical equipmentsuch as the robot or the controller. Do not use water or foam.283HAC 16590-1 Revision: B
1 Safety1.4.4. Recover from emergency stops1.4.4. Recover from emergency stopsOverviewRecovering from an emergency stop is a simple but important procedure. This procedureensures that the robot system is not returned to production while maintaining a hazardouscondition.Reset the latch of emergency stop buttonsAll push-button style emergency stop devices have a latching feature that must be released inorder to remove the emergency stop condition of the device.In many cases this is done by twisting the push-button as marked, but there are also deviceswhere you pull the button to release the latch.Reset automatic emergency stop devicesAll automatic emergency stop devices also have some kind of latching feature that must bereleased. Please consult your plant or cell documentation to see how your robot system isconfigured.Recover from emergency stopsStepAction1. Make sure the hazardous situation that resulted in the emergency stop condition nolonger exists.2. Locate and reset the device or devices that gave the emergency stop condition.3. Acknowledge the emergency stop event (20202) in the event log.4. Press the Motors On button to recover from the emergency stop condition.The Motors On buttonThe Motors On button is located on the controller:en0400000920AMotors on button3HAC 16590-1 Revision: B29
1 Safety1.4.5. Return to the programmed path1.4.5. Return to the programmed pathOverviewStopping the robot’s movement by removing power to its motors often results in the robotslipping from its programmed path. This may occur after an uncontrolled emergency or safetystop. The allowed slip distance is configured with system parameters. The distance can bedifferent depending on operating mode.If the robot is not within the configured allowed distance, you may chose to let the robotreturn to the programmed path or continue to the next programmed point in the path. Thenthe program execution continues automatically in programmed speed.303HAC 16590-1 Revision: B
1 Safety1.5.1. Overview1.5 Working in a safe manner1.5.1. OverviewAbout the robotAbout this sectionA robot is heavy and extremely powerful regardless of its speed. A pause or longer stop inmovement can be followed by a fast hazardous movement. Even if a pattern of movement ispredicted, a change in operation can be triggered by an external signal resulting in anunexpected movement without warning.Therefore, it is important that all safety regulations are followed when entering safeguardedspace.In this section some most basic rules of conduct for you as a robot system user are suggested.However, it is impossible to cover each and every specific situation.3HAC 16590-1 Revision: B31
1 Safety1.5.2. For your own safety1.5.2. For your own safetyGeneral principlesA few simple principles should be followed in order to operate the robot system safely:• Always operate the robot system in manual mode if personnel are inside safeguardedspace.• Always bring the <strong>FlexPendant</strong> along when you enter safeguarded space so that robotcontrol is in your hands.• Watch out for rotating or moving tools such as milling cutters and saws. Make surethose are stopped before you approach the robot.• Watch out for hot surfaces both on work pieces as well as on the robot system. Therobot’s motors can become fairly hot if run for a long time.• Watch out for grippers and objects gripped. If the gripper is opened the work piececould fall and cause injuries or damage equipment. The gripper can be very powerfuland can also cause injuries if not operated in a safe manner.• Watch out for hydraulic and pneumatic systems and live electric parts. Even withpower off residual energy in such circuits can be very dangerous.Disconnected <strong>FlexPendant</strong>Always put away a disconnected <strong>FlexPendant</strong> safe from any robot cell or controller to avoidthat a disconnected unit is used when trying to stop the robot in a hazardous situation.CAUTION!A disconnected <strong>FlexPendant</strong> should be stored in such a way that it cannot be mistaken forbeing connected to the controller.Custom <strong>FlexPendant</strong> connectionsAny means of connecting the <strong>FlexPendant</strong> except by the supplied cable and its standardconnector must not render the emergency stop button inoperative.Always test the emergency stop button to make sure it works if a custom connection cable isused.Controller’s access panelsAccess panels should only be opened by trained service personnel. There are no parts insideof use to others.DANGER!Danger of electrical shock or burn. High voltages inside controller cabinet. The robot andother equipment in the cell are also supplied with high voltages.323HAC 16590-1 Revision: B
1 Safety1.5.3. Handling of <strong>FlexPendant</strong>1.5.3. Handling of <strong>FlexPendant</strong>General instructionsThe <strong>FlexPendant</strong> is a high-quality handheld terminal equipped with highly sensitive state-ofthe-artelectronics. To avoid malfunctions or damage through improper handling, followthese instructions during operation.The <strong>FlexPendant</strong> may only be used for the purposes mentioned in this manual. The<strong>FlexPendant</strong> was developed, manufactured, tested and documented in accordance withapplicable safety standards. If you follow the instructions regarding safety and use asdescribed in this manual, the product will, in the normal case, neither cause personal injurynor damage to machinery and equipment.CAUTION!• Turn off the power supply before opening the cable entrance area of the <strong>FlexPendant</strong>.Otherwise the components could be destroyed or undefined signals could occur.• Make sure that nobody trips over the cable to prevent the device from falling to theground.• Take care not to squeeze and thus damage the cable with any object.• Do not lay the cable over sharp edges since this can damage the cable sheath.• When not using the device, hang it on the wall bracket provided for storage.• Never use sharp objects (e.g. screwdriver) for operating the touch screen. This coulddamage the touch screen.CAUTION!A disconnected <strong>FlexPendant</strong> should be stored in such a way that it cannot be mistaken forbeing connected to the controller.Waste disposalObserve the national regulations when disposing of electronic components! When replacingcomponents equipped with batteries, please dispose of used batteries properly!Foreseeable misuse of enabling deviceForeseeable misuse means that it is not allowed to fixate the enabling device in the enablingposition. The foreseeable misuse of the enabling device must be restricted.When releasing and then pressing the enabling device again, make sure to wait for the systemto go to Motors Off state before pressing again. Otherwise you will receive an error message.3HAC 16590-1 Revision: B33
1 Safety1.5.4. Safety tools1.5.4. Safety toolsSafeguarding mechanismsYour robot system can be equipped with a vast range of safeguards such as door interlocks,safety light curtains, safety mats, and others. The most common is the door interlock of therobot cell that temporarily stops the robot if you open it.The controller has three separate safeguarding mechanisms, the general mode safeguardedstop (GS), the automatic mode safeguarded stop (AS) and the superior safeguarded stop (SS).Safeguards connected to...the GS mechanismthe AS mechanismthe SS mechanismare...always active regardless of the operating mode.only active when the system is in automatic mode.always active regardless of the operating mode.Please consult your plant or cell documentation to see how your robot system is configuredand where the safeguarding mechanisms are placed and how they work.Safety supervisionThe emergency stop and safeguarding mechanisms are supervised so that any failure isdetected by the controller and the robot is stopped until the problem is solved.Built-in safety safety stop functionsThe controller continuously monitor hardware and software functionality. If any problems orerrors are detected the robot is stopped until the problem has been solved.If the failure is...simple and can easily be solvedminor and can be solvedmajor, for instance concerns brokenhardwarethen...a simple program stop is issued (SYSSTOP).a SYSHALT is issued which results in a safety stop.a SYSFAIL is issued which results in an emergencystop. The controller must be restarted in order toreturn to normal operation.Restricting the robot’s working rangeThe robot’s working range can be restricted by means of mechanical stops or softwarefunctions, or by a combination of both.Please consult your plant or cell documentation to see how your robot system is configured.343HAC 16590-1 Revision: B
1 Safety1.5.5. Safety in manual reduced speed and manual full speed mode1.5.5. Safety in manual reduced speed and manual full speed modeWhat is the manual mode?The manual mode is most often used when creating programs and when commissioning arobot system.There are two manual modes:• manual reduced speed mode, usually called manual mode• manual full speed mode (not available in all markets)In manual mode, you need to press the enabling device to activate the robot’s motors.What is the manual full speed mode?In manual full speed mode the robot system can run in full speed. This mode is used whentesting programs.Operating speedIn manual reduced speed mode the robot can only be operated (moved) in reduced speed, 250mm/s or slower. You should always operate in manual speed whenever working insidesafeguarded space.In manual full speed mode the robot moves in programmed speed. The manual full speedmode should only be used while all personnel are outside safeguarded space and only byspecifically trained personnel extra aware of the implied risks.Bypassed safeguard mechanismsAutomatic mode safeguarded stop (AS) mechanisms are all bypassed while operating inmanual mode.The enabling deviceIn manual mode the robot’s motors are activated by the enabling device on the <strong>FlexPendant</strong>.This way the robot can only move as long as the device is pressed.The enabling device is designed so that you must press its push-button just half-way toactivate the robot’s motors. Both in its all-out and full-in positions the robot will not move.The hold-to-run buttonThe hold-to-run button allows stepping or running a program in manual mode.Note that jogging does not require the hold-to-run button, regardless of operating mode.3HAC 16590-1 Revision: B35
1 Safety1.5.6. Safety in automatic mode1.5.6. Safety in automatic modeWhat is the automatic mode?In automatic mode the enabling device is disconnected so that the robot can move withouthuman intervention.Active safeguard mechanismsBoth the general mode safeguarded stop (GS) mechanisms, the automatic mode safeguardedstop (AS) mechanisms and the superior safeguarded stop (SS) are all active while operatingin automatic mode.Coping with process disturbancesProcess disturbances may not only affect a specific robot cell but an entire chain of systemseven if the problem originates in a specific cell.Extra care must be taken during such a disturbance since that chain of events may createhazardous operations not seen when operating the single robot cell. All remedial actions mustbe performed by personnel with good knowledge of the entire production line, not only themalfunctioning robot.Process disturbance examplesA robot picking components from a conveyer might be taken out of production due to amechanical malfunction, while the conveyer must remain running in order to continueproduction in the rest of the production line. This means, of course, that extra care must betaken by the personel preparing the robot in close proximity to the running conveyor.A welding robot needs maintenance. Taking the welding robot out of production also meansthat a work bench as well as a material handling robot must be taken out of production toavoid personnel hazards.363HAC 16590-1 Revision: B
2 Welcome to <strong>FlexPendant</strong>2.1. About the Welcome to <strong>FlexPendant</strong> chapter2 Welcome to <strong>FlexPendant</strong>2.1. About the Welcome to <strong>FlexPendant</strong> chapterOverviewThe Welcome to <strong>FlexPendant</strong> chapter contain an overview on the <strong>FlexPendant</strong>, the IRC5controller, and RobotStudio Online.A basic IRC5 robot system normally consists of a controller, the <strong>FlexPendant</strong>, RobotStudioOnline and one or more robots or other mechanical units. There can also be one or morehardware or software options or additions. This manual describes a basic IRC5 systemwithout options.3HAC 16590-1 Revision: B37
2 Welcome to <strong>FlexPendant</strong>2.2. What is a <strong>FlexPendant</strong>?2.2. What is a <strong>FlexPendant</strong>?Description of <strong>FlexPendant</strong>The <strong>FlexPendant</strong> (occasionally called TPU, or teach pendant unit) is a device for handlingmany of the functions involved with operating the robot system; running programs, joggingthe manipulator, producing and editing application programs, etc.The <strong>FlexPendant</strong> consists of both hardware, such as buttons and joystick, and software. The<strong>FlexPendant</strong> is connected to the controller module through an integrated cable and connector.NOTE that specific functions may not be performed using the <strong>FlexPendant</strong>, but only throughRobotStudio Online . How to perform these are specified in Operator’s manual - RobotStudioOnline.Main partsThese are the main parts on the <strong>FlexPendant</strong>.en0300000586ABCDEFConnectorTouch screenEmergency stop buttonEnabling deviceJoystickHold-to-run buttons (not included in all systems)38Continues on next page3HAC 16590-1 Revision: B
2 Welcome to <strong>FlexPendant</strong>2.2. What is a <strong>FlexPendant</strong>?ContinuedHardware buttonsThere are a number of dedicated hardware buttons on the <strong>FlexPendant</strong>. Four of them areprogrammable and four are pre-programmed.en0300000587ABCDEFGHProgrammable key 1. How to define its function is detailed in section Editingprogrammable keys on page 291 .Programmable key 2. How to define its function is detailed in section Editingprogrammable keys on page 291.Programmable key 3. How to define its function is detailed in section Editingprogrammable keys on page 291.Programmable key 4. How to define its function is detailed in section Editingprogrammable keys on page 291.START button. Starts program execution. In systems without hold-to-run buttons, theStart button is also used for the hold-to-run function.Step BACKWARD button. Steps the program one instruction backwards. In systemswithout hold-to-run buttons, the Backward button is also used for the hold-to-runfunction.Step FORWARD button. Steps the program one instruction forwards. In systemswithout hold-to-run buttons, the Forward button is also used for the hold-to-runfunction.STOP button. Stops the program execution.3HAC 16590-1 Revision: BContinues on next page39
2 Welcome to <strong>FlexPendant</strong>2.2. What is a <strong>FlexPendant</strong>?ContinuedTouch screen elementsThe illustration shows the touch screen elements of the <strong>FlexPendant</strong> touch screen.en0300000588ABCDEFABB menuOperator windowStatus barClose buttonTask barQuickset menuABB menuOperator windowStatus barClose button40The ABB menu contains programs, configurations, and applications. This is described insection The ABB menu on page 73.The Operator window displays messages from the program. This is described in sectionOperator window on page 94.The Status bar displays information about the system and messages. This is described insection Status bar on page 95.Tapping the close button closes the presently open view or application.Continues on next page3HAC 16590-1 Revision: B
2 Welcome to <strong>FlexPendant</strong>2.2. What is a <strong>FlexPendant</strong>?ContinuedTask barQuickset menuThe Task bar displays all open views and applications.The Quickset menu contains shortcuts to jogging and settings. This is described in sectionThe Quickset menu on page 96.Left and right handheldThe <strong>FlexPendant</strong> is set to left handheld on delivery. This can easily be changed to righthandheld and back again whenever required.en04000009133HAC 16590-1 Revision: B41
2 Welcome to <strong>FlexPendant</strong>2.3. What is an IRC5 controller?2.3. What is an IRC5 controller?The IRC5 controllerThe IRC5 controller contains all functions needed to move and control the robot.The base variant of the IRC5 controller, M2004, can consist of a single cabinet or be dividedinto two separate modules; the control module and the drive module. In a single cabinet, thecontrol and drive module are integreted into one single module.The control module contains all the control electronics such as main computer, I/O boards,and flash memory. The control module runs all software necessary for operating the robot(that is the RobotWare system).The drive module contains all the power electronics supplying the robot motors. An IRC5drive module may contain nine drive units and handle six internal axes plus two or additionalaxes depending on the robot model.When running more than one robot with one controller (MultiMove option), an extra drivemodule must be added for each additional robot. However, a single control module is used.Read more about MultiMove in Application manual - MultiMove.xx0400000730ABControl moduleDrive module423HAC 16590-1 Revision: B
2 Welcome to <strong>FlexPendant</strong>2.4. What is RobotStudio Online?2.4. What is RobotStudio Online?PreparationsReferencesRobotStudio Online runs on a PC that must be connected either to a controller network or tothe controller’s service port.If you are about to install over the controller network you need to know the name or IP addressof the controller. You also need to know where the system to be installed is stored, on the PC’shard disk, on a supplied CD or elsewhere.All procedures are detailed in the RobotStudio Online operator's manual.How to choose what activities to perform using either RobotStudio Online or the <strong>FlexPendant</strong>is specified in section When to use the <strong>FlexPendant</strong> and RobotStudio Online on page 44.3HAC 16590-1 Revision: B43
2 Welcome to <strong>FlexPendant</strong>2.5. When to use the <strong>FlexPendant</strong> and RobotStudio Online2.5. When to use the <strong>FlexPendant</strong> and RobotStudio OnlineOverviewFor operating and managing the robot, you either use the <strong>FlexPendant</strong> or RobotStudio Online .The <strong>FlexPendant</strong> is optimized for handling robot motions and ordinary operation, andRobotStudio Online is optimized for configuration, programming and other tasks not related tothe daily operation.Start, restart and shut down the controllerTo...Use...Start the controller. The power switch on the controller’s front panel .Restart the controller. The <strong>FlexPendant</strong>, RobotStudio Online or the power switchon the controller’s front panel .Shut down the controller. The power switch on the controller’s front panel.Run and control robot programsTo...Jog a robot.Start or stop a robot program.Use...The <strong>FlexPendant</strong>The <strong>FlexPendant</strong>Communicate with the controllerTo...Acknowledge events.View and save the controller’s event logs.Back up the controller’s software to files on the PC or a server.Back up the controller’s software to files on the controllerTransfer files between the controller and network drives.Use...The <strong>FlexPendant</strong>.RobotStudio Online orthe <strong>FlexPendant</strong>.RobotStudio Online orthe <strong>FlexPendant</strong>.The <strong>FlexPendant</strong>.RobotStudio Online orthe <strong>FlexPendant</strong>.44Continues on next page3HAC 16590-1 Revision: B
2 Welcome to <strong>FlexPendant</strong>2.5. When to use the <strong>FlexPendant</strong> and RobotStudio OnlineContinuedProgram a robotTo...Create or edit robot programsin a flexible way. This issuitable for complex programswith a lot of logic, I/O signalsor action instructions.Create or edit a robot programin a supportive way. This issuitable for programs thatmostly consist of moveinstructions.Add or edit robot positions.Modify robot positions.Use...RobotStudio Online to create the program’s structure andmost of the source code and the <strong>FlexPendant</strong> to store robotpositions and make final adjustments to the program.When programming, RobotStudio Online provides the followingadvantages:• A text editor optimized for RAPID code, with auto-textand tool-tip information about instructions andparameters.• Program check with program error marking.• Close access to configuration and I/O editing.The <strong>FlexPendant</strong>.When programming, the <strong>FlexPendant</strong> provides the followingadvantages:• Instruction pick lists• Program check and debug while writing• Possibility to create robot positions whileprogrammingThe <strong>FlexPendant</strong>.The <strong>FlexPendant</strong>.Configure the robot’s system parametersTo...Edit the system parameters of the runningsystem.Save the robot's system parameters asconfiguration files.Load system parameters from configurationfiles to the running system.Load calibration data.Use...RobotStudio Online or the <strong>FlexPendant</strong>RobotStudio Online or the <strong>FlexPendant</strong>RobotStudio Online or the <strong>FlexPendant</strong>RobotStudio Online or the <strong>FlexPendant</strong>Create, modify and install systemsTo...Create or modify a system.Install a system on a controller.Install a system on a controller froma USB memory.Use...RobotStudio Online together with RobotWare and avalid RobotWare Key.RobotStudio OnlineThe <strong>FlexPendant</strong>.3HAC 16590-1 Revision: BContinues on next page45
2 Welcome to <strong>FlexPendant</strong>2.5. When to use the <strong>FlexPendant</strong> and RobotStudio OnlineContinuedCalibrationTo...Calibrate base frame etc.Calibrate tools, work objects etc.Use...The <strong>FlexPendant</strong>The <strong>FlexPendant</strong>Related informationThe table below specifies which manuals to read, when performing the various tasks referredto:Recommended use... for details, see manual... Document number<strong>FlexPendant</strong>Operator’s manual - IRC5 with<strong>FlexPendant</strong>RobotStudio Online Operator’s manual -RobotStudio Online3HAC 16590-13HAC 18236-1463HAC 16590-1 Revision: B
2 Welcome to <strong>FlexPendant</strong>2.6. Buttons on the controller2.6. Buttons on the controllerButtons on the control moduleen0400000784Functions for buttons on the control moduleThis section describes the control module button functions or where to find such information.Part Description FunctionA Main Power ON/OFF ON/OFF Switch for system shut down.Described in section:• Start up in automatic mode on page 229• Start up in manual mode on page 231BEmergency stop buttonC Motors On The different statuses of the motors on lamp isdescribed in the Trouble shooting manual - IRC5.D Mode switch Described in section:• Present operating mode on page 225• About the manual mode on page 228• About the automatic mode on page 2273HAC 16590-1 Revision: BContinues on next page47
2 Welcome to <strong>FlexPendant</strong>2.6. Buttons on the controllerContinuedPorts on the control moduleOn the front of the control module are also a service port, and optionally a USB port. Bothare located below the buttons and may be hidden by a small protective hatch.The service port is described in section Connecting a PC to the service port on page 52.The USB port can be used wih a USB memory device to load or save programs, data, or otherinformation to and from the controller. See section USB memory information on page 252.xx0400001299AService port on control module frontButtons on the drive moduleen0400000797Functions for buttons on the drive moduleThis section describes the buttons and their functions on the drive module.DescriptionSwitch ON/OFFFunctionON/OFF switch for the drive module alone.483HAC 16590-1 Revision: B
3 Get started3.1. About the Get started chapter3 Get started3.1. About the Get started chapterOverviewThe Get started chapter describes how to connect the <strong>FlexPendant</strong> to the FlexController, andthe network connections. It also describes a number of action scenarios, an overview of ofterperformed work tasks with the <strong>FlexPendant</strong>.3HAC 16590-1 Revision: B49
3 Get started3.2.1. Connecting a <strong>FlexPendant</strong>3.2 Connections3.2.1. Connecting a <strong>FlexPendant</strong>Location of <strong>FlexPendant</strong> connectorThe <strong>FlexPendant</strong> connector is located as shown below.xx0400000729A<strong>FlexPendant</strong> socket connectorConnecting a <strong>FlexPendant</strong>Step Action Illustration1. Locate the <strong>FlexPendant</strong> socketconnector on the controller.2. Plug in the <strong>FlexPendant</strong> cableconnector.3. Screw the connector lock ring firmlyby turning it clockwise.xx0400000931• O: <strong>FlexPendant</strong> connector(A22.X1)503HAC 16590-1 Revision: B
3 Get started3.2.2. Disconnecting a <strong>FlexPendant</strong>3.2.2. Disconnecting a <strong>FlexPendant</strong>Disconnecting a <strong>FlexPendant</strong>This procedure details how to disconnect a <strong>FlexPendant</strong>StepAction1. Finish any ongoing activities that require the <strong>FlexPendant</strong> to be connected. (Forinstance path adjustments, calibration, program changes.)2. Shut down the system. If the system is not shut down when disconnecting the<strong>FlexPendant</strong> it will go to the emergency stop state.3. Unscrew the connector cable counter clockwise.4. Store the <strong>FlexPendant</strong> safely away from any robot system.3HAC 16590-1 Revision: B51
3 Get started3.2.3. Connecting a PC to the service port3.2.3. Connecting a PC to the service portNOTE!The service port shall only be used for direct connection to a PC as described in thisprocedure. It must not be connected to a LAN (local area network), since it has a DHCP serverthat automatically distributes IP addresses to all units connected to the LAN. Contact yournetwork administrator if you need more information.CAUTION!When a cable is connected to the service port on the Control Module front and the servicehatch is opened, the controller will not comply with the requirements of protection class IP54.PortsThe illustration below shows the two main ports on the computer unit: the Service Port andthe LAN port. Make sure the LAN (factory network) is not connected to any of the serviceports!xx0400001299ABCService port on the Control Module frontService port on computer unit (connected to Service port on the Control Modulefront through a cable)LAN port on computer unit (connects to factory LAN)Connections to ports may be done as detailed below:Connection to/from:Connecting the Control Module to thefactory LANConnecting a PC to the Control Moduleservice port.Detailed in section:Proceed as detailed in section Installation inthe Product <strong>Manual</strong>, IRC5.Proceed as detailed below!52Continues on next page3HAC 16590-1 Revision: B
3 Get started3.2.3. Connecting a PC to the service portContinuedConnecting a pc to the service portStep Action Illustration1. Make sure the network setting on thePC to be connected is correct.2. Use the delivered category 5 Ethernetcrossover boot cable with RJ45connectors.3. Connect the network cable to thenetwork port of your PCRefer to the system documentation foryour PC, depending on the operativesystem you are running.The PC must be set to “Obtain an IPaddress automatically”.The cable is delivered in the RobotWareproduct box.xx0400000844• A: network portThe placement of the network port mayvary depending on the pc model.4. Connect the boot cable to the serviceport, placed on the control module front.3HAC 16590-1 Revision: B53
3 Get started3.2.4. Set up the network connection3.2.4. Set up the network connectionWhen do I need to setup the network connection?You need to setup the controller’s network connection when the controller is connected to anetwork for the first time or when the network addressing scheme changes.PreparationsIf an IP address is to be obtained automatically, make sure there is a server running thatsupplies the network with IP addresses (a DHCP server). Otherwise you will not be able toaccess the controller via the controller network.It is still possible to access the controller via the service PC connection.Network connection dialog boxThe illustration shows the network connection dialog box.en0400000902Set up the network connectionRegardless of how you choose to set up the network connections, the first steps are common:Step Action Info541. You may reach the boot application byperforming an X-start.2. In the boot application, tap Settings.The network connection dialog isdisplayed.3. If you choose to use no IP address, thetap Use no IP address . Otherwise,proceed below!4. If you choose to obtain an IP addressautomatically, the tap Obtain an IPaddress automatically. Otherwise,proceed below!How to perform an X-start is detailed insection Restart and select anothersystem (X-start) on page 258.In some cases it can be useful todisconnect the controller from thenetwork, without disconnecting thenetwork cable. Without IP address thecontroller cannot be accessed fromother equipment on the same network.Continues on next page3HAC 16590-1 Revision: B
3 Get started3.2.4. Set up the network connectionContinuedStep Action Info5. If you choose to use a fixed IP address,tap Use the following IP address.Enter a valid IP address, a valid subnetmask, and the IP address of the defaultgateway to use.6. Tap OK to save the new setting.7. In the boot application, tap RestartController to restart the controller anduse the new setting.3HAC 16590-1 Revision: B55
3 Get started3.3.1. About the Action Scenarios chapter3.3 Action scenarios3.3.1. About the Action Scenarios chapterOverviewMore informationThis chapter contains brief procedures detailing a number of typical actions a typical usermay perform. It also contains many references to detailed information about the samesubjects.The brief information given, is intended to be used directly by experienced users, while thereferences may be more adequate for novices and for training purposes.Note that there may be more information available than the one referred to in the procedures.Information about:• a specific menu is described in chapter Navigating and handling <strong>FlexPendant</strong> on page71.• a specific button on the <strong>FlexPendant</strong> is described in What is a <strong>FlexPendant</strong>? on page38.• a specific button is described in chapter What is an IRC5 controller? on page 42 fortasks performed using the controls on the controller modules.• how to perform a specific task is detailed in the tasks chapters, e.g. Programming andtesting on page 133 or Running in production on page 219.563HAC 16590-1 Revision: B
3 Get started3.3.2. System start up3.3.2. System start upPrerequisites before start upThis procedure details the main steps required to start the system when the power has beenswitched off.All information is based on the assumption that working system software has already beeninstalled on the robot controller, as the case would be at first start-up directly after delivery.No information is given in this manual about how to connect the controller to a LAN (LocalArea Network), but this is detailed in the Installation section of the Product <strong>Manual</strong> - IRC5.Note that there may be more information available than the one referred to in the procedure.System start upThis procedure details all required steps to start the system for the first time. For everydaystartup, step 4 is normally the only required step.Step Action Info1. Install the robot equipment. Mechanical installation and electricalconnections between manipulator andcontroller cabinet is described in theProduct <strong>Manual</strong> of the robot andcontroller respectively.2. Make sure the safety circuits of thesystem are properly connected to therobot cell or have jumper connectionsinstalled (if required).3. Connect the <strong>FlexPendant</strong> to thecontroller cabinet.How to connect the safety circuits isdetailed in the robot’s Product <strong>Manual</strong>.The <strong>FlexPendant</strong> and its major partsand functions are detailed in sectionWhat is a <strong>FlexPendant</strong>? on page 38How to connect the <strong>FlexPendant</strong> to thecabinet is detailed in sectionConnecting a <strong>FlexPendant</strong> on page 504. Switch the power on. Use the main switch on the controlmodule.5. If the controller or manipulator havebeen replaced with spare parts, makesure the calibration values, revolutioncounters and serial numbers areupdated correctly.6. This step is only required if the robotsystem will be connected to a network.Perform an X-start.The Boot Application is started.Normally, only the revolution countersrequire updating, which is to beperformed as detailed in sectionUpdating revolution counters on page274.If required, transfer the calibration datafrom the serial measurement board asdetailed in Serial Measurement Boardmemory on page 280 for systemswithout the AbsAcc option.If required, enter the calibration data asdetailed in Loading calibration datausing the <strong>FlexPendant</strong> on page 276 forsystems with the AbsAcc option.Detailed in section Restart and selectanother system (X-start) on page 258.3HAC 16590-1 Revision: BContinues on next page57
3 Get started3.3.2. System start upContinuedStep Action Info7. This step is only required if the robotsystem will be connected to a network.Use the boot application to:• set the IP address of thecontroller cabinet• set the network connections• select the system• restart the systemThe system is restarted.How to use the boot application isdetailed in section Using the bootapplication on page 254.At this point, a single system isavailable.8. Install RobotStudio Online on a PC. Proceed as detailed in section InstallingRobotStudio Online in the Operator’smanual - RobotStudio Online.RobotStudio Online is used to create asystem to run on the controller, but atthis point (prior to the first start-up) asystem is already installed by themanufacturer.9. Connect the controller to a PC (throughthe service port) or to the network (ifused).Connect a PC to the ControlModuleservice port.Proceed as detailed in sectionConnecting a PC to the service port onpage 52.Also see section Set up the networkconnection on page 54.10. Start RobotStudio Online on the PC. Proceed as detailed in sectionAccessing a controller fromRobotStudio Online in the Operator’smanual - RobotStudio Online.11. Restart the controller.12. The robot system is now ready foroperation.583HAC 16590-1 Revision: B
3 Get started3.3.3. Jogging3.3.3. JoggingJoggingThis procedure details the main steps required to jog the robot.The term Jogging is described in section Introduction to jogging on page 105.Note that there may be more information available than the one referred to in the procedure.Step Action Info1. It is possible to jog the robot under thefollowing conditions:• The system has been started asdetailed in this manual.• no programmed operation isrunning• the system is in <strong>Manual</strong> mode.• the enabling device is pressedand the system is in Motors Onstate2. Many of the mechanical unitsconnected to the controller may bejogged.3. The robot may be jogged in severalways, in different coordinate systems.First, determine in which way you wantto jog.4. Once a mechanical unit has beenselected, its axes may be jogged indifferent ways.These ways may be selected using theQuickSet menu.5. Define the working range for the robot/robots as well as for any other pieces ofequipment working in the robot cell.The <strong>Manual</strong> mode is described insection About the manual mode onpage 228.Starting in the <strong>Manual</strong> mode is detailedin section Start up in manual mode onpage 231.How to switch to manual mode isdetailed in section Switching fromautomatic to manual mode on page235.How to determine which mechanicalunit to jog is detailed in sectionSelecting mechanical unit on page 108.The difference between different typesof jogging is detailed in sectionIntroduction to jogging on page 105.How to jog the robot axis by axis isdetailed in section Jog axis by axis onpage 114.The robot may be jogged in:• Jog in base coordinates on page116• Jog in tool coordinates on page120• Jog in world coordinates on page117• Jog in work object coordinateson page 119The robot’s working range is defined bysystem parameters. See sectionConfiguring system parameters onpage 270 or Technical referencemanual - System parameters.3HAC 16590-1 Revision: BContinues on next page59
3 Get started3.3.3. JoggingContinuedStep Action Info6. Jog the manipulator using the joystickon the <strong>FlexPendant</strong>.7. In some cases, more than onemanipulator may be joggedsimultaneously. This requires theMultiMove option to be installed.The <strong>FlexPendant</strong> and its various partsand sections are described in sectionWhat is a <strong>FlexPendant</strong>? on page 38.The joystick and how to map thedirections of it, is detailed in sectionSelecting motion mode on page 110.How to prevent causing manipulatormovements in certain directions whilejogging, is detailed in section Lockingthe joystick in specific directions onpage 122.There might be restrictions to how youcan jog, see section Restrictions tojogging on page 106.How to jog multiple manipulators isdetailed in section Coordinated joggingon page 107.603HAC 16590-1 Revision: B
3 Get started3.3.4. Using RAPID programs3.3.4. Using RAPID programsUsing the RAPID programThis procedure describes the main steps required in creating, saving, editing and debuggingany RAPID program.Note that there is more information available, than the one referred to in the procedure. Theconcept RAPID program is described in section The structure of a RAPID application onpage 134.Step Action Info1. Start by creating a RAPID program. How to create a RAPID program isdetailed in section Handling ofprograms on page 165.2. Edit your program. Proceed as detailed in section Handlingof instructions on page 176.3. To simplify programming and keep anoverview of the program, you may wantto divide the program into more thanone module.4. To further simplify programming, youmay want to divide the module into morethan one routine.5. When programming you may want towork with:• Tools• Work objects• Payloads6. Based on the four elements specifiedabove, program execution mayautomatically be displaced to better suite.g. the tools as they wear down, etc.7. In order to deal with potential errors thatmay occur during program execution,you may want to create an error handler.8. After completing the actual RAPIDprogram, it will require testing beforebeing put into production.The module concept is described insection The structure of a RAPIDapplication on page 134.How to view, add, or delete a module isdetailed in section Handling of moduleson page 168.The routine concept is described insection The structure of a RAPIDapplication on page 134.How to add or delete a routine isdetailed in section Handling of routineson page 172.Also read the following sections:• Creating a tool on page 142.• Creating a work object on page154.• Creating a payload on page 161.Error handlers are described in RAPIDoverview.Proceed as detailed in section Testingon page 196.3HAC 16590-1 Revision: BContinues on next page61
3 Get started3.3.4. Using RAPID programsContinuedStep Action Info9. After test running your RAPID program,it may require altering. You may want tomodify, or tune, programmed positions,the TCP positions, or paths.10. Programs that are no longer requiredmay be removed.How to modify positions while theprogram is running is described insection HotEdit on page 73.How to modify positions in manualmode is described in section Modifyingpositions on page 184.See Deleting programs from memory onpage 192.Also see Deleting programs from harddisk on page 194.Running the programThis procedure specifies how to use an existing RAPID program.Step Action Info1. Load an existing program. Described in section Starting programson page 219.2. When starting program execution, youmay choose between running theprogram once, or running itcontinuously.3. Once the program has been loaded,you may start program execution.4. After program execution is completed,the program may be stopped.Described in section Quickset menu,Run Mode on page 201.Described in section Starting programson page 219 and in Using multitaskingprograms on page 222.Proceed as detailed in section Stoppingprograms on page 221.623HAC 16590-1 Revision: B
3 Get started3.3.5. Working with inputs and outputs3.3.5. Working with inputs and outputsWorking with inputs and outputsThis procedure details the main steps required to set outputs, read inputs and configure I/Ounits.Note that there may be more information available than the one referred to in the procedure.Step Action Info1. You may want to create a new I/O. I/O signals are created using systemparameters, see section Configuringsystem parameters on page 270.2. Before using any input or output, thesystem must be configured to enablethe I/O functions.3. You may set a value to a specific digitaloutput.4. You may set a value to a specific analogoutput.5. You may view the status of a specificdigital input.6. You may view the status of a specificanalog input.Configuring the system is done whencreating the system. How to do this isdetailed in Operator’s manual -RobotStudio Online.Proceed as detailed in sectionSimulating and changing signal valueson page 238.Proceed as detailed in sectionSimulating and changing signal valueson page 238.Proceed as detailed in sectionSimulating and changing signal valueson page 238.Proceed as detailed in sectionSimulating and changing signal valueson page 238.7. Safety signals. Signal explanation is detailed in SafetyI/O signals on page 2408. How to edit an I/O. Proceed as detailed insectionSimulating and changing signalvalues on page 238.3HAC 16590-1 Revision: B63
3 Get started3.3.6. Backup and restore3.3.6. Backup and restoreBackup and restoreThe contents of a typical backup is specified in section What is saved on backup? on page265. How to perform the backup is detailed in section Backup the system on page 267.Re-introducing the previously saved memory contents from the backup into the robotcontroller is called performing a restore. How to perform the restore is detailed in sectionRestore the system on page 268.Information about starts is described in Restart overview on page 253.Note that there may be more information available than the one referred to above.643HAC 16590-1 Revision: B
3 Get started3.3.7. Running in production3.3.7. Running in productionRunning in productionThis instruction details the main steps useful when running the system in automatic mode(production mode).Note that there may be more information available than the one referred to in the procedure.Step Action Info1. Start the system as detailed in sectionSystem start up on page 57.2. If the system is using UAS, UserAuthorization System, the user must loginto the system before startingoperation.How to log in is described in sectionHow to logout and login on page 103.3. Load a program. How to load a program is described inHandling of programs on page 165.4. Before starting system choose mode tostart in on the FlexController.5. Start by pressing the Start button on the<strong>FlexPendant</strong>.6. The controller system communicateswith the operator through messagesdisplayed on the <strong>FlexPendant</strong> screen.Messages can be either eventmessages or RAPID instructions, e.g.TPWrite.Event messages describe an eventoccurring within the system, and issaved in an event log.7. In manual mode, the Modify Positionfunction allows the operator to makeadjustments to the robot positions in aRAPID program.The HotEdit function allows the operatorto make adjustments to programmedpositions in both automatic and manualmode.8. In a production process you may want tostop the robot.9. In the Production Window you cansupervise the ongoing process.10. When ending operation, the user shouldlog out.How to choose mode is described insection Switching from manual toautomatic mode on page 234.The <strong>FlexPendant</strong>’s hardware buttonsare described in What is a<strong>FlexPendant</strong>? on page 38.The basic concepts are described insection Accessing the event log onpage 243.RAPID instructions TPReadFK andTPWrite are described in RAPIDreference manual - Instructions.How to modify position is described insections Modifying positions on page184 and in HotEdit on page 73How to stop production is described insection Stopping programs on page 221The Production window is described insection Production window on page 79How to log in is described in sectionHow to logout and login on page 1033HAC 16590-1 Revision: B65
3 Get started3.3.8. Granting access for RobotStudio Online3.3.8. Granting access for RobotStudio OnlineAbout write access on the controllerThe controller only accepts one user with write access at a time. Users in RobotStudio Onlinecan request write access to the system and this request is accepted or rejected on the<strong>FlexPendant</strong>. This can only be done in manual mode.Granting access for RobotStudio OnlineThis procedure describes how to grant access for RobotStudio Online.StepAction1. When a user in RobotStudio Online requests access, a message is displayed onthe <strong>FlexPendant</strong>. Decide whether to grant or reject access.If you want to grant access, then tap Grant. The user holds write access until hedisconnects or until you reject the access.If you want to deny access, then tap Reject.2. If you have granted access and want to revoke the access, tap Reject.663HAC 16590-1 Revision: B
3 Get started3.3.9. Upgrading3.3.9. UpgradingUpgradingThis procedure details the main steps required to correctly upgrade the system. By upgradingwe mean changing hardware, such as replacing circuit board with newer versions, as well asloading software with later releases.Note that there may be more information available than the one referred to in the procedure.Type of upgradeWhen replacing circuit boards such as buses,I/O boards, etc., with newer versions, thesystem will automatically reflash the unit.InfoWhat happens during reflashing is detailed insection Reflashing firmware and<strong>FlexPendant</strong> on page 263.xx0100000003During reflashing, the system may restartseveral times, and it is vital not to shut downthe system, or in any other way interrupt theautomatic process.When upgrading the robot or controllermechanically, fitting instructions are normallydelivered with the kit.If no such instruction are provided, usefulinformation may be found in the Repairsection of the Product <strong>Manual</strong> of theequipment in question.When upgrading the system software, thesystem must be changed in order to reflectthe additions.A new license key may be required.How to modify an existing system is detailedin section How to Modify a System in theOperator’s manual - RobotStudio Online.How to create a new system is detailed insection Creating a new system in theOperator’s manual - RobotStudio Online.3HAC 16590-1 Revision: B67
3 Get started3.3.10. Installing software options3.3.10. Installing software optionsInstalling software optionsThe main steps required to correctly install a generic software option or option package isdescribed in Operator’s manual - RobotStudio Online.683HAC 16590-1 Revision: B
3 Get started3.3.11. Shutting down3.3.11. Shutting downShutting downThis procedure describes how to shut down the system and turn off power.Step Action Info1. Stop all running programs.2. Shut down the system using the On/Offswitch on the FlexController.3. If you want to protect the <strong>FlexPendant</strong>you can unplug it and store it elsewherewhen the system has shut down.How to disconnect the <strong>FlexPendant</strong>from the controller is detailed in sectionDisconnecting a <strong>FlexPendant</strong> on page51.3HAC 16590-1 Revision: B69
3 Get started3.3.12. General procedure when trouble shooting3.3.12. General procedure when trouble shootingTypes of faultsFaults occurring in the robot system may be of two categories:• Faults detected by the built-in diagnostics system. These faults are described in sectionEvent log messages in Trouble shooting manual - IRC5.• Faults NOT detected by the built-in diagnostics system. These faults are described insection Other types of faults in Trouble shooting manual - IRC5.Faults causing error message on the <strong>FlexPendant</strong>The control system is supplied with diagnostic software to facilitate trouble shooting and toreduce downtime. Any errors detected by the diagnostics are displayed in plain language witha code number on the <strong>FlexPendant</strong>.All system and error messages are logged in a common log in which the last 150 messagesare saved. The log can be accessed from the Status bar on the <strong>FlexPendant</strong>.To facilitate trouble shooting, it is important that some basic principles are followed. Theseare specified in Trouble shooting principles in Trouble shooting manual - IRC5.Step Action Info1. Read the error message displayed onthe <strong>FlexPendant</strong> and follow anyinstructions given.How to interpret the messages isdetailed in section Overview, event logmessages in Trouble shooting manual -IRC5.2. Was the information given on the<strong>FlexPendant</strong> enough to solve theproblem?If yes; resume operation.If no; proceed below.3. If relevant, check the LEDs on the units. Each unit is thoroughly described insection Unit LEDs in Trouble shootingmanual - IRC5, including a descriptionof its LEDs.4. If relevant, check the cables, etc., withhelp of the circuit diagram.5. Replace, adjust or fix as detailed in theRepairs instruction if required.All relevant document numbers arespecified in section Documentreferences, IRC5 in Trouble shootingmanual - IRC5.All relevant document numbers arespecified in section Documentreferences, IRC5 in the Troubleshooting manual - IRC5.Faults NOT causing error messages on the <strong>FlexPendant</strong>These faults are not detected by the diagnostic system and are handled in other ways. The waythe symptom of the fault is observed greatly influences the type of fault. Instructions are givenin section Other types of faults in Trouble shooting manual - IRC5.To trouble shoot faults NOT causing error messages on the <strong>FlexPendant</strong>, follow steps 3 and4 in the procedure in Faults causing error message on the <strong>FlexPendant</strong> on page 70.703HAC 16590-1 Revision: B
4 Navigating and handling <strong>FlexPendant</strong>4.1. About the Navigate and handle <strong>FlexPendant</strong> chapter4 Navigating and handling <strong>FlexPendant</strong>4.1. About the Navigate and handle <strong>FlexPendant</strong> chapterOverviewThis chapter describes the touch screen elements on the <strong>FlexPendant</strong>, i.e. the menues.Each menu is described in overview, with references to more information on how to use thefunctions. Note that this manual only covers menues in the basic RobotWare system, withoutoptions. All options are described in the application manuals.3HAC 16590-1 Revision: B71
4 Navigating and handling <strong>FlexPendant</strong>4.2. Overview, personalizing the <strong>FlexPendant</strong>4.2. Overview, personalizing the <strong>FlexPendant</strong>PersonalizingThe <strong>FlexPendant</strong> can be personalized in a number of ways. How to do this is described in thefollowing sections:How to:change the language used in windows anddialogschange the display’s brightness and contrastrotate the <strong>FlexPendant</strong> for Left/Righthandheld useconfigure views for program start and userauthorization systemis described in section:Changing language on page 290.Changing brightness and contrast on page285.Switching between left and right handheld<strong>FlexPendant</strong> on page 286.Configuring view settings on page 295.recalibrate the touch screen Calibrating the touch screen on page 298.configure programmable keys Editing programmable keys on page 291.configure most common I/O list Configuring Most Common I/O on page 289.change background image Changing background image on page 297.change the date and time Changing date and time on page 288.723HAC 16590-1 Revision: B
4 Navigating and handling <strong>FlexPendant</strong>4.3.1. HotEdit4.3 The ABB menu4.3.1. HotEditHotEditHotEdit is a function for editing programmed positions. This can be done in all operatingmodes, even while the program is running.When modifying a position, both the coordinates and the orientation can be changed. Notethat the changed offset values are not stored in the original baseline of the program until aCommit command has been applied. The changed values are however used directly in theloaded program.HotEdit can only be used for positions of the type robtarget.If a position is changed during operation, the current path may be affected. It is notrecommended to modify positions close to the program pointer or the motion pointer since itis hard to predict when changes will take effect if they occur between the two pointers.Therefore it is important to be certain of where in the program the robot is before changingany values while the program is running.The functions available in HotEdit may be restricted by the user authorization system, UAS.Illustration of HotEdit menuen05000015423HAC 16590-1 Revision: BContinues on next page73
4 Navigating and handling <strong>FlexPendant</strong>4.3.1. HotEditContinuedFunctions available in HotEditTarget selectionSelected targetsFileBaselineTune targetsAPPLYLists all named positions in a tree view. Select positions and addthem to the section by tapping the arrow. Note that if a position isused in more than one routine, it will appear in all places used andany changes made to the offset will be the same for everywhere itis used.Lists all selected positions and their current offset. Tap the trash canto the right of the position name to remove them from the selection.You can save and load selections of often used positions using theFile menu. If your system uses UAS, this may be the only way toselect positions for editing.The baseline menu is used to apply or reject changes to the original(baseline) system, for both HotEdit and position modifications in theProgram editor.For position modifications in the Program editor, the baseline menuis can only be used for systems with absolute limit modpos, wherethe allowed change distance is limited. See system parameters forthe type ModPos Settings in Technical reference manual - Systemparameters.The original values are not changed until a Commit command hasbeen applied.To apply or reject the changes made to offset values, tap:• Restore to original to discard all changes to the currentlyselected target positions• Restore entire program to original to discard all changesto target positions (also applies to changes made in theprogram editor)• Commit to current to apply all current changes to theselected target positions• Commit entire program to current to apply all changes totarget positions (also applies to changes made in theprogram editor)Tap Tune targets to display a keyboard for editing the offset values(coordinates and orientation).The offset value is the length of the vector calculated from theoriginal value and the changed value (x, y, and z, and orientation) inthe Tune targets menu.Tap APPLY to apply changes made in the Tune targets menu.Note that this does not change the original values for the positions!Related informationPositions can also be modified by jogging the robot to the new position, see section Modifyingpositions on page 184.RAPID reference manual - Functions and datatypes.Technical reference manual - System parameters, chapter Controller.What is “the memory”? on page 248.743HAC 16590-1 Revision: B
4 Navigating and handling <strong>FlexPendant</strong>4.3.2. <strong>FlexPendant</strong> Explorer4.3.2. <strong>FlexPendant</strong> ExplorerAbout <strong>FlexPendant</strong> ExplorerThe <strong>FlexPendant</strong> Explorer is a file manager, similar to Windows Explorer, with which youcan view the file system on the controller. You can also rename, delete, or move files orfolders.Illustration <strong>FlexPendant</strong> ExplorerThe illustration details the <strong>FlexPendant</strong> Explorer.en0400001130Parts <strong>FlexPendant</strong> ExplorerThe table below describes the parts in the illustration above.Part Description FunctionA Simple view Tap to hide type in the file windowB Detailed view Tap to show type in the file windowC Path Displays the directory pathD Menu Tap to display menu with functions for file handlingE New folder Tap to create new folder in present folder.F Up one level Tap to change to parent folder3HAC 16590-1 Revision: B75
4 Navigating and handling <strong>FlexPendant</strong>4.3.3. Inputs and outputs, I/O4.3.3. Inputs and outputs, I/OInputs and outputsInputs and outputs, I/O, are signals used in the robot system. Signals are configured withsystem parameters, see section Configuring system parameters on page 270.The Inputs and outputs menuThis illustration details the Inputs and outputs menu.en04000000770What is a signalAn I/O signal is the logical software representation of an I/O signal located on a fieldbus unitthat is connected to a fieldbus within the controller.By specifying a signal, a logical representation of the real I/O signal is created. The signalconfiguration defines the specific system parameters for the signal that will control thebehavior of the signal.763HAC 16590-1 Revision: B
4 Navigating and handling <strong>FlexPendant</strong>4.3.4. Jogging4.3.4. JoggingOverviewJogging menuThe Jogging functions are found in the Jogging window. The most commonly used are alsoavailable under the Quickset menu.The illustration shows the functions available under the Jogging menu:en0400000654Property/buttonMechanical unitAbsolute accuracyMotion modeCoordinate systemToolWork objectPayloadFunctionSelect active mechanical unit, described in section Selectingmechanical unit on page 108.Absolute Accuracy: Off is default. If the robot has the Absoluteaccuracy option, then Absolute Accuracy: On is displayed.Select motion mode, described in section Selecting motion modeon page 110.Select coordinate system, e.g. described in section Jog in basecoordinates on page 116.Select tool, described in section Selecting tool, work object, andpayload on page 112.Select work object, described in section Selecting tool, work object,and payload on page 112.Select payload, described in section Selecting tool, work object,and payload on page 112.3HAC 16590-1 Revision: BContinues on next page77
4 Navigating and handling <strong>FlexPendant</strong>4.3.4. JoggingContinuedProperty/buttonJoystick lockIncrementPositionPosition formatJoystick directionsAlign...Go To...Activate...FunctionSelect locking joystick directions, described in section Locking thejoystick in specific directions on page 122.Select movement increments, described in section Incrementalmovement for precise positioning on page 124.Displays each axis position in relation to the selected coordinatesystem.Select position format, described in section How to read the exactposition on page 126.Displays current joystick directions, depending on setting in Motionmode. See section Selecting motion mode on page 110.Align the current tool to a coordinate system. See section Aligningtools on page 187.Move the robot to a selected position/target. See section Movingthe robot to a programmed position on page 186.Activate a mechanical unit. See section Activating mechanical unitson page 195.783HAC 16590-1 Revision: B
4 Navigating and handling <strong>FlexPendant</strong>4.3.5. Production window4.3.5. Production windowOverviewThe Production window is used to view the program code while the program is running.Illustration of the Production windowThis section illustrates the Production window.en0400000955Production window parts and functionsThis section describes the parts and functions in the Production window.Use...Load Program...Move PP to MainDebugto...load a new program. Note that the loaded program will not be saved.move the program pointer to the routine main.modify position, go to program pointer or motion pointer, or to open theProgram editor. How to use the Program editor is described in sectionProgram editor, e.g. Handling of instructions on page 176, or Handlingof routines on page 172.Debug is only available in manual mode.3HAC 16590-1 Revision: B79
4 Navigating and handling <strong>FlexPendant</strong>4.3.6. Program data4.3.6. Program dataOverviewThe Program data view contains functions for viewing and working with data types andinstances. You can open more than one window of the Program data, which can be usefulwhen working with many instances or data types.Illustration of Program dataThis section illustrates the Program data view.en0400000659Change scopeShow dataViewchanges scope of data types in the list, see section Viewing data in specifictasks, modules, or routines on page 136.shows all instances of the selected data type.shows all or only used data types.80Continues on next page3HAC 16590-1 Revision: B
4 Navigating and handling <strong>FlexPendant</strong>4.3.6. Program dataContinuedIllustration of a data type instancesThis section illustrates a list of instances for a data type.en0500001571Filter filters the instances, see Filtering data on page 101.NewRefreshEdit valueView data typescreates a new instance of the selected data type, see Creating new datainstance on page 137.refreshes the list of instances.edits the selected instance’s values, see Editing data instances on page139.returns to the Program data menu.3HAC 16590-1 Revision: B81
4 Navigating and handling <strong>FlexPendant</strong>4.3.7. Program editor4.3.7. Program editorOverviewThe Program editor is where you create or modify programs. You can open more than onewindow of the Program editor, which can be useful when working with multitaskingprograms for instance. The Program editor button in the task bar displays the name of the task.Illustration of Program editorThis section illustrates the Program editor view.en0400001143Tasks andprogramsMenu for program operations, see Handling of programs on page 165.Modules Lists all modules, see Handling of modules on page 168.Routines Lists all routines, see Handling of routines on page 172.Add instruction Opens instruction menu, see Handling of instructions on page 176.Edit Opens edit menu, see Handling of instructions on page 176.DebugFunctions for moving the program pointer, service routines etc, seeRunning a service routine on page 209.Modify position See Modifying positions on page 184.HideSee Hiding declarations in program code on page 191.declarations823HAC 16590-1 Revision: B
4 Navigating and handling <strong>FlexPendant</strong>4.3.8. Backup and restore4.3.8. Backup and restoreAbout backupsThe Backup and restore menu is used for performing backups and restoring the system. Seesection Backup and restore systems on page 265.Illustration of backup and restoreThis is the Backup and restore menu.xx0300000440Backup current system See Backup the system on page 267.Restore system See Restore the system on page 268.3HAC 16590-1 Revision: B83
4 Navigating and handling <strong>FlexPendant</strong>4.3.9. Calibration4.3.9. CalibrationAbout calibrationThe Calibration menu is used to calibrate mechanical units in the robot system. Calibrationcan be performed using the options Pendulum Calibration or Levelmeter Calibration(alternative method). See respective instruction manual.Illustration of Calibration menuThis illustration shows the Calibration menu. All mechanical units are listed and theircalibration status is displayed in the Status column.en040000114684Continues on next page3HAC 16590-1 Revision: B
4 Navigating and handling <strong>FlexPendant</strong>4.3.9. CalibrationContinuedCalibration menu optionsThis illustration shows the Calibration menu options after selecting mechanical unit.en0400000771RevolutionCountersCalibrationParametersSee section Updating revolution counters on page 274.See sections Loading calibration data using the <strong>FlexPendant</strong> on page276, Editing motor calibration offset on page 277, and Fine calibrationprocedure on <strong>FlexPendant</strong> on page 278.SMB Memory See section Serial Measurement Board memory on page 280.Base Frame See section 4 points XZ calibration on page 283.3HAC 16590-1 Revision: B85
4 Navigating and handling <strong>FlexPendant</strong>4.3.10. Control panel4.3.10. Control panelControl panelThe Control panel contains functions for customizing the robot system and the <strong>FlexPendant</strong>.en0400000914AppearanceConfigurationDate and TimeI/OLanguageProgKeysSupervisionSystemTouch ScreenSettings to customize the display’s brightness and contrast. See Changingbrightness and contrast on page 285.Configuration of the system parameters configuration. See Configuringsystem parameters on page 270.Settings for date and time for the robot controller. See Changing date andtime on page 288.Settings for configuring the Most Common I/O list. See Configuring MostCommon I/O on page 289.Settings for current language for the robot controller. See Changinglanguage on page 290.Settings for the four programmable keys on the <strong>FlexPendant</strong>. See Editingprogrammable keys on page 291.Settings for motion supervision and execution settings. See Editingsupervision settings on page 293.Configuration of views for operating mode switch and UAS, UserAuthorization System. See Configuring view settings on page 295.Recalibration settings for the touch screen. See Calibrating the touchscreen on page 298.863HAC 16590-1 Revision: B
4 Navigating and handling <strong>FlexPendant</strong>4.3.11. Event log menu4.3.11. Event log menuEvent logThe table is a brief summary of all actions that may be performed with the event log.xx0300000447ActionsThe log may be opened.A specific message may be viewed.If the log contents do not fit into a singlescreen, it may be scrolled and/or zoomed.The log may be deleted.The log may be saved.The log may be closed.DescriptionsHow to do this is detailed in sectionAccessing the event log on page 243.How to do this is detailed in section Viewmessages.How to do this is detailed in section Scrollingand zooming on the <strong>FlexPendant</strong> on page100.How to do this is detailed in section Deletinglog entries on page 244.How to do this is detailed in section Savinglog entries on page 245.How to do this is detailed in sectionAccessing the event log on page 243.3HAC 16590-1 Revision: BContinues on next page87
4 Navigating and handling <strong>FlexPendant</strong>4.3.11. Event log menuContinuedAn event log messageEach event log entry consists of a message describing the event in detail, and it often containsadvice on how to solve the problem.en0300000454ABCDEFGHEvent number. All errors are listed by numbers.Event title. Briefly states what has happened.Event time marker. Specifies exactly when the event occurred.Description. A brief description of the event. Intended to assist in understandingthe causes and implications of the event.Consequences. A brief description of any consequences inflicted on the system,transition to other operation mode, emergency stop, caused by the particularevent. Intended to assist in understanding the causes and implications of theevent.Probable causes. A list of probable causes, listed in order of probability.Recommended actions. A list of the recommended correcting actions, based onthe “Probable causes” specified above. These may range from “Replace the xx...”to “Run test program xx...”, i.e. may be actions to isolate the problem as well asfixing it.Acknowledge or OK button.Related information about logsEvent log messages and more information about the event log are described in Troubleshooting manual - IRC5.883HAC 16590-1 Revision: B
4 Navigating and handling <strong>FlexPendant</strong>4.3.12. Lock the screen4.3.12. Lock the screenOverviewLocking the screenThe <strong>FlexPendant</strong> screen may be locked to prevent accidental interference, when e.g. cleaningthe screen. How to clean the screen and when to do it is detailed in the Product <strong>Manual</strong> -IRC5.This section describes how to lock the <strong>FlexPendant</strong>’s touch screen.StepAction1. On the ABB menu, tap Lock Screen.The following screen is presented:en04000006573HAC 16590-1 Revision: BContinues on next page89
4 Navigating and handling <strong>FlexPendant</strong>4.3.12. Lock the screenContinuedStepAction2. Tap Lock.The following screen is presented:en04000006583. Tapping the two buttons in the correct sequence as specified will unlock thescreen.903HAC 16590-1 Revision: B
4 Navigating and handling <strong>FlexPendant</strong>4.3.13. System info4.3.13. System infoSystem infoSystem info displays all settings, properties and program versions, valid for the controller andthe installed system.Illustration of System info viewen0400000968Controller properties Name of the controller.Network connections Settings for the service port and LAN.Installed systems Information on the installed systems.System properties information about the loaded system.Control moduleName and key for the control module.OptionsAll installed RobotWare options and languages.Drive moduleLists all drive modules.Drive module x Name and key for drive module x.OptionsOptions for drive module x, with type of robot etc.Additional options Any additional installed options.3HAC 16590-1 Revision: B91
4 Navigating and handling <strong>FlexPendant</strong>4.3.14. Restart4.3.14. RestartRestartA running system normally does not need to be restarted.Tap the ABB menu and then Restart to restart the system.en0500001557Related informationRestart overview on page 253.923HAC 16590-1 Revision: B
4 Navigating and handling <strong>FlexPendant</strong>4.3.15. Logout4.3.15. LogoutThe Logout menuThis section details the Logout menu. More about using this menu is described in How tologout and login on page 103.Logout is availble under the ABB menu.en04000009473HAC 16590-1 Revision: B93
4 Navigating and handling <strong>FlexPendant</strong>4.4.1. Operator window4.4 The status bar menu4.4.1. Operator windowOperator windowThe operator window displays messages from the program. In a multitasking system, alltask’s messages are displayed in the same operator window. If a message requires action thena separate window for that task will be displayed.The operator window is opened by tapping the icon to the right of the ABB logo in the statusbar. The illustration shows an example of an operator window:en0400000975ClearDo not show logsClears all messagesHides all messagesMessages are written by the program author in RAPID. It can sometimes be useful to hide allmessages since this window otherwise will pop up and take focus for each message.943HAC 16590-1 Revision: B
4 Navigating and handling <strong>FlexPendant</strong>4.4.2. Status bar4.4.2. Status barIllustration of status barThe Status bar displays information about the current status, such as operational mode,system, and active mechanical unit.en0300000490PartABCDEFNameOperator windowOperating modeSystem name (and controller name)Controller stateProgram stateMechanical units. The selected unit (and any unit coordinated with the selected)is marked with a border. Active units are displayed in color, while deactivated unitsare grey.3HAC 16590-1 Revision: B95
4 Navigating and handling <strong>FlexPendant</strong>4.5.1. The Quickset menu4.5 The QuickSet menu4.5.1. The Quickset menuGeneralThe QuickSet menu provides a quicker way to change among other things jog propertiesrather than using the Jogging view.Each item of the menu uses a symbol to display the currently selected property value orsetting. Tap the Quickset button to display available property values.Illustration of the Quickset menuThis section describes the buttons in the Quickset menu.en0300000471Mechanical unit, see section Quickset menu, Mechanical unit on page 128Increment, see section Quickset menu, Increment on page 132Run Mode, see section Quickset menu, Run Mode on page 201Step Mode, see section Quickset menu, Step Mode on page 203Speed, see section Quickset menu, Speed on page 208963HAC 16590-1 Revision: B
4 Navigating and handling <strong>FlexPendant</strong>4.6.1. Using the soft keyboard4.6 Basic procedures4.6.1. Using the soft keyboardUsing the soft keyboardThe soft keyboard is used frequently when operating the system, e.g. when entering filenames or parameter values.The soft keyboard works as an ordinary keyboard with which you can place the insertionpoint, type and correct typing errors. Tap letters, numbers and special characters to enter yourtext or values.Illustration soft keyboardThis illustration shows the soft keyboard on the <strong>FlexPendant</strong>.en0300000491Using international charactersAll western characters can be used, also in usernames and passwords. To access internationalcharacters, tap the Int’l button on the soft keyboard.3HAC 16590-1 Revision: BContinues on next page97
4 Navigating and handling <strong>FlexPendant</strong>4.6.1. Using the soft keyboardContinuedHow to change the insertion pointTap the arrow keys to change the insertion point, for instance when correcting typing errors.If you need to move...then tap...backwardforwardxx0300000492xx0300000493How to delete1. Tap the Backspace key (top right) to delete characters to the left of the insertion point.xx0300000494983HAC 16590-1 Revision: B
4 Navigating and handling <strong>FlexPendant</strong>4.6.2. Messages on the <strong>FlexPendant</strong>4.6.2. Messages on the <strong>FlexPendant</strong>Overview of messagesThe <strong>FlexPendant</strong> displays messages from the system. These can be status messages, errormessages, program messages, or requests for action from the user. Some require actions, andsome are plain information.Event log messagesThe event log messages are messages from the RobotWare system about system status,events, or errors.How to work with the event log messages is described in section Handling the event log onpage 243. All messages are also described in the manual Trouble shooting - IRC5.System messagesSome messages sent out by the system are not from the event log. They can come from otherapplications, such as RobotStudio Online .To be able to change configurations and settings in the system from RobotStudio Online , theuser must request write access. This generates a message on the <strong>FlexPendant</strong> where theoperator can grant or deny access. The operator can at any time decide to withdraw the writeaccess.How to request access and work with RobotStudio Online is described in Operator’s manual -RobotStudio Online.Program messagesRAPID programs can send out messages to the Operator window, see section Operatorwindow on page 94.How to generate program messages is described in RAPID reference manual - Instructions.3HAC 16590-1 Revision: B99
4 Navigating and handling <strong>FlexPendant</strong>4.6.3. Scrolling and zooming on the <strong>FlexPendant</strong>4.6.3. Scrolling and zooming on the <strong>FlexPendant</strong>OverviewThe entire contents of a screen may not be visible at the same time. To see the entire contents,you may:• Scroll up/down (and sometimes left/right)• Zoom in or out (only available in the Program editor)en0400000685ABCDEFGHZoom in (larger text)Scroll up (the height of one page)Scroll up (the height of one line)Scroll leftScroll rightZoom out (smaller text)Scroll down (the height of one page)Scroll down (the height of one line)1003HAC 16590-1 Revision: B
4 Navigating and handling <strong>FlexPendant</strong>4.6.4. Filtering data4.6.4. Filtering dataFiltering dataIn many of the <strong>FlexPendant</strong>’s menues you can filter data. This is useful e.g. when looking atinstances of data types where there can be more available than is possible to overlook. Byfiltering out instances starting with a specific character, the number of choices can be reduced.Illustration of filtering functionThe filter function is switched on until the active filter is removed (using the keyboard).en0500001539FilterOpen or close the filtering functionActive filter Displays the current filter. This is also displayed in the top of the list of items123 / ABC Switch between numeric or alphabetic keyboardFilterApplies the filter3HAC 16590-1 Revision: B101
4 Navigating and handling <strong>FlexPendant</strong>4.6.5. Process applications4.6.5. Process applicationsProcess applicationsCustom process applications are started from the ABB menu. Each application is listed as amenu item together with the <strong>FlexPendant</strong>’s views.Start a process applicationThis procedure describes how to start a process application.StepAction1. Tap the ABB button to display the ABB menu.Process applications are listed in the menu.2. Tap the name of the process application to start.Switch between started process applicationsA started application has a quick-button in the taskbar, just like <strong>FlexPendant</strong> views. Tap thebuttons to switch between the started applications and views.en0400000768The views and process application running in this case are:ABCD<strong>FlexPendant</strong> Explorer viewProgram editor viewRobotWare Arc, a process applicationControl panel view1023HAC 16590-1 Revision: B
4 Navigating and handling <strong>FlexPendant</strong>4.6.6. How to logout and login4.6.6. How to logout and loginLogout procedureThe procedure details how to logout of the system.Step Action1. Tap Logout on the ABB menu.2. Tap Yes on the logout question.Login procedureThe procedure details how to login to the controller, using the User Authorization System,UAS. UAS can limit the available functions for users.After a logout, the Login window automatically appears.en0400000947Step Action Info1. Tap on the User menu to choose user.If you tap Default User, no password isrequired, and you are logged inautomatically.2. Tap ABC... to display the soft keyboard.After entering the password tap OK.3. Tap Login.If the user you have chosen has apassword you must use the softkeyboard to enter password.3HAC 16590-1 Revision: BContinues on next page103
4 Navigating and handling <strong>FlexPendant</strong>4.6.6. How to logout and loginContinuedHandling users and authorization levelsRead more on how to add users or set the authorization in Operator’s manual - RobotStudioOnline.How to edit what views or functions are hidden for certain users is described in Configuringview settings on page 295.1043HAC 16590-1 Revision: B
5 Jogging5.1. Introduction to jogging5 Jogging5.1. Introduction to joggingWhat is jogging?To jog is to manually position or move robots or external axes using the <strong>FlexPendant</strong> joystick.When can I jog?You jog in manual mode. Jogging is possible regardless of what view is displayed on the<strong>FlexPendant</strong>, however you cannot jog during program execution.About motion modes and robotsThe selected motion mode and/or coordinate system determines the way the robot moves.In linear motion mode the tool center point moves along straight lines in space, in a “movefrom point A to point B” fashion. The tool center point moves in the direction of the selectedcoordinate system’s axes.Axis-by-axis mode moves one robot axis at a time. It is then hard to predict how the toolcenter point moves.About motion modes and additional axesAdditional axes can only be jogged axis-by-axis. An additional axis can either be designedfor some kind of linear motion or for rotational (angular) motion. Linear motion is used inconveyers, rotational motion in many kinds of workpiece handlers.Additional axes are not affected by the selected coordinate system.About coordinate systemsPositioning a pin in a hole with a gripper tool can be performed very easily in the toolcoordinate system, if one of the coordinates in that system is parallel to the hole. Performingthe same task in the base coordinate system may require jogging in both x, y, and zcoordinates, making precision much more difficult.To select the proper coordinate systems to jog in will make jogging easier but there are nosimple or single answers to which coordinate system to choose.A certain coordinate system will make it possible to move the tool center point to the targetposition with fewer joystick moves than another.Conditions such as space limitations, obstacles or the physical size of a work object or toolwill also guide you to the proper judgement.Read more about coordinate systems in section What is a coordinate system? on page 305.3HAC 16590-1 Revision: B105
5 Jogging5.2.1. Restrictions to jogging5.2 Jogging concept5.2.1. Restrictions to joggingJog additional axesAdditional axes can only be jogged axis-by-axis. Please see Application manual - Additionalaxes.Jog mechanical units that are not calibratedAn uncalibrated mechanical unit can only be jogged axis-by-axis. Its working range will notbe checked.If the mechanical unit is not calibrated the text “Unit not calibrated” will be displayed in thePosition area of the Jogging window.CAUTION!Mechanical units whose working range is not controlled by the robot system can be movedto dangerous positions. Mechanical stops should be used and configured to avoid danger toequipment or personnel.Jog robot axes in independent modeIt is not possible to jog axes in independent mode. You need to return the axes to normal modein order to jog. Please see Application manual - Motion functions and events for details.Jog while using world zonesWith the option World Zones installed, defined zones will restrict motion while you jog.Please see Application manual - Motion functions and events for details.Jog with axis loads not setIf equipment is mounted on any of the robot axes, then axes loads must be set. Otherwiseoverload errors might occur when jogging.How to set axis loads are described in the Product <strong>Manual</strong>s delivered with your robot.Jog with tool or payload weights not setIf the weight of tools and payloads is not set, then overload errors might occur when jogging.Loads for additional axes controlled by specific software (dynamic models) can only be setin programing.1063HAC 16590-1 Revision: B
5 Jogging5.2.2. Coordinated jogging5.2.2. Coordinated joggingCoordinationA robot that is coordinated to a work object will follow the movements of that work object.Coordinated joggingIf the mechanical unit moving the work object is jogged, any robot that is currentlycoordinated with the work object will move so that it maintains its relative position to thework object.Set up coordinationStep Action Info1. Select the robot that is to becoordinated to another mechanical unit.2. Set Coordinate system to WorkObject.3. Set Work object to the work objectmoved by the other mechanical unit.4. Select the mechanical unit that movesthe work object.See Selecting mechanical unit on page108.See Jog in work object coordinates onpage 119.See Selecting tool, work object, andpayload on page 112.Any jogging, while this mechanical unitis selected, will also affect the robot thatis coordinated with it.Coordinating robotsCoordinating robots, so that when jogging one robot another robot will follow, requires theoption MultiMove.3HAC 16590-1 Revision: B107
5 Jogging5.3.1. Selecting mechanical unit5.3 Basic settings for jogging5.3.1. Selecting mechanical unitExamples of useYour robot system may consist of more than a single robot. There can also be othermechanical units such as workpiece handlers or additional axes mounted on the robot that canalso be jogged.If your system only has a single robot without additional axes, then you do not need to selectmechanical unit.Identifying mechanical unitsEach mechanical unit that can be jogged is represented in the mechanical units list. The nameof the unit is defined in the system configuration. Each unit also has a symbol that is used inthe Status bar, see section Status bar on page 95.Please consult your plant or cell documentation to see which mechanical units are availablein your robot system.Selecting mechanical unitThis procedure describes how to select a mechanical unit to jog.StepAction1. On the ABB menu, tap Jogging.108Continues on next page3HAC 16590-1 Revision: B
5 Jogging5.3.1. Selecting mechanical unitContinuedStepAction2. Tap Mechanical Unit.en0400000653A list of available mechanical units is displayed.3. Tap the mechanical unit to be jogged, and then tap OK.The selected mechanical unit is used until you choose another unit, even if youclose the Jogging window.TIP!Use the QuickSet menu to switch between mechanical units faster.How jogging properties applyAny changes you make to jogging properties only affects the currently selected mechanicalunit.All jogging properties are saved and restored when you return to jog that mechanical unit.Related informationMechanical units can be activated or deactivated using the Activate function in the Joggingmenu, see section Activating mechanical units on page 195.3HAC 16590-1 Revision: B109
5 Jogging5.3.2. Selecting motion mode5.3.2. Selecting motion modeOverviewThe Joystick Directions area shows how joystick axes correspond to the selected coordinatesystem’s axes.CAUTION!The Directions properties is not intended to show the direction in which the mechanical unitwill move. Always try jogging with small joystick movements so that you learn the truedirections of the mechanical unit.Selecting motion modeThis procedure describes how to select motion mode.Step Action Info1. Tap ABB, then Jogging.2. Tap Motion mode.3. Tap on the mode you want and then tapOK.The significance of the joystickdirections are shown in Joystickdirection after making the selection.Joystick directionsThe significance of the joystick directions depends on what motion mode has been selected.The following are available:Motion mode Illustration joystick DescriptionLinearLinear mode is described insection Setting the tool orientationon page 113.Axis 1-3(default for robots)en0400001131Axis 1-3 mode is described insection Jog axis by axis on page114.en0300000536110Continues on next page3HAC 16590-1 Revision: B
5 Jogging5.3.2. Selecting motion modeContinuedMotion mode Illustration joystick DescriptionAxis 4-6Axis 4-6 mode is described insection Jog axis by axis on page114.Reorienten0300000537Reorient mode is described insection Setting the tool orientationon page 113.en04000011313HAC 16590-1 Revision: B111
5 Jogging5.3.3. Selecting tool, work object, and payload5.3.3. Selecting tool, work object, and payloadOverviewIt is always important to choose the proper tool, work object, or payload. It is absolutely vitalwhen you create a program by jogging to the target positions.Failing to do so will most likely result in overload errors and/or incorrect positioning eitherwhen you jog or when you run the program in production.Selecting tool, work object, and payloadStepAction1. On the ABB menu, choose Jogging to view jogging properties.2. Tap Tool, Work object, or Payload to display the lists of available tools, workobjects or payloads.3. Tap the tool, work object, or payload of choice followed by OK.1123HAC 16590-1 Revision: B
5 Jogging5.3.4. Setting the tool orientation5.3.4. Setting the tool orientationExamples of useTools for arc welding, grinding and dispensing must be oriented in a particular angle to thework piece to obtain the best result. You also need to set up the angle for drilling, milling orsawing.In most cases you set the tool orientation when you have jogged the tool center point to aspecific position such as the starting point for a tool operation. After you have set the toolorientation you continue to jog in linear motion to complete the path and the supposedoperation.Definition of tool orientationThe tool orientation is relative to the currently selected coordinate system. From a userperspective however this is not noticeable.Setting the tool orientationStepAction1. On the ABB menu, tap Jogging.2. Tap Motion Mode, then tap Reorient followed by OK.3. If not already selected, select the proper tool by following the procedure inSelecting tool, work object, and payload on page 112.4. Press and hold the enabling device to activate the mechanical unit’s motors.Move the joystick and the tool’s orientation changes.TIP!Use the QuickSet menu to select jogging mode faster.3HAC 16590-1 Revision: B113
5 Jogging5.3.5. Jog axis by axis5.3.5. Jog axis by axisExamples of useUse axis by axis jogging when you need to:• move the mechanical unit out of hazardous positions.• move a robot out of singularities.• position a robot’s axes for calibration.Select axes to moveStepAction1. On the ABB menu, tap Jogging to view jogging properties.2. Tap Motion Mode, then select the appropriate axes, see description in Illustrationof axes and joystick directions on page 114.3. Tap OK to complete.4. Press the enabling device and jog the axes.Illustration of axes and joystick directionsThe regular six axes of a generic manipulator may be jogged manually using the threedimensions of the joystick as specified below. Please check your plant or cell documentationto determine the physical orientation of any additional axes.The illustration shows the movement patterns of the manipulator's axes.xx0300000520114Continues on next page3HAC 16590-1 Revision: B
5 Jogging5.3.5. Jog axis by axisContinuedIf you want to move… then tap… for joystick directions…axis 1, 2 or 3axis 4, 5 or 6en0300000534en0300000536en0300000535en0300000537CAUTION!The orientation of any mounted tool will be affected by this procedure. If the resultingorientation is important, perform the procedure described in Setting the tool orientation onpage 113 when finished.3HAC 16590-1 Revision: B115
5 Jogging5.3.6. Jog in base coordinates5.3.6. Jog in base coordinatesBase coordinates definitionxx0300000495Jog in base coordinatesStepAction1. On the ABB menu, tap Jogging to view jogging properties.2. Tap Motion Mode, then tap Linear followed by OK.You don’t need to perform this step if you previously selected linear motion.3. Tap Coordinate System, then tap Base followed by OK.4. Press and hold the enabling device to activate the manipulator’s motors.5. Move the joystick and the mechanical unit moves along.TIP!Use the QuickSet menu to select jogging mode faster.1163HAC 16590-1 Revision: B
5 Jogging5.3.7. Jog in world coordinates5.3.7. Jog in world coordinatesExamples of useFor example, you have two robots, one floor mounted and one inverted. The base coordinatesystem for the inverted robot would be upside down.If you jog in the base coordinate system for the inverted robot, movements will be verydifficult to predict. Choose the shared world coordinate system instead.World coordinates definitionen0300000496ABCBase coordinate systemWorld coordinate systemBase coordinate system3HAC 16590-1 Revision: BContinues on next page117
5 Jogging5.3.7. Jog in world coordinatesContinuedJog in world coordinatesStepAction1. On the ABB menu, tap Jogging to view jogging properties.2. Tap Motion Mode, then tap Linear followed by OK.You don’t need to perform this step if you previously selected linear motion.3. Tap Coordinate system, then tap World followed by OK.4. Press and hold the enabling device to activate the manipulator’s motors.5. Move the joystick and the mechanical unit moves along.TIP!Use the QuickSet menu to select jogging mode faster.1183HAC 16590-1 Revision: B
5 Jogging5.3.8. Jog in work object coordinates5.3.8. Jog in work object coordinatesExamples of useFor example, you are determining the positions of a number of holes to be drilled along theedge of the work object.You are creating a weld between two walls in a box.Work object coordinates definitionen0300000498ABCDUser coordinate systemWorld frameWork object coordinate systemWork object coordinate systemJog in work object coordinatesStepAction1. On the ABB menu, tap Jogging to view jogging properties.2. Tap Motion Mode, then tap Linear followed by OK.This is not required if you previously selected linear motion.3. Tap Work object to select work object..4. Tap Coordinate system, then tap Work Object followed by OK.5. Press and hold the enabling device to activate the manipulator’s motors.6. Move the joystick and the mechanical unit moves along.TIP!Use the QuickSet menu to select jogging mode faster.3HAC 16590-1 Revision: B119
5 Jogging5.3.9. Jog in tool coordinates5.3.9. Jog in tool coordinatesExamples of useUse the tool coordinate system when you need to program or adjust operations for threading,drilling, milling or sawing.Tool coordinates definitionThe tool coordinate system has its zero position at the center point of the tool. It therebydefines the position and orientation of the tool. The tool coordinate system is oftenabbreviated to TCP (Tool Center Point) or TCPF (Tool Center Point Frame).When jogging a robot the tool coordinate system is useful when you don’t want to change theorientation of the tool during the movement, for instance moving a saw blade without bendingit.en0300000497Jog in tool coordinatesStepAction1. On the ABB menu, tap Jogging to view jogging properties.2. Tap Motion mode, then tap Linear followed by OK.You do not need to perform this step if you previously selected linear motion.3. Select the proper tool, and if using a stationary tool the proper work object byfollowing the procedure in Selecting tool, work object, and payload on page 112.You do not need to perform this step if you previously selected the tool and/or workobject.4. Tap Coordinate System, then tap Tool followed by OK.5. Press and hold the enabling device to activate the mechanical unit’s motors.6. Move the joystick and the mechanical unit moves along.120Continues on next page3HAC 16590-1 Revision: B
5 Jogging5.3.9. Jog in tool coordinatesContinuedTIP!Use the QuickSet menu to select jogging mode faster.Jog with a stationary toolIf your robot system uses stationary tools, you must select both the proper tool and the properwork object (held by the robot) to jog in tool coordinates.The tool coordinate system is defined by the position and orientation of the stationary tooland is fixed in space. To perform the intended operations you move the work object. This waypositions can be expressed in the tool coordinate system.3HAC 16590-1 Revision: B121
5 Jogging5.3.10. Locking the joystick in specific directions5.3.10. Locking the joystick in specific directionsOverviewThe joystick can be locked in specific directions to prevent movement for one or more axes.This may be useful for instance while fine tuning positions or when programming operationsthat should only be performed in the direction of a specific coordinate system axis.Note that the axes locked depends on the currently selected motion mode.Which axes are locked?This section describes how to see which joystick directions are lockedStepAction1. On the ABB menu, tap Jogging to view jogging properties.2. Tap Joystick lock to check the joystick properties, or check the Joystickdirections area properties in the right hand corner of the window.A padlock symbol is displayed for locked axes.Locking the joystick in specific directionsThis section describes how to lock the joystick in specific directions.StepAction1. In the ABB menu, tap Jogging.2. Tap Joystick lock.en03000004883. Tap the joystick axis or axes that should be locked.The axis toggles between locked and unlocked each time you tap.4. Tap OK to lock.122Continues on next page3HAC 16590-1 Revision: B
5 Jogging5.3.10. Locking the joystick in specific directionsContinuedUnlocking all axesThis section describes how to unlock all axes from the joystick directions lock.Step Action1. In the ABB menu, tap Jogging.2. Tap Joystick lock.3. Tap None, then tap OK.3HAC 16590-1 Revision: B123
5 Jogging5.3.11. Incremental movement for precise positioning5.3.11. Incremental movement for precise positioningIncremental movementUse incremental movement to jog the robot in small steps, which enables very precisepositioning.This means that each time the joystick is deflected, the robot moves one step (increment). Ifthe joystick is deflected for one or more seconds, a sequence of steps, (at a rate of 10 stepsper second), will be performed as long as the joystick is deflected.Default mode is no increment, then the robot moves continuously when the joystick isdeflected.Set the incremental movement sizeThis procedure details how to specify the size of the incremental movement.StepAction1. In the ABB menu, tap Jogging.2. Tap Increment.en04000009713. Tap the desired increment mode, see description in section Incrementalmovement sizes on page 125.4. Tap OK.124Continues on next page3HAC 16590-1 Revision: B
5 Jogging5.3.11. Incremental movement for precise positioningContinuedIncremental movement sizesChoose between small, medium or large increments. You can also define your own incrementmovement sizes.Increment Distance AngularSmall 0.05 mm 0.005°Medium 1 mm 0.02°Large 5 mm 0.2°User3HAC 16590-1 Revision: B125
5 Jogging5.3.12. How to read the exact position5.3.12. How to read the exact positionHow robot positions are displayedPositions are always displayed as:• the point in space expressed in the x, y and z tool center point coordinates,• the angular rotation of the tool center point expressed in Euler angles or as aquaternion.How additional axes’ positions are displayedWhen an additional axis is moved, only the axis position is displayed.Linear axis positions are displayed in millimeters expressed as the distance to the calibrationposition.Rotating axis positions are displayed in degrees expressed as the angle to the calibrationposition.No positions displayedNo position is displayed when the mechanical unit is uncalibrated. Instead the text “Unit notcalibrated" is displayed.How to read the exact positionThis procedure describes how to read the exact position.StepAction1. On the ABB menu tap Jogging.2. The position is displayed in the Position area properties in the right hand side ofthe window.See illustration in Jogging on page 77.Illustration of position formatThe illustration shows all available settings for showing the position format:126Continues on next page3HAC 16590-1 Revision: B
5 Jogging5.3.12. How to read the exact positionContinueden0400000991Available selections for position formatThe following selections are available for Position shown in Illustration of position format onpage 126:• World• Base• Work objectThe following selections are available for Orientation format:• Quaternion• Euler anglesThe following selections are available for Position angle format:• AnglesThe following selections are available for Presentation angle unit:• Degrees• Radians3HAC 16590-1 Revision: B127
5 Jogging5.3.13. Quickset menu, Mechanical unit5.3.13. Quickset menu, Mechanical unitMechanical unit buttonStepAction1. On the Quickset menu, tap Mechanical unit, then tap to select a mechanical unit.en0300000539The following buttons are displayed:• A: Mechanical unit menu button• B: Mechanical unit, a selected unit is highlighted• C: Motion mode settings• D: Tool settings• E: Work object settings• F: Coordinate system settingsEach button is described in the following steps.128Continues on next page3HAC 16590-1 Revision: B
5 Jogging5.3.13. Quickset menu, Mechanical unitContinuedStepAction2. If you want to view/change any motion mode functionality, tap the Motion modesettings button.en0300000540The following buttons are displayed:• A: Axes 1-3 motion mode• B: Axes 4-6 motion mode• C: Linear motion mode• D: Reorient motion mode• E: Close motion mode settings3HAC 16590-1 Revision: BContinues on next page129
5 Jogging5.3.13. Quickset menu, Mechanical unitContinuedStepAction3. If you want to view/change the available tools, tap the Tool settings button.en0400000988A list of all available, defined tools is shown. Tap the one to use.4. If you want to view/change the available work objects, tap the Work object settingsbutton.en0400000989A list of all available, defined work objects is shown. Tap the one to use.130Continues on next page3HAC 16590-1 Revision: B
5 Jogging5.3.13. Quickset menu, Mechanical unitContinuedStepAction5. If you want to view/change any Coordinate system functionality, tap theCoordinate system settings button.en0300000541The following buttons are displayed:• World coordinate system• Base coordinate system• Tool coordinate system• Work object coordinate system3HAC 16590-1 Revision: B131
5 Jogging5.3.14. Quickset menu, Increment5.3.14. Quickset menu, IncrementIncrementAll functions under this button may also be reached from the Jogging menu.StepAction1. If you want to view/change any increment functionality, tap the increment button.en0300000542Tap to select increment size:• None for no increments• Small movement increments• Medium movement increments• Large movement increments• User for movement increments defined by the user.Tap Show values to display the increment values.1323HAC 16590-1 Revision: B
6 Programming and testing6.1. Before you start programming6 Programming and testing6.1. Before you start programmingProgramming toolsYou can use both the <strong>FlexPendant</strong> and RobotStudio Online for programming. For basicprogramming it may be easier to use RobotStudio Online , while the <strong>FlexPendant</strong> is best suitedfor modifying programs, such as positions and paths.How to program using RobotStudio Online is described in Operator’s manual - RobotStudioOnline.Define tools, payloads and work objectsDefine tools, payloads and work objects before you start programming. You can always goback and define more objects later, but you should define your basic objects in advance.Define coordinate systemsMake sure the base and world coordinate systems have been set up properly during theinstallation of your robot system. Also make sure that additional axes have been set up.Define tool and work object coordinate systems as needed before you start programming. Asyou add more objects later you also need to define the corresponding coordinate systems.TIP!Need to know more about the RAPID language and structure? See the manuals RAPIDreference manual - RAPID overview, RAPID reference manual - Instructions, and RAPIDreference manual - Functions and data types.3HAC 16590-1 Revision: B133
6 Programming and testing6.2.1. The structure of a RAPID application6.2 Programming concept6.2.1. The structure of a RAPID applicationIllustration of a RAPID applicationThe structure and contents of the main computer RAM memory during operation is describedin section The structure of the main computer RAM memory contents on page 249en0300000576PartsPartTaskTask propertyparameterProgramFunctionEach task usually contains a RAPID program and system modules aimedat performing a certain function, e.g. spot welding or manipulatormovements.A RAPID application may contain one task. If you have the Multitaskingoption installed, then there can be more than one task.Read more about Multitasking in Application manual - Engineering tools.The task property parameters set certain properties for all task contents.Any program stored in a certain task, assumes the properties set for thattask.The task property parameters are specified in RAPID reference manual.Each program usually contains program modules with RAPID code fordifferent purposes.Any program must have an entry routine defined to be executable.134Continues on next page3HAC 16590-1 Revision: B
6 Programming and testing6.2.1. The structure of a RAPID applicationContinuedPartProgrammoduleDataRoutineEntry routineFunctionEach program module contains data and routines for a certain purpose.The program is divided into modules mainly to enhance overview andfacilitate handling the program. Each module typically represents oneparticular robot action or similar.All program modules will be removed when deleting a program from thecontroller program memory.Program modules are usually written by the user.Data are values and definitions set in program or system modules. Thedata are referenced by the instructions in the same module or in a numberof modules (availability depending on data type).Data type definitions are specified in the RAPID reference manual,Functions and data types.A routine contains sets of instructions, i.e. defines what the robot systemactually does.A routine may also contain data required for the instructions.A special type of routine, in English sometimes referred to as "main",defined as the program execution starting point.InstructionSystem moduleNoteEach program must have an entry routine called "main", or it will not beexecutable. How to appoint a routine as entry routine is specified in RAPIDreference manual. The default name for main can be changed by thesystem parameter configurations, type Task. See Technical referencemanual - System parameters.Each instruction is a request for a certain event to take place, e.g. "Run themanipulator TCP to a certain position" or "Set a specific digital output".The instructions, their syntax and function is thoroughly described in theRAPID reference manual, Instructions.Each system module contains data and routines to perform a certainfunction.The program is divided into modules mainly to enhance overview andfacilitate handling the program. Each module typically represents oneparticular robot action or similar.All system modules will be retained when "Delete program" is ordered.System modules are usually written by the robot manufacturer or linebuilder.3HAC 16590-1 Revision: B135
6 Programming and testing6.3.1. Viewing data in specific tasks, modules, or routines6.3 Data types6.3.1. Viewing data in specific tasks, modules, or routinesOverviewIt is possible to view selections of data types by selecting a specific scope.Viewing data in specific tasks, modules, or routinesThis section details how to view data instances in specific modules or routines.StepAction1. In the ABB menu, tap Program Data.2. Tap Change Scope.The following screen is displayed:en04000006613. Select the required scope by selecting:• Built-In Data Only: Shows all data types used by the specific system• Task: Shows all data types used by a specific task• Module: Shows all data types used by a specific module• Routine: Shows all data types used by a specific routine4. Tap OK to confirm your choice.5. Tap twice to select a data type and view its instances.1363HAC 16590-1 Revision: B
6 Programming and testing6.3.2. Creating new data instance6.3.2. Creating new data instanceCreating new data instanceThis section details how to create new data instances of data types.StepAction1. In the ABB menu, tap Program Data.A list of all available data types is displayed.2. Tap the data instance type to be created, i.e. bool and then tap Show data.A list of all instances of the data type is displayed.3. Tap New.en04000006634. Tap ... the right of Name to define the data instance’s name.5. Tap the Scope menu to set accessibility for the data instance. Select:• Global• Local• Task6. Tap the Storage type menu to select type of memory used for the data instance.Select:• Persistent if the data instance is persistent• Variable if the data instance is variable• Constant if the data instance is constant7. Tap the Module menu to select module.8. Tap the Routine menu to select routine.3HAC 16590-1 Revision: BContinues on next page137
6 Programming and testing6.3.2. Creating new data instanceContinuedStepAction9. If you want to create an array of data instances, then tap the Dimensions menuand select the number of dimensions in the array, 1-3.• 1• 2• 3• NoneThen tap ... to set the Size of the array’s axes.Arrays are described in section What is a data array? on page 31210. Tap OK.1383HAC 16590-1 Revision: B
6 Programming and testing6.3.3. Editing data instances6.3.3. Editing data instancesOverviewThis section describes how to view data instances and then edit values, delete, changedeclaration of, copy, or define an instance.For instances of the types tooldata, wobjdata, and loaddata, see sections Tools on page 142,Work objects on page 154, or Payloads on page 161.Viewing data instancesThis section details how to view the available instances of a data type.StepAction1. In the ABB menu, tap Program Data.2. Tap the data type of the instance you want view, and then tap Show Data.3. Tap and hold the data instance for a couple of seconds.A circle of red dots and a menu appears.en04000006714. Depending on what you want to do with the data instance, you have the followingchoices:• Tap Delete to remove the data instance.• Tap Change Declaration to change the declaration of the data instance.• Tap Copy to copy the data instance.• Tap Define to define the tool frame (only available for tool, work object, andload data).Proceed as described in the following sections.3HAC 16590-1 Revision: BContinues on next page139
6 Programming and testing6.3.3. Editing data instancesContinuedEditing data instance valuesThis section describes how to edit a data instance value..Step Action Info1. Tap Edit value to open the instance.2. Tap the value to open a keyboard or listof choices.3. Select or enter a new value.4. Tap OK.The way to edit values depend on thedata type and possible values, forinstance text, numbers, predefinedvalues etc.Deleting data instancesThis section details how to delete data instances.StepAction1. Tap Delete in the menu for the data instance to be deleted, as detailed in sectionViewing data instances on page 139.A dialog box is displayed.2. Tap Yes if you are sure the data instance is to be deleted.140Continues on next page3HAC 16590-1 Revision: B
6 Programming and testing6.3.3. Editing data instancesContinuedChanging data instance declarationsThis section details how to change the declaration of the data instances.StepAction1. Tap Change declaration in the menu for the data instance to be deleted, asdetailed in section Viewing data instances on page 139.en04000006722. Select what data instance values to be changed:• Name: Tap ... to bring out the soft keyboard and change the name.• Scope• Storage type• Module• RoutineCopying data instancesThis section details how to copy the data instances.StepAction1. Tap Copy in the menu for the data instance to be copied, as detailed in sectionViewing data instances on page 139.A copy of the data instance is created.The copy has the same values as the original, but the name is unique.Defining data instancesHow to define tool frame or work object frame is described in sections Defining the toolframe on page 145 or Defining the work object coordinate system on page 155.3HAC 16590-1 Revision: B141
6 Programming and testing6.4.1. Creating a tool6.4 Tools6.4.1. Creating a toolWhat happens when I create a tool?A variable of the type tooldata is created. The variable’s name will be the name of the tool.For more information on data types, see RAPID reference manual - Functions and data types.The new tool has default values for weight etc which must be defined before the tool can beused.Creating a toolThe tool center point of the default tool (tool0) is in the center of the robot’s mounting flangeand with the mounting flange’s orientation.By creating a tool you can define another tool center point.Aen0400000779ATool center point, TCP, for tool0StepAction1. On the ABB menu, tap Jogging.2. Tap Tool to display the list of available tools.142Continues on next page3HAC 16590-1 Revision: B
6 Programming and testing6.4.1. Creating a toolContinuedStepAction3. Tap New... to create a new tool.en0300000544Enter values for each field, see table below.4. Tap OK.Tool declaration settingsIf you want to change... then... Recommendationthe tool’s namethe scopetap the ... button next to thenameselect the scope of choicefrom the menuTools are automaticallynamed tool followed by arunning number, for exampletool10 or tool21.You should change this tosomething more descriptivesuch as gun, gripper orwelder.If you change the name of atool after it is referenced inany program you must alsochange all occurrences ofthat tool.Tools should always be globalto be available to all modulesin the program.the storage type - Tool variables must alwaysbe persistent.the moduleselect the module in whichthis tool should be declaredfrom the menu3HAC 16590-1 Revision: BContinues on next page143
6 Programming and testing6.4.1. Creating a toolContinuedNOTE!The created tool is not useful until you have defined the tool data (TCP coordinates, weightetc.). This can be done by running the service routine LoadIdentify, or by editing the valuesmanually. See LoadIdentify, load identifiction service routine on page 214 or Editing the tooldata on page 148.1443HAC 16590-1 Revision: B
6 Programming and testing6.4.2. Defining the tool frame6.4.2. Defining the tool framePreparationsTo define the tool frame, you first need a reference point in the world coordinate system. Ifyou need to set the tool center point orientation, you also need to affix elongators to the tool.Selecting method for defining tool frameThis procedure describes how to select method for defining the tool frame.StepAction1. On the ABB menu, tap Jogging.2. Tap Tool to display the list of available tools.3. Tap and hold the tool you want to define.A menu appears.4. In the menu, tap Define...The tool coordinate system definition dialog box appears.5. Select the method of choice from the Method pop up menu.6. Select the number of approach points from the No of points pop up menu.Available methodsAll methods require you to define the cartesian coordinates of the tool center point. Themethods give you a choice in how the orientation will be set and defined.If you want to...set the orientation the same as the orientationof the robots mounting platekeep the current orientationset the orientation in Z axisset the orientation in X and Z axes...then select4points TCP4 points TCP (orientation unchanged)5points TCP&Z6points TCP&Z,X3HAC 16590-1 Revision: BContinues on next page145
6 Programming and testing6.4.2. Defining the tool frameContinuedDefining tool center point Cartesian coordinatesThis procedure describes how to define the tool center point in Cartesian coordinates.en0400000906Step Action Info1. Jog the robot to an appropriate position for the firstapproach point.2. Tap Modify Position to define the point.3. Repeat step 1 and 2 for each approach point to bedefined, positions B, C, and D.Position AJog away from the fixedworld point to achieve bestresults. Just changing thetool orientation will not giveas good a result.146Continues on next page3HAC 16590-1 Revision: B
6 Programming and testing6.4.2. Defining the tool frameContinuedDefining elongator pointsThis procedure describes how to define the elongator points.StepAction1. Without changing the tool’s orientation, jog the robot so that the fixed world pointbecomes a point on the desired positive axis of the rotated tool coordinate system.2. Tap Modify Position to define the point.3. Repeat step 1 and 2 for the second axis if it also should be defined.3HAC 16590-1 Revision: B147
6 Programming and testing6.4.3. Editing the tool data6.4.3. Editing the tool dataTool dataUse the value settings to set the tool center point position and physical properties of the toolsuch as weight and center of gravity.This can also be done automatically with the service routine LoadIdentify. See sectionsRunning a service routine on page 209, or LoadIdentify, load identifiction service routine onpage 214.Displaying the tool dataThis section details how to display the tool data.StepAction1. On the ABB menu, tap Jogging.2. Tap Tool to display the list of available tools.3. Tap and hold the tool you want to edit.A menu appears.• Change Declaration• Change Value• Delete• Define4. In the menu, tap Change Value.The data that defines the tool appears. Green text indicates that the value can bechanged.5. Proceed with changing the data as described below.Measuring the tool center pointThe easiest way to define the tool center point, TCP, is usually to use the predefined methoddescribed in Defining the tool frame on page 145. If you use this method, you do not have towrite any values for tframe as these are supplied by the method.If you already have the measurements of the tool, or for some reason want to measure themmanually, the values can be entered in the tool data.en0400000881148Continues on next page3HAC 16590-1 Revision: B
6 Programming and testing6.4.3. Editing the tool dataContinuedX 0Y 0Z 0X 1Y 1Z 1X axis for tool0Y axis for tool0Z axis for tool0X axis for the tool you want to defineY axis for the tool you want to defineZ axis for the tool you want to defineStepAction1. Measure the distance from the center of the robot’s mounting flange to the tool’scenter point along the X axis of tool0.2. Measure the distance from the center of the robot’s mounting flange to the tool’scenter point along the Y axis of tool0.3. Measure the distance from the center of the robot’s mounting flange to the tool’scenter point along the Z axis of tool0.Editing the tool definitionStep Action Instance Unit1. Enter the cartesian coordinates ofthe tool center point’s position.2. If necessary, enter the tool frameorientation.tframe.trans.xtframe.trans.ytframe.trans.ztframe.rot.q1tframe.rot.q2tframe.rot.q3tframe.rot.q4[mm]None3. Enter the weight of the tool. tload.mass [kg]4. If necessary, enter the tool’scenter of gravity.tload.cog.xtload.cog.ytload.cog.z[mm]5. If necessary, enter the orientationof the axis of moment6. If necessary, enter the tool’smoment of inertia.7. Tap OK to use the new values,Cancel to leave the definitionunchanged.tload.aom.q1tload.aom.q2tload.aom.q3tload.aom.q4tload.ixtload.iytload.izNone[kgm 2 ]3HAC 16590-1 Revision: B149
6 Programming and testing6.4.4. Editing the tool declaration6.4.4. Editing the tool declarationTool declarationUse the declaration to change how the tool variable can be used in the program’s modules.Displaying the tool declarationStepAction1. On the ABB menu, tap Jogging.2. Tap Tool to see the list of available tools.3. Tap and hold the tool whose definition you want to edit.A menu appears.• Change Declaration• Change Value• Delete• Define4. In the menu, tap Change Declaration.The tool's declaration appears.5. Edit the tool declaration as listed in section Creating a tool on page 142.NOTE!If you change the name of a tool after it is referenced in any program you must also changeall occurrences of that tool.1503HAC 16590-1 Revision: B
6 Programming and testing6.4.5. Deleting a tool6.4.5. Deleting a toolDeleting a toolThis section describes how to delete a tool.StepAction1. In the ABB menu, tap Jogging.2. Tap Tool to display the list of available tools.3. Tap and hold the tool you want to delete.A menu appears.4. Tap Delete to delete the selected tool.A confirmation dialog box appears.5. In the dialog box, tap Yes to delete the tool, No to keep the tool.CAUTION!A deleted tool, work object or payload cannot be recovered, and all related data will be lost.If the tool, work object or payload is referenced by any program, those programs cannot runwithout changes.If you delete a tool you cannot continue the program from the current position.3HAC 16590-1 Revision: B151
6 Programming and testing6.4.6. Setup for stationary tools6.4.6. Setup for stationary toolsStationary toolsStationary tools are used, for instance, in applications that involve large machines such ascutters, presses and punch cutters. You may use stationary tools to perform any operation thatwould be difficult or inconvenient to perform with the tool on the robot.With stationary tools, the robot holds the work object.Make a tool stationaryThis section describes how to make a tool stationery.StepAction1. In the ABB menu, tap Jogging.2. Tap Tool to display the list of available tools.3. Tap and hold the tool you want to edit.A menu appears.4. In the menu, tap Change value.The data that defines the tool appears.5. Tap the instance robhold.6. Tap FALSE to make this tool stationary.7. Tap OK to use the new setup, Cancel to leave the tool unchanged.Make a work object robot heldThis section describes how to make a work object robot held.StepAction1. In the Jogging window, tap Work object to display the list of available workobjects.2. Tap and hold the work object you want to edit.A menu appears.3. In the menu, tap Change value.The data that defines the work object appears.4. Tap the instance robhold.5. Tap TRUE to indicate that this work object is held by the robot.6. Tap OK to use the new setup, Cancel to leave the work object unchanged.152Continues on next page3HAC 16590-1 Revision: B
6 Programming and testing6.4.6. Setup for stationary toolsContinuedDifferences in coordinate system referencingThis section describes differences in coordinate system referencing.The......normally referencesthe......but now referencesthe...work object coordinatesystemuser coordinate systemuser coordinate system (nochange)user coordinate system world coordinate system robot’s mounting platetool coordinate system robot’s mounting plate world coordinate systemSet up the tool coordinate systemYou use the same measurement methods to set up a stationary tool coordinate system as withtools mounted on the robot.The world reference tip must, in this case, be attached to the robot. Define and use a tool withthe reference tip’s measurements when you create approach points. You also need to attachelongators to the stationary tool if you need to set up the orientation.You should enter the reference tip’s tool definition manually to minimize errors whencalculating the stationary tool’s coordinate system.You may enter the stationary tool’s definition manually.en04000009903HAC 16590-1 Revision: B153
6 Programming and testing6.5.1. Creating a work object6.5 Work objects6.5.1. Creating a work objectWhat happens when I create a work object?A variable of the type wobjdata is created. The variable’s name will be the name of the workobject.For more information on data types, see RAPID reference manual - Functions and datatypes.See also What is a work object? on page 304 for more details.Creating a work objectThe work object’s coordinate system is now identical with the world coordinate system. Todefine the position and orientation of the work object’s coordinate system, see Editing thework object data on page 158StepAction1. On the ABB menu, tap Jogging.2. Tap Work Object to display the list of available work objects.3. Tap New... to create a new work object.4. Tap OK.Work object declaration settingsIf you want to change... then... Recommendationthe work object’s name tap the ... button next to it Work objects areautomatically named wobjfollowed by a runningnumber, for examplewobj10, wobj27.You should change this tosomething more descriptive.If you change the name of awork object after it isreferenced in any programyou must also change alloccurrences of that workobject.the scopeselect the scope of choicefrom the menuWork objects should alwaysbe global to be available to allmodules in the program.the storage type - Work object variables mustalways be persistent.the moduleselect the module in whichthis work object should bedeclared from the menu1543HAC 16590-1 Revision: B
6 Programming and testing6.5.2. Defining the work object coordinate system6.5.2. Defining the work object coordinate systemOverviewSelecting methodA work object must be defined in two frames, the user frame (related to the world frame) andthe object frame (related to the user frame).When defining a work object you can use either the user frame or the object frame.This procedure describes how to select method. Note that this only works for a user createdwork object, not the default work object, wobj0.StepAction1. On the ABB menu, tap Jogging.2. Tap Work object to display the list of available work objects.3. Tap and hold the work object you want to define.A menu appears.4. In the menu, tap Define....5. Select method from the User method or the Object method menu. See Definingthe user frame on page 156 and Defining the work object frame on page 157en04000008933HAC 16590-1 Revision: BContinues on next page155
6 Programming and testing6.5.2. Defining the work object coordinate systemContinuedDefining the user frameThis section details how to define the user frame. Note that this only works for a user createdwork object, not the default work object, wobj0.en0400000887The x axis will go through points X1-X2, and the y axis through Y1.Step Action Info1. In the User method pop up menu, tap 3 points.2. Press the enabling device and jog the robot to the first(X1, X2 or Y1) point you want to define.3. Select the point in the list.4. Tap Modify Position to define the point.5. Repeat steps 2 to 4 for the remaining points.Great distance betweenX1 and X2 is preferable fora more precise definition.156Continues on next page3HAC 16590-1 Revision: B
6 Programming and testing6.5.2. Defining the work object coordinate systemContinuedDefining the work object frameThis section describes how to define the work object frame.en0400000899The x axis will go through points X1-X2, and the y axis through Y1.StepAction1. In the Object method pop up menu, tap 3 points.2. See steps 2 to 4 in the description of Defining the user frame on page 156.3HAC 16590-1 Revision: B157
6 Programming and testing6.5.3. Editing the work object data6.5.3. Editing the work object dataOverviewUse the definition to set the position of the user and work object coordinate system andphysical properties of the work object, such as weight and center of gravity.Displaying the work object dataStepAction1. In the ABB menu, tap Jogging.2. Tap Work object to display the list of available work objects.3. Tap and hold the work object you want to edit.A menu appears.4. In the menu, tap Change Value.The data that defines the work object appears.Setting the work object and user coordinate systems positionThe easiest way to set the work object and user coordinate systems position is to use themethod described in Defining the work object coordinate system on page 155.Step Action Instance Unit1. Enter the cartesian coordinates ofthe position of the work objectcoordinate system.2. If necessary, enter the coordinatesystem’s orientation.3. Enter the cartesian coordinates ofthe position of the user coordinatesystem.4. If necessary, enter the coordinatesystem’s orientation.5. Tap OK to user the new values,Cancel to leave the definitionunchanged.oframe.trans.x[mm]oframe.trans.yoframe.trans.zoframe.rot.q1-oframe.rot.q2oframe.rot.q3oframe.rot.q4uframe.trans.x[mm]uframe.trans.yuframe.trans.zuframe.rot.q1-uframe.rot.q2uframe.rot.q3uframe.rot.q4- -1583HAC 16590-1 Revision: B
6 Programming and testing6.5.4. Editing the work object declaration6.5.4. Editing the work object declarationOverviewUse the declaration to change how the work object variable can be used in the program’smodules.Displaying the work object declarationStepAction1. In the ABB menu, tap Jogging.2. Tap Work object to see the list of available work objects.3. Tap and hold the work object who’s definition you want to edit.A menu appears.4. In the menu, tap Change Declaration.5. The work object’s declaration appears.6. Edit the tool declaration as listed in section Creating a work object on page 154.NOTE!If you change the name of a work object after it is referenced in any program you must alsochange all occurrences of that work object.3HAC 16590-1 Revision: B159
6 Programming and testing6.5.5. Deleting a work object6.5.5. Deleting a work objectDeleting a work objectStepAction1. In the ABB menu, tap Jogging.2. Tap Work object to display the list of available work objects.3. Tap and hold the work object you want to delete.A menu appears.4. In the menu, tap Delete to delete the work object.A confirmation dialog box appears.5. In the dialog box, tap Yes to delete the work object, No to keep it.CAUTION!A deleted tool, work object or payload cannot be recovered, and all related data will be lost.If the tool, work object or payload is referenced by any program, those programs cannot runwithout changes.If you delete a tool you cannot continue the program from the current position.1603HAC 16590-1 Revision: B
6 Programming and testing6.6.1. Creating a payload6.6 Payloads6.6.1. Creating a payloadWhat happens when I create a payload?A variable of the type loaddata is created. The variables name will be the name of thepayload. For more information on data types, see RAPID reference manual - Functions anddata types.Adding a new payload and setting data declarationThe payloads coordinate system will be set to the position, including orientation, of the worldcoordinate system.StepAction1 In the ABB menu tap Jogging.2 Tap Payload to display the list of available payloads.Tap New to create a new payload. Enter data, see table below.3 Tap OK.Payload declaration settingsIf you want to change... ...then... Recommendationthe payload’s name tap the ... button next to it Payloads are automaticallynamed load followed by arunning number, for exampleload10, load31.You should change this tosomething more descriptive.If you change the name of apayload after it is referencedin any program you must alsochange all occurrences ofthat payload’s name.the scopeselect the scope of choicefrom the menuPayloads should always beglobal to be available to allmodules in the program.the storage type - Payload variables mustalways be persistent.the moduleselect the module in whichthis payload should bedeclared from the menu-3HAC 16590-1 Revision: B161
6 Programming and testing6.6.2. Editing the payload data6.6.2. Editing the payload dataOverviewUse the payload data to set physical properties of the payload such as weight and center ofgravity.This can also be done automatically with the service routine LoadIdentify. See sectionsRunning a service routine on page 209, or LoadIdentify, load identifiction service routine onpage 214.Displaying the payload definitionStepAction1. In the ABB menu, tap Jogging.2. Tap Payload to display the list of available payloads.3. Tap and hold the payload you want to edit.A menu appears.4. On the menu, tap Change Value.The data that defines the payload appears.Changing the payload dataThis procedure describes how to manually enter the payload data. This can also be doneautomatically by running the service routine Load Identify. How to run a service routine isdescribed in section Running a service routine on page 209.Step Action Instance Unit1. Enter the weight of the payload. load.mass [kg]2. Enter the payload’s center of gravity. load.cog.xload.cog.yload.cog.z[mm]3. Enter the orientation of the axis ofmoment.load.aom.q1load.aom.q2load.aom.q3load.aom.q34. Enter the payload’s moment of inertia. ix[kgm 2 ]iyiz5. Tap OK to use the new values, Cancelto leave the data unchanged.- -1623HAC 16590-1 Revision: B
6 Programming and testing6.6.3. Editing the payload declaration6.6.3. Editing the payload declarationOverviewUse the declaration to change how the payload variable can be used in the program’s modules.Displaing the payload declarationStepAction1. In the ABB menu, tap Jogging.2. Tap Payload to see the list of available payloads.3. Tap and hold the payload whose definition you want to edit.A menu appears.4. In the menu, tap Change declaration.5. The payload’s declaration appears. See Creating a payload on page 161.NOTE!If you change the name of a payload after it is referenced in any program you must alsochange all occurrences of that payload’s name.3HAC 16590-1 Revision: B163
6 Programming and testing6.6.4. Deleting a payload6.6.4. Deleting a payloadDeleting a payloadStepAction1. In the ABB menu, tap Jogging.2. Tap Payload to display the list of available payloads.3. Tap and hold the payload you want to delete.A menu appears.4. Tap Delete.A confirmation dialog box appears.5. In the dialog box, tap Yes to delete the payload, No to keep the payload.CAUTION!A deleted tool, work object or payload cannot be recovered, and all related data will be lost.If the tool, work object or payload is referenced by any program, those programs cannot runwithout changes.If you delete a tool you cannot continue the program from the current position.1643HAC 16590-1 Revision: B
6 Programming and testing6.7.1. Handling of programs6.7 Programming6.7.1. Handling of programsOverviewThis section details how to perform normal handling of existing robot programs. It detailshow to:• create a new program• load an existing program• save a program• rename a program• delete a programEach task must contain one program, no more, no less.How to create a new program when no program is available is detailed in section Creating anew program on page 165.About program filesWhen saving a program to the controller hard disk, it is by default saved to the directoryHOME in the system’s folder. The program is saved as a folder, named as the program,containing the actual program file, of type pgf.When loading a program you open the program folder and select the pgf file.When renaming a program you rename the program folder and the program file.When saving a loaded program which is already saved to the hard disk, you must not openthe existing program folder. Instead, you should save the program folder again and overwritethe old version, or rename the program.Creating a new programThis section describes how to create a new program.StepAction1. On the ABB menu, tap Program Editor.2. Tap Tasks and Programs.3. Tap File, then New Program.If there was already a program loaded, a warning dialog appears.• Tap Save to save the loaded program.• Tap Don’t save to close loaded program without saving it, i.e. delete fromprogram memory.• Tap Cancel to leave the program loaded.4. Use the soft keyboard to name the new program. Then tap OK.5. Tap Back to return to the editor view or Show modules to add existing modulesto the new program. Continue by adding instructions, routines, or modules.3HAC 16590-1 Revision: BContinues on next page165
6 Programming and testing6.7.1. Handling of programsContinuedLoading an existing programThis section describes how to load an existing program.StepAction1. On the ABB menu, tap Program Editor.2. Tap Tasks and Programs.3. Tap File, then Load Program.If there was already a program loaded, a warning dialog appears.• Tap Save to save the loaded program.• Tap Don’t save to close loaded program without saving it, i.e. delete fromprogram memory.• Tap Cancel to leave the program loaded.4. Use the file searching tool to locate the program file to be loaded (file type pgf).Then tap OK.The program is loaded and the program code is displayed.en0400000699Saving a programThis section describes how to save a loaded program to the controller’s hard disk.A loaded program is automatically saved in the program memory, but saving to the controllerhard disk is an extra precaution.StepAction1. On the ABB menu, tap Program Editor.2. Tap Tasks and Programs.166Continues on next page3HAC 16590-1 Revision: B
6 Programming and testing6.7.1. Handling of programsContinuedStepAction3. Tap File and select Save Program As....4. Use the suggested program name or tap ... to open the soft keyboard and enter anew name. Then tap OK.Renaming a loaded programThis section describes how to rename a loaded program.StepAction1. On the ABB menu, tap Program Editor.2. Tap Tasks and Programs.3. Tap File and select Rename Program.A soft keyboard is displayed.4. Use the soft keyboard to enter the new name of the program. Then tap OK.3HAC 16590-1 Revision: B167
6 Programming and testing6.7.2. Handling of modules6.7.2. Handling of modulesOverviewThis section details how to handle program modules. i.e.:• create a new module• load an existing module• save a module• rename a module• delete a moduleCreating a new moduleThis section describes how to create a new module.StepAction1. On the ABB menu, tap Program Editor.2. Tap Modules.3. Tap File, then tap New Module.en04000006884. Tap ABC... and use the soft keyboard to enter the new module’s name. Then tapOK to close the soft keyboard.5. Select which type of module to be created:• Program• SystemThen tap OK.The differences between module types are described in section The structure ofa RAPID application on page 134.168Continues on next page3HAC 16590-1 Revision: B
6 Programming and testing6.7.2. Handling of modulesContinuedLoading an existing moduleThis section describes how to load an existing module.StepAction1. On the ABB menu, tap Program Editor.2. Tap Modules.3. Tap File, then Load Module.en0400000689Locate the module to be loaded. See section <strong>FlexPendant</strong> Explorer on page 75.4. Tap OK to load the selected module.The module is loaded.Saving a moduleThis section describes how to save a module.StepAction1. On the ABB menu, tap Program Editor.2. Tap Modules and tap to select the module you want to load.3HAC 16590-1 Revision: BContinues on next page169
6 Programming and testing6.7.2. Handling of modulesContinuedStepAction3. Tap File, then Save Module As...en04000006904. Tap on the suggested file name and use the soft keyboard to enter the module’sname. Then tap OK.5. Use the file searching tool to locate where you want to save the module. Seesection <strong>FlexPendant</strong> Explorer on page 75. The default location is on the controllerdisk.The tap OK.The module is saved.Renaming a moduleThis section describes how to rename a module.StepAction1. On the ABB menu, tap Program Editor.2. Tap Modules.3. Tap File, then Rename Module...The soft keyboard is displayed.4. Use the soft keyboard to enter the module’s name. Then tap OK.170Continues on next page3HAC 16590-1 Revision: B
6 Programming and testing6.7.2. Handling of modulesContinuedDeleting a moduleThis section describes how to delete a module from memory. If the module has been saved todisk, it will not be erased from the disk..StepAction1. On the ABB menu, tap Program Editor.2. Tap Modules and tap to select the module you want to delete.3. Tap File, then Delete Module...A dialog box is displayed.4. Tap OK to delete the module without saving it.If you want to save the module first, tap Cancel and save the module first.How to save the module is detailed in section Saving a module on page 169.3HAC 16590-1 Revision: B171
6 Programming and testing6.7.3. Handling of routines6.7.3. Handling of routinesOverviewThis section details how to handle program routines. i.e.:• create a new routine• create a copy of a routine• change the declaration of a routine• delete a routineCreating a new routineThis section details how to create a new routine, set the declaration, and add it to a module.StepAction1. On the ABB menu, tap Program Editor.2. Tap Routines.3. Tap File, then New Routine.A new routine is created and displayed with default declaration values.en04000006924. Tap ABC... and use the soft keyboard to enter the new routines’ name. Then tapOK.5. Select the type of routine:• Procedure: used for a normal routine without return value• Function: used for a normal routine with return value• Trap: used for an interrupt routine6. Do you need to use any parameters?If YES; tap ... and proceed as detailed in section Defining parameters in routineon page 173.If NO; proceed to the next step.172Continues on next page3HAC 16590-1 Revision: B
6 Programming and testing6.7.3. Handling of routinesContinuedStepAction7. Select module to add the routine to.8. Tap the checkbox to select Local declaration if the routine should be local.A local routine can only be used in the selected module.9. Tap OK.Defining parameters in routineThis section describes how to define parameters in a routine.StepAction1. In the routine declaration, tap ... to define parameters.A list of defined parameters is displayed.en04000006933HAC 16590-1 Revision: BContinues on next page173
6 Programming and testing6.7.3. Handling of routinesContinuedStepAction2. If no parameters are shown, tap Add to add a new parameter.• Add optional parameter adds a parameter that is optional• Add optional mutual parameter adds a parameter that is mutually optionalwith another parameterRead more about routine parameters in the RAPID reference manuals.en04000006953. Use the soft keyboard to enter the name of the new parameter and then tap OK.The new parameter is displayed in the list.174en04000006964. Tap to select a parameter. To edit values, tap the value.Continues on next page3HAC 16590-1 Revision: B
6 Programming and testing6.7.3. Handling of routinesContinuedStepAction5. Tap OK to return to the routine declaration.Creating a copy of a routineThis section describes how to create a copy of a routine.StepAction1. On the ABB menu, tap Program Editor.2. Tap Routines.3. Highlight the routine by tapping it.4. Tap File, then Create copy.The new routine is displayed. The name of the new routine is set to the same asthe original with the suffix Copy.5. Make any changes in the declarations for the new routine copy. Then tap OK.How to make all declarations is detailed in section Creating a new routine on page172.Changing the declaration of a routineThis section describes how to change the declaration of a routine.StepAction1. On the ABB menu, tap Program Editor.2. Tap Routines.3. Highlight the routine by tapping it.4. Tap File, then Change Declaration5. Change any declaration values for the routine. Then tap OK.Declaration settings are described in section Creating a new routine on page 172.Deleting a routineThis section describes how to delete a routine from memory.StepAction1. On the ABB menu, tap Program Editor.2. Tap Routines.3. Highlight the routine by tapping it.4. Tap File, then Delete routine...A dialog box is displayed.5. Tap:• OK to delete the routine without saving any changes made to it.• Cancel to revert without deleting the routine.3HAC 16590-1 Revision: B175
6 Programming and testing6.7.4. Handling of instructions6.7.4. Handling of instructionsInstructionsUndo and redoAdding instructionsA RAPID program consists of instructions. An instruction can, for example, move the robot,set an I/O signal, or write a message to the operator.A large number of instructions are available, and these are listed in RAPID reference manual- Instructions. The basic procedure for adding instructions are, however, identical.When editing programs in the Program editor, you can undo and redo up to three steps. Thisfunction is available in the Edit menu.This section describes how to add instructions.StepAction1. On the ABB menu, tap Program Editor.2. Tap to highlight the instruction under which you want to add a new instruction.3. Tap Add instruction.A category of instructions is displayed.en0400000697A large number of instructions, divided into several categories, are available. Thedefault category is Common, where the most common instructions are listed.You can create three personalized lists using the system parameters of the typeMost Common Instruction in the topic Man-machine Communication. The systemparameters are described in Technical reference manual - System parameters.176Continues on next page3HAC 16590-1 Revision: B
6 Programming and testing6.7.4. Handling of instructionsContinuedStepAction4. Tap Common to display a list of the available categories.You can also tap Previous/Next at the bottom of the list of instructions to move tothe next/previous category.5. Tap the instruction you want to add.The instruction is added to the code.Editing instruction argumentsThis section describes how to edit instruction arguments.StepAction1. Tap the instruction to edit.en04000006993HAC 16590-1 Revision: BContinues on next page177
6 Programming and testing6.7.4. Handling of instructionsContinuedStepAction2. Tap Edit.en04000007013. Tap Change Selected.Depending on the type of instruction, the arguments have different data types.Use the soft keyboard to change string values or proceed to the next steps forother data types or multiple argument instructions.en0400000702178Continues on next page3HAC 16590-1 Revision: B
6 Programming and testing6.7.4. Handling of instructionsContinuedStepAction4. Tap the argument to be changed.A number of options are displayed.en04000007035. Tap an existing data instance to select and then tap OK to complete, or tap InsertExpression... See more about expressions in section Editing instructionexpressions and declarations on page 188.To edit a particular data instance, see Editing instruction expressions anddeclarations on page 188.TIP!Tapping twice on an instruction will automatically launch the Change selected option.Tapping twice on an instruction argument will automatically launch the argument editor.Copying and pasting instructions or argumentsThis section describes how to paste instructions or arguments.StepAction1. Tap to select the argument or instruction you want to copy and then tap Edit.2. Tap Copy.3. Place the cursor on the instruction above where you want to paste the instructionor argument, or tap on the argument or instruction you want to change and tapPaste.3HAC 16590-1 Revision: BContinues on next page179
6 Programming and testing6.7.4. Handling of instructionsContinuedCutting an instructionThis section describes how to cut an instruction.StepAction1. Tap to select the instruction you want to cut and then tap Edit.2. Tap Cut.Changing motion mode for a move instructionThis section describes how to change the motion mode for a move instruction.StepAction1. Tap to select the move instruction you want to change and then tap Edit.2. Tap Change to Joint or Change to Linear.The change is performed.Commenting instruction rowsInstruction rows can be commented, i.e. skipped in the program execution. The comment/uncomment command is found under the Edit menu in the Program editor.1803HAC 16590-1 Revision: B
6 Programming and testing6.7.5. Example: Add movement instructions6.7.5. Example: Add movement instructionsOverviewIn this example you will create a simple program that makes the robot move in a square. Youneed four movement instructions to complete this program.ABCen0400000801ABCFirst pointRobot movement Speed data v50 = speed 50mm/sZone z50 = (50mm)Add movement instructionsThis section details how to add movement instructions.Step Action Info1. Jog the robot to the first point. Tip: Use only left-right/updownjoystick movements tojog in a square.2. In the program editor, tap Add Instruction.3. Tap MoveL to insert a MoveL instruction.4. Repeat for the next three positions of the square.5. Tap on z50 in the last instruction. Tap Edit andthen Change selected.6. Tap Fine to make the square end in a stop point.Tap OK.ResultYour program code should look like this:Proc main()MoveL *, v50, z50, tool0;MoveL *, v50, z50, tool0;MoveL *, v50, z50, tool0;MoveL *, v50, fine, tool0;End Proc;3HAC 16590-1 Revision: B181
6 Programming and testing6.8.1. Mirroring a program, module, or routine6.8 Advanced programming6.8.1. Mirroring a program, module, or routineMirroringMirroring creates a copy of a program, module, or routine with all positions mirrored in aspecific mirror plane. In general, all data used in the original will be mirrored. Mirroring dataonly affects the initialization value, i.e. any current value will be ignored.The mirror function can be applied to any program, module, or routine.Mirroring a routineThis section describes how to mirror a routine.StepAction1. In the ABB menu, tap Program Editor.2. Tap Edit and tap Mirror.3. To define the mirror.• Tap the Module menu to select in which module the routine to mirror isused.• Tap the Routine menu to select which routine you want to mirror.• Tap ... to open the soft keyboard and enter the name for the new routine.4. If you want to define the type of mirror then tap Advanced options, otherwiseproceed to the next step.To define the type of mirror:• Deselect the Base Mirror checkbox.• Tap ... to the right of Work object to select the work object frame to whichall positions which are to be mirrored are related to.• Tap ... to the right of Mirror frame to select the mirror plane to which allpositions will be mirrored.• Tap the Axis to mirror menu to specify the mirroring orientation, x or y.• Tap OK to save the advanced options.5. Tap OK.A dialogue box is displayed.6. Tap Yes to apply the selected mirror to the routine, or tap No to cancel.Mirroring a module or programThis section describes how to mirror a module or program.StepAction1. In the ABB menu, tap Program Editor.2. Tap Edit and tap Mirror.3. To define the mirror.• Tap the Module menu to select module to mirror.• Tap ... to open the soft keyboard and enter the name for the new moduleor program.182Continues on next page3HAC 16590-1 Revision: B
6 Programming and testing6.8.1. Mirroring a program, module, or routineContinuedStepAction4. If you want to define the type of mirror then tap Advanced options, otherwiseproceed to the next step.To define the type of mirror:• Deselect the Base Mirror checkbox.• Tap ... to the right of Work object to select the work object frame to whichall positions which are to be mirrored are related to.• Tap ... to the right of Mirror frame to select the mirror plane to which allpositions will be mirrored.• Tap the Axis to mirror menu to specify the mirroring orientation, x or y.• Tap OK to save the advanced options.5. Tap OK.A dialogue box is displayed.6. Tap Yes to apply the selected mirror to the module, or tap No to cancel.3HAC 16590-1 Revision: B183
6 Programming and testing6.8.2. Modifying positions6.8.2. Modifying positionsOverview modifying positionsPositions are instances of the data type robtarget or jointtarget. See RAPID reference manual- Functions and data types.The positions can be modified either using the function HotEdit, where you enter the newvalues using a soft keyboard, or using the Modify positions function in the Program editorwhere you step and jog the robot to the new position.HotEdit is described in section HotEdit on page 73.Note that jointtargets can only be modified using the Modify positions method in the Programeditor, i.e. not with HotEdit.CAUTION!Changing programmed positions may significantly alter the robot’s movement pattern.Always make sure any changes are safe for both equipment and personnel.Overview modifying positions in the Program editorWhen modifying positions by jogging the robot to the new position you can either single-stepthrough the program to the position(s) you want to modify, or jog directly to the new positionand change the corresponding position argument of the instruction.The recommendation is to step to through the program to the position, but if you know yourrobot program well and the new position is known, it is faster to use the jogging method.Note! Do not use this method to change orientation values.To modify positions using the Program editor, the system must be in manual mode.Modifying positionsThis procedure describes how to modify positions, either by single-stepping to the positionsor jogging.Step Action Info1. On the ABB menu, tap Program Editor.2. Stop the program, if running.3. Do you want to single-step to the position or jog?If single-stepping, step through the program to theposition you want to change. Make sure the correctargument is selected.If jogging, use the Jogging view to make sure thatthe same work object and tool that are used in theinstruction are selected.4. Jog to the new position.5. When using the jogging method, tap to select theposition argument you want to change.6. Tap Modify Position.A confirmation dialog appears.7. Tap Modify to use the new position, Cancel to keepthe original.When single-stepping, ifthe instruction orprocedure call has morethan one positionargument, continue to stepto reach each argument.184Continues on next page3HAC 16590-1 Revision: B
6 Programming and testing6.8.2. Modifying positionsContinuedStep Action Info8. Repeat step 3 through 7 for each position argumentyou want to change.9. Tap Close to close the Program Editor.LimitationsRelated informationThe Modify Position button in the Program editor is disabled until you select a positionargument.The maximum movement or change in orientation, may be restricted by the systemparameters (topic Controller, type ModPos Settings) in the system design. Please read yourcell or plant documentation for details.If the system parameters are setup to use absolute limits for position changes, then the originalpositions can only be restored or changed using the baseline menu in HotEdit.If a named position is changed, all other instructions using that position will be affected.HotEdit on page 73.RAPID reference manual - Functions and data types.Technical reference manual - System parameters.3HAC 16590-1 Revision: B185
6 Programming and testing6.8.3. Moving the robot to a programmed position6.8.3. Moving the robot to a programmed positionPositionsA robot program usually contain programmed positions. The robot can move automaticallyto a programmed position using a function in the Jogging menu.The robot will move at 250 mm/s.DANGER!When moving the robot automatically, the robot arm may move without warning. Make sureno personnel are in safeguarded space and that no objects are in the way between the currentposition and the programmed position.Moving the robot to a programmed positionThis procedure describes how to move a robot automatically to a programmed position.Step Action Info1. On the ABB menu, tap Jogging.2. Make sure the correct mechanical unit is selected andthen tap Go To....3. Tap to select a programmed position. If you have manyprogrammed positions youcan use a filter to narrowdown the visible positions.See section Filtering dataon page 101.4. Press and hold the enabling device and then tap andhold the Go To button.The robot now moves directly from the currentposition to the programmed position. Make sure noobjects are in the way.1863HAC 16590-1 Revision: B
6 Programming and testing6.8.4. Aligning tools6.8.4. Aligning toolsOverviewA tool can be aligned with another coordinate system.When aligning a tool, the tool’s z axis is aligned to the selected coordinate system’s nearestaxis. Therefore it is recommended to first jog the tool so it is close to the desired coordinates.Note that the tool’s data is not changed!Aligning mechanical unitsThis procedure describes how to align tools.StepAction1. On the ABB menu, tap Jogging.2. Make sure that the right tool is active and then tap Align....en05000015483. Select a coordinate system to align the the selected tool to.4. Press and hold the enabling device and then tap and hold Start Align to startaligning the tool.5. Tap Close when completed.3HAC 16590-1 Revision: B187
6 Programming and testing6.8.5. Editing instruction expressions and declarations6.8.5. Editing instruction expressions and declarationsExpressionsAn expression specifies the evaluation of a value. It can be used, for example:• as a condition in an IF instruction• as an argument in an instruction• as an argument in a function callRead more in RAPID reference manual - RAPID overview and RAPID reference manual -Instructions.Inserting expressionsThis procedure describes how to insert and edit expressions in instructions.StepAction1. In the Program Editor, tap to select the instruciton you want to edit and then tapEdit.2. Tap Change selected and tap to select the argument to change.3. Tap Insert expression.en04000007044. Edit the length of the expression by tapping the keys to the right:• Arrows: step backward and forward in the expression.• + to add expression. Tap the new expression to define it.• - to delete expression.• () to set a parenthesis around the highlighted expression.• (o) to delete a parenthesis.188Continues on next page3HAC 16590-1 Revision: B
6 Programming and testing6.8.5. Editing instruction expressions and declarationsContinuedStepAction5. Tap:• New to create a new data declaration, i.e. adding a data declaration notpreviously used. This is detailed in section Creating new data declarationson page 189.• View to change views or change data type. This is detailed in sectionChanging data type on page 190.• ABC displays the soft keyboard.6. Tap OK to save the expression.Declarations and data typesWhen editing an expression new data can be declared with the button New. More informationabout data declarations and how to edit them can be found in section Editing data instanceson page 139.Creating new data declarationsThis procedure describes how to create a new data declaration in an instruction expression.StepAction1. In the Insert Expression view, tap New.en04000007053HAC 16590-1 Revision: BContinues on next page189
6 Programming and testing6.8.5. Editing instruction expressions and declarationsContinuedStepAction2. Tap and enter desired values:• Initial value to set the initial value.• ... to display the soft keyboard and change the data type’s name.• Scope• Storage type• Module• Routine• Dimension to set the size of an array if the data type should be an array.• If a value has been chosen for Dimension, tap ... to set array size, seeWhat is a data array? on page 3123. After making all selections, tap OK.A dialog box is displayed, prompting you to allow resetting of the program pointerand applying all changes:• Tap Yes to proceed.• Tap No to return to the data type view without resetting of the programpointer or applying changes.Changing data typeThis section describes how to change data type.StepAction1. In the Insert Expression view, tap View and then Change data type, the followingscreen is displayed:en04000007062. Tap to select the required data type and tap OK.1903HAC 16590-1 Revision: B
6 Programming and testing6.8.6. Hiding declarations in program code6.8.6. Hiding declarations in program codeDeclarationsHiding declarationsProgram declarations can be hidden to make the program code easier to read.This section describes how to hide or show declarations.StepAction1. In the ABB menu, tap Program Editor to view a program.2. Tap Hide Declarations to hide declarations.Tap Show Declarations to show declarations.3HAC 16590-1 Revision: B191
6 Programming and testing6.8.7. Deleting programs from memory6.8.7. Deleting programs from memoryOverviewDeleting a program in a task does not erase the program from the controller hard disk but onlyfrom the program memory.When you switch programs, the previously used program is deleted from the programmemory, but not removed from the hard disk if it was saved there.How to save your work is detailed in section Handling of programs on page 165.The different memories are described in section What is “the memory”? on page 248.Deleting programs from memoryThis section details how to delete programs from the program memory.StepAction1. On the ABB menu tap Program Editor.2. Tap Tasks and Programs.3. Tap File.en0400000678192Continues on next page3HAC 16590-1 Revision: B
6 Programming and testing6.8.7. Deleting programs from memoryContinuedStepAction4. Tap Delete Program....WARNING! Recent program changes will not be saved.en04000008535. Tap OK.If you don’t want to lose information about program changes then use SaveProgram before deleting the program. How to save your work is described insection Handling of programs on page 165.3HAC 16590-1 Revision: B193
6 Programming and testing6.8.8. Deleting programs from hard disk6.8.8. Deleting programs from hard diskOverviewPrograms are deleted via <strong>FlexPendant</strong> Explorer or an FTP client. When deleting programsfrom the controller hard disk, the currently loaded program in the program memory is notaffected.The different memories are described in section What is “the memory”? on page 248.Deleting programs with <strong>FlexPendant</strong> ExplorerPrograms can be deleted using <strong>FlexPendant</strong> Explorer on the ABB menu. See section<strong>FlexPendant</strong> Explorer on page 75.1943HAC 16590-1 Revision: B
6 Programming and testing6.8.9. Activating mechanical units6.8.9. Activating mechanical unitsOverviewA mechanical unit can be active or deactive. Only active units are run when executing aprogram. Deactivated units will not run. This may be useful when programming or testing aprogram.A robot cannot be deactivated.The Activate function does not affect jogging. To select mechanical unit for jogging, use theMechanical unit property in the Jogging menu.Activating mechanical unitsThis procedure describes how to activate a mechanical unit.Step Action Info1. On the ABB menu, tap Jogging.2. Make sure that the right mechanical unit is selected,then tap Activate....To deactivate an active mechanical unit, tapDeactivate.A robot cannot bedeactivated.Related informationSelecting mechanical unit on page 108.Mechanical units can be active or deactive at startup depending on the system setup, seeTechnical reference manual - System parameters, topic Motion.3HAC 16590-1 Revision: B195
6 Programming and testing6.9.1. How to use the hold-to-run function6.9 Testing6.9.1. How to use the hold-to-run functionWhen to use the hold-to-run functionThe hold-to-run function is used to run or step programs in manual full speed mode, incombination with the enabling device.In systems with hold-to-run buttons on the back of the <strong>FlexPendant</strong>, one of these buttons areused. In systems without hold-to-run buttons, use the Start, Forward, or Backward buttonsinstead (press and hold). The hold-to-run function is the same.Operational mode<strong>Manual</strong> reduced speed mode<strong>Manual</strong> full speed modeAutomatic modeFunctionNormally, hold-to-run has no effect in the manual reducedspeed mode.However, it is possible to activate for manual reduced speedmode by changing a system parameter.Pressing hold-to-run AND pressing the enabling deviceenables running a program. It may be run continuously orstep-by-step.Releasing hold-to-run in this mode immediately stopsmanipulator movement as well as program execution. Whenpressing it again, execution is resumed from that position.Hold-to-run is not used in automatic mode.How to use the hold-to-run functionThis instruction details how use the hold-to-run function in manual full speed mode.StepAction1. Press the enabling device on the <strong>FlexPendant</strong>.2. In a system with hold-to-run buttons, choose execution mode by pressing either:• Start (continuous program execution)• Forward (step-by step program execution forwards)• Backward (step-by step program execution backwards)Then wait for the hold-to-run alert box and press the hold-to-run button.You can also select step mode, see section Stepping instruction by instruction onpage 205.3. In a system without hold-to-run buttons, choose execution mode by pressing andholding either:• Start (continuous program execution)• Forward (step-by step program execution forwards)• Backward (step-by step program execution backwards)4. If Start was pressed, then the program execution continues as long as the holdto-runor Start button is pressed.If Forward or Backward was pressed, the program is executed step-by-step byalternately releasing and pressing the hold-to-run or the Forward/Backwardbutton.196Continues on next page3HAC 16590-1 Revision: B
6 Programming and testing6.9.1. How to use the hold-to-run functionContinuedStepAction5. If the hold-to-run button is released, program execution stops.If the hold-to-run button is pressed again after being released, program executionis resumed from the position in which it was released.6. It is possible to change execution mode when the hold-to-run button is releasedand then continue the program execution with the new execution mode, by justactivating the hold-to-run button again.7. If the enabling device is released, intentionally or by accident, the completeprocedure must be repeated to enable running.3HAC 16590-1 Revision: B197
6 Programming and testing6.9.2. Running the program from a specific instruction6.9.2. Running the program from a specific instructionRunning the program from a specific instructionThis section details how to run the program from a specific instruction.StepAction1. On the ABB menu Tap Program Editor.2. Tap Debug.en0400000868Tap on the program step where you want to start, then tap Debug and selectMove PP to Cur.198Continues on next page3HAC 16590-1 Revision: B
6 Programming and testing6.9.2. Running the program from a specific instructionContinuedStep3.ActionxxMake sure that no personnel are in the robot working area.WARNING! Before running the robot, observe the safety information in sectionDANGER - Moving manipulators are potentially lethal! on page 18.4. Press the Start button on the <strong>FlexPendant</strong> hardware button set (see E inillustration below).en03000005873HAC 16590-1 Revision: B199
6 Programming and testing6.9.3. Running a specific routine6.9.3. Running a specific routineOverviewTo run a specific routine you must have the module with the routine loaded. How to runservice routines is described in section Running a service routine on page 209.Running a specific routineThis procedure describes how to run a specific routine in manual mode.StepAction1. On the ABB menu, tap Program Editor.2. Tap Debug and then Move PP to routine to place the program pointer at the startof the routine.3. Press the Start button on the <strong>FlexPendant</strong>.2003HAC 16590-1 Revision: B
6 Programming and testing6.9.4. Quickset menu, Run Mode6.9.4. Quickset menu, Run ModeRun modeSelect run modeBy setting run mode you define if the program execution should run once and then stop, orrun continuously.Under the Run mode menu, you can also select which tasks should be active or deactivated ifyou have the Multitasking option installed. Select task is also available under the QuicksetStep mode menu.This section describes how to select run mode using the Quickset menu.StepAction1. If you want to view/change any Run mode functionality, tap the Run Mode button.en0300000472The following buttons are displayed:• Single cycle running• Continuous runningThe Show tasks button opens the list with available tasks.3HAC 16590-1 Revision: BContinues on next page201
6 Programming and testing6.9.4. Quickset menu, Run ModeContinuedStepAction2. If you want to view/change which tasks that are active, tap the Show Tasks button.To select tasks you must be in manual mode.en0400000992The following is displayed:• A list of all available tasks. Tap to activate or deactivate tasks.• Hide tasks will hide the task list.2023HAC 16590-1 Revision: B
6 Programming and testing6.9.5. Quickset menu, Step Mode6.9.5. Quickset menu, Step ModeStep modeSelect step modeBy setting step mode you define how the step-by-step program execution should function.Under the Step mode menu, you can also select which tasks should be active or deactivatedif you have the Multitasking option installed. Select task is also available under the QuicksetRun mode menu.This section describes how to select step mode using the Quickset menu.StepAction1. If you want to view/change any Step mode functionality, tap the Step Mode button.en0300000543After tapping Step Mode, the following buttons are displayed:• Step into. Steps into called routines and executes them step-by-step.• Step out. Executes the remains of the current routine and then stops at thenext instruction in the routine from which the current routine was called.Not possible to use in the Main routine.• Step over. Called routines are executed in one single step.• Next move instruction. Steps to the next move instruction. Stops beforeand after movement instructions to allow e.g. modifying positions.Show tasks opens the list of available tasks.3HAC 16590-1 Revision: BContinues on next page203
6 Programming and testing6.9.5. Quickset menu, Step ModeContinuedStepAction2. If you want to view/change which tasks that are active, tap the Show Tasks button.To select tasks you must be in manual mode.en0400000993The following is displayed:• A: A list of all available tasks. Tap to activate or deactivate tasks.• B: Hide tasks will hide the task list.Related informationModifying positions on page 184.2043HAC 16590-1 Revision: B
6 Programming and testing6.9.6. Stepping instruction by instruction6.9.6. Stepping instruction by instructionOverviewIn all operating modes the program may be executed step by step forwards or backwards.Stepping backwards is limited, see RAPID overview for more details.Select step modeThis section details how to select step mode. Stepping can be done in three ways; step in, stepover, and motion step.Step Action Info1. Select step mode using the Quicksetmenu.Described in Quickset menu, StepMode on page 203.SteppingThis section details how to step forwards and backwards.If you want to step...forwardbackwardthen press...Forward button on <strong>FlexPendant</strong>Backward button on <strong>FlexPendant</strong>Limitations of backward executionThere are some restrictions for the backward execution:• When stepping backwards through a MoveC instruction, the execution does not stop inthe circular point.• It is not possible to step backwards out of a IF, FOR, WHILE and TEST statement.• It is not possible to step backwards out of a routine when reaching the beginning ofthe routine.• There are instructions affecting the motion that cannot be executed backwards (e.g.ActUnit, ConfL and PDispOn). If attempting to execute these backwards, an alertbox will inform you that this is not possible.Backward execution behaviorWhen stepping forward though the program code, a program pointer indicates the nextinstruction to execute and a motion pointer indicates the move instruction that the robot isperforming.When stepping backward though the program code, the program pointer indicates theinstruction above the motion pointer. When the program pointer indicates one moveinstruction and the motion pointer indicates another, the next backward movement will moveto the target indicated by the program pointer, using the type of movement and speedindicated by the motion pointer.3HAC 16590-1 Revision: BContinues on next page205
6 Programming and testing6.9.6. Stepping instruction by instructionContinuedExample of backward executionThis example illustrates the behavior when stepping backwards through move instructions.The program pointer and motion pointer helps you keep track of where the RAPID executionis and where the robot is.MoveL, MoveJ, and MoveC are move instructions in RAPID, see RAPID reference manual -Instructions.en0400001204ABCProgram pointerMotion pointerHighlighting of the robtarget that the robot is moving towards, or already hasreached.When...then...206stepping forward untilthe robot is in p5pressing theBackward buttononcepressing theBackward buttonagainpressing theBackward buttonagainthe motion pointer will indicate p5 and the program pointer willindicate the next move instruction (MoveL p6).the robot will not move but the program pointer will move to theprevious instruction (MoveC p3, p4). This indicates that this is theinstruction that will be executed the next time Backward is pressed.the robot will move to p4 linearly with the speed v300.The target for this movement (p4) is taken from the MoveC instruction.The type of movement (linear) and the speed are taken from theinstruction below (MoveL p5).The motion pointer will indicate p4 and the program pointer will moveup to MoveL p2.the robot will move circularly, via p3, to p2 with the speed v100.The target p2 is taken from the instruction MoveL p2. The type ofmovement (circular), the circular point (p3) and the speed are takenfrom the MoveC instruction.The motion pointer will indicate p2 and the program pointer will moveup to MoveL p1.Continues on next page3HAC 16590-1 Revision: B
6 Programming and testing6.9.6. Stepping instruction by instructionContinuedWhen...pressing theBackward buttonagainpressing the Forwardbutton oncepressing the Forwardbutton againthen...the robot will move linearly to p1 with the speed v200.The motion pointer will indicate p1 and the program pointer will moveup to MoveJ p0.the robot will not move but the program pointer will move to the nextinstruction (MoveL p2).the robot will move to p2 with the speed v200.3HAC 16590-1 Revision: B207
6 Programming and testing6.9.7. Quickset menu, Speed6.9.7. Quickset menu, SpeedSpeed buttonThe speed settings apply to the current operating mode. However, if you decrease the speedin automatic mode, the setting also applies to manual mode if you change mode.StepAction1. If you want to view/change any Speed functionality, tap the Speed button.en0300000470The following buttons are displayed (from top left):• Actual running speed (in relation to max)• Decrease running speed in steps of 1%• Increase running speed in steps of 1%• Decrease running speed in steps of 5%• Increase running speed in steps of 5%• Run at quarter speed (25%)• Run at half speed (50%)• Run at full speed (100%)2083HAC 16590-1 Revision: B
6 Programming and testing6.10.1. Running a service routine6.10 Service routines6.10.1. Running a service routineService routinesService routines are routines for performing a number of common services. The serviceroutines available depend on your system setup and available options. Please refer to yourplant or cell documentation for more information.Note that once a service routine has started running, aborting might not resume the system toprevious state since the routine may have moved the robot arm.Running a service routineThis section describes how to run a service routine in manual mode.StepAction1. On the ABB menu tap Program Editor.2. Tap Debug.en04000008683HAC 16590-1 Revision: BContinues on next page209
6 Programming and testing6.10.1. Running a service routineContinuedStepAction3. Tap Call Service Routine to list the service routines. Tap the routine you want torun and tap Go to.en04000008854. If the routine was loaded properly, press Start on the <strong>FlexPendant</strong>.The routine is now started and run. Follow any instructions on the screen.Related informationBattery shutdown service routine on page 211.LoadIdentify, load identifiction service routine on page 214.Service Information System, ServiceInfo service routine on page 213.Calibration Pendulum, CalPendulum service routine on page 212.2103HAC 16590-1 Revision: B
6 Programming and testing6.10.2. Battery shutdown service routine6.10.2. Battery shutdown service routineBat_shutdownIt is possible to shutdown the battery backup of the Serial Measurement Board to save batterypower during transportation or storage. The function is reset when the system is powered onagain. The revolution counters will be lost and needs an update but the calibration values willremain.Related informationHow to start a service routine is described in Running a service routine on page 209.The Serial Measurement Board is described in Serial Measurement Board memory on page280.How to update the revolution counters is described in Updating revolution counters on page274.3HAC 16590-1 Revision: B211
6 Programming and testing6.10.3. Calibration Pendulum, CalPendulum service routine6.10.3. Calibration Pendulum, CalPendulum service routineCalPendulumCalPendulum is a service routine used with Calibration Pendulum, the standard method forcalibration of ABB robots. This is the most accurate method for the standard type ofcalibration, and it is also the recommended method in order to achieve proper performance.The calibration equipment for Calibration Pendulum is delivered as a complete toolkit,including the manual Calibration Pendulum instruction.Related informationRunning a service routine on page 209.Calibration Pendulum is described in full in the manual Calibration Pendulum instruction.Specific information for each robot is described in the robot’s product manual.2123HAC 16590-1 Revision: B
6 Programming and testing6.10.4. Service Information System, ServiceInfo service routine6.10.4. Service Information System, ServiceInfo service routineServiceInfoServiceInfo is a service routine based on Service Information System, SIS, a softwarefunction which simplifies maintenance of the robot system. It supervises the operating timeand mode of the robot, and alerts the operator when a maintenance activity is scheduled.Maintenance is scheduled by setting the system parameters of the type SIS parameters. Howto work with system parameters is described in section Configuring system parameters onpage 270. All system parameters are described in Technical reference manual - Systemparameters. See also the product manual for the robot.Supervised functionsThe following counters are available:• Calender time counter• Operation time counter• Gearbox operation time countersCounters are reset when maintenance has been performed.The counter status is displayed after running the ServiceInfo routine for maintenance. Status“OK” indicates that no service interval limit has been exceeded by that counter.Related informationRunning a service routine on page 209.Configuring system parameters on page 270.The system parameters for SIS are described in Technical reference manual - Systemparameters, chapter Motion.3HAC 16590-1 Revision: B213
6 Programming and testing6.10.5. LoadIdentify, load identifiction service routine6.10.5. LoadIdentify, load identifiction service routineOverviewLoadIdentifyThe service routine LoadIdentify is used to automatically calculate the data of loads mountedon the robot. You can also enter the data manually, but this requires information that may bedifficult to calculate.If you want to run load identification for the payload, make sure that the tool is correctlydefined first, e.g. by running LoadIdentify for the tool.To run LoadIdentify, there are a number of things to consider. These are described on thefollowing pages. You can also find information on error handling and limitations in thischapter.LoadIdentify can identify the tool load and the payload. The data that can be identified aremass, center of gravity, and moments of inertia. Together with the identified data ameasurement accuracy, indicating how well the identification went, is also given.en0500001535ABCUpper arm loadTool loadPayloadThe movements of axis 3 will only be performed if the mass is to be identified. This meansthat to identify the mass, the upper arm load must be known and correctly defined first.Calibration anglesTo perform the identification the robot moves the load after a specific pattern and calculatesthe data. The axes that move are 3, 5 and 6. At the identification position, the motion for axis3 is approximately 3 degrees up and 3 degrees down and for axis 5 it is approximately 30degrees up and 30 degrees down. For axis 6 the motion is performed around twoconfiguration points.The optimum value for the configuration angle is 90 degrees.214Continues on next page3HAC 16590-1 Revision: B
6 Programming and testing6.10.5. LoadIdentify, load identifiction service routineContinueden0500001537A Configuration 2B Configuration angleC Configuration 1 (start position)LoadIdentify with arm loads mountedThe best way to perform load identification is with a robot with no arm loads mounted. If thisis not possible, good accuracy can still be achieved. Consider, for example, the robot in thefigure below, which has arc welding equipment mounted on it.en0500001536A Cable 1B Load 1C Cable 2D Load 2If we want to use load identification to find the data of load 2, the most important thing toremember is to make sure that the upper arm load is correctly defined, in particular its massand its center of gravity along the robot arm. The arm load includes everything that ismounted on the robot, except tool load and payload. In the figure above, cable 1, cable 2, andload 1 are included in the arm load.3HAC 16590-1 Revision: BContinues on next page215
6 Programming and testing6.10.5. LoadIdentify, load identifiction service routineContinuedWhen performing the load identification, cable 2 should be disconnected since it willotherwise put an extra force on load 2. When identifying load 2 with such a force present, theresult may differ considerably from the correct load. Ideally, cable 2 should be disconnectedfrom load 2 and fastened on the upper arm. If this is not possible, the cable can also bedisconnected at load 1 and fastened to the upper arm in such a way that the resulting force onload 2 in minimised.Prerequisites for tool loadsBefore running the LoadIdentify service routine for a tool load, make sure that:• the tool is selected in the jogging menu• the tool is correctly mounted• axis 6 is close to horizontal and that axis 4 is not too far away from 0 degrees• the upper arm load is known, if the mass is to be identified• the axes 3, 5, and 6 are not close to their corresponding working range limits• the speed is set to 100%• the system is in manual mode.Note that LoadIdentify cannot be used for tool0.Prerequisites for payloadsBefore running the LoadIdentify service routine for a payload, make sure that:• the tool and payload are correctly mounted• axis 6 is close to horizontal and that axis 4 is not too far away from 0 degrees• the tool load is known (run LoadIdentify for the tool first)• the upper arm load is known, if the mass is to be identified• when using a moving TCP, the tool must be calibrated (TCP)• when using a stationary TCP, the corresponding work object must be calibrated (userframe and object frame)• the axes 3, 5, and 6 are not close to their corresponding working range limits• the speed is set to 100%• the system is in manual mode.Running LoadIdentifyTo start the load identification service routine you must have an active program in manualmode and the tool and payload that you want to identify must be defined and active in thejogging window.Step Action Info1. Start LoadIdentify from the program editor. Press theenabling device and then the Start button on the<strong>FlexPendant</strong>.2. Tap Tool or Payload.How to start serviceroutines is described inRunning a service routineon page 209.216Continues on next page3HAC 16590-1 Revision: B
6 Programming and testing6.10.5. LoadIdentify, load identifiction service routineContinuedStep Action Info3. Tap OK to confirm that the correct tool and/or payloadis active in the jogging menu and that the tool load/payload is correctly mounted.4. When identifying tool loads, confirm that the tool isactive.When identifying payloads, confirm that the payload’stool is active and calibrated.5. When identifying payloads with stationary TCP,confirm that the correct work object is active and(preferably) calibrated. If it is correct, tap OK toconfirm.6. Select identification method. If you select the methodwhere the mass is assumed to be known, rememberthat the tool/payload that you use must have thecorrect mass defined. Tap OK to confirm.7. Select configuration angle. The optimum is +90 or -90degrees. If this is impossible, tap Other and set theangle. The minimum is plus or minus 30 degrees.8. If the robot is not in a correct position for loadidentification, you will be asked to jog one or moreaxes roughly to a specified position. When you havedone this tap OK to confirm.If the robot is still not in a correct position for loadidentification, the robot will slowly move to the correctposition. Press Move to start the movement.9. The robot can go through the load identificationmovements slowly before performing the loadidentification. Tap Yes if you want a slow test and Noto proceed to the identification.10. The setup for load identification is now complete. Tostart the motion, switch to Automatic mode andMotors On. Then tap Move to start the loadidentification movements.11. When the identification is finished, switch back tomanual mode, press the enabling device and theStart button. Tap OK to confirm.12. The result of the load identification is now presentedon the <strong>FlexPendant</strong>. Tap Yes if you want to updatethe selected tool or payload with the identifiedparameters or No otherwise.If it is not correct, releasethe enabling device andselect the correct tool/payload in the joggingmenu. Then return toLoadIdentify, press theenabling device, andpress Start. Tap Retry andconfirm that the new tool/payload is correct.See above.See above.This is useful for ensuringthat the robot will not hitanything during theidentification. However,this will take a lot longertime.3HAC 16590-1 Revision: BContinues on next page217
6 Programming and testing6.10.5. LoadIdentify, load identifiction service routineContinuedError handlingIf the enabling device is released during the load identification (before the movements start),the routine can always be restarted by pressing the enabling device again and then pressingthe Start button.If an error should occur during the load identification movements, the routine must berestarted from the beginning. This is done automatically by pressing Start after confirmingthe error. To interrupt and leave the load identification procedure, tap Cancel Call Routinein the program editor’s debug menu.Limitations for LoadIdentifyOnly tool loads and payloads can be identified with LoadIdentify. Thus arm loads cannot beidentified using this procedure.If the load identification movements are interrupted by any kind of stop (program stop,emergency stop, etc.), the load identification must be restarted from the beginning. This isdone automatically if you press Start after confirming the error.If the robot is stopped on a path with program stop and load identification is performed at thestop point, the path will be cleared. This means that no regain movement will be performedto return the robot back to the path.If the measurement accuracy is lower than 80%, the result of the load identification may havesignificant errors. In this case, a higher accuracy may be achieved by repeating theLoadIdentify routine. If repeating the routine does not give a higher accuracy, then the torquesmeasured in the identification are probably too small and the tool and/or payload data mustbe set manually. This is typically the case if the mass of the load is small (10% or less of themaximum load). It can also happen if the load has a particular symmetry property, for instanceif the tool load is symmetrical around axis 6. However, even if the measurement accuracy islow some of the identified data may still be correct.Load identification for suspended robots is only available for bending backward robots, e.g.IRB 140.Related informationIt is also possible to include LoadIdentify in a program by using RAPID instructions. Theseare described in RAPID reference manual - Instructions and RAPID reference manual -Functions and data types.How to enter the data manually is described in Editing the tool data on page 148, and Editingthe payload data on page 162.The product manual for the robot contain information on how and where to mount the loads.Load identification for positioners is done with the service routine ManLoadIdentify. This isdescribed in the manual System settings for the positioner.2183HAC 16590-1 Revision: B
7 Running in production7.1. Starting programs7 Running in production7.1. Starting programsStarting programsThis procedure details how to start a program for the first time or to continue running aprogram that has been stopped.If your robot system has the multitasking option installed, also see Using multitaskingprograms on page 222.Step Action Info/illustration1. Check that all necessary preparations are doneto the robot and in the robot cell and that noobstacles exist within the robot’s working area.2. Make sure no personnel are inside the robotcell.3. Select operating mode on the control module.4. Press the Motors on button on the controlmodule to activate the robot.5. Is a program loaded?If yes, proceed to the next step.If no, load a program.6. Press the Start button on the <strong>FlexPendant</strong> tostart the program.7. Is the Return to path dialog box displayed?If yes, return the robot to the path using asuitable method.If no, proceed.en0400000783• A: Button for "Motors on"How to load programs isdescribed in section Handling ofprograms on page 165.The button is shown in sectionHardware buttons on page 39.Returning the robot to the path isdescribed in section Returningthe robot to the path on page224.3HAC 16590-1 Revision: BContinues on next page219
7 Running in production7.1. Starting programsContinuedContinue running after the program is changedYou may always continue a program even if it has been changed.In automatic mode, a warning dialog may appear to avoid restarting the program if theconsequences are unknown.If you...are sure the changes you have made are not in conflict with the robot’scurrent position and that the program can continue without danger toequipment or personnelare unsure of the consequences your changes might have and want toinvestigate furtherthen tap...YesNoRestart from the beginningThis procedure details how to restart a program from the beginning.StepAction1. On the ABB menu, tap Program Editor.2. Tap Debug.3. Tap Move PP to Main.4. Start the program by pressing the Start button on the <strong>FlexPendant</strong>.LimitationsOnly one program at a time may run, unless your system has the multitasking option. If soseveral programs may run simultaneously.If the robot system encounters program code errors while the program is running, it will stopthe program and the error is logged in the event log.2203HAC 16590-1 Revision: B
7 Running in production7.2. Stopping programs7.2. Stopping programsStopping programsIf your robot system has the multitasking option installed, see Using multitasking programson page 222.StepAction1. Check that the ongoing operation is in such a state that it can be interrupted.2. Make sure it is safe to stop the program.3. Press the Stop button on the <strong>FlexPendant</strong> hardware button set.The button is shown in section Hardware buttons on page 39.DANGER!Do not use the Stop button in an emergency. Use the emergency stop button.Stopping a program with the stop button does not mean that the robot will stop movingimmediately.Stopping execution when using hold-to-run or step-by-step executionWhen using hold-to-run or step-by-step execution, execution can be stopped according to thefollowing.Mode Action InfoOperation with hold-to-runRelease the hold-to-runbuttonOperation without hold-to-run Press the STOP buttonStep-by-step modeThe robot will stop afterexecuting each instruction.Execute the next instructionby pressing the Forwardbutton again.The hold-to-run button isdescribed in section What isa <strong>FlexPendant</strong>? on page 38.The STOP button isdescribed in section What isa <strong>FlexPendant</strong>? on page 38.The STOP and Forwardbutton are described insection What is a<strong>FlexPendant</strong>? on page 38.If you press the STOP buttonwhile executing a moveinstruction, the robot will stopwithout completing the move.3HAC 16590-1 Revision: B221
7 Running in production7.3. Using multitasking programs7.3. Using multitasking programsOverviewIn a multitasking system you may have one or several programs running parallel, for instancein a multimove cell with more than one robot where each robot has its own task and program.For general information on program handling, see Handling of programs on page 165.Multitasking is described in Application manual - Engineering tools.TIP!Need to know more about tasks and programs? These concepts are described in The structureof a RAPID application on page 134.<strong>Manual</strong>ly set up tasksTasks need to be set up in order to run as planned. Normally, all tasks are set up on delivery.Setting up tasks is done by defining system parameters of the type Controller. See sectionConfiguring system parameters on page 270 on how to configure system parameters, orTechnical reference manual - System parameters for information about the parameters.You need detailed information to set up tasks manually. Please read your plant or celldocumentation for details.How tasks are runTasks may be defined as Normal, Static, or Semistatic. Static and Semistatic tasks areautomatically started as soon as a program is loaded into that task.Normal tasks are started when you press the Start button of the <strong>FlexPendant</strong>, and stoppedwhen you press the Stop button.The concepts of Static, Semistatic and Normal are described in Technical reference manual -System parameters.Load, run, and stop multitasking programsThis section describes how to load, run, and stop multitasking programs.StepAction1. Make sure there is more than one task set up. This is done using systemparameters, see section Using multitasking programs on page 222.2. Load programs to respective task using the Program Editor, this is described insection Loading an existing program on page 166.3. If one or more task should be disabled, go to the Quickset menu to do this. Seesection Quickset menu, Run Mode on page 201.Deselecting tasks can only be done in manual mode. When switching to automaticmode, an alert box will appear warning that not all tasks are selected to run.4. Start program execution by pressing the start button. All active tasks are started.5. Stop program execution by pressing the stop button. All active tasks are stopped.222Continues on next page3HAC 16590-1 Revision: B
7 Running in production7.3. Using multitasking programsContinuedHow to load a program to a taskThis section describes how to load a program to a task in a multitasking system. It is assumedthat the tasks have been configured.StepAction1. On the ABBmenu, tap Program Editor.2. Tap Tasks and Programs.3. Tap the task into which you want to load a program.4. On the File menu, tap Load Program....If you want to open a program in another folder, locate and open that folder. Seedescription in <strong>FlexPendant</strong> Explorer on page 75.The file dialog box appears.5. Tap the program you want to load followed by OK.6. Tap Close to close the Program Editor.Viewing multitasking programsIn the Production Window, there is one tab for each task. To switch between viewing thedifferent tasks, tap on the tabs.To edit several tasks in parallel, open one Program Editor for each task.3HAC 16590-1 Revision: B223
7 Running in production7.4. Returning the robot to the path7.4. Returning the robot to the pathAbout paths and return regionsWhile a program runs, the robot or additional axis is considered to be on path which meansthat it follows the desired sequence of positions.If you stop the program the robot is still on path, unless you change its position. It is thenconsidered to be off path. However, if the robot is stopped by an emergency or safety stop itmay be off path.If the stopped robot is within the path return region you can start the program again, and therobot will return to the path and continue the program.Note that there is no way to predict the exact return movement for the robot.TIP!The path return region is set with system parameters. This is described in the Technicalreference manual - System parameters.Returning to pathStepAction1. Make sure there are no obstacles blocking the way and that payloads or workobjects are properly placed.2. If necessary, put the system in automatic mode and press the Motors on buttonon the controller to activate the robot’s motors.3. Press the Start button on the <strong>FlexPendant</strong> to continue the program from where itstopped.One of two thing will happen:• The robot or axis slowly returns to the path and the program continues.• The return to path dialog is displayed.4. If the return to path dialog is displayed, select the proper action.Select actionIf you...want to return to the path and continue theprogramwant to return to the next target position andcontinue the programdon't want to return to the path and continuethe programthen tap...PathPositionCancel2243HAC 16590-1 Revision: B
7 Running in production7.5.1. Present operating mode7.5 Operating modes7.5.1. Present operating modeOverviewThe mode switchCheck the position of the controller’s mode switch or the status bar of the <strong>FlexPendant</strong>.Operational mode changes are also logged in the event log.The mode switch should be in the position as illustrated:xx0300000466ABCDETwo position mode switchThree position mode switchAutomatic mode<strong>Manual</strong> reduced speed mode<strong>Manual</strong> full speed modeStep Action Info1. To switch from manual to automaticmode2. To switch from automatic to manualmodedetailed in Switching from manual toautomatic mode on page 234.detailed in Switching from automatic tomanual mode on page 235.3HAC 16590-1 Revision: BContinues on next page225
7 Running in production7.5.1. Present operating modeContinuedViewing present mode on the <strong>FlexPendant</strong>On the <strong>FlexPendant</strong>, you can view the present operating mode in the status bar. An exampleof the status bar is shown below:en0300000490ABCDEFOperator windowOperating modeActive systemController stateProgram stateMechanical units, active is highlighted2263HAC 16590-1 Revision: B
7 Running in production7.5.2. About the automatic mode7.5.2. About the automatic modeWhat is the automatic mode?In automatic mode the enabling device is disconnected so that the robot can move withouthuman intervention.A robot system in production normally runs in the automatic mode. This mode enablescontrolling the robot system remotely, for instance by using the controller’s I/O signals. Aninput signal may be used to start and stop a RAPID program, another to activate the robot’smotors.There are also additional safeguarding mechanisms active in automatic mode, not used inmanual mode, to increase safety.Tasks you normally perform in the automatic modeIn automatic mode you normally:• start and stop processes.• load, start and stop RAPID programs.• return the robot to its path when you return to operation after an emergency stop.• backup the system.• restore backups.• tune paths.• clean tools.• prepare or replace work objects.• perform other process oriented tasks.A well designed system allows you to perform tasks safely and without affecting the runningprocess. In such a system you can at any time enter safeguarded space temporarily having theprocess stopped by safeguarding mechanisms while you perform the tasks necessary. Whenyou leave safeguarded space the process is resumed.Please consult your plant or cell documentation for details on process oriented tasks.CAUTION!If the robot system is under remote control actions such as starting or stopping processapplications and RAPID programs may be overridden. Path tuning may also be disturbed.In such case perform the mentioned tasks in manual mode.Limitations in automatic modeJogging is not possible in automatic mode. There may also be other specific tasks that youshould perform in manual mode to make sure only you are in control of the robot and itsmovements.Please consult your plant or system documentation to find out which specific tasks should notbe performed in manual mode.3HAC 16590-1 Revision: B227
7 Running in production7.5.3. About the manual mode7.5.3. About the manual modeWhat is the manual mode?In manual mode the robot can only move in a reduced and safe speed, and only under manualcontrol.You need to press the enabling device to activate the robot’s motors. The manual mode is mostoften used when creating programs and when commissioning a robot system.In some robot systems, there are two manual modes, the normal manual mode, sometimesreferred to as <strong>Manual</strong> Reduced Speed Mode, and then there is a <strong>Manual</strong> Full Speed Mode.What is the manual full speed mode?In manual full speed mode the robot can move in programmed speed but only under manualcontrol.You need to press the enabling device and the hold-to-run button to activate the robot’smotors. The manual full speed mode is most often used when testing programs andcommissioning a robot system.Note that the manual full speed mode is not available in all robot systems.Tasks you normally perform in manual modeIn manual mode you normally:• jog the robot back on its path when you return to operation after an emergency stop.• correct the value of I/O signals after error conditions.• create and edit RAPID programs.• tune programmed positions.Safety in manual modeWhen in manual mode some safeguarding mechanisms are disabled since the robot in thismode often is operated with personnel in close proximity. Maneuvering an industrial robot ispotentially dangerous and therefore maneuvers should be performed in a controlled fashion,in manual mode the robot is operated in reduced speed, normally 250 mm/s.2283HAC 16590-1 Revision: B
7 Running in production7.5.4. Start up in automatic mode7.5.4. Start up in automatic modeDANGER!When started the robot may move without warning.Make sure no personnel are in safeguarded space before you turn on power.When should I start up in automatic mode?Start the robot system in automatic mode to resume or start a process or programautomatically. Use manual mode for a robot system not yet taken in production or for anyother task you need to perform that requires manual mode.The exact procedure may differ from system to system depending on customizations andprograms specifically created for you.Please consult your plant or cell documentation for details on how to start your specific robotsystem.Start up in automatic modeStep Action Illustration1. Set the mode switch in the automatic position.2. Turn on the mains power by setting the switch in theon position.en04000007943. Did the system start up without errors?If yes, then the procedure is completed.If no, abort.4. After being started, the system will normally be in asafe standby state with motors off awaiting furtheractions.en0400000793ExceptionsIn automatic mode it is possible to start a RAPID program and turn motors on remotely. Thismeans that the system will never enter a safe standby state and the robot may move at anytime.Please consult your plant or cell documentation for details on how your system is configured.3HAC 16590-1 Revision: BContinues on next page229
7 Running in production7.5.4. Start up in automatic modeContinued<strong>Manual</strong>ly resume processFollow this procedure to manually resume the program when the system is not configured forremote restart.Step Action Illustration1. On the controller, press the Motors On button toactivate the robots motors.2. On the <strong>FlexPendant</strong>, press the Start button to startthe program.3. Did the program start without errors?If yes, the procedure is completed.If no, consult your plant or cell documentation for faulttracing guidelines.en0400000795Error handling is detailedin Trouble shooting manual- IRC5.LimitationsIt may not always be desired to resume or start a program. The work piece currently in processshould perhaps be discarded, or an ongoing glue or weld should perhaps not be continued.Please consult your plant or cell documentation for guidelines.2303HAC 16590-1 Revision: B
7 Running in production7.5.5. Start up in manual mode7.5.5. Start up in manual modeWhen should I start the system in manual mode?Start the system in manual mode when there is no process or program to be resumed or startedor when you need to perform operations not possible in automatic mode such as programediting and jogging.Start up in manual modeStep Action Illustration1. Set the mode switch in the manual mode position.2. Turn on the main power by setting the switch in the onposition.en04000008073. Did the system start up without errors?If yes, then the procedure is completed.If no, please consult your plant or cell documentationfor fault tracing guidelines.4. After being started, the system will be in a safestandby state awaiting further actions.en0400000793Error handling is detailedin Trouble shooting manual- IRC5.Where do I go from here?If you want to......then read...create RAPID programs Handling of programs on page 165.jog the robot Introduction to jogging on page 105.work with or change tools, work objects orpayloadsSelecting tool, work object, and payload onpage 112.3HAC 16590-1 Revision: B231
7 Running in production7.5.6. Running programs in automatic mode7.5.6. Running programs in automatic modeRunning programs in automatic modeThis section details how to run programs in automatic mode.Step Action Info1. Switch the robot to Automatic Mode. How to do this is detailed in sectionSwitching from manual to automaticmode on page 2342.xxBefore running the robot, pleaseobserve the safety information insection DANGER - Movingmanipulators are potentially lethal! onpage 183. Select the program to be started. How to load a program is detailed insection Loading an existing program onpage 166.4. Choose in what mode to start theprogram and start.5. Press the Start button on the<strong>FlexPendant</strong>.All <strong>FlexPendant</strong> buttons are shown insection What is a <strong>FlexPendant</strong>? onpage 382323HAC 16590-1 Revision: B
7 Running in production7.5.7. Running programs in manual mode7.5.7. Running programs in manual modeRunning programs in manual modeThis section details how to run programs in manual mode.Step Action Info1. Switch the robot to manual mode. How switch to manual mode isdescribed in section Switching fromautomatic to manual mode on page235.2.xxDANGER!Before running the robot, pleaseobserve the safety information insection DANGER - Movingmanipulators are potentially lethal! onpage 183. Select the program to be started. How to open a program is detailed insection Loading an existing program onpage 166.4. Select in what run or step mode to startthe program.5. Press and hold the enabling device andthen press the Start button on the<strong>FlexPendant</strong>.How to select start mode is detailed insection How to use the hold-to-runfunction on page 196.All <strong>FlexPendant</strong> buttons are shown insection What is a <strong>FlexPendant</strong>? onpage 383HAC 16590-1 Revision: B233
7 Running in production7.5.8. Switching from manual to automatic mode7.5.8. Switching from manual to automatic modeWhen should I put the system in automatic mode?Put the system in automatic mode when you have a process application or a RAPID programthat is ready to be run in production.DANGER!When put in automatic mode the robot may move without warning.Make sure no personnel are in safeguarded space before you change operating mode.Switching from manual to automatic modeStep Action Illustration1. Set the mode switch in the automatic position.A mode change dialog is displayed.2. Tap OK to close the dialog.If you change the switch back to manual mode thedialog will be closed automatically.3. Did the system change mode without errors?If yes, then resume or start the process applicationor RAPID program.If no, stop and troubleshoot the problem.xx0300000467How to start programs isdescribed in Startingprograms on page 219.NOTE!If your specific system uses a distributed operators panel, controls and indicators may not beplaced exactly as described in this manual. Please consult your plant or cell documentationfor details.Controls and indicators do however look and function the same way.When can I start using the robot system?As long as the mode change dialog is displayed programs cannot be started and the robot’smotors cannot be activated either manually or remotely.ExceptionsIn automatic mode it is possible to start a RAPID program and turn motors on remotely. Thismeans that the system will never enter a safe standby state and the robot may move at anytime.Please consult your plant or cell documentation for details on how your system is configured.2343HAC 16590-1 Revision: B
7 Running in production7.5.9. Switching from automatic to manual mode7.5.9. Switching from automatic to manual modeSwitching from automatic to manual modeStep Action Illustration1. Set the mode switch in the manualposition.2. Did the system change mode withouterrors?If yes, then this procedure is completed.If no, try to locate the error.xx0300000468Error handling is detailed in Troubleshooting manual - IRC5.NOTE!If your specific system uses a distributed operators panel, controls and indicators may not beplaced exactly as described in this manual. Please consult your plant or cell documentationfor details.Controls and indicators do however look and function the same way.3HAC 16590-1 Revision: B235
7 Running in production7.5.10. Switching to manual full speed mode7.5.10. Switching to manual full speed modeWhen should I use the manual full speed mode?Use full speed manual mode when the program is to be tested at full speed.The manual full speed mode allows you to run the program at full speed while still havingaccess to all the available debugging functions of the program editor.DANGER!Testing at full speed is dangerous.Make sure no personnel are in safeguarded space when starting the program.Switching to manual full speed modeStep Action Info1. Set the mode switch to the manual fullspeed position.2. Did the system change mode withouterrors?If yes, then this procedure is completed.If no, try to locate the error.Error handling is detailed in Troubleshooting manual - IRC5.<strong>FlexPendant</strong> alertWhen changing mode a dialog is displayed on the <strong>FlexPendant</strong> to alert you about the changeof mode. Tap OK to close the dialog.If you change the switch back to the previous mode the dialog will be closed automaticallyand there will be no change in mode.2363HAC 16590-1 Revision: B
8 Handling inputs and outputs, I/O8.1. Inputs and Outputs, I/O8 Handling inputs and outputs, I/O8.1. Inputs and Outputs, I/OOverviewViewing signalsI/O signal properties is used to view the input and output signals and their values. Signals areconfigured with system parameters, see section Configuring system parameters on page 270.This section details how to view a list of all signals.StepAction1. On the ABB menu tap Inputs and Outputs.The list of Most Common I/O signals is displayed.2. Tap View and then All signals to change the selection of signals in the list.en0400000770Related informationSimulating and changing signal values on page 238.Configuring Most Common I/O on page 289.Configuring system parameters on page 270.3HAC 16590-1 Revision: B237
8 Handling inputs and outputs, I/O8.2. Simulating and changing signal values8.2. Simulating and changing signal valuesSimulating and changing signal valuesA signal can be changed into a simulated signal and the value of the signal can be changed.More information on how to change the signal’s properties is described in the section ControlPanel, Configuring Most Common I/O on page 289.StepAction1. On the ABB menu, tap I/O.A list of most common signals is displayed. See section Configuring MostCommon I/O on page 289.2. Tap on a signal.3. Tap on Simulate to change the signal into a simulated signal.Tap on Remove Simulation to remove the simulation from the signal.4. Tap on 123... to change the signal’s value.The soft numeric keyboard is displayed. Enter the new value and tap OK.2383HAC 16590-1 Revision: B
8 Handling inputs and outputs, I/O8.3. Viewing signal group8.3. Viewing signal groupViewing signal groupThis section details how to view signal groups.StepAction1. On the ABB menu, tap I/O.A list of most common signals is displayed. See section Configuring MostCommon I/O on page 289.2. In the View menu, tap Groups.3. Tap on the signal group’s name in the list and then tap Properties. Or tap twiceon the signal group’s name.The signal group’s properties is displayed.3HAC 16590-1 Revision: B239
8 Handling inputs and outputs, I/O8.4. Safety I/O signals8.4. Safety I/O signalsGeneralSafety I/O signalsIn the controller’s basic and standard form, certain I/O signals are dedicated to specific safetyfunctions. These are listed below with a brief description of each.All signals can be viewed in the I/O menu on the <strong>FlexPendant</strong>.The list below contains the safety I/O signals as used by the standard system.SignalnameES1ES2DescriptionEmergency stop, chain1Emergency stop, chain2Bit valueconditionFrom - To1 = Chain closed From panel board to maincomputer1 = Chain closed From panel board to maincomputerSOFTESI Soft Emergency stop 1 = Soft stop enabled From panel board to maincomputerEN1EN2AUTO1AUTO2MAN1MANFS1MAN2MANFS2USERDOOVLDEnabling device1&2,chain 1Enabling device1&2,chain 2Op mode selector,chain 1Op mode selector,chain 2Op mode selector,chain 1Op mode selector,chain 1Op mode selector,chain 2Op mode selector,chain 21 = Enabled From panel board to maincomputer1 = Enabled From panel board to maincomputer1 = Auto selected From panel board to maincomputer1 = Auto selected From panel board to maincomputer1 = MAN selected From panel board to maincomputer1 = Man. full speedselectedFrom panel board to maincomputer1 = MAN selected From panel board to maincomputer1 = Man. full speedselectedFrom panel board to maincomputerOver load, user DO 1 = Error, 0 = OK From panel board to maincomputerMONPB Motors-on pushbutton 1 = PushbuttonpressedFrom panel board to maincomputerAS1 Auto stop, chain 1 1 = Chain closed From panel board to maincomputerAS2 Auto stop, chain 2 1 = Chain closed From panel board to maincomputerSOFTASI Soft Auto stop 1 = Soft stop enabled From panel board to maincomputerGS1 General stop, chain 1 1 = Chain closed From panel board to maincomputerGS2 General stop, chain 2 1 = Chain closed From panel board to maincomputer240Continues on next page3HAC 16590-1 Revision: B
8 Handling inputs and outputs, I/O8.4. Safety I/O signalsContinuedSignalnameSOFTGSI Soft General stop 1 = Soft stop enabled From panel board to maincomputerSUPES1 Superior stop, chain1 1 = Chain closed From panel board to maincomputerSUPES2 Superior stop, chain2 1 = Chain closed From panel board to maincomputerSOFTSSI Soft Superior stop 1 = Soft stop enabled From panel board to maincomputerCH1CH2ENABLE1All switches in runchain 1 closedAll switches in runchain 2 closedEnable from MC (readback)1 = Chain closed From panel board to maincomputer1 = Chain closed From panel board to maincomputer1 = Enable, 0 = breakchain 1ENABLE2_1 Enable from AXC1 1 = Enable, 0 = breakchain 2ENABLE2_2 Enable from AXC2 1 = Enable, 0 = breakchain 2ENABLE2_3 Enable from AXC3 1 = Enable, 0 = breakchain 2ENABLE2_4 Enable from AXC4 1 = Enable, 0 = breakchain 2PANFANPANEL24OVLDDRVOVLDSuperv. of fan inControl moduleFrom panel board to maincomputerFrom panel board to maincomputerFrom panel board to maincomputerFrom panel board to maincomputerFrom panel board to maincomputer1 = OK, 0 = Error From panel board to maincomputerOverload, panel 24V 1 = Error, 0 = OK From panel board to maincomputerOverload, drivemodulesDRV1LIM1 Read back of chain 1after limit switchesDRV1LIM2 Read back of chain 2after limit switchesDRV1K1 Read back of contactorK1, chain 1DRV1K2 Read back of contactorK2, chain 2DRV1EXTCONTDRV1PANCH1DRV1PANCH2DRV1SPEEDDRV1TEST1DRV1TEST2DescriptionExternal contactorsclosedDrive voltage forcontactor-coil 1Drive voltage forcontactor-coil 2Read back of op. modeselectedA dip in run chain 1 hasbeen detectedA dip in run chain 2 hasbeen detectedBit valuecondition1 = Error, 0 = OK From panel board to maincomputer1 = Chain 1 closed From axis computer to maincomputer1 = Chain 2 closed From axis computer to maincomputer1 = K1 closed From axis computer to maincomputer1 = K2 closed From axis computer to maincomputer1 = ContactorsclosedFrom axis computer to maincomputer1 = Voltage applied From axis computer to maincomputer1 = Voltage applied From axis computer to maincomputer0 = Man. mode lowspeedToggledToggledFrom - ToFrom axis computer to maincomputerFrom axis computer to maincomputerFrom axis computer to maincomputer3HAC 16590-1 Revision: BContinues on next page241
8 Handling inputs and outputs, I/O8.4. Safety I/O signalsContinuedSignalnameSOFTESO Soft Emergency stop 1 = Set soft E-stop From main computer topanel boardSOFTASO Soft Auto stop 1 = Set soft Auto stop From main computer topanel boardSOFTGSO Soft General stop 1 = Set soft GeneralstopSOFTSSO Soft Superior stop 1 = Set soft Sup. E-stopFrom main computer topanel boardFrom main computer topanel boardMOTLMP Motors-on lamp 1 = Lamp on From main computer topanel boardENABLE1 Enable1 from MC 1 = Enable, 0 = breakchain 1From main computer topanel boardTESTEN1 Test of Enable1 1 = Start test From main computer topanel boardDRV1CHAIN1DRV1CHAIN2DRV1BRAKEDescriptionSignal to interlockingcircuitSignal to interlockingcircuitSignal to brakereleasecoilBit valueconditionFrom - To1 = Close chain 1 From main computer to axiscomputer 11 = Close chain 2 From main computer to axiscomputer 11 = Release brake From main computer to axiscomputer 12423HAC 16590-1 Revision: B
9 Handling the event log9.1. Accessing the event log9 Handling the event log9.1. Accessing the event logEvent logOpen the event log to:• view all present entries.• study specific entries in detail.• handle the log entries, such as saving or deleting.The log can be printed by using RobotStudio Online .Open and close the event logThis section details how to open the event log.StepAction1. Tap the status bar.The status window is displayed.2. Tap Event Log.The event log is displayed.3. If the log contents do not fit into a single screen, it can be scrolled.4. Tap a log entry to view the event message.5. Tap the status bar again to close the log.3HAC 16590-1 Revision: B243
9 Handling the event log9.2. Deleting log entries9.2. Deleting log entriesWhy should I delete log entries?Logs can be deleted to increase available disk space. Deleting log entries is often a good wayto trace faults since you remove old and insignificant log entries not related to the problemyou are trying to solve.Delete all log entriesStepAction1. Tap the status bar, then the Event Log tab to open the event log.2. On the Viewmenu, tap Common.3. Tap Delete and then Delete all logs.A confirmation dialog is displayed.4. Tap Yes to delete, or No to keep the log intact.Delete log entries of a specific categoryStepAction1. Tap the status bar, then the Event Log tab to open the event log.2. On the View menu, tap the category of choice.3. Tap Delete and then Delete log.A confirmation dialog is displayed.4. Tap Yes to delete, or No to keep the log intact.2443HAC 16590-1 Revision: B
9 Handling the event log9.3. Saving log entries9.3. Saving log entriesWhy should I save log entries?You should save log entries when:• you need to clear the log but want to keep the current entries to be viewed later.• you want to send log entries to support to solve a problem.• you want to keep log entries for future reference.NOTE!The log can keep up to 20 entries per category and up to 1000 entries in the all events list.When the buffer is full the oldest entries will be overwritten and lost.There is no way to retrieve these lost log entries.Save all log entriesThis section details how to save all log entries.StepAction1. Tap the status bar to open the event log.2. Tap Save all logs as.The file dialog is displayed.3. If you want to save the log in a different folder, locate and open the folder.4. In the File name box, type a name for the file.5. Tap Save.3HAC 16590-1 Revision: B245
9 Handling the event log9.3. Saving log entries2463HAC 16590-1 Revision: B
10 Systems10.1. About systems10 Systems10.1. About systemsSystemsThe FlexController can have one or more systems installed. These are created and managedusing RobotStudio Online.On the <strong>FlexPendant</strong> you can backup, restart, and select systems, and make modifications toconfigurations using the system parameters.For more information on how to create or work with systems, please read Operator’s manual- RobotStudio Online.3HAC 16590-1 Revision: B247
10 Systems10.2.1. What is “the memory”?10.2 Memory and file handling10.2.1. What is “the memory”?OverviewWhen using the term “memory”, a number of things may be implied:• The main computer RAM memory• The system hard disk drive or flash disk drive• The hard disk of some other unit connected to the same LAN as the robot system,serving as a storage for software.Main computer RAM memoryThe RAM memory is the main computer primary memory located on the computermotherboard. The memory is used by the processor during all program execution.The contents of the RAM memory during operation is described in section The structure ofthe main computer RAM memory contents on page 249System hard/flash disk driveThis is the main mass storage unit of the control module, and is located in the front of theControl Module. Depending on controller version, it may be a hard disk drive or a flash diskdrive and may vary in size.It contains all necessary software for operating the robot, and is the unit on which theRobotWare is installed.When starting up, data is loaded into the RAM memory from the disk drive.When powering down, the image.bin is saved here. The contents of the image.bin is describedin section The structure of the main computer RAM memory contents on page 249LAN unitThis may be used as extra mass storage device if the one in the controlled is not sufficient. Itis not normally considered a part of the robot system2483HAC 16590-1 Revision: B
10 Systems10.2.2. The structure of the main computer RAM memory contents10.2.2. The structure of the main computer RAM memory contentsGeneralThis section describes what the main computer RAM memory contains during normaloperation.The term “RAM memory” means the main computer primary memory, i.e. the memorymodules with which the main computer processor works during normal operation.The generic term “memory” is described in section What is “the memory”? on page 248Illustration of the RAM memoryEach part of the illustration is described in the table below.en05000014463HAC 16590-1 Revision: BContinues on next page249
10 Systems10.2.2. The structure of the main computer RAM memory contentsContinuedPartsPartFunction250RAM memoryimage.binctrl.binSMB boardControllerhard/flash diskRAPID codeConfigurationdataThe main computer memory modules, located on the computermotherboard. The processor reads and writes to this memory duringprogram execution.The size of the RAM memory may vary, but increasing the size will notimprove computer performance unless a number of hard- and softwarechanges are made to the robot system.When the system is powered OFF, intentionally or due to power failure, theimage.bin file is saved to the controller hard/flash disk.It is an internal file, created by the system during operation, usually invisibleto the user.When performing a “warm start” of the system, the complete image.bin fileis reloaded into the RAM memory. Other types of restarts may start withanother system, etc, which is described in the Operator’s manual - IRC5 with<strong>FlexPendant</strong>.This file contains, among other things:• robot identity data• calibration data• SIS data• duty timer dataThe file is stored on the SMB board on robot delivery. Data may then betransferred to the controller as detailed in the Operator’s manual - IRC5 with<strong>FlexPendant</strong>.NOTE that the ctrl.bin file is not stored in the system specific file on the hard/flash disk drive. This means that all data in the file will be retained even if thesystem software is updated or in any other way replaced.The SMB board (serial measurement board) is normally fitted on themechanical unit, and contains among other things, data from the ctrl.bin file.How to handle the data on the SMB board, moving data between SMB andcontroller, etc is detailed in the Operator’s manual - IRC5 with <strong>FlexPendant</strong>.The main mass storage unit of the control module, located in the ComputerUnit. Depending on controller version, it may be a hard disk drive or a flashdisk drive and may vary in size.It contains all necessary software for operating the robot, and is the unit onwhich the RobotWare is installed.When starting up, data is loaded into the RAM memory from the disk drive.When powering down, the image.bin file is automatically saved here.This section contains all executable RAPID code, whether written by ABB orthe customer.This data is basically the contents of the configuration files:• proc.cfg• moc.cfg• sio.cfg• mmc.cfg• sys.cfgEach file contains the settings made when creating and defining the system,options etc.The configuration files may not be changed after creation, but their contentsmay be checked as detailed in the Trouble Shooting <strong>Manual</strong> - IRC5. Whenchanging the contents of the configuration files, ABB strongly recommendsusing the tool RobotStudio Online to reduce the risk of introducing errors.Continues on next page3HAC 16590-1 Revision: B
10 Systems10.2.2. The structure of the main computer RAM memory contentsContinuedPartTextsEvent logsInternal statesCalibrationdataSISDuty timer“My system”FunctionSome of the texts used by the system during operation, in all languagesselected when creating the system.All events logged in all event logs.This means that the logs will be saved even if a power failure occurs, whichin turn, simplifies finding the fault causing the power failure.This is data recording the state and position of all robot axes, all I/O, thestate of each manipulator connected to a Multimove system, etc.This data is constantly updated during operation. This enables the systemto instantly return to it’s previous state if the system for any reason stops,there is a power failure or the robot collides with an obstacle etc.This is calibration data for one robot, i.e. all data describing the calibrationposition for all six axes of one robot.This is service data related to the SIS system (Service Interval System).This means that SIS data will be kept by the robot even if it’s controller isreplaced.This is the Duty timer data.This means that duty timer count will be kept by the robot even if it’scontroller is replaced.This is the directory in which the RobotWare is stored after installation. Theimage file is stored in the directory “Internal”.NOTE that the ctrl.bin file is not stored here, which means that the contentsof the image.bin file will be retained even if updating the system softwareduring operation.3HAC 16590-1 Revision: B251
10 Systems10.2.3. File handling10.2.3. File handlingFile handling and storingBackups, programs, and configurations etc. are saved as files in the robot system. These filesare handled either in a specific <strong>FlexPendant</strong> application, such as the Program editor, or usingthe <strong>FlexPendant</strong> Explorer.Files can be stored on a number of different drives, or memory devices, such as:• Controller hard disk• Portable PC• USB device• Other network drivesThese drives are used the same way and available in the <strong>FlexPendant</strong> Explorer or when savingor opening files using an application on the <strong>FlexPendant</strong>.USB memory informationIRC5 is equipped with a USB port on the controller module, see chapter Buttons on thecontroller on page 47.A USB memory is normally detected by the system and ready to use within a few secondsfrom plugging in the hardware. A plugged in USB memory is automatically detected duringsystem start up.It is possible to plug in and unplug a USB memory while the system is running. However,observing the following precautions will avoid problems:• Do not unplug a USB memory immediately after plugging in. Wait at least fiveseconds, or until the memory has been detected by the system.• Do not unplug a USB memory during file operations, such as saving or copying files.Many USB memories indicates ongoing operations with a flashing LED.• Do not unplug a USB memory while the system is shutting down. Wait until shutdownis completed.Please also note the following limitations with USB memories:• There is no guarantee that all USB memories are supported.• Some USB memories have a write protection switch. The system is not able to detectif a file operation failed due to the write protection switch.Related informationFor more information on trouble shooting, see Trouble shooting manual - IRC5.What is “the memory”? on page 248.2523HAC 16590-1 Revision: B
10 Systems10.3.1. Restart overview10.3 Restart procedures10.3.1. Restart overviewWhen do I need to restart a running controller?ABB robot systems are designed to operate unattended for long times. There is no need toperiodically restart functioning systems.Restart the robot system when:• new hardware has been installed.• the robot system configuration files have been changed.• a new system has been added and is to be used.• a system failure (SYSFAIL) has occurred.Restart typesA number of restart types are available:Situation: Restart type: Detailed in section:You want to restart and use the current system.All programs and configurations will be saved.You want to restart and select another system.The Boot application will be launched at startup.You want to switch to another installed systemor install a new system and, at the same time,remove the current system from the controller.Warning! This can not be undone. The systemand the RobotWare system package will bedeleted.You want to delete all user loaded RAPIDprograms.Warning! This can not be undone.You want to return to the default systemsettings.Warning!This will remove all user definedprograms and configurations from memory andrestart with default factory settings.You want to restart the current system using thesystem data from most recent successful shutdown.You want to shut down and save the currentsystem and shut down the main computer.W-start (Warmrestart)X-start (Xtrarestart)C-start (Coldrestart)P-startI-start(Installationrestart)B-startShutdownRestart and use thecurrent system (warmstart) on page 257.Restart and selectanother system (X-start)on page 258.Restart and delete thecurrent system (C-start)on page 259.Restart and deleteprograms and modules(P-start) on page 260.Restart and return todefault settings (I-start)on page 261.Restart from previouslystored system data (Bstart)on page 262.Shutting down on page69.Related informationMore information about the different restart procedures is also described in Trouble shootingmanual - IRC5.3HAC 16590-1 Revision: B253
10 Systems10.3.2. Using the boot application10.3.2. Using the boot applicationBoot applicationThe boot application is primarily used to start up the system when no RobotWare is installed,but may also be used for other purposes, such as changing the system to start. You can alsouse RobotStudio Online, see Operator’s manual - RobotStudio Online.Purpose of the boot applicationThe boot application is installed in the controller at delivery and may be used to:• install systems• set or check network settings• select a system/switch between systems from the mass storage memory• load the system from USB memory units or network connectionsThe illustration shows the boot application main screen. The buttons and functions availableare described below.en0400000894Installing a systemThis procedure may take several minutes.Step Action Info1. You may reach the boot application byperforming an X-start.2. In the boot application, tap InstallSystem.A dialog box is displayed urging you toconnect a USB memory.How to perform an X-start is detailed insection Restart and select anothersystem (X-start) on page 258.Systems are created using the SystemBuilder in RobotStudio Online. SeeOperator’s manual - RobotStudioOnline.254Continues on next page3HAC 16590-1 Revision: B
10 Systems10.3.2. Using the boot applicationContinuedStep Action Info3. Connect a USB memory containing asystem to the computer unit USB port.How to load a system to the USBmemory is detailed in section Creatingboot media in Operator’s manual -RobotStudio Online.The USB port is shown in sectionButtons on the controller on page 47.4. Tap Continue to proceed.Tap Cancel to abort.The system is read from the USBmemory, and a dialog box is displayed,urging you to restart.5. Tap OK. The USB memory may be disconnectedat this point.6. Tap Restart Controller and then tapOK.The controller is now restarted and thesystem from the USB memory isinstalled. The restart may take severalminutes.Boot application settingsThe boot application settings contain IP and network settings.Step Action Info1. You may reach the boot application by performingan X-start.2. In the boot application, tap Settings.How to perform an X-start isdetailed in sectionRestartand select another system(X-start) on page 258.en04000009023. Make the appropriate selections:• Use no IP address• Obtain IP address automatically• Use the following settingsUse the numerical keyboard to enter the desiredvalues.How to make theseselections is detailed insection Set up the networkconnection on page 54.3HAC 16590-1 Revision: BContinues on next page255
10 Systems10.3.2. Using the boot applicationContinuedStep Action Info4. Tap Service PC information to display networksettings to be used when connection a service PCto the controller’s service port.5. Tap <strong>FlexPendant</strong> to display <strong>FlexPendant</strong> softwareversions.Tap Advanced to display the boot loader version.Selecting systemStep Action Info1. You may reach the boot application by performingan X-start.2. In the boot application, tap Select System.A dialog box is displayed showing the availableinstalled systems.3. Tap the system to be selected and then Select.The selected system is displayed in the boxSelected System.4. Tap Close.A dialog box is shown urging you to restart to beable to use the selected system.How to perform an X-start isdetailed in section Restartand select another system(X-start) on page 258.Restarting controllerStep Action Info1. You may reach the boot application by performingan X-start.2. In the boot application, tap Restart System.A dialog box is displayed specifying the selectedsystem.3. Tap OK to restart using the selected system orCancel to abort.How to perform an X-start isdetailed in section Restartand select another system(X-start) on page 258.2563HAC 16590-1 Revision: B
10 Systems10.3.3. Restart and use the current system (warm start)10.3.3. Restart and use the current system (warm start)What happens with my current system?The current system will be stopped.All system parameters and programs will be saved to an image file.During the restart process the system’s state will be resumed. Static and semistatic tasks willbe started. Programs can be started from the point they where stopped.Restarting this way will activate any configuration changes entered using RobotStudio Online .Restart and use the current systemThis section describes how to restart and use the current system.Step Action Info1. On the ABBmenu, tap Restart.The restart dialog is displayed.2. Tap Warm Start to restart the controllerusing the current system.To select another type of start, tapAdvanced. Detailed information aboutadvanced starts is given in Restartoverview on page 253.3HAC 16590-1 Revision: B257
10 Systems10.3.4. Restart and select another system (X-start)10.3.4. Restart and select another system (X-start)What happens with my current system?The current system will be stopped.All system parameters and programs will be saved to an image file, so that the system’s statecan be resumed later.Restart and select another systemThis section describes how to restart and select another system.Step Action Info1. Make sure the power to the controllercabinet is switched on.2. On the ABBmenu, tap Restart.The restart dialog is displayed.3. Tap Advanced... to select restartmethod.The select restart method dialog isdisplayed.4. Tap X-start, then tap OK.A dialog letting you confirm that youreally want to restart is displayed.5. Tap X-Start to restart the controller.The controller is restarted. After thestartup procedure the boot application isstarted.6. Use the boot application to selectsystem.7. Tap Close, then OK to return to the bootapplication.8. Tap Restart to restart the controllerusing the selected system.How to use the boot application isdetailed in Using the boot application onpage 254.2583HAC 16590-1 Revision: B
10 Systems10.3.5. Restart and delete the current system (C-start)10.3.5. Restart and delete the current system (C-start)What happens with my current system?Your current system will be stopped.All contents, backups and programs, in the system directory will be deleted. This means itwill be impossible to resume this system’s state in any way. A new system must be installedusing RobotStudio Online .Restart and delete the current systemThis section describes how to restart and delete the current system.Step Action Info1. On the ABBmenu, tap Restart.The restart dialog is displayed.2. Tap Advanced... to select restartmethod.The select restart method dialog isdisplayed.3. Tap C-start, then tap OK.A dialog letting you confirm that youwant to restart is displayed.4. Tap C-start to restart the controller.A dialog letting you confirm that youwant to restart is displayed.5. Perform any of the followingprocedures:• Select an already installedsystem and restart.• Install another system fromRobotStudio Online or from a USBmemory.How to restart and select anothersystem is described in section Restartand select another system (X-start) onpage 258.RobotStudio Online is described inOperator’s manual - RobotStudioOnline3HAC 16590-1 Revision: B259
10 Systems10.3.6. Restart and delete programs and modules (P-start)10.3.6. Restart and delete programs and modules (P-start)What happens with my current system?After restart the system’s state will be resumed except for manually loaded programs andmodules. Static and semistatic tasks are started from the beginning, not from the state theyhad when the system was stopped.Modules will be installed and loaded in accordance with the set configuration. Systemparameters will not be affected.Restart and delete programs and modulesThis section describes how to restart and delete user loaded programs and modules.StepAction1. On the ABBmenu, tap Restart.The restart dialog is displayed.2. Tap Advanced... to select restart method.The select restart method dialog is displayed.3. Tap P-start, then tap OK.A dialog letting you confirm that you really want to restart is displayed.4. Tap P-start to restart the controller.The controller is restarted using the current system. After the startup procedureno programs or modules are open.2603HAC 16590-1 Revision: B
10 Systems10.3.7. Restart and return to default settings (I-start)10.3.7. Restart and return to default settings (I-start)What happens to my current system?After restart, the system’s state will be resumed but any changes done to system parametersand other settings will be lost. Instead, system parameters and other settings are read from theoriginally installed system on delivery.For example, this returns the system to the original factory system state.Restart and return to default settingsThis section describes how to restart and return to default settings.StepAction1. On the ABBmenu, tap Restart.The restart dialog is displayed.2. Tap Advanced... to select restart method.The select restart method dialog is displayed.3. Tap I-start, then tap OK.A dialog letting you confirm that you really want to restart is displayed.4. Tap I-start to restart the controller.The controller is restarted using the current system. Changes to systemparameters and other settings are lost.3HAC 16590-1 Revision: B261
10 Systems10.3.8. Restart from previously stored system data (B-start)10.3.8. Restart from previously stored system data (B-start)What happens with my current system?The current system is in system failure mode since the previous session was shut downwithout saving the image file correctly. All changes made to the system before the shut downhas been lost. Therefore, the system needs to be restarted from the most recent successful shutdown or load another system.Note that all changes made to the system data since the previous session has been lost.Restart from previously stored system dataThis section describes how to restart from previously stored image file.StepAction1. On the ABBmenu, tap Restart.The restart dialog is displayed.2. Tap Advanced... to select restart method.The select restart method dialog is displayed.3. Tap B-start, then tap OK.4. Tap B-start to restart the controller.The controller is restarted using the system data from the most recent successfulshut down.2623HAC 16590-1 Revision: B
10 Systems10.3.9. Reflashing firmware and <strong>FlexPendant</strong>10.3.9. Reflashing firmware and <strong>FlexPendant</strong>Overview of reflashingAfter replacing hardware units, such as axis computer, buses, etc., or installing newerversions of RobotWare, the system will automatically attempt reflashing the unit in order tomaintain hardware/software compatibility.Reflashing is loading appropriate firmware (hardware specific software) onto a specific unitrunning this software during operation.If RobotWare is upgraded on the controller, then the <strong>FlexPendant</strong> will reflash, i.e. update tothe new version, when connected.Note that performing any such replacements/updates might require running firmwareversions not available! To avoid jeopardizing the function of the system, ABB recommendsusing the same versions as earlier, unless these are unavailable.The units currently using the reflash function are:• Contactor interface board• Drive units• <strong>FlexPendant</strong>• Profibus master• Axis computer• Panel boardReflashing processThe automatic reflashing process, described below, must not be disturbed by switching off thecontroller while running:Step Event Info1. When the system is restarted, thesystem checks the versions of thefirmware used. These are checkedagainst the hardware versions used.2. If the hardware and firmware versionsdo not match, the system restarts itselfautomatically while going to a specificUpdate Mode.3. Was an appropriate firmware versionfound?If YES, the reflash will proceed.If NO, the system will stop. Proceed asdetailed in section Reflashing firmwarefailed in the Trouble shooting manual -IRC5.4. After performing a successful reflash,the system restarts.During the Update Mode, an attempt ismade to download appropriate firmwareonto the hardware while a message isvery briefly displayed on the<strong>FlexPendant</strong>.In either case, a message is very brieflydisplayed on the <strong>FlexPendant</strong> andstored in the event log.The actual reflashing may take a fewseconds or up to a few minutes,depending on the hardware to bereflashed.3HAC 16590-1 Revision: BContinues on next page263
10 Systems10.3.9. Reflashing firmware and <strong>FlexPendant</strong>ContinuedStep Event Info5. Another check is made for anyadditional hardware/firmwaremismatches.6. Was any additional mismatches found?If YES, the process is repeated untilnone are found.If NO, the process is complete.2643HAC 16590-1 Revision: B
10 Systems10.4.1. What is saved on backup?10.4 Backup and restore systems10.4.1. What is saved on backup?GeneralWhat is saved?BackinfoWhen performing a backup, or restoring a previously made backup, only certain data is dealtwith. This section is a specification and description of these.The backup function saves all system parameters, system modules, and program modules ina context.The data is saved in a directory specified by the user. The directory is divided into foursubdirectories, Backinfo, Home, Rapid, and Syspar. System.xml is also saved in the ../backup(root directory) it contains user settings.consists of the files backinfo.txt, key.id, program.id and system.guid, template.guid, keystr.txt.The restore part uses backinfo.txt when the system is restored. This file must never be editedby the user! The files key.id and program.id may be used to recreate a system, usingRobotStudio Online , with the same options as the backed up system. The system.guid is used toidentify the unique system the backup was taken from. The system.guid and/or template.guidis used in the restore to check that the backup is loaded to the correct system. If thesystem.guid and/or template.guid do not match, the user will be informed.HomeRapidSysParen0400000916a copy of the files in the HOME directory.consists of a subdirectory for each task configured. Every task has one directory for programmodules and one for system modules.The first directory will keep all installed modules. More information on loading modules andprograms is given in the Technical reference manual - System parameters.contains the configuration files.3HAC 16590-1 Revision: BContinues on next page265
10 Systems10.4.1. What is saved on backup?ContinuedWhat is not saved?A few things are not saved during backup, and it may be vital to be aware of this, in order tosave these separately:• The environment variable RELEASE: points out the current system pack. Systemmodules loaded with RELEASE: as its path, are not stored in the backup.• The current value of a PERS object in a installed module is not stored in a backup.2663HAC 16590-1 Revision: B
10 Systems10.4.2. Backup the system10.4.2. Backup the systemWhen do I need this?ABB recommends performing a backup:• before installing new RobotWare.• before making any major changes to instructions and/or parameters to make it possibleto return to the previous setting.• after making any major changes to instructions and/or parameters and testing the newsettings to retain the new successful setting.Backup the systemThis section describes how to backup the system.StepAction1. Tap the ABB menu and then tap Backup and Restore.2. Tap Backup Current System.3. Is the displayed backup path the correct one?If YES: Tap Backup to perform the backup to the selected directory. A backup filenamed according to the current date is created.If NO: Tap ... to the right of the backup path and select directory. Then tap Backup.A backup folder named according to the current date is created.xx03000004413HAC 16590-1 Revision: B267
10 Systems10.4.3. Restore the system10.4.3. Restore the systemWhen do I need this?ABB recommends performing a restore:• if you suspect that the program file is corrupt.• if any changes made to the instructions and/or parameters settings did not provesuccessful, and you want to return to the previous settings.During the restore, all system parameters are replaced and all modules from the backupdirectory are loaded.The Home directory is copied back to the new system’s HOME directory during the warmstart.Restore the systemThis section describes how to restore the system.StepAction1. On the ABB menu, tap Backup and Restore.2. Tap Restore System.3. Is the displayed backup folder the correct one?If YES: Tap Restore to perform the restore. The restore is performed, and thesystem is warm started automatically.If NO: Tap ... to the right of the backup folder and select directory. Then tapRestore. The restore is performed, and the system is warm started automatically.xx03000004422683HAC 16590-1 Revision: B
10 Systems10.4.4. Important when performing backups!10.4.4. Important when performing backups!GeneralWhen performing backups or restoring previously made backups, there are several things tokeep in mind. Some of these are listed below.BACKUP directoryA local default backup directory, BACKUP, is automatically created by the system. Werecommend using this directory for saving backups! Such backups are not copied to thedirectory HOME in following backups.Never change the name of the BACKUP directory.Also, never change the name of the actual backup to BACKUP, since this would causeinterference with this directory.When is backup possible?A backup of a system may be performed during program execution. When doing so, a fewlimitations apply:• Start program, load program, load module, close program and erase module can notbe done during backup in executing state. The RAPID instructions Load andStartLoad can, however, be used.What happens during backup?Beside the obvious, a backup being made, a few thing happen during backup:• Background tasks continue to execute during a backup.Duplicated modules?No save operation is performed in the backup command. This implies that two revisions ofthe same modules can exist in the backup, one from the program memory saved inRapid\Task\Progmod\ directory and one from the HOME directory copied to the Backup’sHome directory.Large data amountToo many files in the HOME directory can result in a very large backup directory. Theunnecessary files in the Home directory can then be deleted without any problems.Fault during backupIf a fault occurs during the backup, e.g. full disk or power failure, the whole backup structureis deleted.3HAC 16590-1 Revision: B269
10 Systems10.5.1. Configuring system parameters10.5 Configuring systems10.5.1. Configuring system parametersAbout system parametersSystem parameters define the system configuration and are defined to order on delivery.System parameters are edited using the <strong>FlexPendant</strong> or RobotStudio Online .All system parameters are described in Technical reference manual – System parameters.Viewing system parametersThis procedure describes how to view system parameter configurations.StepAction1. On the ABB menu, tap Control Panel.2. Tap Configuration.A list of available types in the selected topic is displayed.en04000011493. Tap Topics to select the topic.• Controller• Communication• I/O• Man-machine Communication• Motion4. Tap File to save, load, or add new parameters from a file. Select folder and saveor load. Proceed to section Saving, loading system parameter configurations onpage 272.5. Tap to select a type and then tap Show Instances. To edit parameters proceed tosection Editing an instance on page 271. To add instances proceed to sectionAdding a new instance on page 271.270Continues on next page3HAC 16590-1 Revision: B
10 Systems10.5.1. Configuring system parametersContinuedEditing an instanceThis section describes how to edit an instance of a system parameter type.StepAction1. In the list of system parameter instances, tap to select an instance and then tapEdit.The selected instance is displayed.en04000011512. Tap a parameter name or its value to edit the value.The way to edit values depend on the data type for the value, e.g. the softkeyboard is displayed for string or numerical values and dropdown menus aredisplayed for predefined values.3. Tap OK.Adding a new instanceThis section describes how to add a new instance of a system parameter type.StepAction1. In the list of system parameter instances, tap Add.A new instance with default values is displayed.2. Tap the parameter name or its value to edit the value.3. Tap OK.3HAC 16590-1 Revision: BContinues on next page271
10 Systems10.5.1. Configuring system parametersContinuedSaving, loading system parameter configurationsThis section describes how to save and load system parameter configurations, and how to addparameters from a file.It is recommended to save the parameter configurations before making larger changes to therobot system. The parameters are saved automatically when performing backups.StepAction1. In the list of types, tap the File menu and tap:• Load saved parameters• Add new parameters• Add or replace parameters• Save As to save the selected topic’s parameter configurations.• Save All As to save all topics’ parameter configurations.2. Select directory and/or file where you want to save or load the parameters.3. Tap OK.2723HAC 16590-1 Revision: B
11 Calibrating11.1. How to check if the robot needs calibration11 Calibrating11.1. How to check if the robot needs calibrationCheck robot calibration statusThis section describes how to check the robot’s calibration status.StepAction1. On the ABB menu, tap Calibration.2. In the list of mechanical units, check the calibration status.What kind of calibration is needed?If the calibration status is...Not calibratedRev. counter update neededCalibratedthen...the robot must be calibrated by a qualifiedservice technician. See section Loadingcalibration data using the <strong>FlexPendant</strong> onpage 276.You must update the revolution counters.How to update the revolution counters isdescribed in section Updating revolutioncounters on page 274.No calibration is needed.DANGER!Do not attempt to perform the fine calibration procedure without the proper training and tools.Doing so may result in incorrect positioning that may cause injuries and property damage.3HAC 16590-1 Revision: B273
11 Calibrating11.2. Updating revolution counters11.2. Updating revolution countersOverviewThis section details how to perform a rough calibration of each robot axis, i.e. updating therevolution counter value for each axis, using the <strong>FlexPendant</strong>. Detailed information aboutrevolution counters and how to update them, with calibration positions and scales, can befound in the respective robot’s product manual. Also, see the manuals Instructions forLevelmeter Calibration and Calibration Pendulum Instruction for information on calibration.For robots using the Absolute Accuracy option, the calibration data file absacc.cfg must beloaded first.Storing the revolution counter settingThis procedure details the second step when updating the revolution counter; storing therevolution counter setting.StepAction1. On the ABB menu, tap Calibration.All mechanical units connected to the system are shown along with theircalibration status.2. Tap the mechanical unit in question.A screen is displayed: tap Rev. Counters.en04000007713. Tap Update revolution counters....A dialog box is displayed, warning that updating the revolution counters maychange programmed robot positions:• Tap Yes to update the revolution counters.• Tap No to cancel updating the revolution counters.Tapping Yes displays the axis selection window.274Continues on next page3HAC 16590-1 Revision: B
11 Calibrating11.2. Updating revolution countersContinuedStepAction4. Select the axis to have its revolution counter updated by:• Ticking in the box to the left• Tapping Select all to update all axes.Then tap Update.5. A dialog box is displayed, warning that the updating operation cannot be undone:• Tap Update to proceed with updating the revolution counters.• Tap Cancel to cancel updating the revolution counters.Tapping Update updates the selected revolution counters and removes the tickfrom the list of axes.6.-Caution!If a revolution counter is incorrectly updated, it will cause incorrect robotpositioning, which in turn may cause damage or injury!Check the calibration position very carefully after each update.See section Checking the calibration position in either of the manuals: Instructionsfor Levelmeter Calibration or Calibration Pendulum Instruction, depending onwhich calibration method to be used. The Product manual for the robot alsocontains more information about calibration.3HAC 16590-1 Revision: B275
11 Calibrating11.3. Loading calibration data using the <strong>FlexPendant</strong>11.3. Loading calibration data using the <strong>FlexPendant</strong>OverviewThis section describes how to load calibration data for using the <strong>FlexPendant</strong>.The calibration data is delivered on a diskette and will have to be moved to a USB memoryor transferred to the controller through FTP.Load calibration dataThis section describes how to load the calibration data.Step Action Info1. On the ABB menu, tap Calibration and select amechanical unit. Then tap Calib. parameters.2. Tap Load motor calibration....A dialog box is displayed, warning that loading newcalibration offset values may change programmedrobot positions:• Tap Yes to proceed.• Tap No to cancel.3. For systems not running the Absolute Accuracyoption the calibration data is normally stored on theserial measurement board (SMB).4. For system running the Absolute Accuracy option, thecalibration data is normally delivered on a diskette.5. Select the file containing the Absolute Accuracycalibration data to be loaded into the system and tapOK.If a file containing invalid calibration data is selected,a dialog box will be displayed. Then re-select a filecontaining valid calibration data.Tapping Yes results indisplaying a file selectionwindow.In such case, Update datato controller from SMBmemory as detailed insection SerialMeasurement Boardmemory on page 280In such case, proceedbelow.Absacc.cfg for systemswith absolute accuracymeasurement system2763HAC 16590-1 Revision: B
11 Calibrating11.4. Editing motor calibration offset11.4. Editing motor calibration offsetEditing motor calibration offsetThis procedure should be used when no specific file with motor calibration data is available,but only the numerical values. These values are normally found on a sticker on the rear of therobot.Entering motor calibration values may be done in one of three ways:• From a disk, using the <strong>FlexPendant</strong> (as detailed in section Loading calibration datausing the <strong>FlexPendant</strong> on page 276).• From a disk, using RobotStudio Online (as detailed in section Loading calibrationdata in Operator’s manual - RobotStudio Online).• <strong>Manual</strong>ly entering the values, using the <strong>FlexPendant</strong> (as detailed in section Editingmotor calibration offset on page 277).Step Action Info1. On the ABB menu, tap Calibration.2. Tap to select mechanical unit and then tap CalibrationParameters.3. Tap Edit motor calibration offset....A dialog box is displayed, warning that updating therevolution counters may change programmed robotpositions:• Tap Yes to proceed.• Tap No to cancel.Tapping Yes results in displaying a file selection view.4. Tap the axis to have its motor calibration offset edited.The offset value box is opened for that particular axis.5. Use the numerical keyboard to enter the desired valueand then tap OK.After entering new offset values, a dialog box isdisplayed, urging you to restart the system to makeuse of the new values.Perform a warm restart if required.6. After restarting, the contents of the calibration data inthe controller cabinet and on the serial measurementboard will differ.Update the calibration data.Detailed in section SerialMeasurement Boardmemory on page 2807. Update the revolution counters. Detailed in sectionUpdating revolutioncounters on page 2743HAC 16590-1 Revision: B277
11 Calibrating11.5. Fine calibration procedure on <strong>FlexPendant</strong>11.5. Fine calibration procedure on <strong>FlexPendant</strong>OverviewThis section describes how to use the <strong>FlexPendant</strong> when performing a fine calibration of therobot. The method of fitting the calibration equipment to each axis is detailed in thecalibration instruction for the axis, see the Product manual for the robot.Fine calibration procedureThe procedure below details how to perform the fine calibration procedure on the<strong>FlexPendant</strong>.StepAction1.-Warning!Do not fine calibrate the robot without special equipment used for axis calibration!It would cause an unsatisfied accuracy in the robot movement.2. On the ABB menu, tap Calibration.All mechanical units connected to the system are shown along with theircalibration status.3. Tap to select the mechanical unit.A screen is displayed: tap Calib. Parameter.en0400001127278Continues on next page3HAC 16590-1 Revision: B
11 Calibrating11.5. Fine calibration procedure on <strong>FlexPendant</strong>ContinuedStepAction4. Tap Fine Calibration....A dialog box is displayed, urging you to use external equipment to performing theactual calibration. Make sure all necessary calibration equipment is fitted, asdetailed in the calibration instruction, for the axis to be calibrated.A warning that updating the revolution counters may change programmed robotpositions is also displayed:• Tap Yes to proceed.• Tap No to cancel.5. Select the axis to calibrate by ticking the box to the left.6. Tap Calibrate.A dialog box is displayed, warning that calibration of the selected axes will bechanged, which cannot be undone:• Tap Calibrate to proceed.• Tap Cancel to cancel.Tapping Calibrate results in briefly displaying a dialog box, announcing that thecalibration process has started.The axis is calibrated and the system returns to the list of available mechanicalunits.3HAC 16590-1 Revision: B279
11 Calibrating11.6. Serial Measurement Board memory11.6. Serial Measurement Board memorySerial Measurement Board, SMBThe Serial Measurement Board, SMB, primarily gathers resolver data from the robot’s (oradditional axes) motors. This data is used to measure the speed and position of each axis.Each SMB is capable of measuring up to 7 axes. It also stores a number of data pertaining toeach robot.This data is used by the controller and can be transferred between the SMB and the controller.Normally, the data is transferred automatically, but it can also be done manually.The SMB data is affected when:• the robot is replaced• the SMB is replaced• the controller (or its flash disk) is replaced.• updating with new calibration dataThe following data is stored on the SMB:• serial number for the mechanical unit• joint calibration data• Absolute Accuracy data• SIS dataNote that if the IRC5 controller is to be connected to a robot with an older SMB, not equippedwith data storage capability, the SMB needs to be replaced.SMB data updateIf...the flash disk or the complete controller isnew or replaced by an unused spare part...the SMB is replaced by a new, unused, sparepart SMB...the flash disk or the complete controller isreplaced by a spare part, previously used inanother system...the SMB is replaced by a spare part SMB,previously used in another system...new calibration data has been loaded viaRobotStudio Online or using the <strong>FlexPendant</strong>and the system has been restarted...then...the data stored in the SMB is automaticallycopied to the controller memory.the data stored in the controller memory isautomatically copied to the SMB memory.the data in the controller memory and theSMB memory is different. You must updatethe controller memory manually from thethe SMB memory.the data in the controller memory and theSMB memory is different. You must first clearthe data in the new SMB memory, and thenupdate the SMB memory with the data fromthe controller memory.the data in the controller memory and theSMB memory is different. You must updatethe SMB memory manually from thecontroller memory.Check that the new calibration values belongto a manipulator with the serial numberdefined in your system.280Continues on next page3HAC 16590-1 Revision: B
11 Calibrating11.6. Serial Measurement Board memoryContinuedView SMB data statusThis section describes how to view the data status in the Serial Measurement Board and thecontroller.StepAction1. On the ABB menu, tap Calibration and select a mechanical unit.2. Tap SMB memory and then tap Show status.The data is displayed with status on the SMB and on the controller.Update controller data from SMB memoryThis section describes how to load data from the Serial Measurement Board to the controller.Step Action Info1. On the ABB menu, tap Calibration and select amechanical unit.2. Tap SMB memory and then tap Update.3. Tap the button Cabinet or manipulator has beenexchanged.A warning is displayed. Tap Yes to proceed or No tocancel.4. The data is loaded. Tap Yes to acknowledge andrestart the robot system.It is vital that you loadcalibration data correctly.The following data isupdated:• serial numbers formechanical units• calibration data• Absolute Accuracydata• SIS dataUpdate data in SMB memoryThis section describes how to update data on the Serial Measurement Board from thecontroller. This is e.g. after calibration data has been loaded to the controller via RobotStudioOnline or using the <strong>FlexPendant</strong>.If the SMB already contains data, you must first clear the memory, see Delete SMB data onpage 282.Step Action Info1. On the ABB menu, tap Calibration and select amechanical unit.2. Tap SMB memory and then tap Update.3. Tap the button Serial measurement board hasbeen replaced.A warning is displayed. Tap Yes to proceed or No tocancel.4. The data is updated.It is vital that you loadcalibration data correctly.3HAC 16590-1 Revision: BContinues on next page281
11 Calibrating11.6. Serial Measurement Board memoryContinuedDelete SMB dataThis section describes how to delete the data stored on the SMB memory or the controllermemory, when creating spare parts.StepAction1. On the ABB menu, tap Calibration and tap to select a mechanical unit.2. Tap SMB memory and then tap Advanced.The following functions are available:• Clear Cabinet Memory• Clear SMB Memory3. Tap Clear Cabinet Memory if the controller should be replaced and used as aspare part.A list of the SMB data stored in the controller is displayed. Tap Clear to delete thememory for the selected robot. Repeat the procedure for all robots in the controllermemory.4. Tap Clear SMB Memory if the SMB should be replaced and used as a spare part.A list of the SMB data stored is displayed. Tap Clear to delete the memory for theselected robot. Repeat the procedure for all robots using this SMB board.2823HAC 16590-1 Revision: B
11 Calibrating11.7. 4 points XZ calibration11.7. 4 points XZ calibrationBase Frame calibrationThis section describes the 4 points XZ calibration, in the Base Frame calibration options.Other calibration methods may be available in this menu depending on your installed options.4 points XZ calibrationThis section describes how to define the base frame using the 4 points XZ method. Thismethod means that you displace the base frame from the world frame a specified amount inthree dimensions and two planes.xx0400000782A Displacement distance between base frame and world frameX X-axis in the base frameY Y-axis in the base frameZ Z-axis in the base frameX’ X-axis in the world frame3HAC 16590-1 Revision: BContinues on next page283
11 Calibrating11.7. 4 points XZ calibrationContinuedY’ Y-axis in the world frameZ’ Z-axis in the world frameStep Action Info1. On the ABB menu, tap Calibration and select amechanical unit. Then tap Base Frame.2. Tap 4 points XZ....3. Tap ... to change reference point.A numerical keyboard and boxes for X, Y and Zvalues are displayed .4. Is a file available with all transformation data?If YES: Tap the Positions menu and then tap Load.Then select the file containing the values. Load thefile.If NO: Proceed to the next step.5. Enter the previously measured displacement in eachcoordinate box.Tap OK when done.6. Set up a fixed reference position within the workingrange of the robot, e.g. the tip of a pen secured to thework bench.7. Tap Point 1 to highlight the line.8. <strong>Manual</strong>ly run the robot to the previously fixedreference point.9. Tap Modify position.Modified is displayed on the status line.10. Re-orient the robot and again, run it to the referencepoint but from a different angle.11. Tap Elongator X to highlight the line.12. <strong>Manual</strong>ly run the robot to a position where the toolcenter point (TCP) touches an imaginary extension ofthe X-axis.13. Tap Modify position.Modified is displayed on the status line.14. To save the entered transformation data to a file, tapthe Positions menu and then Save. Enter the nameof the file and then tap OK.15. To delete all entered transformation data, tap thePositions menu and then Reset All.You have now specifiedthe amount ofdisplacement the baseframe will be moved fromthe world frame.Proceed below to specifythe direction of the newbase frame in relation tothe world frame.Repeat these steps untilpoints 1, 2, 3, and 4 havebeen modified.The imaginary X-axis isshown in the illustrationabove.Repeat these steps tomodify Elongator Z.2843HAC 16590-1 Revision: B
12 Changing <strong>FlexPendant</strong> settings12.1. Changing brightness and contrast12 Changing <strong>FlexPendant</strong> settings12.1. Changing brightness and contrastAppearance optionsThis section describes the Appearance menu, where you can adjust the screen’s brightnessand contrast.Changing brightness and contrastThis procedure describes how to change brightness and contrast of the screen.StepAction1. On the ABB menu, tap Control Panel.2. Tap Appearance.3. Tap the appropriate Plus or Minus button to adjust the levels. Tap Set Default toreturn to the default levels.The brightness and contrast changes as you change the levels which gives youan instant view of how the new levels will affect the visibility.4. Tap OK to use the the new brightness and contrast levels.3HAC 16590-1 Revision: B285
12 Changing <strong>FlexPendant</strong> settings12.2. Switching between left and right handheld <strong>FlexPendant</strong>12.2. Switching between left and right handheld <strong>FlexPendant</strong>Left and right handheldThe <strong>FlexPendant</strong> is set to left handheld on delivery. This can easily be changed to righthandheld and back again whenever required.en0400000913Switching between left and right handheldThis section details how to switch between right and left handheld <strong>FlexPendant</strong>.StepAction1. Tap the ABB menu, then tap Control Panel.2. Tap Appearance.286Continues on next page3HAC 16590-1 Revision: B
12 Changing <strong>FlexPendant</strong> settings12.2. Switching between left and right handheld <strong>FlexPendant</strong>ContinuedStepAction3. Tap Rotate right (or Rotate left if the <strong>FlexPendant</strong> is set for right handheld).en04000009154. Rotate the <strong>FlexPendant</strong> and switch to your other arm.Changes in settings for right handheld <strong>FlexPendant</strong>The following settings are effected when changing the <strong>FlexPendant</strong> to right handheld.Setting Effect InformationJogging directionsHardware buttons andprogrammable keysHold-to-run buttonEnabling deviceThe joystick directions areadjusted automatically.Start, Stop, Forward, andBackward buttons do notchange place withprogrammable keys.No effectNo effectThe illustrations of joggingdirections in the joggingmenu are adjustedautomatically for the presentleft/right mode.See buttons A-G in theillustration Hardware buttonson page 39.3HAC 16590-1 Revision: B287
12 Changing <strong>FlexPendant</strong> settings12.3. Changing date and time12.3. Changing date and timeChanging date and timeThis procedure details how to set the controller clock.StepAction1. On the ABB menu, tap Control Panel.2. Tap Date and Time.The current date and time is displayed.3. Tap the appropriate Plus or Minus button to change the date or time.4. Tap OK to use the time and date settings.NOTE!The date and time is always displayed according to ISO standard, that is, year-month-day andhour:minute, the time using 24-hour format.2883HAC 16590-1 Revision: B
12 Changing <strong>FlexPendant</strong> settings12.4. Configuring Most Common I/O12.4. Configuring Most Common I/OMost Common I/OMost Common I/O is used in the Program Editor to display a list of the most commonly usedI/O signals in the robot system. Since there can be many signals, it may be very helpful to beable to make this selection.The sorting in the list can be rearranged manually. By default, the signals are sorted in theorder that they are created.Most Common I/O can also be configured using system parameters in the topic Man-machineCommunication. However, sorting the list can only be done by using the function under theControl Panel. See section Configuring system parameters on page 270.Configuring Most Common I/OThis section describes how to configure the list Most Common I/O.StepAction1. On the ABB menu, tap Control Panel.2. Tap I/O.A list of all I/O signals defined in the system is listed with checkboxes.3. Tap the names of the signals to select for the Most Common I/O list.Tap All or None to select all or no signals.Tap Name or Type to sort by name or signal type.4. Tap Preview to see the list of selected signals and adjust the sort order.Tap to select a signal and then tap the arrows to move the signal up or down inthe list, rearranging the sort order.Tap APPLY to save the sort order.Tap Edit to return to the list of all signals.5. Tap APPLY to save the settings.3HAC 16590-1 Revision: B289
12 Changing <strong>FlexPendant</strong> settings12.5. Changing language12.5. Changing languageLanguagesChanging languageThis procedure details how to change between the currently installed languages. The<strong>FlexPendant</strong> supports up to three languages at any one time.After selecting a specific language, all buttons, menus and dialogs are displayed using thislanguage. RAPID instructions, variables, system parameters, and I/O signals are not affected.This section describes how to change language on the <strong>FlexPendant</strong>.StepAction1. On the ABB menu, tap Control Panel.2. Tap Language.A list of all installed languages is displayed.3. Tap the language that you want to change to.4. Tap OK. A dialog box is displayed. Tap Yes to proceed and restart the<strong>FlexPendant</strong>.The current language is replaced by the selected. All buttons, menus and dialogsare displayed using the new language.2903HAC 16590-1 Revision: B
12 Changing <strong>FlexPendant</strong> settings12.6. Editing programmable keys12.6. Editing programmable keysOverviewProgrammable keys are four hardware buttons on the <strong>FlexPendant</strong> that may be used fordedicated, specific functions set by the user. See Hardware buttons on page 39.The keys can be programmed to simplify programming or testing of programs. They can alsobe used to activate menues on the <strong>FlexPendant</strong>.Editing programmable keysThis section describes how to edit the programmable keys.StepAction1. On the ABB menu, tap Control Panel.2. Tap ProgKeys.en04000011543. Select key to edit, Key 1-4 in the upper selection list.4. Tap the Type menu to select type of action:• None• Input• Output• System5. If Type Input is selected.• Tap to select one of the digital inputs from the list.• Tap the Allow in auto menu to select if the function is also allowed inautomatic operating mode.3HAC 16590-1 Revision: BContinues on next page291
12 Changing <strong>FlexPendant</strong> settings12.6. Editing programmable keysContinuedStepAction6. If Type Output is selected.• Tap to select one of the digital outputs from the list• Tap the Key pressed menu to define how the signal should behave whenthe key is pressed.• Tap the Allow in auto menu to select if the function is also allowed inautomatic operating modeKey pressed functions:• Toggle - switches signal value from 0 to 1 or vice versa• Set to 1 - sets the signal to 1• Set to 0 - sets the signal to 0• Press/Release - sets signal value to 1 while key is pressed (note that aninverted signal will be set to 0)• Pulse - the signal value pulses once7. If Type System is selected.• Tap the Key pressed menu to select Move PP to main• Tap the Allow in auto menu to select if the function is also allowed inautomatic operating mode8. Edit the other keys as described in steps 3 to 7 above.9. Tap OK to save the settings.2923HAC 16590-1 Revision: B
12 Changing <strong>FlexPendant</strong> settings12.7. Editing supervision settings12.7. Editing supervision settingsOverviewThe motion supervision monitors the robot, and stops the robot if a mechanical drag largerthan 300 is detected in the motors. The mechanical drag is a value without any specific unit,with a max value of 300 and a min value of 0.The motion supervision must be set for each task separately.Description of functions in RobotWare base:• Path Supervision in automatic mode. This is used to prevent mechanical damage dueto running into an obstacle during program execution with robot movement.• Execution Settings. Non motion execution ON is used to run a program without robotmotion.A RobotWare system with the option Collision Detection has additional functionality:• Path Supervision in manual mode and manual full speed mode.• Jog Supervision. This is used to prevent mechanical damage to the robot duringjogging.• Changing the supervision from a RAPID program.For more information on Collision Detection, see Application manual - Motion coordinationand supervision.Editing motion supervision and execution settingsThis section describes how to edit the motion supervision and execution settings.Step Action Info1. On the ABB menu tap Control Panel and thenSupervision.en04000009702. Tap the Task menu to select a task for the motionsettings.The settings only apply forone task. If you have morethan one task, you need toset the desired values foreach task separately.3HAC 16590-1 Revision: BContinues on next page293
12 Changing <strong>FlexPendant</strong> settings12.7. Editing supervision settingsContinuedStep Action Info3. In the Path Supervision settings, tap ON or OFF toapply or remove path supervision.Tap the + or - buttons to set the sensitivity.Note: unless you have the option Collision Detectioninstalled, this only affects the robot in auto mode.4. In the Jog Supervision settings, tap ON or OFF toapply or remove jog supervision.Tap the + or - buttons to set the sensitivity.Note: this only affects the robot if you have the optionCollision Detection installed.5. Under the Execution Settings, Non motion exectutionmay be turned ON or OFF.TIP!The sensitivity may beadjusted from 0 to 300.Do not set the motionsensitivity lower than 80, orthe robot will stop due tointernal drag.TIP!The sensitivity may beadjusted from 0 to 300.Do not set the motionsensitivity lower than 80, orthe robot will stop due tointernal drag.Non motion execution isdescribed in section Nonmotion execution below.Non motion executionNon motion execution is a function that enables running a RAPID program without robotmotion. All other functions work normally; current cycle times, I/O, TCP speed calculationetc.This function is mainly used for program debugging, cycle time evaluation, and possibility tomeasure e.g. glue or paint consumption during a cycle.Non motion execution is set from the <strong>FlexPendant</strong>. The function can only be set if the systemis in Motors Off state.When non motion execution is turned on, it can be executed in:• <strong>Manual</strong> mode• <strong>Manual</strong> mode full speed• Auto modeCycle times will be simulated according to the selected mode.WARNING!Non-motion execution is reset after a reboot. Do not restart the program without checkingstatus of the Non-motion execution. Starting the program incorrectly may cause serious injuryor death, or damage the robot or other equipment.2943HAC 16590-1 Revision: B
12 Changing <strong>FlexPendant</strong> settings12.8. Configuring view settings12.8. Configuring view settings<strong>FlexPendant</strong> system configurationsThe <strong>FlexPendant</strong> system configuration is used to control views for operating modes and theuser authorization system.View on Operating Mode changeThis section describes how to configure the <strong>FlexPendant</strong> system for which views to showwhen changing operating mode.This is used, for example, when a view other than the Production Window is desired whenchanging to automatic operating mode.StepAction1. On the ABB menu, tap Control Panel and then tap System.2. Tap View on Operating Mode change.en04000011523. Tap the Operating Mode menu to select:• View in Auto• View in <strong>Manual</strong>• View in <strong>Manual</strong> Full SpeedAll three modes can be defined.4. Tap Edit to define the names for the dll and the instance to create.The dll can contain a number of instances.5. Tap OK.3HAC 16590-1 Revision: BContinues on next page295
12 Changing <strong>FlexPendant</strong> settings12.8. Configuring view settingsContinuedUser Authorization System protected function visibilityThis section describes how to change the visibility of protected functions for the userauthorization system, UAS. The protected functions can be hidden or displayed but notaccessible. All other administration of the user authorization system is done usingRobotStudio Online .StepAction1. On the ABB menu, tap Control Panel and then tap System.2. Tap User Authorization System.en04000011533. Tap to select the level of visibility for User Authorization protected functions:• Hide non accessible functions• Show message when accessing protected functions.4. Tap OK.2963HAC 16590-1 Revision: B
12 Changing <strong>FlexPendant</strong> settings12.9. Changing background image12.9. Changing background imageBackground imagesThe background image on the <strong>FlexPendant</strong> can be changed. Any image file on the controllerhard disk can be used, a photo as well as an illustration.For best result, use an image following these recommendations:• 640 by 390 pixels (width, height)• Format gifChanging background imageThis procedure describes how to change background image on <strong>FlexPendant</strong>.StepAction1. On the ABB menu, tap Control panel.2. Tap System and then Background.en05000015473. Tap Browse to locate another picture on the controller hard disk.4. Tap Default to restore the original background image.5. Tap OK to apply the new image or Cancel to leave the background unchanged.3HAC 16590-1 Revision: B297
12 Changing <strong>FlexPendant</strong> settings12.10. Calibrating the touch screen12.10. Calibrating the touch screenRecalibrationThis section describes how to recalibrate the touch screen. The touch screen is calibrated ondelivery and normally never needs to be recalibrated.en0400000974Step Action Info1. On the ABB menu, tap Control Panel.2. Tap Touch Screen.3. Tap Recalibrate.The screen will go blank for a few seconds.A series of crosses will appear on the screen, one ata time.4. Tap the center of each cross with a pointed object.5. The recalibration is complete.CautionDo not use a sharp objectwhich may damage thesurface of the screen.2983HAC 16590-1 Revision: B
13 Descriptions of terms and concepts13.1. About the Descriptions of terms and concepts chapter13 Descriptions of terms and concepts13.1. About the Descriptions of terms and concepts chapterOverviewThis chapter contains descriptions of many of the concepts and words used in this manual.Note that there may also be additional information in any of the chapters dealing with thefeature at hand.3HAC 16590-1 Revision: B299
13 Descriptions of terms and concepts13.2. What is the robot system?13.2. What is the robot system?DescriptionThe concept robot system comprises the manipulator(s), control module, drive module, andall equipment controlled by the controller (tool, sensors, etc.). It includes all hardware as wellas software required to operate the robot. Application specific hardware and software, suchas spot welding equipment, is not included in the term.3003HAC 16590-1 Revision: B
13 Descriptions of terms and concepts13.3. What are robots, manipulators and positioners?13.3. What are robots, manipulators and positioners?ManipulatorRobotPositionerIllustrationManipulator is a generic term for mechanical units used to move objects, tools, etc. The termmanipulator includes robot as well as positioner.A robot is a mechanical unit with TCP. The term robot does not include the controller.A positioner is a mechanical unit used to move a work object. It may have one or several axes,normally no more than 3 axes. A positioner normally does not have a TCP.The illustration depicts the relation between the concepts robot, manipulator, positioner,mechanical unit, and other units, e.g. external axes.en0400000940Mechanical unitA mechanical unit can be jogged, it can either be a robot, a single additional axis or a set ofexternal axes, for instance a two axis positioner.3HAC 16590-1 Revision: B301
13 Descriptions of terms and concepts13.4. What is a tool?13.4. What is a tool?ToolA tool is an object that can be mounted directly or indirectly on the robot turning disk or fittedin a fixed position within the robot working range.A fixture (jig) is not a tool.All tools must be defined with a TCP (Tool Center Point).Each tool that may be used by the robot must be measured and its data stored in order toachieve accurate positioning of the tool center point.Illustrationen0400000803ABTool sideRobot side3023HAC 16590-1 Revision: B
13 Descriptions of terms and concepts13.5. What is the tool center point?13.5. What is the tool center point?IllustrationThe illustration shows how the tool center point (TCP) is the point around which theorientation of the tool/manipulator wrist is being defined.xx0300000604DescriptionMoving TCPStationary TCPThe tool center point (TCP) is the point in relation to which all robot positioning is defined.Usually the TCP is defined as relative to a position on the manipulator turning disk.The TCP will be jogged or moved to the programmed target position. The tool center pointalso constitutes the origin of the tool coordinate system.The robot system can handle a number of TCP definitions, but only one may be active at anyone time.There are two basic types of TCPs: moveable or stationary.The vast majority of all applications deal with moving TCP, i.e. a TCP that moves in spacealong with the manipulator.A typical moving TCP may be defined in relation to, e.g. the tip of a arc welding gun, thecenter of a spot welding gun or the end of a grading tool.In some applications a stationary TCP is used, e.g. when a stationary spot welding gun isused. In such cases the TCP may be defined in relation to the stationary equipment instead ofthe moving manipulator.3HAC 16590-1 Revision: B303
13 Descriptions of terms and concepts13.6. What is a work object?13.6. What is a work object?IllustrationZZZYYYXXXen0400000819DescriptionA work object is a coordinate system with specific properties attached to it. It is mainly usedto simplify programing when editing programs due to displacements of specific tasks, objectsprocesses etc.The work object coordinate system must be defined in two frames, the user frame (related tothe world frame) and the object frame (related to the user frame).Work objects are often created to simplify jogging along the object’s surfaces. There mightbe several different work objects created so you must choose which one to use for jogging.Payloads are important when working with grippers. In order to position and manipulate anobject as accurate as possible its weight must be accounted for. You must choose which oneto use for jogging.3043HAC 16590-1 Revision: B
13 Descriptions of terms and concepts13.7. What is a coordinate system?13.7. What is a coordinate system?OverviewA coordinate system defines a plane or space by axes from a fixed point called the origin.Robot targets and positions are located by measurements along the axes of coordinatesystems.A robot uses several coordinate systems, each suitable for specific types of jogging orprogramming.• The base coordinate system is located att the base of the root.It is the easiest one forjust moving the robot from one position to another. See The base coordinate system onpage 305for more information.• The work object coordinate system is related to the work piece and is often the bestone for programming the robot. See The work object coordinate system on page307for more information.• The tool coordinate system defines the position of the tool the robot uses whenreaching the programmed targets. See The tool coordinate system on page 309formore information.• The world coordinate systemthat defines the robot cell, all other coordiante systemsare realted to the the world coordinate system, either directly or indirectly. it is usefulfor jogging, genral movements and for handling stations and cells with several robotsor robots moved by external axes. See The world coordinate system on page 306formore information.• The user coordinate system is useful for representing equipment that holds othercoordinate systems, like work objects. See The user coordinate system on page 310for more information.The base coordinate systemxx03000004953HAC 16590-1 Revision: BContinues on next page305
13 Descriptions of terms and concepts13.7. What is a coordinate system?ContinuedThe world coordinate systemThe base coordinate system has its zero point in the base of the robot, which makesmovements predictable for fixed mounted robots. It is therefore useful for jogging a robotfrom one position to another. For programming a robot, other coordinate systems, like thework object coordinate system are often better choices. See The work object coordinatesystem on page 307for more information.When you are standing in front of the robot and jog in the base coordinate system, in anormally configured robot system, pulling the joystick towards you will move the robot alongthe X axis, while moving the joystick to the sides will move the robot along the Y axis.Twisting the joystick will move the robot along the Z axis.en0300000496A Base coordinate system for robot 1B World coordinateC Base coordinate system for robot 2The world coordinate system has its zero point on a fixed position in the cell or station. Thismakes it useful for handling several robots or robots moved by external axes.By default the world coordinate system coincidences with the base coordinate system.306Continues on next page3HAC 16590-1 Revision: B
13 Descriptions of terms and concepts13.7. What is a coordinate system?ContinuedThe work object coordinate systemen0300000498A World coordinate systemB Work Object coordinate system 1C Work Object coordinate system 2The work object coordinate system corresponds to the work piece: It defines the placementof the work piece in relation to the world coordinate system (or any other coordinate system).The work object coordinate system must be defined in two frames, the user frame (related tothe world frame) and the object frame (related to the user frame).A robot can have several work object coordinate systems, either for representing differentwork pieces or several copies of the same work piece at different locations.It is in work object coordinate systems you create targets and paths when programming therobot. This gives a lot of advantages:• When repositioning the work piece in the station you just change the position of thework object coordinate system and all paths are updated at once.• Enables work on work pieces moved by external axes or conveyor tracks, since theentire work object with its paths can be moved.3HAC 16590-1 Revision: BContinues on next page307
13 Descriptions of terms and concepts13.7. What is a coordinate system?ContinuedThe displacement coordinate systemACDBen0400001227ABCDOriginal positionObject coordinate systemNew positionDisplacement coordinate systemSometimes, the same path is to be performed at several places on the same objec, or on severalwork pieces located next to each opther. To avoid having to reprogram all positions each timea displacement coordinate system can be defined.This coordinate system can also be used in conjunction with searches, to compensate fordifferences in the positions of the individual parts.The displacement coordinate system is defined based on the object coordinate system.308Continues on next page3HAC 16590-1 Revision: B
13 Descriptions of terms and concepts13.7. What is a coordinate system?ContinuedThe tool coordinate systemxx0300000506The tool coordinate system has its zero position at the center point of the tool. It therebydefines the position and orientation of the tool. The tool coordinate system is oftenabbreviated to TCP (Tool Center Point) or TCPF (Tool Center Point Frame).It is the TCP the robot moves to the programmed positions, when executing programs. Thismeans that if you change the tool (and the tool coordinate system) the robot’s movements willbe changed so that the new TCP will reach the target.All robots have a predefined tool coordinate system, called tool0, located at the wrist of therobot. One or many new tool coordinate systems can then defined as offsets from tool0.When jogging a robot the tool coordinate system is useful when you don’t want to change theorientation of the tool during the movement, for instance moving a saw blade without bendingit.3HAC 16590-1 Revision: BContinues on next page309
13 Descriptions of terms and concepts13.7. What is a coordinate system?ContinuedThe user coordinate systemDACBen0300000497ABCDEUser coordinate systemWorld coordinate systemWork object coordinate systemMoved user coordinate systemWork object coordinate system, moved with user coordinate systemThe user coordinate system can be used for representing equipment like fixtures,workbenches. This gives an extra level in the chain of related coordinate systems, whichmight be useful for handling equipment that hold work objects or other coordinate systems.3103HAC 16590-1 Revision: B
13 Descriptions of terms and concepts13.8. What is a RAPID application?13.8. What is a RAPID application?PurposeA RAPID application contains a sequence of instructions that controls the robot so that it mayperform the operations it is intended for.Contents of the RAPID applicationAn application is written using a particular vocabulary and syntax called RAPIDprogramming language.The programming language contains instructions in English enabling the robot to move,setting outputs and reading inputs. It also contains instructions for making decisions, to repeatother instructions, to structure the program, to communicate with the system operator andmore.Structure of the RAPID applicationThe structure of a RAPID application is shown in section The structure of a RAPIDapplication on page 134.How is an application stored?An application you work with or run must be loaded in the controller’s program memory. Thisprocedure is called to Load the application.You Save applications on the controller’s hard disk or other disk memory to keep them safewhen you want to work on another application.See also What is “the memory”? on page 248.3HAC 16590-1 Revision: B311
13 Descriptions of terms and concepts13.9. What is a data array?13.9. What is a data array?OverviewA data array is a special type of variable: a regular variable may contain one data value, butan array may contain several.It may be construed as a table, which may have one or more dimensions. This table may bepopulated with data (e.g. numerical values or character strings) to be used duringprogramming or operation of the robot system.An example of a three dimensional array is shown below:en0400001006This array, called "Array" is defined by its three dimensions a, b and c. Dimension a has threerows, b has three rows (columns) and c has two rows. The array and its contents may bewritten as Array {a, b, c}.Example 1: Array {2, 1, 1}=29Example 2: Array {1, 3, 2}=123123HAC 16590-1 Revision: B
IndexAABB menu 40Absolute Accuracydata storage 280additional axesactivating 195deactivating 195additional axisdefinition 301automatic modeabout 227running programs 232starting in 229switching to 234axesillustration 114selecting 114Bbackgroundchanging 297backupdirectory 269important 269menu 83system 267system parameters 272backward button 39backward executionabout 205limitations 205base coordinatesdefinition 116jogging 116battery shutdownservice routine 211boot applicationrestart 254settings 255using 254B-start 262Ccalender time counter 213calibratingCalPendulum 212LoadIdentify 214SMB memory 280calibration4 points XZ 283base frame 283fine calibration 278loading data 276motor calibration offset 277touch screen 298calibration menu 84CalPendulumservice routine 212cfg files 250charactersentering 97international 97close button 40Configuration files 250connection<strong>FlexPendant</strong> 50to network 54connector 38control module 42properties 91control tools, overview 44controller 42buttons 47control module 42drive module 42ports 48properties 91C-start 259ctrl.bin file 250Ddata instance 80, 137data typeschanging type 190creating new 137editing 139menu 80viewing 136date and time 288declarationshiding 191DHCP server 54drive module 42buttons 48options 91properties 91Duty timer data 251Eemergency stop 22emergency stop buttoncontroller 26, 47<strong>FlexPendant</strong> 26, 38enabling device 25, 38Entry routine 135error messages 99ESDdamage elimination 20sensitive equipment 20wrist strap connection point 20Ethernet 53event logmenu 87message 88explanation, safety symbols 15expressionsediting 188Ffileshandling 252313
Indexprograms 165filteringabout 101data types 101files 101programs 101firmwarereflashing 263Flash disk drive 248<strong>FlexPendant</strong> 38connecting 50hardware buttons 39how to hold 41, 286main parts 38reflashing 263rotating 287screen 40<strong>FlexPendant</strong> Explorer 75forward button 39HHard disk drive 248holding brakes 19hold-to-run button 25, 38using 196HotEdit 73, 184positions 73II/Oabout 76changing values 238menu 76most common 289safety signals 240simulating 238viewing groups 239I/O, inputs and outputs 237image.bin file 250incompatibilityhardware/software 263incremental movementdefinition 124quickset 132setting size 124size settings 125, 132instancesdata types 137system parameters 270instructionsbackward execution 205changing motion mode 180commenting 180copying and pasting 179copying arguments 179cutting 180data types and declarations 189editing arguments 177expressions 188handling of 176running from a specific 198undo, redo 176IP addressfixed 55obtain automatically 54use no address 54I-start 261Jjoggingabout 105additional axes 106axes in independent mode 106base coordinates 116coordinated 107non calibrated mechanical units 106overview 59restrictions 106stationary tool 120tool coordinates 120work object coordinates 119world coordinates 117world zones 106jogging menu 77joystick 38locking directions 122joystick directionsabout 110illustration 114locking 122LLAN unit 248languagesinstalled 91languages, changing 290left handheld 286linear motion mode 110LoadIdentifyservice routine 214lock screen 90login 103logout, login 103Mmain module 135main power switch 47Main routine 135manipulatorsdefinition 301ManLoadIdentifyservice routine 218manual full speed modeabout 228switching to 236manual modeabout 228running programs 233starting in 231switching to 235mechanical unitquickset 128314
Indexselecting 108, 128mechanical unitsactivating 195deactivating 195definition 301mechanical units, activating 202, 204Memory 249memory, what is? 248mirroring 182mode switch 47modpos 73, 184modulescreating 168deleting 171handling of 168loading 169mirroring 182renaming 170saving 169most common I/Oconfiguring 289motion modeselecting 110motion pointer, MP 206motors onlamp 47multitasking programsabout 222loading, running and stopping 222viewing 223Nnetwork connectionsproperties 91setting 255setting up 54Ooperation time counter 213operator window 40optionsinstalled 91installed RobotWare 91Ppathreturning to 224path return region 224payloadscreating 161declarations 161deleting 164display definitions 162editing 162editing declarations 163identifying 214selecting 112PC, connecting 52personalizing 72portscontroller 48positionersdefinition 301positionsexact 126format 126HotEdit 184modifying 184moving to 186tuning 184power switch 47, 48program datamenu 80program directory 165program execution start button 39program memory 192Program module 135program pointer, PP 206programmable buttonsediting 291programmable keysediting 291programsabout files 165creating 165deleting 192, 194handling of 165loading 166mirroring 182multitasking 222renaming 167saving 166starting 219step by step execution 205stopping 221propertiescontrol module 91controller 91drive module 91network connections 91system 91systems 91P-start 260Qquicksetincrement 132mechanical unit 128run mode 201speed mode 208step mode 203quickset menu 40RRAM memory 248, 249, 250RAM memory, illustration 249RAPID 61RAPID application 134RAPID, structure 134redoinstructions 176reflashing315
Indexaxis computer 263contactor interface board 263drive unit 263firmware 263<strong>FlexPendant</strong> 263panel board 263profibus 263reorient motion mode 110restartB-start 262controller 256C-start 259I-start 261menu 92overview 253P-start 260system 256warm start 257X-start 258restoremenu 83system 268revolution countersbattery shutdown 211setting 274updating 274right handheld 286robotsactivating 195deactivating 195definition 301robot system 300RobotWareinstalled options 91Routine 135routineschanging declarations 175copying 175creating 172defining parameters 173deleting 175handling of 172mirroring 182running a specific 200running service routines 209run button 39run mode 201setting 201Ssafety I/O signals 240safety stop 23safety, symbols 15screen, cleaning 89scrolling 100Serial Measurement Board, SMB 280serial numbersdata storage 280service port 48, 52service routinesbat_shutdown 211CalPendulum 212LoadIdentify 214ManLoadIdentify 218running 209ServiceInfo 213shut down 69SIS 251data storage 280SIS, Service Information Systemcounters 213service routine 213SMB 280battery shutdown 211SMB board 250soft keyboard 97software optionsinstalling 68speed mode 208setting 208start button 39start up 57status bar 40, 95step by step execution 205step mode 203setting 203stop button 39supervision settings, editing 293symbols, safety 15systembackup 267delete current 259installing 254properties 91restarting 256restore 268return to default settings 261return to stored 262start and select 258starting without software 254System module 135system parametersconfiguring 270instances 270saving 272system, starting and selecting 256system, upgrading 67systemsproperties 91Ttargetsmodifying 73, 184moving to 186tuning 73, 184task bar 40tasks 134loading program to 223normal, static, semistatic 222setting up 222316
Indexstarting and stopping 222teach pendant unit 38tool center pointabout 142measuring 148TCP 142tool coordinatesdefinition 120jogging 120tool framedefining 145tool orientationsetting 113tool orientation, definition 113tool, overview control tools 44toolsaligning 187creating 142deleting 151editing declarations 150editing definitions 149editing tool data 148identifying loads 214make stationary 152selecting 112setting up tool coordinate system 153stationary 152touch screen 40background image 297calibrating 298TPU 38trouble shooting 70tuningHotEdit 184positions 184targets 184UUASconfiguring views 296undoinstructions 176USB 252USB memory 252USB port 48Vview settingsconfiguring 295Viewing messages in programs 94Wwarm start 257work object coordinatesdefinition 119jogging 119work objectscreating 154declarations 154defining coordinate system 155deleting 160editing declarations 159editing work objects data 158selecting 112world coordinatesdefinition 117jogging 117write accessgranting 66message 99rejecting 66XX-start 258Zzooming 100317
Index318