shortform operating instructions - Facelift
shortform operating instructions - Facelift
shortform operating instructions - Facelift
- No tags were found...

Create successful ePaper yourself
Turn your PDF publications into a flip-book with our unique Google optimized e-Paper software.
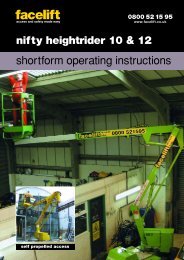
0800 52 15 95www.facelift.co.ukomme 2500ebz<strong>shortform</strong> <strong>operating</strong> <strong>instructions</strong>road towable access
This book is designed as a guide to enable you to start work quickly and safely. It is not intendedto replace the full manufacturer’s <strong>operating</strong> <strong>instructions</strong> (a copy of which should be with yourmachine) which should be read and understood by anyone <strong>operating</strong> the machine.SAFETY TIPSALWAYS• Inspect your machine before use.• Check all operations including ground controls.• Check ground conditions.• Check clearance from overhead obstructions (powercables, building projections etc).• Plan your task/job.• Use sole boards under your outriggers at all timesregardless of ground conditions.• Stabilise and level machine before use.• Wear a safety harness connected to a suitableanchorage point inside the platform.• Operate all controls smoothly.• Warn other people that you are there by means offlashing lights, sign and cones.• MAKE SAFETY YOUR No.1 PRIORITY.NEVER• Use an unsafe machine.• Use an access platform to hoist loads like a crane.• Overload cage/platform.• Operate in strong winds (Check manufacturer’srecommendation).• Rest the cage on a structure or object to gainextra support.• Attach your safety harness to a structure outside ofthe platform.• Throw or drop anything from the platform.• Use boxes, ladders or stand on handrails to gain additionalheight, if you can’t reach, you need a bigger machine.• Let an untrained person operate the access platform.• Take unnecessary risks (hospitals and graveyards arefull of dead heroes!)In the unlikely event that your machine develops a faultplease contact the <strong>Facelift</strong> Tech Team on 01444 881100CONTENTSStarting OMME Lift ................................................1Notes ....................................................................4Handling and Conduct During Operation ..............3
STARTING OMME LIFT1. INSTRUCTIONS OMME LIFT TYPE 2500EBZ/EDZ/EPZ/EBDZ/EBPZ1.1 The lift may only be placed on firm ground. The windvelocity must not exceed 10 in/sec.1.2 Only persons, who meet the national demands topersons <strong>operating</strong> the lift, may operate,it.1.3 On the working site there must always be personspresent, who in any emergency situation can bringdown the operator of the lift.1.4 When working on public roads, warnings and barriersmust be mounted in accordance with the nationaltraffic code.1.5 IMPORTANT! When the lift is in operation, the usermust always take care, that no persons are within theworking area of the tower – squeeze danger.1 .6 Release the lift arm by means of the lock fittings (A)under the basket by pressing the pawl. Lift up in thehandle and free the eye from the hook.1.7 Activate the main switch (B).1.8 Turn key reverser (2) to “stabilizer operation” (2a). The4 red (7b) lamps for stabilizer control will now shine.a. Lower the stabilizers by means of the 4 controlhandles (C).b. The stabilizers in front must always be loweredfirst (the handle in front). When the stabilizers areraised again, the stabilizers at the back mustalways be raised first.c. Lower the stabilizers, until the wheels are free fromthe ground, and the lift position is horizontal.Check by means of the spirit level (D). If theplacing is correct, the 4 lamps (7b) must now beswitched off (pressure on all 4 stabilizers). Placekey reverser in position lift operation. Now thegreen lamp (7a) for lift operation must shine. Thelift is now ready for use.1.9 Turn key reverser (2) to position “operation frombasket” (2d). Bring the key with you in the basket, andput it into the key switch of the basket. Then turn thekey to position 1. The lift is now ready for “operationfrom basket”.1.10 Remember, that because of the constructionelasticity, a movement does not stop immediately,when releasing the corresponding handle. Avoidbumping into immovable parts, such as walls, mastsor trees. Thus start and stop all movements by meansof the adjusting knob (3) for low speed.1.11 As an extra safety the lift is equipped with a warningdevice, which is activated, if the placing is no longer atits optimum during work from basket. If the soundcontinues, then bring the basket into transportposition as soon as possible, and check if the placingof the lift is stable enough.1.12 If the lift reaches its highest outreach, all outwards anddownwards movements are automatically interrupted.Only the movements upwards, inwards and rotationare possible.1.13 If the basket is not completely horizontal, the lift willlevel automatically. This happens, when the lifthandles are activated.1.14 If the basket is more than 100 oblique, all functions areinterrupted. Levelling is made manually by means of anassistant. Please see point B in “emergency lowering”.1.15 The lift is equipped with manually operated emergencystops (1), which interrupt the lift, when activated.1.16 The lift is equipped with a rotation stop, which onlypermits one rotation to each side. If the rotation stopis activated, the lift must be rotated one turnbackwards.1.17 At too low voltage on the batteries, the lift movementsare interrupted. To enable the leaving of the work basketin a secure way, you can make the lift operate for yetanother short while: Push the emergency stop (1) andrelease it again. Hereafter the work basket must belowered immediately, so that you can leave the basket.If possible, bring the lift into transport position. Beforeusing the lift again, the batteries are to be charged.1.18 If the lift stops during work due to other operationerrors, it is possible to bring down the basket byemergency lowering. Please see emergency lowering.1.19 After having used the lift, place it in transport position. Themain switch (B) and the key reverser (2) are interrupted(2b). When leaving the lift, secure it against being used byunauthorized persons. Bring the key with you.1.20 When using power supply for charging or for work inthe basket, be careful that the cable is not damagedduring propulsion or rotation.1.21 On lifts with propulsion, this is connected by turningthe key reverser (2) into stabilizer operation (2a) andby the handle to the left on the block with thestabilizers (C). Connecting is downwards anddeclutching is upwards.IMPORTANTWHEN THE SELF-PROPULSION IS DISCONNECTED,THE HAND BRAKE MUST BE PULLED.IMPORTANTREMEMBER TO CHARGE THE BATTERIES EACH NIGHT.WHEN IT IS POSSIBLE, THE CHARGER CAN ALSO BEUSED, WHEN THE LIFT IS IN OPERATION.DURING ALL WORK WITH THE LIFT, IT ISIMPORTANT TO BE AWARE, THAT THE SAFETYINSTALLATIONS ARE INTACT, AND THAT DAMAGES AREREPAIRED AT ONCE. THE SAFETY OF THE USER ISDEPENDENT ON THE CONDITION OF THE LIFT.1
2. EMERGENCY LOWERING2.1 If the lift stops during work, and it is not possible tolocate the fault, an emergency lowering has to be made.If the fault is due to basket inclination over 10º – pleasesee paragraph B.During manual emergency lowering all safety limitswitches are out of operation. Therefore emergencylowering must be made very carefully and according tothe descriptions below. Manual emergency loweringrequires assistance from the ground.2.2 Before emergency lowering, pump in the telescopicboom. If there are any obstacles to the boom beinglowered to alighting height, use the barring gear.The tools required for emergency lowering are the redhandle for the hand pump and the red emergencylowering fittings. The handles are placed on top of thetower, and the fittings are placed at the valve block. Thevalves are placed in the box behind the control box.(see sketch on page 13 where the valves are placed).IMPORTANTWHEN EMERGENCY LOWERING, ALWAYS REMEMBERTO DRIVE THE TELESCOPIC BOOM IN FIRST.Follow the below <strong>instructions</strong>:Manual operation of the telescopic boom1. Close the valve on the hand pump.2. Place the red extension handle on the hand pump.3. Activate magnet valve MV41 mechanically bymeans of the red bow (please see the sketch onpage 13). Squeeze the bow over the valve, so thatthe tiny bolt activates the sleeve valve and opensthe valve through the opening of the magnet coil onthe valve. Also activate MV.59 by means of theother fittings (EZ/BP/BD).4. Pump in the telescopic boom.5. Open the valve on the hand pump.6. Remove the fittings for the valve.Manual operation of the barring pear1. Close the valve on the hand pump.2. Place the red extension handle on the hand pump.3. Activate magnet valve MVO3 = left or MVO1 =right by means of the red fittings. Place thefittings over the magnet valve, so that the boltend will activate the actual magnet. Also activateMV.59 by means of the other fittings (EZ/BP/BD).4. Turn the lift with the hand pump.5. Open the valve on the hand pump.6. Remove the fitting for the valve.2.3 Lowering of the boom cannot take place, before thetelescope is in. Pull out the red button on the valveblock of the lifting cylinder. Take care, not to getcaught, when the boom is lowered.2.4 Having emergency lowered the lift, check the lift forerrors and damages. Check that all emergencylowering valves are closed. Repair errors anddamages if any, before using the lift again.B – Basket inclination of more than 100If the basket is more than 100 oblique, and the liftfunctions therefore do not take place, then bring thebasket back in the following way:1. Close the valve on the hand pump.2. Place the red extension handle on the hand pump.3. Activate magnet valve MV49 = basket upwardsor MV51 = basket downwards by means of thered fittings. Place the fittings over the magnetvalve, so that the bolt end activates the actualmagnet. Also activate MV.59 by means of theother fittings (EZ/BP/BD).4. Bring the basket into horizontal position bymeans of the hand pump.5. Open the valve on the hand pump.6. Remove the fittings for the valve.Faults and damages, if any, are to be repaired, beforefurther use of the lift.Magnet valve functionsMV 41 Telescopic boom inMVO1 Rotation rightMVO3 Rotation leftMV49 Basket upwardsMV51 Basket downwardsMV59 Lift control (EZ/BP/BD)3. MANUAL CONTROL OF STABILIZERSOnly raise the stabilizers manually, when the boom hasbeen attached to the transport fittings.1. Close the valve on the hand pump.2. Place the red extension handle on the hand pump.3. Activate the magnet valve MV.60 mechanically by2
means of the red fittings (see instruction), which isplaced over the magnet valve, so that the bolt endactivates the actual magnet. The assistant keeps thefittings in while the hand pump is activated.4. Raise the stabilizers one by one with the hand pump byactivating the handle for the stabilizer in question. Theassistant takes care of the valve- and pump function.5. Remove the valve fittings.6. When all stabilizers are raised, open the cock on thehand pump.6. FAULTSIf faults occur in the controLsystem the lift may be switchedoff by means of one of the red emergency switches. Onerroneous activation of the emergency switch it is possibleto switch it off by turning the switch7. FURTHER PRECAUTIONSA daily functional test must be made on the lift. (cf. page18, Maintenance).The user should acquaint himself thoroughly with allfunctions and familiarize himself with:– emergency stop– emergency lowering valvesHANDLING AND CONDUCTDURING OPERATION1. REQUIREMENTS TO PERSONSOPERATING THE LIFTAnybody <strong>operating</strong> the lift must be informed about thenational safety regulations regarding work platforms.The lift may only be operated by persons at least 18 yearsold who have had instruction in using the lift, and who haveproved their proficiency to the person responsible.– manual operation of turn table, telescopic boom andbasket levelling– rotation stop– lowering at too low voltage8. AFTER USEWhen lift operation is finished the lift must be securedagainst being used by unauthorized persons. The keyswitch is switched off and the keys are removed.9. LIFTS WITH EXTRA PUMP CAPACITY2. PERMISSIBLE LOAD/LATERAL FORCEThe permissible load (200 kg / 2000 N in the basket) andthe permissible work basket lateral force (30 KP/300 N)must not be exceeded.3. TRANSPORTWhen changing place of operation the lift must be intransport position, and the stabilizers must be all up. Whenthe lift is towed behind a vehicle, the boom must be lockedto the drawing rod.4. HIGH-VOLTAGE LINESWorking near high-voltage lines is prohibited. Whenworking near uninsulated low-voltage lines, do not gocloser than 1.5 m to the live lines.In general, the national safety standards for workplatforms apply.When key switch (2) is either placed in position (2c) or inposition (2d), it is possible to switch between low! high speedon telescope out by means of the adjusting knob (14).10. LIFTS WITH PROPULSION (EXTRA-EQUIPMENT)It is important always to mount the delivered nose wheel,when self-propulsion is used.5. SAFETY BELTThe lift is prepared for use of safety belt. When using asafety belt, fasten this to the basket.CoupIing and uncoupling of the self-propulsion is made bymeans of the handle, as shown below. Remember to placethe key reverser (2) in position “stabilizer control” (2a).3
NOTESNOTICETHE HAND BRAKE MUST ALWAYS BE ACTIVATED,WHEN THE SELF-PROPULSION IS UNCOUPLED.4
NOTES5
0800 52 15 95www.facelift.co.ukoperator training centreWhen hiring access equipment westrongly recommend takingadvantage of one of our one dayoperator training coursesAs <strong>Facelift</strong> is an accreditedIPAF (Independent PoweredAccess Federation) trainingcentre you can be sure thatyour staff will be trained toa high standard andreceive an internationallyrecognised qualification.Courses can take place on your own premises or at one of our trainingcentres, situated in Hickstead, Iver, Southampton and Liverpool.We can train your personnel on any of the following equipment:(SL) Scissor Lift(SPB) Self Propelled Boom(VMP26) Truck/Van mounted to 26m(VMP200) Truck mounted over 26m(VPP) Vertical Personnel Platform(TP) Trailer/Push aroundThe one day course* covers site safety, practical demonstration, soleusage and site risks and includes a theory test.*(two day course for VMP200)Successful candidates are issued with the IPAF PAL card, widelyaccepted by both the CITB and Health And Safety Executive.For further information or to arrange a training course call us today on:0800 0 72 55 72