Classic Shaker Side Table - Popular Woodworking Magazine
Classic Shaker Side Table - Popular Woodworking Magazine
Classic Shaker Side Table - Popular Woodworking Magazine
- No tags were found...
Create successful ePaper yourself
Turn your PDF publications into a flip-book with our unique Google optimized e-Paper software.
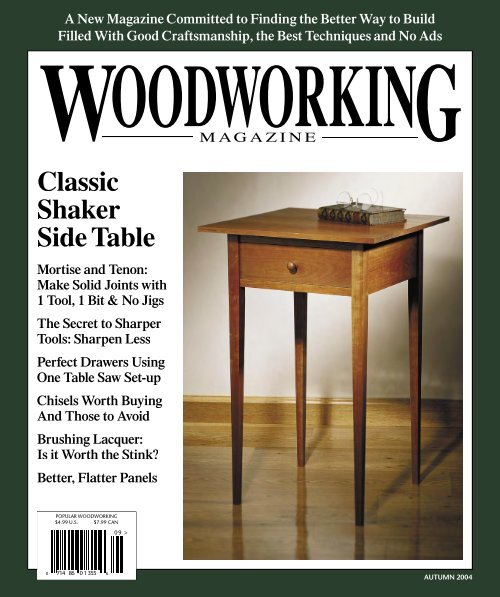
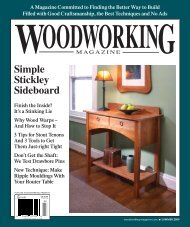
A New <strong>Magazine</strong> Committed to Finding the Better Way to BuildFilled With Good Craftsmanship, the Best Techniques and No AdsW<strong>Classic</strong><strong>Shaker</strong><strong>Side</strong> <strong>Table</strong>Mortise and Tenon:Make Solid Joints with1 Tool, 1 Bit & No JigsThe Secret to SharperTools: Sharpen LessPerfect Drawers UsingOne <strong>Table</strong> Saw Set-upChisels Worth BuyingAnd Those to AvoidBrushing Lacquer:Is it Worth the Stink?Better, Flatter PanelsOODWORKINM AG A Z I N EGPOPULAR WOODWORKING$4.99 U.S. $7.99 CAN09 >0 714 86 0 1 355 6AUTUMN 2004
Contents“You will find something more in woods than in books.Trees and stones will teach you that which youcan never learn from masters.”— Saint Bernard (1090 - 1153), French abbot1 On the LevelThe joy of woodworking actually has little to dowith the act of working wood.2 LettersQuestions, comments and wisdom fromreaders, experts and our staff.4 ShortcutsTricks and tips to help make your woodworkingsimpler and more accurate.SHORTCUTS, PAGE 46 Mortises & TenonsFor <strong>Table</strong>sThis strong and so-called “advanced” jointis just a clever combination of rabbets andgrooves. We show you how to cut mortises andtenons with one tool, one bit and no jigs.11 Sharpen a ChiselThe secret to sharpening is making every strokecount. Focus less on rubbing the tool on astone and more on observing your results.15 Bevel-edge ChiselsWe put five common chisels through a series oftests. Three of the tools are OK. Two we simplycannot recommend.16 Simple <strong>Shaker</strong>End <strong>Table</strong>Good woodworking is the product of the rightjoinery and the right design. This table teachesthe fundamentals of both.22 Gluing Up Flat PanelsMost projects have at least one panel. Stop theslippery, sliding madness and learn the bestway to create flat ones perfectly, every time.24 Simple & FastRabbeted DrawersCut every single joint for a drawer with onesimple setup on your table saw.28 Drawer Primer:Sliding-lid BoxTake our super-quick drawer-making techniquefor a test drive by building this box. The slidinglid makes it ideal for holding candles or chisels.30 Brushing LacquerLacquer dries fast, is forgiving and creates abeautiful topcoat. Find out how to get all thebenefits without spending a fortune buyingfancy spray equipment.32 End Grain: LyptusThis new hybrid wood was bred in Brazil tocompete with cherry and mahogany. Is it worthworking? Check out our results.DRAWER PRIMER: SLIDING-LID BOX, PAGE 28BEVEL-EDGE CHISELS, PAGE 15 BRUSHING LACQUER, PAGE 30 END GRAIN: LYPTUS, PAGE 32
WOODWORKINGM AG A Z I N EAutumn 2004woodworking-magazine.comEditorial Offices 513-531-2690EDITOR & PUBLISHER ■ Steve Shanesyext. 1238, steve.shanesy@fwpubs.comART DIRECTOR ■ Linda Wattsext. 1396, linda.watts@fwpubs.comEXECUTIVE EDITOR ■ Christopher Schwarzext. 1407, chris.schwarz@fwpubs.comSENIOR EDITOR ■ David Thielext. 1255, david.thiel@fwpubs.comMANAGING EDITOR ■ Kara Gebhartext. 1348, kara.gebhart@fwpubs.comASSOCIATE EDITOR ■ Michael A. Rabkinext. 1327, michael.rabkin@fwpubs.comILLUSTRATOR ■ Matt BantlyPHOTOGRAPHER ■ Al ParrishCIRCULATIONGroup Circulation Manager ■ Mark FleetwoodPRODUCTIONVice President ■ Barbara SchmitzPublication Production Manager ■ Vicki WhitfordProduction Coordinator ■ Brian CourterF+W PUBLICATIONS, INC.William F. Reilly ■ ChairmanStephen J. Kent ■ PresidentMark F. Arnett ■ Executive Vice President & CFOF+W PUBLICATIONS, INC. MAGAZINE DIVISIONDavid Hoguet ■ Group HeadColleen Cannon ■ Senior Vice PresidentNewsstand Distribution: Curtis Circulation Co.,730 River Road, New Milford, NJ 07646You can order our first issue for $7 ($9 Canada; $11 other foreign).This includes shipping and handling. Send check or money orderto: <strong>Woodworking</strong> <strong>Magazine</strong> Spring 2004 Issue, F+W PublicationsProducts, 700 E. State St., Iola, WI 54990, or call 800-258-0929.Please specify <strong>Woodworking</strong> <strong>Magazine</strong>, Spring 2004 issue.IMPORTANT SAFETY NOTESafety is your responsibility. Manufacturers place safetydevices on their equipment for a reason. In many photos yousee in <strong>Woodworking</strong> <strong>Magazine</strong>, these have been removed toprovide clarity. In some cases we’ll use an awkward bodyposition so you can better see what’s being demonstrated.Don’t copy us. Think about each procedure you’re going toperform beforehand. Safety First!Highly RecommendedThough some people prefer new tools,there is great merit in purchasing vintagechisels – if you know what to buy. Premiumsocket chisels are still widely available atflea markets and through eBay, and cancost from $2 to $25 apiece. With some ex-ceptions, these chisels are better than newones. The steel holds a better edge, thehandles fit your hand better and the bevelson the sides are ground much smaller so youcan easily sneak into corners.We’ve had immense success with the followingvintage (and now-vanished) models:Witherby, Swan (shown), E.A. Berg andold Buck Brothers socket chisels.Avoid buying rusty ones, especially ifthere is pitting on the face of the tool. Thehandles should feel good when paring andchopping. Most of all, look for chisels thatwere used as a chisel – not as a pry bar.Beat-up chisels are difficult to restore.– Christopher SchwarzOn the LevelThe Process is the PrizeIf I asked you what made a piece of music soundgreat, chances are you’d respond by saying it’s thenotes. But that’s only partially correct. The spaces,or time between the notes, are equally (somewould even say more) important. The same successionof notes played with more or less timebetween them would produce a totally differentsong. Odds are, it would sound awful.So what does this have to do with woodworking?Glad you asked.Let me apply the music question to the craft ofwoodworking. What makes woodworking so enjoyable?There must be something to this activity,because at least a million people in the UnitedStates and Canada say they are woodworkers.If you asked them, I bettheir responses wouldbe something like: “Ienjoy making things,using my hands.” Onceagain, I believe this isonly partially correct.The mere act ofmaking things may notbe all that enjoyable.But combine that act (the musical notes) withall the thinking required to perform the act correctly(the spaces of time between the notes) andyou have the essence of what makes woodworkingso enjoyable.Let me elaborate. The actual doing – say, thecutting of a board or the gluing of parts – if donerepetitiously for hours on end wouldn’t be enjoyableat all. Have you ever made 20 or 30 of thesame thing? It can get old very fast. It’s the brainworkthat puts the joy in woodworking.Consider all the thinking required, the problemsto be solved and decisions to be made, oneven the simplest project. What joint should Iuse? Is that joint the best choice? How do I makethe joint? Is that the best way to make it? Hundredsof choices must be sifted through, considered,decided on and executed in even simpleprojects. Larger projects require thousands ofthought processes before your efforts come to asuccessful conclusion.A major reason novice woodworkers experiencetremendous frustration is not so muchfrom a lack of skill. It really isn’t hard to cut aboard to a specified size, to rout an edge profileor glue a couple of parts together. In fact, when“It’s good to have an end to journeytoward; but it is the journeythat matters, in the end.”— Ursula K. Le Guin (1929 – )novelist, poet, essayistyou break down the physical skills required tobuild a project into individual steps, they’re oftenrather simple. Instead, the frustration the novicefeels comes from the lack of experience in makinggood decisions about how to go about completinga task successfully. The frustrations andresulting insecurity lead to a lack of confidencethat comes from navigating unfamiliar territory.A series of less-than-good choices makes fora bad day in the shop.That’s partially why beginners rush to completeprojects. They focus on the end project, notthe process. For these reasons, the beginner’s finishedproject often looks amateurish. Noviceslack the ability to understand the importanceof the means to achievea desirable end. They“don’t know enough toknow they don’t know,”as the expression goes.That’s why many peoplethink patience is thehardest thing to learnabout woodworking.Alternately, considerthe confident, experienced woodworker. Hecalls on experience to direct the work as he movesseamlessly through each task. He makes the rightchoices, anticipates problems, knows how andwhen to go slow, be patient and get it just rightbecause he knows not doing so will create otherproblems down the road. The experienced woodworkerfocuses on the process of doing the work.As he works through each step, he spends littletime thinking about the completed project.For the experienced woodworker and thoseon their way to becoming one, the day of enlightenmentcomes with two realizations: First,that you just spent hours in the shop and it seemslike minutes. And second, you feel relaxed, evenrefreshed, after hours of hard labor. The joy ofwoodworking is simply being engaged in doingit. The completed project is but a nice souvenirof time well spent. WMSteve ShanesyEditor & Publisherwoodworking-magazine.com ■ 1
The Right Way to CleanGunked-up Saw BladesRegarding using oven cleaner to clean the gunkoff saw blades (“Letters,” Spring 2004), a morebenign and equally effective product is GreasedLightning Orange Blast kitchen cleaner, distributedby A&M Cleaning Products of Clemson, S.C.(greased-lightning.com). It is one of several similarproducts I found on the shelves at the supermarket.I once tried an oven cleaner on my saw blade.It was so strong, the stamped serial number was theonly thing it didn’t remove from the blade.Ron CulbertsonMyrtle Creek, OregonRon,Oven cleaners can be caustic. Handling blades(or router bits) that are being cleaned this wayshould be done with care to avoid an eye injuryor skin irritation. Citrus cleaners, such as the oneyou mention, can be effective and are not as harshif they come in contact with skin. Still another optionis an overnight soak in kerosene. We contactedone of the biggest manufacturers of carbide in theworld, Leitz Tooling Systems Inc., and learned thatall these cleaning approaches are acceptable andwill not harm the carbide itself. We also learnedthat on an industrial level, Leitz uses ultrasonicwaves to remove pitch from tooling.Steve Shanesy, editor & publisherAdditional 6" Rule SourcesRegarding “Almost-perfect 6" Rulers” (Spring2004): These 6" rules are generally based on machinist’srules, which come in many patterns.Buying them through woodworking tool suppliersisn’t the best approach. People should buythem through companies that sell to machinists,where you can get a far wider variety of widths,thicknesses and measurement patterns, often atlower prices. Two good possibilities to check outare McMaster-Carr (www.mcmaster.com) andEnco (use-enco.com). Good brands to considerbesides the pair you recommend (Starrett andShinwa) are Brown & Sharpe and Mitutoyo.Also, the last time I looked in my hardwarestore, conventional tapered wood screws werestill available in steel and hot-dipped galvanizedsteel (“Screws,” Spring 2004). Perhaps the hardwarestores near you no longer carry them, butthis isn’t true everywhere.Bill HoughtonSebastopol, California“Only those who have the patience to dosimple things perfectly ever acquire theskill to do difficult things easily.”— Friedrich Von Schiller (1759 – 1805)dramatist, essayist and poetStack dadoWobble dadoShimDado is adjusted by stackingblades to the correct widthDado is cut by the rotating angled bladeDifferences in Dado SetsWhat is the difference between a stack dado andan adjustable (also called a “wobble”) dado? Isone safer or more exact than the other?David Ecclesvia the InternetDavid,There are two kinds of dado sets, and both are“adjustable,” meaning you can alter the width ofthe dado. A stack dado consists of several bladesthat you stack on the arbor until you get to the desiredwidth. The outside blades are simply outerblades, while the inside blades are called “chippers.”There also are shims that allow you to makesmall changes in width, as small as a few thousandthsof an inch.The other kind of dado set is a “wobble” dado.This is a one-blade system. By turning a knob atthe center you can adjust how much the blade willwobble as it rotates. The more it wobbles, the widerthe dado cut. This tooling, though generally lessexpensive, leaves a cut that is unacceptable forall but the roughest of woodworking. You shouldchoose a stack dado when building furniture.– Christopher Schwarz, executive editorA Question about Birch PlywoodI just picked up a copy of <strong>Woodworking</strong> <strong>Magazine</strong>(Spring 2004) and had to share my enthusiasm.I get every woodworking magazine out there butyours shows a quality missing from the rest. I wasparticularly taken by the articles and your “Letters”section. Your style is engaging, clear and interesting.In each instance, I came away feelinglike definitive information was transmitted andthat I truly learned something of value to me.One comment on the “Glossary” (Editor’s note:Our interactive, newly expanded glossary appearsonline at woodworking-magazine.com):Your definition of Baltic birch seems to equateit with Finnish birch. I’ve read in several placesthat this plywood is made with a different gluethat makes it suitable for outdoor use, a subtle butsignificant difference.Joe PiccolinoDelmar, New YorkJoe,There are differences between the two plywoods,but it’s not the glue. To clear up the confusion,we talked with Luke Wolstenholme, president ofWolstenholme International, a Boulder, Colo.-based company that has been importing Balticbirch to this country for 12 years.Baltic and Finnish birch are both high-qualityplywoods made from veneer plies of equal thicknesses.The plies are thinner than those in mostdomestic plywoods, and therefore there are morelayers. Add the fact that these plywoods don’t havevoids and are generally inexpensive and you cansee why they are desirable materials. Wolstenholmesays although Baltic birch (imported fromRussia) is made in 4' x 8', 5' x 8' and 5' x 10' sheets,90 percent of it is sold in 5' x 5' sheets. Finnish birch(from Finland) is available in other sizes, but 90percent of it is sold in 4' x 8' sheets.Both types of plywood are available with eitherinterior- or exterior-grade adhesive. Typically,4' x 8' sheets are used in construction, so thoseare made with glue suitable for exterior use, while5' x 5' sheets are used for furniture projects, sothose are made with glue suitable for interior use.Perhaps this has led to the assumption that Finnishbirch is always made with glue suitable for outdooruse. In most cases it is – but not always. WM– Kara Gebhart, managing editorHOW TO CONTACT USSend your comments and questions viae-mail to letters@fwpubs.com, or byregular mail to <strong>Woodworking</strong> <strong>Magazine</strong>,Letters, 4700 E. Galbraith Road,Cincinnati, OH 45236. Please include yourcomplete mailing address and daytimephone number. All letters becomeproperty of <strong>Woodworking</strong> <strong>Magazine</strong>.woodworking-magazine.com ■ 3
ShortcutsTwo Finger Tricks for Drilling and Sawing StraightPoint index fingerin line with drill bitUse middle fingerto operate triggerFor first-time (or even experienced) drill users, itcan be difficult to drill a straight hole every time.Your eyes can trick you. Therefore, it’s best to letyour brain and body take over. When using yourdrill, lay your index finger along the barrel ofthe drill (in line with the bit), then use your middlefinger to pull the trigger. Essentially, you’reusing your index finger to point the way you wantto drill. This technique will allow your body topoint straight every time.David Thiel, senior editorPlace index finger on top of blade,pointing in direction of cutTry to usefull length of bladeA sharp hand saw can be a precision instrumentwith just a little practice. Here are three tips I wastaught that make all saws cut straighter and faster.One: Similar to the shortcut shown at left, alwayshold the saw with your index finger extended out,pointing down the blade. This greatly improvesyour control. (This advice is true for many tools,actually). Two: Use very little downward pressurewhen sawing. Let the saw do the work. If you pressthe saw down as you cut, it will wander off the line.Three: Woodworkers tend to use the teeth only inthe middle of the saw. As you are cutting, pretendthat the saw is longer than it actually is. This willtrick you into making longer strokes. Your sawwill cut faster and the teeth will stay sharp longerbecause you are using more of them.Christopher Schwarz, executive editorNo More Broken DowelsLike most turners, I use a 3 ⁄ 8 " dowel glued into asmall block of wood when turning bottle stoppers.The dowel provides a handy way to hold thework in a standard drill chuck in the head stock.The problem was, I would sometimes break thedowel when turning, ruining the work. I guessedthat one of the reasons the dowel was breakingwas because of the small area of contact in thechuck on the dowel itself. Remembering I had anold 3 ⁄ 8 " split-sleeve router collet, I tried insertingthe dowel in the collet, then the collet in the drillchuck. Now the dowel was supported all aroundby a steel sleeve. Since adding the collet to my setup,I haven’t broken a dowel yet.Steve Shanesy, editor & publisherSleeve placed intoSleeve placed intodrill chuck on lathe3 ⁄ 8" routercollet givesfull supportFixing Gaps in JointsThis is an often-forgotten carpenter’s trick. Whenyou have two parts of a joint that won’t closetightly, there is a simple solution. First put the jointtogether and apply enough clamp or hand pressureto keep the parts in place. Take a fine-toothsaw (a Japanese flush-cutting saw is ideal) and sawbetween the two parts of the joint. The small kerfUse workpieceas guidewhen cuttingClamp workpieceto benchtopwill remove the imperfections between the twomating parts and the joint will go together tightly.This works with many joints including half-laps,miters, mortise-and-tenons and scarf joints.David FlemingCobden, OntarioParts don’t meetat clean lineJoint tight afterthe cut at the jointJointer’s Guard a Source of ErrorRecently in our shop here at <strong>Woodworking</strong> <strong>Magazine</strong>,we were having trouble getting our jointerto machine an edge that was 90° to the face of theboard. At first we thought our machinist squarehad gone out of true, but that wasn’t the case. Nomatter how much we tweaked the fence, all theedges were off a couple of degrees.Then one day it dawned on me: The jointer’sspring-loaded guard was slapping the machine’sfence after each pass. The guard wasn’t hittingthe fence hard, but it was enough to throw off theangle setting – no matter how tightly we lockedthe fence down. Here’s how to see if you have thisproblem: Set your jointer’s fence to 90° and allowthe spring-loaded guard to strike the fence. Thencheck the angle of the fence again.The solution is simple: Set the tension on theguard so that it doesn’t slap the fence after eachboard passes over the machine’s cutterhead. Adjustthe tension until the guard swings to cover thecutterhead, but doesn’t strike the fence.Christopher Schwarz, executive editor4 ■ woodworking magazine Autumn 2004
Mortises & Tenons for <strong>Table</strong>sWe found that all you needto cut this stout jointis a router, a router table anda single inexpensive bit.TTo avoid cutting mortise-and-tenon joints, manywoodworkers opt to build their projects using simplerrabbets, dados and grooves instead. Whatmany of them fail to realize is that the mortiseand-tenonjoint is nothing more than a clever combinationof rabbets and grooves.The mortise is just a stopped groove. And thetenon is just a piece of wood that has been rabbetedon at least one (but usually four) of its faces.So the real challenge for the woodworker whosets out to make this joint for the first time is actuallya set of three manageable tasks:■ Choosing the right tools.■ Setting up the tools for accurate results.■ Choosing a project to practice on.Why Build a <strong>Table</strong>?Without a doubt, the best project to learn how tomake a mortise-and-tenon joint on is a table. Thetypical table has – at most – eight joints to cut.(Compare that to a Morris chair, where you caneasily have 75 joints or more.)Fitting a mortise-and-tenon joint for a tableis more forgiving than fitting the same joint foreven a simple square picture frame. With a frame,you need to fit the horizontal members (calledrails) between the vertical members (called stiles)at the top and bottom of the frame. There canbe quite a bit of fiddling to get the rails closedtightly against the stiles at both places.With a small table, each assembly of two legsand one apron is simpler – you have to fit the jointonly at the top of the legs. There is indeed somefiddling when you put these assemblies togetherinto the completed table base, but because the workis done in stages, it’s more manageable.Also, the mortise-and-tenon joint for a smalltable can be much simpler to execute than themortise-and-tenon joint for a frame or door. Tounderstand why this is true, you first need a lessonin basic tenon anatomy.The Tenacious TenonEach part of the tenon has a job to do. Once youknow this, you’ll also know how the joint can bemodified or tweaked and still do its job.All tenons have four cheeks. The wider cheeksare face cheeks and the narrower ones are edgecheeks. The face cheeks are the backbone of thejoint. They are the long-grain gluing surface thatmates with the long-grain surface in the wall ofthe mortise. The better the fit between the facecheeks and the mortise, the stronger your gluejoint ultimately will be.The edge cheeks don’t provide much gluingstrength at all. Though the edge cheeks are alsolong-grain surfaces, they mate with end-grain surfacesin the mortise, which makes a poor joint. Instead,the job of the edge cheek is to resist rackingforces in the assembly. The better the fit betweenthe edge cheek and the mortise, the less likelyyour project will wobble, even if the glue joint atthe face cheek becomes compromised.Tenons also have shoulders. This part of thejoint – which literally looks like a shoulder – canbe on one to four of the edges of the tenon. Thejob of the shoulder is mostly cosmetic: It hidesany sloppiness in the mortise opening. It also canbe pared in various ways to hide other defects ofthe joint. For example, if you sanded your mor-PHOTO BY AL PARRISH6 ■ woodworking magazine Autumn 2004
tised piece too much and crowned the surface,the shoulder can be chiseled up near the cheek toeliminate any gap that might appear between thejoint’s pieces. The shoulder is therefore necessaryonly on surfaces that show on the final project.There’s something else to consider when makingshoulders: If you make them too wide, youcan introduce two problems to your joint. First,bigger shoulders means you have smaller cheeks,which reduces the overall strength of the joint.Second, a large shoulder will allow the tenonedboard to cup or bow slightly at its edges. Big shoulderscan, over time, result in a joint that isn’t flushlike it was the day you made it.Fewer Shoulders Make it EasierWith all these parts to keep track of, it’s no wonderthat some woodworkers shy away from this joint.But tenons for tables can be simpler than tenonsfor other assemblies. Here’s why: The tenons fortables need fewer shoulders. Really, only one faceof the apron shows in a table. You definitely don’tneed a shoulder on the inside of the apron.A shoulder at the bottom of the apron is optional,though a very small one is easy to fit andprevents the apron from cupping.And here’s the real kicker – you don’t need ashoulder at the top of the apron. In fact, I’d arguethat eliminating it can make a better joint for tworeasons: First, because the tenon is almost thefull width of the apron, it keeps your apron fromcupping or bowing. This is especially importantin a table because a cupped apron can push thetabletop up in places, spoiling its flatness. Second,it makes the mortise easy to cut. Essentially themortise is stopped only at one end. As you’ll seeshortly, this allows you to make this joint withouta lot of equipment.Of course, the logical objection to a joint likethis is that if the mortise is open on one end thenthe table won’t resist racking. I argue that a properlyfitted tabletop takes the place of that mortisewall, constraining the tenon’s edge cheekand keeping it from racking. And, as you’ll seelater, you can easily reinforce this joint with awell-placed peg for added insurance.Choosing Your ToolsOne big objection to mortise-and-tenon joineryis the specialized tools you need to make it.Benchtop mortising machines cost $200; a kitthat allows your drill press to serve as a makeshiftmortiser costs about $70 (assuming you have adrill press). An option is to cut your mortises witha plunge router and a shopmade or commercial jig($75 or so). But these jigs take time and moneyand aren’t necessary for this particular joint.For cutting the tenons, you could buy a commercialjig, build a tenoning jig or get a dado stack($85 for starters) to do the job on the table saw.Still other woodworkers insist on cutting thejoint by hand. I do a lot of handwork, but makingCheeksShouldersThe anatomy of a typicaltenon with four shoulders.Faceshoulderthis joint with hand tools requires an investmentin tools (tenon saw, carcase saw, mortising chiseland shoulder plane) and practice time. Whilethere is pleasure in cutting this joint by hand, itcan be frustrating at first. (See “Cutting this Jointwith Hand Tools” on page 8.)There is an easier way. I argue that you cando all the mortise-and-tenon joinery for a simpletable with a router, a router table and a 3 ⁄ 8 "-diameter straight bit. All three items are commonequipment in even the most bare-bones shop.In a nutshell, here’s how it’s done: First millyour mortises in the legs. Set up the straight bitin your router table and set the fence to center thecut on the width of the leg. Cut the mortise outin several passes, increasing the height of the bitwith each pass. You’ll need a stop on the outfeedside of the router table’s fence to stop the mortisein the same location.To cut the tenons, keep that same bit in yourrouter table and use a miter gauge (or a scrap ofwood) to guide the apron into the bit, cutting arabbet on each end. Adjust the height of the bituntil the tenon fits perfectly in its mortise.The heart of this method is the 3 ⁄ 8 "-diameterstraight bit. Why 3 ⁄ 8 "? There are several reasons.Aprons for small tables are typically going to bemade using 3 ⁄ 4 "-thick wood, and tenons as a ruleare supposed to be half as thick as the stock they’re“Any intelligent fool can make thingsbigger, more complex, and moreviolent. It takes a touch of genius –and a lot of courage – to movein the opposite direction.”— E.F. Schumacher (1911 - 1977)author of “Small is Beautiful”FacecheekEdgeshoulderEdgecheekThe shoulders cover up any inaccuracy in the mortises of thesebare-faced tenons with simple shoulders.BWhen tenons are closer to the outside of theaprons, as in example “B” above, they can haveextra length, compared to the tenons in example“A” that are centered on the aprons.cut on. This makes a balanced joint: half of it istenon and the other half is shoulder.But some woodworkers use 1 ⁄ 4 "-thick tenonson 3 ⁄ 4 " stock. For this particular technique, I thinkthat’s a mistake. Straight bits that are 1 ⁄ 4 " diameterare fragile; even quality ones will snap easily ifyou put too much pressure on them. Similarly, abeefy 1 ⁄ 2 "-diameter straight bit is also a bad idea.You could use one, but then your mortise starts toget so wide that its walls can become more fragile,especially in a small table’s delicate legs. I’dsave the 1 ⁄ 2 " bit for milling joints for bigger projects,such as dining tables.The router doesn’t have to be fancy – even alow-powered single-speed tool will do this jobwith relative ease. And the router table doesn’thave to be expensive, either. Any table with anadjustable fence will do – even a shop-made versionwith a simple plywood table and a straightscrap of solid wood for the fence.Awoodworking-magazine.com ■ 7
Cutting This Joint with Hand ToolsTo cut the tenons, saw the cheeks diagonallywith the piece held in your vice. Seeing twosides simultaneously increases your accuracy.Bottom of mortiseEdge of mortiseTo cut a mortise by hand, use a chisel that’s theexact width of your desired mortise. Work fromthe center out with the face of the tool pointedtoward the center of the mortise (left). I slicedopen this joint during the process (above) so youcan see how you chop out a “V” in the center andthen chop to the ends.Once you make the first diagonal cut, turn thework around and saw straight down. The firstcut guides your second cut.The next step is to saw the shoulders. Mark the location of your shoulder with a chisel andstraightedge. This cut will guide your saw. With the shoulders cut, trim them with a shoulder plane(shown above) until the tenon fits the mortise.Make the MortisesThe first step is to mill the mortises on the ends ofthe legs. Set up your router table so the bit projects1 ⁄ 4 " above the table. Position the fence so the cutwill be centered on the end of the leg. You probablywon’t hit this dimension the first time, so besure you practice on test pieces.Clamp a stop piece (a scrap piece is fine) toyour fence so your mortises will end at the sameplace. Where you clamp the stop is determinedby the width of your aprons. For example, if youraprons are 4" wide, I’d position the stop so that themortise is 3 7 ⁄ 8 " long. This will give you a small1 ⁄ 8 " shoulder at the bottom of the apron.Take some scrap that is the exact size as yourtable leg and mill a test mortise. Push the leginto the bit with steady pressure. If the bit burns,you’re going too slowly; if it chatters, you’re goingtoo fast. Check your results. To determine ifthe mortise is centered on the leg, use calipersand check the length with a ruler.With your setup just right, you can mill themortises. First mill all the mortises with the bitset to 1 ⁄ 4 " high. Then increase the height of the bitto 1 ⁄ 2 " and perform the same operation on all thelegs. Finally, raise the bit to 3 ⁄ 4 "(if that’s your finalheight) and make the last pass. In my book, a 1"-deep mortise would be preferable, but not everyproject will allow it. The small side table projectin this issue uses a 3 ⁄ 8 "-deep mortise.Time to Try the TenonsMaking the matching tenons is surprisingly simplework using the same router-table setup. Setthe height of your bit to 1 ⁄ 8 " and adjust the fenceso that the diameter of the bit plus the distancebetween the bit and fence equals the length ofyour tenon. For example, to cut a 3 ⁄ 4 "-long tenon,position the fence so that the 3 ⁄ 8 "-diameter bit is3 ⁄ 8 " away from the fence.Get some scrap that’s the same thickness asyour aprons and cut a test tenon. You can use amiter gauge to guide the work, but a simple squareback-up block works just as well – and it reducestear-out as the bit exits the cut. Make the testcut in at least three passes. Start at the end of thetenon and work to the shoulder. This is the safestway to make the cut because you cannot get anywood jammed between the bit and the fence.Check the length of your tenon and adjust yourfence. With the length set, mill the edge shoulderson the bottom edge of the apron.Next, make the first cut on the face cheek onall the aprons. Do this using the same procedureyou followed for the edge cheeks. With that cutcomplete, raise the bit very close to 3 ⁄ 16 " high andmake another pass on all your tenons. Your tenonsshould almost fit in the mortises.Getting a perfect fit is just a matter of takingthe time to nudge the router bit up until the tenonsfit in the mortises you cut. What’s a perfectfit? You should be able to fit the tenon in its mor-8 ■ woodworking magazine Autumn 2004
Mark yourstart and stoppoints on apiece of tapeStopTo cut the mortise with the router, first mark outthe location on the end of a leg and line up the bitwith your layout lines as best you can.The stop determines the length of the mortise. Don’t forget to include the diameter of the bit whendetermining where the stop should go. Try to get it as close as you can when making a test cut.tise using just hand pressure. If you have to usea mallet, it’s too tight. If the tenon drops into themortise and wiggles, it’s too loose.If the tenon is too tight, don’t force it. You’lldestroy a fragile leg. If it’s too loose, you’re goingto have to beef up your tenon a bit. The best wayto do this is to glue hand-plane shavings (forsmall adjustments) or thicker scraps (for largeerrors) to the tenon. Once this extra wood is gluedin place, you might have to mill down the tenon abit again. Take your time when cutting your tenons– a little extra care saves you a lot of grief.When the tenons slide home in their mortises,you’re close to completing the joint. Now it’s justa matter of squaring the rounded end of the mortiseand either mitering or notching the tenons sothey fit together, if necessary.Getting the tenons to fit with each other is simplework with a backsaw. Really, there is nothingdifficult about this cut, and even if you messit up it will never show. If you like, you can cutwide of your line and then pare to your layoutline using a chisel.In small tables (and many large ones), it’s typicalfor the two mortises in a leg to meet at thecenter. This is easy to deal with; you’ll just haveto modify your tenons a bit to make them fit.There are two generally good solutions: You canmiter the end of each tenon to fit, or you can cutnotches on the ends so they interlock, as shownin the illustrations at right.Both solutions are simple work with a saw. Youdon’t need a perfect fit inside the leg because itwill never show. But they are both good ways toget some experience cutting with a hand saw ormaking a couple of miters.When your joint is ready to assemble, hereare a couple of tips: Don’t try to assemble yourtable base all at once. Glue up one side andMill the mortises in several passes to avoidstressing the bit. With your stop and fence inplace, the work proceeds quickly.WallsA dial caliper ensures that you will have lessfussing when you fit your joints. A perfectlycentered mortise will result in a table base that issquare and not a parallelogram. Check the twomortise walls. When they are equal in thickness,your mortise is centered.One option to deal with the point where thetenons meet is to miter the end of the tenons.If you don’t want to miter the tenons, you can cutnotches in the ends so they interlock.woodworking-magazine.com ■ 9
The tenon length is determined by the diameterof the bit and its distance from the fence. Use aruler to get this setting close. Make a test cut andadjust the fit so it’s perfect.Your test set-up is perfect for milling the singleedge shoulder. Make this cut with the apron onedge guided by a back-up block or a miter gauge.After the second pass, your tenons should be onlya hair off. Make this cut on a piece of scrap first toensure you don’t overshoot your mark.then the other. Then glue those two assembliestogether. It takes more time, but there are fewerjoints to keep an eye on as the glue begins to setup. The glue-up procedure also reinforces thesometimes-fragile mortise wall created by thismortising technique.Be sure to do a dry fit. If the tenon won’t seat allthe way into its mortise, shorten your tenon untilit does. If there is a gap at the outside shoulder, tryparing away some of the end grain of the shoulderat the corner where it meets the cheek – but don’tchisel the edge of the shoulder that shows.During glue-up, add glue on the mortise wallsonly. Don’t glue on the shoulder and don’t worryabout gluing the edge cheeks or the mortise’s bottom.If you get glue there, that’s fine, but mostlyyou want to get the maximum amount of contactbetween the face cheeks and the mortise wall.ReinforcementsFinally, I think it’s a good idea to reinforce tabletenons using a wooden peg driven through theleg. But don’t peg your joints until the glue is setup. If you don’t want the peg to show, you can pegthe joint from inside the table base.No matter where you put the peg, the procedureis the same. Cut some pegs on your table saw;I like square stuff that’s a hair bigger than 1 ⁄ 4 " x1 ⁄ 4 ". I don’t use manufactured dowels because theyare inconsistent in size. Sharpen one end of yoursquare peg in a pencil sharpener and crosscut it to1" long. With a knife, trim off a good deal of thepointiest part of the end you sharpened.Take a drill with a 1 ⁄ 4 " brad-point bit and drillthe hole for the peg. The hole should be deepenough to pass all the way through the tenon butnot pass through the entire leg. Usually I like tocenter my pegs on the length of the tenon.Put a little glue in the hole and drive the peg inwith a hammer. As the peg hits bottom, the hammerwill make a different sound when it strikesthe peg. Stop hammering. Any more hits couldsplit the peg. As you’ll see, this procedure lets youput a square peg in a round hole. The corners ofthe peg bite into the surrounding wood to keep itfrom twisting out. Finally, trim the peg flush (oralmost flush) using a chisel, a gouge or a flushcuttingsaw, as shown below.With this simplified version of the mortiseand-tenonjoint mastered, you can see how a coupleof extra cuts can change it. Keep practicingthis joint and before you know it, that Arts &Crafts spindle bed or Morris chair will look likean easier (or at least doable) job. WM— Christopher SchwarzRoundedcorner leftby routerScrap guidesthe chiselThe best way to square the end of a mortise iswith a chisel that is the exact width of yourmortise. This joint will be concealed by thetenon shoulder, so it doesn’t have to be pretty.If you’ve never pegged a joint before, give it a try on one of your test joints. It’s actually simple andstraightforward work. This extra effort will add strength to your table base.10 ■ woodworking magazine Autumn 2004
Sharpen a ChiselHere’s the secret: The less you sharpen, the keener your tool’s edges will become.TThere are two things you must learn to get yourchisels sharp enough for woodworking.The first is easy. Your cutting edge is the intersectionof two planes: the bevel and the faceof the tool. As the metal is abraded, the pointwhere those two planes intersect becomes finer,sharper and more durable. The ultimate goal ofsharpening is to make that point of intersectionas small as possible. The smaller that point of intersection,the sharper your edge will be.The second thing isn’t as obvious. Good sharpeningis more about learning to observe yourprogress than it is about rubbing a tool on a sharpeningstone. Ultimately, a good sharpener spendslittle time rubbing the tool and more time makingevery stroke count.If this sounds odd, think for a minute abouthow you viewed furniture before you startedwoodworking. Most non-woodworkers can seea piece of furniture as a whole form. But it takestraining to see the individual details (such asrecognizing inset doors that have perfect revealsall around) and to know what they mean (whichis good craftsmanship). As your woodworkingskills develop, your eye becomes more discriminating.At that point, creating fine furniture hasmore to do with seeing the details than with rippinglumber on a table saw.With sharpening, you must develop your eyeto know what a good edge looks and feels like.Once you know what sharp is and how to getthere, your edges will get better every time yousharpen. And you’ll spend less time at the stones.Ultimately, it should take you only five minutesto bring a dull edge back to perfection.The Right Sharpening KitBuying the right equipment is important. Somesystems are slow (oilstones), some need moremaintenance (waterstones) and some have peculiarities(such as the tendency of sandpaper toround over an edge). I have used every system,and after years of experimenting and sharpeninghundreds of edges, I’ve settled on a hybrid systemthat consists primarily of the following:■ A DMT diamond stone for removing metalquickly and truing my other sharpening stones(dmtsharp.com or 800-666-4368).■ A coarse waterstone (#800- or #1,000-grit)for shaping the tool’s secondary bevel.■ A fine waterstone (#6,000- or #8,000-grit)for polishing the secondary bevel and face.■ An inexpensive side-clamp honing guide.This list is a bit unusual because of what I’veincluded and what some may say is missing. Thehoning guide is a bit controversial, but it’s thekey to early success. Many excellent craftsmendispense with these “training wheels” and insistbeginners sharpen without it. However, withouthands-on instruction, most beginners will struggleneedlessly learning freehand technique. Producingyour first keen edge will take far morepractice. And your progress will be slower. Thehoning guide allows you to succeed on your firstor second try. And once you know what sharp is,you can then choose to use the guide or not.The second reason the above list is radical isbecause there is no medium-grit stone betweencoarse and fine. British craftsman and teacherDavid Charlesworth recently convinced me thatPHOTO BY AL PARRISHwoodworking-magazine.com ■ 11
the medium-grit stone was unnecessary. Aftersharpening about 100 edges his way, observingthem with a 30x jeweler’s loupe and putting themto work, I’m convinced he’s correct. A fine-gritwaterstone cuts fast enough to polish your edge andremove the scratches left by the coarse-grit stone.In addition to the above equipment, I recommenda Tupperware-like container to store yourstones (a $6 expense), a spray bottle to mist wateron your stones, a plastic non-skid mat from thehousewares department to contain your mess,some oil, a small square and some rags.Know Your ChiselBefore you can sharpen a chisel, you must knowyour goal. Chisels are somewhat Zen-like tools.Though they are the simplest woodworking devices,properly setting them up is tricky.The first thing to understand is the function ofthe face of the chisel. The face is the flat, unbeveledside of the blade. For a chisel to work correctly,this surface must be flat. If you polish onlynear the cutting edge (a tempting time-saver) thechisel won’t cut true. When you guide your chiselon one surface to pare a mating surface, the toolwill wander up or down, depending on whetherthe face is convex or concave. When you attemptto clean up a routed corner or remove waste betweendovetails, you will have difficulty steeringthe tool straight for the same reason.You should also remember that the face of thetool is half of your cutting edge. If left unpolished,your edge will be less durable. Why? Pretend thatyour hand is a chisel and the spaces between yourfingers are scratches in the metal left by grindingon a coarse stone. If you jabbed someone withyour fingers stretched out and spread apart (similarto an edge with deep scratches), you’d probablybreak your hand. But if you brought yourfingers together into a fist (similar to an edgewith smaller and shallower scratches), your handwould endure the punch pretty well.The second important thing to know is that thecutting edge must be 90° to the sides of the tool.A skewed edge will tend to wander in a cut.Third, the bevel of the tool must be evenly polishedat the cutting edge. The best way to determineif you are truly sharpening at the cuttingedge is the emergence of a “burr” on the face ofthe tool during sharpening. The importance ofthis burr cannot be overstated. Your edge mightlook nice and shiny, but unless you created a burron the face of the chisel on your coarsest stone,your edge isn’t sharp. The photos below discusshow and where to look for this burr.The Act: Brief but BountifulAs you follow the photos that illustrate the stepsto sharpening, keep these things in mind:Honing the chisel does not require a lot ofstrokes on the stone. In fact, the more back-andforthmotions you make, the more likely you areto put pressure in the wrong place or dish yourwaterstone unnecessarily.Here is another trick I learned from Charlesworth:When honing on the waterstones, startwith about six strokes. Then observe the edgecarefully by eye and rub your finger up to theedge of the face to feel for the burr. If you don’tfeel the burr but it looks like you’re sharpeningthe bevel, switch to a coarser stone and try againuntil you can definitely feel the burr.When you can feel the burr and the scratch patternis consistent, move to the next finer grit.One mistake beginners make is that they useSTAGE 1: Preparing the FaceThe face of a chisel needs to be flattened and polished only once if youdo it right. Before flattening the face, remove protective lacquer from theblade with lacquer thinner (you may need to soak some tools overnight).As you flatten the face, be mindful never to lift the chisel’s handle duringthis operation. If you do, you will grind a curve into your tool’s face thatwill be difficult to ever straighten out.MoreworkneededherePlungeMove forwardFlattening begins on the diamond stone. I useDMT’s extra-coarse stone for this, which is#220-grit. I use mineral spirits as a lubricant.The first type of stroke is used for 1 ⁄ 2 " chiselsand wider. Rub the face against the stone asshown, keeping the face flat against the stone.Start with 20 strokes and check your work.The scratches shouldrun left to right on theface of the chisel afterthis stroke. This chiselis getting there, but itneeds more work.The second stroke (used with all chisels) is toplunge the chisel back and forth on the stone.After each plunge, move the chisel forward alittle bit on the stone. Note that with narrowchisels ( 1 ⁄ 8 "- 3 ⁄ 8 ") this is the only stroke possiblewhen flattening the face. (The first type ofstroke will round over the edges of the face.)Here is a picture of the polished face of the toolreflecting the surface of the diamond sharpeningstone. Ultimately, this is what your face shouldlook like: a mirror along most of the face of thetool. There will be some small scratches frompolishing, but these are OK.After 20 strokes of theplunging motion, thescratches should lookvertical. Repeat thesestrokes until the first3" of the chisel’s faceshows a consistentscratch pattern. Thenrepeat these strokeson the coarse #325-grit diamond stone,then the coarse andfine waterstones.12 ■ woodworking magazine Autumn 2004
STAGE 3: Honing the Secondary BevelTo hone the secondary bevel, you want to sharpen only at the cutting edge – sharpening theentire bevel is a waste of time. So you need to shift your tool in the guide a bit so only theleading edge contacts the stone. I usually shift the tool back 1 ⁄ 4 " in the guide; this adds a 2°or 3° secondary bevel. This works with all makes and models of the side-clamping guide thatI’m aware of.STAGE 4: Polishing theSecondary BevelThe motions are the same for polishing asthey are for honing. Keep the tool in thesame position in the guide and place it onthe waterstone. Some polishing stonesrequire you to first build up a slurry with asecond little stone, called a Nagura. Adda little water and rub the Nagura on thepolishing stone until a thin film of slurryappears over the entire surface of thewaterstone. Now you are ready to polish.First loosen the screw on the guide and shiftthe tool backwards. I mark this second settingon my bench, which speeds my sharpening.Retighten the guide’s screw.Second, place the guide on your coarsewaterstone at the far end. Place even pressureon the chisel and pull the guide toward you ina smooth motion. Roll the guide forward usingalmost no pressure. Repeat this motion fivemore times and then examine your edge.Place the guide on the far end of the stoneand roll it toward you. Repeat this motionfive more times and examine your edge.Secondary bevelYour secondary bevel should appear as aseries of fine scratches in a narrow band at thecutting edge. Feel for the burr. If you can’tfeel it, repeat the six strokes on the coarsewaterstone. When you can feel the burr andthe scratches appear consistent on thesecondary bevel, move to the next step.BurrThe burr is almost impossible to photographbecause it is so small, but we got lucky here.The small wire lying across the bevel of the toolis indeed the burr, which detached from theface when I pushed my thumb against it. Nowyou know how small the burr is.The edge should look like a mirror all theway across. You should not be able to feel aburr on the face of the chisel, but it’s there.You must remove the burr before proceedingto polishing. Use your polishing waterstone.When removing the sizable burr left by thecoarse waterstone, you want to take carebecause the burr can score the stone. Pressthe face lightly against the polishing stone andpush forward. Repeat this a couple of timesand increase the pressure slightly. When theburr is gone, you can move to polishing.Remove the burr from the face of thechisel. Remove the chisel from the guide,place it face-down on the polishing stoneand push it forward once. Rubbing back andforth will scratch the face needlessly. WM14 ■ woodworking magazine Autumn 2004
Bevel-edge ChiselsFFor any one project, a set of chisels can be usedto pare, chop, scrape, clean up, clean out or (eventhough you shouldn’t) open cans. In short, it is amust-have in the toolbox. Owning a good first setis invaluable, but choosing that set can be hard.A chisel should be easy to set up, endure a fairamount of abuse before it needs to be rehonedand feel comfortable in your hand – even afteryou’ve chopped out a dozen dovetails. You alsoneed to pay attention to a chisel’s side bevels, asshown below. (Smaller is better for cleaning outtight joints.) So we put five common, reasonablypriced 1 ⁄ 2 " chisels through a series of tests to helpyou select a good first set.3 ⁄ 32" side bevelThe side bevel on the Craftsman (above) is too bigat the tip (it’s 3 ⁄ 32 ") to clean out dovetail joints. TheSorby’s 1 ⁄ 32 " side bevel is much better.ASHLEY ILESMARPLES BLUE CHIPOur Four TestsFirst we set up each tool, lapping the back until itwas flat, then honing the bevel to a razor-sharp,30° edge. (Typically you would use a 25° bevel ona 1 ⁄ 2 " chisel, but 30° is better for chopping.)Next, we tested edge retention. We drove eachchisel with a mallet 20 times into a piece of ash,then inspected each cutting edge under a rakinglight with a jeweler’s loupe. We then pared a pieceof cherry’s end grain with each chisel. We repeatedthis routine until the tool required rehoning,at which point it was removed from the test.To test the ergonomics of each tool, five editorsused the tools in different applications. The size ofour hands vary widely, so the results vary, too.Finally, we tested hardness on the Rockwell“C” scale using an industrial hardness tester atthe University of Cincinnati’s College of AppliedSciences. David Conrad, the director of the CertificateProgram, performed this test.SORBY CABINETMAKER’SCRAFTSMANSTANLEYConclusionsIn the end, we determined none of these tools isperfect. But three will get the job done comfortablywithout requiring hours of set-up time: TheAshley Iles is balanced, quick to set up and heldits edge reasonably well; the Marples is inexpensiveand performed adequately in every test; andthe Sorby held its edge very well and is a beautifultool. All earn our “Recommended” rating, butnone can be called “Highly Recommended.” TheAshley Iles’ and Marples’ edges could have heldup longer, and the Sorby, which some editors saidwas uncomfortable, took too long to set up.We can’t recommend the Craftsman and Stanleychisels. Their bevels are too big for cutting intothe tight corners of dovetails, they’re a chore to setup and they’re uncomfortable to use – especiallywhen your hands get sweaty. The word to describethese isn’t inexpensive – it’s cheap. WM– Kara GebhartBevel-edge ChiselsBRAND PRICE* HANDLE LENGTH SETUP EDGE ERGONOMICS BLADE CONTACTTIME RETENTION HARDNESS**RecommendedAshley Iles $83.25/ Bubinga 7 1 ⁄ 2 " Easiest Edge looked fantastic Short, smooth handle 59/32*** 800-426-4613 orset of 4 throughout; paring ideal for chopping and toolsforworkingwood.comincreasingly difficult; comfortable for paring3rd most durableMarples $42.50/ Plastic 10 1 ⁄ 4 " Adequate Paring increasingly more Handle orients easily in 60 1 ⁄ 2 /60 1 ⁄ 2 800-871-8158 orBlue Chip set of 5 difficult after a few rounds; hand; some editors leevalley.com4th most durablesuggest cutting plasticseam off for best results3⁄8Sorby $144.90/ Boxwood 10 3 ⁄ 8 " Longer than Edge looked awful with Results mixed; some 59/59 800-225-1153 orCabinetmaker’s set of 4 acceptable deep nicks and crumbling editors suggest woodcraft.comacross; pared very well; breaking octagonal2nd most durable edges for best resultsNot RecommendedCraftsman $19.99/ Plastic 9 1 ⁄ 4 " Unacceptable Most durable Results mixed; plastic 60/60 800-377-7414 orset of 3 slippery when hands craftsman.comget sweaty3⁄4Stanley $14.46/ Plastic 7 3 ⁄ 4 " Unacceptable Edge immediately showed Similar to Ashley Iles; 58/58 1 ⁄ 2 Available at mostset of 3 big nick and crumbling; plastic slippery when home-supply storesleast durablehands get sweaty*Prices as of publication deadline. **From Rockwell “C” scale. First number is hardness of metal measured 3 ⁄ 4 " up from cutting edge. Second number is hardnessmeasured 1 1 ⁄ 2 " up from cutting edge. ***Great difference indicates steel near cutting edge has been hardened and steel near handle has been tempered.woodworking-magazine.com ■ 15


