Stringing a Hammered Dulcimer - Everything Dulcimer
Stringing a Hammered Dulcimer - Everything Dulcimer
Stringing a Hammered Dulcimer - Everything Dulcimer
- No tags were found...
Create successful ePaper yourself
Turn your PDF publications into a flip-book with our unique Google optimized e-Paper software.
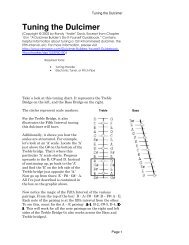
<strong>Stringing</strong> the <strong>Dulcimer</strong>(Copyright © 2002 by Randy "Ardie" Davis. Excerpt from Chapter 14 in "A <strong>Dulcimer</strong> Builder’s Do-It-Yourself Guidebook" Contains helpful information about stringing a 15/14 hammered dulcimer, the two-fifthsratio, etc. For more information, please visit http://www.amazon.com/<strong>Dulcimer</strong>-Builders-Yourself-Guidebook-Woodworker/dp/1553950100)Required Materials:Appropriate Gauge WireSuggested Tools:Needle-Nose Wire CuttersTuning Handle(Looping Machine)Someone once said (perhaps it was me) that stringing a hammered dulcimer is a #@$% bloody sport that oughtto be left to those who feel no pain and are not easily frustrated. In fact, before stringing a hammered dulcimeryourself, you ought to seriously consider finding someone you dislike intensely and hiring him or her to do it.That way you would get two things you want: a bit of sadistic revenge on your enemy and a strung instrument.The reasons stringing a hammered dulcimer is so challenging are several.Picking the WiresFirst, you must determine the exact gauge of wire to use for each course, no easy task because so muchdepends on the measurements of the instrument, the angle of the bass bridge as well as its position, the skill ofthe stringer and personal taste. For example, two different instrument makers that I know of use the followingwire gauges for the treble bridge |C through high |G on their 15/14 models:Maker No. 1Note Wire GaugeD|G 7-6-7C|F 7-6-7B|E 7-6-7A|D 8-7-8G|C 8-7-8Maker No. 2Note Wire GaugeD|G 5-5-5C|F 5-5-5B|E 6-6-6A|D 6-6-6G|C 6-6-6
While the stringing scheme for Maker No. 1 will not work on the ardie's handcrafted Performance 15/14<strong>Hammered</strong> <strong>Dulcimer</strong>, the scheme for Maker No. 2 will. However, I like less sustain in my instrument than thesecond stringing scheme allows, so I do not use it. Instead, I’ve adapted a stringing scheme that works well onmy 15/14 and which goes like this:ardie's handcraftedNote Wire GaugeD|G 6-5-6C|F 7-6-7B|E 7-6-7A|D 8-7-8G|C 8-7-8The reasons that Maker No. 1’s stringing scheme doesn’t work for me are simple: the thicker gauges eitherbreak or the loops come undone under the high tension of my design. In the end you go with what works.Check out Appendix F for string gauges and lengths!Maker's NoteYou will note that I use two different gauges of wire per course (i.e., musical note) while Maker No. 2 doesnot.< If I wanted increased resonance and sustain, I would use three gauges of the same wire so that they couldresonate with each other at the same musical amplitude. However, since I want to lessen the sustain a coursecreates when struck, I mix in a wire of a different gauge which resonates at a different amplitude. The effect isless sustain – even if it is ever so slightly.Getting the WireObtaining high-quality piano wire< of gauges 5-11 (those I use) is no easy matter either. Just try getting it atyour local hardware store. Luckily a great piano supply company like Schaff Piano Supply Co.(www.schaffpiano.com) caters to instrument builders like us, and carries the right gauges in the right quantities(½ lb rolls) at the right prices. By the way, ½ lb of No. 7 wire means 568 feet of wire; so do not get carriedaway if you’re just going to build one dulcimer.You can find pre-cut, pre-looped lengths at certain dulcimer supply companies like those listed in Appendix A.Unless you plan on going into the business, spend the money on pre-looped string and avoid the hassle oftwisting the loops yourself.
Required ToolsTo loop your own wire and string your dulcimer, you will need the following tools and supplies:The appropriate gauge wires for each course.A Looping Machine (do not let the name fool you. It’s a hand-cranked machine for creating loops inwire, and it can be some persnickety). If you buy pre-looped wire, you won’t need the Looping Machine.A Tuning Lever for Harpsichord or Zither tuning pins.A pair of wire cutter, needle-nose pliers.More patience than you think you have.Persistence.Band-Aids.Looping, Looping, LoopingBesides the tensile strength of the wire itself, the next most important thing about the wire is the loop that goesaround the hitch pin. If you do not get this exactly right, you will never get the higher tension wires to tune.You also have to consider how many coils you want to take for each loop. If you take too many coils then youwill weaken the loop or the loop will cut into the side bridge when the wire is tightened. If you take too few,the loop will un-twist.On average I have about ½" of coil for each loop.The looping machine comes with instructions on how to use it and create perfect loops and coils.Placing the BridgesNow is the time to place the Treble and Bass Bridges on top of the soundboard. Remember that the TrebleBridge is on the left and has 14 holes, and the Bass Bridge is on the right side of the soundboard and has 13holes.The placement of the Treble Bridge is critical: it must be placed using the two-fifths ratio. Placing the BassBridge is less critical, though I put it at a one-fifth ratio.The two-fifths ratio is taken from the inside edge of side bridge to the inside edge of side bridge. Follow theexplanation and example below carefully.The side bridges are typically placed ¼" from the side edges of the pin blocks. Assuming the side bridge is ½"wide, the inside edge of the side bridges would therefore be ¾" from the edges of the pin blocks.Again assuming that the full distance between Short Rail pin block ends is 20.125", the actual distance betweenShort Rail marks (A) would be about 18.75". If the full distance between the Long Rail pin block ends is 40",the actual distance between Long Rail marks (B) would be 38.5." The two-fifths ratios would therefore becalculated against 18.75" and 38.5".
Two-Fifths Ratio = Width / 5 * 2You would calculate the placement of the Treblebridge as follows:38.5" / 5 = 7.7" * 2 = 15.4"18.75 / 5 = 3.75" * 2 = 7.5"The Treble Bridge would be placed, therefore,15.4" from the inside edge of the left side bridge atthe Long Rail, and 7.5" from the inside edge of theside bridge at the Short Rail.The Bass Bridge would be placed according to the following one-fifth ratio:38.5" / 5 = 7.7"18.75" / 5 = 3.75"Using these ratios, the Treble Bridge should be directly over the Treble support bridge underneath thesoundboard. Check to make sure it is. If the Treble Bridge is not over the Treble Bridge Support, you will haveto move the bridge support, not the Treble Bridge.Then make sure the Bass Bridge is positioned directly between the two Bass support bridges, splitting thedifference. Since Bass Bridge positioning is not as critical as it is for the Treble Bridge, you can actuallyposition the Bass Bridge over the gap between the two Bass bridge supports and that will be fine.You can make minor positioningadjustments after the first top andbottom wires are strung. String the topand bottom wires for each bridge firstin order to hold the bridges in placewhile you complete the stringing.
Installing the WireSomeone estimated that the wires on a hammered dulcimer create over 3 tons of tension on the instrument. Infact, if a single wire is not installed correctly, over time it can actually bend the hitch pin or tuning pin to whichit is attached. Follow these simple steps and you should be ok.1. Starting at the side bridge next to the hitch pin, run the wire through the side bridge until the loop is nextto the appropriate hitch pin. You will insert the wire from the pin block side of the side bridge pushing itthrough towards the soundboard.2. Place the loop over the hitch pin and press the loop all the way down to the pin block.3. Run the wire through (or over) the Treble Bridge or Bass Bridge as appropriate, and either through orover the side bridge next to the tuning pin.Treble Wires: Working right to left, run the treble wires through the Bass Bridge, over the Treble Bridge,and through the left side bridgeBass Wires: Working left to right, run the bass wires through the Treble Bridge, over the Bass Bridge,and over the right side bridge.See the illustrations below.
4. Pass the wire through the tuning pin and cut it so that about 1 ½ - 2 inches remains.5. Take the needle-nose pliers and bend a tight loop in the end of the wire. This loop is important to keepthe wire from pulling through the Tuning Pin during tuning.6. Pull the wire so that the newly created tight loop rests against the side of the tuning pin where the wireexits the pin.7. Push down on the wire that it makes contact with the pin block right at the base of the tuning pin.8. While holding the wire against the pin block, use the Tuning Lever to turn the tuning pin clockwise sothe wire begins wrapping itself around the base of the tuning pin. This will help keep the wire frompulling through the tuning pin under high tension. It will also keep the wire from crawling up the tuningpin and bending it under tension. (It is at this point that you may find the Band-Aids quite helpful.)Maker’s HintWhen do I insert the 1/8" Delrin Rod? I do it after stringing the low G#, the middle G and the high G.I measure the Delrin Rod against the top edge of the Treble Bridge and cut it to the same length. I then insert it under the wires before Itighten them.9. Go back and check the hitch pin. Make sure the wire loop is all the way down at the base of the hitch pin.
10. Make sure the wire is positioned correctly on the appropriate treble or bass bridge and turn the tuning pinuntil the wire comes snug.11. Do the same to the next 86 wires.Refer to the pictures on the following page to see how the strings lie in reference to the Treble and BassBridges.On the High WireMaker’s HintTo help avoid breakage, pluck the high wires while you are tightening them. This will help them stretchwithout breaking. If you do not do this, tuning them to the proper note immediately may put too much tensionon the string and it could break. You may want to order extra No. 5 and No. 6 gauge strings.A note on high note wires. <strong>Stringing</strong> the high notes is sometimes difficult because the wire can break or comeuncoiled during the initial tuning. This is especially true for gauges 5 & 6 on the high B-flat and C on the Bassside, and the high F and G on the Treble side. Take it easy while stringing the high wires.How Long Should It Take?If you’ve never strung a hammered dulcimer before, do not be surprised if it takes 8-12 hours to string a 15/14.Then allow another 48-72 hours for the strings to settle before it will hold the tuning, all the while beating thecrud out of the strings with your hammers (not the construction kind). All in all it really takes about 6 monthsof playing for a well-constructed hammered dulcimer to find its voice – so be patient.
This graphic illustrates the two ends of the Bass Bridge.
The Bass Bridge must allow enough clearance for the Treble strings to pass by, but must be long enough for allthree strings of the first and last Bass courses to rest on comfortably.
15/14 String GaugesThe following chart indicates the different gauges used in stringing a 15/14 hammered dulcimer. The chartindicates the wire’s tuned note (Note), the number of wires for a particular gauge per course (#) and the gaugeof wire within the course for the note indicated (Gauge).For example, D/G 2 #6, 1 #5 indicates that for the Treble Bridge wire for the notes D/G, two No. 6 gauge wiresare required and one No. 5 gauge wire.Treble BridgeBass BridgeNote Gauge Note Gauge1. D/G 2 #6, 1 #5 1. C 2 #6, 1 #52. C/F 2 #7S, 1 #62. Bflat 2 #6, 1 #53. B/E 2 #7S, 1 #6 3. A 2 #7S, 1 #64. G 2 #7S, 1 #64. A/D 2 #8S, 1 #7S 5. F 2 #7S, 1 #65. G/C 2 #8S, 1 #7S6. F#/B 2 #8S, 1 #7S 6. E 2 #8S, 1 #7S7. E/A 2 #8S, 1 #7S8. D/G 2 #8S, 1 #7L7. D 2 #9S, 1 #8S8. C 2 #9S, 1 #8L9. C#/F# 2 #8L, 1 #7L 9. B 2 #9S, 1 #8L10. B/E 2 #8L, 1 #7L11. A/D 2 #8L, 1 #7L 10. A 2 #10, 1 #9S12. G#/C# 2 #8L, 1 #7L13. F#/B 2 #9L, 1 #8L11. G 2 #10, 1 #9L14. E/A 2 #9L, 1 #8L 12. F# 2 #11, 1 #1015. D#/G# 2 #9L, 1 #8L 13. E 2 #11, 1 #1014. D 2 #11, 1 #10


