QIG DG-WN3300N v1.cdr - Digisol.com
QIG DG-WN3300N v1.cdr - Digisol.com
QIG DG-WN3300N v1.cdr - Digisol.com
- No tags were found...

You also want an ePaper? Increase the reach of your titles
YUMPU automatically turns print PDFs into web optimized ePapers that Google loves.
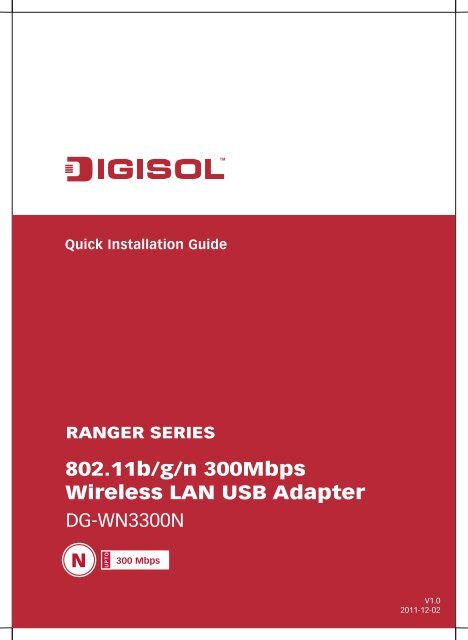
RANGER SERIES802.11b/g/n 300MbpsWireless LAN USB Adapter<strong>DG</strong>-<strong>WN3300N</strong>N300 MbpsV1.02011-12-02
FCC warning:This equipment has been tested and found to <strong>com</strong>ply with the limits fora class B digital device, pursuant to Part 15 of the FCC Rules. Theselimitations are designed to provide reasonable protection againstharmful interference in a residential installation. This equipmentgenerates, uses and can radiate radio frequency energy and, if notinstalled and used in accordance with the instructions, may causeharmful interference to radio <strong>com</strong>munications. However, there is noguarantee that interference will not occur in a particular installation. Ifthis equipment does cause harmful interference to radio or televisionreception, which can be determined by turning the equipment off andon, the user is encouraged to try to correct the interference by one ormore of the following measures:• Increase the separation between the equipment and receiver.• Connect the equipment into a different outlet from that to which thereceiver is connected.• Consult your local distributors or an experienced radio/TV technicianfor help.• Shielded interface cables must be used in order to <strong>com</strong>ply withemission limitsChanges or modifications to the equipment, which are not approved bythe party responsible for <strong>com</strong>pliance could affect the user's authority tooperate the equipment.Copyright © 2011. All rights reserved.Company has an on-going policy of upgrading its products and it maybe possible that information in this document is not up-to-date.Please check with your local distributors for the latest information.No part of this document can be copied or reproduced in any formwithout written consent from the <strong>com</strong>pany.Trademarks:TMDIGISOL is a trademark of Smartlink Network Systems Ltd. All othertrademarks are the property of the respective manufacturers.
Package ContentsThe following items should be present in your package:<strong>DG</strong>-<strong>WN3300N</strong> 300Mbps Wireless USB Adapter (1 No.)Protection cap (1 No.)Quick installation guideInstallation Guide CDMake sure that the package contains above items. If any of the listeditems is damaged or missing, please contact your retailer immediately.Product OverviewThank you for purchasing <strong>DG</strong>-<strong>WN3300N</strong> IEEE 802.11b/g/n 300Mbpswireless N USB adapter! This adapter has a tiny size design whichenables users to plug it into the USB port of your <strong>com</strong>puter. <strong>DG</strong>-<strong>WN3300N</strong> supports wireless standards IEEE802.11b/g, this wirelessadapter also supports IEEE802.11n through which users can get datatransfer speed up to 300Mbps.Product FeaturesIEEE 802.11b/g/n <strong>com</strong>patible.Wireless data transfer rate – up to 300Mbps.Supports WMM wireless QoS feature.Supports 64/128-bit WEP, WPS, WPA, WPA2 with IEEE 802.1x functionsfor high level of security.Supports the most popular operating system: Windows2000/XP/Vista/7.Supports WPS (Wi-Fi Protected Setup) hardware button for easyconnection.Supports soft AP function.Supports USB 2.0 interface.Portable and tiny size design.Green Power Saving: It supports the smart transmit power control andauto-idle state adjustment.
System RequirementsThe following system requirements are re<strong>com</strong>mendedAn empty USB 2.0 portWindows 2000, XP, Vista or Windows 7 operating systemCD-ROM driveAt least 100MB of available disk spaceProduct ViewBelow shown is the product view indicating the USB interface andLink/Activity LED (under the case).Link/Activity LEDWPS ButtonUSB InterfaceTop ViewBottom ViewAfter installing the wireless adapter, users can verify its status from theLED indicators as shown below.LED Name Light Status DescriptionLink/Activity OffWireless Radio is switched OFFOnSteady light 5 seconds means WPS connection isestablished successfully.Blinking i) Wireless network adapter is normally installedii) Linked to a wireless access pointiii) Transferring or receiving dataFast Blinking three times per second means WPS isactivated. The USB adapter will wait for 2 minutes toestablish WPS connection.
Driver InstallationPlease follow the instructions mentioned below to install your newwireless USB adapter:Note1: The following installation was operated under Windows XP.(Procedures are similar for Windows 2000/Vista.)Note2: If you have installed the Wireless PC Adapter driver & utilitybefore, please uninstall the previous version first.1 Insert "Installation Software CD" into the CD/DVD ROM drive of your<strong>com</strong>puter, and Browse it. Execute 'Setup.exe' program.For Windows Vista / Windows 7 OS, you'll be prompted to confirminstallation. Click 'Yes' to continue.
2 Click 'Next' to begin with the driver and utility installation.3The Installation procedure will need few minutes to <strong>com</strong>plete thesetup, please be patient.
4 Click 'Finish' to reboot your <strong>com</strong>puter to <strong>com</strong>plete the installationprocedure. If you don't want to reboot the <strong>com</strong>puter now, select 'No,I'll restart my <strong>com</strong>puter later' option and click 'Finish'. Please noteyou have to reboot your <strong>com</strong>puter before you can use your newwireless USB adapter.5 Once <strong>com</strong>puter has restarted, insert the wireless USB adapter intoan empty USB 2.0 port. Never use force to insert the adapter, if youfeel it's stuck, flip it over and try again.
6 A new icon will appear near the clock of system tray:Here!Driver Installation is now Complete!Connecting to a Wireless Network1 Left-click the DIGISOL configuration utility icon located at lower-rightcorner of <strong>com</strong>puter desktop, and configuration menu will appear:2 Wireless utility will appear. Click 'Available Network' menu to searchfor wireless access points nearby.
3 Please wait for a while, and all wireless access points which can bereached by this wireless network adapter will be displayed hereIf the wireless Access Point you wish to connect does not appearhere, you can click ‘Refresh’ button to scan for wireless accesspoints again; if the wireless Access Point you’re looking for still notappear, try to move the <strong>com</strong>puter closer.When the Access Point you’re looking for is on the list, left-click itand then double click it or click ‘Add to Profile’.
4 If a password is required to access the wireless access point, pleaseinput it in 'Network key' (and input it again in 'Confirm network key'for confirmation). Click 'OK' when password is properly inputted.NOTE: Network security type ('Network Authentication' and 'Dataencryption') will be selected automatically based on wireless accesspoint's security setting. It's not required to change these settingsyourself.
5Network adapter will attempt to connect to access point now, thismay require few seconds to minutes, please be patient. When the'Status' be<strong>com</strong>e 'Associated', your <strong>com</strong>puter is connected to accesspoint you selected. Click 'Close' to close configuration menu.NOTE: If you are connected to an access point but the connectionhas dropped soon, please check security settings and re-checkpassword spelling.Now the Wireless adapter will be connected to the AccessPoint and users can access their LAN Resources.