Thermostat Instructions for Replacement (Gas Model) - Keating of ...
Thermostat Instructions for Replacement (Gas Model) - Keating of ...
Thermostat Instructions for Replacement (Gas Model) - Keating of ...
- No tags were found...
Create successful ePaper yourself
Turn your PDF publications into a flip-book with our unique Google optimized e-Paper software.
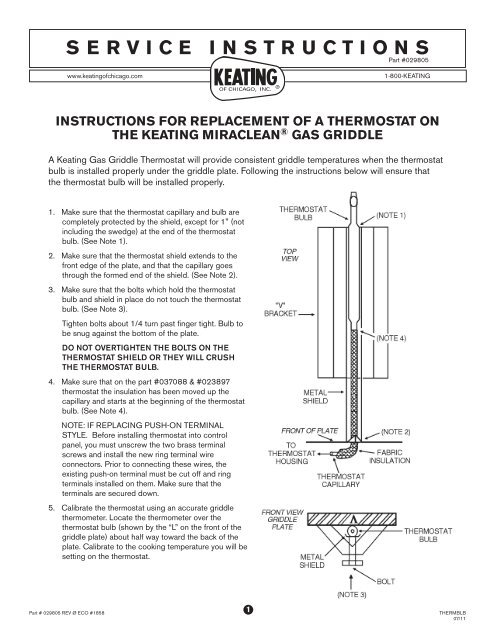
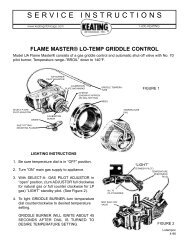
SERVICE INSTRUCTIONSPart #029805www.keating<strong>of</strong>chicago.com1-800-KEATINGINSTRUCTIONS FOR REPLACEMENT OF A THERMOSTAT ONTHE KEATING MIRACLEAN ® GAS GRIDDLEA <strong>Keating</strong> <strong>Gas</strong> Griddle <strong>Thermostat</strong> will provide consistent griddle temperatures when the thermostatbulb is installed properly under the griddle plate. Following the instructions below will ensure thatthe thermostat bulb will be installed properly.1. Make sure that the thermostat capillary and bulb arecompletely protected by the shield, except <strong>for</strong> 1" (notincluding the swedge) at the end <strong>of</strong> the thermostatbulb. (See Note 1).2. Make sure that the thermostat shield extends to thefront edge <strong>of</strong> the plate, and that the capillary goesthrough the <strong>for</strong>med end <strong>of</strong> the shield. (See Note 2).3. Make sure that the bolts which hold the thermostatbulb and shield in place do not touch the thermostatbulb. (See Note 3).Tighten bolts about 1/4 turn past fi nger tight. Bulb tobe snug against the bottom <strong>of</strong> the plate.DO NOT OVERTIGHTEN THE BOLTS ON THETHERMOSTAT SHIELD OR THEY WILL CRUSHTHE THERMOSTAT BULB.4. Make sure that on the part #037088 & #023897thermostat the insulation has been moved up thecapillary and starts at the beginning <strong>of</strong> the thermostatbulb. (See Note 4).NOTE: IF REPLACING PUSH-ON TERMINALSTYLE. Be<strong>for</strong>e installing thermostat into controlpanel, you must unscrew the two brass terminalscrews and install the new ring terminal wireconnectors. Prior to connecting these wires, theexisting push-on terminal must be cut <strong>of</strong>f and ringterminals installed on them. Make sure that theterminals are secured down.5. Calibrate the thermostat using an accurate griddlethermometer. Locate the thermometer over thethermostat bulb (shown by the “L” on the front <strong>of</strong> thegriddle plate) about half way toward the back <strong>of</strong> theplate. Calibrate to the cooking temperature you will besetting on the thermostat.Part # 029805 REV Ø ECO #18581THERMBLB07/11
SERVICE INSTRUCTIONSPart #029805www.keating<strong>of</strong>chicago.com1-800-KEATINGINSTRUCTIONS THERMOSTAT FOR GAS REPLACEMENT GRIDDLE BULB OF REPLACEMENTA THERMOSTAT ONTHE KEATING MIRACLEAN ® GAS GRIDDLE(CONTINUED)Part # 029805 REV Ø ECO #18582THERMBLB07/11


