View / Download Ombre Hand Dyes
View / Download Ombre Hand Dyes
View / Download Ombre Hand Dyes
- No tags were found...

Create successful ePaper yourself
Turn your PDF publications into a flip-book with our unique Google optimized e-Paper software.
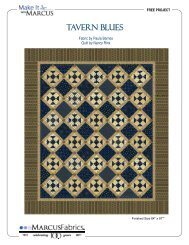
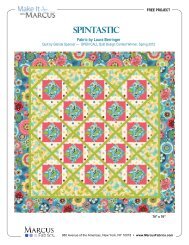
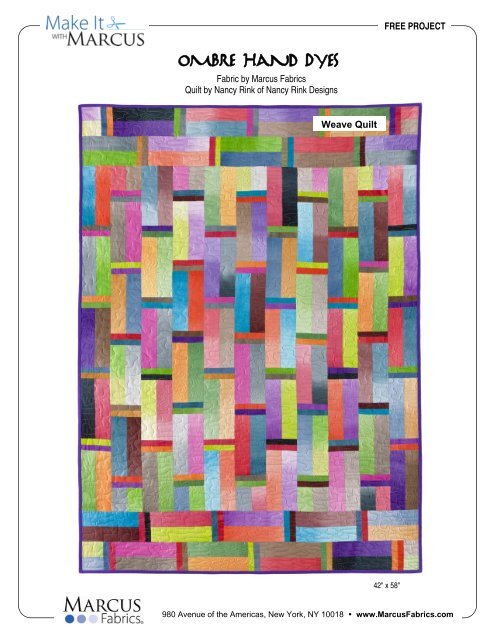
<strong>Ombre</strong> <strong>Hand</strong> <strong>Dyes</strong>Fabric by Marcus FabricsQuilt by Nancy Rink of Nancy Rink DesignsFREE PROJECTWeave Quilt42" x 58"980 Avenue of the Americas, New York, NY 10018 • www.MarcusFabrics.com
HELPFUL TIPSfor working with<strong>Ombre</strong> <strong>Hand</strong> <strong>Dyes</strong> Strip-It Bundlesby Nancy Rink of Nancy Rink DesignsBecause the <strong>Ombre</strong> <strong>Hand</strong> <strong>Dyes</strong> Strip‐It Bundles are also hand cut, it is likelythat you will find variations in either the color, the width of the strips, orboth. But don’t let that deter you from using them, because the threequilts in this pattern were made with this in mind.Here are some tips for working with the strips:A. If the strips are of uneven widths, simply go ahead and sew them together anyway. Toadjust the strips for the various projects:◄ For Rainbow Square, the blocks are sewn a bit oversized and are trimmed to 10 ½” prior tosewing them together.◄ For Prism, the triangles have two bias edges, so you should be able to ease seams together.Spray starch and a little steam are your best allies when it comes to easing sides together. Ifyou are uncomfortable doing this, then select one triangle that is on the smaller side and trimthe larger triangles to match.◄ For Weave, the strip pairs should measure 4 ½” wide, from raw edge to raw edge. Trimthem if they are too wide. Since no seams match up, you don’t have to worry. If the strip pairsare a bit narrow, sew a slightly narrower seam.B. If some of your strips are “V’ed” at the fold, here is how to adjust—For Rainbow Square, no adjustment is necessary; the strips will be cut apart at the fold.For Prism and Weave, there are a couple of ways to straighten the strips:1. Make a registration line on your ironing board with a wash‐away pen or with painter’stape. Spritz the strip with water until damp. Align one long strip edge with the registrationline. Pin in place if desired. Using a hot iron, press the strip and let dry. If fullness remains,repeat this process, targeting the area where the fullness is. Or, stitch a little pleat to take inthe fullness. Once you sew everything together the pleat is barely noticeable.2. Cut the strip in half on the fold. Align both halves, and square up the cut ends. Stitch thehalves back together, pressing the seam open. If you like, you can also sew together theselvedge ends, just make sure to trim off the selvedge. This results in a reverse ombre’ and is anice way to create a little more variation in your quilt.<strong>Download</strong> these free projects at www.MarcusFabrics.com/MakeItMARCUS FABRICS 980 Ave of the Americas, New York, NY 10018 • www.MarcusFabrics.com • www.NancyRinkDesigns.com
<strong>Ombre</strong> <strong>Hand</strong> <strong>Dyes</strong> Weave QuiltFabric by Marcus Fabric Quilt by Nancy RinkPAGE 2 of 3Fabric RequirementsFinished Quilt Size: 42" x 58”One <strong>Ombre</strong> Strip-It Roll # ST03½ yard binding fabric (quilt shown uses Centennial Solid, Purple Ice #5901-2076)3 yards backing fabric (quilt shown uses Centennial Solid, Raspberry #5901-0480)Also:Neutral thread in tan or greySpray Starch or SizingThe total segment count to complete the quilt is as follows:(based on 42” long strips)Sixty-eight 8 ½” long segmentsFourteen 3 ¾” long segmentsThirty-six 4 ½” long segments1. Randomly sew together two 2 ½” strips. Press seams in one direction. Starch and repress. This will help to stabilize your strip setsand minimize stretching. Repeat for a total of 20 pairs.2. Cut a 4 ½” segment from one end of ALL strip sets.3. From each of SEVEN strip sets, cutTwo 3 ¾ ”long segments from the endsThree 8 ½” long segmentsOne 4 ½” long segment4 ½”4. From each of ELEVEN strip sets, cut Four 8 ½” long segments5. From ONE strip set, cutThree 8 ½” long segmentsTwo 4 ½” long segments8 ½” 8 ½” 8 ½” 8 ½”6. From ONE strip set, cutSeven 4 ½” long segments7. Gather all of the 4 ½” segments and sew together as shown.Cut into sixty-seven 1 ½” wide segments, centering the seamlineon the ¾” hash mark of the ruler.1 ½”8. Row A. Arrange five 8 ½” long segments alternately with four 1 ½” wide segments. Sew together, pressing seams toward the 1 ½”wide segments. Repeat for a total of eight.9. Row B. Arrange four 8 ½” long segments alternately with five 1 ½” segments. Add a 3 ¾” wide segment to each end. Press seamstoward 1 ½” wide segments. Make a total of seven.10. Sew a Row A to a Row B. Make a total of seven.ContinuedMARCUS FABRICS • 980 Avenue of the Americas, New York, NY 10018 • www.MarcusFabrics.com
<strong>Ombre</strong> <strong>Hand</strong> <strong>Dyes</strong> Weave QuiltFabric by Marcus Fabric Quilt by Nancy RinkPAGE 3 of 311. Referring to Quilt Assembly Diagram, arrange Row pairs and the remaining Row A so that there are five Row pairs plus theRow A in the center section. Sew together the center section, then add a Row pair to the top and bottom of the quilt.12. Stay-stitch around the edge of the quilt to stabilize prior to machine quilting.Finishing1. Cut backing into two equal lengths. Sew a 1”seam along the selvedgeedge. Trim off selvedges and press seam open.2. Layer top, batting, and backing. Quilt in an all-over pattern. Note: quiltshown was quilted with a pastel variegated thread.3. Cut fabric for binding into six 2 ¼”-wide strips. Sew together end-to-endand press in half. Bind quilt.Quilt Assembly DiagramVisit www.nancyrinkdesigns.comfor more patterns and quilt ideas and kitsMARCUS FABRICS • 980 Avenue of the Americas, New York, NY 10018 • www.MarcusFabrics.com