INSTRUCTION BOOK - Janome
INSTRUCTION BOOK - Janome
INSTRUCTION BOOK - Janome
You also want an ePaper? Increase the reach of your titles
YUMPU automatically turns print PDFs into web optimized ePapers that Google loves.
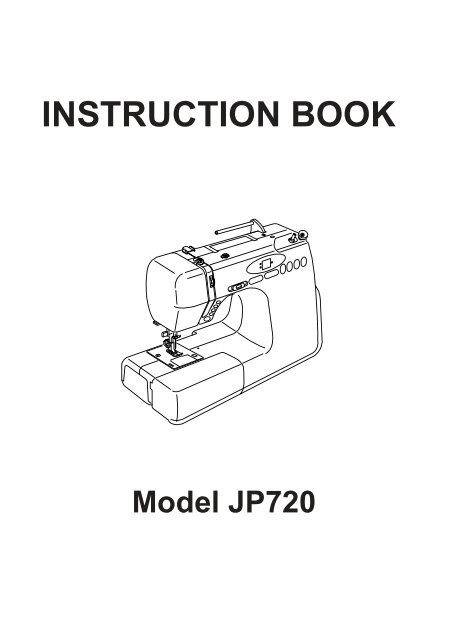
<strong>INSTRUCTION</strong> <strong>BOOK</strong>Model JP720
IMPORTANT SAFETY <strong>INSTRUCTION</strong>SWhen using an electrical appliance, basic safety precautions should always be followed, including thefollowings:Read all instructions before using this appliance.DANGER— To reduce the risk of electric shock:1. An appliance should never be left unattended when plugged in. Always unplug this sewing machinefrom the electric outlet immediately after using and before cleaning.WARNING— To reduce the risk of burns, fire, electric shock, or injury to persons:1. Do not allow children to play with the machine. The machine is not intended for use by children orinfirmed persons without proper supervision.Do not allow to be used as a toy. Close attention is necessary when this sewing machine is used byor near children.2. Use this appliance only for its intended use as described in this owner’s manual.Use only attachments recommended by the manufacturer as contained in this instruction book.3. Never operate this sewing machine if it has a damaged cord or plug, if it is not working properly, if ithas been dropped or damaged, or dropped into water.Return this sewing machine to the nearest authorized dealer or service center for examination,repair, electrical or mechanical adjustment.4. Never operate the appliance with any air opening blocked. Keep ventilation openings of this sewingmachine and foot controller free from accumulation of lint, dust and loose cloth.5. Never drop or insert any object into any opening.6. Do not use outdoors.7. Do not operate where aerosol (spray) products are being used or where oxygen is beingadministered.8. To disconnect, turn all controls to the off (“O”) position, then remove plug from outlet.9. Do not unplug by pulling on cord. To unplug, grasp the plug, not the cord.10. Keep fingers away from all moving parts. Special care is required around the sewing machineneedle.11. Always use the proper needle plate. The wrong plate can cause the needle to break.12. Do not use bent needles.13. Do not pull or push fabric while stitching. It may deflect the needle causing it to break.14. Switch this sewing machine off (“O”) when making any adjustment in the needle area, such asthreading the needle, changing the needle, threading the bobbin or changing the presser foot, andthe like.15. Always unplug this sewing machine from the electrical outlet when removing covers, lubricating, orwhen making any other adjustments mentioned in this owner’s manual.SAVE THESE <strong>INSTRUCTION</strong>SThe design and specifications are subject to change without a prior notice.
KNOW YOUR MACHINEName of Parts ........................................................... 2Setting the Spool Pin................................................. 2Standard Accessories ............................................... 3Extension Table ......................................................... 3GETTING READY TO SEWConnecting the Power Supply .................................. 4Using the start/stop button ........................................ 4Using the foot control ................................................ 4Controlling Sewing Speed ........................................ 5Speed control slider ............................................. 5Foot control .......................................................... 5Function Buttons ....................................................... 6Start/stop button ................................................... 6Reverse button .................................................... 6Auto-lock button ................................................... 6Needle up/down button ........................................ 6Stitch width adjusting button ................................ 7Stitch length adjusting button .............................. 7Direct pattern selection buttons ........................... 7Dropping the Feed Dog ............................................ 8Changing the Presser Foot ....................................... 8Detaching and Attaching the Foot Holder ................. 8Raising and Lowering the Presser Foot ................... 9Balancing Thread Tension ........................................ 9Changing Needles .................................................. 10Needle and Thread Chart........................................ 10Winding the Bobbin ................................................. 11Removing the bobbin ......................................... 11Setting the spool ................................................ 11Threading for bobbin winding ............................ 12Additional spool pin ........................................... 12Inserting the bobbin ........................................... 13Threading the Machine ........................................... 14Needle Threader ..................................................... 15Drawing Up the Bobbin Thread .............................. 16UTILITY STITCHESOvercasting with Zigzag Stitch ............................... 22Multiple Zigzag Stitch (Tricot Stitch) ....................... 22Buttonholes ............................................................. 23Square buttonhole ............................................. 23Altering the buttonhole width ............................. 26Altering the buttonhole stitch density................. 26Double layer buttonhole ..................................... 26Corded buttonhole ............................................. 27Auto buttonhole.................................................. 28Button Sewing ......................................................... 29Zipper Sewing ......................................................... 30Blind Hemming........................................................ 32DECORATIVE SEWINGApplique .................................................................. 33Patchwork ............................................................... 33Smocking ................................................................ 34Correcting Distorted Stretch Patterns ..................... 35CARE AND MAINTENANCECleaning the Hook Race and Feed Dogs ............... 36Replacing the Bobbin Holder .................................. 36Problems and Warning Signals .............................. 37Troubleshooting ...................................................... 38BASIC STITCHESStraight Stitch ......................................................... 17Changing sewing direction ................................ 17Securing a seam ................................................ 17Altering the stitch length .................................... 18Altering the needle drop position ....................... 18Variety of Straight Stitchesand Recommended Feet ................................... 20Zigzag Stitch ........................................................... 21Altering the stitch width...................................... 21Altering the stitch length .................................... 211
io!0!1!2!3@44#0#1yu@5@6@7@9!4@8t!5!6rew!7@3@2@1@0#8#7q!9!8KNOW YOUR MACHINEName of Partsq Direct pattern selection buttonsw Indicator windowe Bobbin winder stopperr Bobbin winder spindlet Spool pin (included in accessory bag)y Bobbin winding thread guideu Thread guidei Thread take-up levero Tension regulating dial!0 Face plate!1 Thread cutter!2 Needle threader!3 Needle plate!4 Extension table (accessory storage)!5 Hook cover plate!6 Hook cover plate release button!7 Speed control slider!8 Stitch width adjusting button!9 Stitch length adjusting button@0 Start/stop button@1 Reverse button@2 Auto-lock button@3 Needle up/down button@4 Foot holder@5 Needle clamp screw@6 Needle@7 Zigzag foot A@8 Carrying handle@9 Hole for additional spool pin#0 Hand wheel#1 Stitch balance adjusting dial#2 Power switch#3 Machine socket#4 Power inlet#5 Drop-feed lever#6 Free arm#7 Buttonhole lever#8 Presser foot lifter#6#2#5#3#4qSetting the Spool PinInsert the spool pin into the hole asshown.(The spool pin is in the accessory bag.)q Spool pinw Setting holew2
q w er t yu i o!0 !1!2Standard Accessoriesq Needlesw Bobbine Screwdriverr Seam rippert Spool holdery Spool pinu Additional spool pini Felto Satin stitch foot!0 Automatic buttonhole foot!1 Zigzag foot A (set on the machine)!2 Instruction book!3 Power supply cord!4 Foot control!3!4Extension TableThe extension table provides an extended sewingarea and can be easily removed for free armsewing.The accessories can be stored in the table.Detaching the table:Pull the table away from the machine, as illustrated.qwerAttaching the table:Push the extension table, inserting the tab into theslot until the table snaps into the machine.q Extension tablew Tabe Slotr Accessory storageFree arm sewingFree arm sewing is useful for darning socks ormending knees, elbows or areas of wear inchildren’s clothes.3
GETTING READY TO SEWConnecting the Power SupplywNOTE:Before connecting to the power supply, make sure thevoltage shown on the machine conforms to yourelectrical power.retyqUsing the start/stop buttonTurn off the power switch.Insert the machine plug into the power inlet.Insert the power supply plug into the wall outlet.Turn on the power switch.q Start/stop buttonw Power switche Machine plugr Power inlett Power supply plugy Wall outletqtewryuUsing the foot controlTurn off the power switch.Insert the foot control plug into the machine socket.Insert the machine plug into the machine socket.Insert the power supply plug into the wall outlet.Turn on the power switch.q Power switchw Foot control pluge Machine socketr Machine plugt Power inlety Power supply plugu Wall outletNOTE:The start/stop button does not work when the footcontrol is connected.When the power is turned on, the indicator window willshow a test pattern then will indicate 01.NOTE:After turning off the power, wait for 3 seconds to turnit on again.WARNING:While in operation, always keep your eyes on thesewing area, and do not touch any moving parts suchas the thread take-up lever, handwheel or needle.Always turn off the power switch and unplug from thepower supply:- when leaving the machine unattended.- when attaching or removing parts.- when cleaning the machine.Do not place anything on the foot control, otherwise themachine will run intermittently.Operating Instructions:The symbol "O" of a switch indicates the "off" position ofa switch.For appliances with a polarized plug (one blade widerthan the other). To reduce the risk of electric shock, thisplug is intended to fit in a polarized outlet only one way.If it does not fit fully in the outlet, reverse the plug. If itstill does not fit, contact a qualified electrician to installthe proper outlet. Do not modify the plug in any way.4
Controlling Sewing SpeedSpeed control sliderYou can limit the maximum sewing speed with thespeed control slider according to your sewing needs.To increase sewing speed, slide it to the right.To decrease sewing speed, slide it to the left.Foot controlPressing on the foot control can vary sewing speed.The harder you press the foot control, the faster themachine runs.NOTES:The machine runs at the maximum speed set by thespeed control slider when the foot control is fullydepressed.Keep the foot control free from accumulation of lint,dust and loose cloth.Do not place anything on the foot control.Operating Instructions:Foot controller Model 21249 is for use with sewingmachine model JP720.5
erFunction Buttonsq Start/stop buttonPress this button to start or to stop the machine.The machine will run slowly as long as this button ispressed, and will start running at the speed set by thespeed control lever, or stop when the button isreleased.NOTE:The start/stop button does not work when the footcontrol is connected.wqw Reverse buttonWhen sewing the stitch pattern #01, #05 or #09the machine will sew in reverse as long as thereverse button is pressed.If you press the reverse button when sewing anyother stitch, the machine will immediately sew lockingstitches and automatically stop.If you press the reverse button when stitch pattern#01, #05 or #09 has been selected and thefoot control is not connected, the machine will startsewing in reverse as long as the button is pressedand the machine will stop when the button isreleased.e Auto-lock buttonWhen stitch pattern #01, #05 or #09 hasbeen selected, the machine will immediately sewlocking stitches and automatically stop when theauto-lock button is pressed.When sewing any other stitches, the machine willsew locking stitch at the end of the pattern beingsewn and automatically stop.r Needle up/down buttonPress this button to bring the needle up or down.The machine will stop with the needle up or downdepending on the needle position determined by thisbutton.6
t Stitch width adjusting buttonWhen pressing this button,the stitch width of theselected pattern will be indicated and the green lighton the top left will light up.To alter the stitch width, press on the "+" or "–" sign.The stitch width can be altered while stitching.ty Stitch length adjusting buttonWhen pressing this button,the stitch length of theselected pattern will be indicated and the green lighton the bottom left will light up.To alter the stitch length, press on the "+" or "–" sign.The stitch length can be altered while stitching.yu6 6i o !0Direct pattern selection buttonsThere are 4 buttons for selecting stitch patterns.Press one of the buttons until the pattern number ofthe desired stitch pattern is indicated.u Button 01 will select the patterns #01 to #05.i Button 06 will select the patterns #06 to #10.o Button 11 will select the patterns #11 to #15.!0 Button 16 will select the patterns #16 to #20.NOTE:When selecting the pattern, raise the needle to itshighest position.7
Dropping the Feed DogwThe feed dog can be lowered with the drop-feed leverfor sewing on buttons etc.qeShift the drop-feed lever to the right to lower the feeddog.wqrShift the lever to the left to raise the feed dog, it willreturn to the up position when the machine is started.q Up positionw Down positione Feed dogr Hand wheelNOTE:The feed dog should be in the up position for regularsewing. Turn the handwheel toward you to check ifthe feed dog comes up after setting the lever in theup position.Changing the Presser FootqCAUTION:Turn OFF the power switch before changing the foot.Always use the proper foot for the selected pattern.The wrong foot can cause the needle to break.Do not push the lever down to prevent it from beingbroken.rweTo snap off:Raise the needle and presser foot.Press the lever on the back of the foot holder and thefoot will drop.q LeverTo snap on:Place the presser foot so the pin on the foot lies justunder the groove of the foot holder.Lower the foot holder to lock the foot in place.w Groovee PinEach foot is marked with a letter for identification.r Identification LetterDetaching and Attaching the Foot HolderqewrWARNING:Turn OFF the power switch before detaching orattaching the foot holder.To detach:Raise the presser bar and turn the setscrewcounterclockwise to remove the foot holder.q Setscreww Foot holderTo attach:Align the hole in the foot holder with the threadedhole in the presser bar and insert the setscrewthrough the hole.Tighten the setscrew by turning it clockwise.e Holer Threaded hole8
Raising and Lowering the Presser FooteThe presser foot lifter raises and lowers the presserfoot.You can raise the presser foot about 1/4" (0.6 cm)higher than the normal up position by exerting morepressure when lifting the presser foot lifter. Thisallows for easy removal of the presser foot and helpsyou to place thick fabric under the foot.ewqwq Presser foot lifterw Normal up positione Extra liftBalancing Thread TensionwqThe thread tension should be adjusted depending onthe sewing materials, layers of fabric and sewingmethod.To adjust the thread tension, turn the tension dial.q Tension regulating dialw Setting marketyBalanced tension:The ideal straight stitch has threads locked betweentwo layers of fabric.For an ideal zigzag stitch, the bobbin thread does notshow on the right side of the fabric, and the needlethread shows slightly on the wrong side of the fabric.e Needle threadr Bobbin threadt Right side of the fabricy Wrong side of the fabricrtyNeedle thread tension is too tight:–if the bobbin thread appears on the right side of thefabric.Loosen the needle thread tension by moving the dialto a lower number.tyNeedle thread tension is too loose:–if the needle thread appears on the wrong side ofthe fabric.Tighten the needle thread tension by moving the dialto a higher number.9
qweChanging NeedlesWARNING:Always make sure to turn the power switch off anddisconnect the machine from power supply beforechanging the needle.Raise the needle by turning the handwheel and lowerthe presser foot.Turn off the power switch.z Loosen the needle clamp screw by turning itcounterclockwise.Remove the needle from the clamp.q Needle clamp screwx Insert a new needle into the needle clamp with theflat side of the needle to the rear.When inserting the needle into the needle clamp,push it up against the stopper pin and tighten theneedle clamp screw firmly.w Stopper pine Flat siderTo check needle straightness, place the flat side of theneedle onto something flat (a needle plate, glass etc.)The gap between the needle and the flat surfaceshould be consistent.Never use a blunt needle.r GapNeedle and Thread ChartWEIGHTVery LightLightFABRICChiffon, Georgette, Fine Lace, OrgandyNet, TulleBatiste, Voile, Lawn, Pure Silk, Crepe de Chine,Sheer Crepe, Chambray, Handkerchief Linen,Gingham, Challis, Percale, Wool Crepe, Peau deSoie, Taffeta, Satin, Silk Surah, Satin-backedCrepe, QianaSingle Knits, Jersey, Swimwear, and TricotLeather, SuedeTYPE of NEEDLEUniversalBall PointBlue Tipped NeedleUniversalBlue Tipped NeedleBall PointWedge PointLeather NeedleNEEDLE SIZE9 (65)9 (65)11 (75)11 (75)12 (80)11 (75)11 (75)11 (75)MediumFlannel, Velour, Velvet, Muslin, Velveteen,Poplin, Corduroy, Broadcloth, Linen, Chintz,Gabardine, Felt, Terry, Burlap, Quilted FabricsUniversal14 (90)Double Knits, (synthetic and natural) StretchVelour, Stretch Terry, Sweater KnitsBall Point14 (90)Leather, Vinyl, SuedeWedge PointLeather Needle14 (90)HeavyDenim, Sailcloth, TickingDouble Faced Wool, Heavy Coating, Fake Fur,Drapery FabricsDenim NeedleUniversal16 (100)16 (100)Leather, SuedeWedge PointLeather Needle16 (100)18 (110)Very HeavyCanvas, Duck, Upholstery FabricsUniversal16 (100)Topstitching for Special FinishesTopstitching Needle14 (90)10
Winding the BobbinqRemoving the bobbinPush the hook cover plate release button to theright and remove the cover plate.q Hook cover plate release buttonw Hook cover platewLift out the bobbin.e BobbineqwSetting the spoolPlace a spool of thread on the spool pin with thethread coming off the spool as illustrated.q Spool of threadw Spool pinPress the spool holder firmly against the spool ofthread.e Spool holdere11
Threading for bobbin windingSet the speed control lever at .zqz Hold the thread with both hands and pass the threadunder the thread guide.q Thread guidecxwx Draw the thread toward you and guide the threadaround the bobbin winding thread guide.w Bobbin winding thread guidec Pass the thread through the hole in the bobbinfrom the inside to the outside. Put the bobbin onthe bobbin winder spindle.vv Push the bobbin winder spindle to the right.The indicator will show .bb Hold the free end of the thread in your hand andstart the machine.Stop the machine when the bobbin has beenwound a few layers, and cut the thread close tothe bobbin.nn Start the machine again. When the bobbinis fully wound, it will stop automatically.Stop the machine and return the bobbinwinder spindle to its original position by moving itto the left, and cut the thread with a pair ofscissors. Remove the bobbin from the bobbinwinder spindle.NOTE:The machine will not sew until the spindle has beenreturned to the left.qweAdditional spool pinThe additional spool pin is for bobbin winding withoutunthreading the machine.Insert the additional spool pin into the hole.Place the felt and a spool on the pin.q Additional spool pinw Spool pin felte Spool pin hole12
Inserting the bobbinzqz Place the bobbin in the bobbin holder with thethread running off counterclockwise.q Threadw Bobbin holderwxx Guide the thread into the notch on the front of thebobbin holder.e Notch on the frontecc Draw the thread to the left, sliding it betweenthe tension spring blades.r Spring bladesrvv Continue to draw the thread lightly until the threadslips into the notch on the side.t Notch on the sidetbyb Pull out about 4" (10 cm) of thread to the rear.Reattach the hook cover plate.NOTE:A threading chart is shown on the hook cover platefor your reference.y Threading chart13
Threading the MachineRaise the presser foot.Press the needle up/downbutton to raise the threadtake-up lever to its highestposition.WARNING:Turn OFF the power switch before threading themachine.qz Draw the thread from the spool and pass it underthe thread guide.q Thread guiderwx Draw the thread down along the rightchannel and pull it up around the bottom of thethread guide plate.Pull the thread up along the left channel.w Right channele Thread guide plater Left channeletc Firmly draw the thread from right to left over thethread take-up lever and down into the take-uplever eye.t Thread take-up leverv Draw the thread down along the left channel andslip the thread behind the needle bar thread guidefrom the left.y Needle bar thread guideyub Pass the thread through the needle eye from thefront.u Needle eye14
zqNeedle Threaderz Raise the needle to its highest position.Pull down the needle threader knob as far as it willgo.q Threader knobxex Turn the knob in the direction of the arrow in theillustration, then insert hook into the needle eye.Lead the thread around guide and under hook.w Hooke Guidecewc Turn the knob in the direction of the arrow in theillustration, drawing the thread loop through theneedle.qGently let the needle threader go up to pull the threadloop up.vv Pull the thread through the needle eye.NOTE:The needle threader can be used with a #11 to #16needle or a blue tipped needle. Thread size 50 to 90should also work well.15
qDrawing Up the Bobbin Threadz Raise the presser foot lifter.Turn the power switch on.Hold the needle thread with your fingerq Presser foot lifterw Needle threadwewrx Press the needle up/down button twice to pick upthe bobbin thread.Draw up the needle thread to bring up a loop of thebobbin thread.e Bobbin threadr Needle up/down buttonc Slide 4" (10 cm) of both threads to the back underthe presser foot.16
q w eBASIC STITCHESStraight StitchMachine settingsq Pattern: #01w Presser foot: Zigzag foot Ae Thread tension: 2 – 6To sewRaise the presser foot and position the fabric next toa seam guide line on the needle plate. Lower theneedle into the fabric where you wish to start.Pull the needle and bobbin threads to the back.Lower the presser foot.Depress the foot control or press the start/stop buttonto start sewing. Gently guide the fabric along theseam guide line.qChanging sewing directionStop the machine a few stitches before the end of aseam. Press the needle up/down button a few timesuntil the needle falls on the end of the seam.q Needle up/down buttonRaise the presser foot.Pivot the fabric around the needle to change thesewing direction as desired.Lower the presser foot and start sewing in a newdirection.Securing a seamFor fastening the beginning of a seam, press thereverse button and sew several reverse stitches.Release the reverse button to sew forward.w Reverse buttonwFor fastening the ends of a seam, press the reversebutton at the end of the seam.Sew a few stitches in reverse to fasten the seam.Raise the presser foot and pull the fabric to the backto remove it.eTo cut the threads, pull the fabric to draw the threadsup to the thread cutter as shown.The threads are cut a proper length to start the nextseam.e Thread cutterWhen pattern #02 (lock-a-matic stitch) is selected:The machine will sew reverse stitches at thebeginning of a seam automatically, and at the end ofthe seam by pressing the reverse button once.17
Altering the stitch lengthThe stitch length can be altered between 0.0 and 4.0.Press the stitch length adjusting button to alter thestitch length. The bottom green light will light up andthe preset value "2.2" will be indicated.Press the "+" sign to increase the stitch length.Press the "–" sign to decrease the stitch length.1.0 2.2 4.0Altering the needle drop positionThe needle drop position of the following stitches canbe altered:Press the stitch width adjusting button to change theneedle drop position. The top green light will light upand the preset value "2.5" (center needle position)will be indicated.Press the "+" sign to move the needle drop to theright.Press the "–" sign to move the needle drop to the left.q Left needle drop positionw Center needle drop positione Right needle drop position0.0 2.5 5.0q w e18
Using the seam guide linesThe seam guides on the needle plate help you tomeasure seam allowances.wNOTE:The number indicates the distance from the centerneedle position.q Guide linesw Center needle positionqNumberDistance(cm)Distance(inch)15 20 4/8 5/8 6/81.5 2.0 1.3 1.6 1.91/2 5/8 3/4qTurning square cornersTo turn a square corner 5/8" (1.6 cm) from the fabricedge:When the fabric edge facing you lines up with thecornering guide as illustrated, stop stitching andlower the needle by turning the handwheel towards you.Raise the presser foot and turn the fabric to linethe edge with the 5/8˝ (1.6 cm) seam guide.Lower the presser foot and begin stitching in the newdirection.q Cornering guidesSewing from the edge of thick fabricThe black button on the zigzag foot locks the foot inthe horizontal position.This is helpful when starting sewing from the extremeedge of thick fabrics or sewing across a hem.qLower the needle into the fabric at the point where youwish to start sewing.Lower the foot while pushing in the black button.The foot will be locked in the horizontal position toavoid slipping.qThe foot will be unlocked after sewing a few stitches.q Black button19
Variety of Straight Stitches and Recommended Feet#01 Straight stitchPresser foot: Zigzag foot AThread tension: 2 – 6Use this stitch for seaming and for zipper sewing.#02 Lock-a-matic stitchPresser foot: Zigzag foot AThread tension: 2 – 6Use this stitch to secure the beginning and the end of a seam withbackstitching.When you reach the end of the seam, press the reverse button once.The machine will sew four reverse stitches, four forward stitches, andthen stop sewing automatically.#03 Locking stitchPresser foot: Zigzag foot AThread tension: 2 – 6This unique stitch is used where an invisible locking stitch is needed.Lower the needle close to the front edge of the fabric.The machine will sew several locking stitches in place and continuesewing forward.When you press the reverse button at the end of the seam, the machinewill sew several locking stitches in place, then stop sewing automatically.#04 Stretch stitchPresser foot: Zigzag foot AThread tension: 3 – 6This is a narrow stretch stitch designed to eliminate puckering on knitfabrics and bias seams, while allowing the seam to be pressedcompletely open flat.#06 Triple stretch stitchPresser foot: Zigzag foot AThread tension: 2 – 6This strong, durable stitch is recommended for areas where bothelasticity and strength are needed to ensure comfort and durability.Use it to reinforce areas such as crotch and armhole seams.Also use it when constructing items such as backpacks for extrastrength.#07 New sculpture stitchPresser foot: Zigzag foot AThread tension: 3 – 6This stitch is used for topstitching and outline-stitches enhancing thedesign appearance.#08 Sculpture stitchPresser foot: Satin stitch foot FThread tension: 3 – 6The stitch is used for topstitching and outline-stitches enhancing thedesign appearance.20
Zigzag Stitchq w eMachine settingsq Pattern: #05w Presser foot: Zigzag foot Ae Thread tension: 3 – 7The zigzag stitch is used for various sewing needsincluding overcasting. It can be used on most wovenfabrics.A dense zigzag stitch can also be used for appliqué.Altering the stitch widthThe stitch width can be altered between 0.0 and 5.0.Press the stitch width adjusting button to alter thestitch width. The top green light will light up and thepreset value "5.0" will be indicated.Press the "+" sign to increase the stitch width.Press the "–" sign to decrease the stitch width.q Stitch widthqAltering the stitch lengthThe stitch length can be altered between 0.0 and 4.0.Press the stitch length adjusting button to alter thestitch length. The bottom green light will light up andthe preset value "2.0" will be indicated.Press the "+" sign to increase the stitch length.Press the "–" sign to decrease the stitch length.w Stitch lengthwNOTE:The stitch length and width can be altered whilestitching.21
q w eqUTILITY STITCHESOvercasting with Zigzag StitchMachine settingsq Pattern: #05w Presser foot: Zigzag foot Ae Thread tension: 3 – 7Place the fabric edge next to the right side of theclear window of the foot and carefully guide the fabricso the needle falls off the edge when it swings to theright.q Clear window09q w eMultiple Zigzag Stitch (Tricot Stitch)Machine settingsq Pattern: #09w Presser foot: Zigzag foot Ae Thread tension: 3 – 6This stitch is used to finish a raw edge of syntheticsand other stretch fabrics that tend to pucker.Sew along the fabric edge leaving an adequate seamallowance.After sewing, trim the seam allowance close to thestitches.22
Buttonholes#14 Square buttonhole (sensor buttonhole)This buttonhole is widely used on medium to heavyweight fabrics.The buttonhole size is automatically determined byplacing a button in the rear of the foot.#15 Auto buttonholeThis is also a square buttonhole similar to the SensorSquare Buttonhole, but you can manually set thebuttonhole size and you can memorize the size tosew buttonholes of the same size.Square buttonholeq w eMachine Settingsq Stitch pattern: #14w Foot:Automatic buttonhole foot Re Thread tension: 1 – 5NOTES:• The size of a buttonhole is automatically set byplacing a button in the rear of automatic buttonholefoot R.• The button holder of the foot takes a button size of3/8" (1 cm) to 1" (2.5 cm) in diameter.• It is sometimes necessary to change the buttonholesize to match certain heavy or specific fabrics andthreads.• Make a test buttonhole on an extra piece of thefabric to check your settings.• The preset width of the buttonhole is suitable forordinary buttons.• Apply an interfacing to stretch or fine fabrics.23
zqwTo sewz Press the needle up/down button to raise theneedle.Attach the automatic buttonhole foot R snappingthe pin into the groove of the foot holder.q Groovew Pinxex Pull the button holder to the back, and placethe button in it. Push it together tightly to thebutton.NOTE:If the button is extremely thick, make a testbuttonhole on an extra piece of the fabric.If it is difficult to fit the button through the testbuttonhole, you can lengthen the buttonhole bypulling the button holder back a little. The length ofthe buttonhole will be increased.e Button Holderr Extra gaprcc Pull the buttonhole lever down as far as it will go.t Buttonhole Levertvi!0ov Insert the corner of the fabric under the foot.Press the needle up/down button twice.Remove the fabric to the left to draw the needlethread through the hole of the foot.Place the garment under the foot, and lower theneedle at the starting point of the buttonholemark.Then lower the automatic buttonhole foot R.y Buttonhole Marku Starting Pointyu!1NOTE:Make sure there is no gap between the slider andstopper, otherwise the left and right lengths will bedifferent.i Slidero Stopper!0 No gap!1 Sewing gap24
Step 1b Start the machine to sew the buttonhole.The buttonhole will be automatically sewn.Step 1: The machine will sew the front bartack andthe left row first.Then it goes back to the starting point withstraight stitch.Step 2: The machine will sew the right row.Step 2Step 3: The machine will sew the back bartack.Step 3Step 4!2Step 4: The machine will stop automatically and a dotwill blink.!2 Blinking dotTo sew another buttonhole, raise the presser foot.Move the fabric to where the next buttonhole is to besewn, then lower the foot and start the machine.NOTE:If you start sewing the buttonhole without lowering thebuttonhole lever, the indicator will show a warningsign.Lower the buttonhole lever, then restart the machine.NOTE:If you select another pattern without raising thebuttonhole lever after buttonhole sewing, the indicatorwill show a warning sign.Raise the buttonhole lever, then select the pattern.n!3!4nRemove the fabric and place a pin just below thebartack at each end to prevent accidentallycutting stitches. Cut the opening with the seamripper. Use an eyelet punch to open akeyhole buttonhole.!3 Pin!4 Seam rippermmWhen buttonhole sewing is finished, push thebuttonhole lever upward as far as it will go.t Buttonhole levert25
Altering the buttonhole widthPress the stitch width adjusting button to change thebuttonhole width.Press the "+" sign to increase the buttonhole width.Press the "–" sign to decrease the buttonhole width.q Narrower buttonholew Wider buttonhole* The width can be altered between 2.5 and 7.0.qwAltering the buttonhole stitch densityPress the stitch length adjusting button to change thebuttonhole stitch density.Press the "+" sign to make the stitches sparser.Press the "–" sign to make the stitches denser.* The stitch density can be altered between 0.2 and0.8.NOTE:The indicator shows the stitch width or density whilesewing. When the buttonhole is completed, theindicator will show the pattern number .Double layer buttonholeStep 1Step 2Step 3Step 4To make a solid and sturdy buttonhole, sew anotherlayer of buttonhole over the previous stitches.After the buttonhole is finished, simply start themachine again.Do not raise the foot or buttonhole lever.The machine will sew another buttonhole in thefollowing order and stop automatically when it iscompleted:Step 1: Straight stitching in reverse to go back to thestarting pointStep 2: Front bartack and left row, then straightstitching in reverse to go back to thestarting pointStep 3: Right rowStep 4: Back bartack and locking stitches at the endThe machine will stop automatically.NOTE:A double layer buttonhole can be sewn when the dotis blinking.26
q w eCorded buttonholeMachine Settingsq Pattern: #14w Presser foot: Automatic buttonhole foot Re Thread tension: 1 – 5To sew a corded buttonhole, follow the sameprocedure as for a square buttonhole (sensorbuttonhole).z xz With the automatic buttonhole foot R raised, hookthe filler cord on the spur on the back of thebuttonhole foot.qwx Bring the ends of cord toward you under thebuttonhole foot clearing the front end.Hook the ends of the filler cord into the forks onthe front of the buttonhole foot to hold them tight.q Spurw Forkse Cordc vec Lower the needle into the garment where thebuttonhole will start and lower the foot.v Lower the buttonhole lever and buttonhole foot.Start the machine and sew the buttonhole over thefiller cord.The machine stops automatically when finished.NOTES:Set the stitch width in accordance with the thicknessof the filler cord used.To cut the buttonhole opening, refer to page 25.b nb Remove the fabric from the machine and cut thesewing threads.n Pull the left end of the filler cord to tighten it.Thread the end of the cord through a darningneedle and draw it to the wrong side of the fabricand cut.27
q w eAuto buttonholeMachine Settingsq Pattern: #15w Presser foot: Automatic buttonhole foot Re Thread tension: 1 – 5z xqz Pull the Button Holder all the way out.Insert the fabric under the foot. Press the up/down needle button twice. Remove the fabric tothe left to draw the needle thread through thehole of the foot.x Insert the garment under the foot, and lower theneedle at the starting point. Then lower theAutomatic buttonhole foot R.q Button HolderNOTE:You do not need to pull down the buttonhole lever.cc Sew the left row up to the required length. Thenstop the machine and press the reverse button.w Reverse buttonwvv Start the machine again to sew the back bartackand the right row of the buttonhole.Stop the machine when you are directlyopposite the starting point.Press the reverse button.bb Start the machine again. The machine will sewthe front bartack, lock the stitches andautomatically stop when the buttonhole iscompleted.NOTE:You can sew another buttonhole identical to thefirst one by simply restarting the machine.The buttonhole width and stitch density cannot bealtered after the buttonhole is finished.To cut the buttonhole opening, refer to page 25.28
Button Sewingq w eMachine Settingsq Pattern: #05w Presser foot: Satin stitch foot Fe Thread tension: 3 – 7e Feed dog: LoweredrUnthread the needle thread.Place a button on the fabric and lower the needleby turning the handwheel, so that the needleenters into the left hole in the button.Align the holes in the button with the slot on thefoot and lower it to hold the button in place.Turn the handwheel several times until the needlebar swings to the right.Adjust the stitch width so the needle enters intothe right hole in the button.Rethread the machine and sew about 10 stitchesat a slow speed.Raise the presser foot and remove the fabric.Trim both needle and bobbin threads at thebeginning.Cut both threads leaving 8” (20 cm) tails.Pull the bobbin thread to bring the needle thread tothe wrong side of the fabric then knot the threads.After sewing is finished, raise the feed dog.29
q w eZipper SewingMachine Settingsq Pattern: #01w Presser foot: Zipper foot E (optional item)e Thread tension: 2 – 6CAUTION:When sewing with the zipper foot, make sure to usepattern #01 (straight stitch with the center needleposition). Otherwise the needle may hit the foot andpossibly break.Attaching the zipper foot (optional item)wq(A)(B)(A) Attach zipper foot E with the pin on the righthandside to the groove to sew the left side ofthe zipper.(B) Attach zipper foot E with the pin on the lefthandside to the groove to sew the right side ofthe zipper.q Pinw GrooveNOTE:The zipper foot is available as an optional item.zxqieorw!3!1!0uyt!4!2Fabric preparationz Add 3/8” (1 cm) to the zipper size. This is theoverall opening size.q Right side of the fabricw 3/8” (1 cm)e Opening sizer Zipper sizet Slidery Zipper teethu Zipper tapei Wrong side of the fabrico End of the openingx Place the right (top) sides of the fabric together.Sew a bottom seam 5/8" (2 cm) from the right edgeto the zipper bottom stop position. Sew a fewstitches in reverse to lock.Increase the stitch length to “4”, set needle threadtension to “1”, and baste the remaining length ofthe fabric.!0 5/8” (2 cm)!1 Basting!2 Reverse stitch!3 End of the opening!4 Bottom seamqTo sewzwteryuz Attach zipper foot with the right side pin.Fold back the upper layer seam allowance. Foldback the lower layer seam allowance to leave a1/8" (0.4 cm) margin of fabric.q Lower layerw End of the openinge Zipper teethr 1/8” (0.4 cm) margint Upper layery Opening sizeu Folded edge30
xx Place zipper teeth next to margin edge and bastethe zipper tape to the lower fabric layer.Align zipper foot with margin edge. Return threadtension and stitch length to original settings.Sew a seam the entire length of zipper tape.NOTE:To secure the beginning of a seam, sew severalreverse stitches.cioc Stop the machine 2” (5 cm) before reaching theslider, with needle in the fabric and raise the foot,then unzip a few inches to clear a path forstitching.i Slidero 2” (5 cm)NOTE:To secure the biginning of a seam, sew severalreverse stitches.v!1!0v Remove fabric and close zipper. Take the upperfabric layer and lay it flat over the zipper.Baste the zipper tape to the upper fabric layer.!0 Basting!1 Zipper tapeb!3!4!2b Raise and release the foot, and re-attach it withthe left side pin.Starting just below zipper bottom stop, sewacross the fabric to about 3/8" (1 cm) distancefrom the basting line.Turn fabric 90 degrees and sew a seam theentire length of the zipper tape. Before reachingthe slider, stop the machine with needle infabric and raise the foot. Use seam ripper toopen a few inches of basting stitch.!2 Unstitch basting!3 3/8" (1 cm)!4 Basting linen!5n Unzip a few inches to clear a path for stitching.At end of seam, sew a few stitches in reverse tolock. Once both sides of zipper are sewn, usethe seam ripper to open the rest of bastingstitch.!5 Basting31
3q w eBlind HemmingMachine setting2q Stitch pattern: #13 or #12w Presser foot: Zigzag foot Ae Thread tension: 3 – 6zqewqrwz On heavy weight fabrics that ravel, the rawedge should be overcast first.Fold the hem under the fabric as illustrated forfine or medium fabrics.Fold a hem with the wrong side up forming a3/16” (0.5 cm) allowance.q Wrong side of the fabricw 3/16” (0.5 cm)e Heavy weight fabricr Fine and medium weight fabricx cyx Place the fabric so that the needle just piercesthe folded edge when the needle comes overthe extreme left side.Lower the presser foot.Adjust the needle drop position with the stitchwidth adjusting button if necessary.tc Sew slowly while guiding the folded edge alongthe left side of the clear window of the foot.t Folded edgey Clear windowvv Open and press the fabric after sewing isfinished.u Right side of the fabricuNOTE:If the needle drops too far left, the stitches will beapparent on the right side of the fabric.Adjusting the needle drop positionPress the stitch width adjusting button to adjust theneedle drop position. The top green light will light upand the preset value "0.6" will be indicated.The value indicates a distance from the centerneedle drop position in millimeter.q Distancew Center needle drop positionqwPress the "+" sign to move the needle drop positionto the right.Press the "–" sign to move the needle drop positionto the left.32
16q w eDECORATIVE SEWINGAppliqueMachine setting166 17 18q Stitch pattern: #16, #17, #18w Presser foot: Satin stitch foot Fe Thread tension: 1 – 4Place the applique on the fabric and baste it inplace. Sew, guiding the edge of the applique alongthe slit on the foot, so that the needle falls off theedge of the applique when it swings to the right.NOTE:When changing the sewing direction at a corner orcurve, lower the needle into the applique at the leftswing and turn the fabric to a new direction.09q w ePatchworkMachine settingq Stitch pattern: #09w Presser foot: Satin stitch foot Fe Thread tension: 1 – 4Seam the patchwork pieces with straight stitch andpress seam allowance open. Sew pattern #09 on theright side of garment centering over the seam line.33
20q w eSmockingMachine settingq Stitch pattern: #20w Presser foot: Satin stitch foot Fe Thread tension: 3 – 6qSmocking is a delicate, decorative treatment onchildren’s clothes or women’s blouses.Choose a soft, lightweight fabric such as batiste,gingham or challis. Cut the fabric three times theprojected width. Set the stitch length at 4.0 and sewstraight lines 3/8”(1cm) apart across the area to besmocked.q 3/8”(1cm)A looser needle thread tension will makegathering easier.Knot the threads along one edge. From the otherend, pull the bobbin threads to distribute the gathersevenly. Secure the threads at the other end.Sew the smocking stitches between the straightseams.Remove the straight stitches by pulling them out.34
Correcting Distorted Stretch PatternsqweThe sewing results of the stretch patterns may varydepending upon the sewing conditions, such assewing speed, type of the fabric, number of layersetc.Always test sew on a scrap piece of the fabric thatyou wish to use.If stretch stitch patterns are distorted, correct it withthe feed balancing dial.q Feed balancing dialw Neutral positione Setting mark(A)(B)Example: Pattern #10(A)If the pattern is compressed, turn the feedbalancing dial in the direction of “+”.(B)If the pattern is drawn out, turn the feedbalancing dial in the direction of “—”.35
CARE AND MAINTENANCEzWARNING:Turn the power switch off and unplug the machinebefore cleaning.qNOTE:Do not dismantle the machine in any way other thanwhat is explained in this section.xClean the outside of the machine with a soft cloth andmild soap.Cleaning the Hook Race and Feed Dogscwz Remove the presser foot and needle. Remove screwon the needle plate with the screwdriver.Remove the needle plate and take out the bobbin.q Screwvwrex Lift up the bobbin holder and remove it.w Bobbin holderc Brush out dust and lint. Wipe the bobbin holder witha soft, dry cloth.v Clean the feed dogs and hook race with the lintbrush.e Lint brushr Feed dogbb Wipe the hook race with a soft, dry cloth.t Hook raceNOTE:You may also use a vacuum cleaner.tzReplacing the Bobbin Holderz Insert the bobbin holder into the hook race.crexqewx Make sure the knob of the bobbin holder fits next tothe stopper on the race.q Knobw Stopperc Replace the bobbin.Attach the needle plate, inserting the two guide pinsinto the holes in the needle plate. Tighten the screwfirmly with the screwdriver.e Guide holesr Screw36
Problems and Warning SignalsIf a buzzer sounds and the indicator shows a warning sign, follow the guidance below.Warning signalProblemTry thisThe start/stop button is pressed with the footcontrol being connected.The foot control is connected or disconnectedwhile sewing.Disconnect the foot control.Turn the power switch off whenconnecting or disconnecting thefoot control.The machine is re-started too soon after ithas halted due to the overload.Wait for at least 15 seconds to restart.If threads are jamming, removejammed threads.The buttonhole is sewn without loweringthe buttonhole lever.Lower the buttonhole lever andrestart the machine.Selecting a pattern after buttonhole is completedwith the buttonhole lever still lowered.Raise the buttonhole lever and reselectthe pattern.Do not sew other pattern with thebuttonhole foot.The bobbin winder spindle is shifted to the rightfor bobbin winding.Return the bobbin winder spindleto the left.toThe machine is malfunctioning due to aproblem in the electronic components.Contact the service center or thestore from where the machine waspurchased.NOTE:The safety device will shut the power down when the machine is locked. If the threads are jamming, removethe jammed threads and turn the power on again after 3 minutes.Audible signalPipPip-pip-pipPip-pip-peepPeepThe buzzer sounds when:Normal operationInvalid operationButtonhole sewing completedMalfuncitonIt is not abnormal that a faint humming sound is coming from the internal motors.This machine equipped with LED sewing light, which will not burn out and does not need to be replaced.37
TroubleshootingCondition Cause Reference1. The needle thread is not threaded properly.Page 14,152. The needle thread tension is too tight.Page 93. The needle is bent or blunt.Page 104. The needle is incorrectly inserted.Page 105. The needle thread and the bobbin thread are not setproperly under (drawn to the rear of) the presser footwhen sewing is starting.Page 176. The fabric is not drawn to the rear when sewing isfinished.Page 177. The thread is too heavy or too fine for the needle. Page 101. The bobbin thread is not threaded properly in thebobbin holder.2. Lint has collected in the bobbin holder.3. The bobbin is damaged and doesn’t turn smoothly.4. The thread is wound loosely on the bobbin.The needle threadbreaks.The bobbin threadbreaks.The needle breaks.The needle threadloops.1. Needle is incorrectly inserted.2. The needle is bent or blunt.3. The needle clamp screw is too loose.4. A proper foot is not used.5. The fabric is not drawn to the rear when sewing isfinished.6. The needle is too fine for the fabric being sewn.1. The needle thread tension is too loose.2. The needle size is not suitable for the thread.Page 13Page 36Replace the bobbinRe-wind the bobbin.Page 10Page 10Page 10Use proper foot.Page 17Page 10Page 9Page 10Skipped stitchesSeam puckeringThe cloth is not fedsmoothly.The machine does notwork.Patterns are distorted.The buttonhole is notsewn well.Noisy operation1. The needle is incorrectly inserted.2. The needle is bent or blunt.3. The needle and/or thread are not suitable for thefabric being sewn.4. A blue needle is not being used for sewing stretch,very fine fabrics and synthetics.5. The needle thread is not threaded properly.6. A poor quality needle is used.1. The needle thread tension is too tight.2. The needle thread is not threaded properly.3. The needle is too heavy for the fabric being sewn.4. The stitch length is too long for the fabric.* Use a stabilizer for very fine fabrics.1. The feed dog is packed with lint.2. The stitches are too fine.3. The feed dog was not raised after being lowered.1. The machine is not plugged in.2. Thread is caught in the hook race.3. The bobbin winder spindle is still in the winding position.1. The stitch is not balanced.1. The stitch density is not suitable for the fabric beingsewn.2. Interfacing is not being used with stretch fabrics.1. The feed dog is packed with lint.2. Lint has collected in the bobbin holder.Page 10Page 10Page 10Page 10Page 14,15Replace the needlePage 9Page 14,15Page 10Make stitch shorterPage 36Make stitch longerPage 8Page 4Page 36Page 12Page 35Page 26Page 23Page 36Page 3638
806-800-011 (E)Printed in Taiwan


