Manual, Addendum B, Atomlab 500 Dose Calibrator - Biodex
Manual, Addendum B, Atomlab 500 Dose Calibrator - Biodex
Manual, Addendum B, Atomlab 500 Dose Calibrator - Biodex
- No tags were found...

You also want an ePaper? Increase the reach of your titles
YUMPU automatically turns print PDFs into web optimized ePapers that Google loves.
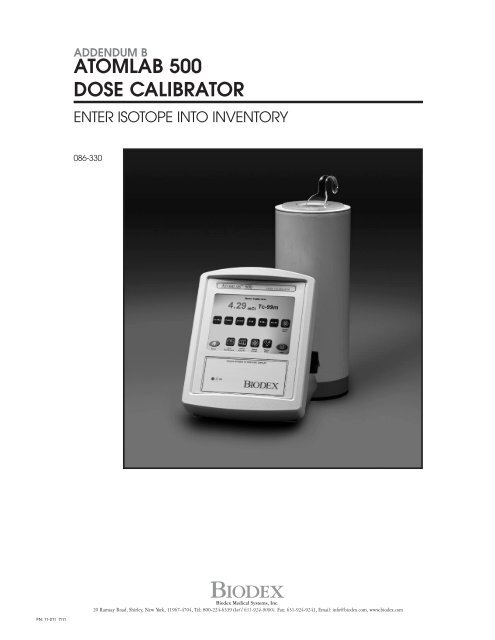
ADDENDUM BATOMLAB <strong>500</strong>DOSE CALIBRATORENTER ISOTOPE INTO INVENTORY086-330BIODEX<strong>Biodex</strong> Medical Systems, Inc.20 Ramsay Road, Shirley, New York, 11967-4704, Tel: 800-224-6339 (Int’l 631-924-9000), Fax: 631-924-9241, Email: info@biodex.com, www.biodex.comFN: 11-211 7/11
ATOMLAB <strong>Dose</strong> <strong>Calibrator</strong> Operation <strong>Manual</strong><strong>Addendum</strong> BNOTE: : This addendum replaces pages 5-2 through 5-6 in the <strong>Atomlab</strong> <strong>500</strong><strong>Dose</strong> <strong>Calibrator</strong> Operation and Service <strong>Manual</strong>, FN#: 10-096 Rev A, 2/11.ENTER ISOTOPE INTO INVENTORY(See Figures 5.1 – 5.8.)Figure 5.2. The Enter Kit Data screen.<strong>Biodex</strong> Medical Systems 2
ATOMLAB <strong>Dose</strong> <strong>Calibrator</strong> Operation <strong>Manual</strong><strong>Addendum</strong> BFigure 5.3. The Select Inventory and Isotope Kit screen.Figure 5.4. The Draw <strong>Dose</strong> From Sample screen.<strong>Biodex</strong> Medical Systems 3
ATOMLAB <strong>Dose</strong> <strong>Calibrator</strong> Operation <strong>Manual</strong><strong>Addendum</strong> BEnter An Isotope Other Than TC-99m Into Inventory1. From the Nuclear Pharmacy screen, select .The Enter Kit # Data screen is displayed for the currently selected dose calibratorchamber. Touch if you have multiple chambers andneed to change detectors.NOTE: The kit number is automatically assigned to the lowest number available.2. Touch . The Select Inventory Isotope and Kit screen isdisplayed. Touch to highlight the isotope in the isotope list and kit type. Ifnecessary, use or to scroll to the appropriate isotope/kit type.3. Touch to return to the Enter Kit # Data screen with the new isotopeand/or kit selected.4. If a kit has been selected, touch . Enter the Kit Lot # withthe on-screen key pad and touch to record the Lot # and return tothe Enter Kit # Data screen. This could also be the generator lot number.5. Touch . Enter the volume with the on-screen key pad. Touch to record the volume and return to the Enter Kit # Data screen.6. Look at the current sample activity reading, displayed in red. This is the currentbackground reading. If it is too high, touch and thenzero the background reading if necessary. Touch to return to theEnter Kit # Data screen.7. Place the isotope in the detector and allow the reading to settle. CurrentActivity displayed on the screen is a live reading. The current activity is displayedin red.8. Touch to enter the activity of the sample. The time anddate are now displayed to the right of the activity reading. From this point forward,the current sample activity is based on half-life. The concentration displayedis based on the current sample activity and the volume entered. Boththe current sample activity and concentration are continually updated for thesample based on the isotope’s half-life.NOTE: Press if a label is desired. To save, touch .Press to confirm and return to the Nuclear Pharmacy screen.9. Touch . The Saving A New Kit screen prompt will be displayed.<strong>Biodex</strong> Medical Systems 4
ATOMLAB <strong>Dose</strong> <strong>Calibrator</strong> Operation <strong>Manual</strong><strong>Addendum</strong> BFigure 5.5.Kit labels without Moly.Enter TC-99m Into Inventory With Moly1. From the Nuclear Pharmacy screen, select .The Enter Kit # Data Screen is displayed for the currently selected dose calibratorchamber. Touch if you have multiple chambers andneed to change detectors.NOTE: The kit number is automatically assigned to the lowest numberavailable.2. Touch . The Select Inventory Isotope and Kit screen isdisplayed. Touch Tc-99m to highlight the isotope in the Isotope List. Selectthe appropriate kit type.3. Touch to return to the Enter Kit # Data screen with the new isotopeand kit selected.4. If a kit has been selected, touch . Enter the kit lot numberwith the on-screen key pad and touch to record the lot numberand return to the Enter Kit # Data screen. This could be the generator lotnumber.5. Touch . Enter the volume with the on-screen key pad. Touch to record the volume and return to the Enter Kit # Data screen.<strong>Biodex</strong> Medical Systems 5
ATOMLAB <strong>Dose</strong> <strong>Calibrator</strong> Operation <strong>Manual</strong><strong>Addendum</strong> BFigure 5.6a. The Enter Kit # Data screen for Tc-99m.Figure 5.6b: Moly BreakThru Reading screen.<strong>Biodex</strong> Medical Systems 6
ATOMLAB <strong>Dose</strong> <strong>Calibrator</strong> Operation <strong>Manual</strong><strong>Addendum</strong> B6. Press to perform the Moly BreakThru. The Moly BreakThru Readingscreen is now displayed.NOTE: If you press , you cannot perform a Moly BreakThru test.7. Touch . The Zero Background screen is now displayed.8. Touch again to begin a background count lasting up to100 seconds.NOTE: You must perform a Mo-99 Background count using the emptyMoly Shield before counting the Moly BreakThru.9. When the background time reaches zero, touch to record the readingand return to the Zero Background screen.Figure 5.6c. Moly BreakThru Reading screen.10.Press again to return to the Moly BreakThru Reading screen.11. Press . Place the vial of Tc-99m into the Moly Shield and put it intothe chamber. Touch .NOTE: The system will prompt you to wait 30 seconds for the activity reading asshown on the Time Remaining clock.<strong>Biodex</strong> Medical Systems 7
ATOMLAB <strong>Dose</strong> <strong>Calibrator</strong> Operation <strong>Manual</strong><strong>Addendum</strong> BFigure 5.6d. The Moly BreakThru reading screen with MolyBackground Reading Activity displayed.12.Press to save the Moly BreakThru reading and proceed to thescreen for counting Tc-99m.13.Remove the Moly Shield from the chamber. Remove the Tc-99m from theMoly Shield and place it into the chamber. Touch torecord the Tc-99m activity.14.Touch to advance to the Moly BreakThru reading screen showingthe Tc-99m and Moly BreakThru activity along with the concentration of Moly.Figure 5.6e. The Moly BreakThru reading screen counting Tc-99m.<strong>Biodex</strong> Medical Systems 8
ATOMLAB <strong>Dose</strong> <strong>Calibrator</strong> Operation <strong>Manual</strong><strong>Addendum</strong> BFigure 5.6f: The Moly BreakThru reading screen showing the Tc-99m and MolyBreakThru activity along with the concentration of Moly.15.Touch to return to the Enter Kit # Data screen.NOTE: Touch if a label is desired.16.To save the data, touch and then to confirm. If you haveprinted a label already, the system returns to the Nuclear Pharmacy screen.17. If you have not yet printed a label, a screen is displayed at this point allowingyou to print a label or skip printing. Touch if a label isdesired or if you do not want to print a label. After printing orskipping the label, the system returns to the Nuclear Pharmacy screen.Figure 5.6g. Kit labels with Moly.<strong>Biodex</strong> Medical Systems 9
ATOMLAB <strong>Dose</strong> <strong>Calibrator</strong> Operation <strong>Manual</strong><strong>Addendum</strong> BEnter TC-99m Into Inventory Without Moly1. From the Nuclear Pharmacy screen, select .The Enter Kit # Data Screen is displayed for the currently selected dose calibratorchamber. Touch if you have multiple chambers andneed to change detectors.NOTE: The kit number is automatically assigned to the lowest number available.2. Touch . The Select Inventory and Isotope and Kit screenis displayed. Touch Tc-99m to highlight the isotope in the Isotope List. Selectthe appropriate kit type.3. Touch to return to the Enter Kit # Data screen with the new isotopeand/or kit selected.4. After selecting the isotope and kit, touch . Enter the kit lot numberwith the on-screen key pad and touch to record the lot numberand return to the Enter Kit # Data screen. This could be the generator lotnumber.5. Touch . Enter the volume with the on-screen key pad. Touch to record the volume and return to the Enter Kit # Data screen.Figure 5.6h. The Enter Kit # Data screen for Tc-99m.6. Press to proceed without performing a Moly BreakThru.7. Touch to begin a background count lasting up to 100seconds if necessary.8. When the background time reaches zero, touch to record the readingand return to the Zero Background screen.<strong>Biodex</strong> Medical Systems 10
ATOMLAB <strong>Dose</strong> <strong>Calibrator</strong> Operation <strong>Manual</strong><strong>Addendum</strong> B9. Press again to return to the Enter Kit # Data screen.10.The button should now begin to flash. Place the vial orsyringe of Tc-99m into the chamber and touch .NOTE: Touch if a label is desired.Figure 5.j. The Enter Kit # Data screen results without Moly.11. To save the data, touch and then to confirm. If you haveprinted a label already, the system returns to the Nuclear Pharmacy screen.12.If you have not yet printed a label, a screen is displayed at this point allowingyou to print a label or skip printing. Touch if a label is desiredor if you do not want to print a label. After printing or skippingthe label, the system returns to the Nuclear Pharmacy screen.Figure 5k. The Kit labels with without Moly.<strong>Biodex</strong> Medical Systems 11
Certified Quality Management SystemBIODEX<strong>Biodex</strong> Medical Systems, Inc.20 Ramsay Road, Shirley, New York, 11967-4704, Tel: 800-224-6339 (Int’l 631-924-9000), Fax: 631-924-9241, Email: info@biodex.com, www.biodex.com