Heat Seeker Pool Heat Pump - Poolstore
Heat Seeker Pool Heat Pump - Poolstore
Heat Seeker Pool Heat Pump - Poolstore

You also want an ePaper? Increase the reach of your titles
YUMPU automatically turns print PDFs into web optimized ePapers that Google loves.
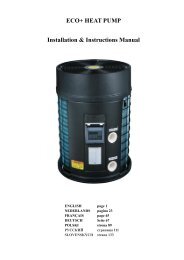
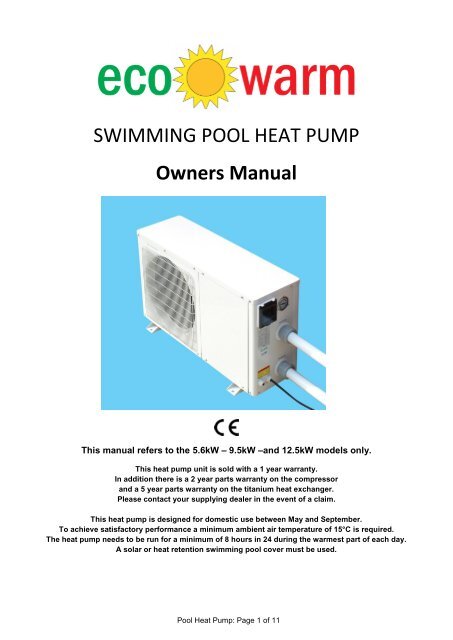
SWIMMING POOL HEAT PUMPOwners ManualThis manual refers to the 5.6kW – 9.5kW –and 12.5kW models only.This heat pump unit is sold with a 1 year warranty.In addition there is a 2 year parts warranty on the compressorand a 5 year parts warranty on the titanium heat exchanger.Please contact your supplying dealer in the event of a claim.This heat pump is designed for domestic use between May and September.To achieve satisfactory performance a minimum ambient air temperature of 15°C is required.The heat pump needs to be run for a minimum of 8 hours in 24 during the warmest part of each day.A solar or heat retention swimming pool cover must be used.<strong>Pool</strong> <strong>Heat</strong> <strong>Pump</strong>: Page 1 of 11
CONTENTSA. PositioningB. Connecting Pipe WorkC. SizesD. Starting the <strong>Heat</strong> <strong>Pump</strong>E. Setting the TemperatureF. Checking the StatusG. Changing the ModeH. Auxiliary ModeI. Winterising and MaintenanceJ. Troubleshooting: Error CodesK. Troubleshooting: Parameter SettingsL. AccessoriesM. Technical Information<strong>Pool</strong> <strong>Heat</strong> <strong>Pump</strong>: Page 2 of 11
A. Positioning Your Swimming <strong>Pool</strong> <strong>Heat</strong> <strong>Pump</strong>1. For correct operation air must be free to circulate around the heat pump. Do not placethe unit in a shed, greenhouse or similar. This unit is designed to be placed outdoorsonly.2. Refer to the drawing below for required clearance.3. You should position the heat pump so that the control panel does not face directlytowards the sun.4. The heat pump must be upright.5. The distance between the heat pump and the pool / plant room should be as short aspractically possible to reduce pressure and heat loss in the pipe work.6. Insulating the pipe work will assist with the prevention of heat losses.7. An isolator switch should be installed (by a qualified electrician) near the heat pump.8. The electrical supply to the heat pump must be protected by a 30mA RCD.9. The air inlets and outlets must not be obstructed or blocked.10. Even though the heat pump is low noise, it must be positioned so as to be considerateto neighbours.11. Your heat pump must be placed on a solid base.12. Condensation will drip from underneath the heat pump, your base must be able totolerate this.B. Connecting Your Swimming <strong>Pool</strong> Pipe Work1. The pool water is fed through the heat pump by a swimming pool pump.2. The heat pump must be installed after (down stream) the swimming pool filter so clean,filtered water passes through it.3. Double union ball valves must be fitted just before the heat pump inlet and just after theoutlet to aid servicing and winterising.4. Each heat pump has a maximum water flow rate. If the flow via the pool pump is higherthan this then a by-pass should be installed. Consult your supplying dealer.5. Each heat pump also has a minimum flow rate, below this the heat pump will notoperate. Consult your supplying dealer.6. Pipe work of less than 1½" diameter should not be used.<strong>Pool</strong> <strong>Heat</strong> <strong>Pump</strong>: Page 3 of 11
<strong>Pool</strong> <strong>Heat</strong> <strong>Pump</strong>: Page 5 of 11
D. Starting Your Swimming <strong>Pool</strong> <strong>Heat</strong> <strong>Pump</strong>1. Do not switch on the power to your heat pump unless your swimming pool pump isrunning and you have a good flow rate. Required flow rates are given in the technicalinformation section.2. Switch on the main power supply to the heat pump. The display will briefly show alloptions.Start / Stop Mode Set Aux3. After a few seconds the display shows ROOM and a temperature. This is thetemperature of the air surrounding the heat pump.4. Push the START/STOP button and await the display to show the inlet and outlettemperature.5. Note that when you first push the START/STOP button the heat pump fan andcompressor will not start immediately.6. If the water flow from the pool pump is correct, the heat pump will start after a 2 - 3minute pause due to a delayed start facility.7. When the heat pump is operational the display will show temperatures for the poolwater inlet and outlet.<strong>Pool</strong> <strong>Heat</strong> <strong>Pump</strong>: Page 6 of 11
G. Changing the Mode of Your Swimming <strong>Pool</strong> <strong>Heat</strong> <strong>Pump</strong>1. In some regions the swimming pool heat pump is equipped with the option to cool theswimming down.2. Make sure the heat pump is in standby (power on but fan and compressor not running)by using the START/STOP button.3. Press the MODE button to scroll through the available modes.4. The snow flake symbol indicates cooling.5. The sunshine symbol indicates heating.6. The three arrows in a triangle is the automatic mode where the heat pump wouldchoose to heat or cool the pool depending on the set temperature.7. For pool heating in the UK keep the heat pump in the heating mode (sunshine symbol).8. If pressing the MODE button does not change the mode and the heat pump remains inthe heat mode (sunshine symbol) then the cooling and automatic modes have beendeactivated.9. If pressing the MODE button does not change the mode and the heat pump is not inthe heating mode firstly make sure you are in standby and then try again. If you can notchange the mode at all refer to the troubleshooting (changing parameters) section.H. Auxiliary Mode of Your Swimming <strong>Pool</strong> <strong>Heat</strong> <strong>Pump</strong>1. The AUX button on the heat pump is not used.2. When pressed the AUX button may make a wavy line symbol appear and disappear onthe display but no equipment is operated.I. Winterising and Maintenance of Your Swimming <strong>Pool</strong> <strong>Heat</strong> <strong>Pump</strong>1. At all times only let swimming pool water through the heat pump which has the correctchemical balance.Chlorine not to exceed 3 ppmpH between 7.2 and 7.7Total Alkalinity 90 – 150 ppmCalcium Hardness 100 – 400 ppm2. When it is decided to close down the swimming pool for the winter it is important thatthe heat pump be immediately emptied of water.3. Ensure that pool water can not freely flow out of the pool and then loosen both couplingnuts to the pipe work and withdraw the pipes from the heat pump.4. Drain all the water from the heat pump.5. Also empty the pipes.6. The heat pump warranty does not cover frost damage.7. The heat pump may be left outside all the year round but if you do have some room forthe heat pump in a shed or garage, this will be a perfect place to keep it for the winterperiod.8. You may wish to cover the heat pump to protect it from the worst weather conditionsbut do not wrap up the unit too tightly, let air circulate around it.9. Do not lay the heat pump on its side, always store upright.<strong>Pool</strong> <strong>Heat</strong> <strong>Pump</strong>: Page 8 of 11
J. Troubleshooting Your Swimming <strong>Pool</strong> <strong>Heat</strong> <strong>Pump</strong>: Error Codes1. The most common problem reported is the heat pump showing a display but notrunning its fan and compressor. This is the time delay on start up. From pressingSTART/STOP there is a 2 – 3 minute delay before the fan and compressor start.2. The second most common problem is insufficient flow through the heat pump indicatedby EE 03. If your swimming pool filter has a multiport valve turn off the pool pump andturn the valve to “recirculate” , restart the pool pump and try the heat pump again. If thissolves the problem make sure your sand filter is backwashed.3. Another issue is not being able to operate the control panel at all. Look for a smallpadlock symbol on the display which means that the controls are locked. To releasethis press the up and down arrows together at the same time for about 5 seconds sothat the padlock symbol disappears.4. During the operating and defrosting process, the heat pump will yield a volume ofcondensed water. The condensed water from the cooling coil will drip from the bottomof the heat pump. Do not assume the condensed water is due to a fault or a leak in theheat pump.The table below shows error codes the heat pump may displayFault/Error Display Cause ActionWater temperaturein, sensor fault/errorWater temperatureout, sensorfault/errorCoil 1 sensorfault/errorCoil 2 sensorfault/errorAmbient temperaturesensorToo high differenceintemperature in/out.PP 01 Sensor interrupted or short circuited Test line, sensor andsocket.May have to be replacedPP 02 Sensor interrupted or short circuited Test line, sensor andsocket.May have to be replacedPP 03 Sensor interrupted or short circuited Test line, sensor andsocket.May have to be replacedPP 04 Sensor interrupted or short circuited Test line, sensor andsocket.May have to be replacedPP 05 Sensor interrupted or short circuited Test line, sensor andsocket.May have to be replacedPP 06 Water flow too low Check valves, filter pump,filter and by-pass<strong>Heat</strong>ing up PP 07 Water flow too low Check valves, filter pump,filter and by-passFirst frost proofingrunPP 08 Low out temperature Empty system of waterSecond frostproofing runPP 09 Low out temperature Empty system of waterFunction error insystem 1EE 01 Function error in print card Call technicianFunction error insystem 2EE 02 Input voltage too low Check main cable /electricianFlow guard error EE 03 Too small or too high flow Check pool pump, piping,by-pass and ball cocks.Check technical specEE 04Temperature EE 05 Water flow varying Check pool pump andfluctuationspiping. Check valves, filterand by-passDefrosting Logo Cold coil / element. None. Normal functionCommunication error EE 08Communication error betweencontrol panel and controlCheck cable connection.Call technician<strong>Pool</strong> <strong>Heat</strong> <strong>Pump</strong>: Page 9 of 11
K. Troubleshooting Your Swimming <strong>Pool</strong> <strong>Heat</strong> <strong>Pump</strong>: Parameter Settings1. The heat pump has 11 control parameters from 00 to 10.2. The parameters can be viewed but not changed while in operation mode. They canonly be changed in stand-by mode.3. Use the SET button to scroll through the parameters.4. If you need to change a parameter make sure the heat pump is in standby mode.Parameter Description Range Default Setting Remarks00 Setting of cooling temp 8 – 28°C 12°C For technician only01 Setting of heat temp 15 – 40°C To be set by user02 Defrosting period 30 – 90 min. 45 minutes For technician only03 Coil temp. start 0 ~ -30°C 0°C For technician onlydefrosting04 Coil temp. stop 2 – 30°C 13°C For technician onlydefrosting05 Defrosting time 1 – 12 min 8 minutes For technician only06 System number 1 – 2 1 May not be changed07 Re-start after power 0 / 1 1 = ja. For technician onlyfailure08 Available Modes:Cooling only= 0<strong>Heat</strong>ing + cooling = 1 0 – 3 3 For technician only<strong>Heat</strong>ing only= 309 Work method. 0 0 May not be changed10 Setting of water temp.(auto mode )30°C 30°C For technician only5. With the exception of Parameter 01 (setting the pool temperature set point) theseparameters are usually only changed by a service technician.6. Most parameters can not immediately be changed, even in standby mode. If you aresure you want to change a parameter proceed as below.7. Before you change a parameter write down what it was set on.8. In standby mode use the SET button to chose the parameter that needs changing.9. Press the up and down arrows at the same time for about 5 seconds until you hear asmall bleep. This unlocks the parameter to enable setting.10. Use the up and down arrow to set the parameter to the new desired level.11. After a few seconds the panel will revert to the standby mode with the new settingstored.12. If you need to check the parameter setting use the SET button to display thatparameter.L. AccessoriesThe heat pump has a housing and cover plate to allow the digital control panel it to bemounted remotely if required. A 5m extension line with socket for this purpose is providedwith the kit.<strong>Pool</strong> <strong>Heat</strong> <strong>Pump</strong>: Page 10 of 11
M. Technical InformationCode WBR-5.6H-B WBR-9.5H-B WBR-12.5H-BRated<strong>Heat</strong>ingCapacityW 5600 9500 12500BTU’s/hr 19000 32500 42500Input Power <strong>Heat</strong>ing W 1160 1939 2550Running Current<strong>Heat</strong>ingA 3.6 8.8 11.6COP w/w 4.8 4.8 4.9Power Supply v/ph/hz 220/1/50Number ofCompressorsCompressor Type1RotaryNumber of Fans 1Input Power of Fan W 25 30 30Fan Rotation Speed rpm 950 950 950Noise Level dB 55 58 58Water Connection inches 1½ 1½ 1½Water Flow Rate m 3 /h 3 - 5 4 - 7 4 - 7Water Pressure Drop KPa 12 15 15L99510851085UnitDimensionWHmm360550370615370615L109011701170PackingDimensionWHmm390580415645415645WeightNetGrosskg505363677175This product is CE marked. The heat pump is tested to current EN standards: EN 55014-1:2001, EN 55014-2:1997, EN 61000-3-2:2001 and EN 61000-3-3:1995.LVD: EN 60335-2-40:2003, EN 60335-1:2002.<strong>Pool</strong> <strong>Heat</strong> <strong>Pump</strong>: Page 11 of 11