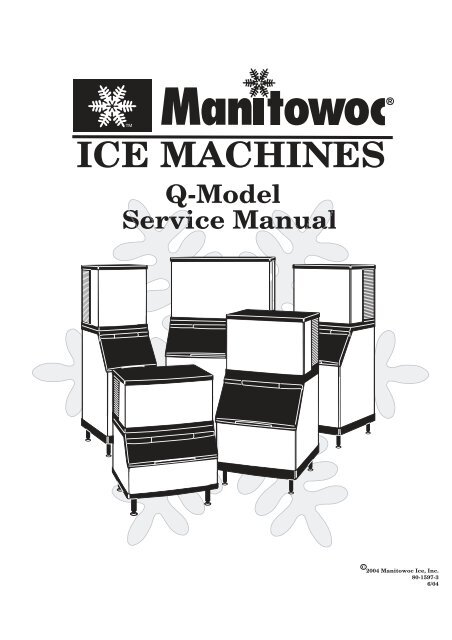
ICE MACHINES Q-Model Service Manual
ICE MACHINES Q-Model Service Manual
ICE MACHINES Q-Model Service Manual
- No tags were found...

Create successful ePaper yourself
Turn your PDF publications into a flip-book with our unique Google optimized e-Paper software.
Safety NoticesAs you work on a Q-Series Ice Machine, be sure to payclose attention to the safety notices in this manual.Disregarding the notices may lead to serious injury and/or damage to the ice machine.Throughout this manual, you will see the following typesof safety notices:Procedural NoticesAs you work on a Q-Series Ice Machine, be sure to readthe procedural notices in this manual. These noticessupply helpful information which may assist you as youwork.Throughout this manual, you will see the following typesof procedural notices:! WarningPERSONAL INJURY POTENTIALDo not operate equipment that has been misused,abused, neglected, damaged, or altered/modifiedfrom that of original manufactured specifications.ImportantText in an Important box provides you withinformation that may help you perform a proceduremore efficiently. Disregarding this information willnot cause damage or injury, but it may slow youdown as you work.! WarningText in a Warning box alerts you to a potentialpersonal injury situation. Be sure to read theWarning statement before proceeding, and workcarefully.NOTE: Text set off as a Note provides you with simple,but useful, extra information about the procedure youare performing.! CautionText in a Caution box alerts you to a situation inwhich you could damage the ice machine. Be sureto read the Caution statement before proceeding,and work carefully.We reserve the right to make product improvements at any time.Specifications and design are subject to change without notice.
Attend A Manitowoc Factory <strong>Service</strong> School• Improve Your <strong>Service</strong> Techniques• Network with Your Peers• 4 1/2 Days of Intensive Training on Manitowoc Ice Machines• Extensive “Hands On” Training on a Variety of Equipment• Breakfast, Lunch and Hotel Room Included with Tuition• Contact Your Distributor or Manitowoc Ice, Inc. for DetailsOR• Visit Our Website at www.manitowocice.com for School DatesMANITOWOC <strong>ICE</strong>, INC.2110 South 26th Street P.O. Box 1720Manitowoc, WI 54221-1720Phone: (920) 682-0161<strong>Service</strong> Fax: (920) 683-7585Web Site - www.manitowocice.com© 2003 Manitowoc Ice, Inc.Litho in U.S.A.
Table of ContentsSection 1General Information<strong>Model</strong> Numbers . . . . . . . . . . . . . . . . . . . . . . . . . . . . . . . . . . . . . . . . . . . . . . . . . . 1-1How to Read a <strong>Model</strong> Number . . . . . . . . . . . . . . . . . . . . . . . . . . . . . . . . . . . . . . 1-1Ice Cube Sizes . . . . . . . . . . . . . . . . . . . . . . . . . . . . . . . . . . . . . . . . . . . . . . . . . . . 1-1<strong>Model</strong>/Serial Number Location . . . . . . . . . . . . . . . . . . . . . . . . . . . . . . . . . . . . . . 1-2Warranty Coverage . . . . . . . . . . . . . . . . . . . . . . . . . . . . . . . . . . . . . . . . . . . . . . . 1-3General . . . . . . . . . . . . . . . . . . . . . . . . . . . . . . . . . . . . . . . . . . . . . . . . . . . . . 1-3Parts . . . . . . . . . . . . . . . . . . . . . . . . . . . . . . . . . . . . . . . . . . . . . . . . . . . . . . . 1-3Labor . . . . . . . . . . . . . . . . . . . . . . . . . . . . . . . . . . . . . . . . . . . . . . . . . . . . . . . 1-3Exclusions . . . . . . . . . . . . . . . . . . . . . . . . . . . . . . . . . . . . . . . . . . . . . . . . . . . 1-3Authorized Warranty <strong>Service</strong> . . . . . . . . . . . . . . . . . . . . . . . . . . . . . . . . . . . . 1-3Section 2Installation InstructionsGeneral . . . . . . . . . . . . . . . . . . . . . . . . . . . . . . . . . . . . . . . . . . . . . . . . . . . . . . . . . 2-1Ice Machine Dimensions . . . . . . . . . . . . . . . . . . . . . . . . . . . . . . . . . . . . . . . . . . . 2-1Q320/Q370/Q420 Ice Machines . . . . . . . . . . . . . . . . . . . . . . . . . . . . . . . . . . 2-1Q200 – Q1000 Ice Machines . . . . . . . . . . . . . . . . . . . . . . . . . . . . . . . . . . . . 2-2Q1300/Q1600/Q1800 Ice Machines . . . . . . . . . . . . . . . . . . . . . . . . . . . . . . . 2-2Q1300/Q1600/Q1800 Ice Machines (Cont.) . . . . . . . . . . . . . . . . . . . . . . . . . 2-3Ice Storage Bin Dimensions . . . . . . . . . . . . . . . . . . . . . . . . . . . . . . . . . . . . . . . . 2-3S170/S400/S570 Ice Storage Bins . . . . . . . . . . . . . . . . . . . . . . . . . . . . . . . . 2-3S320/S420 Ice Storage Bins . . . . . . . . . . . . . . . . . . . . . . . . . . . . . . . . . . . . . 2-3S970 Ice Storage Bins . . . . . . . . . . . . . . . . . . . . . . . . . . . . . . . . . . . . . . . . . 2-4Remote Condenser Dimensions . . . . . . . . . . . . . . . . . . . . . . . . . . . . . . . . . . . . 2-4JC0495/JC0895/JC1095/JC1395 . . . . . . . . . . . . . . . . . . . . . . . . . . . . . . . . . 2-4JC1895 . . . . . . . . . . . . . . . . . . . . . . . . . . . . . . . . . . . . . . . . . . . . . . . . . . . . . 2-4Location of Ice Machine . . . . . . . . . . . . . . . . . . . . . . . . . . . . . . . . . . . . . . . . . . . 2-5Stacking Two Ice Machines on a Single Storage Bin . . . . . . . . . . . . . . . . . . . . 2-5Ice Machine Heat of Rejection . . . . . . . . . . . . . . . . . . . . . . . . . . . . . . . . . . . . . . 2-5Leveling the Ice Storage Bin . . . . . . . . . . . . . . . . . . . . . . . . . . . . . . . . . . . . . . . 2-6Air-Cooled Baffle . . . . . . . . . . . . . . . . . . . . . . . . . . . . . . . . . . . . . . . . . . . . . . . . . 2-6Electrical <strong>Service</strong> . . . . . . . . . . . . . . . . . . . . . . . . . . . . . . . . . . . . . . . . . . . . . . . . . 2-7General . . . . . . . . . . . . . . . . . . . . . . . . . . . . . . . . . . . . . . . . . . . . . . . . . . . . . 2-7Voltage . . . . . . . . . . . . . . . . . . . . . . . . . . . . . . . . . . . . . . . . . . . . . . . . . . . . . 2-7Fuse/Circuit Breaker . . . . . . . . . . . . . . . . . . . . . . . . . . . . . . . . . . . . . . . . . . . 2-7Minimum Circuit Ampacity . . . . . . . . . . . . . . . . . . . . . . . . . . . . . . . . . . . . . . 2-7Self-Contained Electrical Wiring Connections . . . . . . . . . . . . . . . . . . . . . . . . . 2-9Self Contained Ice Machine115/1/60 or 208-230/1/60 . . . . . . . . . . . . . . . . . . . . . . . . . . . . . . . . . . . . . . . 2-9Self Contained Ice Machine208-230/3/60 . . . . . . . . . . . . . . . . . . . . . . . . . . . . . . . . . . . . . . . . . . . . . . . . . 2-9Self Contained Ice Machine230/1/50 . . . . . . . . . . . . . . . . . . . . . . . . . . . . . . . . . . . . . . . . . . . . . . . . . . . . 2-9For United Kingdom Only . . . . . . . . . . . . . . . . . . . . . . . . . . . . . . . . . . . . . . . . . . 2-9Part No. 80-1100-3 1
Table of Contents (continued)Remote Electrical Wiring Connections . . . . . . . . . . . . . . . . . . . . . . . . . . . . . . . 2-10Remote Ice MachineWith Single Circuit <strong>Model</strong> Condenser115/1/60 or 208-230/1/60 . . . . . . . . . . . . . . . . . . . . . . . . . . . . . . . . . . . . . . . 2-10Remote Ice MachineWith Single Circuit <strong>Model</strong> Condenser208-230/3/60 or 380-415/3/50 . . . . . . . . . . . . . . . . . . . . . . . . . . . . . . . . . . . . 2-10Remote Ice MachineWith Single Circuit <strong>Model</strong> Condenser230/1/50 . . . . . . . . . . . . . . . . . . . . . . . . . . . . . . . . . . . . . . . . . . . . . . . . . . . . . 2-10Water Supply and Drain Requirements . . . . . . . . . . . . . . . . . . . . . . . . . . . . . . . 2-11Water Supply . . . . . . . . . . . . . . . . . . . . . . . . . . . . . . . . . . . . . . . . . . . . . . . . . 2-11Water Inlet Lines . . . . . . . . . . . . . . . . . . . . . . . . . . . . . . . . . . . . . . . . . . . . . . 2-11Drain Connections . . . . . . . . . . . . . . . . . . . . . . . . . . . . . . . . . . . . . . . . . . . . . 2-11Cooling Tower Applications(Water-Cooled <strong>Model</strong>s) . . . . . . . . . . . . . . . . . . . . . . . . . . . . . . . . . . . . . . . . . . . . 2-11Water Supply and Drain Line Sizing/Connections . . . . . . . . . . . . . . . . . . . . . 2-12Remote Condenser/Line Set Installation . . . . . . . . . . . . . . . . . . . . . . . . . . . . . . 2-13Remote Ice MachinesRefrigerant Charge . . . . . . . . . . . . . . . . . . . . . . . . . . . . . . . . . . . . . . . . . . . . 2-13General . . . . . . . . . . . . . . . . . . . . . . . . . . . . . . . . . . . . . . . . . . . . . . . . . . . . . 2-14Guidelines for Routing Line Sets . . . . . . . . . . . . . . . . . . . . . . . . . . . . . . . . . . 2-14Calculating Remote Condenser Installation Distances . . . . . . . . . . . . . . . . . 2-15Lengthening or Reducing Line Set Lengths . . . . . . . . . . . . . . . . . . . . . . . . . 2-16Connecting A Line Set . . . . . . . . . . . . . . . . . . . . . . . . . . . . . . . . . . . . . . . . . . 2-16Remote Receiver <strong>Service</strong> Valve . . . . . . . . . . . . . . . . . . . . . . . . . . . . . . . . . . 2-16Remote Ice Machine Usage with Non-Manitowoc Multi-Circuit Condensers . 2-17Warranty . . . . . . . . . . . . . . . . . . . . . . . . . . . . . . . . . . . . . . . . . . . . . . . . . . . . 2-17Head Pressure Control Valve . . . . . . . . . . . . . . . . . . . . . . . . . . . . . . . . . . . . 2-17Fan Motor . . . . . . . . . . . . . . . . . . . . . . . . . . . . . . . . . . . . . . . . . . . . . . . . . . . 2-17Internal Condenser Volume . . . . . . . . . . . . . . . . . . . . . . . . . . . . . . . . . . . . . . 2-17Condenser DT . . . . . . . . . . . . . . . . . . . . . . . . . . . . . . . . . . . . . . . . . . . . . . . . 2-17Refrigerant Charge . . . . . . . . . . . . . . . . . . . . . . . . . . . . . . . . . . . . . . . . . . . . 2-17Quick Connect Fittings . . . . . . . . . . . . . . . . . . . . . . . . . . . . . . . . . . . . . . . . . 2-17Non-Manitowoc Multi-Circuit Condenser Sizing Chart . . . . . . . . . . . . . . . . . 2-18Installation Check List . . . . . . . . . . . . . . . . . . . . . . . . . . . . . . . . . . . . . . . . . . . . . 2-19Additional Checks for Remote <strong>Model</strong>s . . . . . . . . . . . . . . . . . . . . . . . . . . . . . . . 2-19Section 3MaintenanceComponent Identification . . . . . . . . . . . . . . . . . . . . . . . . . . . . . . . . . . . . . . . . . . 3-1Operational Checks . . . . . . . . . . . . . . . . . . . . . . . . . . . . . . . . . . . . . . . . . . . . . . . 3-2General . . . . . . . . . . . . . . . . . . . . . . . . . . . . . . . . . . . . . . . . . . . . . . . . . . . . . 3-2Water Level . . . . . . . . . . . . . . . . . . . . . . . . . . . . . . . . . . . . . . . . . . . . . . . . . . 3-2Ice Thickness Check . . . . . . . . . . . . . . . . . . . . . . . . . . . . . . . . . . . . . . . . . . . 3-2Harvest Sequence Water Purge . . . . . . . . . . . . . . . . . . . . . . . . . . . . . . . . . . 3-3Cleaning the Condenser . . . . . . . . . . . . . . . . . . . . . . . . . . . . . . . . . . . . . . . . . . . 3-3Air-Cooled Condenser . . . . . . . . . . . . . . . . . . . . . . . . . . . . . . . . . . . . . . . . . . 3-3Water-Cooled Condenserand Water Regulating Valve . . . . . . . . . . . . . . . . . . . . . . . . . . . . . . . . . . . . . 3-4Interior Cleaning and Sanitizing . . . . . . . . . . . . . . . . . . . . . . . . . . . . . . . . . . . . . 3-5General . . . . . . . . . . . . . . . . . . . . . . . . . . . . . . . . . . . . . . . . . . . . . . . . . . . . . 3-5Manitowoc’s Patented Cleaning or Sanitizing Technology . . . . . . . . . . . . . . 3-52 Part No. 80-1100-3
HEALTH, SAFETY & THE ENVIRONMENTImpact on the EnvironmentAs part of the planning processan Environmental Impact Statementwill be prepared and willinclude exhaustive studies to assessthe impact of the project onthe local fl ora and fauna, horserearing, archaeology, soils andgeology, noise and emissions,both during construction andoperational phases. It will alsodetail mitigation measures thatwill be followed to minimise theimpacts identifi ed.The proposed facility will besubject to integrated pollutionprevention and control (IPCC)licensing by the EnvironmentalProtection Agency (EPA).SafetyThe main areas of safety concernsfor a Straw CHP plant arehandling of heavy straw bales,dust, fungal spores and fi re. Allhandling of the straw bales willbe automated and at no time willoperators physically handle strawbales or be in danger of fallingbales. Breathing apparatus will beworn by all personnel in the strawshed and all yard machinery willbe fi tted with ventillating equipmentand fi lters to protect operatorsfrom dust and spores. Thestorage shed and boiler buildingwill be fi tted with an automaticallyactivated overhead sprinklersystem. The furnace will also becleaned several times per day byautomated soot blowers and waterlances.EmissionsOdour Monitoring Ireland havecarried out a dispersion modellingassessment on the predictedemissions from the CHP plant.The predicted emissions of carbonmonoxide, nitrogen oxides,sulphur dioxide and particulatematter when added to the currentbaseline atmospheric concentrationsare all well below theIrish Guideline / Limit Values asset out in SI 271/2001 - Air QualityStandards, EU Limit valuesas laid out in the EU Daughterdirective on Air Quality 99/33/EC and the WHO Air QualityGuidelines for particulate matter,ozone, nitrogen and sulphur dioxide,Global update 2005.The above limits and guidelineshave been set for the protectionof human health. Therefore, theproposed Biomass plant will nothave any adverse effects on humanhealth as all predicted emissionsare below these limits.NoiseA noise impact assessment hasbeen carried out for the proposedCHP plant and predictionmodelling indicates that theoperation of the facility will havea negligible impact on off-sitenoise sensitive locations andwill not result in any increase inambient noise levels during theevening or night time.DustDust emissions will not occur,due to combustion of dust in thefi ring kiln. Dust particles from thestack have never posed a problemat BioEner straw burningplants.Flora & FaunaNo part of the prosposed siteis within an area designated forconservation. No habitats orplant species listed under AnnexI and Annex II of the Council Directive92/43/EEC on the Conservationof Natural Habitats andof Wild Flora and Fauna wereencountered in the proposedsite. There is not expected to beany signifi cant impact on fl ora orfauna in the proposed site.HorsesSeveral stud farms are locatedin the Naas-Newbridge area.There will be no impact to thehorses or stud farms as all emissionsand noise levels will benegligible.It should be noted that there aresimiliar Straw CHP plants in successfuloperation in Denmarkand the UK in close proximity tostud farms and the horses havenot experienced any ill health effectsor effects on foaling rates inthese stud farms.Organic Power Ltd
Table of Contents (continued)Wiring Diagrams . . . . . . . . . . . . . . . . . . . . . . . . . . . . . . . . . . . . . . . . . . . . . . . . . . 6-17Wiring Diagram Legend . . . . . . . . . . . . . . . . . . . . . . . . . . . . . . . . . . . . . . . . . 6-17Q200/Q280/Q320 - Self Contained - 1 Phase With Terminal Board . . . . . . . 6-18Q280/Q370 - Self Contained - 1 Phase Without Terminal Board . . . . . . . . . 6-19Q320 - Self Contained - 1 Phase Without Terminal Board . . . . . . . . . . . . . . 6-20Q420/Q450/Q600/Q800/Q1000 - Self Contained -1 Phase With Terminal Board . . . . . . . . . . . . . . . . . . . . . . . . . . . . . . . . . . . . 6-21Q420/Q450/Q600/Q800/Q1000 - Self Contained -1 Phase Without Terminal Board . . . . . . . . . . . . . . . . . . . . . . . . . . . . . . . . . . 6-22Q800/Q1000 - Self Contained - 3 Phase With Terminal Board . . . . . . . . . . . 6-23Q800/Q1000 - Self Contained - 3 Phase Without Terminal Board . . . . . . . . 6-24Q1300/Q1800 - Self Contained - 1 Phase With Terminal Board . . . . . . . . . . 6-25Q1300/Q1600/Q1800 - Self Contained - 1 Phase Without Terminal Board . 6-26Q1300/Q1800 - Self Contained - 3 Phase With Terminal Board . . . . . . . . . . 6-27Q1300/Q1600/Q1800 - Self Contained - 3 Phase Without Terminal Board . 6-28Q450/Q600/Q800/Q1000 - Remote - 1 Phase With Terminal Board . . . . . . 6-29Q450/Q600/Q800/Q1000 - Remote - 1 Phase Without Terminal Board . . . . 6-30Q800/Q1000 -Remote - 3 Phase With Terminal Board . . . . . . . . . . . . . . . . . 6-31Q800/Q1000 -Remote - 3 Phase Without Terminal Board . . . . . . . . . . . . . . 6-32Q1300/Q1800 - Remote - 1 Phase With Terminal Board . . . . . . . . . . . . . . . 6-33Q1300/Q1600/Q1800 - Remote - 1 Phase Without Terminal Board . . . . . . . 6-34Q1300/Q1800 - Remote - 3 Phase With Terminal Board . . . . . . . . . . . . . . . 6-35Q1300/Q1600/Q1800 - Remote - 3 Phase Without Terminal Board . . . . . . . 6-36Component Specifications and Diagnostics . . . . . . . . . . . . . . . . . . . . . . . . . . . 6-38Main Fuse . . . . . . . . . . . . . . . . . . . . . . . . . . . . . . . . . . . . . . . . . . . . . . . . . . . 6-38Bin Switch . . . . . . . . . . . . . . . . . . . . . . . . . . . . . . . . . . . . . . . . . . . . . . . . . . . 6-38Compressor Electrical Diagnostics . . . . . . . . . . . . . . . . . . . . . . . . . . . . . . . . 6-40PTCR Diagnostics . . . . . . . . . . . . . . . . . . . . . . . . . . . . . . . . . . . . . . . . . . . . . 6-41<strong>ICE</strong>/OFF/CLEAN Toggle Switch . . . . . . . . . . . . . . . . . . . . . . . . . . . . . . . . . . 6-44Control Board Relays . . . . . . . . . . . . . . . . . . . . . . . . . . . . . . . . . . . . . . . . . . 6-44Electronic Control Board . . . . . . . . . . . . . . . . . . . . . . . . . . . . . . . . . . . . . . . . 6-45Ice Thickness Probe (Harvest Initiation) . . . . . . . . . . . . . . . . . . . . . . . . . . . . . . 6-47How The Probe Works . . . . . . . . . . . . . . . . . . . . . . . . . . . . . . . . . . . . . . . . . 6-47Harvest/Safety Limit Light . . . . . . . . . . . . . . . . . . . . . . . . . . . . . . . . . . . . . . . 6-47Freeze Time Lock-In Feature . . . . . . . . . . . . . . . . . . . . . . . . . . . . . . . . . . . . 6-47Maximum Freeze Time . . . . . . . . . . . . . . . . . . . . . . . . . . . . . . . . . . . . . . . . . 6-47Ice Thickness Check . . . . . . . . . . . . . . . . . . . . . . . . . . . . . . . . . . . . . . . . . . . 6-47Diagnosing Ice Thickness Control Circuitry . . . . . . . . . . . . . . . . . . . . . . . . . . 6-48Water Level Control Circuitry . . . . . . . . . . . . . . . . . . . . . . . . . . . . . . . . . . . . . . . 6-50Water Level Probe Light . . . . . . . . . . . . . . . . . . . . . . . . . . . . . . . . . . . . . . . . 6-50Water Inlet Valve Safety Shut-Off . . . . . . . . . . . . . . . . . . . . . . . . . . . . . . . . . 6-50Freeze Cycle Circuitry . . . . . . . . . . . . . . . . . . . . . . . . . . . . . . . . . . . . . . . . . . 6-50Harvest Cycle Circuitry . . . . . . . . . . . . . . . . . . . . . . . . . . . . . . . . . . . . . . . . . 6-50Diagnosing Freeze Cycle Potable Water Level Control Circuitry . . . . . . . . . 6-51Diagnosing An Ice Machine That Will Not Run . . . . . . . . . . . . . . . . . . . . . . . . . 6-544 Part No. 80-1100-3
Table of Contents (continued)Section 7Refrigeration SystemSequence of Operation . . . . . . . . . . . . . . . . . . . . . . . . . . . . . . . . . . . . . . . . . . . . 7-1Self-Contained Air or Water -Cooled <strong>Model</strong>s . . . . . . . . . . . . . . . . . . . . . . . . 7-1Remote <strong>Model</strong>s . . . . . . . . . . . . . . . . . . . . . . . . . . . . . . . . . . . . . . . . . . . . . . . 7-3Q1300/Q1600/Q1800 Refrigeration Tubing Schematics . . . . . . . . . . . . . . . 7-6Operational Analysis (Diagnostics) . . . . . . . . . . . . . . . . . . . . . . . . . . . . . . . . . . 7-8General . . . . . . . . . . . . . . . . . . . . . . . . . . . . . . . . . . . . . . . . . . . . . . . . . . . . . 7-8Before Beginning <strong>Service</strong> . . . . . . . . . . . . . . . . . . . . . . . . . . . . . . . . . . . . . . . 7-9Ice Production Check . . . . . . . . . . . . . . . . . . . . . . . . . . . . . . . . . . . . . . . . . . 7-9Installation/Visual Inspection Checklist . . . . . . . . . . . . . . . . . . . . . . . . . . . . . 7-10Water System Checklist . . . . . . . . . . . . . . . . . . . . . . . . . . . . . . . . . . . . . . . . 7-10Ice Formation Pattern . . . . . . . . . . . . . . . . . . . . . . . . . . . . . . . . . . . . . . . . . . 7-11Safety Limits . . . . . . . . . . . . . . . . . . . . . . . . . . . . . . . . . . . . . . . . . . . . . . . . . 7-13Analyzing Discharge PressureDuring Freeze or Harvest Cycle . . . . . . . . . . . . . . . . . . . . . . . . . . . . . . . . . . 7-17Analyzing Suction PressureDuring Freeze Cycle . . . . . . . . . . . . . . . . . . . . . . . . . . . . . . . . . . . . . . . . . . . 7-18Single Expansion Valve Ice Machines -Comparing Evaporator Inlet andOutlet Temperatures . . . . . . . . . . . . . . . . . . . . . . . . . . . . . . . . . . . . . . . . . . . 7-20Harvest Valve Temperature Check . . . . . . . . . . . . . . . . . . . . . . . . . . . . . . . . 7-21Discharge Line Temperature Analysis . . . . . . . . . . . . . . . . . . . . . . . . . . . . . 7-22How to Use the Refrigeration SystemOperational Analysis Tables . . . . . . . . . . . . . . . . . . . . . . . . . . . . . . . . . . . . . 7-24Refrigeration System Operational Analysis Tables . . . . . . . . . . . . . . . . . . . . 7-25Harvest Pressure Regulating(H.P.R.) System . . . . . . . . . . . . . . . . . . . . . . . . . . . . . . . . . . . . . . . . . . . . . . 7-27Headmaster Control Valve . . . . . . . . . . . . . . . . . . . . . . . . . . . . . . . . . . . . . . 7-29Pressure Control Specifications and Diagnostics . . . . . . . . . . . . . . . . . . . . . . 7-31Fan Cycle Control . . . . . . . . . . . . . . . . . . . . . . . . . . . . . . . . . . . . . . . . . . . . . 7-31High Pressure Cut-Out (HPCO) Control . . . . . . . . . . . . . . . . . . . . . . . . . . . . 7-31Cycle Time/24 Hour Ice Production/Refrigerant Pressure Charts . . . . . . . . . 7-32Q200 Series . . . . . . . . . . . . . . . . . . . . . . . . . . . . . . . . . . . . . . . . . . . . . . . . . 7-32Q280 Series . . . . . . . . . . . . . . . . . . . . . . . . . . . . . . . . . . . . . . . . . . . . . . . . . 7-33Q320 Series . . . . . . . . . . . . . . . . . . . . . . . . . . . . . . . . . . . . . . . . . . . . . . . . . 7-34Q370 Series . . . . . . . . . . . . . . . . . . . . . . . . . . . . . . . . . . . . . . . . . . . . . . . . . 7-35Q420/450 Series . . . . . . . . . . . . . . . . . . . . . . . . . . . . . . . . . . . . . . . . . . . . . . 7-36Q450 Series . . . . . . . . . . . . . . . . . . . . . . . . . . . . . . . . . . . . . . . . . . . . . . . . . 7-37Q600 Series . . . . . . . . . . . . . . . . . . . . . . . . . . . . . . . . . . . . . . . . . . . . . . . . . 7-37Q800 Series . . . . . . . . . . . . . . . . . . . . . . . . . . . . . . . . . . . . . . . . . . . . . . . . . 7-39Q1000 Series . . . . . . . . . . . . . . . . . . . . . . . . . . . . . . . . . . . . . . . . . . . . . . . . 7-40Q1300 Series . . . . . . . . . . . . . . . . . . . . . . . . . . . . . . . . . . . . . . . . . . . . . . . . 7-42Q1600 Series . . . . . . . . . . . . . . . . . . . . . . . . . . . . . . . . . . . . . . . . . . . . . . . . 7-43Q1800 Series . . . . . . . . . . . . . . . . . . . . . . . . . . . . . . . . . . . . . . . . . . . . . . . . 7-44Part No. 80-1100-3 5
Table of Contents (continued)Refrigerant Recovery/Evacuation and Recharging . . . . . . . . . . . . . . . . . . . . . 7-46Normal Self-Contained <strong>Model</strong> Procedures . . . . . . . . . . . . . . . . . . . . . . . . . . 7-46Normal Remote <strong>Model</strong> Procedures . . . . . . . . . . . . . . . . . . . . . . . . . . . . . . . . 7-48System Contamination Clean-Up . . . . . . . . . . . . . . . . . . . . . . . . . . . . . . . . . 7-52Replacing Pressure Controls WithoutRemoving Refrigerant Charge . . . . . . . . . . . . . . . . . . . . . . . . . . . . . . . . . . . . 7-54Filter-Driers . . . . . . . . . . . . . . . . . . . . . . . . . . . . . . . . . . . . . . . . . . . . . . . . . . 7-56Total System Refrigerant Charges . . . . . . . . . . . . . . . . . . . . . . . . . . . . . . . . 7-56Refrigerant Definitions . . . . . . . . . . . . . . . . . . . . . . . . . . . . . . . . . . . . . . . . . . 7-57Refrigerant Re-Use Policy . . . . . . . . . . . . . . . . . . . . . . . . . . . . . . . . . . . . . . . 7-58HFC Refrigerant Questions and Answers . . . . . . . . . . . . . . . . . . . . . . . . . . . 7-596 Part No. 80-1100-3
Section 1General Information<strong>Model</strong> NumbersThis manual covers the following models:Self-ContainedAir-CooledQR0320AQD0322AQY0324AQR0420AQD0422AQY0424AQR0200AQD0202AQY0204AQR0280AQD0282AQY0284AQD0372AQY0374AQR0450AQD0452AQY0454AQR0600AQD0602AQY0604AQR0800AQD0802AQY0804AQR1000AQD1002AQY1004AQR1300AQD1302AQY1304A----QR1800AQD1802AQY1804ASelf-ContainedWater-CooledQR0321WQD0323WQY0325WQR0421WQD0423WQY0425WQR0201WQD0203WQY0205WQR0281WQD0283WQY0285WQD0373WQY0375WQR0451WQD0453WQY0455WQR0601WQD0603WQY0605WQR0801WQD0803WQY0805WQR1001WQD1003WQY1005WQR1301WQD1303WQY1305WQD1603WQY1605WQR1801WQD1803WQY1805WRemote--------------------QR0490NQD0492NQY0494NQR0690NQD0692NQY0694NQR0890NQD0892NQY0894NQR1090NQD1092NQY1094NQR1390NQD1392NQY1394NQD1692NQY1694NQR1890NQD1892NQY1894NHow to Read a <strong>Model</strong> Number9 REMO TEAIR-COOLED<strong>ICE</strong> M ACHINEMODEL<strong>ICE</strong> CUBE SIZER REG ULARD D<strong>ICE</strong>Y HALF D<strong>ICE</strong>Ice Cube SizesRegular1-1/8" x 1-1/8" x 7/8"2.86 x 2.86 x 2.22 cm# C UB E SIZE CONDEN SER TYPE0 REG ULAR AIR-COOLED1 R EG U LAR W ATER-COOLED2 D<strong>ICE</strong> AIR-COOLED3 D<strong>ICE</strong> W ATER-COOLED4 H ALF-D<strong>ICE</strong>5 H ALF-D<strong>ICE</strong>AIR-COOLEDW ATER-COOLEDQ R 0450 A<strong>ICE</strong> M ACHINESER IESCONDEN SER TYPEA SEL F-CON TAINED AIR-COOLEDW SELF-CON TAINED W ATER-COOLEDN REMO TE AIR-COOLEDDice7/8" x 7/8" x 7/8"2.22 x 2.22 x 2.22 cmHalf Dice3/8" x 1-1/8" x 7/8"0.95 x 2.86 x 2.22 cmNOTE: <strong>Model</strong> numbers ending in 3 indicate a 3-phaseunit. Example: QY1804A3! WarningPERSONAL INJURY POTENTIALDo not operate equipment that has been misused,abused, neglected, damaged, or altered/modifiedfrom that of original manufactured specifications.Part No. 80-1100-3 1-1
General Information Section 1<strong>Model</strong>/Serial Number LocationThese numbers are required when requestinginformation from your local Manitowoc distributor, orManitowoc Ice, Inc.The model and serial number are listed on the MODEL/SERIAL NUMBER DECAL affixed to the ice machine,remote condenser and storage bin.SV1600Figure 1-1. <strong>Model</strong>/Serial Number Location1-2 Part No. 80-1100-3
Section 1General InformationWarranty CoverageGENERALThe following Warranty outline is provided for yourconvenience. For a detailed explanation, read thewarranty bond shipped with each product.Contact your local Manitowoc Distributor or ManitowocIce, Inc. if you need further warranty information.ImportantThis product is intended exclusively for commercialapplication. No warranty is extended for personal,family, or household purposes.PARTS1. Manitowoc warrants the ice machine against defectsin materials and workmanship, under normal useand service for three (3) years from the date oforiginal installation.2. The evaporator and compressor are covered by anadditional two (2) year (five years total) warrantybeginning on the date of the original installation.LABOR1. Labor required to repair or replace defectivecomponents is covered for three (3) years from thedate of original installation.2. The evaporator is covered by an additional two (2)year (five years total) labor warranty beginning onthe date of the original installation.EXCLUSIONSThe following items are not included in the ice machine’swarranty coverage:1. Normal maintenance, adjustments and cleaning.2. Repairs due to unauthorized modifications to the icemachine or use of non-standard parts without priorwritten approval from Manitowoc Ice, Inc.3. Damage caused by improper installation of the icemachine, electrical supply, water supply or drainage,or damage caused by floods, storms, or other acts ofGod.4. Premium labor rates due to holidays, overtime,etc.; travel time; flat rate service call charges;mileage and miscellaneous tools and materialcharges not listed on the payment schedule.Additional labor charges resulting from theinaccessibility of equipment are also excluded.5. Parts or assemblies subjected to misuse, abuse,neglect or accidents.6. Damage or problems caused by installation,cleaning and/or maintenance proceduresinconsistent with the technical instructions providedin this manual.7. This product is intended exclusively for commercialapplication. No warranty is extended for personal,family, or household purposes.AUTHORIZED WARRANTY SERV<strong>ICE</strong>To comply with the provisions of the warranty, arefrigeration service company qualified and authorizedby a Manitowoc distributor, or a Contracted <strong>Service</strong>Representative must perform the warranty repair.Part No. 80-1100-3 1-3
General Information Section 1THIS PAGE INTENTIONALLY LEFT BLANK1-4 Part No. 80-1100-3
Section 2Installation InstructionsGeneralRefer to Installation <strong>Manual</strong> for complete installationguidelines.ImportantFailure to follow these installation guidelines mayaffect warranty coverage.Ice Machine DimensionsQ320/Q370/Q420 <strong>ICE</strong> <strong>MACHINES</strong>WATER COOLEDAIR COOLEDSV1602SV1611Ice MachineQ320Q370Q420Dimension H21.5 in (54.6 cm)21.5 in (54.6 cm)26.5 in (67.3 cm)Part No. 80-1100-3 2-1
Installation Instructions Section 2Q200 – Q1000 <strong>ICE</strong> <strong>MACHINES</strong>Q1300/Q1600/Q1800 <strong>ICE</strong> <strong>MACHINES</strong>WATER-COOLEDSELF CONTAINEDAIR-COOLEDSV1612SV1628AIR-COOLEDSELF CONTAINEDWATER-COOLEDSV1613SV1627Ice MachineDimension HIce MachineQ200 – Q280Dimension H16.5 in (41.9 cm)Q1300/Q1600Q180029.5 in (74.9 cm)29.5 in (74.9 cm)Q45021.5 in (54.6 cm)Q60021.5 in (54.6 cm)Q80026.5 in (67.3 cm)Q100029.5 in (74.9 cm)2-2 Part No. 80-1100-3
Section 2Installation InstructionsQ1300/Q1600/Q1800 <strong>ICE</strong> <strong>MACHINES</strong> (CONT.)REMOTE AIR-COOLEDIce Storage Bin DimensionsS170/S400/S570 <strong>ICE</strong> STORAGE BINSSV1629SV1609Bin <strong>Model</strong> Dimension A Dimension BS170 29.5 in (74.9 cm) 19.1 in (48.5 cm)S400 34.0 in (86.3 cm) 32.0 in (81.3 cm)S570 34.0 in (86.3 cm) 44.0 in (111.7 cm)S320/S420 <strong>ICE</strong> STORAGE BINSSV1614Bin <strong>Model</strong> Dimension A Dimension BS320 34.0 in (86.3 cm) 32.0 in (81.3 cm)S420 34.0 in (86.3 cm) 44.0 in (111.7 cm)Part No. 80-1100-3 2-3
Installation Instructions Section 2S970 <strong>ICE</strong> STORAGE BINSRemote Condenser DimensionsJC0495/JC0895/JC1095/JC1395SV1610SV1297! WarningAll Manitowoc ice machines require the ice storagesystem (bin, dispenser, etc.) to incorporate an icedeflector.The Q1300, Q1600 and Q1800 series ice machinesrequire adding Manitowoc Ice Deflector Kit K00139when installing with non-Manitowoc ice storagesystems.Prior to using a non-Manitowoc ice storage systemwith other Manitowoc ice machines, contact themanufacturer to assure their ice deflector iscompatible with Manitowoc ice machines.JC1895SV13012-4 Part No. 80-1100-3
Section 2Installation InstructionsLocation of Ice MachineThe location selected for the ice machine must meet thefollowing criteria. If any of these criteria are not met,select another location.• The location must be free of airborne and othercontaminants.• The air temperature must be at least 35°F (1.6°C),but must not exceed 110°F (43.4°C).• The location must not be near heat-generatingequipment or in direct sunlight.• The location must not obstruct air flow through oraround the ice machine. Refer to the chart below forclearance requirements.Q1300/Q1600/Q1800Self-ContainedAir-CooledWater-Cooledand RemoteTop/Sides 24" (61 cm) 8" (20.3 cm)Back 12" (30.5 cm) 5" (12.7 cm)Q370Self-ContainedAir-CooledWater-CooledTop/Sides 12" (30.5 cm) 5" (12.7 cm)Back 5" (127 mm) 5" (12.7 cm)All otherQ modelsSelf-ContainedAir-CooledWater-Cooledand RemoteTop/Sides 8" (20.3 cm) 8" (20.3 cm)Back 5" (12.7 cm) 5" (12.7 cm)There is no minimum clearance required. This value isrecommended for efficient operation and servicing only.Q1600 is not available as an air-cooled model.! CautionThe ice machine must be protected if it will besubjected to temperatures below 32°F (0°C).Failure caused by exposure to freezingtemperatures is not covered by the warranty. See“Removal from <strong>Service</strong>/Winterization” on Page 3-14.Stacking Two Ice Machines on a SingleStorage BinA stacking kit is required for stacking two ice machines.Installation instructions are supplied with the stacking kit.Q450/Q600/Q800/Q1000StackedSelf-ContainedAir-CooledIce Machine Heat of RejectionStackedWater-Cooledand Remote*Top/Sides 16" (40.64 cm) 5" (12.70 cm)Back 5" (12.70 cm) 5" (12.70 cm)Q1300/Q1600/Q1800Top/Sides 48" (121.92 cm) 24" (60.96 cm)Back 12" (30.48 cm) 12" (30.48 cm)*There is no minimum clearance required. This value isrecommended for efficient operation and servicing only.Q1600 is not available as an air-cooled model.SeriesHeat of RejectionIce Machine Air Conditioning PeakQ320 4,600 6,200Q370 3,900 5,950Q420 7,000 9,600Q200 3,800 5,000Q280 3,800 6,000Q450 7,000 9,600Q600 9,000 13,900Q800 12,400 19,500Q1000 16,000 24,700Q1300 24,000 35,500Q1600 24,000 35,500Q1800 36,000 50,000B.T.U./HourBecause the heat of rejection varies during the ice making cycle,the figure shown is an average.Ice machines, like other refrigeration equipment, rejectheat through the condenser. It is helpful to know theamount of heat rejected by the ice machine when sizingair conditioning equipment where self-contained aircooledice machines are installed.This information is also necessary when evaluating thebenefits of using water-cooled or remote condensers toreduce air conditioning loads. The amount of heat addedto an air conditioned environment by an ice machineusing a water-cooled or remote condenser is negligible.Knowing the amount of heat rejected is also importantwhen sizing a cooling tower for a water-cooledcondenser. Use the peak figure for sizing the coolingtower.Part No. 80-1100-3 2-5
Installation Instructions Section 2Leveling the Ice Storage Bin1. Screw the leveling legs onto the bottom of the bin.2. Screw the foot of each leg in as far as possible.! CautionThe legs must be screwed in tightly to prevent themfrom bending.3. Move the bin into its final position.4. Level the bin to assure that the bin door closes andseals properly. Use a level on top of the bin. Turneach foot as necessary to level the bin.NOTE: An optional caster assembly is available for usein place of the legs. Installation instructions are suppliedwith the casters.Air-Cooled BaffleThe air-cooled baffle prevents condenser air fromrecirculating. To install:1. Remove the back panel screws next to thecondenser.2. Align the mounting holes in the air baffle with thescrew holes and reinstall the screws.AIRBAFFLESCREWSTHREAD LEVELINGLEG INTO BASE OFCABINETSV1607THREAD ‘FOOT’ IN ASFAR AS POSSIBLEFigure 2-2. Air BaffleSV1606Figure 2-1. Leveling Leg and Foot2-6 Part No. 80-1100-3
Section 2Installation InstructionsElectrical <strong>Service</strong>GENERAL! WarningAll wiring must conform to local, state and nationalcodes.VOLTAGEThe maximum allowable voltage variation is ±10% of therated voltage at ice machine start-up (when the electricalload is highest).FUSE/CIRCUIT BREAKERA separate fuse/circuit breaker must be provided foreach ice machine. Circuit breakers must be H.A.C.R.rated (does not apply in Canada).MINIMUM CIRCUIT AMPACITYThe minimum circuit ampacity is used to help select thewire size of the electrical supply. (Minimum circuitampacity is not the ice machine’s running amp load.)The wire size (or gauge) is also dependent uponlocation, materials used, length of run, etc., so it must bedetermined by a qualified electrician.! WarningThe ice machine must be grounded in accordancewith national and local electrical codes.Part No. 80-1100-3 2-7
Installation Instructions Section 2Table 2-1. Q320/370/420 Ice MachinesIce MachineQ320Q370Q420VoltagePhaseCycleMaximum Fuse/Circuit BreakerAir-CooledMinimumCircuit AmpsMaximum Fuse/Circuit BreakerWater CooledMinimumCircuit Amps115/1/60 15 11.2 15 10.5208-230/1/60 15 4.8 15 4.2230/1/50 15 5.2 15 4.7115/1/60 20 12.9 20 12.2208-230/1/60 15 6.2 15 5.8230/1/50 15 6.2 15 5.8115/1/60 20 12.3 20 11.4208-230/1/60 15 7.8 15 7.4230/1/50 15 6.3 15 5.9Table 2-2. Q200 - Q1000 Ice MachinesIce MachineQ200Q280Q450Q600Q800Q1000Q1300Q1600Q1800VoltagePhaseCycleMaximumFuse/CircuitBreakerAir-Cooled Water Cooled RemoteMinimumCircuit AmpsMaximumFuse/CircuitBreakerMinimumCircuit AmpsMaximumFuse/CircuitBreakerMinimumCircuit Amps115/1/60 15 11.6 15 10.9 N/A N/A208-230/1/60 15 5.4 15 4.8 N/A N/A230/1/50 15 5.2 15 4.9 N/A N/A115/1/60 20 12.6 20 11.7 N/A N/A208-230/1/60 15 5.7 15 5.2 N/A N/A230/1/50 15 5.7 15 5.2 N/A N/A115/1/60 20 12.8 20 11.9 20 13.6208-230/1/60 15 7.8 15 7.4 N/A N/A230/1/50 15 6.1 15 5.7 N/A N/A208-230/1/60 15 9.2 15 8.7 15 9.3230/1/50 15 9.2 15 8.8 15 9.4208-230/1/60 20 12.1 20 11.4 20 11.9208-230/3/60 15 8.9 15 8.2 15 8.9230/1/50 20 12.0 20 10.6 20 11.2208-230/1/60 20 14.3 20 13.2 20 14.2208-230/3/60 15 9.8 15 8.8 15 9.9230/1/50 20 15.6 20 14.2 20 14.6208-230/1/60 30 19.5 30 18.1 30 19.8208-230/3/60 20 13.1 20 11.6 20 12.7230/1/50 30 15.7 30 14.3 30 14.7380-415/3/50 N/A N/A N/A N/A 15 7.3208-230/1/60 N/A N/A 30 17.2 30 18.2208-230/3/60 N/A N/A 20 11.0 20 12.0230/1/50 N/A N/A N/A N/A N/A N/A380-415/3/50 N/A N/A N/A N/A N/A N/A208-230/1/60 40 28.1 40 26.7 40 26.9208-230/3/60 20 15.5 20 14.1 20 13.9230/1/50 40 23.3 40 21.9 40 22.2380-415/3/50 N/A N/A N/A N/A 15 9.12-8 Part No. 80-1100-3
Section 2Installation InstructionsSelf-Contained Electrical Wiring Connections! WarningThese diagrams are not intended to show properwire routing, wire sizing, disconnects, etc., only thecorrect wire connections.All electrical work, including wire routing andgrounding, must conform to local, state and nationalelectrical codes.Though wire nuts are shown in the drawings, the icemachine field wiring connections may use eitherwire nuts or screw terminals.SELF CONTAINED <strong>ICE</strong> MACHINE208-230/3/60L 1 L 1L 2L 3L 2L 3SELF CONTAINED <strong>ICE</strong> MACHINE115/1/60 OR 208-230/1/60GROUNDGROUNDSV1190<strong>ICE</strong> MACHINECONNECTIONSTO SEPARATEFUSE/BREAKERL 1 L 1N=115VORL2=208-230VSELF CONTAINED <strong>ICE</strong> MACHINE230/1/50GROUNDGROUNDL 1 L 1SV1258<strong>ICE</strong> MACHINECONNECTIONSTO SEPARATEFUSE/BREAKERNNGROUNDGROUNDSV1191<strong>ICE</strong> MACHINECONNECTIONSTO SEPARATEFUSE/BREAKER.DISCONNECT ALLPOLES.For United Kingdom OnlyAs the colours of the wires in the mains lead of the appliance may not correspond with the coloured markingsidentifying the terminals in your plug, proceed as follows:• The wire which is coloured green and yellow must be connected to the terminal in the plug which is marked withthe letter E or by the earth ground symbol or coloured green or green and yellow.• The wire coloured blue must be connected to the terminal which is marked with the letter N or coloured black.• The wire coloured brown must be connected to the terminal which is marked with the letter L or coloured red.Part No. 80-1100-3 2-9
Installation Instructions Section 2Remote Electrical Wiring Connections! WarningThese diagrams are not intended to show properwire routing, wire sizing, disconnects, etc., only thecorrect wire connections.All electrical work, including wire routing andgrounding, must conform to local, state and nationalelectrical codes.Though wire nuts are shown in the drawings, the icemachine field wiring connections may use eitherwire nuts or screw terminals.REMOTE <strong>ICE</strong> MACHINEWITH SINGLE CIRCUIT MODEL CONDENSER208-230/3/60 OR 380-415/3/50SINGLE CIRCUITREMOTECONDENSERF 2L 1L 2GROUNDNOTE: FANMOTOR IS208-230VREMOTE <strong>ICE</strong> MACHINEWITH SINGLE CIRCUIT MODEL CONDENSER115/1/60 OR 208-230/1/60<strong>ICE</strong>MACHINEF 1L 1L 1L 2L 2SINGLE CIRCUITREMOTECONDENSERL 1GROUNDNOTE:CONDENSER FANMOTOR VOLTAGEMATCHES <strong>ICE</strong>MACHINEVOLTAGE (115VOR 208-230V)SV1199L 3GROUNDL 3GROUNDTO SEPARATEFUSE/BREAKERREMOTE <strong>ICE</strong> MACHINEWITH SINGLE CIRCUIT MODEL CONDENSER230/1/50<strong>ICE</strong><strong>MACHINES</strong>V1255L 1L 2GROUNDL 2L 1F 2F 1N=115V OR L2=208-230VL 2GROUNDTO SEPARATEFUSE/BREAKERSINGLE CIRCUITREMOTECONDENSERL 1L 2NOTE: FANMOTOR IS220-240VF 2<strong>ICE</strong>MACHINEF 1L 1L 1NNSV1256GROUNDGROUNDTO SEPARATEFUSE/BREAKER(220-240).DISCONNECT ALLPOLES.2-10 Part No. 80-1100-3
Section 2Installation InstructionsWater Supply and Drain RequirementsWATER SUPPLYLocal water conditions may require treatment of thewater to inhibit scale formation, filter sediment, andremove chlorine odor and taste.ImportantIf you are installing a Manitowoc water filter system,refer to the Installation Instructions supplied with thefilter system for ice making water inlet connections.WATER INLET LINESFollow these guidelines to install water inlet lines:• Do not connect the ice machine to a hot watersupply. Be sure all hot water restrictors installed forother equipment are working. (Check valves on sinkfaucets, dishwashers, etc.)• If water pressure exceeds the maximumrecommended pressure, obtain a water pressureregulator from your Manitowoc distributor.• Install a water shut-off valve for both the ice makingand condenser water lines.• Insulate water inlet lines to prevent condensation.DRAIN CONNECTIONSFollow these guidelines when installing drain lines toprevent drain water from flowing back into the icemachine and storage bin:• Drain lines must have a 1.5 inch drop per 5 feet ofrun (2.5 cm per meter), and must not create traps.• The floor drain must be large enough toaccommodate drainage from all drains.• Run separate bin and ice machine drain lines.Insulate them to prevent condensation.• Vent the bin and ice machine drain to theatmosphere. Do not vent the condenser drain onwater-cooled models.Cooling Tower Applications(Water-Cooled <strong>Model</strong>s)A water cooling tower installation does not requiremodification of the ice machine. The water regulatorvalve for the condenser continues to control therefrigeration discharge pressure.It is necessary to know the amount of heat rejection, andthe pressure drop through the condenser and watervalves (inlet and outlet) when using a cooling tower onan ice machine.• Water entering the condenser must not exceed 90°F(32.2°C).• Water flow through the condenser must not exceed 5gallons (19 liters) per minute.• Allow for a pressure drop of 7 psi (48 kPA) betweenthe condenser water inlet and the outlet of the icemachine.• Water exiting the condenser must not exceed 110°F(43.3°C).Part No. 80-1100-3 2-11
Installation Instructions Section 2WATER SUPPLY AND DRAIN LINE SIZING/CONNECTIONS! CautionPlumbing must conform to state and local codes.Location Water Temperature Water Pressure Ice Machine FittingIce MakingWater InletIce MakingWater DrainCondenserWater InletCondenserWater Drain33°F (0.6°C) Min.90°F (32.2°C) Max.20 psi (137.9 kPA) Min.80 psi (551.5 kPA) Max.--- ---33°F (0.6°C) Min.90°F (32.2°C) Max.20 psi (137.9 kPA) Min.150 psi (1034.2 kPA) Max.--- ---Bin Drain --- ---3/8" FemalePipe Thread1/2" FemalePipe ThreadTubing Size Up to IceMachine Fitting3/8" (9.5 mm) minimuminside diameter1/2" (12.7 mm) minimuminside diameterQ1300/Q1600/Q1800 - 1/2" Female Pipe ThreadAll Others - 3/8" Female Pipe Thread1/2" FemalePipe Thread3/4" FemalePipe Thread1/2" (12.7 mm) minimuminside diameter3/4" (19.1 mm) minimuminside diameterSV1626Figure 2-3. Typical Water Supply Drain Installation2-12 Part No. 80-1100-3
Section 2Installation InstructionsRemote Condenser/Line Set InstallationIce MachineRemote SingleCircuitLine Set*CondenserQ490 JC0495 RT-20-R404AQ690JC0895 RT-35-R404AQ890Q1090JC1095RT-50-R404AQ1390 JC1395 RL-20-R404AQ1690JC1695 RL-35-R404AQ1890JC1895 RL-50-R404A*Line Set Discharge Line Liquid LineRT 1/2" (1.27 cm) 5/16" (.79 cm)RL 1/2" (1.27 cm) 3/8" (.95 cm)Air Temperature Around the CondenserMinimumMaximum-20°F (-28.9°C)120°F (49°C)REMOTE <strong>ICE</strong> <strong>MACHINES</strong>REFRIGERANT CHARGEEach remote ice machine ships from the factory with arefrigerant charge appropriate for installation with linesets of up to 50' (15.25 m). The serial tag on the icemachine indicates the refrigerant charge.Additional refrigerant may be required for installationsusing line sets between 50' and 100' (15.25-30.5 m)long. If additional refrigerant is required, an additionallabel located next to the <strong>Model</strong>/Serial Numbers decalstates the amount of refrigerant to be added.IMPORTANTEPA CERTIFIED TECHNICIANSIf remote line set length is between 50' and 100' (15.25-30.5 m), add 1.5 lb. (24 oz) (0.68 kg) of refrigerant to thenameplate charge.Tubing length: ______________________________Refrigerant added to nameplate: ________________New total refrigerant charge: ___________________Figure 2-4. Typical Additional Refrigerant LabelIf there is no additional label, the nameplate charge issufficient for line sets up to 100' (30.5 m). (See the chartbelow.)WARNINGPotential Personal Injury SituationThe ice machine contains refrigerant charge. Installation ofthe line sets must be performed by a properly trained andEPA certified refrigeration technician aware of the dangersof dealing with refrigerant charged equipment.Ice MachineNameplate Charge(Charge Shipped in Ice Machine)Refrigerant to be Added for50'-100' Line SetsMaximum System Charge(Never Exceed)Q490 6 lb. (96 oz.) None 6 lb. (96 oz.)Q690 8 lb. (128 oz.) None 8 lb. (128 oz.)Q890 8 lb. (128 oz.) None 8 lb. (128 oz.)Q1090 9.5 lb. (152 oz.) None 9.5 lb. (152 oz.)Q1390 12.5 lb. (200 oz.) 1.5 lb. (24 oz) 14 lb. (224 oz.)Q1690 15 lb. (240 oz.) 2.0 lb. (32 oz) 17 lb. (272 oz.)Q1890 15 lb. (240 oz.) 2.0 lb. (32 oz) 17 lb. (272 oz.)Part No. 80-1100-3 2-13
Installation Instructions Section 2GENERALCondensers must be mounted horizontally with the fanmotor on top.Remote condenser installations consist of vertical andhorizontal line sets between the ice machine and thecondenser. When combined, they must fit withinapproved specifications. The following guidelines,drawings and calculation methods must be followed toverify a proper remote condenser installation.! CautionThe 60 month compressor warranty (including the36 month labor replacement warranty) will not applyif the remote ice machine is not installed accordingto specifications.This warranty also will not apply if the refrigerationsystem is modified with a condenser, heat reclaimdevice, or other parts or assemblies notmanufactured by Manitowoc Ice, Inc., unlessspecifically approved in writing by Manitowoc Ice,Inc.GUIDELINES FOR ROUTING LINE SETSFirst, cut a 2.5" (6.35 cm) circular hole in the wall or rooffor tubing routing. The line set end with the 90° bend willconnect to the ice machine. The straight end will connectto the remote condenser.Follow these guidelines when routing the refrigerantlines. This will help insure proper performance andservice accessibility.1. Optional - Make the service loop in the line sets (SeeFigure 2-5). This permits easy access to the icemachine for cleaning and service. Do not use hardrigid copper at this location.2. Required - Do not form traps in the refrigeration lines(except the service loop). Refrigerant oil must befree to drain toward the ice machine or thecondenser. Route excess tubing in a supporteddownward horizontal spiral (See Figure 2-5). Do notcoil tubing vertically.3. Required - Keep outdoor refrigerant line runs asshort as possible.3DOWNWARDHORIZONTALSPIRAL22131SV1204Figure 2-5. Routing Line Sets2-14 Part No. 80-1100-3
Section 2Installation InstructionsCALCULATING REMOTE CONDENSERINSTALLATION DISTANCESLine Set LengthThe maximum length is 100' (30.5 m).The ice machine compressor must have the proper oilreturn. The receiver is designed to hold a chargesufficient to operate the ice machine in ambienttemperatures between -20°F (-28.9°C) and 120°F(49°C), with line set lengths of up to 100' (30.5 m).Line Set Rise/DropThe maximum rise is 35' (10.7 m).The maximum drop is 15' (4.5 m).! CautionIf a line set has a rise followed by a drop, anotherrise cannot be made. Likewise, if a line set has adrop followed by a rise, another drop cannot bemade.Make the following calculations to make sure the line setlayout is within specifications.1. Insert the measured rise into the formula below.Multiply by 1.7 to get the calculated rise.(Example: A condenser located 10 feet above theice machine has a calculated rise of 17 feet.)2. Insert the measured drop into the formula below.Multiply by 6.6 to get the calculated drop.(Example. A condenser located 10 feet below theice machine has a calculated drop of 66 feet.)3. Insert the measured horizontal distance into theformula below. No calculation is necessary.4. Add together the calculated rise, calculated drop,and horizontal distance to get the total calculateddistance. If this total exceeds 150' (45.7 m), movethe condenser to a new location and perform thecalculations again.Calculated Line Set DistanceThe maximum distance is 150' (45.7 m).Line set rises, drops, horizontal runs (or combinations ofthese) in excess of the stated maximums will exceedcompressor start-up and design limits. This will causepoor oil return to the compressor.Maximum Line Set Distance FormulaStep 1. Measured Rise (35' [10.7 m] Maximum) ______ x 1.7 = _______ Calculated RiseStep 2. Measured Drop (15' [4.5 m] Maximum) ______ x 6.6 = _______ Calculated DropStep 3. Measured Horizontal Distance (100' [30.5 m] Maximum) _______ Horizontal DistanceStep 4. Total Calculated Distance 150' (45.7 m) _______ Total Calculated DistanceHHHRDRDSV1196 SV1195 SV1194Figure 2-6. Combination of a Riseand a Horizontal RunFigure 2-7. Combination of a Dropand a Horizontal RunFigure 2-8. Combination of aRise, a Drop and a Horizontal RunPart No. 80-1100-3 2-15
Installation Instructions Section 2LENGTHENING OR REDUCING LINE SET LENGTHSIn most cases, by routing the line set properly,shortening will not be necessary. When shortening orlengthening is required, do so before connecting the lineset to the ice machine or the remote condenser. Thisprevents the loss of refrigerant in the ice machine orcondenser.The quick connect fittings on the line sets are equippedwith Schraeder valves. Use these valves to recover anyvapor charge from the line set. When lengthening orshortening lines, follow good refrigeration practices andinsulate new tubing. Do not change the tube sizes.Evacuate the lines and place about 5 oz (143g) of vaporrefrigerant charge in each line.REMOTE RECEIVER SERV<strong>ICE</strong> VALVEThe receiver service valve is closed during shipment.Open the valve prior to starting the ice machine.1. Remove the top and left side panels.2. Remove the receiver service valve cap.3. Backseat (open) the valve.4. Reinstall the cap and panels.REMOVE FRONT, TOP,AND LEFT SIDE PANELFOR ACCESS TORECEIVER VALVECONNECTING A LINE SET1. Remove the dust caps from the line set, condenserand ice machine.2. Apply refrigeration oil to the threads on the quickdisconnect couplers before connecting them to thecondenser.TURNCOUNTERCLOCKWISE TOOPEN3. Carefully thread the female fitting to the condenseror ice machine by hand.4. Tighten the couplings with a wrench until theybottom out.5. Turn an additional 1/4 turn to ensure proper brassto-brassseating. Torque to the followingspecifications:SV1603RECEIVER SERV<strong>ICE</strong>VALVE CAP (TURNCOUNTERCLOCKWISE TOREMOVE)Liquid Line10-12 ft lb.(13.5-16.2 N•m)Discharge Line35-45 ft lb.(47.5-61.0 N•m)Figure 2-9. Backseating the Receiver <strong>Service</strong> Valve6. Check all fittings for leaks.2-16 Part No. 80-1100-3
Section 2Installation InstructionsRemote Ice Machine Usage with Non-Manitowoc Multi-Circuit CondensersWARRANTYThe sixty (60) month compressor warranty, includingthirty six (36) month labor replacement warranty, shallnot apply when the remote ice machine is not installedwithin the remote specifications. The foregoing warrantyshall not apply to any ice machine installed and/ormaintained inconsistent with the technical instructionsprovided by Manitowoc Ice, Inc. Performance may varyfrom Sales specifications. Q-<strong>Model</strong> ARI certifiedstandard ratings only apply when used with a Manitowocremote condenser.If the design of the condenser meets the specifications,Manitowoc’s only approval is for full warranty coverageto be extended to the Manitowoc manufactured part ofthe system. Since Manitowoc does not test thecondenser in conjunction with the ice machine,Manitowoc will not endorse, recommend, or approve thecondenser, and will not be responsible for itsperformance or reliability..ImportantManitowoc warrants only complete new and unusedremote packages. Guaranteeing the integrity of anew ice machine under the terms of our warrantyprohibits the use of pre-existing (used) tubing orcondensers.HEAD PRESSURE CONTROL VALVEAny remote condenser connected to a Manitowoc Q-<strong>Model</strong> Ice Machine must have a head pressure controlvalve #836809-3 (available from Manitowoc Distributors)installed on the condenser package. Manitowoc will notaccept substitute “off the shelf” head pressure controlvalves.! CautionDo not use a fan cycling control to try to maintaindischarge pressure. Compressor failure will result.FAN MOTORThe condenser fan must be on during the complete icemachine freeze cycle (do not cycle on fan cycle control).The ice maker has a condenser fan motor circuit for usewith a Manitowoc condenser. It is recommended that thiscircuit be used to control the condenser fan(s) on themulti-circuit condenser to assure it is on at the propertime. Do not exceed the rated amps for the fan motorcircuit listed on the ice machine’s serial tag.INTERNAL CONDENSER VOLUMEThe multi-circuit condenser internal volume must not beless than or exceed that used by Manitowoc (see charton Page 2-18). Do not exceed internal volume and tryto add charge to compensate, as compressor failurewill result.CONDENSER ∆T∆T is the difference in temperature between thecondensing refrigerant and entering air. The ∆T shouldbe 15 to 20°F (-9.4 to -6.6°C) at the beginning of thefreeze cycle (peak load conditions) and drop down to 12to 17°F (-11.1 to -8.3°C) during the last 75% of thefreeze cycle (average load conditions).REFRIGERANT CHARGERemote ice machines have the serial plate refrigerantcharge (total system charge) located in the ice makersection. (Remote condensers and line sets are suppliedwith only a vapor charge.)! CautionNever add more than nameplate charge to icemachine for any application.QUICK CONNECT FITTINGSThe ice machine and line sets come with quick connectfittings. It is recommended that matching quick connects(available through Manitowoc Distributors) be installed inthe multi-circuit condenser, and that a vapor “holding”charge (5 oz.) of proper refrigerant be added to thecondenser prior to connection of the ice machine or lineset to the condenser.Part No. 80-1100-3 2-17
Installation Instructions Section 2NON-MANITOWOC MULTI-CIRCUIT CONDENSER SIZING CHARTIceMachine<strong>Model</strong>RefrigerantTypeChargeHeat of RejectionAverageBtu/hrPeakBtu/hrInternalQuick Connect Stubs-CondenserDesign Male EndsVolume (cu ft)PressureMin Max Discharge LiquidQ450Q600R-404AR-404A6 lbs.8 lbs.7,0009,0009,60013,9000.0200.0450.0350.060500 psigsafe workingpressureQ800 R-404A 8 lbs. 12,400 19,500 0.045 0.060Q1000 R-404A 9.5 lbs. 16,000 24,700 0.065 0.085Q1300 R-404A 14 lbs. 1 24,000 35,500 0.085 0.105Q1600 R-404A 17 lbs. 1 36,000 50,000 0.130 0.170Q1800 R-404A 17 lbs. 36,000 50,000 0.130 0.1702,500 psigburstpressurecouplingP/N83-6035-3mountingflange P/N83-6006-3couplingP/N83-6034-3mountingflange P/N83-6005-3HeadPressureControlValveManitowocP/N83-6809-3nosubstitutesAmount reflects additional R-404A refrigerant added to nameplate charge for 50' to 100' line sets, to ensure proper operation at all ambientconditions. Q1300 has 1.5 lbs. additional R-404A. Q1600 and Q1800 has 2.0 lbs. additional R-404ASINGLE CIRCUIT REMOTECONDENSERDISCHARGELINEELECTRICALDISCONNECTLIQUID LINEELECTRICALDISCONNECT<strong>ICE</strong> MACHINEELECTRICALSUPPLYBIN36.00"(91.44 cm)DROPDISCHARGEREFRIGERANTLINELIQUIDREFRIGERANTLINESV1615Figure 2-10. Typical Single Circuit Remote Condenser Installation2-18 Part No. 80-1100-3
Section 2Installation InstructionsInstallation Check ListIs the Ice Machine level?Has all of the internal packing been removed?Have all of the electrical and water connectionsbeen made?Are the ice machine and bin drains vented?Are all electrical leads free from contact withrefrigeration lines and moving equipment?Has the owner/operator been instructedregarding maintenance and the use ofManitowoc Cleaner and Sanitizer?Has the supply voltage been tested and checkedagainst the rating on the nameplate?Has the owner/operator completed the warrantyregistration card?Is there proper clearance around the ice machinefor air circulation?Has the ice machine been installed whereambient temperatures will remain in the range of35° - 110°F (1.7° - 43.3°C)?Has the ice machine been installed where theincoming water temperature will remain in therange of 33° - 90°F (0.6° - 32.2°C)?Is there a separate drain for the water-cooledcondenser?Has the ice machine and bin been sanitized?Is the toggle switch set to ice? (The toggle switchis located directly behind the front panel).Is the ice thickness control set correctly? (Referto Operational Checks on page 3-4 of thismanual to check/set the correct ice bridgethickness).Additional Checks for Remote <strong>Model</strong>sHas the receiver service valve been opened?Is the water trough drain plug installed? (The drainplug is taped to the top of the water pump).Does the remote condenser fan operate properlyafter start-up?Has the remote condenser been located whereambient temperatures will remain in the range of-20° - 120°F ( -6.6 - 49°C).Is the line set routed properly?Part No. 80-1100-3 2-19
Installation Instructions Section 2THIS PAGE INTENTIONALLY LEFT BLANK2-20 Part No. 80-1100-3
Section 3MaintenanceComponent IdentificationHARVEST VALVEAIR CONDENSERCONDENSER WATERREGULATING VALVEREMOTE COUPLINGSWATER DUMP VALVECOMPRESSORDRAIN HOSEWATERCONDENSERWATER COOLEDMODELSV1604GDISTRIBUTIONTUBE<strong>ICE</strong> THICKNESSPROBEEVAPORATORHIGH PRESSURE CUTOUT/MANUAL RESET(When applicable)<strong>ICE</strong>/OFF/CLEANSWITCHWATERCURTAINWATERPUMPWATERTROUGHSV1605BIN SWITCHFigure 3-1. Component Identification (Typical Q450 Shown)Part No. 80-1100-3 3-1
Section 3MaintenanceHARVEST SEQUENCE WATER PURGEThe harvest sequence water purge adjustment may beused when the ice machine is hooked up to specialwater systems, such as a de-ionized water treatmentsystem.ImportantThe harvest sequence water purge is factory-set at45 seconds. A shorter purge setting (with standardwater supplies such as city water) is notrecommended. This can increase water systemcleaning and sanitizing requirements.• The harvest sequence water purge may be set to 15,30, or 45 seconds.• During the harvest sequence water purge, the waterfill valve energizes and de-energizes by time. Thewater purge must be at the factory setting of 45seconds for the water fill valve to energize during thelast 15 seconds of the water purge. If it is set to lessthan 45 seconds, the water fill valve will not energizeduring the water purge.Cleaning the Condenser! WarningDisconnect electric power to the ice machine andthe remote condenser at the electric service switchbefore cleaning the condenser.AIR-COOLED CONDENSER(SELF-CONTAINED AND REMOTE MODELS)A dirty condenser restricts airflow, resulting inexcessively high operating temperatures. This reducesice production and shortens component life. Clean thecondenser at least every six months. Follow the stepsbelow.! CautionThe condenser fins are sharp. Use care whencleaning them.1. The washable aluminum filter on self-contained icemachines is designed to catch dust, dirt, lint andgrease. This helps keep the condenser clean. Cleanthe filter with a mild soap and water solution.CONTROLBOARDWATER PURGEADJUSTMENT30 4515AIR FILTERSV1608Figure 3-4. Water Purge AdjustmentSV1617Figure 3-5. Self-Contained Air-Cooled Filter2. Clean the outside of the condenser (bottom of aremote condenser) with a soft brush or a vacuumwith a brush attachment. Clean from top to bottom,not side to side. Be careful not to bend thecondenser fins.Continued on next page …Part No. 80-1100-3 3-3
Maintenance Section 33. Shine a flashlight through the condenser to checkfor dirt between the fins. If dirt remains:A. Blow compressed air through the condenser finsfrom the inside. Be careful not to bend the fanblades.B. Use a commercial condenser coil cleaner.Follow the directions and cautions supplied withthe cleaner.4. Straighten any bent condenser fins with a fin comb.FIN COMBCONDENSERWATER-COOLED CONDENSERAND WATER REGULATING VALVESymptoms of restrictions in the condenser water circuitinclude:• Low ice production• High water consumption• High operating temperatures• High operating pressuresIf the ice machine is experiencing any of these symptoms,the water-cooled condenser and water regulating valvemay require cleaning due to scale build-up.The cleaning procedures require special pumps andcleaning solutions. Follow the manufacturer’sinstructions for the specific cleaner being used.“COMB”DOWNONLYSV1515Figure 3-6. Straighten Bent Condenser Fins5. Carefully wipe off the fan blades and motor with asoft cloth. Do not bend the fan blades. If the fanblades are excessively dirty, wash with warm, soapywater and rinse thoroughly.! CautionIf you are cleaning the condenser fan blades withwater, cover the fan motor to prevent waterdamage.3-4 Part No. 80-1100-3
Section 3MaintenanceInterior Cleaning and SanitizingGENERALClean and sanitize the ice machine every six months forefficient operation. If the ice machine requires morefrequent cleaning and sanitizing, consult a qualifiedservice company to test the water quality andrecommend appropriate water treatment or installationof AuCS ® accessory (Automatic Cleaning System). Ifrequired, an extremely dirty ice machine may be takenapart for cleaning and sanitizing.! CautionUse only Manitowoc approved Ice Machine Cleaner(part number 94-0546-3) and Sanitizer (part number94-0565-3). It is a violation of Federal law to usethese solutions in a manner inconsistent with theirlabeling. Read and understand all labels printed onbottles before use.! CautionDo not mix Cleaner and Sanitizer solutions together.It is a violation of Federal law to use these solutionsin a manner inconsistent with their labeling.! WarningWear rubber gloves and safety goggles (and/or faceshield) when handling ice machine Cleaner orSanitizer.MANITOWOC’S PATENTED CLEANING ORSANITIZING TECHNOLOGYManitowoc Ice Machines include technology that allowsthe initiation and completion of a cleaning or sanitizingcycle at the flip of a switch. This cycle will permitcleaning or sanitizing of all surfaces that come in contactwith the water distribution system. Periodic maintenancemust be performed that includes sanitizing the bin (ordispenser) and adjacent surface areas, which cannot becontacted by the water distribution system.This technology will also allow initiation and completionof a clean or sanitize cycle, after which the ice machineautomatically starts ice making again.Refer to the cleaning or sanitizing procedure forcomplete details.The AuCS Accessory can be set to automatically startand finish a clean or sanitize cycle every 2, 4, or 12weeks. This accessory monitors ice-making cycles andinitiates a cleaning or sanitizing cycle automatically.Refer to Automatic Cleaning System (AuCS) Accessoryfor further details.ALPHASAN ®The goal of AlphaSan ® is to keep the plastic surfaces ofan ice machine cleaner, by reducing or delaying theformation of bio-film. The active ingredient inAlphaSan ® is the element silver in the form of silver ions(Ag+). AlphaSan ® slowly releases silver ions via an ionexchange mechanism. When AlphaSan ® iscompounded directly into a plastic part, a controlledrelease of silver ions from the surface is regulated tomaintain an effective concentration at or near thesurface of the plastic ice machine part. AlphaSan’s ®unique ability to effectively control the release of silvernot only protects against undesired discoloration of theplastic, but also will last the life of the plastic part.Although AlphaSan ® helps prevent bio-film build up itdoes not eliminate the need for periodic cleaning andmaintenance. AlphaSan ® has no adverse effect on thetaste of the ice or beverage.Part No. 80-1100-3 3-5
Maintenance Section 3CLEANING PROCEDUREIce machine cleaner is used to remove lime scale orother mineral deposits. It is not used to remove algae orslime. Refer to the section on Sanitizing for removal ofalgae and slime.Step 1 Set the toggle switch to the OFF position afterice falls from the evaporator at the end of a Harvestcycle. Or, set the switch to the OFF position and allowthe ice to melt off the evaporator.! CautionNever use anything to force ice from the evaporator.Damage may result.Step 2 To start cleaning, place the toggle switch in theCLEAN position. The water will flow through the waterdump valve and down the drain. The Clean light will turnon to indicate the ice machine is in the Cleaning mode.Step 3 Wait about one minute or until water starts toflow over the evaporator.Step 4 Add the proper amount of Manitowoc IceMachine Cleaner to the water trough.<strong>Model</strong>Q200 Q280 Q320 Q370Q420 Q450 Q600 Q800Q1000 Q1300Q1600 Q1800Amount of Cleaner3 ounces (90 ml)5 ounces (150 ml)9 ounces (270 ml)Step 5 The ice machine will automatically time out aten minute cleaning cycle, followed by six rinse cycles,and stop. The Clean light will turn off to indicate theCleaning mode is completed. This entire cycle lastsapproximately 25 minutes.Step 6 When the cleaning process stops, move thetoggle switch to OFF position. Refer to “SanitizingProcedure” on the next page.Step 7A. The ice machine may be set to start and finish acleaning procedure then automatically start icemaking again.B. You must wait about one minute into thecleaning cycle (until water starts to flow over theevaporator) then move the switch from CLEANto <strong>ICE</strong> position.C. When the cleaning cycle is completed, an icemaking sequence will start automatically.ImportantAfter the toggle switch is moved to the <strong>ICE</strong> position,opening the curtain switch will interrupt the cleaningsequence. The sequence will resume from the pointof interruption when the curtain switch closes.3-6 Part No. 80-1100-3
Section 3MaintenanceSANITIZING PROCEDUREUse sanitizer to remove algae or slime. Do not use it toremove lime scale or other mineral deposits.Step 1 Set the toggle switch to the OFF position afterice falls from the evaporator at the end of a Harvestcycle. Or, set the switch to the OFF position and allowthe ice to melt off the evaporator.! CautionNever use anything to force ice from the evaporator.Damage may result.Step 4 Use the sanitizing solution and a sponge orcloth to sanitize (wipe) all parts and interior surfaces ofthe ice machine. Sanitize the following areas:A. Side wallsB. Base (area above water trough)C. Evaporator plastic partsD. Bin or dispenserStep 5 Rinse all sanitized areas with clear water.Step 6 Install the removed parts, restore power andplace toggle switch in the ice position.! WarningDisconnect electric power to the ice machine (anddispenser if applicable) at the electric switch boxbefore proceeding.Step 2 Refer to Removal of Parts For Cleaning/Sanitizing and remove ice machine parts.Step 3 Mix a solution of water and sanitizer.Solution Type Water Mixed WithSanitizer 4 gal. (15 l) 3 oz (90 ml) sanitizerPart No. 80-1100-3 3-7
Maintenance Section 3AUTOMATIC CLEANING SYSTEM (AuCS ® )This accessory monitors ice making cycles and initiatescleaning (or sanitizing) procedures automatically. TheAuCS ® Accessory can be set to automatically clean orsanitize the ice machine every 2, 4, or 12 weeks.! CautionRefer to the AuCS ® Accessory Installation - Useand Care <strong>Manual</strong> for complete details on theinstallation, operation, maintenance and cautionarystatements of this accessory.Automatic OperationThe following occurs when the toggle switch is in the <strong>ICE</strong>position:• The ice machine control board counts the number ofice harvest cycles.• The AuCS ® accessory interrupts the ice makingmode and starts the cleaning (or sanitizing) modewhen the harvest count equals the “Frequency ofCleaning” setting of the AuCS ® .• When the automatic cleaning (or sanitizing) cycle iscomplete (approximately 25 minutes), ice makingresumes automatically, and the “Harvest Count” isreset to zero.ImportantOpening the curtain switch will interrupt the cleaningor sanitizing sequence. The sequence will resumefrom the point of interruption when the curtain recloses.<strong>Manual</strong> Start OperationStep 1 Set the toggle switch to the OFF position afterice falls from the evaporator at the end of a Harvestcycle. Or, set the switch to the OFF position and allowthe ice to melt off the evaporator.! CautionNever use anything to force ice from the evaporator.Damage may result.Step 2 To start the automatic cleaning system, movethe toggle switch to the CLEAN position. The water willflow through the water dump valve and down the drain.The Clean light will turn on to indicate the ice machine isin the Self Cleaning mode. The AuCS ® thenautomatically adds cleaner or sanitizer to the icemachine.Step 3 The ice machine will automatically time out aten minute cleaning or sanitizing cycle, followed by sixrinse cycles, (de-energize the Clean light) and stop. Thisentire cycle lasts approximately 25 minutes.Step 4 After the cleaning or sanitizing cycle stops,move the toggle switch to <strong>ICE</strong> position.Step 5A. The ice machine may be set to start and finish acleaning or sanitizing cycle, then automaticallystart ice making again.B. You must wait about one minute into thecleaning cycle (until water starts to flow over theevaporator), then move the toggle switch fromCLEAN to <strong>ICE</strong> position.C. When the cleaning or sanitizing cycle iscompleted, the clean light will turn off and an icemaking sequence will start automatically.3-8 Part No. 80-1100-3
Section 3MaintenanceREMOVAL OF PARTS FOR CLEANING/SANITIZING1. Turn off the water supply to the ice machine at thewater service valve.! WarningDisconnect electric power to the ice machine at theelectric switch box before proceeding.2. Remove the water curtain and the components youwant to clean or sanitize. See the following pages forremoval procedures for these parts.! WarningWear rubber gloves and safety goggles (and/or faceshield) when handling Ice Machine Cleaner orSanitizer.3. Soak the removed part(s) in a properly mixedsolution.Solution Type Water Mixed WithCleaner 1 gal. (4 l) 16 oz (500 ml) cleanerSanitizer 4 gal. (15 l) 1 oz (30 ml) sanitizer4. Use a soft-bristle brush or sponge (NOT a wirebrush) to carefully clean the parts.! CautionDo not mix Cleaner and Sanitizer solutions together.It is a violation of Federal law to use these solutionsin a manner inconsistent with their labeling.! CautionDo not immerse the water pump motor in thecleaning or sanitizing solution.5. Use the solution and a brush to clean the top, sides,and bottom evaporator extrusions; the inside of theice machine panels; and the entire inside of the bin.6. Thoroughly rinse all of the parts and surfaces withclean water.7. Install the removed parts.NOTE: Incomplete rinsing of the ice thickness probe orwater level probe may leave a residue. This could causethe ice machine to malfunction. For best results, brush orwipe the probes off while rinsing it. Thoroughly dry theprobes before installing them.8. Turn on the water and electrical supply.Part No. 80-1100-3 3-9
Maintenance Section 3Water Dump ValveThe water dump valve normally does not requireremoval for cleaning. To determine if removal isnecessary:1. Locate the water dump valve.2. Set the toggle switch to <strong>ICE</strong>.3. While the ice machine is in the freeze mode, checkthe dump valve’s clear plastic outlet drain hose forleakage.A. If the dump valve is leaking, remove,disassemble and clean it.B. If the dump valve is not leaking, do not removeit. Instead, follow the “Cleaning Procedure” onPage 3-5.Follow the procedure below to remove the dump valve.! WarningDisconnect the electric power to the ice machine atthe electric service switch box and turn off the watersupply before proceeding.1. If so equipped, remove the water dump valve shieldfrom its mounting bracket.2. Lift and slide the coil retainer cap from the top of thecoil.3. Note the position of the coil assembly on the valvefor assembly later. Leaving the wires attached, liftthe coil assembly off the valve body and theenclosing tube.4. Press down on the plastic nut on the enclosing tubeand rotate it 1/4 turn. Remove the enclosing tube,plunger, and plastic gasket from the valve body.NOTE: At this point, the water dump valve can easily becleaned. If complete removal is desired, continue withstep 5.Figure 3-7. Dump Valve RemovalImportantThe plunger and the inside of the enclosing tubemust be completely dry before assembly.NOTE: During cleaning, do not stretch, damage orremove the spring from the plunger. If it is removed, slidethe spring’s flared end into the plunger’s slotted topopening until the spring contacts the plunger spring stop.5. Remove the valve body.6. Remove the tubing from the dump valve by twistingthe clamps off.7. Remove the two screws securing the dump valveand the mounting bracket.CAPCOILPLUNGERSPRING STOPSPRINGPLUNGERENCLOSINGTUBEDIAPHRAMVALVE BODYFigure 3-8. Dump Valve Disassembly3-10 Part No. 80-1100-3
Section 3MaintenanceWater Pump! WarningDisconnect the electric power to the ice machine atthe electric service switch box and turn off the watersupply.1. Disconnect the water pump power cord.Ice Thickness Probe1. Compress the side of the ice thickness probe nearthe top hinge pin and remove it from the bracket.DISCONNECTWIRE LEADCOMPRESSHINGE PIN TOREMOVEPOWERCORDWATERPUMPLOOSENSCREWS<strong>ICE</strong>THICKNESSPROBESV1619PUMPOUTLETSV1618Figure 3-9. Water Pump Removal2. Disconnect the hose from the pump outlet.3. Loosen the screws securing the pump mountingbracket to the bulkhead.4. Lift the pump and bracket assembly off the screws.Figure 3-10. Ice Thickness Probe RemovalNOTE: At this point, the ice thickness probe can easilybe cleaned. If complete removal is desired, continue withstep 2 below.! WarningDisconnect the electric power to the ice machine atthe electric service switch box.2. Disconnect the wire lead from the control boardinside the electrical control box.Ice Thickness Probe Cleaning1. Mix a solution of Manitowoc ice machine cleanerand water (2 ounces of cleaner to 16 ounces ofwater) in a container.2. Soak ice thickness probe in container of cleaner/water solution while disassembling and cleaningwater circuit components (soak ice thickness probefor 10 minutes or longer).3. Clean all ice thickness probe surfaces including allplastic parts (do not use abrasives). Verify the icethickness probe cavity is clean. Thoroughly rinse icethickness probe (including cavity) with clean water,then dry completely. Incomplete rinsing anddrying of the ice thickness probe can causepremature harvest.4. Reinstall ice thickness probe, then sanitize all icemachine and bin/dispenser interior surfaces.Part No. 80-1100-3 3-11
Maintenance Section 3Water Level Probe1. Loosen the screw that holds the water level probe inplace. The probe can easily be cleaned at this pointwithout proceeding to step 2.! WarningDisconnect the electrical power to the ice machineat the electrical disconnect before proceeding.2. If complete removal is required, disconnect the wirelead from the control board inside the electricalcontrol box.SCREWFollow the procedure below to remove the water inletvalve.! WarningDisconnect the electric power to the ice machine atthe electric service switch box and turn off the watersupply before proceeding.1. Remove the valve shield if necessary.2. Remove the filter access screws that hold the valvein place.NOTE: The water inlet valve can be disassembled andcleaned without disconnecting the incoming watersupply line to the ice machine.3. Remove, clean, and install the filter screen.4. If necessary, remove the enclosure tube accessscrews to clean interior components.WATERTROUGHWATERLEVELPROBEWIRELEADFILTERACCESSSCREWS<strong>ICE</strong><strong>MACHINES</strong>IDEPANELSV1621INCOMINGWATERLINEWATERINLETVALVEFigure 3-11. Water Level Probe RemovalWater Inlet ValveThe water inlet valve normally does not require removalfor cleaning. Follow the instructions below to determine ifremoval is necessary.1. Set the <strong>ICE</strong>/OFF/CLEAN switch to OFF. Locate thewater inlet valve (in the compressor area of the icemachine). It pours water into the water trough.2. When the ice machine is off, the water inlet valvemust completely stop water flow into the machine.Watch for water flow. If water flows, remove,disassemble and clean the valve.3. When the ice machine is on, the water inlet valvemust allow the proper water flow through it. Set thetoggle switch to ON. Watch for water flow into the icemachine. If the water flow is slow or only trickles intothe ice machine, remove, disassemble, and cleanthe valve.MOUNTINGPLATEFILTERACCESSSCREWSFigure 3-12. Water Inlet Valve RemovalENCLOSURE TUBEACCESS SCREWSELECTRICALSOLENOIDRESTRICTOR(FLAT SIDE MUSTFACE OUT)FITTINGO-RINGVALVEBODYFILTERSCREENSV1622ENCLOSURETUBESPRINGPINRUBBERSEALSV1623Figure 3-13. Exploded View of Water Inlet Valve3-12 Part No. 80-1100-3
Section 3MaintenanceWater Distribution Tube1. Disconnect the water hose from the distributiontube.Water Curtain1. Gently flex the curtain in the center and remove itfrom the right side.1. LIFT UP2. SLIDE BACK3. SLIDE TO RIGHT321DISTRIBUTIONTUBETHUMBSCREWSTEP 1LOCATINGPINTHUMBSCREWSV1620STEP 2SV1213Figure 3-14. Water Distribution Tube Removal1. Loosen the two thumbscrews which secure thedistribution tube.2. Lift the right side of the distribution tube up off thelocating pin, then slide it back and to the right.Figure 3-16. Water Curtain Removal2. Slide the left pin out.! CautionDo not force this removal. Be sure the locating pin isclear of the hole before sliding the distribution tubeout.3. Disassemble for cleaning.A. Twist both of the inner tube ends until the tabsline up with the keyways.B. Pull the inner tube ends outward.INNER TUBEINNER TUBETABKEYWAYSV1211Figure 3-15. Water Distribution Tube DisassemblyPart No. 80-1100-3 3-13
Maintenance Section 3Water Treatment/FiltrationGENERALLocal water conditions may require the installation of awater treatment system to inhibit scale formation, filterout sediment, and remove chlorine taste and odor.Consult your local distributor for information onManitowoc’s full line of NSF ® -certified Tri-Liminator ®filtration systems.FILTER REPLACEMENT PROCEDURETri-Liminator ® systems include a pre-filter and a primaryfilter. For maximum filtration efficiency, replace theprimary filter cartridge every six months. If the filtergauge reading drops below 20 psig prior to six monthsusage, replace the pre-filter first.1. Turn off the water supply at the inlet shutoff valve.3. Unscrew the housing from the cap.4. Remove the used filter cartridge from the housingand discard it.5. Remove the O-ring from the housing groove. Wipethe housing groove and the O-ring clean.6. Lubricate the O-ring with petroleum jelly.7. Press the O-ring into the housing groove.8. Insert a new filter cartridge into the housing. Makesure it slips down over the housing standpipe.9. Screw the housing on to the cap and carefully handtightenit.! CautionHand-tighten only. Do not overtighten. Do not use aspanner wrench.SEALCAPSHUT OFFVALVEPRESSURERELEASE BUTTON10. Repeat steps 3-9 for each filter housing.11. Turn on the water supply to allow the housing andfilter to slowly fill with water.O-RINGCARTRIDGEOUTLET SIDE12. Depress the pressure release button to releasetrapped air from the housing.13. Check for leaks.INLET SIDEPRE-FILTERHOUSINGPRIMARYFILTERSEALFigure 3-17. Typical Tri-Liminator ®Water Filtration System2. Depress the pressure release button to relieve thepressure.3-14 Part No. 80-1100-3
Section 3MaintenanceRemoval from <strong>Service</strong>/WinterizationGENERALSpecial precautions must be taken if the ice machine isto be removed from service for an extended period oftime or exposed to ambient temperatures of 32°F (0°C)or below.! CautionIf water is allowed to remain in the ice machine infreezing temperatures, severe damage to somecomponents could result. Damage of this nature isnot covered by the warranty.Follow the applicable procedure below.SELF-CONTAINED AIR-COOLED <strong>ICE</strong> <strong>MACHINES</strong>1. Disconnect the electric power at the circuit breakeror the electric service switch.2. Turn off the water supply.3. Remove the water from the water trough.4. Disconnect and drain the incoming ice-making waterline at the rear of the ice machine.5. Blow compressed air in both the incoming water andthe drain openings in the rear of the ice machineuntil no more water comes out of the inlet water linesor the drain.6. Make sure water is not trapped in any of the waterlines, drain lines, distribution tubes, etc.WATER-COOLED <strong>ICE</strong> <strong>MACHINES</strong>1. Perform steps 1-6 under “Self-Contained Air-CooledIce Machines.”2. Disconnect the incoming water and drain lines fromthe water-cooled condenser.3. Insert a large screwdriver between the bottom springcoils of the water regulating valve. Pry upward toopen the valve.SV1624Figure 3-18. Pry Open the Water Regulating Valve4. Hold the valve open and blow compressed airthrough the condenser until no water remains.REMOTE <strong>ICE</strong> <strong>MACHINES</strong>1. Move the <strong>ICE</strong>/OFF/CLEAN switch to OFF.2. “Frontseat” (shut off) the receiver service valves.Hang a tag on the switch as a reminder to open thevalves before restarting.3. Perform steps 1-6 under “Self-Contained Air-CooledIce Machines.”AUCS ® AccessoryRefer to the AuCS ® Accessory manual for winterizationof the AuCS ® Accessory.Part No. 80-1100-3 3-15
Maintenance Section 3THIS PAGE INTENTIONALLY LEFT BLANK3-16 Part No. 80-1100-3
Section 4Ice Machine Sequence of OperationSelf-Contained Air- and Water-CooledQ200/Q280/Q320/Q370/Q420/Q450/Q600/Q800/Q1000/Q1300/Q1600/Q1800INITIAL START-UP OR START-UP AFTERAUTOMATIC SHUT-OFF1. Water PurgeBefore the compressor starts, the water pump and waterdump solenoid are energized for 45 seconds, tocompletely purge the ice machine of old water. Thisfeature ensures that the ice making cycle starts withfresh water.The harvest valve(s) is also energized during waterpurge, although it stays on for an additional 5 seconds(50 seconds total on time) during the initial refrigerationsystem start-up.2. Refrigeration System Start-UpThe compressor starts after the 45 second water purge,and it remains on throughout the entire Freeze andHarvest Sequences. The water fill valve is energized atthe same time as the compressor. It remains on until thewater level sensor closes for 3 continuous seconds, oruntil a six-minute time period has expired. (See “WaterInlet Valve Safety Shutoff,” Page 6-50.) The harvestvalve(s) remains on for 5 seconds during initialcompressor start-up and then shuts off.At the same time the compressor starts, the condenserfan motor (air-cooled models) is supplied with powerthroughout the entire Freeze and Harvest Sequences.The fan motor is wired through a fan cycle pressurecontrol, therefore it may cycle on and off. (Thecompressor and condenser fan motor are wired throughthe contactor. As a result, anytime the contactor coil isenergized, the compressor and fan motor are suppliedwith power.)FREEZE SEQUENCE3. PrechillThe compressor is on for 30 seconds prior to water flow,to prechill the evaporator.4. FreezeThe water pump restarts after the 30 second prechill. Aneven flow of water is directed across the evaporator andinto each cube cell, where it freezes. The water fill valvewill cycle on and then off one more time to refill the watertrough.When sufficient ice has formed, the water flow (not theice) contacts the ice thickness probe. Afterapproximately 7 seconds of continual water contact, theharvest sequence is initiated. The ice machine cannotinitiate a harvest sequence until a 6 minute freeze lockhas been surpassed.Figure 4-1. Freeze Sequence(Typical Q450 Shown)Continued on next page …Part No. 80-1100-3 4-1
Ice Machine Sequence of Operation Section 4HARVEST SEQUENCE5. Water PurgeThe water pump continues to run, and the water dumpvalve energizes for 45 seconds to purge the water in thesump trough. The water fill valve energizes (turns on)and de-energizes (turns off) strictly by time. The water fillvalve energizes for the last 15 seconds of the 45-secondwater purge. The water purge must be at the factorysetting of 45 seconds for the fill valve to energize duringthe last 15 seconds of the Water Purge. If set at lessthan 45 seconds the water fill valve does not energizeduring the water purge.After the 45 second water purge, the water fill valve,water pump and dump valve de-energize. (Refer to“Water Purge Adjustment” on Page 3-3 for details.) Theharvest valve also opens at the beginning of the waterpurge to divert hot refrigerant gas into the evaporator.6. HarvestThe harvest valve(s) remains open and the refrigerantgas warms the evaporator causing the cubes to slide, asa sheet, off the evaporator and into the storage bin. Thesliding sheet of cubes swings the water curtain out,opening the bin switch. The momentary opening and reclosingof the bin switch terminates the harvestsequence and returns the ice machine to the freezesequence (Step 3 - 4.)AUTOMATIC SHUT-OFF7. Automatic Shut-OffWhen the storage bin is full at the end of a harvestsequence, the sheet of cubes fails to clear the watercurtain and will hold it open. After the water curtain isheld open for 7 seconds, the ice machine shuts off. Theice machine remains off for 3 minutes before it canautomatically restart.The ice machine remains off until enough ice has beenremoved from the storage bin to allow the ice to fall clearof the water curtain. As the water curtain swings back tothe operating position, the bin switch re-closes and theice machine restarts (steps 1 - 2), provided the 3 minutedelay period is complete.Figure 4-3. Automatic Shut-Off (Typical Q450Shown)Figure 4-2. Harvest Sequence (Typical Q450 Shown)4-2 Part No. 80-1100-3
Section 4Ice Machine Sequence of OperationRemoteQ450/Q600/Q800/Q1000/Q1300/Q1600/Q1800INITIAL START-UP OR START-UP AFTERAUTOMATIC SHUT-OFF1. Water PurgeBefore the compressor starts, the water pump and waterdump solenoid are energized for 45 seconds, tocompletely purge the ice machine of old water. Thisfeature ensures that the ice making cycle starts withfresh water.The harvest valve and harvest pressure regulating(HPR) solenoid valves also energize during water purge,although they stay on for an additional 5 seconds (50seconds total on time) during the initial refrigerationsystem start-up.2. Refrigeration System Start-UpThe compressor and liquid line solenoid valve energizeafter the 45 second water purge and remain onthroughout the entire Freeze and Harvest Sequences.The water fill valve is energized at the same time as thecompressor. It remains on until the water level sensorcloses for 3 continuous seconds, or until a six-minutetime period has expired. (See “Water Inlet Valve SafetyShutoff,” Page 6-50.). The harvest valve and HPRsolenoid valves remain on for 5 seconds during initialcompressor start-up and then shut off.The remote condenser fan motor starts at the same timethe compressor starts and remains on throughout theentire Freeze and Harvest Sequences. (The compressorand condenser fan motor are wired through thecontactor, therefore, anytime the contactor coil isenergized, the compressor and fan motor are on.)FREEZE SEQUENCE3. PrechillThe compressor is on for 30 seconds prior to water flow,to prechill the evaporator.4. FreezeThe water pump restarts after the 30 second prechill. Aneven flow of water is directed across the evaporator andinto each cube cell, where it freezes. The water fill valvewill cycle on and then off one more time to refill the watertrough. (See Page 4-1.)When sufficient ice has formed, the water flow (not theice) contacts the ice thickness probe. Afterapproximately 7 seconds of continual water contact, theharvest sequence is initiated. The ice machine cannotinitiate a harvest sequence until a 6 minute freeze lockhas been surpassed.Figure 4-4. Freeze Sequence (Typical Q450 Shown)Continued on next page …Part No. 80-1100-3 4-3
Ice Machine Sequence of Operation Section 4HARVEST SEQUENCE5. Water PurgeThe water pump continues to run, and the water dumpvalve energizes for 45 seconds to purge the water in thesump trough. The water fill valve energizes (turns on)and de-energizes (turns off) strictly by time. The water fillvalve energizes for the last 15 seconds of the 45-secondwater purge. The water purge must be at the factorysetting of 45 seconds for the fill valve to energize duringthe last 15 seconds of the Water Purge. If set at lessthan 45 seconds the water fill valve does not energizeduring the water purge.After the 45 second water purge, the water fill valve,water pump and dump valve de-energize. (Refer to“Water Purge Adjustment” on Page 3-3 for details.) Theharvest valve(s) and HPR solenoid valve also open atthe beginning of the water purge.6. HarvestThe HPR valve and the harvest valve(s) remain openand the refrigerant gas warms the evaporator causingthe cubes to slide, as a sheet, off the evaporator and intothe storage bin. The sliding sheet of cubes swings thewater curtain out, opening the bin switch. Themomentary opening and re-closing of the bin switchterminates the harvest sequence and returns the icemachine to the freeze sequence (Step 3 - 4.)AUTOMATIC SHUT-OFF7. Automatic Shut-OffWhen the storage bin is full at the end of a harvestsequence, the sheet of cubes fails to clear the watercurtain and will hold it open. After the water curtain isheld open for 7 seconds, the ice machine shuts off. Theice machine remains off for 3 minutes before it canautomatically restart.The ice machine remains off until enough ice has beenremoved from the storage bin to allow the ice to dropclear of the water curtain. As the water curtain swingsback to the operating position, the bin switch re-closesand the ice machine restarts (steps 1 - 2) provided the 3minute delay period is complete.Figure 4-6. Automatic Shut-Off (Typical Q450Shown)Figure 4-5. Harvest Sequence (Typical Q450 Shown)4-4 Part No. 80-1100-3
Section 5Water System Ice Making Sequence of OperationNOTE: The sequence of operation is the same for selfcontainedand remote models.INITIAL START-UP OR START-UP AFTERAUTOMATIC SHUT-OFF1. Before the ice machine starts, the water pump andwater dump solenoid are energized for 45 secondsto purge old water from the water trough. Thisensures that the ice-making cycle starts with freshwater. The water fill valve energizes after the 45-second water purge, and remains on until the waterlevel probe is satisfied.FREEZE CYCLE2. To pre-chill the evaporator, there is no water flowover the evaporator for the first 30 seconds of thefreeze cycle.3. The water pump starts after the 30-second pre-chill.An even flow of water is directed across theevaporator and into each cube cell.During the first 45 seconds of the Freeze Cycle, thewater fill valve cycles on and off as many times asneeded to refill the water trough.After the 45 seconds, the water fill valve cycles onand off one more time to refill the water trough. Thewater fill valve then remains off for the duration ofthe Freeze Cycle.WATER INLET VALVE SAFETY SHUT-OFFThis feature limits the water inlet valve to a six-minute ontime. Regardless of the water level probe input, thecontrol board automatically shuts off the water inlet valveif it remains on for 6 continuous minutes.TO DISTRIBUTION TUBEWATER INLET VALVEWATER DUMP VALVEWATER PUMPTO DRAINSV1677Figure 5-1. Water Flow Over the EvaporatorPart No. 80-1100-3 5-1
Water System Ice Making Sequence of Operation Section 5HARVEST CYCLE4. The water pump and water dump solenoid areenergized for 45 seconds to purge the water fromthe water trough. The water fill valve energizes forthe last 15 seconds of the 45-second purge cycle, toflush sediment from the bottom of the water trough.5. After the 45-second purge, the water pump andwater dump valve de-energize.AUTOMATIC SHUT-OFFThere is no water flow during an automatic shut-off.TO DISTRIBUTION TUBEWATER INLET VALVEWATER DUMP VALVEWATER PUMPTO DRAINSV1677Figure 5-2. Water Flow Down the Drain5-2 Part No. 80-1100-3
Section 6Electrical SystemEnergized Parts ChartsSELF-CONTAINED AIR- AND WATER-COOLED MODELSIce MakingSequence OfOperationSTART-UP 11. Water Purge2. RefrigerationSystemStart-UpFREEZESEQUENCE3. Pre-Chill1. Initial Start-Up or Start-Up After Automatic Shut-OffControl Board RelaysContactor1 2 3 4 5 5A 5BWaterPumpWater FillValveHarvestValve(s)Condenser Fan MotorThe fan motor is wired through a fan cycle pressurecontrol, therefore, it may cycle on and off.Harvest Water PurgeThe circuit board has an adjustable water purge in theharvest cycle. This permits a 15, 30 or 45 second purgecycle.Auto Shut-OffThe ice machine remains off for 3 minutes before it canautomatically restart. The ice machine restarts (steps 1-2) immediately after the delay period, if the bin switch reclosesprior to 3 minutes.Safety TimersThe control board has the following non-adjustablesafety timers:WaterDumpValveContactorCoilCompressorFREEZE SEQUENCECondenserFan MotorLengthOf TimeOn Off On On Off Off Off 45 SecondsOff On On Off On OnOffMay cycle On/Off during first45 sec.-----------Cycles On,then Off 1more timeLocked OutAfter SixMinutesOff Off On On4. Freeze On Off Off On OnHARVESTSEQUENCE5. Water PurgeOn30 sec. Off,15 sec. OnOn On On On6. Harvest Off Off On Off On On7. AUTOMATICSHUT-OFFMay CycleOn/OffMay CycleOn/OffMay CycleOn/OffMay CycleOn/OffMay CycleOn/OffOff Off Off Off Off Off Off5 Seconds30 SecondsUntil 7 sec.water contactwith icethickness probeFactory-set at45 SecondsBin switchactivationUntil bin switchre-closes• The ice machine is locked into the freeze cycle forthe first 6 minutes, not allowing the ice thicknessprobe to initiate a harvest sequence.• The maximum freeze time is 60 minutes, at whichtime the control board automatically initiates aharvest sequence (steps 5-6).HARVEST SEQUENCEThe maximum harvest time is 3-1/2 minutes, at whichtime the control board automatically terminates theharvest sequence. If the bin switch is open, the icemachine will go to automatic shut-off (step 7). If the binswitch is closed, the ice machine will go to the freezesequence (steps 3-4).Part No. 80-1100-3 6-1
Electrical System Section 6REMOTE MODELSIce MakingSequence OfOperationSTART-UP 11. Water Purge2. RefrigerationSystemStart-UpFREEZESEQUENCE3. Pre-Chill1. Initial Start-Up or Start-Up After Automatic Shut-OffControl Board RelaysContactor1 2 3 4 5 5A 5BWaterPumpWater FillValvea. HarvestValve(s)b. HPRSolenoidAuto Shut-OffThe ice machine remains off for 3 minutes before it canautomatically restart. The ice machine restarts (steps 1-2) immediately after the delay period, if the bin switch reclosesprior to 3 minutes.Harvest Water PurgeThe circuit board has an adjustable water purge in theharvest cycle. This permits a 15, 30 or 45 second purgecycle.Safety TimersThe control board has the following non-adjustablesafety timers:WaterDumpValvea.ContactorCoilb. LiquidLineSolenoidFREEZE SEQUENCECompressorCondenserFan MotorLengthOf TimeOn Off On On Off Off Off 45 SecondsOff On On Off On On On 5 SecondsOffMay cycleOn/Off duringfirst 45 sec.------------Cycles On,then Off 1Off Off On On On 30 Seconds4. Freeze On more timeLocked OutAfter SixMinutesOff Off On On OnHARVESTSEQUENCE5. Water PurgeOn30 sec. Off,15 sec. OnOn On On On On6. Harvest Off Off On Off On On On7. AUTOMATICSHUT-OFFOff Off Off Off Off Off OffUntil 7 sec.watercontact withice thicknessprobeFactory-setat 45SecondsBin switchactivationUntil binswitch recloses• The ice machine is locked into the freeze cycle forthe first 6 minutes, not allowing the ice thicknessprobe to initiate a harvest sequence.• The maximum freeze time is 60 minutes, at whichtime the control board automatically initiates aharvest sequence (steps 5-6).HARVEST SEQUENCE• The maximum harvest time is 3-1/2 minutes, at whichtime the control board automatically terminates theharvest sequence. If the bin switch is open, the icemachine will go to automatic shut-off (step 7). If thebin switch is closed, the ice machine will go to thefreeze sequence (steps 3-4).6-2 Part No. 80-1100-3
Section 6Electrical SystemWiring Diagram Sequence ofOperationL1SEE SERIAL PLATE FOR VOLTAGEL2 (N)SELF-CONTAINED MODELSInitial Start-Up or Start-Up AfterAutomatic Shut-Off1. WATER PURGEBefore the compressor starts, thewater pump and water dumpsolenoid are energized for 45seconds to purge old water from theice machine. This ensures that theice-making cycle starts with freshwater.The harvest valve(s) is alsoenergized during the water purge. Inthe case of an initial refrigerationstart-up, it stays on for an additional5 seconds (50 seconds total).TB35HIGH PRESCUTOUTTB32<strong>ICE</strong> THICKNESS PROBEWATER LEVEL PROBENOT USED(64)(66)(55)(62)(63)BIN SWITCH (65)24135TRANS.1C1F1GFUSE (7A)LOW D.C.VOLTAGEPLUG(67)(66)(68)(69)(62)(20)(61)(60)(58)CLEAN LIGHTWATER LEVELTB37(59)(56)BIN SWITCH LIGHTHARVEST LIGHT/SAFETY LIMIT CODE LIGHTTOGGLE SWITCH<strong>ICE</strong>INTERNAL WORKINGOFF VIEWCLEAN(21) (22)WATERVALVE(77)HARVESTSOLENOID(76)DUMP(57) SOLENOIDTB31 (98)(73)(80)(81)CONTACTORCOIL(99)WATERPUMPTERMINATES ATPIN CONNECTION(74)(75)VIEW FOR WIRING6866676269TB30TB30TB30TB30(49)CONTACTORCONTACTS*OVERLOADRCCOMPRESSOR(47)SRUN CAPACITORR R(46) (50)TB30TB35(42)L1TB33(51)(48)(52)(85) (86)(53)TB34PTCR(45)FAN CYCLE CONTROLRUN CAPACITOR**FAN MOTOR(AIR COOLED ONLY)TB30SV1646-1Table 6-1. Self-Contained <strong>Model</strong>sFigure 6-1. Self-Contained — Water Purge1. Water Purge (45 Seconds)Toggle Switch<strong>ICE</strong>Bin SwitchClosedControl Board Relays#1 Water Pump Closed / ON#2 Water Fill Valve Open / OFF#3 Harvest Solenoid Closed / ON#4 Water Dump Valve Closed / ON#5 Contactor Coil Open / OFFCompressorOFFCondenser Fan MotorOFFSafety Controls (Which could stop ice machine operation)High Pressure Cut-OutClosedMain Fuse (On Control Board)ClosedPart No. 80-1100-3 6-3
Electrical System Section 62. REFRIGERATION SYSTEMSTART-UPThe compressor starts after the 45-second water purge, and it remainson throughout the Freeze andHarvest cycles.The water fill valve is energized atthe same time as the compressor. Itremains on until the water levelsensor closes for 3 continuousseconds.The harvest valve(s) remains on forthe first 5 seconds of the initialcompressor start-up.At the same time the compressorstarts, the condenser fan motor (aircooledmodels) is supplied withpower. It continues to be suppliedwith power throughout the Freezeand Harvest cycles.The fan motor is wired through a fancycle pressure control, and maycycle on and off. (The compressorand the condenser fan motor arewired through the contactor. Any timethe contactor coil is energized, thesecomponents are supplied withpower.)TB35TB35L1HIGH PRESCUTOUT<strong>ICE</strong> THICKNESS PROBEWATER LEVEL PROBENOT USED(42)CONTACTORCONTACTSL1TB32TB33(64)(66)(51)(55)BIN SWITCH(52)*OVERLOAD(48)(62)(63)(65)R241351C1F1GC(85) (86)FAN CYCLE CONTROLTRANS.FUSE (7A)LOW D.C.VOLTAGEPLUG(67)(66)COMPRESSOR(47)S(53)RUN CAPACITOR**RUN CAPACITORR R(46) (50)Figure 6-2. Self-Contained — Refrigeration System Start-Up(68)(69)(62)(49)TB34(20)(61)(60)(58)CLEAN LIGHTWATER LEVELBIN SWITCH LIGHTHARVEST LIGHT/SAFETY LIMIT CODE LIGHTTOGGLE SWITCH<strong>ICE</strong>INTERNAL WORKINGOFF VIEWCLEANPTCRSEE SERIAL PLATE FOR VOLTAGETB37(59)(56)(45)(21) (22)WATERVALVE(77)HARVESTSOLENOID(76)DUMP(57) SOLENOIDTB31 (98)(73)TERMINATES ATPIN CONNECTIONCONTACTORCOILFAN MOTOR(AIR COOLED ONLY)(80)(81)(99)WATERPUMP(74)(75)VIEW FOR WIRING6866676269L2 (N)TB30TB30TB30TB30TB30TB30SV1646-2Table 6-2. Self-Contained <strong>Model</strong>s2. Refrigeration System Start Up (5 Seconds)Toggle Switch<strong>ICE</strong>Bin SwitchClosedControl Board Relays#1 Water Pump Open / OFF#2 Water Fill Valve Closed / ON#3 Harvest Solenoid Closed / ON#4 Water Dump Valve Open / OFF#5 Contactor Coil Closed / ONCompressorONCondenser Fan MotorONSafety Controls (Which could stop ice machine operation)High Pressure Cut-OutClosedMain Fuse (On Control Board)Closed6-4 Part No. 80-1100-3
Section 6Electrical SystemFreeze SequenceSEE SERIAL PLATE FOR VOLTAGE3. PRE-CHILLL1L2 (N)To pre-chill the evaporator, thecompressor runs for 30 seconds priorto water flow.TB35HIGH PRESCUTOUTTB32(55)2(61)(60)(20)(21) (22)WATERVALVE(77)The water fill valve remains on untilthe water level sensor closes forthree continuous seconds.<strong>ICE</strong> THICKNESS PROBEWATER LEVEL PROBENOT USED4135TRANS.1C1F1GFUSE (7A)LOW D.C.VOLTAGEPLUG(58)(57)CLEAN LIGHTWATER LEVELTB31TB37(59)HARVESTSOLENOID(56)(73)(76)DUMPSOLENOID(98)(80)(81)CONTACTORCOIL(99)WATERPUMPTERMINATES ATPIN CONNECTION(74)(75)TB30TB30TB30TB30(62)BIN SWITCH LIGHT(64)(66)(63)BIN SWITCH (65)(67)(66)(68)(69)(62)HARVEST LIGHT/SAFETY LIMIT CODE LIGHTTOGGLE SWITCH<strong>ICE</strong>INTERNAL WORKINGOFF VIEWCLEANVIEW FOR WIRING6866676269(49)CONTACTORCONTACTS*OVERLOADRCCOMPRESSOR(47)SRUN CAPACITORR R(46) (50)TB30TB35(42)L1TB33(51)(48)(52)(85) (86)(53)TB34PTCR(45)Table 6-3. Self-Contained <strong>Model</strong>sFAN CYCLE CONTROLRUN CAPACITOR**FAN MOTOR(AIR COOLED ONLY)Figure 6-3. Self-Contained — Pre-Chill3. Pre-Chill (30 Seconds)Toggle Switch<strong>ICE</strong>Bin SwitchClosedControl Board Relays#1 Water Pump Open / OFF#2 Water Fill Valve Closed / ON#3 Harvest Solenoid Open / OFF#4 Water Dump Valve Open / OFF#5 Contactor Coil Closed / ONCompressorONCondenser Fan MotorONSafety Controls (Which could stop ice machine operation)High Pressure Cut-OutClosedMain Fuse (On Control Board)ClosedTB30SV1646-3Part No. 80-1100-3 6-5
Electrical System Section 64. FREEZESEE SERIAL PLATE FOR VOLTAGEThe water pump starts after the 30-second pre-chill. An even flow ofwater is directed across theevaporator and into each cube cell,where it freezes.After six minutes the water inlet valveis locked out and can not addadditional water.When sufficient ice has formed, thewater flow (not the ice) contacts theice thickness probes. Afterapproximately 7 seconds of continualcontact, a harvest cycle is initiated.NOTE: The ice machine cannotinitiate a harvest cycle until a 6-minute freeze lock has expired.TB35L1HIGH PRESCUTOUTTB32<strong>ICE</strong> THICKNESS PROBEWATER LEVEL PROBENOT USED(64)(66)(55)(62)(63)BIN SWITCH (65)24135TRANS.1C1F1GFUSE (7A)LOW D.C.VOLTAGEPLUG(67)(66)(68)(69)(62)(20)(61)(60)(58)CLEAN LIGHTWATER LEVELTB37(59)(56)BIN SWITCH LIGHTHARVEST LIGHT/SAFETY LIMIT CODE LIGHTTOGGLE SWITCH<strong>ICE</strong>INTERNAL WORKINGOFF VIEWCLEAN(21) (22)WATERVALVE(77)HARVESTSOLENOID(76)DUMP(57) SOLENOIDTB31 (98)(73)(80)(81)CONTACTORCOIL(99)WATERPUMPTERMINATES ATPIN CONNECTION(74)(75)VIEW FOR WIRING6866676269L2 (N)TB30TB30TB30TB30(49)CONTACTORCONTACTS*OVERLOADRCCOMPRESSOR(47)SRUN CAPACITORR R(46) (50)TB30TB35(42)L1TB33(51)(48)(52)(85) (86)(53)TB34PTCR(45)FAN CYCLE CONTROLRUN CAPACITOR**FAN MOTOR(AIR COOLED ONLY)TB30SV1646-4Figure 6-4.Self-Contained — FreezeTable 6-4. Self-Contained <strong>Model</strong>s4. Freeze (Until 7 Seconds of Water Contact with Ice Thickness Probe)Toggle Switch<strong>ICE</strong>Bin SwitchClosedControl Board Relays#1 Water Pump Closed / ON#2 Water Fill Valve Cycles ON then OFF#3 Harvest Solenoid Open / OFF#4 Water Dump Valve Open / OFF#5 Contactor Coil Closed / ONCompressorONCondenser Fan MotorONSafety Controls (Which could stop ice machine operation)High Pressure Cut-OutClosedMain Fuse (On Control Board)Closed6-6 Part No. 80-1100-3
Section 6Electrical SystemHarvest Sequence5. WATER PURGEThe water pump continues to run,and the water dump valve energizesfor 45 seconds to purge the water inthe sump trough. The water fill valveenergizes (turns on) and deenergizes(turns off) strictly by time.The water fill valve energizes for thelast 15 seconds of the 45-secondwater purge. The water purge mustbe at the factory setting of 45seconds for the fill valve to energizeduring the last 15 seconds of theWater Purge. If set at less than 45seconds, the water fill valve does notenergize during the water purge.After the 45 second water purge, thewater fill valve, water pump anddump valve de-energize. (Refer to“Water Purge Adjustment” on Page3-3 for details.) The harvest valvealso opens at the beginning of thewater purge to divert hot refrigerantgas into the evaporator.TB35TB35L1HIGH PRESCUTOUT<strong>ICE</strong> THICKNESS PROBEWATER LEVEL PROBENOT USED(42)CONTACTORCONTACTSL1TB32TB33(64)(66)(51)(55)BIN SWITCH(52)*OVERLOAD(48)(62)(63)(65)R241351C1FC(85) (86)TRANS.1GFUSE (7A)LOW D.C.VOLTAGEPLUG(67)(66)COMPRESSOR(47)S(53)(68)(69)(62)(49)TB34(20)(61)(60)(58)CLEAN LIGHTWATER LEVELBIN SWITCH LIGHTHARVEST LIGHT/SAFETY LIMIT CODE LIGHTTOGGLE SWITCH<strong>ICE</strong>INTERNAL WORKINGOFF VIEWCLEANRUN CAPACITORR R(46) (50)PTCRSEE SERIAL PLATE FOR VOLTAGETB37(59)(56)(45)(21)WATERVALVE(77)HARVESTSOLENOID(76)DUMP(57) SOLENOIDTB31 (98)(73)(22)(80)(81)TERMINATES ATPIN CONNECTIONCONTACTORCOIL(99)WATERPUMP(74)(75)VIEW FOR WIRING6866676269L2 (N)TB30TB30TB30TB30TB30FAN CYCLE CONTROLRUN CAPACITOR**FAN MOTOR(AIR COOLED ONLY)TB30SV1646-5Table 6-5. Self-Contained <strong>Model</strong>sFigure 6-5.Self-Contained — Water Purge5. Water Purge (45 Seconds)Toggle Switch<strong>ICE</strong>Bin SwitchClosedControl Board Relays#1 Water Pump Closed / ON#2 Water Fill Valve Cycles OFF then ON#3 Harvest Solenoid Closed / ON#4 Water Dump Valve Closed / ON#5 Contactor Coil Closed / ONCompressorONCondenser Fan MotorONSafety Controls (Which could stop ice machine operation)High Pressure Cut-OutClosedMain Fuse (On Control Board)ClosedPart No. 80-1100-3 6-7
Electrical System Section 66. HARVESTSEE SERIAL PLATE FOR VOLTAGEThe harvest valve(s) remains open,allowing refrigerant gas to warm theevaporator. This causes the cubes toslide, as a sheet, off the evaporatorand into the storage bin.The sliding sheet of cubes swings thewater curtain out, opening the binswitch. This momentary opening andclosing of the bin switch terminatesthe Harvest Cycle and returns the icemachine to the Freeze Cycle (steps3-4).TB35L1HIGH PRESCUTOUTTB32<strong>ICE</strong> THICKNESS PROBEWATER LEVEL PROBENOT USED(55)24135TRANS.1C1F1GFUSE (7A)LOW D.C.VOLTAGEPLUG(20)(61)(60)(58)CLEAN LIGHTWATER LEVELTB37(59)(56)(21) (22)WATERVALVE(77)HARVESTSOLENOID(76)DUMP(57) SOLENOIDTB31 (98)(73)(80)(81)CONTACTORCOIL(99)WATERPUMPTERMINATES ATPIN CONNECTION(74)(75)L2 (N)TB30TB30TB30TB30(62)BIN SWITCH LIGHT(64)(66)(63)BIN SWITCH (65)(67)(66)(68)(69)(62)HARVEST LIGHT/SAFETY LIMIT CODE LIGHTTOGGLE SWITCH<strong>ICE</strong>INTERNAL WORKINGOFF VIEWCLEANVIEW FOR WIRING6866676269(49)CONTACTORCONTACTS*OVERLOADRCCOMPRESSOR(47)SRUN CAPACITORR R(46) (50)TB30TB35(42)L1TB33(51)(48)(52)(85) (86)(53)TB34PTCR(45)FAN CYCLE CONTROLRUN CAPACITOR**FAN MOTOR(AIR COOLED ONLY)TB30SV1646-6Table 6-6. Self-Contained <strong>Model</strong>sFigure 6-6. Self-Contained — Harvest6. Harvest (Until Bin Switch Activation)Toggle Switch<strong>ICE</strong>Bin SwitchClosedControl Board Relays#1 Water Pump Open / OFF#2 Water Fill Valve Open / OFF#3 Harvest Solenoid Closed / ON#4 Water Dump Valve Open / OFF#5 Contactor Coil Closed / ONCompressorONCondenser Fan MotorONSafety Controls (Which could stop ice machine operation)High Pressure Cut-OutClosedMain Fuse (On Control Board)Closed6-8 Part No. 80-1100-3
Section 6Electrical SystemAutomatic Shut-Off7. AUTOMATIC SHUT-OFFSEE SERIAL PLATE FOR VOLTAGEIf the storage bin is full at the end of aharvest cycle, the sheet of cubes failsto clear the water curtain and holds itopen. After the water curtain is heldopen for 7 seconds, the ice machineshuts off.The ice machine remains off untilenough ice is removed from thestorage bin to allow the sheet ofcubes to drop clear of the watercurtain. As the water curtain swingsback to the operating position, the binswitch closes and the ice machinerestarts (steps 1-2).NOTE: The ice machine must remainoff for 3 minutes before it canautomatically restart.TB35L1HIGH PRESCUTOUTTB32<strong>ICE</strong> THICKNESS PROBEWATER LEVEL PROBENOT USED(64)(66)(55)(62)(63)BIN SWITCH (65)24135TRANS.1C1F1GFUSE (7A)LOW D.C.VOLTAGEPLUG(67)(66)(68)(69)(62)(61)(60)(20)(58)(57)CLEAN LIGHTWATER LEVELTB31TB37(59)(56)BIN SWITCH LIGHTHARVEST LIGHT/SAFETY LIMIT CODE LIGHTTOGGLE SWITCH<strong>ICE</strong>INTERNAL WORKINGOFF VIEWCLEAN(21) (22)WATERVALVE(73)(77)HARVESTSOLENOID(76)DUMPSOLENOID(98)(80)(81)CONTACTORCOIL(99)WATERPUMPTERMINATES ATPIN CONNECTION(74)(75)VIEW FOR WIRING6866676269L2 (N)TB30TB30TB30TB30(49)CONTACTORCONTACTS*OVERLOADRCCOMPRESSOR(47)SRUN CAPACITORR R(46) (50)TB30TB35(42)L1TB33(51)(48)(52)(85)(86)(53)TB34PTCR(45)FAN CYCLE CONTROLRUN CAPACITOR**FAN MOTOR(AIR COOLED ONLY)TB30SV1646-7Table 6-7. Self-Contained <strong>Model</strong>sFigure 6-7. Self-Contained — Automatic Shut-Off7. Automatic Shut-Off (Until Bin Switch Closes)Toggle Switch<strong>ICE</strong>Bin SwitchOpenControl Board Relays#1 Water Pump Open / OFF#2 Water Fill Valve Open / OFF#3 Harvest Solenoid Open / OFF#4 Water Dump Valve Open / OFF#5 Contactor Coil Open / OFFCompressorOFFCondenser Fan MotorOFFSafety Controls (Which could stop ice machine operation)High Pressure Cut-OutClosedMain Fuse (On Control Board)ClosedPart No. 80-1100-3 6-9
Electrical System Section 6REMOTE MODELSInitial Start-Up Or Start-Up AfterAutomatic Shut-Off1. WATER PURGEBefore the compressor starts, thewater pump and water dumpsolenoid are energized for 45seconds to purge old water from theice machine. This ensures that theice-making cycle starts with freshwater.NOTE: The harvest valve andharvest pressure regulating (HPR)solenoid valve are also energizedduring the water purge. In the case ofan initial refrigeration start-up, theystay on for an additional 5 seconds(50 seconds total).TB35L1HIGH PRESCUTOUTTB32<strong>ICE</strong> THICKNESS PROBEWATER LEVEL PROBENOT USED(64)(66)(55)(62)(63)BIN SWITCH (65)24135TRANS.1C1F1GFUSE (7A)LOW D.C.VOLTAGEPLUG(67)(66)(68)(69)(62)(20)(61)(60)CLEAN LIGHTWATER LEVEL(73)BIN SWITCH LIGHTHARVEST LIGHT/SAFETY LIMIT CODE LIGHT<strong>ICE</strong>OFFCLEAN(58)(57)TB37SEE SERIAL PLATE FOR VOLTAGETB31(78) (79)(77)HARVEST (80)SOLENOID(56)(76)(59)(21)HPRSOLENOIDDUMPSOLENOID(98)(22)WATERVALVE(81)(99)WATERPUMP(75)(83)(82)LIQUID LINESOLENOID(74)CONTACTORCOILTOGGLE SWITCH VIEW FOR WIRING68INTERNAL WORKINGVIEW66676269L2 (N)TB30TB30TB30TB30(49)TB35(42)CONTACTORCONTACTSL1TB33(51)(52)*OVERLOAD(48)RCTERMINATES ATPIN CONNECTIONCOMPRESSORS(53)(47)TB34RUN CAPACITORR R(46)(45)PTCR(50)TB30(F1)(F2)TB30REMOTEFAN MOTORRUN CAPACITORREMOTE CONDENSERSV1648-1Table 6-8. Remote <strong>Model</strong>sFigure 6-8. Remote — Water Purge1. Water Purge (45 Seconds)Toggle Switch<strong>ICE</strong>Bin SwitchClosedControl Board Relays#1 Water Pump Closed / ON#2 Water Fill Valve Open / OFF#3 Harvest Solenoid Closed / ONHarvest Pressure Regulating (HPR) SolenoidClosed / ON#4 Water Dump Valve Closed / ON#5 Contactor Coil Open / OFFLiquid Line SolenoidDe-energizedCompressorOFFCondenser Fan MotorOFFSafety Controls (Which could stop ice machine operation)High Pressure Cut-OutClosedMain Fuse (On Control Board)Closed6-10 Part No. 80-1100-3
Section 6Electrical System2. REFRIGERATION SYSTEMSTART-UPThe compressor, remote condenserfan motor and liquid line solenoidvalve energize after the 45-secondwater purge, and remain onthroughout the Freeze and Harvestcycles.The water fill valve is energized atthe same time as the compressor. Itremains on until the water levelsensor closes for 3 continuousseconds.The harvest valve and harvestpressure regulating (HPR) solenoidvalve remain on for the first 5seconds of the initial compressorstart-up.NOTE: (The compressor and thecondenser fan motor are wiredthrough the contactor. Any time thecontactor coil is energized, thesecomponents are supplied withpower.)TB35TB35L1HIGH PRESCUTOUT<strong>ICE</strong> THICKNESS PROBEWATER LEVEL PROBENOT USED(42)CONTACTORCONTACTSL1TB32TB33(64)(66)(51)(52)(55)(63)BIN SWITCH (65)*OVERLOAD(48)(F1)(62)R24135TRANS.1CC(66)TERMINATES ATPIN CONNECTIONFUSE (7A)1F1G LOW D.C.VOLTAGEPLUG(67)S(53)(68) <strong>ICE</strong>(69)OFF(62) CLEAN(49)COMPRESSOR(47)TB34(20)(61)(60)(77)HARVEST (80)SOLENOID(76)(75)DUMP(81)(57)SOLENOIDTB31 (98)(99)WATERPUMP(58)TB37 (59) (83)(82)LIQUID LINESOLENOID(73)(74)CONTACTOR(56) COILCLEAN LIGHTWATER LEVELBIN SWITCH LIGHTHARVEST LIGHT/SAFETY LIMIT CODE LIGHTTOGGLE SWITCH VIEW FOR WIRING68INTERNAL WORKINGVIEW66676269RUN CAPACITOR(46)PTCRSEE SERIAL PLATE FOR VOLTAGER(45)(21)HPRSOLENOIDR(78)(22)WATERVALVE(50)(79)(F2)L2 (N)TB30TB30TB30TB30TB30TB30REMOTEFAN MOTORREMOTE CONDENSERSV1648-2Table 6-9. Remote <strong>Model</strong>sRUN CAPACITORFigure 6-9. Remote — Refrigeration System Start-Up2. Refrigeration System Start-Up (5 Seconds)Toggle Switch<strong>ICE</strong>Bin SwitchClosedControl Board Relays#1 Water Pump Open / OFF#2 Water Fill Valve Closed / ON#3 Harvest Solenoid Closed / ONHarvest Pressure Regulating (HPR) SolenoidClosed / ON#4 Water Dump Valve Open / OFF#5 Contactor Coil Closed / ONLiquid Line SolenoidEnergizedCompressorONCondenser Fan MotorONSafety Controls (Which could stop ice machine operation)High Pressure Cut-OutClosedMain Fuse (On Control Board)ClosedPart No. 80-1100-3 6-11
Electrical System Section 6Freeze Sequence3. PRE-CHILLTo pre-chill the evaporator, thecompressor runs for 30 seconds priorto water flow.NOTE: The water fill valve remainson until the water level sensor closesfor three continuous seconds.TB35L1HIGH PRESCUTOUTTB32<strong>ICE</strong> THICKNESS PROBEWATER LEVEL PROBENOT USED(55)(62)24135TRANS.1CFUSE (7A)1F1G LOW D.C.VOLTAGEPLUG(20)(61)(60)(58)(57)CLEAN LIGHTWATER LEVELBIN SWITCH LIGHTSEE SERIAL PLATE FOR VOLTAGETB31(21)HPRSOLENOID(78) (79)(77)HARVEST (80)SOLENOID(76)DUMPSOLENOID(22)WATERVALVE(81)(98) (99)WATERPUMP(75)TB37 (59) (83)(82)LIQUID LINESOLENOID(73)(74)CONTACTOR(56) COILL2 (N)TB30TB30TB30TB30(64)(66)(63)BIN SWITCH (65)(67)(66)(68) <strong>ICE</strong>(69)OFF(62) CLEANHARVEST LIGHT/SAFETY LIMIT CODE LIGHTTOGGLE SWITCH VIEW FOR WIRING68INTERNAL WORKINGVIEW66676269(49)TB35(42)CONTACTORCONTACTSL1TB33(51)(52)*OVERLOAD(48)RCTERMINATES ATPIN CONNECTIONCOMPRESSORS(53)(47)TB34RUN CAPACITORR R(46)(45)PTCR(50)TB30(F1)(F2)TB30REMOTEFAN MOTORREMOTE CONDENSERRUN CAPACITORSV1648-3Table 6-10. Remote <strong>Model</strong>sFigure 6-10. Remote — Pre-Chill3. Pre-Chill (30 Seconds)Toggle Switch<strong>ICE</strong>Bin SwitchClosedControl Board Relays#1 Water Pump Open / OFF#2 Water Fill Valve Closed / ON#3 Harvest Solenoid Open / OFFHarvest Pressure Regulating (HPR) SolenoidOpen / OFF#4 Water Dump Valve Open / OFF#5 Contactor Coil Closed / ONLiquid Line SolenoidEnergizedCompressorONCondenser Fan MotorONSafety Controls (Which could stop ice machine operation)High Pressure Cut-OutClosedMain Fuse (On Control Board)Closed6-12 Part No. 80-1100-3
Section 6Electrical System4. FREEZEThe water pump starts after the 30-second pre-chill. An even flow ofwater is directed across theevaporator and into each cube cell,where it freezes.After six minutes the water inlet valveis locked out and can not addadditional water.When sufficient ice has formed, thewater flow (not the ice) contacts theice thickness probes. Afterapproximately 7 seconds of continualcontact, a harvest cycle is initiated.NOTE: The ice machine cannotinitiate a harvest cycle until a 6-minute freeze lock has expired.TB35L1HIGH PRESCUTOUTTB32<strong>ICE</strong> THICKNESS PROBEWATER LEVEL PROBENOT USED(64)(66)(55)(62)(63)BIN SWITCH (65)24135TRANS.1CFUSE (7A)1F1G LOW D.C.VOLTAGEPLUG(67)(66)(20)(61)(60)(68) <strong>ICE</strong>(69)OFF(62) CLEAN(77)HARVEST (80)SOLENOID(76)(75)DUMP(81)(57)SOLENOIDTB31 (98)(99)WATERPUMP(58)TB37 (59) (83)(82)LIQUID LINESOLENOID(73)(74)CONTACTOR(56) COILCLEAN LIGHTWATER LEVELBIN SWITCH LIGHTHARVEST LIGHT/SAFETY LIMIT CODE LIGHTSEE SERIAL PLATE FOR VOLTAGE(21)HPRSOLENOID(78)(22)WATERVALVE(79)TOGGLE SWITCH VIEW FOR WIRING68INTERNAL WORKINGVIEW66676269L2 (N)TB30TB30TB30TB30(49)TB35(42)CONTACTORCONTACTSL1TB33(51)(52)*OVERLOAD(48)RCTERMINATES ATPIN CONNECTIONCOMPRESSORS(53)(47)TB34RUN CAPACITORR R(46)(45)PTCR(50)TB30(F1)(F2)TB30REMOTEFAN MOTORREMOTE CONDENSERRUN CAPACITORSV1648-4Figure 6-11. Remote — FreezeTable 6-11. Remote <strong>Model</strong>s4. Freeze (Until 7 Seconds of Water Contact with Ice Thickness Probe)Toggle Switch<strong>ICE</strong>Bin SwitchClosedControl Board Relays#1 Water Pump Closed / ON#2 Water Fill Valve Cycles / ON then OFF#3 Harvest Solenoid Open / OFFHarvest Pressure Regulating (HPR) SolenoidOpen / OFF#4 Water Dump Valve Open / OFF#5 Contactor Coil Closed / ONLiquid Line SolenoidEnergizedCompressorONCondenser Fan MotorONSafety Controls (Which could stop ice machine operation)High Pressure Cut-OutClosedMain Fuse (On Control Board)ClosedPart No. 80-1100-3 6-13
Electrical System Section 6Harvest Sequence5. WATER PURGEThe water pump continues to run,and the water dump valve energizesfor 45 seconds to purge the water inthe sump trough. The water fill valveenergizes (turns on) and deenergizes(turns off) strictly by time.The water fill valve energizes for thelast 15 seconds of the 45-secondwater purge. The water purge mustbe at the factory setting of 45seconds for the fill valve to energizeduring the last 15 seconds of theWater Purge. If set at less than 45seconds the water fill valve does notenergize during the water purge.NOTE: After the 45 second waterpurge, the water fill valve, waterpump and dump valve de-energize.(Refer to “Water Purge Adjustment”on Page 3-3 for details.) The harvestvalve and HPR solenoid also open atthe beginning of the water purge todivert hot refrigerant gas into theevaporator.TB35TB35L1HIGH PRESCUTOUT<strong>ICE</strong> THICKNESS PROBEWATER LEVEL PROBENOT USED(42)CONTACTORCONTACTSL1TB32TB33(64)(66)(51)(52)(55)(63)BIN SWITCH (65)*OVERLOAD(48)(F1)(62)R24135TRANS.1CC(66)TERMINATES ATPIN CONNECTIONFUSE (7A)1F1G LOW D.C.VOLTAGEPLUG(67)S(53)(20)(68) <strong>ICE</strong>(69)OFF(62) CLEAN(49)COMPRESSOR(47)TB34(61)(60)(77)HARVEST (80)SOLENOID(76)(75)DUMP(81)(57)SOLENOIDTB31 (98) (99)WATERPUMP(58)TB37 (59) (83)(82)LIQUID LINESOLENOID(73)(74)CONTACTOR(56) COILCLEAN LIGHTWATER LEVELBIN SWITCH LIGHTHARVEST LIGHT/SAFETY LIMIT CODE LIGHTTOGGLE SWITCH VIEW FOR WIRING68INTERNAL WORKINGVIEW66676269RUN CAPACITOR(46)PTCRSEE SERIAL PLATE FOR VOLTAGER(45)(21)HPRSOLENOIDR(78)(22)WATERVALVE(50)(79)(F2)L2 (N)TB30TB30TB30TB30TB30TB30REMOTEFAN MOTORREMOTE CONDENSERRUN CAPACITORSV1648-5Table 6-12. Remote <strong>Model</strong>sFigure 6-12. Remote — Water Purge5. Water Purge (45 Seconds)Toggle Switch<strong>ICE</strong>Bin SwitchClosedControl Board Relays#1 Water Pump Closed / ON#2 Water Fill Valve Cycles / OFF then ON#3 Harvest Solenoid Closed / ONHarvest Pressure Regulating (HPR) SolenoidClosed / ON#4 Water Dump Valve Closed / ON#5 Contactor Coil Closed / ONLiquid Line SolenoidEnergizedCompressorONCondenser Fan MotorONSafety Controls (Which could stop ice machine operation)High Pressure Cut-OutClosedMain Fuse (On Control Board)Closed6-14 Part No. 80-1100-3
Section 6Electrical System6. HARVESTThe harvest valve(s) and HPRsolenoid valve remain open, allowingrefrigerant gas to warm theevaporator. This causes the cubes toslide, as a sheet, off the evaporatorand into the storage bin.The sliding sheet of cubes swings thewater curtain out, opening the binswitch. This momentary opening andclosing of the bin switch terminatesthe Harvest Cycle and returns the icemachine to the Freeze Cycle (steps3-4).TB35L1HIGH PRESCUTOUTTB32<strong>ICE</strong> THICKNESS PROBEWATER LEVEL PROBENOT USED(55)(62)24135TRANS.1CFUSE (7A)1F1G LOW D.C.VOLTAGEPLUG(20)(61)(60)(77)HARVEST (80)SOLENOID(76)(75)DUMP(81)(57)SOLENOIDTB31 (98)(99)WATERPUMP(58)TB37 (59) (83)(82)LIQUID LINESOLENOID(73) (74)CONTACTOR(56) COILCLEAN LIGHTWATER LEVELBIN SWITCH LIGHTSEE SERIAL PLATE FOR VOLTAGE(21)HPRSOLENOID(78)(22)WATERVALVE(79)L2 (N)TB30TB30TB30TB30(64)(66)(63)BIN SWITCH (65)(67)(66)(68) <strong>ICE</strong>(69)OFF(62) CLEANHARVEST LIGHT/SAFETY LIMIT CODE LIGHTTOGGLE SWITCH VIEW FOR WIRING68INTERNAL WORKINGVIEW66676269(49)TB35(42)CONTACTORCONTACTSL1TB33(51)(52)*OVERLOAD(48)RCTERMINATES ATPIN CONNECTIONCOMPRESSORS(53)(47)TB34RUN CAPACITORR R(46)(45)PTCR(50)TB30(F1)(F2)TB30REMOTEFAN MOTORRUN CAPACITORREMOTE CONDENSERSV1648-6Table 6-13. Remote <strong>Model</strong>sFigure 6-13. Remote — Harvest6. Harvest (Until Bin Switch Activation)Toggle Switch<strong>ICE</strong>Bin SwitchClosedControl Board Relays#1 Water Pump Open / OFF#2 Water Fill Valve Open / OFF#3 Harvest Solenoid Closed / ONHarvest Pressure Regulating (HPR) SolenoidClosed / ON#4 Water Dump Valve Open / OFF#5 Contactor Coil Closed / ONLiquid Line SolenoidEnergizedCompressorONCondenser Fan MotorONSafety Controls (Which could stop ice machine operation)High Pressure Cut-OutClosedMain Fuse (On Control Board)ClosedPart No. 80-1100-3 6-15
Electrical System Section 6Automatic Shut-Off7. AUTOMATIC SHUT-OFFIf the storage bin is full at the end of aharvest cycle, the sheet of cubes failsto clear the water curtain and holds itopen. After the water curtain is heldopen for 7 seconds, the ice machineshuts off.The ice machine remains off untilenough ice is removed from thestorage bin to allow the sheet ofcubes to drop clear of the watercurtain. As the water curtain swingsback to the operating position, the binswitch closes and the ice machinerestarts.NOTE: The ice machine must remainoff for 3 minutes before it canautomatically restart.TB35TB35L1HIGH PRESCUTOUT<strong>ICE</strong> THICKNESS PROBEWATER LEVEL PROBENOT USED(42)CONTACTORCONTACTSL1TB32TB33(64)(66)(51)(52)(55)(63)BIN SWITCH (65)*OVERLOAD(48)(F1)(62)R24135TRANS.1CC(66)TERMINATES ATPIN CONNECTIONFUSE (7A)1F1G LOW D.C.VOLTAGEPLUG(67)S(53)(68) <strong>ICE</strong>(69)OFF(62) CLEAN(49)COMPRESSOR(47)TB34(20)(61)(60)(77)HARVEST (80)SOLENOID(76)(75)DUMP(81)(57)SOLENOIDTB31 (98)(99)WATERPUMP(58)TB37 (59) (83)(82)LIQUID LINESOLENOID(73)(74)CONTACTOR(56) COILCLEAN LIGHTWATER LEVELBIN SWITCH LIGHTHARVEST LIGHT/SAFETY LIMIT CODE LIGHTTOGGLE SWITCH VIEW FOR WIRING68INTERNAL WORKINGVIEW66676269RUN CAPACITOR(46)PTCRSEE SERIAL PLATE FOR VOLTAGER(45)(21)HPRSOLENOIDR(78)(22)WATERVALVE(50)(79)(F2)L2 (N)TB30TB30TB30TB30TB30TB30REMOTEFAN MOTORREMOTE CONDENSERRUN CAPACITORSV1648-7Table 6-14. Remote <strong>Model</strong>sFigure 6-14. Remote — Automatic Shut-Off7. Automatic Shut-Off (Until Bin Switch Closes)Toggle Switch<strong>ICE</strong>Bin SwitchOpenControl Board Relays#1 Water Pump Open / OFF#2 Water Fill Valve Open / OFF#3 Harvest Solenoid Open / OFFHarvest Pressure Regulating (HPR) SolenoidOpen / OFF#4 Water Dump Valve Open / OFF#5 Contactor Coil Open / OFFLiquid Line SolenoidDe-energizedCompressorONCondenser Fan MotorONSafety Controls (Which could stop ice machine operation)High Pressure Cut-OutClosedMain Fuse (On Control Board)Closed6-16 Part No. 80-1100-3
Section 6Electrical SystemWiring DiagramsThe following pages contain electrical wiring diagrams. Be sure you are referring to the correct diagram for the icemachine which you are servicing.! WarningAlways disconnect power before working onelectrical circuitry.WIRING DIAGRAM LEGENDThe following symbols are used on all of the wiring diagrams:* Internal Compressor Overload(Some models have external compressor overloads)** Fan Motor Run Capacitor(Some models do not incorporate fan motor run capacitor)TB Terminal Board Connection(Terminal board numbers are printed on the actual terminal board)( ) Wire Number Designation(The number is marked at each end of the wire)—>>— Multi-Pin Connection(Electrical Box Side) —>>— (Compressor Compartment Side)Part No. 80-1100-3 6-17
Electrical System Section 6Q200/Q280/Q320 - SELF CONTAINED - 1 PHASE WITH TERMINAL BOARDL1CAUTION: DISCONNECT POWER BEFORE WORKINGON ELECTRICAL CIRCUITRY.DIAGRAM SHOWN DURING FREEZE CYCLE(20)SEE SERIAL PLATE FOR VOLTAGE(21) (22)L2 (N)TB35HIGH PRESCUTOUTTB32(55)24135(61)(60)(57)WATERVALVE(77)HARVESTSOLENOID(76)DUMPSOLENOID(80)(81)(75)TB30TRANS.FUSE (7A)(58)TB37TB31(59)(98)WATERPUMPTERMINATES ATPIN CONNECTION(99)TB30<strong>ICE</strong> THICKNESS PROBEWATER LEVEL PROBENOT USED1C1F1GLOW D.C.VOLTAGEPLUG(73)(56)CLEAN LIGHTWATER LEVEL LIGHTCONTACTORCOIL(74)TB30TB30(62)BIN SWITCH LIGHT(64)(66)(63)BIN SWITCH(65)(67)(66)TOGGLE SWITCH(68)(69)(62)HARVEST LIGHT/SAFETY LIMIT CODE LIGHT<strong>ICE</strong>OFFCLEANINTERNAL WORKINGVIEWVIEW FOR WIRING6866626769COMPRESSOR(49)(47)TB30TB35(42)CONTACTORCONTACTSL1TB33(48)(51)(52)R*OVERLOAD C(85) (86)S(53)TB34PTCRFAN MOTOR(AIR COOLED ONLY)(50)TB30TB30FAN CYCLE CONTROLRUN CAPACITOR**SV16546-18 Part No. 80-1100-3
Section 6Electrical SystemQ280/Q370 - SELF CONTAINED - 1 PHASE WITHOUT TERMINAL BOARDSEE SERIAL PLATE FOR VOLTAGEL2 (N)L1CAUTION: DISCONNECT POWER BEFORE WORKINGON ELECTRICAL CIRCUITRY.DIAGRAM SHOWN DURING FREEZE CYCLE(20)(61)(21) (22)WATERVALVE(60)(88)(89)HIGH PRESCUTOUT(55)24315TRANS.FUSE (7A)(57)(58)(77)HARVESTSOLENOID(76)DUMPSOLENOID(98)(81)WATERPUMP(99)(80)(75)(59)TERMINATES ATPIN CONNECTION(42)<strong>ICE</strong> THICKNESS PROBEWATER LEVEL PROBENOT USED(62)1C1F1GLOW D.C.VOLTAGEPLUGCLEAN LIGHTWATER LEVELBIN SWITCH LIGHT(56)CONTACTORCOIL(74)(63)(64)BIN SWITCH (65)(67)(66) (66)(68)(69)(62)HARVEST LIGHT/SAFETY LIMIT CODE LIGHT<strong>ICE</strong>OFFCLEANVIEW FORWIRING6662686769COMPRESSORCONTACTORCONTACTSOVERLOAD INTERNAL{230V 50/60 HZ}RCS(47)L1(51)(48)5 2(46) (44)POTENTIALRELAY4 1STARTCAPACITOR(45)(49)RCSCOMPRESSORTERMINAL LAYOUTVIEWED FROM ENDOF COMPRESSOR(50)(85)(86)FAN CYCLE CONTROLFAN MOTOR(AIR COOLED ONLY)RUN CAPACITOR**SV3018Part No. 80-1100-3 6-19
Electrical System Section 6Q320 - SELF CONTAINED - 1 PHASE WITHOUT TERMINAL BOARDCAUTION: DISCONNECT POWER BEFORE WORKINGON ELECTRICAL CIRCUITRY.SEE SERIAL PLATE FOR VOLTAGEL1HIGH PRESCUTOUT(88)(89)(55)DIAGRAM SHOWN DURING FREEZE CYCLE(61)24315(60)(20)(21)WATERVALVE(77)HARVESTSOLENOID(76)DUMPSOLENOID(22)(80)(81)(75)L2 (N)TRANS.(57)(98)(99)WATERPUMP(42)<strong>ICE</strong> THICKNESS PROBEWATER LEVEL PROBENOT USED(62)1C1F1GFUSE (7A)LOW D.C.VOLTAGEPLUGCLEAN LIGHTWATER LEVEL(58)BIN SWITCH LIGHT(59)TERMINATES ATPIN CONNECTION(56)CONTACTORCOIL(74)BIN SWITCH(63)HARVEST LIGHT/SAFETY LIMIT CODE LIGHT(64)(65)TOGGLE SWITCH<strong>ICE</strong>(68)(67)(69)OFF(66)CLEAN(62)(49)VIEW FOR WIRING6866676269RSCOMPRESSOR(47)CONTACTORCONTACTS*OVERLOADC(50)L1(48)PTCRFAN MOTOR(AIR COOLED ONLY)(51)(85) (86)FAN CYCLE CONTROLRUN CAPACITOR**COMPRESSOR(49)OVERLOAD(47)RUN CAPACITORR R(46)(50)(48)(45)PTCRSV20706-20 Part No. 80-1100-3
Section 6Electrical SystemQ420/Q450/Q600/Q800/Q1000 - SELF CONTAINED -1 PHASE WITH TERMINAL BOARDCAUTION: DISCONNECT POWER BEFORE WORKINGON ELECTRICAL CIRCUITRY.SEE SERIAL PLATE FOR VOLTAGEL1DIAGRAM SHOWN DURING FREEZE CYCLEL2 (N)TB35HIGH PRESCUTOUTTB32(55)2(61)(60)(20)(21)WATERVALVE(77)(22)4135(57)HARVESTSOLENOID(76)DUMPSOLENOID(80)(81)(75)TB30TRANS.FUSE (7A)(58)TB31TB37(59)(98)(99)WATERPUMPTERMINATES ATPIN CONNECTIONTB30<strong>ICE</strong> THICKNESS PROBEWATER LEVEL PROBENOT USED1C1F1GLOW D.C.VOLTAGEPLUGCLEAN LIGHTWATER LEVEL LIGHT(56)(73)CONTACTORCOIL(74)TB30TB30(62)BIN SWITCH LIGHT(64)(66)BIN SWITCH(63)(65)(67)(66)TOGGLE SWITCH(68) <strong>ICE</strong>(69)OFF(62)HARVEST LIGHT/SAFETY LIMIT CODE LIGHTCLEANINTERNAL WORKINGVIEWVIEW FOR WIRING6866676269(49)CONTACTORCONTACTS*OVERLOADRCCOMPRESSORS(47)RUN CAPACITORR R(46) (50)TB30TB35(42)L1TB33(48) (45)(51)PTCR(52) (85) (86) (53)TB34FAN CYCLE CONTROLRUN CAPACITOR**FAN MOTOR(AIR COOLED ONLY)TB30SV1646Part No. 80-1100-3 6-21
Electrical System Section 6Q420/Q450/Q600/Q800/Q1000 - SELF CONTAINED -1 PHASE WITHOUT TERMINAL BOARDL1CAUTION: DISCONNECT POWER BEFORE WORKINGON ELECTRICAL CIRCUITRY.SEE SERIAL PLATE FOR VOLTAGEL2 (N)DIAGRAM SHOWN DURING FREEZE CYCLE(20) (21)(22)(89)(55)(61)WATERVALVEHIGH PRESCUTOUT2(77)(88)43(60)HARVESTSOLENOID(80)1(76)(75)5DUMPSOLENOID(81)TRANS.FUSE (7A)(57)(98)WATERPUMP(99)(59)TERMINATES ATPIN CONNECTION<strong>ICE</strong> THICKNESS PROBEWATER LEVEL PROBENOT USED1C1F1GLOW D.C.VOLTAGEPLUG(58)(56)CLEAN LIGHTWATER LEVELCONTACTORCOIL(74)(62)BIN SWITCH LIGHTBIN SWITCH(63)HARVEST LIGHT/SAFETY LIMIT CODE LIGHT(64)(65)TOGGLE SWITCH(67) (68)(69)(66)(62)<strong>ICE</strong>OFFCLEANVIEW FOR WIRING6866676269COMPRESSOR(49)(50)RS(42)CONTACTORCONTACTS*OverloadC(47)(50)(48)L1(45) (46)(51)(85) (86)FAN CYCLE CONTROLPTCRFAN MOTOR(AIR COOLED ONLY)RUN CAPACITOR**SV20716-22 Part No. 80-1100-3
Section 6Electrical SystemQ800/Q1000 - SELF CONTAINED - 3 PHASE WITH TERMINAL BOARDSEE SERIAL PLATE FOR VOLTAGEL3 L2 L1CAUTION: DISCONNECT POWER BEFORE WORKINGON ELECTRICAL CIRCUITRY.DIAGRAM SHOWN DURING FREEZE CYCLETB35HIGH PRESCUTOUTTB322(61)(60)(20)(21) (22)WATERVALVE(77)41HARVESTSOLENOID(80)<strong>ICE</strong> THICKNESS PROBEWATER LEVEL PROBENOT USED(55)35TRANS.1C1F1GFUSE (7A)LOW D.C.VOLTAGEPLUG(58)(57)CLEAN LIGHTTB37TB31(56)WATER LEVEL LIGHT(59)(73)(76)DUMPSOLENOID(98)(81)(99)WATERPUMPTERMINATES ATPIN CONNECTIONCONTACTORCOIL(74)(75)TB30TB30TB30TB30(62)BIN SWITCH LIGHT(64)(66)BIN SWITCH(63)(65)(67)(66)TOGGLE SWITCH(68) <strong>ICE</strong>(69)OFF(62)HARVEST LIGHT/SAFETY LIMIT CODE LIGHTCLEANINTERNAL WORKINGVIEWVIEW FOR WIRING6866676269(42)(96)TB30TB35L3L2L1TB33(52)(85) (86)FAN CYCLE CONTROL(53)TB34FAN MOTOR(AIR COOLED ONLY)TB30T2COMPRESSORRUN CAPACITOR**T3T1SV1647aPart No. 80-1100-3 6-23
Electrical System Section 6Q800/Q1000 - SELF CONTAINED - 3 PHASE WITHOUT TERMINAL BOARDCAUTION: DISCONNECT POWER BEFORE WORKINGON ELECTRICAL CIRCUITRY.DIAGRAM SHOWN DURING FREEZE CYCLESEE SERIAL PLATE FOR VOLTAGEL3L2L1(89)(55)(20) (21)(61)WATERVALVE(22)(88)HIGH PRESCUTOUT243(60)(77)HARVESTSOLENOID(80)(42)15(76)DUMPSOLENOID(81)(75)TRANS.FUSE (7A)(57)(98)WATERPUMP(99)(59)TERMINATES ATPIN CONNECTION<strong>ICE</strong> THICKNESS PROBEWATER LEVEL PROBENOT USED1C1F1GLOW D.C.VOLTAGEPLUG(58)(56)CLEAN LIGHTWATER LEVELCONTACTORCOIL(74)BIN SWITCH(64)(62)(63)(65)(67)(66)TOGGLE SWITCH(68)<strong>ICE</strong>(69)OFF(62)CLEANBIN SWITCH LIGHTHARVEST LIGHT/SAFETY LIMIT CODE LIGHTVIEW FOR WIRING6662686769L3L2L1CONTACTORCONTACTSFAN MOTOR(AIR COOLED ONLY)(51)(85) (86)T2FAN CYCLE CONTROLRUN CAPACITOR**T3T1SV20726-24 Part No. 80-1100-3
Section 6Electrical SystemQ1300/Q1800 - SELF CONTAINED - 1 PHASE WITH TERMINAL BOARDL1CAUTION: DISCONNECT POWER BEFORE WORKINGON ELECTRICAL CIRCUITRY.DIAGRAM SHOWN DURING FREEZE CYCLE(20)SEE SERIAL PLATE FOR VOLTAGE(21)WATERVALVEL2(N)(22)TB35HIGH PRESCUTOUTTB32(55)24135(61)(60)(57)RH HARVESTSOLENOID(77)(88)LH HARVESTSOLENOID(76)DUMPSOLENOID(80)(81)(87)(75)TB30<strong>ICE</strong> THICKNESS PROBEWATER LEVEL PROBEAUCS DISPENSE TIMETRANS.1C1F1GFUSE (7A)LOW D.C.VOLTAGEPLUG(58)CLEAN LIGHTTB31TB37WATER LEVEL LIGHT(59)(56)(73)(98)(99)WATERPUMPTERMINATES ATPIN CONNECTIONCONTACTORCOIL(74)TB30TB30TB30(62)BIN SWITCH LIGHT(64)(66)BIN SWITCH(63)(65)(67)(66)TOGGLE SWITCH(68)(69)(62)HARVEST LIGHT/SAFETY LIMIT CODE LIGHT<strong>ICE</strong>OFFCLEANINTERNAL WORKINGVIEWVIEW FOR WIRING6866676269TB35(95)CRANKCASE HEATER(49)(94)TB30COMPRESSOR(47)RUN CAPACITORCONTACTORCONTACTS*OVERLOADRCS(46)R R(50)CONTACTORCONTACTSTB35(42)L1TB33(51)(52)(48) (45)PTCR(44)(85) (86) (53)TB34L2(96)TB30FAN CYCLE CONTROLRUN CAPACITOR**FAN MOTOR(AIR COOLED ONLY)SV1652Part No. 80-1100-3 6-25
Electrical System Section 6Q1300/Q1600/Q1800 - SELF CONTAINED - 1 PHASE WITHOUT TERMINAL BOARDCAUTION: DISCONNECT POWER BEFORE WORKINGON ELECTRICAL CIRCUITRY.SEE SERIAL PLATE FOR VOLTAGEL1DIAGRAM SHOWN DURING FREEZE CYCLEL2 (N)(20) (21)(22)(89)(55)WATERVALVEHIGH PRESCUTOUT(88)243(60)(61)(77) (80)HARVESTSOLENOID(42)15(76)DUMPSOLENOID(81)(75)TRANS.FUSE (7A)(57)(98)WATERPUMP(99)(59)TERMINATES ATPIN CONNECTION<strong>ICE</strong> THICKNESS PROBE1C(58)WATER LEVEL PROBE1F(56)CONTACTORCOILAUCS DISPENSE TIME1GLOW D.C.VOLTAGEPLUGCLEAN LIGHTWATER LEVEL LIGHT(74)(62)BIN SWITCH LIGHTBIN SWITCH(63)HARVEST LIGHT/SAFETY LIMIT CODE LIGHT(64)(65)TOGGLE SWITCH(67)(68)(69)<strong>ICE</strong>VIEW FOR WIRING68(66)OFF6667(62)CLEAN6269(95)CRANKCASE HEATER(94)COMPRESSOR(49)RS(47)RUN CAPACITOR*OVERLOADC(46)(50)(48)(45)(96)L1L2CONTACTORCONTACTSPTCRCONTACTORCONTACTS(51)(85) (86)FAN CYCLE CONTROLFAN MOTOR(AIR COOLED ONLY)RUN CAPACITOR**SV20756-26 Part No. 80-1100-3
Section 6Electrical SystemQ1300/Q1800 - SELF CONTAINED - 3 PHASE WITH TERMINAL BOARDSEE SERIAL PLATE FOR VOLTAGEL3 L2 L1CAUTION: DISCONNECT POWER BEFORE WORKINGON ELECTRICAL CIRCUITRY.DIAGRAM SHOWN DURING FREEZE CYCLE (20)(21)WATERVALVE(22)TB35HIGH PRESCUTOUTTB32<strong>ICE</strong> THICKNESS PROBEWATER LEVEL PROBEAUCS DISPENSE TIME(55)24135TRANS.1C1F1GFUSE (7A)LOW D.C.VOLTAGEPLUG(61)(60)(58)(57)CLEAN LIGHTTB31(77)LH HARVESTSOLENOIDTB37(59)(56)WATER LEVEL LIGHTRH HARVESTSOLENOID(88)(76)(73)DUMPSOLENOID(98)(80)(81)(87)WATERPUMPCONTACTORCOIL(99)TERMINATES ATPIN CONNECTION(74)(75)N - 50HZONLYTB30TB30TB30TB30TB30(62)BIN SWITCH LIGHT(64)(66)BIN SWITCH(63)(65)(67)(66)TOGGLE SWITCH(68) <strong>ICE</strong>(69)OFF(62)CLEANHARVEST LIGHT/SAFETY LIMIT CODE LIGHTINTERNAL WORKINGVIEWVIEW FOR WIRING6866676269TB35(95)CRANKCASE HEATER(94)TB30L3L2L1(42)TB35(96)NOTE: WIRE (96) IS NOT USED ON 50HZTB30TB33 (52)(85) (86)FAN CYCLE CONTROL(53)TB34FAN MOTOR(AIR COOLED ONLY)TB30T2COMPRESSORRUN CAPACITOR**SV1653T3T1Part No. 80-1100-3 6-27
Electrical System Section 6Q1300/Q1600/Q1800 - SELF CONTAINED - 3 PHASE WITHOUT TERMINAL BOARDSEE SERIAL PLATE FOR VOLTAGEL3 L2 L1(88)HIGH PRESCUTOUT(89) (55)CAUTION: DISCONNECT POWER BEFORE WORKINGON ELECTRICAL CIRCUITRY.DIAGRAM SHOWN DURING FREEZE CYCLE243(60)(61)(20) (21)(22)WATERVALVERH HARVESTSOLENOID(88)(77)LH HARVESTSOLENOID(87)(80)N - 50HZONLY(42)15(76)DUMPSOLENOID(81)(75)TRANS.FUSE (7A)(57)(98) (99)WATERPUMP<strong>ICE</strong> THICKNESS PROBEWATER LEVEL PROBEAUCS DISPENSE TIME(62)BIN SWITCH(63)(64)(65)1C1F1GLOW D.C.VOLTAGEPLUG(67)(66)TOGGLE SWITCH(68)<strong>ICE</strong>(69)OFF(62) CLEAN(58)(56)CLEAN LIGHTWATER LEVEL LIGHTBIN SWITCH LIGHT(59)HARVEST LIGHT/SAFETY LIMIT CODE LIGHTCONTACTORCOILVIEW FOR WIRING6866676269TERMINATES ATPIN CONNECTION(95)CRANKCASE HEATERNOTE: WIRE (96) IS NOT USED ON 50HZ(94)(96)L3L2L1CONTACTORCONTACTSFAN MOTOR(AIR COOLED ONLY)(51)(85) (86)T2FAN CYCLE CONTROLRUN CAPACITOR**T3T1COMPRESSORSV30086-28 Part No. 80-1100-3
Section 6Electrical SystemQ450/Q600/Q800/Q1000 - REMOTE - 1 PHASE WITH TERMINAL BOARDL1CAUTION: DISCONNECT POWER BEFORE WORKINGON ELECTRICAL CIRCUITRY.DIAGRAM SHOWN DURING FREEZE CYCLE(20)SEE SERIAL PLATE FOR VOLTAGE(21)(22)L2 (N)TB35HIGH PRESCUTOUTTB32(55)24135(61)(60)(57)HPRSOLENOID(77)(76)(78)HARVESTSOLENOIDDUMPSOLENOIDWATERVALVE(79)(80)(81)(75)TB30<strong>ICE</strong> THICKNESS PROBEWATER LEVEL PROBENOT USEDTRANS.1C1F1GFUSE (7A)LOW D.C.VOLTAGEPLUG(58)CLEAN LIGHTTB37TB31WATER LEVEL LIGHT(56)(59)(73)(98)(83)(99)WATERPUMPCONTACTORCOIL(82)LIQUID LINESOLENOID(74)TB30TB30TB30(62)BIN SWITCH LIGHT(64)(66)BIN SWITCH(63)(65)(66)(67)TOGGLE SWITCH(68)(69)(62)<strong>ICE</strong>OFFCLEANHARVEST LIGHT/SAFETY LIMIT CODE LIGHTINTERNAL WORKINGVIEWVIEW FOR WIRING6866676269(49)COMPRESSOR(47)RUN CAPACITORCONTACTORCONTACTS*OVERLOADRCSR R(46) (50)TB30TB35(42)L1TB33(51)(52)(48) (45)TERMINATES ATPIN CONNECTION(53)TB34PTCR(F1)(F2)TB30REMOTEFAN MOTORREMOTE CONDENSERRUN CAPACITORSV1648Part No. 80-1100-3 6-29
Electrical System Section 6Q450/Q600/Q800/Q1000 - REMOTE - 1 PHASE WITHOUT TERMINAL BOARDCAUTION: DISCONNECT POWER BEFORE WORKINGON ELECTRICAL CIRCUITRY.SEE SERIAL PLATE FOR VOLTAGEL1DIAGRAM SHOWN DURING FREEZE CYCLE(20) (21)(22)L2 (N)(89)(55) (61)HPRSOLENOIDWATERVALVE(78) (79)HIGH PRESCUTOUT2(88)(42)4135TRANS.FUSE (7A)(60)(57)(88) (80)HARVESTSOLENOID(77)DUMPSOLENOID(98)(81)(99)WATERPUMP(75)(59) (83) (82)<strong>ICE</strong> THICKNESS PROBEWATER LEVEL PROBEAUCS DISPENSE TIME1C1F1GLOW D.C.VOLTAGEPLUGCLEAN LIGHTWATER LEVEL LIGHT(58)(56)CONTACTORCOIL(74)LIQUID LINESOLENOID(62)BIN SWITCH LIGHTBIN SWITCH(63)HARVEST LIGHT/SAFETY LIMIT CODE LIGHT(64)(65)TOGGLE SWITCH(67)(66)(68) <strong>ICE</strong>(69)OFF(62)CLEANVIEW FOR WIRING6662686769COMPRESSORRS(49)(47)RUN CAPACITOR(94)CONTACTORCONTACTS*OVERLOADC(46)RR(50)(48)(45)L1PTCR(51)F1F2REMOTEFAN MOTORREMOTE CONDENSERRUN CAPACITOR**SV20736-30 Part No. 80-1100-3
Section 6Electrical SystemQ800/Q1000 -REMOTE - 3 PHASE WITH TERMINAL BOARDSEE SERIAL PLATE FOR VOLTAGEL3 L2 L1TB35HIGH PRESCUTOUTTB32<strong>ICE</strong> THICKNESS PROBEWATER LEVEL PROBEAUCS DISPENSE TIME(64)CAUTION: DISCONNECT POWER BEFORE WORKINGON ELECTRICAL CIRCUITRY.DIAGRAM SHOWN DURING FREEZE CYCLE(20)(55)BIN SWITCH(62)(63)(65)24135TRANS.1C1F1GFUSE (7A)LOW D.C.VOLTAGEPLUG(61)(60)TOGGLE SWITCH(67)(68)(69)<strong>ICE</strong>(66)OFF(62) CLEAN(58)(57)CLEAN LIGHTTB31TB37WATER LEVEL LIGHTBIN SWITCH LIGHTHPRSOLENOID(77)(76)(59)(98)(78)HARVESTSOLENOID(73)(56)HARVEST LIGHT/SAFETY LIMIT CODE LIGHTINTERNAL WORKINGVIEW(21)DUMPSOLENOID(22)WATERVALVE(79)(80)(81)(99)WATERPUMP(75)(83)(82)LIQUID LINESOLENOID(74)CONTACTORCOILVIEW FOR WIRING6866676269TB30TB30TB30TB30(42)(96)TB30L3L2L1TB35CONTACTORCONTACTS(F1)(F2)TB30TB33 (52)TERMINATES ATPIN CONNECTION(53)TB34T2COMPRESSORREMOTEFAN MOTORT3T1REMOTE CONDENSERRUN CAPACITORSV1649Part No. 80-1100-3 6-31
Electrical System Section 6Q800/Q1000 -REMOTE - 3 PHASE WITHOUT TERMINAL BOARDSEE SERIAL PLATE FOR VOLTAGEL3 L2 L1(89)(55)CAUTION: DISCONNECT POWER BEFORE WORKINGON ELECTRICAL CIRCUITRY.DIAGRAM SHOWN DURING FREEZE CYCLE(60)(20)(61)(21)(22)WATERVALVEHPRSOLENOID (79)(78)(88)HIGH PRESCUTOUT243(77)HARVESTSOLENOID(80)(42)15(76)DUMPSOLENOID(81)(75)TRANS.FUSE (7A)(57)(98)WATERPUMP(99)<strong>ICE</strong> THICKNESS PROBEWATER LEVEL PROBENOT USEDBIN SWITCH(64)(62)(63)(65)1C1F1GLOW D.C.VOLTAGEPLUGTOGGLE SWITCH(68) <strong>ICE</strong>(67)(69)OFF(66)CLEAN(62)(58)(56)CLEAN LIGHTWATER LEVEL LIGHTBIN SWITCH LIGHT(59)HARVEST LIGHT/SAFETY LIMIT CODE LIGHTINTERNAL WORKINGVIEW(83)(82)LIQUID LINESOLENOIDCONTACTORCOIL(74)VIEW FOR WIRING6866676269L3L2L1CONTACTORCONTACTS(51)(85)(F2)(F1)T2REMOTEFAN MOTORT3T1COMPRESSORRUN CAPACITORREMOTE CONDENSERSV20746-32 Part No. 80-1100-3
Section 6Electrical SystemQ1300/Q1800 - REMOTE - 1 PHASE WITH TERMINAL BOARDCAUTION: DISCONNECT POWER BEFORE WORKINGON ELECTRICAL CIRCUITRY.DIAGRAM SHOWN DURING FREEZE CYCLE(20)(21)SEE SERIAL PLATE FOR VOLTAGEWATERVALVE(22)L2 (N)L1HPRSOLENOID(78)(79)TB35HIGH PRESCUTOUTTB32(55)24135(61)(60)RH HARVESTSOLENOID(57)(77)LH HARVESTSOLENOID(76)(88)DUMPSOLENOID(87)(80)(81)(75)TB30<strong>ICE</strong> THICKNESS PROBEWATER LEVEL PROBEAUCS DISPENSE TIMETRANS.1C1F1GFUSE (7A)LOW D.C.VOLTAGEPLUG(58)CLEAN LIGHTTB31TB37WATER LEVEL LIGHT(59)(56)(73)(98)(83)(99)WATERPUMPCONTACTORCOIL(82)LIQUID LINESOLENOID(74)TB30TB30TB30(62)BIN SWITCH LIGHT(64)(66)BIN SWITCH(63)(65)(67)(66)TOGGLE SWITCH(68)(69)(62)<strong>ICE</strong>OFFCLEANHARVEST LIGHT/SAFETY LIMIT CODE LIGHTINTERNAL WORKINGVIEWVIEW FOR WIRING6866676269TB35(95)CRANKCASE HEATER (94)TB30(49)TB35(42)CONTACTORCONTACTSL1TB33(51)(52)*OVERLOADRCTERMINATES ATPIN CONNECTIONCOMPRESSORS(53)TB34R R(46) (50)(48) (45)(47)RUN CAPACITORPTCR(44)CONTACTORCONTACTS(F2)L2(96)TB30(F1)REMOTEFAN MOTORREMOTE CONDENSERRUN CAPACITORSV1650Part No. 80-1100-3 6-33
Electrical System Section 6Q1300/Q1600/Q1800 - REMOTE - 1 Phase Without Terminal BoardL1CAUTION: DISCONNECT POWER BEFORE WORKINGON ELECTRICAL CIRCUITRY.DIAGRAM SHOWN DURING FREEZE CYCLE (20)(21)SEE SERIAL PLATE FOR VOLTAGEHPRSOLENOID(22)WATERVALVEL2 (N)(89)(55)RH HARVESTSOLENOID(78)(79)HIGH PRESCUTOUT(61)(88)(87)(88)241(60)(77)LH HARVESTSOLENOID(80)3(76)(81)(75)5DUMPSOLENOIDTRANS.FUSE (7A)(57)TB37(98)(99)WATERPUMP(59)(83)(82)<strong>ICE</strong> THICKNESS PROBEWATER LEVEL PROBE1C1F(58)(56)CONTACTORCOILLIQUID LINESOLENOIDAUCS DISPENSE TIMEBIN SWITCH(62)(63)1GLOW D.C.VOLTAGEPLUGCLEAN LIGHTWATER LEVEL LIGHTBIN SWITCH LIGHTHARVEST LIGHT/SAFETY LIMIT CODE LIGHT(74)(64)(65)(67)(66)TOGGLE SWITCH(68)(69)(62)<strong>ICE</strong>OFFCLEANINTERNAL WORKINGVIEWVIEW FOR WIRING6866676269(42)(95)CRANKCASE HEATER(94)COMPRESSOR(49)(F2)CONTACTORCONTACTS*OVERLOADRCS(47)RUN CAPACITORR R(46) (50)CONTACTORCONTACTS(96)L1(48)(45)L2(51)(44) PTCR(F1)(F2)REMOTEFAN MOTORREMOTE CONDENSERSV2076RUN CAPACITOR6-34 Part No. 80-1100-3
Section 6Electrical SystemQ1300/Q1800 - REMOTE - 3 PHASE WITH TERMINAL BOARDL3 L2 L1SEE SERIAL PLATE FOR VOLTAGECAUTION: DISCONNECT POWER BEFORE WORKINGON ELECTRICAL CIRCUITRY.DIAGRAM SHOWN DURING FREEZE CYCLE(20)(21)HPRSOLENOIDWATERVALVE (22)N - 50HZONLY(78)(79)TB35HIGH PRESCUTOUTTB32<strong>ICE</strong> THICKNESS PROBEWATER LEVEL PROBEAUCS DISPENSE TIME(55)24135TRANS.1C1F1GFUSE (7A)LOW D.C.VOLTAGEPLUG(61)(60)(58)(57)CLEAN LIGHTRH HARVESTSOLENOIDTB31(77)LH HARVESTSOLENOIDTB37(59)WATER LEVEL LIGHT(56)(76)DUMPSOLENOID(73)(98)(88)(83)(87)(80)(81)(99)WATERPUMPCONTACTORCOIL(75)(82)LIQUID LINESOLENOID(74)TB30TB30TB30TB30TB30(62)BIN SWITCH LIGHT(64)(66)BIN SWITCH(63)(65)(67)(66)TOGGLE SWITCH(68) <strong>ICE</strong>(69)OFF(62) CLEANHARVEST LIGHT/SAFETY LIMIT CODE LIGHTINTERNAL WORKINGVIEWVIEW FOR WIRING6662686769TB35(95)CRANKCASE HEATER (94)TB30(42)(96)NOTE: WIRE (96) IS NOT USED ON 50HZTB30L3L2L1TB35CONTACTORCONTACTS(F1)(F2)(51)TB33 (52)TERMINATES ATPIN CONNECTION(53)TB34T2COMPRESSORREMOTEFAN MOTORT3T1REMOTE CONDENSERRUN CAPACITORSV1651Part No. 80-1100-3 6-35
Electrical System Section 6Q1300/Q1600/Q1800 - REMOTE - 3 PHASE WITHOUT TERMINAL BOARDL3 L2 L1SEE SERIAL PLATE FOR VOLTAGECAUTION: DISCONNECT POWER BEFORE WORKINGON ELECTRICAL CIRCUITRY.DIAGRAM SHOWN DURING FREEZE CYCLE(20)(21)HPRSOLENOID(22)WATERVALVEN - 50 HZONLY(78)(79)(88)(42)(89)HIGH PRESCUTOUT(55)24315(61)(60)LH HARVESTSOLENOID(77)(76)(88)RH HARVESTSOLENOIDDUMPSOLENOID(87)(80)(81)(75)TRANS.FUSE (7A)(57)(98)WATERPUMP(99)<strong>ICE</strong> THICKNESS PROBE1C(58)(59)(83)(82)LIQUID LINESOLENOIDWATER LEVEL PROBENOT USED1F1GLOW D.C.VOLTAGEPLUG(56)CLEAN LIGHTWATER LEVEL LIGHTCONTACTORCOIL(74)(62)BIN SWITCH LIGHTBIN SWITCH(64)(63)(65)TOGGLE SWITCH(68)(67)(69)(66)(62)HARVEST LIGHT/SAFETY LIMIT CODE LIGHT<strong>ICE</strong>OFFCLEANINTERNAL WORKINGVIEWVIEW FOR WIRING6866676269(95) (94)NOTE: WIRE (96) IS NOT USED ON 50HZ(96) (96)L3L2L1CONTACTORCONTACTS(F1)(F2)(51)T2REMOTEFAN MOTORT3T1REMOTE CONDENSERCOMPRESSORRUN CAPACITORSV20776-36 Part No. 80-1100-3
Section 6Electrical SystemTHIS PAGE INTENTIONALLY LEFT BLANKPart No. 80-1100-3 6-37
Electrical System Section 6Component Specifications and DiagnosticsMAIN FUSEFunctionThe control board fuse stops ice machine operation ifelectrical components fail causing high amp draw.SpecificationsThe main fuse is 250 Volt, 7 amp.Check Procedure! WarningHigh (line) voltage is applied to the control board(terminals #55 and #56) at all times. Removing thecontrol board fuse or moving the toggle switch toOFF will not remove the power supplied to thecontrol board.1. If the bin switch light is on with the water curtainclosed, the fuse is good.! WarningDisconnect electrical power to the entire icemachine before proceeding.2. Remove the fuse. Check the resistance across thefuse with an ohm meter.BIN SWITCHFunctionMovement of the water curtain controls bin switchoperation. The bin switch has two main functions:1. Terminating the harvest cycle and returning the icemachine to the freeze cycle.This occurs when the bin switch is opened andclosed again within 7 seconds during the harvestcycle.2. Automatic ice machine shut-off.If the storage bin is full at the end of a harvest cycle,the sheet of cubes fails to clear the water curtain andholds it open. After the water curtain is held open for7 seconds, the ice machine shuts off. The icemachine remains off until enough ice is removedfrom the storage bin to allow the sheet of cubes todrop clear of the water curtain. As the water curtainswings back to the operating position, the bin switchcloses and the ice machine restarts, provide thethree-minute delay has expired.ImportantThe water curtain must be ON (bin switch(s) closed)to start ice making.ReadingOpen (OL)Closed (O)ResultReplace fuseFuse is goodSpecificationsThe bin switch is a magnetically operated reed switch.The magnet is attached to the lower right corner of thewater curtain. The switch is attached to the evaporatormountingbracket.The bin switch is connected to a varying D.C. voltagecircuit. (Voltage does not remain constant.)NOTE: Because of a wide variation in D.C. voltage, it isnot recommended that a voltmeter be used to check binswitch operation.6-38 Part No. 80-1100-3
Section 6Electrical SystemCheck Procedure1. Set the toggle switch to OFF.2. Watch the bin switch light on the control board.3. Move the water curtain toward the evaporator. Thebin switch must close. The bin switch light “on”indicates the bin switch has closed properly.Move the water curtain away from the evaporator. Thebin switch must open. The bin switch light “off” indicatesthe bin switch has opened properly.OHM Test1. Disconnect the bin switch wires to isolate the binswitch from the control board.2. Connect an ohmmeter to the disconnected binswitch wires.3. Cycle the bin switch open and closed numeroustimes by opening and closing the water curtain.NOTE: To prevent misdiagnosis:• Always use the water curtain magnet to cycle theswitch (a larger or smaller magnet will affect switchoperation).• Watch for consistent readings when the bin switch iscycled open and closed (bin switch failure could beerratic).Water Curtain Removal NotesThe water curtain must be on (bin switch closed) to startice making. While a freeze cycle is in progress, the watercurtain can be removed and installed at any time withoutinterfering with the electrical control sequence.If the ice machine goes into harvest sequence while thewater curtain is removed, one of the following willhappen:• Water curtain remains off:When the harvest cycle time reaches 3.5 minutesand the bin switch is not closed, the ice machinestops as though the bin were full.• Water curtain is put back on:If the bin switch closes prior to reaching the 3.5-minute point, the ice machine immediately returns toanother freeze sequence prechill.Part No. 80-1100-3 6-39
Electrical System Section 6COMPRESSOR ELECTRICAL DIAGNOSTICSThe compressor will not start or will trip repeatedly onoverload.Check Resistance (Ohm) ValuesNOTE: Compressor windings can have very low ohmvalues. Use a properly calibrated meter.Perform the resistance test after the compressor cools.The compressor dome should be cool enough to touch(below 120°F/49°C) to assure that the overload is closedand the resistance readings will be accurate.SINGLE PHASE COMPRESSORS1. Disconnect power from the cuber and remove thewires from the compressor terminals.2. The resistance values must be within publishedguidelines for the compressor. The resistancevalues between C and S and between C and R,when added together, should equal the resistancevalue between S and R.3. If the overload is open, there will be a resistancereading between S and R, and open readingsbetween C and S and between C and R. Allow thecompressor to cool, then check the readings again.THREE PHASE COMPRESSORS1. Disconnect power from the cuber and remove thewires from the compressor terminals.2. The resistance values must be within publishedguidelines for the compressor. The resistancevalues between L1 and L2, between L2 and L3, andbetween L3 and L1 should all be equal.3. If the overload is open, there will be open readingsbetween L1 and L2, between L2 and L3, andbetween L3 and L1. Allow the compressor to cool,then check the readings again.Check Motor Windings to GroundCheck continuity between all three terminals and thecompressor shell or copper refrigeration line. Scrapemetal surface to get good contact. If continuity ispresent, the compressor windings are grounded and thecompressor should be replaced.Determine if the Compressor is SeizedCheck the amp draw while the compressor is trying tostart.COMPRESSOR DRAWING LOCKED ROTORThe two likely causes of this are:• Defective starting component• Mechanically seized compressorTo determine which you have:1. Install high and low side gauges.2. Try to start the compressor.3. Watch the pressures closely.A. If the pressures do not move, the compressor isseized. Replace the compressor.B. If the pressures move, the compressor is turningslowly and is not seized. Check the capacitorsand start relay.COMPRESSOR DRAWING HIGH AMPSThe continuous amperage draw on start-up should notbe near the maximum fuse size indicated on the serialtag.The voltage when the compressor is trying to start mustbe within ±10% of the nameplate voltage.Diagnosing Capacitors• If the compressor attempts to start, or hums and tripsthe overload protector, check the startingcomponents before replacing the compressor.• Visual evidence of capacitor failure can include abulged terminal end or a ruptured membrane. Do notassume a capacitor is good if no visual evidence ispresent.• A good test is to install a known good substitutecapacitor.• Use a capacitor tester when checking a suspectcapacitor. Clip the bleed resistor off the capacitorterminals before testing.6-40 Part No. 80-1100-3
Section 6Electrical SystemPTCR DIAGNOSTICSWhat is a PTCR?A PTCR (or Positive Temperature Coefficient Resistor) ismade from high-purity, semi-conducting ceramics.A PTCR is useful because of its resistance versustemperature characteristic. The PTCR has a lowresistance over a wide (low) temperature range, butupon reaching a certain higher temperature, itsresistance greatly increases, virtually stopping currentflow. When the source of heat is removed, the PTCRreturns to its initial base resistance.In severe duty cycles, it can be used to repeatedlyswitch (virtually stop) large currents at line voltages.PTCR’s have been used for many years in millions ofHVAC applications. In place of using the conventionalstart relay/start capacitor, a simple PTCR provides thestarting torque assistance to PSC (Permanent SplitCapacitor) single-phase compressors, which canequalize pressures before starting.Compressor Start SequencePTCR’s provide additional starting torque by increasingthe current in the auxiliary (start) winding during starting.The PTCR is wired across the run capacitor (in serieswith the start winding).1. It is important for the refrigerant discharge andsuction pressures to be somewhat equalized prior tothe compressor starting. To assure equalization ofpressures the harvest valve (and HPR valve onremotes) will energize for 45 seconds prior tocompressor starting. The harvest valve (and HPRvalve on remotes) remains on for an additional 5seconds while the compressor is starting.2. When starting the compressor, the contactor closesand the PTCR, which is at a low resistance value,allows high starting current to flow in the startwinding.3. The current passing through the PTCR causes it torapidly heat up, and after approximately .25-1second it abruptly “switches” to a very highresistance, virtually stopping current flow through it.4. At this point the motor is up to speed and all currentgoing through the start winding will now passthrough the run capacitor.5. The PTCR remains hot and at a high resistance aslong as voltage remains on the circuit.6. It is important to provide time between compressorrestarts to allow the PTCR to cool down to near itsinitial temperature (low resistance). When thecontactor opens to stop the compressor, the PTCRcools down to its initial low resistance and is againready to provide starting torque assistance. Toassure the PTCR has cooled down, during anautomatic shut-off, the Q model ice machines have abuilt-in 3-minute off time before it can restart.Part No. 80-1100-3 6-41
Electrical System Section 6Q-<strong>Model</strong> Automatic Shut-Off and RestartWhen the storage bin is full at the end of a harvest cycle,the sheet of cubes fails to clear the water curtain and willhold it open. After the water curtain is held open for 7seconds, the ice machine shuts off. To assure the PTCRhas cooled, the ice machine remains off for 3 minutesbefore it can automatically restart.The ice machine remains off until enough ice has beenremoved from the storage bin to allow the ice to fall clearof the water curtain. As the water curtain swings back tooperating position, the bin switch closes and the icemachine restarts, provided the three-minute delay periodis complete.L1SV1506Figure 6-15. During Start-Up (First .25 - 1.0 Seconds)L1CONTACTORCONTACTSCCONTACTORCONTACTSSCOMPRESSORCRRSCOMPRESSORRUN CAPACITORRPTCRRRUN CAPACITORRRL2L2Troubleshooting PTCR’sWHY A GOOD PTCR MAY FAILTO START THE COMPRESSORThe PTCR must be cooled before attempting to start thecompressor, otherwise the high starting torque may notlast long enough.For example, if the PTCR is properly cooled, say 60°F(15.6°C) when the compressor starts, it will take .25 to1.0 seconds before its temperature reaches 260°F(126.6°C), and current flow is stopped.If the PTCR is still warm, say 160°F (71.1°C) when thecompressor starts, it will take only .125 to .50 secondsbefore its temperature reaches 260°F (126.6°C), andcurrent flow is stopped. This decreased time may beinsufficient to start the compressor.A good PTCR may be too hot to operate properly atstart-up because:• The ice machine’s 3-minute delay has beenoverridden. Opening and closing the servicedisconnect or cycling the toggle switch from OFF to<strong>ICE</strong> will override the delay period.• The control box temperature is too high. Thoughrare, very high air temperatures (intense sunlight,etc.) can greatly increase the temperature of thecontrol box and its contents. This may require alonger off time to allow the PTCR to cool.• The compressor has short-cycled, or the compressoroverload has opened. Move the toggle switch to OFFand allow the compressor and PTCR to cool.Continued on next page …PTCRSV1507Figure 6-16. After Start-Up(Current Flows Through Run Capacitor)6-42 Part No. 80-1100-3
Section 6Electrical SystemThere are other problems that may cause compressorstart-up failure with a good PTCR in a new, properlywired ice machine.• The voltage at the compressor during start-up is toolow.Manitowoc ice machines are rated at ±10% ofnameplate voltage at compressor start-up. (Ex: Anice machine rated at 208-230 should have acompressor start-up voltage between 187 and 253volts.)• The compressor discharge and suction pressuresare not matched closely enough or equalized.These two pressures must be somewhat equalizedbefore attempting to start the compressor. Theharvest valve (and HPR valve on remotes) energizesfor 45 seconds before the compressor starts, andremains on 5 seconds after the compressor starts.Make sure this is occurring and the harvest valve(and HPR solenoid) coil is functional beforeassuming that the PTCR is bad.CHECKING THE PTCR<strong>Model</strong>Q200Q280Q320Q420Q450Q600Q800Q1000Q1300Q1600Q1800ManitowocPart NumberCera-MitePart NumberRoomTemperatureResistance8505003 305C20 22-50 Ohms8504993 305C19 18-40 Ohms8504913 305C9 8-22 Ohms! WarningDisconnect electrical power to the entire icemachine at the building electrical disconnect boxbefore proceeding.SV15401. Visually inspect the PTCR. Check for signs ofphysical damage.Figure 6-17. Manitowoc PTCR’s 8505003 & 8504993NOTE: The PTCR case temperature may reach 210°F(100°C) while the compressor is running. This is normal.Do not change a PTCR just because it is hot.2. Wait at least 10 minutes for the PTCR to cool toroom temperature.3. Remove the PTCR from the ice machine.4. Measure the resistance of the PTCR as shownbelow. If the resistance falls outside of theacceptable range, replace it.SV1541Figure 6-18. Manitowoc PTCR 8504913Part No. 80-1100-3 6-43
Electrical System Section 6<strong>ICE</strong>/OFF/CLEAN TOGGLE SWITCHFunctionThe switch is used to place the ice machine in <strong>ICE</strong>, OFFor CLEAN mode of operation.SpecificationsDouble-pole, double-throw switch. The switch isconnected into a varying low D.C. voltage circuit.Check ProcedureNOTE: Because of a wide variation in D.C. voltage, it isnot recommended that a volt meter be used to checktoggle switch operation.1. Inspect the toggle switch for correct wiring.2. Isolate the toggle switch by disconnecting all wiresfrom the switch, or by disconnecting the Molexconnector and removing wire #69 from the toggleswitch.CONTROL BOARD RELAYSFunctionThe control board relays energize and de-energizesystem components.SpecificationsRelays are not field replaceable. There are five relays onthe control board:RelayControls#1 Water Pump#2 Water Inlet Valve#3 Harvest Valve / HPR Valve (Remotes)#4 Water Dump Valve#5 Contactor (Self-Contained)Contactor / Liquid Line Solenoid (Remotes)3. Check across the toggle switch terminals using acalibrated ohm meter. Note where the wire numbersare connected to the switch terminals, or refer to thewiring diagram to take proper readings.Switch Setting Terminals Ohm Reading66-62 Open<strong>ICE</strong>67-68 Closed67-69 Open66-62 ClosedCLEAN67-68 Open67-69 Closed66-62 OpenOFF67-68 Open67-69 Open4. Replace the toggle switch if ohm readings do notmatch all three switch settings.6-44 Part No. 80-1100-3
Section 6Electrical SystemELECTRONIC CONTROL BOARDAC LINE VOLTAGEELECTRICALPLUG (NUMBERSMARKED ONWIRES)CLEAN LIGHTYELLOWWATER LEVELPROBE LIGHTGREENMAIN FUSE (7A)BIN SWITCHLIGHT GREENAUTOMATICCLEANINGSYSTEM (AuCS)ACCESSORY PLUGHARVEST LIGHT/SAFETY LIMITCODE LIGHTRED<strong>ICE</strong> THICKNESSPROBE (3/16''CONNECTION)WATER LEVELPROBE1CJUMPER USEDON Q1300/Q1600/Q1800 ONLY1F1G676862DC LOW VOLTAGEELECTRICAL PLUG(NUMBERSMARKED ONWIRES)6365SV1588Figure 6-19. Control BoardPart No. 80-1100-3 6-45
Electrical System Section 6GeneralQ-<strong>Model</strong> control boards use a dual voltage transformer.This means only one control board is needed for both115V and 208-230V use.Safety LimitsIn addition to standard safety controls, such as the highpressure cut-out, the control board has built-in safetylimits.These safety limits protect the ice machine from majorcomponent failures. For more information, see “SafetyLimits” on Page 7-13.InputsThe control board, along with inputs, controls allelectrical components, including the ice machinesequence of operation. Prior to diagnosing, you mustunderstand how the inputs affect the control boardoperation.Refer to specific component specifications (inputs),wiring diagrams and ice machine sequence of operationsections for details.As an example, refer to “Ice Thickness Probe” on thenext page for information relating to how the probe andcontrol board function together.This section will include items such as:• How a harvest cycle is initiated• How the harvest light functions with the probe• Freeze time lock-in feature• Maximum freeze time• Diagnosing ice thickness control circuitry6-46 Part No. 80-1100-3
Section 6Electrical SystemIce Thickness Probe (Harvest Initiation)HOW THE PROBE WORKSManitowoc’s electronic sensing circuit does not rely onrefrigerant pressure, evaporator temperature, waterlevels or timers to produce consistent ice formation.As ice forms on the evaporator, water (not ice) contactsthe ice thickness probe. After the water completes thiscircuit across the probe continuously for 6-10 seconds, aharvest cycle is initiated.SV1730AFigure 6-20. Ice Thickness ProbeHARVEST/SAFETY LIMIT LIGHTThis light’s primary function is to be on as water contactsthe ice thickness probe during the freeze cycle, andremain on throughout the entire harvest cycle. The lightwill flicker as water splashes on the probes.The light’s secondary function is to continuously flashwhen the ice machine is shut off on a safety limit, and toindicate which safety limit shut off the ice machine.FREEZE TIME LOCK-IN FEATUREThe ice machine control system incorporates a freezetime lock-in feature. This prevents the ice machine fromshort cycling in and out of harvest.The control board locks the ice machine in the freezecycle for six minutes. If water contacts the ice thicknessprobe during these six minutes, the harvest light willcome on (to indicate that water is in contact with theprobe), but the ice machine will stay in the freeze cycle.After the six minutes are up, a harvest cycle is initiated.This is important to remember when performingdiagnostic procedures on the ice thickness controlcircuitry.To allow the service technician to initiate a harvest cyclewithout delay, this feature is not used on the first cycleafter moving the toggle switch OFF and back to <strong>ICE</strong>.MAXIMUM FREEZE TIMEThe control system includes a built-in safety which willautomatically cycle the ice machine into harvest after 60minutes in the freeze cycle.<strong>ICE</strong> THICKNESS CHECKThe ice thickness probe is factory-set to maintain the icebridge thickness at 1/8" (3.2 mm).NOTE: Make sure the water curtain is in place whenperforming this check. It prevents water from splashingout of the water trough.1. Inspect the bridge connecting the cubes. It shouldbe about 1/8" (3.2 mm) thick.2. If adjustment is necessary, turn the ice thicknessprobe adjustment screw clockwise to increasebridge thickness, or counterclockwise to decreasebridge thickness.NOTE: Turning the adjustment 1/3 of a turn will changethe ice thickness about 1/16" (1.5 mm).ADJUSTING SCREW1/8” <strong>ICE</strong> BRIDGE THICKNESSSV1208Figure 6-21. Ice Thickness CheckMake sure the ice thickness probe wire and the bracketdo not restrict movement of the probe.Ice Thickness Probe Cleaning1. Mix a solution of Manitowoc ice machine cleanerand water (2 ounces of cleaner to 16 ounces ofwater) in a container.2. Soak ice thickness probe in container of cleaner/water solution while disassembling and cleaningwater circuit components (soak ice thickness probefor 10 minutes or longer).3. Clean all ice thickness probe surfaces including allplastic parts (do not use abrasives). Verify the icethickness probe cavity is clean. Thoroughly rinse icethickness probe (including cavity) with clean water,then dry completely. Incomplete rinsing anddrying of the ice thickness probe can causepremature harvest.4. Reinstall ice thickness probe, then sanitize all icemachine and bin/dispenser interior surfaces.Part No. 80-1100-3 6-47
Electrical System Section 6DIAGNOSING <strong>ICE</strong> THICKNESS CONTROL CIRCUITRYIce Machine Does Not Cycle Into Harvest When Water Contacts The Ice Thickness Control ProbeStep 1 Bypass the freeze time lock-in feature by moving the <strong>ICE</strong>/OFF/CLEAN switch to OFF and back to <strong>ICE</strong>. Waituntil the water starts to flow over the evaporator.Step 2 Clip the jumper wire leads to the ice thickness probe and any cabinet ground.<strong>ICE</strong> THICKNESS PROBECLEAN LIGHTWATER LEVEL LIGHTBIN SWITCH LIGHTHARVEST/SAFETY LIMIT LIGHTEVAPORATORGROUNDSV3010JUMPER WIRESV1588AFigure 6-22. Step 2Step 2 Jumper wire connected from probe to groundMonitoring of Harvest LightCorrectionThe harvest light comes on, and 6-10 seconds later, icemachine cycles from freeze to harvest.The harvest light comes on but the ice machine stays in thefreeze sequence.The harvest light does not come on.The ice thickness control circuitry is functioning properly. Donot change any parts.The ice thickness control circuitry is functioning properly. Theice machine is in a six-minute freeze time lock-in. Verify step 1of this procedure was followed correctly.Proceed to Step 3, below.Step 3 Disconnect the ice thickness probe from the control board at terminal 1C. Clip the jumper wire leads toterminal 1C on the control board and any cabinet ground. Monitor the harvest light.<strong>ICE</strong> THICKNESS PROBECLEAN LIGHTEVAPORATORJUMPER WIREWATER LEVEL LIGHTBIN SWITCH LIGHTHARVEST/SAFETY LIMIT LIGHTGROUND1CSV3011SV1588GFigure 6-23. Step 3Step 3 Jumper wire connected from control board terminal 1C to groundMonitoring of Harvest LightCorrectionThe harvest light comes on, and 6-10 seconds later, ice The ice thickness probe is causing the malfunction.machine cycles from freeze to harvest.The harvest light comes on but the ice machine stays in thefreeze sequence.The harvest light does not come on.The control circuitry is functioning properly. The ice machine isin a six-minute freeze time lock-in (verify step 1 of thisprocedure was followed correctly).The control board is causing the malfunction.6-48 Part No. 80-1100-3
Section 6Electrical SystemIce Machine Cycles Into Harvest Before Water Contact With The Ice Thickness ProbeStep 1 Bypass the freeze time lock-in feature by moving the <strong>ICE</strong>/OFF/CLEAN switch to OFF and back to <strong>ICE</strong>. Waituntil the water starts to flow over the evaporator, then monitor the harvest light.Step 2 Disconnect the ice thickness probe from the control board at terminal 1C.<strong>ICE</strong> THICKNESS PROBECLEAN LIGHTWATER LEVEL LIGHTBIN SWITCH LIGHTHARVEST/SAFETY LIMIT LIGHTSV3011SV1588Figure 6-24. Step 2Step 2 Disconnect probe from control board terminal 1C.Monitoring of Harvest LightCorrectionThe harvest light stays off and the ice machine remains in thefreeze sequence.The harvest light comes on, and 6-10 seconds later, the icemachine cycles from freeze to harvest.The ice thickness probe is causing the malfunction.Verify that the Ice Thickness probe is adjusted correctly.The control board is causing the malfunction.Part No. 80-1100-3 6-49
Electrical System Section 6Water Level Control CircuitryWATER LEVEL PROBE LIGHTThe water level probe circuit can be monitored bywatching the water level light. The water level light is onwhen water contacts the probe, and off when no water isin contact with the probe. The water level light functionsany time power is applied to the ice machine, regardlessof toggle switch position.FREEZE CYCLE CIRCUITRYManitowoc’s electronic sensing circuit does not rely onfloat switches or timers to maintain consistent waterlevel control. During the freeze cycle, the water inletvalve energizes (turns on) and de-energizes (turns off) inconjunction with the water level probe located in thewater trough.During the first 45 seconds of the Freeze Cycle:• The water inlet valve is on when there is no water incontact with the water level probe.• The water inlet valve turns off after water contactsthe water level probe for 3 continuous seconds.• The water inlet valve will cycle on and off as manytimes as needed to fill the water trough.After 45 seconds into the Freeze Cycle:The water inlet valve will cycle on, and then off one moretime to refill the water trough. The water inlet valve isnow off for the duration of the freeze sequence.HARVEST CYCLE CIRCUITRYThe water level probe does not control the water inletvalve during the harvest cycle. During the harvest cyclewater purge, the water inlet valve energizes (turns on)and de-energizes (turns off) strictly by time. The harvestwater purge adjustment dial may be set at 15, 30 or 45seconds.CONTROL BOARDSV1616Figure 6-25. Freeze Cycle Water Level SettingDuring the freeze cycle, the water level probe is set tomaintain the proper water level above the water pumphousing. The water level is not adjustable. If the waterlevel is incorrect, check the water level probe fordamage (probe bent, etc.). Repair or replace the probeas necessary.WATER INLET VALVE SAFETY SHUT-OFFIn the event of a water level probe failure, this featurelimits the water inlet valve to a six-minute on time.Regardless of the water level probe input, the controlboard automatically shuts off the water inlet valve if itremains on for 6 continuous minutes. This is important toremember when performing diagnostic procedures onthe water level control circuitry.HARVESTWATER PURGEADJUSTMENT30 45NOTE: The water purge must be at the factory settingof 45 seconds for the water inlet valve to energize duringthe last 15 seconds of the Water Purge. If set at 15 or 30seconds the water inlet valve will not energize during theharvest water purge.15SV16176-50 Part No. 80-1100-3
Section 6Electrical SystemDIAGNOSING FREEZE CYCLE POTABLE WATERLEVEL CONTROL CIRCUITRYProblem: Water Trough Overfilling During TheFreeze CycleStep 1 Start a new freeze sequence by moving the <strong>ICE</strong>/OFF/CLEAN toggle switch to OFF, then back to <strong>ICE</strong>.ImportantThis restart must be done prior to performingdiagnostic procedures. This assures the icemachine is not in a freeze cycle water inlet valvesafety shut-off mode. You must complete the entirediagnostic procedure within 6 minutes of starting.Step 2 Wait until the freeze cycle starts(approximately 45 seconds, the freeze cycle starts whenthe compressor energizes) then connect a jumper fromthe water level probe to any cabinet ground.ImportantFor the test to work properly you must wait until thefreeze cycle starts, prior to connecting the jumperwire. If you restart the test you must disconnect thejumper wire, restart the ice machine, (step 1) andthen reinstall the jumper wire after the compressorstarts.YELLOWCLEAN LIGHTGR EE NWATER LEVEL LIGHTGR EE NBIN SWITCH LIGHTREDHARVEST/SAFETY LIMIT LIGHT1C1FGR OUNDJUMP ERSV1621aFigure 6-26. Step 2Is water flowing into thewater trough?Step 2 Jumper wire connected from probe to groundThe Water Inlet ValveThe Water Level Light is:Solenoid Coil is:Causeno on De-Energized This is normal operation.Do not change any parts.yes on De-Energized The water inlet valve iscausing the problem.yes off Energized Proceed to step 3.Continued on next page …Part No. 80-1100-3 6-51
Electrical System Section 6Problem: Water Trough Overfilling During TheFreeze Cycle (continued)Step 3 Allow ice machine to run. Disconnect the waterlevel probe from control board terminal 1F, and connecta jumper wire from terminal 1F to any cabinet ground.1Remember if you are past 6 minutes from starting, theice machine will go into a freeze cycle water inlet valvesafety shut-off mode, and you will be unable to completethis test. If past 6 minutes you must restart this test bydisconnecting the jumper wire, restarting the icemachine, (step 1) and then reinstalling the jumper wire toterminal 1F, after the compressor starts.YELLOWCLEAN LIGHTGREENWATER LEVEL LIGHTGREENBIN SWITCH LIGHTREDHARVEST/SAFETY LIMIT LIGHTGROUNDJUMPER1C1FSV1588bFigure 6-27. Step 3Is water flowing intothe water trough?Step 3 Jumper wire connected from control board terminal 1F to groundThe Water LevelLight is:The Water Inlet ValveSolenoid Coil is:Causeno on De-EnergizedThe water level probe is causing the problem.Clean or replace the water level probe.yes off Energized The control board is causing the problem.yes on De-Energized The water fill valve is causing the problem.6-52 Part No. 80-1100-3
Section 6Electrical SystemProblem: Water Will Not Run Into The Sump TroughDuring The Freeze CycleStep 1 Verify water is supplied to the ice machine, andthen start a new freeze sequence by moving the <strong>ICE</strong>/OFF/CLEAN toggle switch to OFF then back to <strong>ICE</strong>.Step 2 Wait until the freeze cycle starts (approximately45 seconds, the freeze cycle starts when thecompressor energizes), and then refer to chart.ImportantThis restart must be done prior to performingdiagnostic procedures. This assures the ice machineis not in a freeze cycle water inlet valve safety shutoffmode. You must complete the entire diagnosticprocedure within 6 minutes of starting.Is water flowing intothe water trough?The Water LevelLight is:Step 2 Checking for normal operationThe Water Inlet ValveSolenoid Coil is:Causeyes off Energized This is Normal Operation don’t change any partsno on or off Energized Or De-Energized Proceed to step 3Step 3 Leave the ice machine run, then disconnect thewater level probe from control board terminal 1F.ImportantFor the test to work properly you must wait until thefreeze cycle starts, prior to disconnecting the waterlevel probe. If you restart the test you mustreconnect the water level probe, restart the icemachine, (step 1) and then disconnect the waterlevel probe after the compressor starts.YELLOWCLEAN LIGHTDISCONNECTWATER LEVELPROBE FROMTERMINAL 1FGREENGREENREDWATER LEVEL LIGHTBIN SWITCH LIGHTHARVEST/SAFETY LIMITLIGHT1C1FSV1621GSV1588Figure 6-28. Step 3Is water flowing intothe water trough?Step 3 Disconnect water level probe from control board terminal 1FThe Water LevelLight is:The Water Inlet ValveSolenoid Coil is:Causeyes off Energized The water level probe is causing the problem.Clean or replace the water level probe.no off Energized The water inlet valve is causing the problem.no on or off De-Energized The control board is causing the problem.Part No. 80-1100-3 6-53
Electrical System Section 6Diagnosing An Ice Machine That Will Not Run! WarningHigh (line) voltage is applied to the control board(terminals #55 and #56) at all times. Removingcontrol board fuse or moving the toggle switch toOFF will not remove the power supplied to thecontrol board.Step Check Notes1 Verify primary voltage supply to ice Verify that the fuse or circuit breaker is closed.machine.2 Verify the high-pressure cutout is closed. The H.P.C.O. is closed if primary power voltage is present at terminals#55 and #56 on the control board.3 Verify control board fuse is OK. If the bin switch light functions, the fuse is OK.4 Verify the bin switch functions properly. A defective bin switch can falsely indicate a full bin of ice.5 Verify <strong>ICE</strong>/OFF/CLEAN toggle switch A defective toggle switch may keep the ice machine in the OFF mode.functions properly.6 Verify low DC voltage is properly Loose DC wire connections may intermittently stop the ice machine.grounded.7 Replace the control board. Be sure Steps 1-6 were followed thoroughly. Intermittent problems arenot usually related to the control board.NOTE: Refer to wiring diagram on Page 6-55 for component and sequence identification.6-54 Part No. 80-1100-3
Section 6Electrical SystemQ0420/Q0450/Q0600/Q0800/Q1000 - SELF CONTAINED -1 PHASE WITH TERMINAL BOARDTB35L1HIGH PRESCUTOUTTB32<strong>ICE</strong> THICKNESS PROBE4CONTACTORCONTACTS3WATER LEVEL PROBENOT USEDCAUTION: DISCONNECT POWER BEFORE WORKING(64)(66)ON ELECTRICAL CIRCUITRY.DIAGRAM SHOWN DURING FREEZE CYCLE(55)2BIN SWITCH6(62)5(63)*OVERLOAD(65)R24135TRANS.1C1F1GCFUSE (7A)LOW D.C.VOLTAGEPLUG(67)(66)S1COMPRESSOR(62)(49)(47)(61)(60)(20)TOGGLE SWITCH(68) <strong>ICE</strong>(69)OFF(58)(57)CLEAN LIGHTTB31TB37WATER LEVEL LIGHTBIN SWITCH LIGHT(56)(21)HARVESTSOLENOID(59)(73)(76)HARVEST LIGHT/SAFETY LIMIT CODE LIGHTCLEANRUN CAPACITORSEE SERIAL PLATE FOR VOLTAGEWATERVALVE(77)DUMPSOLENOID(98)INTERNAL WORKINGVIEW(22)(81)CONTACTORCOILR R(46) (50)(99)WATERPUMPTERMINATES ATPIN CONNECTION(74)(75)VIEW FOR WIRING686662(80)6769L2 (N)TB30TB30TB30TB30TB30TB35(42)L1TB33(48) (45)(51)PTCR(52) (85) (86) (53)TB34FAN CYCLE CONTROLRUN CAPACITOR**FAN MOTOR(AIR COOLED ONLY)TB30SV2071Part No. 80-1100-3 6-55
Electrical System Section 6THIS PAGE INTENTIONALLY LEFT BLANK6-56 Part No. 80-1100-3
Section 7Refrigeration SystemSequence of OperationSELF-CONTAINED AIR OR WATER -COOLED MODELSEVAPORATORHEATEXCHANGEREXPANSION VALVEHARVEST SOLENOID VALVECOMPRESSORSTRAINERXAIR OR WATERCONDENSERDRIERRECEIVER(WATER COOLED ONLY)HIGH PRESSURE VAPORHIGH PRESSURE LIQUIDLOW PRESSURE LIQUIDLOW PRESSURE VAPORSV1569Figure 7-1. Self-Contained Prechill and Freeze Cycle(<strong>Model</strong>s Q200/Q280/Q320/Q370/Q420/Q450/Q600/Q800/Q1000)Prechill Refrigeration SequenceFreeze Cycle Refrigeration SequenceNo water flows over the evaporator during the prechill.The refrigerant absorbs heat (picked up during theharvest cycle) from the evaporator. The suction pressuredecreases during the prechill.The refrigerant absorbs heat from water running over theevaporator surface. The suction pressure graduallydrops as ice forms.Part No. 80-1100-3 7-1
Refrigeration System Section 7EVAPORATORHEATEXCHANGEREXPANSION VALVEHARVEST SOLENOID VALVECOMPRESSORSTRAINERAIR OR WATERCONDENSERDRIERRECEIVER(WATER COOLED ONLY)HIGH PRESSURE VAPORHIGH PRESSURE LIQUIDLOW PRESSURE LIQUIDLOW PRESSURE VAPORSV1570Figure 7-2. Self-Contained Harvest Cycle (<strong>Model</strong>s Q200/Q280/Q320/Q370/Q420/Q450/Q600/Q800/Q1000)Harvest Cycle Refrigeration SequenceHot gas flows through the energized harvest valve,heating the evaporator. The harvest valve is sized toallow the proper amount of refrigerant into theevaporator. This specific sizing (along with the propersystem refrigerant charge) assures proper heat transfer,without the refrigerant condensing and slugging thecompressor.7-2 Part No. 80-1100-3
Section 7Refrigeration SystemREMOTE MODELSEVAPORATORHEATEXCHANGEREXPANSION VALVECOMPRESSORSTRAINERXHARVEST SOLENOID VALVECHECK VALVEREMOTECONDENSERLIQUIDLINESOLENOIDVALVEDRIERHARVEST PRESSUREREGULATING VALVEXH.P.R. SOLENOIDVALVEHEADPRESSURECONTROLVALVERBCHECK VALVECRECEIVERSERV<strong>ICE</strong>VALVERECEIVERHIGH PRESSURE VAPOR HIGH PRESSURE LIQUID LOW PRESSURE LIQUID LOW PRESSURE VAPORFigure 7-3. Remote Pre-Chill and Freeze Cycle (<strong>Model</strong>s Q450/Q600/Q800/Q1000)Prechill Refrigeration SequenceFreeze Cycle Refrigeration SequenceNo water flows over the evaporator during the prechill.The refrigerant absorbs heat (picked up during theharvest cycle) from the evaporators. The suctionpressure decreases during the prechill.SV1566The refrigerant absorbs heat from the water running overthe evaporator surface. The suction pressure graduallydrops as ice forms.The headmaster control valve maintains dischargepressure in ambient temperatures below 70°F (21.1°C).(See “Headmaster Control Valve” on Page 7-30.)Part No. 80-1100-3 7-3
Refrigeration System Section 7EVAPORATORHEATEXCHANGEREXPANSION VALVECOMPRESSORSTRAINERHARVEST SOLENOID VALVECHECK VALVEREMOTECONDENSERLIQUIDLINESOLENOIDVALVEDRIERRECEIVERSERV<strong>ICE</strong>VALVEHARVEST PRESSUREREGULATING VALVEH.P.R. SOLENOIDVALVEHEADPRESSURECONTROLVALVERBCHECK VALVECRECEIVERHIGH PRESSURE VAPOR HIGH PRESSURE LIQUID LOW PRESSURE LIQUID LOW PRESSURE VAPORSV1567Figure 7-4. Remote Harvest Cycle (<strong>Model</strong>s Q450/Q600/Q800/Q1000)Harvest Cycle Refrigeration SequenceHot gas flows through the energized harvest valve,heating the evaporator. The harvest valve is sized toallow the proper amount of hot gas into the evaporator.This specific harvest valve sizing, along with the harvestpressure regulating (H.P.R.) system, assures properheat transfer, without the hot gas condensing to liquidand slugging the compressor.The harvest pressure regulating (H.P.R.) valve helpsmaintain the suction pressure during the harvest cycle.(See “H.P.R. System” on Page 7-27.)7-4 Part No. 80-1100-3
Section 7Refrigeration SystemEVAPORATORHEATEXCHANGEREXPANSION VALVECOMPRESSORSTRAINERXHARVEST SOLENOID VALVEXLIQUIDLINESOLENOIDVALVEDRIERRECEIVERSERV<strong>ICE</strong>VALVEHARVEST PRESSUREREGULATING VALVEXH.P.R. SOLENOIDVALVECHECK VALVEHEADPRESSURECONTROLVALVERBREMOTECONDENSERCHECK VALVECRECEIVERLIQUID/VAPOR EQUALIZED TO AMBIENT CONDITIONSSV1568Figure 7-5. Remote Automatic Shut-Off (<strong>Model</strong>s Q450/Q600/Q800/Q1000)Automatic Shut-OffThe compressor and liquid line solenoid valve are deenergizedsimultaneously when the contactor contactsopen.During the off cycle, the check valve prevents refrigerantfrom migrating back into the high side, and the liquid linesolenoid prevents refrigerant from migrating back intothe low side. This protects the compressor fromrefrigerant migration during the off cycle, preventingrefrigerant slugging upon start-up.Part No. 80-1100-3 7-5
Refrigeration System Section 7Q1300/Q1600/Q1800 REFRIGERATION TUBING SCHEMATICSEVAPORATORHEATEXCHANGEEXPANSION VALVExxEXPANSION VALVEHARVESTSOLENOID VALVEHARVESTSOLENOID VALVEDRIERCOMPRESSORSTRAINERAIR OR WATER COOLEDCONDENSERRECEIVERSV1512Figure 7-6. Q1300/Q1600/Q1800 Self-Contained Air- or Water-Cooled <strong>Model</strong>sNOTE: The refrigeration sequence for self-containeddual expansion valve ice machines is identical to selfcontainedsingle expansion valve ice machines. SeePages 7-1 and 7-2 for sequence of operation.7-6 Part No. 80-1100-3
Section 7Refrigeration SystemEVAPORATORHEATEXCHANGEEXPANSION VALVExxEXPANSION VALVEHARVESTSOLENOID VALVEHARVESTSOLENOID VALVEXLIQUIDLINESOLENOIDVALVEDRIERRECEIVERSERV<strong>ICE</strong>VALVECOMPRESSORSTRAINERHARVEST PRESSUREREGULATING VALVEXCHECK VALVEHEADPRESSURECONTROLVALVEREMOTECONDENSERRBH.P.R. SOLENOIDVALVECHECK VALVECRECEIVERSV1513Figure 7-7. Q1300/Q1600/Q1800 Remote <strong>Model</strong>sNOTE: The refrigeration sequence for remote dualexpansion valve ice machines is identical to remotesingle expansion valve ice machines. See Pages 7-3,7-4 and 7-5 for sequence of operation.Part No. 80-1100-3 7-7
Refrigeration System Section 7Operational Analysis (Diagnostics)GENERALWhen analyzing the refrigeration system, it is importantto understand that different refrigeration componentmalfunctions may cause very similar symptoms.Also, many external factors can make good refrigerationcomponents appear bad. These factors can includeimproper installation, or water system malfunctions suchas hot incoming water supply or water loss.The following two examples illustrate how similarsymptoms can result in a misdiagnosis.1. An expansion valve bulb that is not securelyfastened to the suction line and/or not insulated willcause a good expansion valve to flood. If a servicetechnician fails to check for proper expansion valvebulb mounting, he may replace the expansion valvein error.The ice machine now functions normally. Thetechnician erroneously thinks that the problem wasproperly diagnosed and corrected by replacing theexpansion valve. Actually, the problem (loose bulb)was corrected when the technician properlymounted the bulb of the replacement expansionvalve.2. An ice machine that is low on charge may cause agood expansion valve to starve. If a servicetechnician fails to verify the system charge, he mayreplace the expansion valve in error.During the replacement procedure, recovery,evacuation and recharging are performed correctly.The ice machine now functions normally. Thetechnician erroneously thinks that the problem wasproperly diagnosed and corrected by replacing theexpansion valve.The service technician’s failure to check the icemachine for a low charge condition resulted in amisdiagnosis and the needless replacement of agood expansion valve.When analyzing the refrigeration system, use theRefrigeration System Operational Analysis Table. Thistable, along with detailed checklists and references, willhelp prevent replacing good refrigeration componentsdue to external problems.The service technician’s failure to check theexpansion valve bulb for proper mounting (anexternal check) resulted in a misdiagnosis and theneedless replacement of a good expansion valve.7-8 Part No. 80-1100-3
Section 7Refrigeration SystemBEFORE BEGINNING SERV<strong>ICE</strong>Ice machines may experience operational problems onlyduring certain times of the day or night. A machine mayfunction properly while it is being serviced, butmalfunctions later. Information provided by the user canhelp the technician start in the right direction, and maybe a determining factor in the final diagnosis.2. Refer to the appropriate 24 Hour Ice ProductionChart. (These charts begin on Page 7-33.) Use theoperating conditions determined in Step 1 to findpublished 24 hour ice production: ______3. Perform an actual ice production check. Use theformula below.Ask these questions before beginning service:• When does the ice machine malfunction? (night, day,all the time, only during the freeze cycle, etc.)• When do you notice low ice production? (one day aweek, every day, on weekends, etc.)• Can you describe exactly what the ice machineseems to be doing?1.2.3.__________Freeze Time1440Minutes in 24Hours__________Weight of OneHarvest+ __________Harvest Time÷ __________Total Cycle Timex__________Cycles Per Day= __________Total Cycle Time= __________Cycles Per Day= __________Actual 24 Hour IceProduction• Has anyone been working on the ice machine?• Is anything (such as boxes) usually stored near or onthe ice machine which could obstruct airflow aroundthe machine?• During “store shutdown,” is the circuit breaker, watersupply or air temperature altered?• Is there any reason why incoming water pressuremight rise or drop substantially?<strong>ICE</strong> PRODUCTION CHECKThe amount of ice a machine produces directly relates tothe operating water and air temperatures. This meansan ice machine in a 70°F (21.1°C) room with 50°F(10.0°C) water produces more ice than the same modelice machine in a 90°F (32.2°C) room with 70°F (21.1°C)water.1. Determine the ice machine operating conditions:Air temp. entering condenser: _______ °Air temp. around ice machine: _______ °Water temp. entering sump trough: _______ °ImportantTimes are in minutes.Example: 1 min., 15 sec. converts to 1.25 min.(15 seconds ÷ 60 seconds = .25 minutes)Weights are in pounds.Example: 2 lb., 6 oz. converts to 2.375 lb.(6 oz. ÷ 16 oz. = .375 lb.)Weighing the ice is the only 100% accuratecheck. However, if the ice pattern is normal and the1/8" thickness is maintained, the ice slab weightslisted with the 24 Hour Ice Production Charts maybe used.4. Compare the results of step 3 with step 2. Iceproduction is normal when these numbers matchclosely. If they match closely, determine if:• another ice machine is required.• more storage capacity is required.• relocating the existing equipment to lower theload conditions is required.Contact the local Manitowoc distributor forinformation on available options and accessories.Part No. 80-1100-3 7-9
Refrigeration System Section 7INSTALLATION/VISUAL INSPECTION CHECKLISTWATER SYSTEM CHECKLISTPossible ProblemIce machine is not levelImproper clearance aroundtop, sides and/or back of icemachineAir-cooled condenser filter isdirtyIce machine is not on anindependent electrical circuitWater filtration is plugged (ifused)Water drains are not runseparately and/or are notventedRemote condenser line set isimproperly installedCorrective ActionLevel the ice machineReinstall according to theInstallation <strong>Manual</strong>Clean the condenser filterand/or condenserReinstall according to theInstallation <strong>Manual</strong>Install a new water filterRun and vent drainsaccording to the Installation<strong>Manual</strong>Reinstall according to theInstallation <strong>Manual</strong>A water-related problem often causes the samesymptoms as a refrigeration system componentmalfunction.Example: A water dump valve leaking during the freezecycle, a system low on charge, and a starving TXV havesimilar symptoms.Water system problems must be identified andeliminated prior to replacing refrigeration components.Possible ProblemWater area (evaporator) isdirtyWater inlet pressure notbetween 20 and 80 psiIncoming water temperatureis not between 35°F (1.7°C)and 90°F (32.2°C).Water filtration is plugged (ifused)Water dump valve leakingduring the freeze cycleVent tube is not installed onwater outlet drainHoses, fittings, etc., areleaking waterWater fill valve is stuck openWater is spraying out of thesump trough areaUneven water flow across theevaporatorWater is freezing behind theevaporatorPlastic extrusions andgaskets are not secured tothe evaporatorWater does not flow over theevaporator (not trickle)immediately after the prechillCorrective ActionClean as neededInstall a water regulator valveor increase the waterpressureIf too hot, check the hot waterline check valves in otherstore equipmentInstall a new water filterClean/replace dump valve asneededSee Installation InstructionsRepair/replace as neededClean/replace as neededStop the water sprayClean the ice machineCorrect the water flowRemount/replace as neededClean/replace water levelprobe as needed7-10 Part No. 80-1100-3
Section 7Refrigeration System<strong>ICE</strong> FORMATION PATTERNEvaporator ice formation pattern analysis is helpful in icemachine diagnostics.Analyzing the ice formation pattern alone cannotdiagnose an ice machine malfunction. However, whenthis analysis is used along with Manitowoc’sRefrigeration System Operational Analysis Table, it canhelp diagnose an ice machine malfunction.Improper ice formation can be caused by any number ofproblems.Example: An ice formation that is “extremely thin onoutlet” could be caused by a hot water supply, a dumpvalve leaking water, a faulty water fill valve, a lowrefrigerant charge, etc.ImportantKeep the water curtain in place while checking theice formation pattern to ensure no water is lost.2. Extremely Thin at Evaporator OutletThere is no ice, or a considerable lack of ice formationon the outlet of the evaporator (tubing outlet).Examples: No ice at all on the outlet of the evaporator,but ice forms on the intlet half of the evaporator. Or, theice at the outlet of the evaporator reaches 1/8" to initiatea harvest, but the intlet of the evaporator already has1/2" to 1" of ice formation.OUTLET<strong>ICE</strong>1. Normal Ice FormationIce forms across the entire evaporator surface.At the beginning of the freeze cycle, it may appear thatmore ice is forming on the intlet of the evaporator thanon the outlet. At the end of the freeze cycle, iceformation on the outlet will be close to, or just a bitthinner than, ice formation on the intlet. The dimples inthe cubes at the outlet of the evaporator may be morepronounced than those on the intlet. This is normal.The ice thickness probe must be set to maintain the icebridge thickness at approximately 1/8". If ice formsuniformly across the evaporator surface, but does notreach 1/8" in the proper amount of time, this is stillconsidered normal.INLET<strong>ICE</strong>SV1576Figure 7-8. Extremely Thin Ice Formation atEvaporator OutletPart No. 80-1100-3 7-11
Refrigeration System Section 73. Extremely Thin at Evaporator InletThere is no ice, or a considerable lack of ice formationon the intlet of the evaporator (tubing inlet). Examples:The ice at the outlet of the evaporator reaches 1/8" toinitiate a harvest, but there is no ice formation at all onthe intlet of the evaporator.OUTLET5. No Ice FormationThe ice machine operates for an extended period, butthere is no ice formation at all on the evaporator.ImportantThe Q1300 Q1600 and Q1800 model machineshave left and right expansion valves and separateevaporator circuits. These circuits operateindependently from each other. Therefore, one mayoperate properly while the other is malfunctioning.Example: If the left expansion valve is starving, itmay not affect the ice formation pattern on the entireright side of the evaporator.<strong>ICE</strong>OUTLETOUTLETINLETINLETINLETSV1575SV1571Figure 7-9. Extremely Thin Ice Formation atEvaporator InletFigure 7-11. Q1300/Q1600/Q1800 Evaporator Tubing4. Spotty Ice FormationThere are small sections on the evaporator where thereis no ice formation. This could be a single corner, or asingle spot in the middle of the evaporator. This isgenerally caused by loss of heat transfer from the tubingon the back side of the evaporator.OUTLET<strong>ICE</strong>INLETSV1577Figure 7-10. Spotty Ice Formation7-12 Part No. 80-1100-3
Section 7Refrigeration SystemSAFETY LIMITSGeneralIn addition to standard safety controls, such as highpressure cut-out, the control board has two built in safetylimit controls which protect the ice machine from majorcomponent failures. There are two control boards withdifferent safety limit sequences. Original productioncontrol boards have a black micro-processor. Currentproduction and replacement control boards have anorange label on the control board microprocessor.Safety Limit #1: If the freeze time reaches 60 minutes,the control board automatically initiates a harvest cycle.Control Board with black microprocessorIf 3 consecutive 60-minute freeze cycles occur, the icemachine stops.Control Board with orange label on microprocessor.If 6 consecutive 60-minute freeze cycles occur, the icemachine stops.Safety Limit #2: If the harvest time reaches 3.5minutes, the control board automatically returns the icemachine to the freeze cycle.Control Board with black microprocessorIf three consecutive 3.5 minute harvest cycles occur, theice machine stops.Control Board with orange label on microprocessor.If 500 consecutive 3.5 minute harvest cycles occur, theice machine stops.Control Board with Orange LabelWhen a safety limit condition is exceeded for 3consecutive cycles the control board enters the limit intomemory and the ice machine continues to run. Use thefollowing procedures to determine if the control boardcontains a safety limit indication.1. Move the toggle switch to OFF.2. Move the toggle switch back to <strong>ICE</strong>.3. Watch the harvest light. If a safety limit has beenrecorded, the harvest light will flash one or twotimes, corresponding to safety limit 1 or 2.When a safety limit condition is exceeded (6 consecutivecycles for Safety Limit #1 or 500 cycles for Safety Limit#2) the ice machine stops and the harvest light on thecontrol board continually flashes on and off. Use thefollowing procedures to determine which safety limit hasstopped the machine.1. Move the toggle switch to OFF.2. Move the toggle switch back to <strong>ICE</strong>.3. Watch the harvest light. It will flash one or two times,corresponding to safety limit 1 or 2 to indicate whichsafety limit stopped the ice machine.After safety limit indication, the ice machine will restartand run until a safety limit is exceeded again.Safety Limit IndicationControl Board with Black MicroprocessorWhen a safety limit condition is exceeded for 3consecutive cycles the ice machine stops and theharvest light on the control board continually flashes onand off. Use the following procedures to determinewhich safety limit has stopped the ice machine.1. Move the toggle switch to OFF.2. Move the toggle switch back to <strong>ICE</strong>.3. Watch the harvest light. It will flash one or two times,corresponding to safety limits 1 and 2, to indicatewhich safety limit stopped the ice machine.After safety limit indication, the ice machine will restartand run until a safety limit is exceeded again.Orange LabelPart No. 80-1100-3 7-13
Refrigeration System Section 7Analyzing Why Safety Limits May Stop the IceMachineAccording to the refrigeration industry, a high percentageof compressors fail as a result of external causes. Thesecan include: flooding or starving expansion valves, dirtycondensers, water loss to the ice machine, etc. Thesafety limits protect the ice machine (primarily thecompressor) from external failures by stopping icemachine operation before major component damageoccurs.The safety limit system is similar to a high pressure cutoutcontrol. It stops the ice machine, but does not tellwhat is wrong. The service technician must analyze thesystem to determine what caused the high pressure cutout,or a particular safety limit, to stop the ice machine.The safety limits are designed to stop the ice machineprior to major component failures, most often a minorproblem or something external to the ice machine. Thismay be difficult to diagnose, as many external problemsoccur intermittently.Example: An ice machine stops intermittently on safetylimit #1 (long freeze times). The problem could be a lowambient temperature at night, a water pressure drop, thewater is turned off one night a week, etc.When a high pressure cut-out or a safety limit stops theice machine, they are doing what they are supposed todo. That is, stopping the ice machine before a majorcomponent failure occurs.Refrigeration and electrical component failures may alsotrip a safety limit. Eliminate all electrical components andexternal causes first. If it appears that the refrigerationsystem is causing the problem, use Manitowoc’sRefrigeration System Operational Analysis Table, alongwith detailed charts, checklists, and other references todetermine the cause.The following checklists are designed to assist theservice technician in analysis. However, because thereare many possible external problems, do not limit yourdiagnosis to only the items listed.7-14 Part No. 80-1100-3
Section 7Refrigeration SystemSafety Limit #1Refer to page 7-13 for control board identification and safety limit operation.Control Board with Black Microprocessor - Freeze Time exceeds 60 minutes for 3 consecutive freeze cyclesorControl Board with Orange Label on Microprocessor - Freeze time exceeds 60 minutes for 6 consecutive freezecycles.Possible CauseCheck/CorrectImproper installation See “Installation/Visual Inspection Checklist” on Page 7-10Water systemLow water pressure (20 psi min.)High water pressure (80 psi max.)High water temperature (90°F/32.2°C max.)Clogged water distribution tubeDirty/defective water fill valveDirty/defective water dump valveDefective water pumpElectrical systemIce thickness probe out of adjustmentHarvest cycle not initiated electricallyContactor not energizingCompressor electrically non-operationalRestricted condenserair flow (air-cooled models)Restricted condenser water flow (water-cooled models)Refrigeration systemHigh inlet air temperature (110°F/43.3°C max.)Condenser discharge air recirculationDirty condenser filterDirty condenser finsDefective fan cycling controlDefective fan motorLow water pressure (20 psi min.)High water temperature (90°F/32.2°C max.)Dirty condenserDirty/defective water regulating valveWater regulating valve out of adjustmentNon-Manitowoc componentsImproper refrigerant chargeDefective head pressure control (remotes)Defective harvest valveDefective compressorTXV starving or flooding (check bulb mounting)Non-condensables in refrigeration systemPlugged or restricted high side refrigerant lines or componentSAFETY LIMIT NOTES• Because there are many possible external problems,do not limit your diagnosis to only the items listed inthis chart.• A continuous run of 100 harvests automaticallyerases the safety limit code.• The control board will store and indicate only onesafety limit – the last one exceeded.• If the toggle switch is moved to the OFF position andthen back to the <strong>ICE</strong> position prior to reaching the100-harvest point, the last safety limit exceeded willbe indicated.• If the harvest light did not flash prior to the icemachine restarting, then the ice machine did not stopbecause it exceeded a safety limit.Part No. 80-1100-3 7-15
Refrigeration System Section 7Safety Limit #2Refer to page 7-13 for control board identification and safety limit operation.Control Board with Black Microprocessor - Harvest time exceeds 3.5 minutes for 3 consecutive harvest cycles.orControl Board with Orange Label on Microprocessor - Harvest time exceeds 3.5 minutes for 500 consecutiveharvest cycles.Possible CauseCheck/CorrectImproper installation See “Installation/Visual Inspection Checklist” on Page 7-10Water systemWater area (evaporator) dirtyDirty/defective water dump valveVent tube not installed on water outlet drainWater freezing behind evaporatorPlastic extrusions and gaskets not securely mounted to theevaporatorLow water pressure (20 psi min.)Loss of water from sump areaClogged water distribution tubeDirty/defective water fill valveDefective water pumpElectrical systemIce thickness probe out of adjustmentIce thickness probe dirtyBin switch defectivePremature harvestRefrigeration systemNon-Manitowoc componentsWater regulating valve dirty/defectiveImproper refrigerant chargeDefective head pressure control valve (remotes)Defective harvest pressure control (HPR) valve (remotes)Defective harvest valveTXV flooding (check bulb mounting)Defective fan cycling controlSAFETY LIMIT NOTES• Because there are many possible external problems,do not limit your diagnosis to only the items listed inthis chart.• A continuous run of 100 harvests automaticallyerases the safety limit code.• The control board will store and indicate only onesafety limit – the last one exceeded.• If the toggle switch is moved to the OFF position andthen back to the <strong>ICE</strong> position prior to reaching the100-harvest point, the last safety limit exceeded willbe indicated.• If the harvest light did not flash prior to the icemachine restarting, then the ice machine did not stopbecause it exceeded a safety limit.7-16 Part No. 80-1100-3
Section 7Refrigeration SystemANALYZING DISCHARGE PRESSUREDURING FREEZE OR HARVEST CYCLEProcedure1. Determine the ice machine operating conditions:Air temp. entering condenser ______Air temp. around ice machine ______Water temp. entering sump trough ______2. Refer to Operating Pressure Chart for ice machinebeing checked. (These charts begin on Page 7-33.)Use the operating conditions determined in step 1 tofind the published normal discharge pressures.Freeze Cycle _______ Harvest Cycle_______3. Perform an actual discharge pressure check.FreezeCycle PSIGHarvestCycle PSIGBeginning of Cycle __________ __________Middle of Cycle __________ __________End of Cycle __________ __________4. Compare the actual discharge pressure (step 3) withthe published discharge pressure (step 2).The discharge pressure is normal when the actualpressure falls within the published pressure range for theice machine’s operating conditions.Freeze Cycle Discharge Pressure High ChecklistPossible CauseCheck/CorrectImproper installation See “Installation/Visual Inspection Checklist” on Page 7-10Restricted condenser air flow (air-cooled models) High inlet air temperature (110°F/43.3°C max.)Condenser discharge air recirculationDirty condenser filterDirty condenser finsDefective fan cycling controlDefective fan motorRestricted condenser water flow (water-cooledmodels)Improper refrigerant chargeOtherFreeze Cycle Discharge Pressure Low ChecklistLow water pressure (20 psi min.)High inlet water temperature (90°F/32.2°C max.)Dirty condenserDirty/defective water regulating valveWater regulating valve out of adjustmentOverchargedNon-condensables in systemWrong type of refrigerantNon-Manitowoc components in systemHigh side refrigerant lines/component restricted (before mid-condenser)Defective head pressure control valve (remote models)Possible CauseCheck/CorrectImproper installation See “Installation/Visual Inspection Checklist” on Page 7-10Improper refrigerant chargeUnderchargedWrong type of refrigerantWater regulating valve (water-cooled condensers) Out of adjustmentDefectiveOtherNon-Manitowoc components in systemDefective head pressure control valve (remote models)Defective fan cycle controlNOTE: Do not limit your diagnosis to only the items listed in the checklists.Part No. 80-1100-3 7-17
Refrigeration System Section 7ANALYZING SUCTION PRESSUREDURING FREEZE CYCLEThe suction pressure gradually drops throughout thefreeze cycle. The actual suction pressure (and drop rate)changes as the air and water temperatures entering theice machine change. This affects freeze cycle times.NOTE: Analyze discharge pressure before analyzingsuction pressure. High or low discharge pressure maybe causing high or low suction pressure.To analyze and identify the proper suction pressure dropthroughout the freeze cycle, compare the publishedsuction pressure to the published freeze cycle time.“Operating Pressure” and “Freeze Cycle Time” chartscan be found later in this section.ProcedureStep1. Determine the ice machine operatingconditions.2A. Refer to “Cycle Time” and “OperatingPressure” charts for ice machine model beingchecked. Using operating conditions from Step1, determine published freeze cycle time andpublished freeze cycle suction pressure.Example Using QY0454A <strong>Model</strong> Ice MachineAir temp. entering condenser:90°F/32.2°CAir temp. around ice machine:80°F/26.7°CWater temp. entering water fill valve:70°F/21.1°CPublished freeze cycle time: Published freeze cycle suction pressure:13.7 - 14.1 minutes 55-36 PSIGPublished Freeze Cycle Time (minutes)1 3 5 7 9 12 142B. Compare the published freeze cycle timeand published freeze cycle suction pressure.Develop a chart.3. Perform an actual suction pressure check atthe beginning, middle and end of the freezecycle. Note the times at which the readings aretaken.4. Compare the actual freeze cycle suctionpressure (Step 3) to the published freeze cycletime and pressure comparison (Step 2B).Determine if the suction pressure is high, lowor acceptable.55 52 48 44 41 38 36Published Freeze Cycle Suction Pressure (psig)Beginning of freeze cycle:Middle of freeze cycle:End of freeze cycle:Time IntoFreeze Cycle1 minutes7 minutes14 minutesPublishedPressure55 PSIG44 PSIG36 PSIG59 PSIG at 1 minute48 PSIG at 7 minutes40 PSIG at 14 minutesActualPressure59 PSIG48 PSIG40 PSIGResultHighHighHigh7-18 Part No. 80-1100-3
Section 7Refrigeration SystemFreeze Cycle Suction Pressure High ChecklistPossible CauseCheck/CorrectImproper installation See “Installation/Visual Inspection Checklist” on Page 7-10Discharge pressureDischarge pressure is too high, and is affecting low side(See “Freeze Cycle Discharge Pressure High Checklist” on Page 7-16)Improper refrigerant chargeOverchargedWrong type of refrigerantOtherNon-Manitowoc components in systemH.P.R. solenoid leakingharvest valve stuck openTXV flooding (check bulb mounting)Defective compressorFreeze Cycle Suction Pressure Low ChecklistPossible CauseCheck/CorrectImproper installation See “Installation/Visual Inspection Checklist” on Page 7-10Discharge pressureDischarge pressure is too low, and is affecting low side(See “Freeze Cycle Discharge Pressure Low Checklist” on Page 7-16)Improper refrigerant chargeUnderchargedWrong type of refrigerantOtherNon-Manitowoc components in systemImproper water supply over evaporator (See “Water System Checklist” on page 7-10)Loss of heat transfer from tubing on back side of evaporatorRestricted/plugged liquid line drierRestricted/plugged tubing in suction side of refrigeration systemTXV starvingNOTE: Do not limit your diagnosis to only the itemslisted in the checklists.Part No. 80-1100-3 7-19
Refrigeration System Section 7SINGLE EXPANSION VALVE <strong>ICE</strong> <strong>MACHINES</strong> -COMPARING EVAPORATOR INLET ANDOUTLET TEMPERATURESNOTE: This procedure will not work on the dualexpansion valve Q1300 Q1600 and Q1800 icemachines.The temperatures of the suction lines entering andleaving the evaporator alone cannot diagnose an icemachine. However, comparing these temperaturesduring the freeze cycle, along with using Manitowoc’sRefrigeration System Operational Analysis Table, canhelp diagnose an ice machine malfunction.The actual temperatures entering and leaving theevaporator vary by model, and change throughout thefreeze cycle. This makes documenting the “normal” inletand outlet temperature readings difficult. The key to thediagnosis lies in the difference between the twotemperatures five minutes into the freeze cycle. Thesetemperatures must be within 7° of each other.Use this procedure to document freeze cycle inlet andoutlet temperatures.1. Use a quality temperature meter, capable of takingtemperature readings on curved copper lines.2. Attach the temperature meter sensing device to thecopper lines entering and leaving the evaporator.ImportantDo not simply insert the sensing device under theinsulation. It must be attached to and reading theactual temperature of the copper line.3. Wait five minutes into the freeze cycle.4. Record the temperatures below and determine thedifference between them.5. Use this with other information gathered on theRefrigeration System Operational Analysis Table todetermine the ice machine malfunction.______________Inlet Temperature_______________DifferenceMust be within 7° at 5minutes into freeze cycle______________Outlet Temperature7-20 Part No. 80-1100-3
Section 7Refrigeration SystemHARVEST VALVE TEMPERATURE CHECKNOTE: This procedure requires checking both harvestvalves on dual expansion valve Q1300 and Q1800 icemachines.GeneralA harvest valve requires a critical orifice size. Thismeters the amount of hot gas flowing into the evaporatorduring the harvest cycle. If the orifice is even slightly toolarge or too small, long harvest cycles will result.A too-large orifice causes refrigerant to condense toliquid in the evaporator during the harvest cycle. Thisliquid will cause compressor damage. A too-small orificedoes not allow enough hot gas into the evaporator. Thiscauses low suction pressure, and insufficient heat for aharvest cycle.Refer to the Parts <strong>Manual</strong> for proper valve application. Ifreplacement is necessary, Use only “original” Manitowocreplacement parts.Harvest Valve AnalysisSymptoms of a harvest valve remaining partially openduring the freeze cycle can be similar to symptoms ofeither an expansion valve or compressor problem. Thebest way to diagnose a harvest valve is by usingManitowoc’s Ice Machine Refrigeration SystemOperational Analysis Table.Use the following procedure and table to help determineif a harvest valve is remaining partially open during thefreeze cycle.1. Wait five minutes into the freeze cycle.3. Feel the compressor discharge line.! WarningThe inlet of the harvest valve and the compressordischarge line could be hot enough to burn yourhand. Just touch them momentarily.4. Compare the temperature of the inlet of the harvestvalves to the temperature of the compressordischarge line.FindingsThe inlet of theharvest valve is coolenough to touch andthe compressordischarge line is hot.The inlet of theharvest valve is hotand approaches thetemperature of a hotcompressordischarge line.Both the inlet of theharvest valve andthe compressordischarge line arecool enough totouch.CommentsThis is normal as the discharge lineshould always be too hot to touch andthe harvestharvest valve inlet,although too hot to touch duringharvest, should be cool enough totouch after 5 minutes into the freezecycle.This is an indication something iswrong, as the harvest valve inlet didnot cool down during the freeze cycle.If the compressor dome is also entirelyhot, the problem is not a harvest valveleaking, but rather something causingthe compressor (and the entire icemachine) to get hot.This is an indication something iswrong, causing the compressordischarge line to be cool to the touch.This is not caused by a harvest valveleaking.2. Feel the inlet of the harvest valve(s).ImportantFeeling the harvest valve outlet or across theharvest valve itself will not work for this comparison.The harvest valve outlet is on the suction side (coolrefrigerant). It may be cool enough to touch even ifthe valve is leaking.Part No. 80-1100-3 7-21
Refrigeration System Section 7DISCHARGE LINE TEMPERATURE ANALYSISGeneralKnowing if the discharge line temperature is increasing,decreasing or remaining constant can be an importantdiagnostic tool. Maximum compressor discharge linetemperature on a normally operating ice machinesteadily increases throughout the freeze cycle.Comparing the temperatures over several cycles willresult in a consistent maximum discharge linetemperature.Ambient air temperatures affect the maximum dischargeline temperature.Higher ambient air temperatures at the condenser =higher discharge line temperatures at the compressor.Lower ambient air temperatures at the condenser =lower discharge line temperatures at the compressor.Regardless of ambient temperature, the freeze cycledischarge line temperature will be higher than 160°F(71.1°C) on a normally operating ice machine.ProcedureConnect a temperature probe on the compressordischarge line with-in 6" of the compressor and insulate.Observe the discharge line temperature for the last threeminutes of the freeze cycle and record the maximumdischarge line temperature.Discharge Line Temperature Above 160°F (71.1°C) AtEnd Of Freeze Cycle:Ice machines that are operating normally will haveconsistent maximum discharge line temperatures above160°F (71.1°C).Discharge Line Temperature Below 160°F (71.1°C) AtEnd Of Freeze CycleIce machines that have a flooding expansion valve willhave a maximum discharge line temperature thatdecreases each cycle.Verify the expansion valve sensing bulb is 100%insulated and sealed airtight. Condenser air contactingan incorrectly insulated sensing bulb will causeoverfeeding of the expansion valve.Verify the expansion valve sensing bulb is positionedand secured correctly.7-22 Part No. 80-1100-3
Section 7Refrigeration SystemTHIS PAGE INTENTIONALLY LEFT BLANKPart No. 80-1100-3 7-23
Refrigeration System Section 7HOW TO USE THE REFRIGERATION SYSTEMOPERATIONAL ANALYSIS TABLESGeneralThese tables must be used with charts, checklists andother references to eliminate refrigeration componentsnot listed on the tables and external items and problemswhich can cause good refrigeration components toappear defective.The tables list five different defects that may affect theice machine’s operation.NOTE: A low-on-charge ice machine and a starvingexpansion valve have very similar characteristics andare listed under the same column.NOTE: Before starting, see “Before Beginning <strong>Service</strong>”on Page 7-9 for a few questions to ask when talking tothe ice machine owner.ProcedureStep 1 Complete the “Operation Analysis” column.Read down the left “Operational Analysis” column.Perform all procedures and check all information listed.Each item in this column has supporting referencematerial to help analyze each step.While analyzing each item separately, you may find an“external problem” causing a good refrigerantcomponent to appear bad. Correct problems as they arefound. If the operational problem is found, it is notnecessary to complete the remaining procedures.Step 2 Enter check marks (√) in the small boxes.Each time the actual findings of an item in the“Operational Analysis” column matches the publishedfindings on the table, enter a check mark.Example: Freeze cycle suction pressure is determinedto be low. Enter a check mark in the “low” box.Step 3 Add the check marks listed under each of thefour columns. Note the column number with the highesttotal and proceed to “Final Analysis.”NOTE: If two columns have matching high numbers, aprocedure was not performed properly and/or supportingmaterial was not analyzed correctly.Final AnalysisThe column with the highest number of check marksidentifies the refrigeration problem.COLUMN 1 - HARVEST VALVE LEAKINGA leaking harvest valve must be replaced.COLUMN 2 - LOW CHARGE/TXV STARVINGNormally, a starving expansion valve only affects thefreeze cycle pressures, not the harvest cycle pressures.A low refrigerant charge normally affects both pressures.Verify the ice machine is not low on charge beforereplacing an expansion valve.1. Add refrigerant charge in 2 to 4 oz. increments as adiagnostic procedure to verify a low charge. If theproblem is corrected, the ice machine is low oncharge. Find the refrigerant leak.The ice machine must operate with the nameplatecharge. If the leak cannot be found, properrefrigerant procedures must still be followed Changethe liquid line drier. Then, evacuate and weigh in theproper charge.2. If the problem is not corrected by adding charge, theexpansion valve is faulty.On dual expansion valve ice machines, change onlythe TXV that is starving. If both TXV’s are starving,they are probably good, and are being affected bysome other malfunction, such as low charge.COLUMN 3 - TXV FLOODINGA loose or improperly mounted expansion valve bulbcauses the expansion valve to flood. Check bulbmounting, insulation, etc., before changing the valve. Ondual expansion valve machines, the service technicianshould be able to tell which TXV is flooding by analyzingice formation patterns. Change only the floodingexpansion valve.COLUMN 4 - COMPRESSORReplace the compressor and start components. Toreceive warranty credit, the compressor ports must beproperly sealed by crimping and soldering them closed.Old start components must be returned with the faultycompressor.7-24 Part No. 80-1100-3
Section 7Refrigeration SystemREFRIGERATION SYSTEM OPERATIONAL ANALYSIS TABLESQ, J and B <strong>Model</strong> Single Expansion ValveThis table must be used with charts, checklists and other references to eliminaterefrigeration components not listed on the table and external items and problems,which can cause good refrigeration components to appear defective.Operational Analysis 1 2 3 4Ice ProductionInstallation and WaterSystemIce Formation PatternSafety LimitsRefer to “Analyzing SafetyLimits” to eliminate all nonrefrigerationproblems.Freeze CycleDischarge Pressure_____ ______ ______1 minute Middle Endinto cycleFreeze CycleSuction Pressure_____ ______ ______1 minute Middle EndWait 5 minutes into the freezecycle.Compare temperatures ofevaporator inlet andevaporator outlet.Inlet ____ ° F (° C)Outlet ____ ° F (° C)Difference ____ ° F (° C)Wait 5 minutes into the freezecycle.Compare temperatures ofcompressor discharge lineand harvest valve inlet.Discharge Line TemperatureRecord freeze cycle dischargeline temperature at the end ofthe freeze cycle_________°F (°C)Air-Temperature Entering Condenser_____________Water Temperature Entering Ice Machine_________Published 24 hour ice production________________Calculated (actual) ice production_______________NOTE: The ice machine is operating properly if the ice fill patterns is normal and ice production is within 10% of chartedcapacity.All installation and water related problems must be corrected before proceeding with chart.Ice formation is extremelythin on outlet of evaporator-or-No ice formation on theentire evaporatorStops on safety limit:1Ice formation is extremelythin on outlet of evaporator-or-No ice formation on entireevaporatorStops on safety limit:1Ice formation normal-or-Ice formation is extremelythin on inlet of evaporator-or-No ice formation on entireevaporatorStops on safety limit:1 or 2Ice formation normal-or-No ice formation on entireevaporatorStops on safety limit:1If discharge pressure is High or Low refer to freeze cycle high or low discharge pressure problem checklist to eliminateproblems and/or components not listed on this table before proceeding.If suction pressure is High or Low refer to freeze cycle high or low suction pressure problem checklist to eliminate problemsand/or components not listed on this table before proceeding.Suction pressure is HighInlet and outletwithin 7°of each otherThe harvest valve inlet isHot-andapproachesthe temperatureof a Hot compressordischarge line.Discharge line temperature160°F (71.1°C)or higherat the end of the freezecycleSuction pressure is Low orNormalInlet and outletnot within 7°of each other-and-Inlet is colder than outletThe harvest valve inlet isCool enough to hold handon-andthecompressor dischargeline is Hot.Discharge line temperature160°F (71.1°C)or higherat the end of the freezecycleSuction pressure is HighInlet and outletwithin 7°of each other-or-Inlet and outletnot within 7°of each other-and-Inlet is warmer than outletThe harvest valve inlet isCool enough to hold handon-andthecompressor dischargeline is Coolenough to hold hand on.Discharge line temperatureless than160°F (71.1°C)at the end of the freezecycleSuction pressure is HighInlet and outletwithin 7°of each otherThe harvest valve inlet isCool enough to hold handon-andthecompressor dischargeline is Hot.Discharge line temperature160°F (71.1°C)or higher at the end of thefreeze cycleFinal AnalysisEnter total number of boxeschecked in each column.Harvest Valve LeakingLow On Charge-Or-TXV StarvingTXV FloodingCompressorPart No. 80-1100-3 7-25
Refrigeration System Section 7Q and J <strong>Model</strong> Dual Expansion ValveThis table must be used with charts, checklists and other references to eliminaterefrigeration components not listed on the table and external items and problems,which can cause good refrigeration components to appear defective.Operational Analysis 1 2 3 4Ice ProductionAir-Temperature Entering Condenser____________Water Temperature Entering Ice Machine_________Published 24 hour ice production________________Calculated (actual) ice production________________NOTE: The ice machine is operating properly if the ice productionand ice formation pattern is normal and ice production is within 10% of charted capacity.Ice Formation PatternLeft side________________________________Right side ______________________________Safety limitsRefer to “Analyzing SafetyLimits” to eliminate problemsand/or components not listedon this tableFreeze CycleDISCHARGE pressure_____ ______ ______1 minute Middle Endinto cycleFreeze CycleSUCTION pressure_____ ______ ______Beginning Middle EndHarvest ValveWait 5 minutes into the freezecycle.Compare temperatures ofcompressor discharge lineand both harvest valve inlets.Discharge Line TemperatureRecord freeze cycle dischargeline temperature at the end ofthe freeze cycle_________°F (°C)Ice formation isextremely thin onoutet of one side ofevaporator-or-No ice formation onone side ofevaporatorStops on safety limit:1Ice formation isextremely thin onoutlet of one or bothsides of evaporator-or-No ice formation onentire evaporatorStops on safety limit:1Ice formation normal-or-Ice formation isextremely thin on inletof one side ofevaporator-or-No ice formation onentire evaporatorStops on safety limit:1 or 2Ice formation normal-or-No ice formation onentire evaporatorStops on safety limit:1If discharge pressure is High or Low refer to a freeze cycle high or low discharge pressureproblem checklist to eliminate problems and/or components not listed on this table beforeproceeding.If suction pressure is High or Low refer to a freeze cycle high or low suction pressure problemchecklist to eliminate problems and/or components not listed on this table before proceeding.Suction pressure isHighOne harvest valveinlet is Hot-andapproachesthetemperature of a Hotcompressordischarge line.Discharge linetemperature160°F (71.1°C)or higherat the end of thefreeze cycleSuction pressure isLow or NormalBoth harvest valveinlets areCool enoughto hold hand on-andthecompressordischarge line is Hot.Discharge linetemperature160°F (71.1°C)or higherat the end of thefreeze cycleSuction pressure isHighBoth harvest valveinlets are Coolenoughto hold hand on-andthecompressordischarge line isCool enoughto hold hand on.Discharge linetemperatureless than160°F (71.1°C)at the end of thefreeze cycleSuction pressure isHighBoth harvest valveinlets are Coolenoughto hold hand on-andthecompressordischarge line is Hot.Discharge linetemperature160°F (71.1°C)or higherat the end of thefreeze cycleFinal AnalysisEnter total number of boxeschecked in each column.Harvest ValveLeakingLow On Charge-Or-TXV StarvingTXV FloodingCompressor7-26 Part No. 80-1100-3
Section 7Refrigeration SystemHARVEST PRESSURE REGULATING(H.P.R.) SYSTEMRemotes OnlyGENERALThe harvest pressure regulating (H.P.R.) systemincludes:• Harvest pressure regulating solenoid valve (H.P.R.solenoid). This is an electrically operated valve whichopens when energized, and closes when deenergized.Figure 7-13. H.P.R. ValveINLETFLOWOUTLETSV1427Figure 7-12. H.P.R. Solenoid• Harvest pressure regulating valve (H.P.R. valve).This is a non-adjustable pressure regulating valvewhich modulates open and closed, based on therefrigerant pressure at the outlet of the valve. Thevalve closes completely and stops refrigerant flowwhen the pressure at the outlet rises above the valvesetting.INLETOUTLETSV3053Part No. 80-1100-3 7-27
Refrigeration System Section 7FREEZE CYCLEThe H.P.R. system is not used during the freeze cycle.The H.P.R. solenoid is closed (de-energized), preventingrefrigerant flow into the H.P.R. valve.HARVEST CYCLEDuring the harvest cycle, the check valve in thedischarge line prevents refrigerant in the remotecondenser and receiver from backfeeding into theevaporator and condensing to liquid.The H.P.R. solenoid is opened (energized) during theharvest cycle, allowing refrigerant gas from the top of thereceiver to flow into the H.P.R. valve. The H.P.R. valvemodulates open and closed, raising the suction pressurehigh enough to sustain heat for the harvest cycle,without allowing refrigerant to condense to liquid in theevaporator.In general, harvest cycle suction pressure rises, thenstabilizes in the range of 75-100 psig (517-758 kPA).Exact pressures vary from model to model. These canbe found in the “Operational Refrigerant Pressures”charts, beginning on Page 7-32.7-28 Part No. 80-1100-3
Section 7Refrigeration SystemHPR DIAGNOSTICSSteps 1 through 4 can be quickly verified withoutattaching a manifold gauge set or thermometer.All questions must have a yes answer to continuethe diagnostic procedure.1. Liquid line warm?(Body temperature is normal)If liquid line is warmer or cooler than bodytemperature, refer to headmaster diagnostics.2. Ice fill pattern normal?Refer to “Ice Formation Pattern” if ice fill is notnormal.3. Freeze time normal?(Refer to Cycle Times/Refrigerant Pressures/24Hour Ice Production Charts)Shorter freeze cycles - Refer to headmasterdiagnostics.Longer freeze cycles - Refer to water systemchecklist, then refer to Refrigeration DiagnosticProcedures.4. Harvest time is longer than normal and control boardindicates safety limit #2?(Refer to Cycle Times/Refrigerant Pressures/24Hour Ice Production Charts)Connect refrigeration manifold gauge set to theaccess valves on the front of the ice machine, and athermometer thermocouple on the discharge linewithin 6" of the compressor (insulate thermocouple).5. Establish baseline by recording suction anddischarge pressure, discharge line temperature andfreeze & harvest cycle times. (Refer to section 7“Operational Analysis” for data collection detail).6. Freeze cycle Head Pressure 220 psig or higher?If the head pressure is lower than 220 psig refer toheadmaster diagnostics.7. Freeze cycle Suction Pressure normal?Refer to analyzing suction pressure if suctionpressure is high or low.8. Discharge line temperature is 160°F (71.1°C) orhigher at end of freeze cycle?If less than 160°F (71.1°C) check expansion valvebulb mounting and insulation.9. Harvest cycle suction and discharge pressures arelower than indicated in the cycle times/refrigerantpressures/24 hour ice production chart?Replace Harvest Pressure Regulating system (HPRValve and HPR solenoid valve).Part No. 80-1100-3 7-29
Refrigeration System Section 7HEADMASTER CONTROL VALVEManitowoc remote systems require headmaster controlvalves with special settings. Replace defectiveheadmaster control valves only with “original” Manitowocreplacement parts.OperationThe R404A headmaster control valve is non adjustable.At ambient temperatures of approximately 70°F (21.1°C)or above, refrigerant flows through the valve from thecondenser to the receiver inlet. At temperatures belowthis (or at higher temperatures if it is raining), the headpressure control dome’s nitrogen charge closes thecondenser port and opens the bypass port from thecompressor discharge line.In this modulating mode, the valve maintains minimumhead pressure by building up liquid in the condenser andbypassing discharge gas directly to the receiver.Diagnosing1. Determine the air temperature entering the remotecondenser.2. Determine if the head pressure is high or low inrelationship to the outside temperature. (Refer to theproper “Operational Pressure Chart” later in thissection.) If the air temperature is below 70°F(21.1°C), the head pressure should be modulatingabout 225 PSIG.3. Determine the temperature of the liquid line enteringthe receiver by feeling it. This line is normally warm;“body temperature.”4. Using the information gathered, refer to the chartbelow.NOTE: A headmaster that will not bypass, will functionproperly with condenser air temperatures ofapproximately 70°F (21.1°C) or above. When thetemperature drops below 70°F (21.1°C), the headmasterfails to bypass and the ice machine malfunctions. Lowerambient conditions can be simulated by rinsing thecondenser with cool water during the freeze cycle.Symptom Probable Cause Corrective MeasureValve not maintaining pressures Non-approved valve Install a Manitowoc Headmaster controlvalve with proper settingDischarge pressure extremely high; Valve stuck in bypassReplace valveLiquid line entering receiver feels hotDischarge pressure low; Liquid lineentering receiver feels extremely coldValve not bypassingReplace valveDischarge pressure low; Liquid lineentering receiver feels warm to hotIce machine low on chargeSee “Low on Charge Verification” onPage 7-317-30 Part No. 80-1100-3
Section 7Refrigeration SystemLOW ON CHARGE VERIFICATIONThe remote ice machine requires more refrigerantcharge at lower ambient temperatures than at highertemperatures. A low on charge ice machine mayfunction properly during the day, and then malfunction atnight. Check this possibility.If you cannot verify that the ice machine is low oncharge:1. Add refrigerant in 2 lb. increments, but do notexceed 6 lbs.2. If the ice machine was low on charge, theheadmaster function and discharge pressure willreturn to normal after the charge is added. Do not letthe ice machine continue to run. To assure operationin all ambient conditions, the refrigerant leak mustbe found and repaired, the liquid line drier must bechanged, and the ice machine must be evacuatedand properly recharged.3. If the ice machine does not start to operate properlyafter adding charge, replace the headmaster.FAN CYCLE CONTROL VS. HEADMASTERA fan cycle control cannot be used in place of aheadmaster. The fan cycle control is not capable ofbypassing the condenser coil and keeping the liquid linetemperature and pressure up.This is very apparent when it rains or the outsidetemperature drops. When it rains or the outsidetemperature drops, the fan begins to cycle on and off. Atfirst, everything appears normal. But, as it continuesraining or getting colder, the fan cycle control can onlyturn the fan off. All the refrigerant must continue to flowthrough the condenser coil, being cooled by the rain orlow outside temperature.This causes excessive sub-cooling of the refrigerant. Asa result, the liquid line temperature and pressure are notmaintained for proper operation.Part No. 80-1100-3 7-31
Refrigeration System Section 7Pressure Control Specifications andDiagnosticsFAN CYCLE CONTROL(Self-Contained Air-Cooled <strong>Model</strong>s Only)FunctionCycles the fan motor on and off to maintain properoperating discharge pressure.The fan cycle control closes on an increase, and openson a decrease in discharge pressure.Specifications<strong>Model</strong> Cut-In (Close) Cut-Out (Open)Q200/Q280Q320/Q370/Q420 250 psig ±5 200 psig ±5Q450/Q600Q800/Q1000Q1300/ Q1800275 psig ±5 225 psig ±5Check Procedure1. Verify fan motor windings are not open or grounded,and fan spins freely.2. Connect manifold gauges to ice machine.3. Hook voltmeter in parallel across the fan cyclecontrol, leaving wires attached.4. Refer to chart below.At: Reading Should Be: Fan Should Be:above cut-in 0 volts runningbelow cut-out line voltage offHIGH PRESSURE CUT-OUT (HPCO) CONTROLFunctionStops the ice machine if subjected to excessive highsidepressure.The HPCO control is normally closed, and opens on arise in discharge pressure.SpecificationsCut-out: 450 psig ±10Cut-in: <strong>Manual</strong> or automatic reset(Must be below 300 psig to reset).Check Procedure1. Set <strong>ICE</strong>/OFF/CLEAN switch to OFF, (<strong>Manual</strong> resetHPCO reset if tripped).2. Connect manifold gauges.3. Hook voltmeter in parallel across the HPCO, leavingwires attached.4. On water-cooled models, close the water servicevalve to the water condenser inlet. On self-containedair-cooled and remote models, disconnect the fanmotor.5. Set <strong>ICE</strong>/OFF/CLEAN switch to <strong>ICE</strong>.6. No water or air flowing through the condenser willcause the HPCO control to open because ofexcessive pressure. Watch the pressure gauge andrecord the cut-out pressure.! WarningIf discharge pressure exceeds 460 psig and theHPCO control does not cut out, set <strong>ICE</strong>/OFF/CLEAN switch to OFF to stop ice machineoperation.Replace the HPCO control if it:• Will not reset (below 300 psig)• Does not open at the specified cut-out point7-32 Part No. 80-1100-3
Section 7Refrigeration SystemCycle Time/24 Hour Ice Production/Refrigerant Pressure ChartsQ200 SERIESSelf-Contained Air-CooledNOTE: These characteristics may vary depending onoperating conditions.Cycle TimesFreeze Time + Harvest Time = Total Cycle TimeAir Temp.EnteringFreeze TimeWater Temperature °F/°CCondenser°F/°C 50/10.0 70/21.1 90/32.270/21.1 11.5-13.5 13.8-16.1 15.2-17.880/26.7 13.8-16.1 15.6-18.2 17.0-19.890/32.2 16.1-18.7 18.6-21.6 20.5-23.8100/37.8 19.8-23.0 23.6-27.4 25.5-29.6Times in minutes24 Hour Ice ProductionOperating PressuresHarvestTime1.0-2.5Air Temp.Water Temperature °F/°CEnteringCondenser 50/10.0 70/21.1 90/32.2°F/°C70/21.1 270 230 21080/26.7 230 205 19090/32.2 200 175 160100/37.8 165 140 130Based on average ice slab weight of 2.44 - 2.81 lbRegular cube derate is 7%Air Temp.EnteringCondenser°F/°CFreeze CycleDischargePressurePSIGSuctionPressurePSIGHarvest CycleDischargePressurePSIGSuctionPressurePSIG50/10.0 195-260 60-28 120-190 85-11070/21.1 195-260 60-28 120-190 85-11080/26.7 210-270 65-28 160-190 90-11090/32.2 240-290 70-30 190-210 100-120100/37.8 270-330 70-35 220-240 120-140110/43.3 310-390 85-40 250-270 120-150Suction pressure drops gradually throughout the freeze cycleQ200 SERIESSelf-Contained Water-CooledNOTE: These characteristics may vary depending onoperating conditions.Cycle TimesFreeze Time + Harvest Time = Total Cycle TimeAir Temp.Around IceFreeze TimeWater Temperature °F/°CMachine°F/°C 50/10.0 70/21.1 90/32.270/21.1 11.5-13.5 12.8-15.0 14.5-16.980/26.7 12.0-14.1 13.5-15.7 15.2-17.890/32.2 12.6-14.7 14.1-16.5 16.1-18.7100/37.8 13.1-15.4 14.8-17.3 17.0-19.8Times in minutes24 Hour Ice ProductionOperating PressuresHarvestTime1-2.5Air Temp.Water Temperature °F/°CAround IceMachine 50/10.0 70/21.1 90/32.2°F/°C70/21.1 270 245 22080/26.7 260 235 21090/32.2 250 225 200100/37.8 240 215 190Based on average ice slab weight of 2.44 - 2.81 lbRegular cube derate is 7%CondenserWaterConsumption90/32.2 Air TemperatureAround Ice MachineWater Temperature °F/°C50/10.0 70/21.1 90/32.2Gal/24 hours 240 480 2100Water regulating valve set to maintain 230 PSIG discharge pressureAir Temp.Around IceMachine°F/°CFreeze CycleDischargePressurePSIGSuctionPressurePSIGHarvest CycleDischargePressurePSIGSuctionPressurePSIG50/10.0 225-235 60-28 170-200 90-11070/21.1 225-235 60-28 170-200 90-11080/26.7 225-240 60-28 175-205 90-11090/32.2 225-245 65-30 175-205 90-115100/37.8 225-250 70-32 180-210 90-115110/43.3 225-260 75-34 185-215 90-120Suction pressure drops gradually throughout the freeze cyclePart No. 80-1100-3 7-33
Refrigeration System Section 7Q280 SERIESSelf-Contained Air-CooledNOTE: These characteristics may vary depending onoperating conditions.Cycle TimesFreeze Time + Harvest Time = Total Cycle TimeQ280 SERIESSelf-Contained Water-CooledNOTE: These characteristics may vary depending onoperating conditions.Cycle TimesFreeze Time + Harvest Time = Total Cycle TimeAir Temp.EnteringCondenser°F/°CFreeze TimeWater Temperature °F/°C50/10.0 70/21.1 90/32.2HarvestTimeAir Temp.Around IceMachine°F/°CFreeze TimeWater Temperature °F/°C50/10.0 70/21.1 90/32.2HarvestTime70/21.1 10.6-12.5 11.8-13.8 12.6-14.770/21.1 10.6-12.5 12.0-14.1 12.3-14.480/26.7 11.5-13.5 12.8-15.0 13.8-16.190/32.2 12.6-14.7 14.1-16.5 15.2-17.8100/37.8 14.5-16.9 16.5-19.3 18.0-21.01.0-2.580/26.7 10.8-12.7 12.3-14.4 13.8-16.190/32.2 11.0-13.0 12.6-14.7 14.1-16.5100/37.8 11.3-13.2 12.8-15.0 14.5-16.91-2.5Times in minutesTimes in minutes24 Hour Ice Production24 Hour Ice ProductionAir Temp.Water Temperature °F/°CEnteringCondenser 50/10.0 70/21.1 90/32.2°F/°C70/21.1 290 265 25080/26.7 270 245 23090/32.2 250 225 210100/37.8 220 195 180Based on average ice slab weight of 2.44 - 2.81 lbRegular cube derate is 7%Operating PressuresAir Temp.EnteringCondenser°F/°CFreeze CycleDischargePressurePSIGSuctionPressurePSIGHarvest CycleDischargePressurePSIGSuctionPressurePSIG50/10.0 195-250 60-20 150-190 70-9070/21.1 195-250 60-20 150-190 70-9080/26.7 220-280 60-26 180-220 70-9090/32.2 250-310 66-30 190-220 80-100100/37.8 280-350 70-32 220-250 80-110110/43.3 310-390 85-40 250-270 80-120Suction pressure drops gradually throughout the freeze cycleAir Temp.Water Temperature °F/°CAround IceMachine 50/10.0 70/21.1 90/32.2°F/°C70/21.1 290 260 25580/26.7 285 255 23090/32.2 280 250 225100/37.8 275 245 220Based on average ice slab weight of 2.44 - 2.81 lbRegular cube derate is 7%CondenserWaterConsumptionOperating Pressures90/32.2 Air TemperatureAround Ice MachineWater Temperature °F/°C50/10.0 70/21.1 90/32.2Gal/24 hours 250 490 3400Water regulating valve set to maintain 230 PSIG discharge pressureAir Temp.AroundIceMachine°F/°CFreeze CycleDischargePressurePSIGSuctionPressurePSIGHarvest CycleDischargePressurePSIGSuctionPressurePSIG50/10.0 225-235 60-28 190-200 75-9070/21.1 225-235 60-28 190-200 80-9080/26.7 225-240 60-28 190-200 80-9090/32.2 225-245 62-28 190-200 80-90100/37.8 225-250 62-30 190-200 80-90110/43.3 225-260 64-32 195-205 80-95Suction pressure drops gradually throughout the freeze cycle7-34 Part No. 80-1100-3
Section 7Refrigeration SystemQ320 SERIESSelf-Contained Air-CooledNOTE: These characteristics may vary depending onoperating conditions.Cycle TimesFreeze Time + Harvest Time = Total Cycle TimeQ320 SERIESSelf-Contained Water-CooledNOTE: These characteristics may vary depending onoperating conditions.Cycle TimesFreeze Time + Harvest Time = Total Cycle TimeAir Temp.EnteringCondenser°F/°CFreeze TimeWater Temperature °F/°C50/10.0 70/21.1 90/32.2HarvestTimeAir Temp.Around IceMachine°F/°CFreeze TimeWater Temperature °F/°C50/10.0 70/21.1 90/32.2HarvestTime70/21.1 12.2-13.9 13.1-14.9 14.2-16.270/21.1 12.6-14.4 13.6-15.5 15.4-17.680/26.7 13.6-15.5 14.8-16.8- 16.1-18.490/32.2 16.1-18.4 17.7-20.2 19.7-22.3100/37.8 19.7-22.3 22.0-25.0 25.0-28.31-2.580/26.7 13.1-14.9 14.2-16.2 16.1-18.490/32.2 13.6-15.5 14.8-16.8 16.9-19.2100/37.8 14.2-16.2 15.4-17.6 17.7-20.21-2.5Times in minutesTimes in minutes24 Hour Ice Production24 Hour Ice ProductionAir Temp.Water Temperature °F/°CEnteringCondenser 50/10.0 70/21.1 90/32.2°F/°C70/21.1 310 290 27080/26.7 280 260 24090/32.2 240 220 200100/37.8 200 180 160Based on average ice slab weight of 2.94 - 3.31lbRegular cube derate is 7%Air Temp.Water Temperature °F/°CAround IceMachine 50/10.0 70/21.1 90/32.2°F/°C70/21.1 300 280 25080/26.7 290 270 24090/32.2 280 260 230100/37.8 270 250 220Based on average ice slab weight of 2.94 - 3.31 lbRegular cube derate is 7%Operating PressuresAir Temp.EnteringCondenser°F/°CFreeze CycleDischargePressurePSIGSuctionPressurePSIGHarvest CycleDischargePressurePSIGSuctionPressurePSIG50/10.0 200-250 50-36 150-180 75-9070/21.1 200-250 50-36 160-190 80-10080/26.7 220-280 50-36 170-200 90-11090/32.2 230-320 54-38 180-220 90-120100/37.8 270-360 56-40 200-250 95-140110/43.3 280-380 58-42 210-260 95-150Suction pressure drops gradually throughout the freeze cycleCondenserWaterConsumptionOperating Pressures90/32.2 Air TemperatureAround Ice MachineWater Temperature °F/°C50/10.0 70/21.1 90/32.2Gal/24 hours 270 560 3200Water regulating valve set to maintain 230 PSIG discharge pressureAir Temp.Around IceMachine°F/°CFreeze CycleDischargePressurePSIGSuctionPressurePSIGHarvest CycleDischargePressurePSIGSuctionPressurePSIG50/10.0 225-235 50-36 160-180 80-11070/21.1 225-235 50-36 170-190 85-11580/26.7 225-240 50-36 170-200 85-11590/32.2 225-250 50-36 170-210 90-120100/37.8 225-260 52-36 170-210 90-120110/43.3 225-265 54-36 175-215 95-125Suction pressure drops gradually throughout the freeze cyclePart No. 80-1100-3 7-35
Refrigeration System Section 7Q370 SERIESSelf-Contained Air-CooledNOTE: These characteristics may vary depending onoperating conditions.Cycle TimesFreeze Time + Harvest Time = Total Cycle TimeQ370 SERIESSelf-Contained Water-CooledNOTE: These characteristics may vary depending onoperating conditions.Cycle TimesFreeze Time + Harvest Time = Total Cycle TimeAir Temp.EnteringCondenser°F/°CFreeze TimeWater Temperature °F/°C50/10.0 70/21.1 90/32.2HarvestTimeAir Temp.Around IceMachine°F/°CFreeze TimeWater Temperature °F/°C50/10.0 70/21.1 90/32.2HarvestTime70/21.1 10.3-11.7 11.7-13.4 12.6-14.470/21.1 10.3-11.7 11.0-12.5 12.2-13.980/26.7 11.3-12.9 12.6-14.4 13.9-15.890/32.2 12.9-14.7 13.9-15.8 15.4-17.6100/37.8 14.5-16.5 16.1-18.4 17.3-19.71-2.580/26.7 10.6-12.1 11.3-12.9 12.6-14.490/32.2 11.0-12.5 11.7-13.4 13.1-14.4100/37.8 11.3-12.9 12.2-13.9 13.6-15.51-2.5Times in minutesTimes in minutes24 Hour Ice Production24 Hour Ice ProductionAir Temp.Water Temperature °F/°CEnteringCondenser 50/10.0 70/21.1 90/32.2°F/°C70/21.1 360 320 30080/26.7 330 300 27590/32.2 295 275 250100/37.8 265 240 225Based on average ice slab weight of 2.94 - 3.31lbAir Temp.Water Temperature °F/°CAround IceMachine°F/°C 50/10.0 70/21.1 90/32.270/21.1 360 340 31080/26.7 350 330 30090/32.2 340 320 290100/37.8 330 310 280Based on average ice slab weight of 2.94 - 3.31lbOperating PressuresAir Temp.EnteringCondenser°F/°CFreeze CycleDischargePressurePSIGSuctionPressurePSIGHarvest CycleDischargePressurePSIGSuctionPressurePSIG50/10.0 200-250 60-34 145-165 75-9570/21.1 215-250 60-36 150-170 85-10080/26.7 250-290 65-38 165-185 90-11090/32.2 260-330 70-40 175-195 100-120100/37.8 300-380 80-41 195-220 130-150110/43.3 310-390 80-42 200-225 135-155Suction pressure drops gradually throughout the freeze cycleCondenserWaterConsumptionOperating Pressures90/32.2 Air TemperatureAround Ice MachineWater Temperature °F/°C50/10.0 70/21.1 90/32.2Gal/24 hours 220 490 3700Water regulating valve set to maintain 230 PSIG discharge pressureAir Temp.Around IceMachine°F/°CFreeze CycleDischargePressurePSIGSuctionPressurePSIGHarvest CycleDischargePressurePSIGSuctionPressurePSIG50/10.0 225-235 60-32 150-170 85-10070/21.1 225-235 60-33 150-170 85-10580/26.7 225-240 65-36 155-175 90-11090/32.2 225-240 68-38 155-175 90-110100/37.8 235-260 75-40 175-200 100-120110/43.3 240-265 85-40 185-205 105-125Suction pressure drops gradually throughout the freeze cycle7-36 Part No. 80-1100-3
Section 7Refrigeration SystemQ420/450 SERIESSelf-Contained Air-CooledNOTE: These characteristics may vary depending onoperating conditions.Cycle TimesFreeze Time + Harvest Time = Total Cycle TimeQ420/450 SERIESSelf-Contained Water-CooledNOTE: These characteristics may vary depending onoperating conditions.Cycle TimesFreeze Time + Harvest Time = Total Cycle TimeAir Temp.EnteringCondenser°F/°CFreeze TimeWater Temperature °F/°C50/10.0 70/21.1 90/32.2HarvestTimeAir Temp.Around IceMachine°F/°CFreeze TimeWater Temperature °F/°C50/10.0 70/21.1 90/32.2HarvestTime70/21.1 9.7-11.4 10.9-12.8 12.0-14.070/21.1 9.9-11.7 11.4-13.4 12.6-14.880/26.7 10.9-12.8 12.3-14.4 13.3-15.690/32.2 12.3-14.4 14.1-16.5 15.5-18.0100/37.8 14.5-17.0 16.5-19.2 18.3-21.31-2.580/26.7 10.1-11.9 11.7-13.7 13.0-15.290/32.2 10.4-12.2 12.0-14.0 13.3-15.6100/37.8 10.6-12.5 12.3-14.4 13.7-16.01-2.5Times in minutesTimes in minutes24 Hour Ice Production24 Hour Ice ProductionAir Temp.Water Temperature °F/°CEnteringCondenser 50/10.0 70/21.1 90/32.2°F/°C70/21.1 530 480 44080/26.7 480 430 40090/32.2 430 380 350100/37.8 370 330 300Based on average ice slab weight of 4.12 - 4.75lbRegular cube derate is 7%Air Temp.Water Temperature °F/°CAround IceMachine 50/10.0 70/21.1 90/32.2°F/°C70/21.1 520 460 42080/26.7 510 450 41090/32.2 500 440 400100/37.8 490 430 390Based on average ice slab weight of 4.12 - 4.75 lb.Regular cube derate is 7%Operating PressuresAir Temp.EnteringCondenser°F/°CFreeze CycleDischargePressurePSIGSuctionPressurePSIGHarvest CycleDischargePressurePSIGSuctionPressurePSIG50/10.0 195-260 45-30 150-170 75-9070/21.1 200-260 47-33 165-180 80-10080/26.7 230-265 50-35 165-185 80-10090/32.2 260-290 55-36 190-210 90-110100/37.8 290-340 60-38 215-235 105-125110/43.3 195-260 45-30 235-255 125-140Suction pressure drops gradually throughout the freeze cycleCondenserWaterConsumptionOperating Pressures90/32.2 Air TemperatureAround Ice MachineWater Temperature °F/°C50/10.0 70/21.1 90/32.2Gal/24 hours 400 740 2400Water regulating valve set to maintain 230 PSIG discharge pressureAir Temp.Around IceMachine°F/°CFreeze CycleDischargePressurePSIGSuctionPressurePSIGHarvest CycleDischargePressurePSIGSuctionPressurePSIG50/10.0 235-245 50-35 165-180 85-10070/21.1 235-245 50-35 165-180 85-10080/26.7 235-245 50-35 165-180 85-10090/32.2 235-245 52-35 165-180 85-100100/37.8 235-245 52-35 165-185 85-100110/43.3 240-250 55-36 165-185 85-100Suction pressure drops gradually throughout the freeze cyclePart No. 80-1100-3 7-37
Refrigeration System Section 7Q450 SERIESRemoteNOTE: These characteristics may vary depending onoperating conditions.Cycle TimesFreeze Time + Harvest Time = Total Cycle TimeQ600 SERIESSelf-Contained Air-CooledNOTE: These characteristics may vary depending onoperating conditions.Cycle TimesFreeze Time + Harvest Time = Total Cycle TimeAir Temp.EnteringCondenser°F/°CFreeze TimeWater Temperature °F/°C50/10.0 70/21.1 90/32.2HarvestTimeAir Temp.EnteringCondenser°F/°CFreeze TimeWater Temperature °F/°C50/10.0 70/21.1 90/32.2HarvestTime-20/-28.9 to70/21.110.6-12.5 12.0-14.0 13.3-15.680/26.7 10.9-12.8 12.3-14.4 13.7-16.090/32.2 11.1-13.1 12.6-14.8 14.1-16.5100/37.8 12.0-14.0 13.7-16.0 15.5-18.0110/43.3 13.3-15.6 15.5-18.0 17.6-20.61-2.570/21.1 7.1-8.4 7.8-9.2 8.6-10.180/26.7 7.8-9.2 8.6-10.1 9.5-11.290/32.2 8.6-10.1 9.5-11.2 10.4-12.2100/37.8 9.5-11.2 10.6-12.5 12.0-14.0Times in minutes1-2.5Times in minutes24 Hour Ice Production24 Hour Ice ProductionAir Temp.Water Temperature °F/°CEnteringCondenser 50/10.0 70/21.1 90/32.2°F/°C-20/-28.9 to70/21.1490 440 40080/26.7 480 430 39090/32.2 470 420 380100/37.8 440 390 350110/43.3 400 350 310Based on average ice slab weight of 4.12- 4.75lbRegular cube derate is 7%Ratings with JC0495 condenser, dice or half dice cubesOperating PressuresAir Temp.EnteringCondenser°F/°CFreeze CycleDischargePressurePSIGSuctionPressurePSIGHarvest CycleDischargePressurePSIGSuctionPressurePSIG-20/-28.9 to50/10.0225-245 50-32 175-190 85-10070/21.1 230-250 50-32 175-190 85-10080/26.7 240-260 52-32 180-195 85-10090/32.2 245-270 54-35 185-200 85-100100/37.8 280-310 57-37 190-205 90-105110/43.3 290-325 64-39 190-205 95-110Suction pressure drops gradually throughout the freeze cycleAir Temp.Water Temperature °F/°CEnteringCondenser 50/10.0 70/21.1 90/32.2°F/°C70/21.1 690 640 59080/26.7 640 590 54090/32.2 590 540 500100/37.8 540 490 440Based on average ice slab weight of 4.12- 4.75lbRegular cube derate is 7%Operating PressuresAir Temp.EnteringCondenser°F/°CFreeze CycleDischargePressurePSIGSuctionPressurePSIGHarvest CycleDischargePressurePSIGSuctionPressurePSIG50/10.0 195-260 42-22 155-180 75-9570/21.1 220-290 44-22 160-185 85-10080/26.7 220-305 52-22 160-190 90-11090/32.2 250-325 52-23 175-195 95-115100/37.8 280-355 54-30 195-210 95-125110/43.3 300-385 56-32 200-225 100-135Suction pressure drops gradually throughout the freeze cycle7-38 Part No. 80-1100-3
Section 7Refrigeration SystemQ600 SERIESSelf-Contained Water-CooledNOTE: These characteristics may vary depending onoperating conditions.Cycle TimesFreeze Time + Harvest Time = Total Cycle TimeQ600 SERIESRemoteNOTE: These characteristics may vary depending onoperating conditions.Cycle TimesFreeze Time + Harvest Time = Total Cycle TimeAir Temp.Around IceMachine°F/°CFreeze TimeWater Temperature °F/°C50/10.0 70/21.1 90/32.2HarvestTimeAir Temp.EnteringCondenser°F/°CFreeze TimeWater Temperature °F/°C50/10.0 70/21.1 90/32.2HarvestTime70/21.1 7.4-8.7 8.2-9.7 9.5-11.280/26.7 7.5-8.9 8.4-9.9 9.7-11.490/32.2 7.8-9.2 8.7-10.3 9.9-11.7100/37.8 7.9-9.4 8.9-10.5 10.1-11.9Times in minutes1-2.5-20/-28.9 to70/21.17.9-9.4 8.9-10.5 9.5-11.280/26.7 8.0-9.4 9.0-10.6 9.6-11.390/32.2 8.1-9.5 9.1-10.7 9.7-11.4100/37.8 8.4-9.9 9.5-11.2 10.1-11.9110/43.3 8.9-10.5 10.1-11.9 10.9-12.81-2.524 Hour Ice ProductionTimes in minutesAir Temp.Water Temperature °F/°CAround IceMachine 50/10.0 70/21.1 90/32.2°F/°C70/21.1 670 610 54080/26.7 660 600 53090/32.2 640 580 520100/37.8 630 570 510Based on average ice slab weight of 4.12 - 4.75 lbRegular cube derate is 7%CondenserWaterConsumptionOperating Pressures90/32.2 Air TemperatureAround Ice MachineWater Temperature °F/°C50/10.0 70/21.1 90/32.2Gal/24 hours 600 1250 6800Water regulating valve set to maintain 230 PSIG discharge pressureAir Temp.Around IceMachine°F/°CFreeze CycleDischargePressurePSIGSuctionPressurePSIGHarvest CycleDischargePressurePSIGSuctionPressurePSIG50/10.0 225-235 46-25 140-184 80-10270/21.1 225-235 46-26 148-184 82-10480/26.7 225-235 48-26 154-186 86-10890/32.2 225-240 48-26 154-190 86-108100/37.8 225-245 50-28 162-194 86-112110/43.3 225-250 52-28 165-200 86-115Suction pressure drops gradually throughout the freeze cycle24 Hour Ice ProductionAir Temp.Water Temperature °F/°CEnteringCondenser 50/10.0 70/21.1 90/32.2°F/°C-20/-28.9 to70/21.1630 570 54080/26.7 625 565 53590/32.2 620 560 530100/37.8 600 540 510110/43.3 570 510 480Based on average ice slab weight of 4.12- 4.75 lbRegular cube derate is 7%Ratings with JC0895 condenser, dice or half dice cubesOperating PressuresAir Temp.EnteringCondenser°F/°CFreeze CycleDischargePressurePSIGSuctionPressurePSIGHarvest CycleDischargePressurePSIGSuctionPressurePSIG-20/-28.9 to50/10.0220-250 42-26 152-170 75-10070/21.1 225-260 44-26 155-172 82-10080/26.7 245-265 46-26 156-174 82-10090/32.2 250-265 48-26 157-174 84-100100/37.8 265-295 52-26 158-176 84-100110/43.3 300-335 52-28 158-176 84-105Suction pressure drops gradually throughout the freeze cyclePart No. 80-1100-3 7-39
Refrigeration System Section 7Q800 SERIESSelf-Contained Air-CooledNOTE: These characteristics may vary depending onoperating conditions.Cycle TimesFreeze Time + Harvest Time = Total Cycle TimeQ800 SERIESSelf-Contained Water-CooledNOTE: These characteristics may vary depending onoperating conditions.Cycle TimesFreeze Time + Harvest Time = Total Cycle TimeAir Temp.EnteringCondenser°F/°CFreeze TimeWater Temperature °F/°C50/10.0 70/21.1 90/32.2HarvestTimeAir Temp.Around IceMachine°F/°CFreeze TimeWater Temperature °F/°C50/10.0 70/21.1 90/32.2HarvestTime70/21.1 8.9-10.2 9.7-11.1 10.3-11.970/21.1 8.7-10.1 9.5-11.0 10.9-12.580/26.7 9.3-10.7 10.2-11.7 10.9-12.590/32.2 10.3-11.9 11.4-13.1 12.3-14.1100/37.8 12.1-13.8 13.3-15.2 14.4-16.51-2.580/26.7 8.9-10.2 9.7-11.1 11.0-12.790/32.2 9.0-10.3 9.8-11.3 11.2-12.9100/37.8 9.1-10.5 10.0-11.5 11.4-13.11-2.5Times in minutesTimes in minutes24 Hour Ice Production24 Hour Ice ProductionAir Temp.Water Temperature °F/°CEnteringCondenser 50/10.0 70/21.1 90/32.2°F/°C70/21.1 800 740 70080/26.7 770 710 67090/32.2 700 640 600100/37.8 610 560 520Based on average ice slab weight of 5.75- 6.50 lbRegular cube derate is 7%Air Temp.Water Temperature °F/°CAround IceMachine 50/10.0 70/21.1 90/32.2°F/°C70/21.1 810 750 67080/26.7 800 740 66090/32.2 790 730 650100/37.8 780 720 640Based on average ice slab weight of 5.75- 6.50lbRegular cube derate is 7%Operating PressuresAir Temp.EnteringCondenser°F/°CFreeze CycleDischargePressurePSIGSuctionPressurePSIGHarvest CycleDischargePressurePSIGSuctionPressurePSIG50/10.0 220-280 31-18 135-180 65-9070/21.1 220-280 32-18 140-180 70-9080/26.7 225-280 36-20 140-180 70-9590/32.2 260-295 38-22 150-200 80-100100/37.8 300-330 40-24 210-225 80-100110/43.3 320-360 44-26 210-240 85-120Suction pressure drops gradually throughout the freeze cycleCondenserWaterConsumptionOperating Pressures90/32.2 Air TemperatureAround Ice MachineWater Temperature °F/°C50/10.0 70/21.1 90/32.2Gal/24 hours 640 1420 6000Water regulating valve set to maintain 230 PSIG discharge pressureAir Temp.Around IceMachine°F/°CFreeze CycleDischargePressurePSIGSuctionPressurePSIGHarvest CycleDischargePressurePSIGSuctionPressurePSIG50/10.0 225-235 33-20 160-185 65-8570/21.1 225-235 34-20 165-185 70-8580/26.7 225-235 34-20 165-185 70-8590/32.2 225-235 36-22 165-185 70-85100/37.8 225-235 36-22 165-185 70-85110/43.3 225-240 38-24 170-190 75-90Suction pressure drops gradually throughout the freeze cycle7-40 Part No. 80-1100-3
Section 7Refrigeration SystemQ800 SERIESRemoteNOTE: These characteristics may vary depending onoperating conditions.Cycle TimesFreeze Time + Harvest Time = Total Cycle TimeQ1000 SERIESSelf-Contained Air-CooledNOTE: These characteristics may vary depending onoperating conditions.Cycle TimesFreeze Time + Harvest Time = Total Cycle TimeAir Temp.EnteringCondenser°F/°CFreeze TimeWater Temperature °F/°C50/10.0 70/21.1 90/32.2HarvestTimeAir Temp.EnteringCondenser°F/°CFreeze TimeWater Temperature °F/°C50/10.0 70/21.1 90/32.2HarvestTime-20/-28.9 to70/21.19.5-11.0 10.6-12.2 11.6-13.480/26.7 9.7-11.1 10.8-12.4 11.9-13.690/32.2 9.8-11.3 11.0-12.6 12.1-13.8100/37.8 10.6-12.2 11.9-13.6 13.2-15.1110/43.3 11.9-13.6 13.4-15.4 14.7-16.91-2.570/21.1 9.9-10.6 10.6-11.4 11.3-12.280/26.7 10.2-11.0 11.2-12.0 11.9-12.890/32.2 10.9-11.7 11.9-12.8 12.8-13.7100/37.8 12.1-13.0 13.2-14.1 14.2-15.2Times in minutes1-2.5Times in minutes24 Hour Ice Production24 Hour Ice ProductionAir Temp.Water Temperature °F/°CEnteringCondenser 50/10.0 70/21.1 90/32.2°F/°C-20/-28.9 to70/21.1750 685 63080/26.7 740 675 62090/32.2 730 665 610100/37.8 685 620 565110/43.3 620 555 510Based on average ice slab weight of 5.75- 6.50lbRegular cube derate is 7%Ratings with JC0895 condenser, dice or half dice cubesOperating PressuresAir Temp.EnteringCondenser°F/°CFreeze CycleDischargePressurePSIGSuctionPressurePSIGHarvest CycleDischargePressurePSIGSuctionPressurePSIG-20/-28.9 to50/10.0220-250 30-22 180-200 65-9070/21.1 225-250 32-22 190-200 70-9080/26.7 240-260 33-22 190-205 70-9090/32.2 255-265 34-22 195-205 70-90100/37.8 275-295 38-24 200-210 70-90110/43.3 280-320 40-26 200-225 75-100Suction pressure drops gradually throughout the freeze cycleAir Temp.Water Temperature °F/°CEnteringCondenser 50/10.0 70/21.1 90/32.2°F/°C70/21.1 980 920 87080/26.7 950 880 83090/32.2 900 830 780100/37.8 820 760 710Based on average ice slab weight of 7.75 - 8.25lbRegular cube derate is 7%Operating PressuresAir Temp.EnteringCondenser°F/°CFreeze CycleDischargePressurePSIGSuctionPressurePSIGHarvest CycleDischargePressurePSIGSuctionPressurePSIG50/10.0 220-280 38-18 135-180 65-9070/21.1 220-280 40-18 140-180 70-9080/26.7 225-280 42-20 140-180 70-9590/32.2 260-295 42-22 150-200 80-100100/37.8 300-330 42-24 210-225 80-100110/43.3 320-360 44-24 210-240 85-120Suction pressure drops gradually throughout the freeze cyclePart No. 80-1100-3 7-41
Refrigeration System Section 7Q1000 SERIESSelf-Contained Water-CooledNOTE: These characteristics may vary depending onoperating conditions.Cycle TimesFreeze Time + Harvest Time = Total Cycle TimeQ1000 SERIESRemoteNOTE: These characteristics may vary depending onoperating conditions.Cycle TimesFreeze Time + Harvest Time = Total Cycle TimeAir Temp.Around IceMachine°F/°CFreeze TimeWater Temperature °F/°C50/10.0 70/21.1 90/32.2HarvestTimeAir Temp.EnteringCondenser°F/°CFreeze TimeWater Temperature °F/°C50/10.0 70/21.1 90/32.2HarvestTime70/21.1 10.0-10.7 10.6-11.4 12.1-13.080/26.7 10.1-10.9 10.8-11.6 12.3-13.290/32.2 10.2-11.0 10.9-11.7 12.5-14.3100/37.8 10.4-11.1 11.0-11.8 12.6-14.4Times in minutes1-2.5-20/-28.9 to70/21.110.5-11.3 11.3-12.2 12.1-13.080/26.7 10.7-11.5 11.5-12.3 12.3-13.290/32.2 10.8-11.6 11.6-12.5 12.5-13.4100/37.8 11.5-12.3 12.5-13.4 13.4-14.3110/43.3 12.3-13.2 13.4-14.3 14.4-15.51-2.524 Hour Ice ProductionTimes in minutesAir Temp.Water Temperature °F/°CAround IceMachine 50/10.0 70/21.1 90/32.2°F/°C70/21.1 970 920 82080/26.7 960 910 81090/32.2 950 900 800100/37.8 940 890 790Based on average ice slab weight of 7.75- 8.25lbRegular cube derate is 7%CondenserWaterConsumptionOperating Pressures90/32.2 Air TemperatureAround Ice MachineWater Temperature °F/°C50/10.0 70/21.1 90/32.2Gal/24 hours 750 1500 6200Water regulating valve set to maintain 230 PSIG discharge pressureAir Temp.Around IceMachine°F/°CFreeze CycleDischargePressurePSIGSuctionPressurePSIGHarvest CycleDischargePressurePSIGSuctionPressurePSIG50/10.0 225-235 36-18 160-185 65-8570/21.1 225-235 38-18 165-185 70-8580/26.7 225-235 40-18 165-185 70-8590/32.2 225-235 40-20 165-185 70-85100/37.8 225-235 40-20 165-185 70-85110/43.3 225-240 42-20 170-190 75-90Suction pressure drops gradually throughout the freeze cycle24 Hour Ice ProductionAir Temp.Water Temperature °F/°CEnteringCondenser 50/10.0 70/21.1 90/32.2°F/°C-20/-28.9 to70/21.1930 870 82080/26.7 915 860 81090/32.2 906 850 800100/37.8 860 800 750110/43.3 810 750 700Based on average ice slab weight of 7.75- 8.25lbRegular cube derate is 7%Ratings with JC1095 condenser, dice or half dice cubesOperating PressuresAir Temp.EnteringCondenser°F/°CFreeze CycleDischargePressurePSIGSuctionPressurePSIGHarvest CycleDischargePressurePSIGSuctionPressurePSIG-20/-28.9 to50/10.0220-250 40-22 180-200 65-9070/21.1 225-250 40-22 190-200 70-9080/26.7 240-260 42-22 190-205 70-9090/32.2 255-265 44-22 195-205 70-90100/37.8 275-295 44-24 200-210 70-90110/43.3 280-320 46-26 200-225 75-100Suction pressure drops gradually throughout the freeze cycle7-42 Part No. 80-1100-3
Section 7Refrigeration SystemQ1300 SERIESSelf-Contained Air-CooledNOTE: These characteristics may vary depending onoperating conditions.Cycle TimesFreeze Time + Harvest Time = Total Cycle TimeQ1300 SERIESSelf-Contained Water-CooledNOTE: These characteristics may vary depending onoperating conditions.Cycle TimesFreeze Time + Harvest Time = Total Cycle TimeAir Temp.EnteringCondenser°F/°CFreeze TimeWater Temperature °F/°C50/10.0 70/21.1 90/32.2HarvestTimeAir Temp.Around IceMachine°F/°CFreeze TimeWater Temperature °F/°C50/10.0 70/21.1 90/32.2HarvestTime70/21.1 9.4-10.5 9.9-11.1 10.9-12.270/21.1 9.0-10.1 9.8-10.9 11.4-12.680/26.7 9.9-11.1 10.6-11.8 11.6-12.990/32.2 11.0-12.3 11.5-12.8 12.8-14.2100/37.8 12.3-13.7 13.2-14.7 14.7-16.31-2.580/26.7 9.1-10.1 9.8-11.0 11.6-12.990/32.2 9.2-10.3 10.0-11.2 12.0-13.3100/37.8 9.4-10.5 10.1-11.3 12.2-13.61-2.5Times in minutesTimes in minutes24 Hour Ice Production24 Hour Ice ProductionAir Temp.Water Temperature °F/°CEnteringCondenser 50/10.0 70/21.1 90/32.2°F/°C70/21.1 1320 1260 116080/26.7 1260 1190 110090/32.2 1150 1110 1010100/37.8 1040 980 890Based on average ice slab weight of 10.0- 11.0 lbRegular cube derate is 7%Air Temp.Water Temperature °F/°CAround IceMachine 50/10.0 70/21.1 90/32.2°F/°C70/21.1 1370 1280 112080/26.7 1360 1270 110090/32.2 1340 1250 1070100/37.8 1320 1240 1050Based on average ice slab weight of 10.0 - 11.0 lbRegular cube derate is 7%Operating PressuresAir Temp.EnteringCondenser°F/°CFreeze CycleDischargePressurePSIGSuctionPressurePSIGHarvest CycleDischargePressurePSIGSuctionPressurePSIG50/10.0 220-280 40-20 140-170 65-8070/21.1 220-280 40-20 145-170 70-8080/26.7 220-280 42-22 150-185 70-8090/32.2 245-300 48-26 160-190 70-85100/37.8 275-330 50-26 160-210 70-90110/43.3 280-360 52-28 165-225 75-100Suction pressure drops gradually throughout the freeze cycleCondenserWaterConsumptionOperating Pressures90/32.2 Air TemperatureAround Ice MachineWater Temperature °F/°C50/10.0 70/21.1 90/32.2Gal/24 hours 1150 2220 7400Water regulating valve set to maintain 240 PSIG discharge pressureAir Temp.Around IceMachine°F/°CFreeze CycleDischargePressurePSIGSuctionPressurePSIGHarvest CycleDischargePressurePSIGSuctionPressurePSIG50/10.0 235-245 40-18 150-180 70-8070/21.1 235-245 40-18 150-180 70-8080/26.7 235-245 40-20 150-180 70-8090/32.2 235-250 42-20 150-180 70-80100/37.8 235-255 44-20 150-180 70-80110/43.3 240-265 46-20 150-180 70-80Suction pressure drops gradually throughout the freeze cyclePart No. 80-1100-3 7-43
Refrigeration System Section 7Q1300 SERIESRemoteNOTE: These characteristics may vary depending onoperating conditions.Cycle TimesFreeze Time + Harvest Time = Total Cycle TimeQ1600 SERIESSelf-Contained Water-CooledNOTE: These characteristics may vary depending onoperating conditions.Cycle TimesFreeze Time + Harvest Time = Total Cycle TimeAir Temp.EnteringCondenser°F/°CFreeze TimeWater Temperature °F/°C50/10.0 70/21.1 90/32.2HarvestTimeAir Temp.EnteringCondenser°F/°CFreeze TimeWater Temperature °F/°C50/10.0 70/21.1 90/32.2HarvestTime-20/-28.9 to70/21.19.9-11.1 10.9-12.2 11.7-13.080/26.7 10.0-11.2 11.0-12.3 11.1-12.490/32.2 10.1-11.3 11.1-12.4 10.7-11.9100/37.8 10.8-12.0 11.8-13.2 12.8-14.2110/43.3 11.7-13.0 12.9-14.3 13.8-15.41-2.570/21.1 7.2-8.1 8.0-9.0 8.9-9.980/26.7 7.3-8.2 8.1-9.1 9.2-10.290/32.2 7.4-8.2 8.2-9.1 9.6-10.7100/37.8 7.4-8.3 8.4-9.4 9.7-10.8Times in minutes1-2.5Times in minutes24 Hour Ice Production24 Hour Ice ProductionAir Temp.Water Temperature °F/°CEnteringCondenser 50/10.0 70/21.1 90/32.2°F/°C-20/-28.9 to70/21.11260 1160 109080/26.7 1250 1150 114090/32.2 1240 1140 1180100/37.8 1170 1080 1010110/43.3 1090 1000 940Based on average ice slab weight of 10.0- 11.0 lbRatings with JC1395 condenser, dice or half dice cubesOperating PressuresAir Temp.EnteringCondenser°F/°CFreeze CycleDischargePressurePSIGSuctionPressurePSIGHarvest CycleDischargePressurePSIGSuctionPressurePSIG-20/-28.9 to50/10.0220-250 40-22 135-170 75-9570/21.1 240-260 40-22 140-180 80-9580/26.7 240-270 41-22 140-190 80-9590/32.2 250-290 42-22 140-200 80-95100/37.8 280-320 46-22 140-210 80-95110/43.3 310-360 48-24 140-220 85-100Suction pressure drops gradually throughout the freeze cycleAir Temp.Water Temperature °F/°CEnteringCondenser 50/10.0 70/21.1 90/32.2°F/°C70/21.1 1650 1510 139080/26.7 1635 1500 135090/32.2 1625 1490 1300100/37.8 1620 1450 129070/21.1 1650 1510 1390Based on average ice slab weight of 13.0 -14.12 lbCondenserWaterConsumptionOperating Pressures90/32.2 Air TemperatureAround Ice MachineWater Temperature °F/°C50/10.0 70/21.1 90/32.2Gal/24 hours 1400 2235 6500Water regulating valve set to maintain 240 PSIG discharge pressureAir Temp.EnteringCondenser°F/°C-20/-28.9 to50/10.0Freeze CycleDischargePressurePSIGSuctionPressurePSIGHarvest CycleDischargePressurePSIGSuctionPressurePSIG235-245 48-24 145-170 70-9070/21.1 235-265 52-26 150-175 70-9080/26.7 235-270 52-26 150-175 75-9590/32.2 235-280 52-28 155-180 75-95100/37.8 240-285 52-28 155-180 80-100110/43.3 240-290 54-28 155-185 80-100Suction pressure drops gradually throughout the freeze cycle7-44 Part No. 80-1100-3
Section 7Refrigeration SystemQ1600 SERIESRemoteNOTE: These characteristics may vary depending onoperating conditions.Cycle TimesFreeze Time + Harvest Time = Total Cycle TimeQ1800 SERIESSelf-Contained Air-CooledNOTE: These characteristics may vary depending onoperating conditions.Cycle TimesFreeze Time + Harvest Time = Total Cycle TimeAir Temp.EnteringFreeze TimeWater Temperature °F/°CCondenser°F/°C 50/10.0 70/21.1 90/32.2-20 to 70 7.5-8.4 8.2-9.2 9.0-10.1-29 to 21.190/32.2 8.0-8.9 8.6-9.6 9.2-10.3100/37.8 8.4-9.3 9.2-10.2 9.7-10.8110/43.3 9.2-10.3 10.0-11.2 10.4-11.6Times in minutes24 Hour Ice ProductionOperating PressuresHarvestTime1 - 2.5Air Temp.Water Temperature °F/°CEnteringCondenser 50/10.0 70/21.1 90/32.2°F/°C-20 to 70-29 to 21.11600 1478 137090/32.2 1523 1425 1340100/37.8 1460 1350 1290110/43.3 1343 1250 1213Based on average ice slab weight of 13.0- 14.12lbRatings with JC1895 condenser, dice or half dice cubesAir Temp.EnteringCondenser°F/°CFreeze CycleDischargePressurePSIGSuctionPressurePSIGHarvest CycleDischargePressurePSIGSuctionPressurePSIG-20 to 50/-29to 10.0220-255 52-26 100-120 70-8570/21.1 250-270 56-28 110-120 75-9080/26.7 250-275 56-28 110-120 75-9090/32.2 255-285 56-28 110-120 80-90100/37.8 270-310 56-30 115-130 80-95110/43.3 305-350 58-32 120-135 80-100Suction pressure drops gradually throughout the freeze cycleAir Temp.EnteringFreeze TimeWater Temperature °F/°CCondenser°F/°C 50/10.0 70/21.1 90/32.270/21.1 8.5-9.3 9.4-10.3 9.9-10.980/26.7 9.0-9.9 9.8-10.8 10.5-11.590/32.2 9.6-10.5 10.4-11.5 11.1-12.2100/37.8 10.6-11.6 11.5-12.6 12.4-13.6Times in minutes24 Hour Ice ProductionOperating PressuresHarvestTime1-2.5Air Temp.Water Temperature °F/°CEnteringCondenser 50/10.0 70/21.1 90/32.2°F/°C70/21.1 1880 1720 164080/26.7 1780 1650 156090/32.2 1690 1570 1480100/37.8 1550 1440 1350Based on average ice slab weight of 13.0 - 14.12lbRegular cube derate is 7%Air Temp.EnteringCondenser°F/°CFreeze CycleDischargePressurePSIGSuctionPressurePSIGHarvest CycleDischargePressurePSIGSuctionPressurePSIG50/10.0 220-280 40-20 155-190 60-8070/21.1 220-280 40-20 160-190 65-8080/26.7 230-290 42-20 160-190 65-8090/32.2 260-320 44-22 185-205 70-90100/37.8 300-360 46-24 210-225 75-100110/43.3 320-400 48-26 215-240 80-100Suction pressure drops gradually throughout the freeze cyclePart No. 80-1100-3 7-45
Refrigeration System Section 7Q1800 SERIESSelf-Contained Water-CooledNOTE: These characteristics may vary depending onoperating conditions.Cycle TimesFreeze Time + Harvest Time = Total Cycle TimeQ1800 SERIESRemoteNOTE: These characteristics may vary depending onoperating conditions.Cycle TimesFreeze Time + Harvest Time = Total Cycle TimeAir Temp.Around IceMachine°F/°CFreeze TimeWater Temperature °F/°C50/10.0 70/21.1 90/32.2HarvestTimeAir Temp.EnteringCondenser°F/°CFreeze TimeWater Temperature °F/°C50/10.0 70/21.1 90/32.2HarvestTime70/21.1 8.7-9.6 9.6-10.5 10.8-11.980/26.7 9.0-9.9 9.6-10.6 10.8-11.990/32.2 9.1-10.1 9.7-10.7 10.9-12.0100/37.8 9.2-10.1 9.8-10.7 11.1-12.1Times in minutes1-2.5-20/-28.9 to70/21.19.1-10.0 9.8-10.8 10.7-11.780/26.7 9.3-10.2 10.1-11.1 10.9-12.090/32.2 9.5-10.5 10.3-11.4 11.1-12.2100/37.8 10.1-11.1 11.1-12.2 11.9-13.0110/43.3 11.0-12.1 12.1-13.2 12.7-13.91-2.524 Hour Ice ProductionTimes in minutesAir Temp.Water Temperature °F/°CAround IceMachine 50/10.0 70/21.1 90/32.2°F/°C70/21.1 1840 1690 152080/26.7 1780 1680 152090/32.2 1760 1670 1510100/37.8 1750 1660 1490Based on average ice slab weight of 13.0- 14.12lbRegular cube derate is 7%CondenserWaterConsumptionOperating Pressures90/32.2 Air TemperatureAround Ice MachineWater Temperature °F/°C50/10.0 70/21.1 90/32.2Gal/24 hours 2000 2670 7750Water regulating valve set to maintain 240 PSIG discharge pressureAir Temp.Around IceMachine°F/°CFreeze CycleDischargePressurePSIGSuctionPressurePSIGHarvest CycleDischargePressurePSIGSuctionPressurePSIG50/10.0 235-245 36-20 170-190 65-8070/21.1 235-245 38-20 170-190 65-8080/26.7 235-245 40-20 170-190 65-8090/32.2 235-250 42-22 175-190 65-80100/37.8 235-255 44-22 175-190 65-80110/43.3 235-260 46-22 175-190 65-80Suction pressure drops gradually throughout the freeze cycle24 Hour Ice ProductionAir Temp.Water Temperature °F/°CEnteringCondenser 50/10.0 70/21.1 90/32.2°F/°C-20/-28.9 to70/21.11770 1650 154080/26.7 1735 1615 151090/32.2 1700 1580 1480100/37.8 1620 1480 1400110/43.3 1500 1380 1320Based on average ice slab weight of 13.0 - 14.12lbRegular cube derate is 7%Ratings with JC1895 condenser, dice or half dice cubesOperating PressuresAir Temp.EnteringCondenser°F/°CFreeze CycleDischargePressurePSIGSuctionPressurePSIGHarvest CycleDischargePressurePSIGSuctionPressurePSIG-20/-28.9 to50/10.0220-250 38-24 160-180 60-8070/21.1 220-260 40-24 170-180 60-8080/26.7 250-270 48-24 175-190 70-9090/32.2 250-280 50-24 180-200 80-90100/37.8 270-300 52-28 205-215 80-95110/43.3 300-350 54-28 205-230 80-100Suction pressure drops gradually throughout the freeze cycle7-46 Part No. 80-1100-3
Section 7Refrigeration SystemRefrigerant Recovery/Evacuation and RechargingNORMAL SELF-CONTAINED MODEL PROCEDURESRefrigerant Recovery/EvacuationDo not purge refrigerant to the atmosphere. Capturerefrigerant using recovery equipment. Follow themanufacturer’s recommendations.SELF-CONTAINED RECOVERY/EVACUATION1. Place the toggle switch in the OFF position.2. Install manifold gauges, charging cylinder/scale, andrecovery unit or two-stage vacuum pump.MANIFOLD SETImportantManitowoc Ice, Inc. assumes no responsibility forthe use of contaminated refrigerant. Damageresulting from the use of contaminated refrigerant isthe sole responsibility of the servicing company.LOW SIDESERV<strong>ICE</strong>VALVEOPENBACKSEATEDOPENBACKSEATEDHIGH SIDESERV<strong>ICE</strong>VALVEImportantReplace the liquid line drier before evacuating andrecharging. Use only a Manitowoc (O.E.M.) liquidline filter drier to prevent voiding the warranty.CONNECTIONS1. Suction side of the compressor through the suctionservice valve.VACUUM PUMP/RECOVERY UNIT2. Discharge side of the compressor through thedischarge service valve.CLOSEDOPENSV1404AFigure 7-14. Recovery/Evacuation Connections3. Open (backseat) the high and low side ice machineservice valves, and open high and low side onmanifold gauges.4. Perform recovery or evacuation:A. Recovery: Operate the recovery unit as directedby the manufacturer’s instructions.B. Evacuation prior to recharging: Pull the systemdown to 250 microns. Then, allow the pump torun for an additional half hour. Turn off the pumpand perform a standing vacuum leak check.NOTE: Check for leaks using a halide or electronic leakdetector after charging the ice machine.5. Refer to Charging Procedures.Part No. 80-1100-3 7-47
Refrigeration System Section 7Self-Contained Charging ProceduresImportantThe charge is critical on all Manitowoc icemachines. Use a scale or a charging cylinder toensure the proper charge is installed.1. Be sure the toggle switch is in the OFF position.LOW SIDESERV<strong>ICE</strong>VALVECLOSEDFRONTSEATEDCHARGINGCYLINDEROPENMANIFOLD SETOPENBACKSEATEDHIGH SIDESERV<strong>ICE</strong>VALVECLOSEDFigure 7-15. Charging ConnectionsVACUUM PUMP/RECOVERY UNITSV1404B2. Close the vacuum pump valve, the low side servicevalve, and the low side manifold gauge valve.3. Open the high side manifold gauge valve, andbackseat the high side service valve.4. Open the charging cylinder and add the properrefrigerant charge (shown on nameplate) throughthe discharge service valve.5. Let the system “settle” for 2 to 3 minutes.6. Place the toggle switch in the <strong>ICE</strong> position.7. Close the high side on the manifold gauge set. Addany remaining vapor charge through the suctionservice valve (if necessary).NOTE: Manifold gauges must be removed properly toensure that no refrigerant contamination or loss occurs.8. Make sure that all of the vapor in the charging hosesis drawn into the ice machine before disconnectingthe charging hoses.A. Run the ice machine in freeze cycle.B. Close the high side service valve at the icemachine.C. Open the low side service valve at the icemachine.D. Open the high and low side valves on themanifold gauge set. Any refrigerant in the lineswill be pulled into the low side of the system.E. Allow the pressures to equalize while the icemachine is in the freeze cycle.F. Close the low side service valve at the icemachine.Remove the hoses from the ice machine and install thecaps.7-48 Part No. 80-1100-3
Section 7Refrigeration SystemNORMAL REMOTE MODEL PROCEDURESRefrigerant Recovery/EvacuationDo not purge refrigerant to the atmosphere. Capturerefrigerant using recovery equipment. Follow themanufacturer’s recommendations.ImportantManitowoc Ice, Inc. assumes no responsibility forthe use of contaminated refrigerant. Damageresulting from the use of contaminated refrigerant isthe sole responsibility of the servicing company.ImportantReplace the liquid line drier before evacuating andrecharging. Use only a Manitowoc (O.E.M.) liquidline filter drier to prevent voiding the warranty.CONNECTIONSImportantRecovery/evacuation of a remote system requiresconnections at four points for complete systemevacuation. See the drawing on next page.Make these connections:• Suction side of the compressor through the suctionservice valve.• Discharge side of the compressor through thedischarge service valve.• Receiver outlet service valve, which evacuates thearea between the check valve in the liquid line andthe pump down solenoid.• Access (Schrader) valve on the discharge line quickconnectfitting, located on the outside of thecompressor/evaporator compartment. Thisconnection evacuates the condenser. Without it, themagnetic check valves would close when thepressure drops during evacuation, preventingcomplete evacuation of the condenser.NOTE: Manitowoc recommends using an access valvecore removal and installation tool on the discharge linequick-connect fitting. This permits access valve coreremoval. This allows for faster evacuation and charging,without removing the manifold gauge hose.REMOTE RECOVERY/EVACUATION1. Place the toggle switch in the OFF position.2. Install manifold gauges, charging cylinder/scale, andrecovery unit or two-stage vacuum pump.3. Open (backseat) the high and low side ice machineservice valves.4. Open the receiver service valve halfway.5. Open high and low side on the manifold gauge set.6. Perform recovery or evacuation:A. Recovery: Operate the recovery unit as directedby the manufacturer’s instructions.B. Evacuation prior to recharging: Pull the systemdown to 250 microns. Then, allow the pump torun for an additional hour. Turn off the pump andperform a standing vacuum leak check.NOTE: Check for leaks using a halide or electronic leakdetector after charging the ice machine.7. Refer to Charging Procedures.Part No. 80-1100-3 7-49
Refrigeration System Section 7HEAT E XCHANGEREVAPO RAT O REXPANSIO NVALVExH O T GASSO LEN O IDVALVESxHAR VESTPRESSUREREG ULATINGVALVELIQU IDLINESO LEN O IDLO W SIDESER V<strong>ICE</strong> VALVE(BAC K SEATED )CO M PRESSO RxHAR VESTPRESSURESO LEN O IDVALVEHIGH SIDESER V<strong>ICE</strong> VALVE(BAC K SEATED )STRAINERCHEC KVALVEDRIERDISCHARGE LINEQU ICK CO NNECTSCHRAEDER FITTINGRECEI VERSER V<strong>ICE</strong> VALVE1/2 OPENCHEC K VALVERE M O TE CO NDENSERBRCM ANIFO LD SETTEEHEAD PRESSURECO NTR O L VALVEOPENOPENSCA LECLO SEDOPENVACUUM PUM P/REC O VER Y UNITSV1461Figure 7-16. Recovery/Evacuation Connections7-50 Part No. 80-1100-3
Section 7Refrigeration SystemRemote Charging Procedures1. Be sure the toggle switch is in the OFF position.2. Close the vacuum pump valve, the low and high sideservice valves (frontseat), and the low side manifoldgauge valve.3. Open the charging cylinder and add the properrefrigerant charge (shown on nameplate) into thesystem high side (receiver outlet valve anddischarge lines quick-connect fitting).4. If the high side does not take the entire charge,close the high side on the manifold gauge set, andbackseat (open) the low side service valve andreceiver outlet service valve. Start the ice machineand add the remaining charge through the low side(in vapor form) until the machine is fully charged.5. Ensure all vapor in charging hoses is drawn into themachine, then disconnect the manifold gauges.NOTE: Backseat the receiver outlet service valve aftercharging is complete and before operating the icemachine. If the access valve core removal andinstallation tool is used on the discharge quick-connectfitting, reinstall the Schraeder valve core beforedisconnecting the access tool and hose.6. Run the ice machine in freeze cycle.7. Close the high side service valve at the ice machine.8. Open the low side service valve at the ice machine.9. Open the high and low side valves on the manifoldgauge set. Any refrigerant in the lines will be pulledinto the low side of the system.10. Allow the pressures to equalize while the icemachine is in the freeze cycle.11. Close the low side service valve at the ice machine.12. Remove the hoses from the ice machine and installthe caps.Part No. 80-1100-3 7-51
Refrigeration System Section 7HEAT E XCHANGEREVAPO RAT O REXPANSIO NVALVELO W SIDESER V<strong>ICE</strong> VALVE(BAC K SEATED )xH O T GASSO LEN O IDVALVESCO M PRESSO RSTRAINERxLIQU IDLINESO LEN O IDHAR VESTPRESSUREREG ULATINGVALVExHAR VESTPRESSURESO LEN O IDVALVEHIGH SIDESER V<strong>ICE</strong> VALVE(BAC K SEATED )CHEC KVALVEDRIERDISCHARGE LINEQU ICK CO NNECTSCHRAEDER FITTINGRE M O TE CO NDENSERRECEI VERSER V<strong>ICE</strong> VALVE1/2 OPENCHEC K VALVERCBHEAD PRESSURECO NTR O L VALVEM ANIFO LD SETTEECLO SEDOPENSCA LEOPENCLO SEDVACUUM PUM P/REC O VER Y UNITSV1462Figure 7-17. Remote Charging Connections7-52 Part No. 80-1100-3
Section 7Refrigeration SystemSYSTEM CONTAMINATION CLEAN-UPGeneralThis section describes the basic requirements forrestoring contaminated systems to reliable service.ImportantManitowoc Ice, Inc. assumes no responsibility forthe use of contaminated refrigerant. Damageresulting from the use of contaminated refrigerant isthe sole responsibility of the servicing company.Determining Severity Of ContaminationSystem contamination is generally caused by eithermoisture or residue from compressor burnout enteringthe refrigeration system.Inspection of the refrigerant usually provides the firstindication of system contamination. Obvious moisture oran acrid odor in the refrigerant indicates contamination.If either condition is found, or if contamination issuspected, use a Total Test Kit from Totaline or a similardiagnostic tool. These devices sample refrigerant,eliminating the need to take an oil sample. Follow themanufacturer’s directions.If a refrigerant test kit indicates harmful levels ofcontamination, or if a test kit is not available, inspect thecompressor oil.1. Remove the refrigerant charge from the icemachine.2. Remove the compressor from the system.3. Check the odor and appearance of the oil.4. Inspect open suction and discharge lines at thecompressor for burnout deposits.5. If no signs of contamination are present, perform anacid oil test.Check the chart below to determine the type of cleanuprequired.Contamination/Cleanup ChartSymptoms/FindingsRequired Cleanup ProcedureNo symptoms or suspicion of contaminationNormal evacuation/recharging procedureMoisture/Air Contamination symptomsRefrigeration system open to atmosphere for longer than 15minutesMild contamination cleanup procedureRefrigeration test kit and/or acid oil test shows contaminationLeak in water-cooled condenserNo burnout deposits in open compressor linesMild Compressor Burnout symptomsOil appears clean but smells acridMild contamination cleanup procedureRefrigeration test kit or acid oil test shows harmful acid contentNo burnout deposits in open compressor linesSevere Compressor Burnout symptomsOil is discolored, acidic, and smells acridSevere contamination cleanup procedureBurnout deposits found in the compressor and lines, and inother componentsPart No. 80-1100-3 7-53
Refrigeration System Section 7Mild System Contamination Cleanup Procedure1. Replace any failed components.2. If the compressor is good, change the oil.3. Replace the liquid line drier.NOTE: If the contamination is from moisture, use heatlamps during evacuation. Position them at thecompressor, condenser and evaporator prior toevacuation. Do not position heat lamps too close toplastic components, or they may melt or warp.ImportantDry nitrogen is recommended for this procedure.This will prevent CFC release.4. Follow the normal evacuation procedure, exceptreplace the evacuation step with the following:A. Pull vacuum to 1000 microns. Break the vacuumwith dry nitrogen and sweep the system.Pressurize to a minimum of 5 psi.B. Pull vacuum to 500 microns. Break the vacuumwith dry nitrogen and sweep the system.Pressurize to a minimum of 5 psi.C. Change the vacuum pump oil.D. Pull vacuum to 250 microns. Run the vacuumpump for 1/2 hour on self-contained models, 1hour on remotes.NOTE: You may perform a standing vacuum test tomake a preliminary leak check. You should use anelectronic leak detector after system charging to be surethere is no leak.5. Charge the system with the proper refrigerant to thenameplate charge.6. Operate the ice machine.Severe System Contamination Cleanup Procedure1. Remove the refrigerant charge.2. Remove the compressor.3. Disassemble the harvest solenoid valve. If burnoutdeposits are found inside the valve, install a rebuildkit, and replace manifold strainer, TXV and harvestpressure regulating valve.4. Wipe away any burnout deposits from suction anddischarge lines at compressor.5. Sweep through the open system with dry nitrogen.ImportantRefrigerant sweeps are not recommended, as theyrelease CFC’s into the atmosphere.6. Install a new compressor and new start components.7. Install a suction line filter-drier with acid andmoisture removal capability (P/N 89-3028-3). Placethe filter drier as close to the compressor aspossible.8. Install an access valve at the inlet of the suction linedrier.9. Install a new liquid line drier.Continued on next page …7-54 Part No. 80-1100-3
Section 7Refrigeration System10. Follow the normal evacuation procedure, exceptreplace the evacuation step with the following:ImportantDry nitrogen is recommended for this procedure.This will prevent CFC release.A. Pull vacuum to 1000 microns. Break the vacuumwith dry nitrogen and sweep the system.Pressurize to a minimum of 5 psi.B. Change the vacuum pump oil.C. Pull vacuum to 500 microns. Break the vacuumwith dry nitrogen and sweep the system.Pressurize to a minimum of 5 psi.D. Change the vacuum pump oil.E. Pull vacuum to 250 microns. Run the vacuumpump for 1/2 hour on self-contained models, 1hour on remotes.NOTE: You may perform a standing vacuum test tomake a preliminary leak check. You should use anelectronic leak detector after system charging to be surethere is no leak.11. Charge the system with the proper refrigerant to thenameplate charge.12. Operate the ice machine for one hour. Then, checkthe pressure drop across the suction line filter-drier.A. If the pressure drop is less than 1 psi, the filterdriershould be adequate for complete cleanup.B. If the pressure drop exceeds 1 psi, change thesuction line filter-drier and the liquid line drier.Repeat until the pressure drop is acceptable.13. Operate the ice machine for 48-72 hours. Then,remove the suction line drier and change the liquidline drier.14. Follow normal evacuation procedures.REPLACING PRESSURE CONTROLS WITHOUTREMOVING REFRIGERANT CHARGEThis procedure reduces repair time and cost. Use itwhen any of the following components requirereplacement, and the refrigeration system is operationaland leak-free.• Fan cycle control (air-cooled only)• Water regulating valve (water-cooled only)• High pressure cut-out control• High side service valve• Low side service valveImportantThis is a required in-warranty repair procedure.1. Disconnect power to the ice machine.2. Follow all manufacturer’s instructions supplied withthe pinch-off tool. Position the pinch-off tool aroundthe tubing as far from the pressure control asfeasible. (See the figure on next page.) Clamp downon the tubing until the pinch-off is complete.! WarningDo not unsolder a defective component. Cut it out ofthe system. Do not remove the pinch-off tool untilthe new component is securely in place.3. Cut the tubing of the defective component with asmall tubing cutter.4. Solder the replacement component in place. Allowthe solder joint to cool.5. Remove the pinch-off tool.6. Re-round the tubing. Position the flattened tubing inthe proper hole in the pinch off tool. Tighten thewingnuts until the block is tight and the tubing isrounded. (See the drawing on next page.)NOTE: The pressure controls will operate normally oncethe tubing is re-rounded. Tubing may not re-round100%.Part No. 80-1100-3 7-55
Refrigeration System Section 7SV1406Figure 7-18. Using Pinch-Off Tool7-56 Part No. 80-1100-3
Section 7Refrigeration SystemFILTER-DRIERSThe filter-driers used on Manitowoc ice machines aremanufactured to Manitowoc specifications.The difference between Manitowoc driers and off-theshelfdriers is in filtration. Manitowoc driers have dirtretainingfiltration, with fiberglass filters on both the inletand outlet ends. This is very important because icemachines have a back-flushing action which takes placeduring every harvest cycle.These filter-driers have a very high moisture removalcapability and a good acid removal capability.The size of the filter-drier is important. The refrigerantcharge is critical. Using an improperly sized filter-drierwill cause the ice machine to be improperly charged withrefrigerant.Listed below are the recommended O.E.M. fieldreplacement driers:<strong>Model</strong>DrierSizeEndConnectionSizePartNumberSelf-Contained Airand Water CooledQ200 /Q280/Q320 UK-032S 1/4" 89-3025-3Q370/Q420/Q450Q600/Q800/Q1000Remote Air CooledQ450/Q600 UK-083S 3/8" 89-3027-3Q800/Q1000All CondenserTypeQ1300/Q1600UK-083S 3/8" 89-3027-3Q1800Suction Filter UK-165S 5/8" 89-3028-3Suction Filter used when cleaning up severely contaminated systemsImportantDriers are covered as a warranty part. The driermust be replaced any time the system is opened forrepairs.TOTAL SYSTEM REFRIGERANT CHARGESImportantThis information is for reference only. Refer to theice machine serial number tag to verify the systemcharge. Serial plate information overridesinformation listed on this page.Series Version ChargeQ200Air-Cooled18 oz.Water-Cooled 15 oz.Q210Air-Cooled15 ozWater-Cooled 11 ozQ280Air-Cooled18 ozWater-Cooled 15 ozQ320Air-Cooled20 oz.Water-Cooled 16 oz.Q370Air-Cooled20 oz.Water-Cooled 17 oz.Air-Cooled24 oz.Q420/Q450 Water-Cooled 22 oz.Remote6 lb.Air-Cooled28 oz.Q600 Water-Cooled 22 oz.Remote8 lb.Air-Cooled36 oz.Q800 Water-Cooled 25 oz.Remote8 lb.Air-Cooled38 oz.Q1000 Water-Cooled 32 oz.Remote9.5 lb.Air-Cooled48 oz.Q1300 Water-Cooled 44 oz.Remote 12.5 lb. *Q1600Water-Cooled 46 oz.Remote15 lb.*Air-Cooled56 oz.Q1800 Water-Cooled 46 oz.Remote15 lb.**For remote line sets with lengths between 50' and 100' refer tochart on Page 2-13NOTE: All ice machines on this list are charged usingR-404A refrigerant.Part No. 80-1100-3 7-57
Refrigeration System Section 7REFRIGERANT DEFINITIONSRecoverTo remove refrigerant, in any condition, from a systemand store it in an external container, without necessarilytesting or processing it in any way.RecycleTo clean refrigerant for re-use by oil separation andsingle or multiple passes through devices, such asreplaceable core filter-driers, which reduce moisture,acidity and particulate matter. This term usually appliesto procedures implemented at the field job site or at alocal service shop.ReclaimTo reprocess refrigerant to new product specifications(see below) by means which may include distillation. Achemical analysis of the refrigerant is required afterprocessing to be sure that product specifications aremet. This term usually implies the use of processes andprocedures available only at a reprocessing ormanufacturing facility.Chemical analysis is the key requirement in thisdefinition. Regardless of the purity levels reached by areprocessing method, refrigerant is not considered“reclaimed” unless it has been chemically analyzed andmeets ARI Standard 700 (latest edition).New Product SpecificationsThis means ARI Standard 700 (latest edition). Chemicalanalysis is required to assure that this standard is met.7-58 Part No. 80-1100-3
Section 7Refrigeration SystemREFRIGERANT RE-USE POLICYManitowoc recognizes and supports the need for properhandling, re-use, and disposal of, CFC and HCFCrefrigerants. Manitowoc service procedures requirerecapturing refrigerants, not venting them to theatmosphere.It is not necessary, in or out of warranty, to reduce orcompromise the quality and reliability of your customers’products to achieve this.ImportantManitowoc Ice, Inc. assumes no responsibility foruse of contaminated refrigerant. Damage resultingfrom the use of contaminated, recovered, orrecycled refrigerant is the sole responsibility of theservicing company.Manitowoc approves the use of:1. New Refrigerant• Must be of original nameplate type.2. Reclaimed Refrigerant• Must be of original nameplate type.• Must meet ARI Standard 700 (latest edition)specifications.3. Recovered or Recycled Refrigerant• Must be recovered or recycled in accordancewith current local, state and federal laws.• Must be recovered from and re-used in the sameManitowoc product. Re-use of recovered orrecycled refrigerant from other products is notapproved.• Recycling equipment must be certified to ARIStandard 740 (latest edition) and be maintainedto consistently meet this standard.• Recovered refrigerant must come from a“contaminant-free” system. To decide whetherthe system is contaminant free, consider:– Type(s) of previous failure(s)– Whether the system was cleaned, evacuatedand recharged properly following failure(s)– Whether the system has been contaminatedby this failure– Compressor motor burnouts and improperpast service prevent refrigerant re-use.– Refer to “System Contamination Cleanup” totest for contamination.4. “Substitute” or “Alternative” Refrigerant• Must use only Manitowoc-approved alternativerefrigerants.• Must follow Manitowoc-published conversionprocedures.Part No. 80-1100-3 7-59
Refrigeration System Section 7HFC REFRIGERANT QUESTIONS AND ANSWERSManitowoc uses R-404A and R-134A HFC refrigerantswith ozone depletion potential (ODP) factors of zero(0.0). R-404A is used in ice machines and reach-infreezers and R-134A is used in reach-in refrigerators.1. What compressor oil does Manitowoc require foruse with HFC refrigerants?Manitowoc products use Polyol Ester (POE) typecompressor oil. It is the lubricant of choice amongcompressor manufacturers.2. What are some of the characteristics of POE oils?They are hygroscopic, which means they have theability to absorb moisture. POE oils are 100 timesmore hygroscopic than mineral oils. Once moistureis absorbed into the oil, it is difficult to remove, evenwith heat and vacuum. POE oils are also excellentsolvents, and tend to “solvent clean” everythinginside the system, depositing material where it is notwanted.3. What do these POE oil characteristics mean to me?You must be more exacting in your procedures. Takeutmost care to prevent moisture from entering therefrigeration system. Refrigeration systems andcompressors should not be left open to theatmosphere for more than 15 minutes. Keep oilcontainers and compressors capped at all times tominimize moisture entry. Before removing thesystem charge to replace a faulty component, besure you have all of the needed components at thesite. Remove new system component plugs andcaps just prior to brazing. Be prepared to connect avacuum pump immediately after brazing.4. Are there any special procedures required if a POEsystem is diagnosed with a refrigerant leak?For systems found with positive refrigerant systempressure, no special procedures are required.For systems found without any positive refrigerantpressure, assume that moisture has entered thePOE oil. After the leak is found and repaired, thecompressor oil must be changed. The compressormust be removed and at least 95% of the oil drainedfrom the suction port of the compressor. Use a“measuring cup” to replace the old oil with exactlythe same amount of new POE oil, such as MobilEAL22A.Remember, care must be taken to prevent moisturefrom getting into the refrigeration system duringrefrigeration repairs.5. How do I leak-check a system containing HFCrefrigerant?Use equipment designed for HFC detection. Do notuse equipment designed for CFC detection. Consultleak detection equipment manufacturers for theirrecommendations. Also, standard soap bubbles willwork with HFC refrigerants.6. Does Manitowoc use a special liquid line filter-drierwith HFC refrigerants?Yes. Manitowoc uses an ALCO “UK” series filterdrierfor increased filtration and moisture removal.During a repair, Manitowoc recommends installingthe drier just before hooking up a vacuum pump.Continued on next page …7-60 Part No. 80-1100-3
Section 7Refrigeration System7. Is other special equipment required to service HFCrefrigerants?No. Standard refrigeration equipment such asgauges, hoses, recovery systems, vacuum pumps,etc., are generally compatible with HFC refrigerants.Consult your equipment manufacturer for specificrecommendations for converting existing equipmentto HFC usage. Once designated (and calibrated, ifneeded) for HFC use, this equipment should beused specifically with HFC refrigerants only.8. Do I have to recover HFC refrigerants?Yes. Like other refrigerants, government regulationsrequire recovering HFC refrigerants.9. Will R-404A or R-134A separate if there is a leak inthe system?No. Like R-502, the degree of separation is too smallto detect.10. How do I charge a system with HFC refrigerant?The same as R-502. Manitowoc recommendscharging only liquid refrigerant into the high side ofthe system.Part No. 80-1100-3 7-61
Refrigeration System Section 7THIS PAGE INTENTIONALLY LEFT BLANK7-62 Part No. 80-1100-3
Section 7Refrigeration SystemTHIS PAGE INTENTIONALLY LEFT BLANKPart No. 80-1100-3 7-63