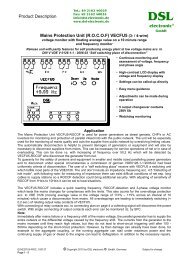
Aggregate Control Unit GENCON II pro - DSL electronic ® GmbH
Aggregate Control Unit GENCON II pro - DSL electronic ® GmbH
Aggregate Control Unit GENCON II pro - DSL electronic ® GmbH

You also want an ePaper? Increase the reach of your titles
YUMPU automatically turns print PDFs into web optimized ePapers that Google loves.
Software maintenance<br />
Text editing<br />
You may wish to change the name of an input alarm channel, or you may wish to translate all the commands<br />
and messages from English into another language. You can do this by yourself using the PC <strong>pro</strong>gram ED.EXE.<br />
After editing the texts by ED.EXE, load the revised software into <strong>GENCON</strong> <strong>II</strong> using the <strong>pro</strong>cedure described<br />
in the following section.<br />
Run the <strong>pro</strong>gram by ED SET to define the <strong>pro</strong>gram input and output files. If you omit the argument SET,<br />
ED.EXE will use the file names that it used in its previous execution. You can edit an existing software file by<br />
specifying the same input and output file names.<br />
The layout of your PC keyboard may be different from the USA English standard. ED.EXE allows you to redefine<br />
the keyboard "stroke to font" linkage. You can link a font with a single key, with a function key or with a<br />
common key combination (ie Ctrl-key, Shift-key, Alt-key).<br />
To link a key with a font, use the arrow keys first to point to the desired font and then strike the ENTER key,<br />
the blue font background turns to red. Strike the desired key to establish linkage. The PC beeps if you strike an<br />
unlinked key. If you strike a linked key, the blue "highlight" moves to the corresponding font. Strike Esc to end<br />
the keyboard definition phase.<br />
The text editing <strong>pro</strong>cess is straightforward: Type over the existing text (the PC left, right, insert and delete keys<br />
are at your disposal). Skip text line editing by striking the down arrow key.<br />
Backtrack by striking the up arrow key. To introduce your text changes strike the ENTER key. End ED.EXE<br />
by striking the Esc key. Be careful not to place text where measured values are displayed!<br />
Software down loading<br />
It may be required to load <strong>GENCON</strong> <strong>II</strong> with a new software version to enhance its capabilities, or it may be<br />
required to load <strong>GENCON</strong> <strong>II</strong> with software having modified texts (see Text Editing). The software is stored in<br />
a non-volatile Flash memory. The Flash memory is <strong>pro</strong>grammed (written to) by <strong>GENCON</strong> <strong>II</strong> itself. Flash<br />
memories can undergo 10,000 re-<strong>pro</strong>gramming cycles. You can identify the version of the software resident in<br />
<strong>GENCON</strong> <strong>II</strong> using the COMMAND\HELP.<br />
Prerequisites:<br />
1. The PC should have an RS-485 serial communication port, preferably isolated from the PC ground. The<br />
RS-485 transmitter (TX) enable signal should either be DTR, RTS or OUT1. No IRQ line is required.<br />
2. Minimum 15 volt DC power supply for <strong>GENCON</strong> <strong>II</strong>. The DC supply should be well regulated or loading<br />
the software may fail. It is advised to avoid electrical transients while loading software!<br />
3. New software disk.<br />
Procedure:<br />
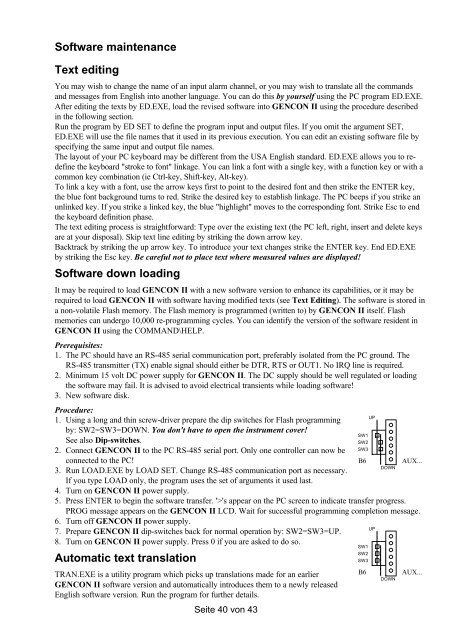
1. Using a long and thin screw-driver prepare the dip switches for Flash <strong>pro</strong>gramming<br />
by: SW2=SW3=DOWN. You don't have to open the instrument cover!<br />
See also Dip-switches.<br />
2. Connect <strong>GENCON</strong> <strong>II</strong> to the PC RS-485 serial port. Only one controller can now be<br />
connected to the PC!<br />
3. Run LOAD.EXE by LOAD SET. Change RS-485 communication port as necessary.<br />
If you type LOAD only, the <strong>pro</strong>gram uses the set of arguments it used last.<br />
4. Turn on <strong>GENCON</strong> <strong>II</strong> power supply.<br />
5. Press ENTER to begin the software transfer. '>'s appear on the PC screen to indicate transfer <strong>pro</strong>gress.<br />
PROG message appears on the <strong>GENCON</strong> <strong>II</strong> LCD. Wait for successful <strong>pro</strong>gramming completion message.<br />
6. Turn off <strong>GENCON</strong> <strong>II</strong> power supply.<br />
7. Prepare <strong>GENCON</strong> <strong>II</strong> dip-switches back for normal operation by: SW2=SW3=UP.<br />
8. Turn on <strong>GENCON</strong> <strong>II</strong> power supply. Press 0 if you are asked to do so.<br />
Automatic text translation<br />
TRAN.EXE is a utility <strong>pro</strong>gram which picks up translations made for an earlier<br />
<strong>GENCON</strong> <strong>II</strong> software version and automatically introduces them to a newly released<br />
English software version. Run the <strong>pro</strong>gram for further details.<br />
Seite 40 von 43<br />
SW1<br />
SW2<br />
SW3<br />
UP<br />
B6 AUX...<br />
SW1<br />
SW2<br />
SW3<br />
UP<br />
DOWN<br />
B6 AUX...<br />
DOWN