Instructions To Install Off The Shelf Oki - Snap-on Equipment
Instructions To Install Off The Shelf Oki - Snap-on Equipment
Instructions To Install Off The Shelf Oki - Snap-on Equipment
You also want an ePaper? Increase the reach of your titles
YUMPU automatically turns print PDFs into web optimized ePapers that Google loves.
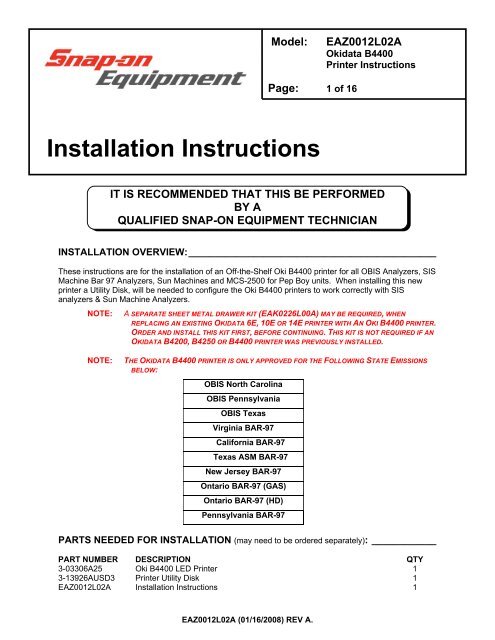
Model:EAZ0012L02A<str<strong>on</strong>g>Oki</str<strong>on</strong>g>data B4400Printer <str<strong>on</strong>g>Instructi<strong>on</strong>s</str<strong>on</strong>g>Page: 1 of 16<str<strong>on</strong>g>Install</str<strong>on</strong>g>ati<strong>on</strong> <str<strong>on</strong>g>Instructi<strong>on</strong>s</str<strong>on</strong>g>IT IS RECOMMENDED THAT THIS BE PERFORMEDBY AQUALIFIED SNAP-ON EQUIPMENT TECHNICIANINSTALLATION OVERVIEW:______________________________________________<str<strong>on</strong>g>The</str<strong>on</strong>g>se instructi<strong>on</strong>s are for the installati<strong>on</strong> of an <str<strong>on</strong>g>Off</str<strong>on</strong>g>-the-<str<strong>on</strong>g>Shelf</str<strong>on</strong>g> <str<strong>on</strong>g>Oki</str<strong>on</strong>g> B4400 printer for all OBIS Analyzers, SISMachine Bar 97 Analyzers, Sun Machines and MCS-2500 for Pep Boy units. When installing this newprinter a Utility Disk, will be needed to c<strong>on</strong>figure the <str<strong>on</strong>g>Oki</str<strong>on</strong>g> B4400 printers to work correctly with SISanalyzers & Sun Machine Analyzers.NOTE:A SEPARATE SHEET METAL DRAWER KIT (EAK0226L00A) MAY BE REQUIRED, WHENREPLACING AN EXISTING OKIDATA 6E, 10E OR 14E PRINTER WITH AN OKI B4400 PRINTER.ORDER AND INSTALL THIS KIT FIRST, BEFORE CONTINUING. THIS KIT IS NOT REQUIRED IF ANOKIDATA B4200, B4250 OR B4400 PRINTER WAS PREVIOUSLY INSTALLED.NOTE:THE OKIDATA B4400 PRINTER IS ONLY APPROVED FOR THE FOLLOWING STATE EMISSIONSBELOW:OBIS North CarolinaOBIS PennsylvaniaOBIS TexasVirginia BAR-97California BAR-97Texas ASM BAR-97New Jersey BAR-97Ontario BAR-97 (GAS)Ontario BAR-97 (HD)Pennsylvania BAR-97PARTS NEEDED FOR INSTALLATION (may need to be ordered separately): ____________PART NUMBER DESCRIPTION QTY3-03306A25 <str<strong>on</strong>g>Oki</str<strong>on</strong>g> B4400 LED Printer 13-13926AUSD3 Printer Utility Disk 1EAZ0012L02A <str<strong>on</strong>g>Install</str<strong>on</strong>g>ati<strong>on</strong> <str<strong>on</strong>g>Instructi<strong>on</strong>s</str<strong>on</strong>g> 1EAZ0012L02A (01/16/2008) REV A.
Page 3 of 16INSTALLING OKI B4400 PRINTER <strong>on</strong> OBIS: _________________________________Removing old Printer Ic<strong>on</strong>s1. Leave old or defective Printer <str<strong>on</strong>g>Install</str<strong>on</strong>g>ed and turned <strong>on</strong> during this next part.2. Turn computer <strong>on</strong>, and log in as PC. Do not enter in a password.3. Select Start ⇒ Settings ⇒ Printers. Right click <strong>on</strong> the current printer ic<strong>on</strong>. Click <strong>on</strong> .4. Click <strong>on</strong> to delete the current printer. Click <strong>on</strong> to c<strong>on</strong>firm deleti<strong>on</strong>.5. If you are unable to delete the current printer Ic<strong>on</strong>, this maybe due to either outstanding print jobspending that need to be canceled first or you do not have the printer installed with the printer turned<strong>on</strong> and plugged into the USB port.6. Remove any other Printer or fax Ic<strong>on</strong>s if present by right clicking <strong>on</strong> their ic<strong>on</strong> and selecting delete.7. <str<strong>on</strong>g>The</str<strong>on</strong>g> <strong>on</strong>ly Ic<strong>on</strong> that should be left is the Add printer Ic<strong>on</strong>.Uninstalling older versi<strong>on</strong>s of <str<strong>on</strong>g>Oki</str<strong>on</strong>g>data Status M<strong>on</strong>itor software1. In order for the new printer to install correctly you need to remove any old OKI softwarefrom the computer.2. Go to Start→ Settings → C<strong>on</strong>trol Panel.3. Double click <strong>on</strong> "Add Remove Programs".4. Scroll down the list of software until you get to the OKI XXXX program.5. Click <strong>on</strong> "Change/Remove". It will ask you if you want to c<strong>on</strong>firm file deleti<strong>on</strong>. Click <strong>on</strong> "Yes"and it will uninstall. Click <strong>on</strong> when completed. Do not reboot the computer at this time.6. Remove any other OKI XXXX printer software the same way. Do not reboot the computer at thistime.7. Close the Add/Remove Programs window by clicking <strong>on</strong> the X in the upper right hand corner ofthe window.<str<strong>on</strong>g>Install</str<strong>on</strong>g>ing the new <str<strong>on</strong>g>Oki</str<strong>on</strong>g>data B4400 Printer Driver and Status M<strong>on</strong>itor1. Unplug the AC cord and USB cable from the defective printer. Remove the defective printer.2. Unpack the new <str<strong>on</strong>g>Oki</str<strong>on</strong>g> B4400 printer from the box, and follow the <str<strong>on</strong>g>Oki</str<strong>on</strong>g>data instructi<strong>on</strong>s to make sureyou insert the t<strong>on</strong>er cartridge correctly.3. After installing the new printer <strong>on</strong> top the unit, make sure you plug the AC plug and USB cableback into the new printer but leave the power switch in the <str<strong>on</strong>g>Off</str<strong>on</strong>g> Positi<strong>on</strong>.4. Note: It is very important to leave the new printer power switch in the <str<strong>on</strong>g>Off</str<strong>on</strong>g> positi<strong>on</strong> until youare instructed to turn it <strong>on</strong>.5. Insert the B4400 CD that came with the printer into the DVD-ROM drive.6. It should automatically come up with an “OKI Printing Soluti<strong>on</strong>s screen”.7. I it does not, go to Start→ Run → Browse. Browse to your DVD-ROM drive where the CD isinserted, and Double-click <strong>on</strong> Setup.exe. Click .8. Select your Language. <str<strong>on</strong>g>The</str<strong>on</strong>g>n select the Printers Model number (B4400) from the list.9. Next, the License Agreement screen appears. Select “I Agree” to the terms.10. Select “<str<strong>on</strong>g>Install</str<strong>on</strong>g> Driver and Status M<strong>on</strong>itor”.11. When the next screen appears click <strong>on</strong> “Local Printer” and click <strong>on</strong> “Next”.12. Next the Port screen will appear. Verify that “USB” is highlighted and click <strong>on</strong> “Next”.13. Next the Printer model and emulati<strong>on</strong> screen will appear. Verify that “B4400” is highlighted forthe printer model and that “PCL” is highlighted for the printer emulati<strong>on</strong>. Click <strong>on</strong> “Next”.EAZ0012L02A (01/16/2008) REV A.
Page 4 of 1614. Follow the <strong>on</strong>-screen instructi<strong>on</strong>s until the drivers and Status m<strong>on</strong>itor software is completelyloaded.15. After the software has been loaded, the screen will prompt you to c<strong>on</strong>nect the new printer with thepower off. (D<strong>on</strong>’t forget to c<strong>on</strong>nect the USB cable to the printer).16. Next turn On the Printer and verify that Window Plug and Play finds new hardware. If all goeswell, the “C<strong>on</strong>gratulati<strong>on</strong>s your printer has been installed successfully” should appear. Click<strong>on</strong> “Finish”.17. Exit the OKI Printing Soluti<strong>on</strong>s window by clicking <strong>on</strong> the X in the top right hand corner of thewindow.18. Remove the B4400 Printer CD from the DVD-ROM drive and keep it with the unit.19. Next, go to Start ⇒ Settings ⇒ Printers. Verify that there is a printer Ic<strong>on</strong> for the B4400 printerand that it has a check mark next to it which indicates that it is the default printer. If no checkmark is next to the Ic<strong>on</strong> then you will need to right click <strong>on</strong> the Ic<strong>on</strong> and select it as the defaultprinter.Verifying new <str<strong>on</strong>g>Oki</str<strong>on</strong>g>data B4400 Printer Driver and Status M<strong>on</strong>itor works20. Right click <strong>on</strong> the B4400 Printer ic<strong>on</strong> and select “Properties”.21. Next click <strong>on</strong> “Print Test Page”. If the printer prints successfully click <strong>on</strong> “OK” and exit thePrinter and Faxes window.22. <str<strong>on</strong>g>The</str<strong>on</strong>g> Status M<strong>on</strong>itor can be accessed by going to Start→ Programs → <str<strong>on</strong>g>Oki</str<strong>on</strong>g>data → B4400 StatusM<strong>on</strong>itor → Status M<strong>on</strong>itor and maximizing the Status M<strong>on</strong>itor window.23. For more informati<strong>on</strong> <strong>on</strong> how to use the status m<strong>on</strong>itor, refer to the OBIS Service Manual.24. Reboot the computer for the settings to take affect and log <strong>on</strong> as OBIS.B4400 PRINTER INSTALLATION COMPLETE FOR OBISEAZ0012L02A (01/16/2008) REV A.
Page 5 of 16OKI B4400 PRINTER <strong>on</strong> SIS ANALYZERS with WIN 9X OS (Ontario GAS & HD;Virginia SIS): __________________________________________________________NOTE: A SEPARATE SHEET METAL DRAWER KIT (EAK0226L00A) MAY BE REQUIRED, WHENREPLACING AN EXISTING OKIDATA 6E, 10E OR 14E PRINTER WITH AN OKI B4400 PRINTER.ORDER AND INSTALL THIS KIT FIRST, BEFORE CONTINUING. THIS KIT IS NOT REQUIRED IF ANOKIDATA B4200, B4250 OR B4400 PRINTER WAS PREVIOUSLY INSTALLED.1. Leave old or defective printer c<strong>on</strong>nected at this time.2. Power up the SIS analyzer.3. This next step requires you to gain access to the Windows 95 c<strong>on</strong>trol panel.4. Select Start ⇒ Settings ⇒ Printers. Right click <strong>on</strong> the current printer ic<strong>on</strong>. Double click <strong>on</strong>.5. Click <strong>on</strong> to delete the current printer.6. If you are unable to delete the current printer Ic<strong>on</strong>, this maybe due to either outstanding print jobspending that need to be canceled first or you do not have the old printer installed with the printerturned <strong>on</strong> and plugged into the Parallel port of the computer.7. Remove any other Printer or fax Ic<strong>on</strong>s if present by right clicking <strong>on</strong> their ic<strong>on</strong> and selectingdelete.8. <str<strong>on</strong>g>The</str<strong>on</strong>g> <strong>on</strong>ly Ic<strong>on</strong> that should be left is the Add printer Ic<strong>on</strong>.9. Remove the defective printer from the unit, and leave the data cable and AC power supply cordattached to the unit.10. Unpack the new <str<strong>on</strong>g>Oki</str<strong>on</strong>g> B4400 printer from the box, and follow the <str<strong>on</strong>g>Oki</str<strong>on</strong>g>data instructi<strong>on</strong>s to make sureyou insert the t<strong>on</strong>er cartridge correctly.11. <str<strong>on</strong>g>Install</str<strong>on</strong>g> the <str<strong>on</strong>g>Oki</str<strong>on</strong>g> B4400 Printer into the SIS Machine. C<strong>on</strong>nect the existing data cable and ACPower cable to the <str<strong>on</strong>g>Oki</str<strong>on</strong>g> B4400 printer. Turn <strong>on</strong> the power switch <strong>on</strong> the side of the printer.NOTE:ENSURE THE PRINTER IS TURNED ON (1) POSITION AND CONNECTED TO THE COMPUTER VIATHE PARALLEL PORT CONNECTION.NOTE: IF WINDOWS PLUG AND PLAY FINDS THE NEW PRINTER CLICK ON CANCEL.12. Double click <strong>on</strong> the Add Printer Ic<strong>on</strong>, select Next >.13. Select “Local Printer”, select Next >.14. Select select Next >.15. Insert <str<strong>on</strong>g>Oki</str<strong>on</strong>g> B4400 ® Software CD into the CD/DVD-ROM Drive.16. Select browse. Browse the CD-ROM drive to select the following directory path D:\Drivers\Enu\Win9x and select Inf file ok2839le and click <strong>on</strong> .17. Follow any <strong>on</strong>screen prompts to complete the loading of the drivers.18. Do not change the “Printer Name” that is currently listed; select for “Make this printeryour default printer”.19. Follow any <strong>on</strong>screen prompts to complete the loading of the software.20. Click <strong>on</strong> to print test page. Visually inspect the test page for print quality.21. Once the software completes loading the unit will need to reboot for changes to take effect,reboot the unit at this time. D<strong>on</strong>’t forget to remove the B4400 CD from the CD/DVD-ROM drive.PRINTER INSTALLATION COMPLETE FOROKI B4400 PRINTER ON SIS MACHINE ANALYZERSBAR 97; WIN 9X OS (VIRGINA SIS)EAZ0012L02A (01/16/2008) REV A.
Page 7 of 16OKI B4400 PRINTER <strong>on</strong> SIS with SUN MACHINE Versi<strong>on</strong> 3.3; 5.0 with WIN 9X OS:1. Leave old or defective printer c<strong>on</strong>nected at this time.2. Power up the Analyzer using the rear panel "Main Power" Switch.3. Once the Emissi<strong>on</strong>s Software has loaded select, "PC OPTION" and press . <str<strong>on</strong>g>The</str<strong>on</strong>g> analyzer willnow boot to the Main Menu of the PC Opti<strong>on</strong> Hard Drive.4. Select “Sun Machine Analyzer”5. Select Start ⇒ Settings ⇒ Printers. Right click <strong>on</strong> the current printer ic<strong>on</strong>. Double click <strong>on</strong>“Delete”.6. Click <strong>on</strong> “Yes” to delete the current printer.7. If you are unable to delete the current printer Ic<strong>on</strong>, this maybe due to either outstanding print jobspending that need to be canceled first or you do not have the old printer installed with the printerturned <strong>on</strong> and plugged into the Parallel port of the computer.8. Remove any other Printer or fax Ic<strong>on</strong>s if present by right clicking <strong>on</strong> their ic<strong>on</strong> and selectingdelete.9. <str<strong>on</strong>g>The</str<strong>on</strong>g> <strong>on</strong>ly Ic<strong>on</strong> that should be left is the Add printer Ic<strong>on</strong>.10. Remove the defective printer from the unit, and leave the data cable and AC power supply cordattached to the unit.11. Unpack the new <str<strong>on</strong>g>Oki</str<strong>on</strong>g> B4400 printer from the box, and follow the <str<strong>on</strong>g>Oki</str<strong>on</strong>g>data instructi<strong>on</strong>s to make sureyou insert the t<strong>on</strong>er cartridge correctly.12. <str<strong>on</strong>g>Install</str<strong>on</strong>g> the <str<strong>on</strong>g>Oki</str<strong>on</strong>g> B4400 Printer into the SIS Machine. C<strong>on</strong>nect the existing data cable and ACPower cable to the <str<strong>on</strong>g>Oki</str<strong>on</strong>g> B4400 printer. Turn <strong>on</strong> the power switch <strong>on</strong> the side of the printer.NOTE:ENSURE THE PRINTER IS TURNED ON (1) POSITION AND CONNECTED TO THE COMPUTER VIATHE PARALLEL PORT CONNECTION.NOTE: IF WINDOWS PLUG AND PLAY FINDS THE NEW PRINTER CLICK ON CANCEL.7. Select the Add Printer Wizard, select Next >.8. Select “Local Printer”, select Next >.9. Select “Have Disk” select Next >.10. Insert <str<strong>on</strong>g>Oki</str<strong>on</strong>g> B4400 ® Software CD into the CD/DVD-ROM Drive.11. Select browse. Browse the CD-ROM drive to select the following directory path D:\Drivers\Enu\Win9x and select Inf file ok2839le and click <strong>on</strong> .12. Follow any <strong>on</strong>screen prompts to complete the loading of the drivers.13. Do not change the “Printer Name” that is currently listed; select “Yes” for “Make this printeryour default printer”.14. Follow any <strong>on</strong>screen prompts to complete the loading of the software.15. Click <strong>on</strong> “Yes” to print test page. Visually inspect the test page for print quality.16. Select “No” for “Reboot” or “Restart”, the unit.17. Select Start ⇒ Settings ⇒ Printers. Press the right mouse butt<strong>on</strong> over the printer ic<strong>on</strong> for theOKIDATA B4400 printer <strong>on</strong> the Printers page.18. Select <strong>on</strong> the dialog. Select the Details tab.19. Select the butt<strong>on</strong>.20. Verify that there is no check mark <strong>on</strong> Spool MS-DOS print jobs, then select OK.21. Select the butt<strong>on</strong> <strong>on</strong> the printer properties dialog.22. Close the Printers window by pressing the in the upper right corner of the window.23. Insert the “Printer Utility Disk” (3-13926AUSD3) in the floppy drive.EAZ0012L02A (01/16/2008) REV A.
Page 8 of 1624. From the desktop, select Start ⇒ Programs ⇒ MS DOS Prompt.25. At the DOS prompt type and press .26. A message indicating 1 file copied should be displayed, if not you are not in the correct drive orthe floppy disk is bad, verify the problem and retry running the <str<strong>on</strong>g>Snap</str<strong>on</strong>g><strong>on</strong> batch file.27. Exit the DOS window by typing at the DOS prompt and press .28. Click <strong>on</strong> “Sun Machine Analyzer” in the Sun Machine <str<strong>on</strong>g>To</str<strong>on</strong>g>ol Box.29. Click <strong>on</strong> after calibrati<strong>on</strong>.30. Select from the top menu bar.31. Select , and then select .32. Select “Laser Jet 4”.33. Close “Utilities”.34. <str<strong>on</strong>g>To</str<strong>on</strong>g> make sure the new settings take effect you will need to reboot your unit. Reboot the unit byselecting Start ⇒ Shut down ⇒ Shut down the computer ⇒ Yes.PRINTER INSTALLATION COMPLETE FOROKI B4400 PRINTER ON SIS MACHINE WITHSUN MACHINE SOFTWARE VERSION3.3; 5.0 WITH WIN 9X OSEAZ0012L02A (01/16/2008) REV A.
Page 9 of 16OKI B4400 PRINTER <strong>on</strong> SIS with SUN MACHINE Versi<strong>on</strong> 3.3 with DOS OS:NOTE: MAKE SURE OKI B4400 PRINTER IS INSTALLED, AND THE AC POWER CORD AND THE EXISTINGDATA CABLE ARE CONNECTED TO THE OKI B4400 PRINTER. ENSURE THE PRINTER ISTURNED ON (1) POSITION.1. Power up the Analyzer using the rear panel "Main Power" Switch.2. Once the Emissi<strong>on</strong>s Software has loaded select, "PC OPTION" and press . <str<strong>on</strong>g>The</str<strong>on</strong>g> analyzer willnow boot to the Main Menu of the PC Opti<strong>on</strong> Hard Drive.3. Press to "Exit to DOS". "C:\" prompt should be displayed.4. Place the “Printer Utility Disk” (3-13926AUSD3) in the PC Opti<strong>on</strong> Floppy Drive.5. At the DOS prompt type and press .6. A message indicating 1 file copied should be displayed, if not you are not in the correct drive orthe floppy disk is bad, verify the problem and retry running the snap<strong>on</strong> batch file.7. Power down the unit. Wait 10 sec<strong>on</strong>ds after powering down and power up the analyzer.8. Once the Emissi<strong>on</strong>s Software has loaded select, "PC OPTION" and press . <str<strong>on</strong>g>The</str<strong>on</strong>g> analyzer willnow boot to the Main Menu of the PC Opti<strong>on</strong> Hard Drive.9. Select from the menu.10. Click <strong>on</strong> after calibrati<strong>on</strong>.11. Select from the top menu bar.12. Select , and then select “Printer Type”.13. Select “Laser Jet 4”.14. Close “Utilities”.PRINTER INSTALLATION COMPLETE FOROKI B4400 PRINTER ON SIS MACHINE ANALYZERSWITH SUN MACHINE SOFTWAREVERSION 3.3 WITH DOS OSEAZ0012L02A (01/16/2008) REV A.
Page 10 of 16OKI B4400 PRINTER <strong>on</strong> MCS 2500 Pep Boys: _______________________________NOTE:A SEPARATE SHEET METAL DRAWER KIT (EAK0226L10A) IS REQUIRED, WHEN REPLACINGAN EXISTING OKI 6E; OKI 10E OR OKI 14E PRINTER WITH AN OKI B4400 PRINTER.ORDER AND INSTALL THIS KIT FIRST, BEFORE CONTINUING. THIS KIT IS NOT REQUIRED IF ANOKIDATA B4200, B4250 OR B4400 PRINTER WAS PREVIOUSLY INSTALLED.1. Remove the defective printer and unplug the AC power supply cord and data cable attached tothe back of the printer.2. Unpack the new <str<strong>on</strong>g>Oki</str<strong>on</strong>g> B4400 printer from the box, and follow the <str<strong>on</strong>g>Oki</str<strong>on</strong>g>data instructi<strong>on</strong>s for propersetup of the t<strong>on</strong>er.3. <str<strong>on</strong>g>Install</str<strong>on</strong>g> the <str<strong>on</strong>g>Oki</str<strong>on</strong>g> B4400 Printer into the unit. C<strong>on</strong>nect the existing data cable and AC Power cable tothe <str<strong>on</strong>g>Oki</str<strong>on</strong>g> B4250 printer. Turn <strong>on</strong> the power switch <strong>on</strong> the side of the printer.NOTE:ENSURE THE PRINTER IS TURNED ON (1) POSITION AND CONNECTED TO THE COMPUTER VIATHE PARALLEL PORT CONNECTION.4. Power up the analyzer.5. Click <strong>on</strong> after calibrati<strong>on</strong>.6. Select from the top menu bar.7. Select , and then select “Printer Type”.8. Select “Laser Jet 4”.9. Press key; Select “Save…” to save the new settings.PRINTER INSTALLATION COMPLETE FOROKI B4400 PRINTER ONMCS 2500 PEP BOYSEAZ0012L02A (01/16/2008) REV A.
Page 11 of 16OKI B4400 PRINTER <strong>on</strong> SUN MACHINE ANALYZERS with WIN 9X: _____________NOTE: A separate sheet metal drawer kit (EAK0226L10A) is required, when replacing anexisting HP DeskJet; OKI 6E; OKI 10E or OKI 14E PRINTER with AN <str<strong>on</strong>g>Oki</str<strong>on</strong>g> B4400printer. Order and install this kit first, before c<strong>on</strong>tinuing. THIS KIT IS NOT REQUIREDIF AN OKIDATA B4200, B4250 OR B4400 PRINTER WAS PREVIOUSLY INSTALLED.1. Leave old or defective printer c<strong>on</strong>nected at this time.2. Power up the Sun Machine analyzer.3. Select Start ⇒ Settings ⇒ Printers. Right click <strong>on</strong> the current printer ic<strong>on</strong>. Double click <strong>on</strong>“Delete”.4. Click <strong>on</strong> “Yes” to delete the current printer.5. If you are unable to delete the current printer Ic<strong>on</strong>, this maybe due to either outstanding print jobspending that need to be canceled first or you do not have the old printer installed with the printerturned <strong>on</strong> and plugged into the Parallel port of the computer.6. Remove any other Printer or fax Ic<strong>on</strong>s if present by right clicking <strong>on</strong> their ic<strong>on</strong> and selectingdelete.7. <str<strong>on</strong>g>The</str<strong>on</strong>g> <strong>on</strong>ly Ic<strong>on</strong> that should be left is the Add printer Ic<strong>on</strong>.8. Remove the defective printer from the unit, and leave the data cable and AC power supply cordattached to the unit.9. Unpack the new <str<strong>on</strong>g>Oki</str<strong>on</strong>g> B4400 printer from the box, and follow the <str<strong>on</strong>g>Oki</str<strong>on</strong>g>data instructi<strong>on</strong>s to make sureyou insert the t<strong>on</strong>er cartridge correctly.10. <str<strong>on</strong>g>Install</str<strong>on</strong>g> the <str<strong>on</strong>g>Oki</str<strong>on</strong>g> B4400 Printer into the Sun Machine. C<strong>on</strong>nect the existing data cable and ACPower cable to the <str<strong>on</strong>g>Oki</str<strong>on</strong>g> B4400 printer. Turn <strong>on</strong> the power switch <strong>on</strong> the side of the printer.11. Select the Add Printer Wizard, select Next >.12. Select “Local Printer”, select Next >.13. Select “Have Disk” select Next >.14. Insert <str<strong>on</strong>g>Oki</str<strong>on</strong>g> B4400 ® Software CD into the CD/DVD-ROM Drive.15. Select browse. Browse the CD-ROM drive to select the following directory path D:\Drivers\Enu\Win9x and select Inf file ok2839le and click <strong>on</strong> .16. Follow any <strong>on</strong>screen prompts to complete the loading of the drivers.17. Do not change the “Printer Name” that is currently listed; select for “Make this printeryour default printer”.18. Follow any <strong>on</strong>screen prompts to complete the loading of the software.19. Click <strong>on</strong> to print test page. Visually inspect the test page for print quality.20. Once the software completes loading the unit will need to reboot for changes to take effect,reboot the unit at this time.21. Select Start ⇒ Settings ⇒ Printers. Press the right mouse butt<strong>on</strong> over the printer ic<strong>on</strong> for theOKIDATA B4400 printer <strong>on</strong> the Printers page.22. Select <strong>on</strong> the dialog. Select the Details tab.23. Select the butt<strong>on</strong>.24. Verify that there is no check mark <strong>on</strong> Spool MS-DOS print jobs, then select .25. Select the butt<strong>on</strong> <strong>on</strong> the printer properties dialog.26. Close the Printers window by pressing the X in the upper right corner of the window.27. Insert the “Printer Utility Disk” (3-13926AUSD3) in the floppy drive.28. From the desktop, select Start ⇒ Programs ⇒ MS DOS Prompt. At the DOS prompt type A:and press .EAZ0012L02A (01/16/2008) REV A.
Page 12 of 1629. From the A: prompt type “<str<strong>on</strong>g>Snap</str<strong>on</strong>g><strong>on</strong>” and press .30. A message indicating 1 file copied should be displayed, if not you are not in the correct drive orthe floppy disk is bad, verify the problem and retry running the snap<strong>on</strong> batch file.31. Exit the DOS window by typing at the DOS prompt and press .32. <str<strong>on</strong>g>To</str<strong>on</strong>g> make sure the new settings take effect you will need to reboot your unit. Reboot the unit byselecting Start ⇒ Shut down ⇒ Shut down the computer ⇒ Yes.33. Click <strong>on</strong> “Sun Machine Analyzer” in the Sun Machine <str<strong>on</strong>g>To</str<strong>on</strong>g>ol Bar.34. Click <strong>on</strong> after calibrati<strong>on</strong>.35. Select from the top menu bar.36. Select , and then select .37. Select .38. Close “Utilities”PRINTER INSTALLATION COMPLETE FOROKI B4400 PINTER ON SUN MACHINE ANALYZERSWITH WIN 9X OSEAZ0012L02A (01/16/2008) REV A.
Page 13 of 16OKI B4400 PRINTER SUN MACHINE ANALYZERS with DOS 6.22: ______________NOTE:A separate sheet metal drawer kit (EAK0226L10A) is required, when replacing anexisting HP DeskJet; OKI 6E; OKI 10E or OKI 14E PRINTER with AN <str<strong>on</strong>g>Oki</str<strong>on</strong>g> B4400printer. Order and install this kit first, before c<strong>on</strong>tinuing. THIS KIT IS NOT REQUIREDIF AN OKIDATA B4200, B4250 OR B4400 PRINTER WAS PREVIOUSLY INSTALLED.1. Remove the defective printer and unplug the AC power supply cord and data cable attached tothe back of the printer.2. Unpack the new <str<strong>on</strong>g>Oki</str<strong>on</strong>g> B4400 printer from the box, and follow the <str<strong>on</strong>g>Oki</str<strong>on</strong>g>data instructi<strong>on</strong>s for propersetup of the t<strong>on</strong>er cartridge.3. <str<strong>on</strong>g>Install</str<strong>on</strong>g> the <str<strong>on</strong>g>Oki</str<strong>on</strong>g> B4400 Printer into the unit. C<strong>on</strong>nect the existing data cable and AC Power cable tothe <str<strong>on</strong>g>Oki</str<strong>on</strong>g> B4400 printer. Turn <strong>on</strong> the power switch <strong>on</strong> the side of the printer.NOTE:ENSURE THE PRINTER IS TURNED ON (1) POSITION AND CONNECTED TO THE COMPUTER VIATHE PARALLEL PORT CONNECTION.4. Power up the analyzer and when fully booted, exit to DOS prompt.5. Insert the “Printer Utility Disk” (3-13926AUSD3) in the floppy drive.6. At the DOS prompt type and press .7. An message indicating 1 file copied should be displayed, if not you are not in the correct drive orthe floppy disk is bad, verify the problem and retry running the snap<strong>on</strong> batch file.8. You must reboot unit for changes to take effect.9. Select “Sun Machine” from the menu10. Click <strong>on</strong> “C<strong>on</strong>tinue” after calibrati<strong>on</strong>.11. Select from the top menu bar.12. Select , and then select .13. Select 14. Close .PRINTER INSTALLATION COMPLETE FOROKI B4400 PINTER ON SUN MACHINE ANALYZERSWITH DOS OSEAZ0012L02A (01/16/2008) REV A.
Page 14 of 16OKI B4400 PRINTER INSTALLATION VERIFICATION: _________________________• Printer Power LED is <strong>on</strong>, no blinking or red LED’s should be seen• Up<strong>on</strong> Power up the printer should initialize• Test Page should be printed with no errors.• Perform Print Screen Test after installati<strong>on</strong> is complete to verify the proper operati<strong>on</strong><strong>on</strong> the printer.EAZ0012L02A (01/16/2008) REV A.
Page 15 of 16PRINTER INSTALLATION TROUBLESHOOTING:_____________________________FaultNo Printer Power LED OnPrinter does not print (No Error LEDS)Blinking Orange Error LEDBlank sheets printed.Entire page prints faintlyPage has gray backgroundVertical white streaking or faint areas <strong>on</strong>page.Bold characters and dark lines aresmearedPages curl excessivelyResoluti<strong>on</strong>Check AC Cord C<strong>on</strong>necti<strong>on</strong> from the Source to thePrinterCheck data printer cable or USB c<strong>on</strong>necti<strong>on</strong> fromthe computer to the printer.Unplug and plug it back again. Turn printer poweroff, wait for 10 sec<strong>on</strong>ds and turn power <strong>on</strong>.If using a Windows OS verify that the <str<strong>on</strong>g>Oki</str<strong>on</strong>g> B4400driver is the <strong>on</strong>ly printer driver installed and that it isset as the default printer. (If no drivers are installed,refer back to the installati<strong>on</strong> instructi<strong>on</strong>s in thisdocument).If installed <strong>on</strong> an OBIS unit and the printer will stillnot print a test page.Left click <strong>on</strong> the B4400 printer ic<strong>on</strong> and go toproperties and then to the "Ports" tab.Verify that there is <strong>on</strong>ly <strong>on</strong>e USB port listed.If more then <strong>on</strong>e is listed, select the other USB portand click <strong>on</strong> OK and try printing a Test page again.Check data printer cable or USB c<strong>on</strong>necti<strong>on</strong> fromthe computer to the printer.Unplug and plug it back again. Turn printer poweroff, wait for 10 sec<strong>on</strong>ds and turn power <strong>on</strong>.Check the Paper tray for paper.Check the Paper tray for correct paper size setup,should be set to paper size of 11 X 8.5Check the printer for any paper jams.Check the installati<strong>on</strong> of the t<strong>on</strong>er cartridge.Image drum cartridge not properly installed.Reinstall image drum cartridge.Empty or missing t<strong>on</strong>er cartridge. <str<strong>on</strong>g>Install</str<strong>on</strong>g> new t<strong>on</strong>ercartridge,"Type 9" t<strong>on</strong>er cartridge (3-03306A26).Empty t<strong>on</strong>er cartridge.Pages get fainter when t<strong>on</strong>er is low. <str<strong>on</strong>g>Install</str<strong>on</strong>g> new"Type 9" t<strong>on</strong>er cartridge(3-03306A26)Static electricity, generally from dry, cott<strong>on</strong> fiberpapers, causes t<strong>on</strong>er to stick to background.Change to approved laser b<strong>on</strong>d or use a humidifier.<str<strong>on</strong>g>To</str<strong>on</strong>g>ner is low and does not distribute properly, or thedrum is worn out.Replace t<strong>on</strong>er cartridge. Check drum and replacethe "Type 9" if necessary (3-03306A27).<str<strong>on</strong>g>To</str<strong>on</strong>g>ner is low. <str<strong>on</strong>g>Install</str<strong>on</strong>g> new "Type 9" t<strong>on</strong>er cartridge (3-03306A26)Printing <strong>on</strong> wr<strong>on</strong>g side of paper. High humidity.Turn paper over in tray.Note arrow <strong>on</strong> paper package.<str<strong>on</strong>g>Install</str<strong>on</strong>g> paper print side down in tray.Moisture in paper.Improper storage.Avoid storing paper in areas of excessivetemperature and humidity.Recommended operating humidity: 20-80%EAZ0012L02A (01/16/2008) REV A.
Page 16 of 16Fuzzy print.FaultPrinter does not print when Print Screenfuncti<strong>on</strong> is used in Utility Programs i.e.SIS Test; UB TestPrinter does not print VIR or reports in Fix<str<strong>on</strong>g>The</str<strong>on</strong>g> Car UtilityResoluti<strong>on</strong>Dirty LED array.Clean LED array.<str<strong>on</strong>g>The</str<strong>on</strong>g> LED array is <strong>on</strong> the underside of the printercover.Wipe it gently with the cleaning pad that is includedin the t<strong>on</strong>er cartridge kit.You can also use a clean, soft cloth with a smallamount of rubbing alcohol <strong>on</strong> itReinstall Printer driver using the Printer UtilityDiskReinstall Bar 97 Emissi<strong>on</strong>s Software (Full<str<strong>on</strong>g>Install</str<strong>on</strong>g>), and select "PCL" Printer whenprompted.In Fix <str<strong>on</strong>g>The</str<strong>on</strong>g> Car Utility c<strong>on</strong>firm that the correctprinter is selected for the “Printer Setup”selecti<strong>on</strong>.EAZ0012L02A (01/16/2008) REV A.


