
Create successful ePaper yourself
Turn your PDF publications into a flip-book with our unique Google optimized e-Paper software.
Table of contentsAdjustment of preset time.................................................................................. 30Temperature buttons and illuminated temperature indicators........................ 30Indicator for remaining heat............................................................................... 31Soft start............................................................................................................... 31Gentle heating setting.......................................................................................... 31Varoma temperature setting .............................................................................. 32Speed selector ..................................................................................................... 32Gentle stir setting ............................................................................................... 32Stirring................................................................................................................ 32Mixing/blending................................................................................................. 33Turbo button ....................................................................................................... 33Clockwise/counter-clockwise operation............................................................ 34Dough mode........................................................................................................ 34Things to remember...................................................................................... 35Sleep mode .......................................................................................................... 35Electronic motor protection ............................................................................... 35First time use and high loads ............................................................................. 35Cleaning............................................................................................................ 36How to clean the mixing bowl and its lid........................................................... 36How to clean the mixing knife ............................................................................ 37How to clean the Varoma .................................................................................... 37How to clean the main appliance ....................................................................... 38Additional information for cleaning .................................................................. 38Notes for <strong>your</strong> own recipes ......................................................................... 39Troubleshooting............................................................................................. 40Legal Regulations ........................................................................................... 41Warranty........................................................................................................... 42Customer Service........................................................................................... 424 Table of contents
Danger of injury by usage of notintended items or equipment• Use only parts provided with the Thermomix <strong>TM31</strong>(page 10–11) or original spare parts from <strong>Vorwerk</strong>Thermomix.• Never use the Thermomix <strong>TM31</strong> in combination withparts or equipment not provided by <strong>Vorwerk</strong> Thermomix.• Use only the Thermomix <strong>TM31</strong> measuring cup to closethe opening in the mixing bowl lid. Do not cover mixingbowl lid with towels or similar items.• Use only the Thermomix <strong>TM31</strong> spatula with safety diskfor stirring food in mixing bowl. Never use other itemssuch as spoons, cooking spoons or any other tools forstirring. These might get caught in the rotating mixingknife, possibly resulting in injury.• Lock the mixing bowl lid before inserting the Thermomix<strong>TM31</strong> spatula through the opening in the mixing bowl lid.Property damageThermomix <strong>TM31</strong> can move• Place <strong>your</strong> Thermomix <strong>TM31</strong> on a clean, solid, evenand non-heatable surface so that it cannot slip. KeepThermomix <strong>TM31</strong> in a sufficient distance from theedge of this surface to prevent it from falling down.When preparing dough or chopping food, an imbalancecan develop in the mixing bowl which, under certaincircumstances, may cause the whole appliance to move.Do not, therefore, leave the appliance unattended whileit is operating as it might fall from the work surface.Risk of damage• By hot steam: Ensure a sufficient distance aboveThermomix <strong>TM31</strong> and Varoma i.e. below (suspendedcupboards, shelving) and around them to prevent damagefrom hot escaping steam.• By external heat source: Keep a sufficient distancebetween the Thermomix <strong>TM31</strong> and external heatsources such as radiators, hot plates, ovens, hobs, etc.Do not place the Thermomix or its connecting cable onany heat source (e. g. hot plates, cooking elements, stoveor oven) because unintended turning on may causedamage to the appliance.• By leaking out food: Ensure sealing ring of mixingknife is fitted to the knife bearing. If there is no sealingring the food to be mixed or cooked may leak out anddamage the appliance.• By insufficient cooling of Thermomix <strong>TM31</strong>:Ensure ventilation openings on both sides of the applianceare always free from splashes of fat, food leftovers orsuchlike and not covered. Otherwise damage of theappliance may occur.• By improper use: Use Thermomix <strong>TM31</strong> only withalternating current and a mains power supply dulyinstalled by a specialist. The mains power supply voltageand mains frequency must correspond with the typeplate (on the bottom of the main appliance).englishNotes for <strong>your</strong> safety7
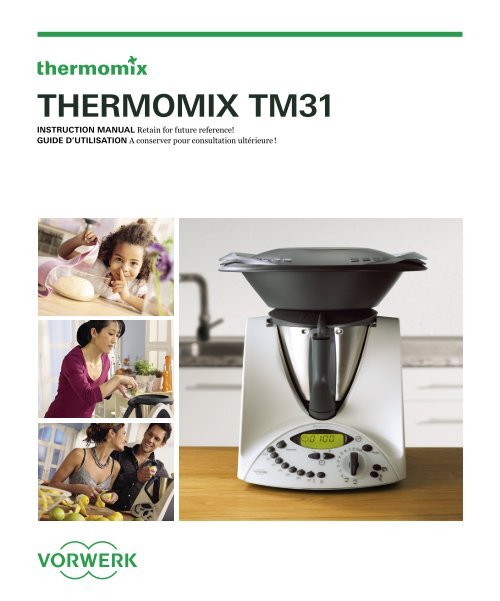
Introduction/Customer ServiceenglishDear Customer,Congratulations on having chosen theThermomix <strong>TM31</strong>!During a Thermomix <strong>TM31</strong> demonstration, you experiencedand tested with <strong>your</strong> five senses the benefits of <strong>your</strong> newThermomix. An experienced Thermomix advisor helpedyou optimize the usage of all possible functions to <strong>your</strong>individual needs.Now you are ready to start taking advantage of <strong>your</strong> ownThermomix. Preparing tasty and healthy food becomesfast and easy.Cooking with Thermomix saves you time for other activities.This instruction manual will familiarize you step by stepwith <strong>your</strong> new Thermomix. Please read it carefully. Witheach step you will experience that we have considered<strong>your</strong> interests and needs when we designed this highquality product.If you have any questions or difficulties please do nothesitate to contact:Your Thermomix <strong>TM31</strong> advisor:NameTelephoneFaxMobile phoneEmailThermomix customer service: see page 42.<strong>Vorwerk</strong> International Strecker & Co.Verenastrasse 398832 WollerauSwitzerlandThis instruction manual is available in furtherlanguages at www.thermomix.comThe easy to understand step by step design of our recipeswill enable you to prepare <strong>your</strong> meals and dishes withoutexpert knowledge.We wish you, <strong>your</strong> family and <strong>your</strong> friends a lot of fun with<strong>your</strong> new Thermomix!<strong>Vorwerk</strong> ThermomixVersion: 20120816/230_120Introduction/Customer Service9
YourThermomix <strong>TM31</strong>2After opening the packaging please check that all Thermomix <strong>TM31</strong>components are included. These are:• Thermomix <strong>TM31</strong> including mixing bowl and lid with sealing ring• Simmering basket• Stirring attachment (butterfly whisk)• Measuring cup• Spatula• Varoma• Recipe Cookbook• Instruction Manual134510 Your Thermomix <strong>TM31</strong>
69english7810 11 121 Main appliance2 Mixing bowl3 Mixing bowl base4 Sealing ring for mixing knife135 Mixing knife9 Mixing bowl lid1410 Stirring attachment (butterfly)11 Spatula with safety disk12 Simmering basket13 Measuring cup14 Sealing ring for mixing bowl lidVaroma6 Varoma lid7 Varoma tray8 Varoma dishYour Thermomix <strong>TM31</strong>11
Beforeyou startCongratulations on purchasing theThermomix <strong>TM31</strong>!Before using <strong>your</strong> Thermomix <strong>TM31</strong> for the first time attend a demonstrationwith a qualified Thermomix advisor. Familiarize <strong>your</strong>self with using <strong>your</strong>Thermomix <strong>TM31</strong>.1Before you startMake sure to place <strong>your</strong> Thermomix <strong>TM31</strong> on a clean, solid and even surfaceso that it cannot slip. Keep <strong>your</strong> Thermomix <strong>TM31</strong> in a permanent position in<strong>your</strong> kitchen, so that you can operate it easily. Clean <strong>your</strong> Thermomix <strong>TM31</strong>thoroughly before using it for the first time. Follow the instructions in thechapter on cleaning (page 36).2How to insert the mixing bowl correctlyBefore inserting the mixing bowl please always ensure that the speed selectorhas been set to 1 . Insert the mixing bowl with the handle pointing to thefront and push it gently into position 2 – the grooves on the sides of the bowlslide down the ridges on the shoulders of the appliance.The mixing bowl has been inserted correctly if its handle is at the front, asshown in picture 2 , and if the bowl itself is securely fixed in the appliance. Toclose the mixing bowl correctly press the mixing bowl lid vertically onto themixing bowl 3 . The arrow must point to the handle of the <strong>TM31</strong> bowl. Thenturn the lid in a clockwise direction 4 until you hear it “click” into place,make sure to turn it all the way to the stop. Turn speed selector to closed lidposition ; other wise, the Thermomix <strong>TM31</strong> cannot be switched on.3412Before you start
englishCautionDanger of scalding by splashing hot foodNever try to open mixing bowl lid by force. Only open the mixing bowl lid afterthe speed selector is pointing to open lid position and the food or liquid in theTM bowl has stopped moving.5How to remove the mixing knifeTo remove the mixing knife: Hold the mixing bowl with one hand, with<strong>your</strong> other hand turn the mixing bowl base 30 degrees clockwise and pullthe mixing bowl base off downwards 5 . Carefully hold the upper part ofthe mixing knife and remove it together with its sealing ring 6 .CautionDanger of injury from sharp mixing knifeDo not touch the blades of mixing knife. They are very sharp. Hold upperpart of mixing knife when removing or re-inserting it.6Important:Take precautions to prevent the mixing knife from falling out accidentally.Before you start13
Before you startHow to insert the mixing knifeTo re-insert the mixing knife, follow the ‘removal’ steps in the reverse order.Put the mixing knife back into the mixing bowl 1 by pushing it through theopening in the bottom of the bowl 2 .NOTICERisk of damage by leaking out foodEnsure sealing ring of mixing knife is fitted to the knife bearing. If there isno sealing ring the food to be mixed or cooked may leak out and damagethe appliance.1Now re-fit the mixing bowl base from below onto the mixing knife. Push themixing knife through the opening in the bottom of the mixing bowl with onehand. With <strong>your</strong> other hand hold the mixing bowl and turn (at the same time)the mixing bowl base 30 degrees counter-clockwise to lock 3 .2314Before you start
ACCESSORIESenglishBefore you start using <strong>your</strong> Thermomix <strong>TM31</strong> we would like to present itsaccessories in more detail. They are proof of a well thought out design. Everypart has been designed intelligently and serves several purposes.Mixing bowlOn the inside and on the outside of the mixing bowl there are marks indicatingthe filling level 4 .Each mark corresponds to 0.5 litre. The mixing bowl has a maximum capacityof 2 litres 5 .CautionDanger of scalding by splashing hot food• Place a maximum filling quantity of 2 litres of food and/or liquid intomixing bowl.• Observe the fill level marks of mixing bowl.Mixing bowl baseThe mixing bowl base 6 is used to fasten and loosen the mixing knife withinthe mixing bowl. The whole mixing bowl may be placed on any work surface.There is no need to place a mat under the bowl.Important:The mixing bowl base must be turned as far as it will go and locked. Neverplace the bowl onto the appliance without first locking the mixing knifeand mixing bowl base in place. Failure to fit the mixing bowl base and mixingknife correctly may result in damage to other parts of the Thermomix.4562.0 litre1.5 litre1.0 litre0.5 litremaximumcapacityof mixingbowlAccessories15
ACCESSORIESMixing bowl lidThe mixing bowl lid is used to close the mixing bowl. For safety reasons <strong>your</strong>Thermomix <strong>TM31</strong> will not start working unless the lid has been positioned andlocked correctly. Never try to force the lid open when the appliance is locked.Take care to insert the sealing ring for the lid correctly. Put the lid upside downon <strong>your</strong> work surface and position the ring onto the lid by pushing it into thethree hinges whereupon you can hear a “click” 1 . The sealing ring preventsliquid or food from escaping between the mixing bowl and the lid.CautionDanger of scalding by splashing hot foodUse Thermomix <strong>TM31</strong> only with correctly fitted, clean sealing ring of mixingbowl lid. Inspect the sealing ring regularly. Should damage or leakage occurreplace immediately, at the latest every 2 years.12When cleaning the mixing bowl lid, remove the sealing ring and clean it separately.Measuring cupCautionDanger of scalding by splashing hot food• Be aware that single spots of hot food may escape from the opening ofmixing bowl lid. Place the measuring cup correctly into the openingleaving it in place especially when processing hot food (e.g. jam, soup) atmedium (3–6) and higher (7–10, Turbo) speed levels.• Do not cover mixing bowl lid with towels or similar items.The measuring cup is a multi-purpose item: it is a closing cap for the openingin the lid to avoid heat loss and it prevents food to be mixed or cooked fromescaping.The measuring cup can be used to measure ingredients. A measuring cup filledto the brim holds 100 ml, and a half-filled measuring cup (middle notch) 50 ml.Place the measuring cup into the opening in the lid with its opening showingupwards 2 .16Accessories
Only when using the butterfly whisk: position the measur ing cup with theopening pointing downwards. If you wish to add some liquid there is no needto remove the measuring cup. Simply pour the liquid onto the lid. It willgradually trickle into the mixing bowl.To add ingredients through the opening in the lid lift the measuring cup andadd them into the mixing bowl.3englishSimmering basketThe simmering basket for the Thermomix <strong>TM31</strong> is made of high-qualityplastic. Like the measuring cup, the basket is a multi-purpose item:• Filtering of fruit and vegetable juices. Chop and make a puree in theThermomix <strong>TM31</strong>, then insert the simmering basket into the mixing bowland use it as a filter when pouring the juice out. When pouring the juice usethe spatula to hold the simmering basket 3 .• Delicate food such as meatballs or fishballs that are not suited to be preparedin the mixing bowl as a whole should be put into the simmering basket. Herethey can be stewed or steamed.• For cooking side dishes (e.g. rice, potatoes).4Removing the simmering basket is effortless: place the hook of the spatulainto the notch of the simmering basket 4 and lift the basket 5 .The spatula can be removed at any time.• The feet at the bottom of the simmering basket 6 allow liquid to drip off thefood in the basket.• In case of reducing liquid in food (e.g. tomato sauce) put the simmeringbasket as cover onto the lid 7 instead of the measuring cup.567Accessories17
ACCESSORIESSpatulaThe spatula 1 is another example of the intelligent design of the Thermomix.• The Thermomix <strong>TM31</strong> spatula is the only instrument you may use to mix orstir the ingredients in the mixing bowl 2 . Push it from above into the bowlthrough the opening in the lid. The safety disk ensures that the spatula is notcaught by the mixing knife. This means that you can use the spatula duringchopping, cooking or simmering.• The spatula should be used to scrape all ingredients from the mixing bowl.The tip of the spatula is shaped to fit exactly between the mixing knifeassembly and the wall of the mixing bowl.• The spatula has a specially shaped safety disk to make sure that it does notroll off the work top.• When filtering fruit or vegetable juices use the spatula to hold the simmeringbasket in place.• Removing the simmering basket is effortless with the spatula (see page 17,photo 4).12CautionDanger of injury by usage of not intended items• Use only the spatula with safety disk (provid ed with the Thermomix <strong>TM31</strong>)for stirring food in mixing bowl.• Lock the mixing bowl lid before inserting the spatula through the openingin the mixing bowl lid.• Never use other items such as spoons, cooking spoons or any other toolsfor stirring. These might get caught by the rotating mixing knife, possiblyresulting in injury.18Accessories
Stirring attachment (butterfly)• The butterfly 3 (here positioned on mixing knife 4 ) will help you to achievebest results when whipping cream or beating egg whites. It is also the perfectutensil for the preparation of creamy puddings or cream mixtures.• When boiling milk or preparing puddings or sauces the butterfly allows aconstant movement of ingredients. This will prevent the food from sticking.It is easy to insert and remove the butterfly: Insert the butterfly as shown in thepicture 5 . Its ball-shaped end ensures that it can be removed easily.To remove the butterfly hold the ball-shaped end and pull it out with rotations inboth directions.Caution• Only switch on speed after the butterfly has been positioned into place.• Do not select a speed higher than level 4 when the butterfly is fitted.• Never use the spatula when the butterfly is fitted.• Do not add ingredients that might damage or block the butterfly when themixing knife is in motion and the butterfly is fitted.34english5Accessories19
ACCESSORIESVaromaThe Varoma 1 consists of three parts 2• Varoma dish (bottom)• Varoma tray (middle)• Varoma lid (top)All parts are made of high-quality, food compatible plastic.Notice• Always store the Varoma with its lid closed 1 .• Use Varoma only with Thermomix <strong>TM31</strong> (not suitable for microwave,oven or other appliances).1How to combine the Varoma parts2You can use <strong>your</strong> Varoma in either of the follow ing two combinations:Combination 1:Varoma dish plus Varoma tray and lid 2 .Use this combination for cooking different foods, e.g. vegetables with meat orfish, or a larger amount of the same food, e.g. yeast dumplings.Combination 2:Varoma dish plus Varoma lid 3 .Use this combination for cooking large amounts of the same food, e.g. vegetables,potatoes or large pieces of meat or sausages.3CautionDanger of scalding by hot steam and hot condensed waterNever use Varoma without Varoma lid.Important:If Varoma lid is not positioned properly, the steam will escape and thefood inside the Varoma will not cook properly.20Accessories
How to use the Varoma correctlyYour Varoma is an accessory designed for the Thermomix <strong>TM31</strong> and can onlybe used with the <strong>TM31</strong>. Before you can start steam cooking with the Varomayou will need to set up <strong>your</strong> Thermomix <strong>TM31</strong> correctly.Step 1: Set up Thermomix <strong>TM31</strong>Place the mixing bowl into position. Pour at least 0.5 litre (500 g) of water intomixing bowl for up to 30 minutes steam cooking. If you steam cook withsimmering basket, insert the simmering basket and fill it with ingredients, e.g.potatoes or rice. Close the mixing bowl with mixing bowl lid and lock it.For a flavoursome variation you can use a vegetable broth or water-wine-mixinstead of water.4englishStep 2: Filling the VaromaPlace Varoma lid upside down on <strong>your</strong> work sur face 4 and positionVaroma dish on top – it fits precisely into the groove.Now loosely fill Varoma dish with food 5 . Make sure that some slotsremain open so that the steam can spread evenly. As you fill the Varoma,put food requiring longer cooking at the bottom, and food requiring shortercooking at the top.Varoma lid underneath Varoma dish will stop the liquid from washedvegetables, ripe fruit, raw meat or fish from wetting <strong>your</strong> work surface.CautionDanger of scalding by hot steam and hot condensed water• Ensure that opening of mixing bowl lid and some slots of Varomadish and tray remain free, otherwise there can be uncontrolled escapeof steam.• Be sure to position the Varoma correctly onto mixing bowl andappliance.5Accessories21
ACCESSORIESWhen using the Varoma tray, insert it into the Varoma dish. Make sureVaroma tray is positioned loosely and evenly. Then place food onto it 1 .Place Varoma upright into position onto locked mixing bowl lid (without themeasuring cup) in such a way that it sits well 2 .Place the Varoma lid on top. It should be positioned loosely and evenly sothat it seals the Varoma well, allowing no steam to escape.Important:Never leave the measuring cup in the mixing bowl lid when using theVaroma. If Varoma lid is not positioned properly, not enough steam willstay in the Varoma. This will slow down the cooking process.1CautionDanger of scalding by hot steam and hot condensed water• Mind hot steam escapes at the sides and from the top of Varoma lidduring operation.• Keep children away from Thermomix <strong>TM31</strong> when using Varoma andwarn them about the danger of hot steam and hot condensed water.Danger of scalding by splashing hot food• Use only low speed levels ( – 2) when selecting Varoma temperature.Higher speed levels can lead to splashing hot food or liquid to froth up.Step 3: Steam cooking with Varoma 3All you need to do is select the time and Varoma temperature on the controlpanel. The steam cooking process begins when you turn the speed selectorto a low speed setting ( – 2). The timer starts to count down. Water or waterbasedliquid in the mixing bowl heats up to over 100°C, developing hot steam.The steam rises through the opening in the mixing bowl lid of the Thermomix<strong>TM31</strong> into the Varoma. The food is cooked gently in the hot steam. Pleasenote that the maximum Varoma temperature is 120°C, depending on whatingredients you are using, e.g. oil.2322Accessories
CautionDanger of scalding by hot steam and hot condensed water• Touch only the handles at both sides of Varoma.• Hold Varoma lid in such a way that the rising steam or hot drippingliquid cannot come into contact with you when taking it off.• Mind hot steam which will continue to rise up out of opening of mixingbowl lid when remov ing the entire Varoma.When the ingredients are cooked or if you want to check whether they arecooked, turn speed selector to closed or open lid position ( / ). In orderto open the Varoma, slightly incline the Varoma lid carefully to the front sothat the steam can escape on the back 4 . Take care to let the condensationwater drip into the Varoma dish and tray by holding the Varoma lid abovethem.Then carefully remove the Varoma lid and place it upside down onto the worksurface. Lift the Varoma dish and tray up, wait some seconds so that thecondensed water drips onto mixing bowl lid. Then place Varoma dish andtray onto Varoma lid.4englishAccessories23
ACCESSORIESPractical work with the VaromaThis description explains clearly how easy it is to use the Varoma. Observethe following basic rules for using the Varoma:• Place enough water in the mixing bowl.Important:30 minutes steam cooking requires 0.5 litre (500 g) of water, for everyadditional 15 minutes an additional 250 g.1• The bottom of the Varoma dish and tray are both designed with an evenpattern of small slots to guarantee an even distribution of steam in theVaroma. The food should always be positioned so that as many slots aspossible remain “free”. Laying the food in “loosely” is usually enough toensure this.• You can cook foods of different consistency and hardness at the same time.Place food requiring longer cooking at the bottom and food requiring lesscooking at the top, e.g. vegetables in the Varoma dish and fish on theVaroma tray.• The vegetables will be evenly cooked if you cut them into similar-sized pieces.The cooking times stated are approximate. Cooking time varies dependingon quality, ripeness and size of the ingredients as well as <strong>your</strong> personalpreferences.• Grease the Varoma dish and tray to make sure that ingredients such as meat,fish or dough do not stick.• Do not thicken <strong>your</strong> sauces and soups until the steam cooking process isfinished. Thickeners may stop steam from forming evenly in the mixing bowland slow down the overall cooking process.• You can also turn the Varoma lid upside down and use it as a drip collectorfor the Varoma dish and the Varoma tray 1 . It can also be used as a trayto serve food directly from the Varoma.24Accessories
Working with theThermomix <strong>TM31</strong>englishNoticeThermomix <strong>TM31</strong> can movePlace <strong>your</strong> Thermomix <strong>TM31</strong> on a clean, solid, even and non-heatablesurface so that it cannot slip. Keep a sufficient distance from the edge ofthis surface to prevent Thermomix <strong>TM31</strong> from falling down.Risk of damage by hot steamEnsure a sufficient distance above Thermomix <strong>TM31</strong> and Varoma(suspended cupboards, shelving) and around them to prevent damagefrom hot escaping steam.2Find a permanent place in <strong>your</strong> kitchen for <strong>your</strong> Thermomix <strong>TM31</strong> right fromthe start so that it is ready at hand whenever you need it.Starting the Thermomix <strong>TM31</strong>Pull the electric cable lightly from the housing and connect it to the mainssupply. You can choose what ever length of cable you need, up to 1 m. If you donot need the whole length of the cable the remaining length can be kept insidethe Thermomix <strong>TM31</strong> avoiding any tiresome “spaghetti” of cables! Make surethat there is no strain on the cable so that the scales work properly. Do notplace the appliance on the cable. If you do, the appliance will not sit firmly onthe surface and the scales will not weigh accur a tely. Now the appliance isoperable and the display shows the timer mode 2 .The appliance is activated or switched into sleep mode by pushing thebutton.Before you start using <strong>your</strong> Thermomix <strong>TM31</strong> consider the following tips tomake <strong>your</strong> work easier:A safety device is provided which prevents the Thermomix <strong>TM31</strong> from operatingif the mixing bowl has not been inserted properly and the lid has not beencorrectly locked (speed selector is blocked). Likewise, a safety device preventsthe lid from opening while the appliance is operating.Working with the Thermomix <strong>TM31</strong>25
Working with the Thermomix <strong>TM31</strong>The electronic scales work within a temperature range between –20°C and+50°C (4°F and +122°F). If the appliance has been transported in winter andthe temperature falls below –20°C (–4°F) wait until the Thermomix <strong>TM31</strong> hasreached room temperature again. In this way, the integrated scales will workperfectly. If you do not need <strong>your</strong> Thermomix <strong>TM31</strong> for a prolonged period oftime please disconnect it from mains supply as you do with most electric appliances(economizing on power consumption; see also: “Sleep mode”, page 35).NoticeRisk of damage by insufficient cooling ofThermomix <strong>TM31</strong>:Ensure ventilation openings on both sides of the appliance 1 are alwaysfree from splashes of fat, food leftovers or suchlike and not covered.Otherwise damage of the appliance may occur.1Explanation of symbols on control panelTimer buttons Button for dough mode Closed lidTemperature buttons Tare button for scales Open lidGentle stir setting Button for clockwise/ Sleep mode buttoncounter-clockwise operation26Working with the Thermomix <strong>TM31</strong>
Multi-function displayIn the centre at the top of the control panel there is a digital display.This display provides the following information:• Weighing mode• Timer mode• Counter-clockwise operation has been chosen• Thermomix in dough mode2englishThe symbols and are displayed to indicate if the appliance is inweighing or timer mode.The latter two operating modes as well are indicat ed by their respectivesymbols ( or ).Weighing and adding with the tare buttonThe integrated scales allow you to weigh all ingredients directly in the mixingbowl and in the Varoma. Please observe the following sequence of steps:3Step 1: Insert mixing bowl. The display will show the timer 00:00 2 .Step 2: Press tare button. Wait for the tone “beep” and the display will showthe scales 0.000 3 .Important:When pressing the tare button do not touch the Thermomix or leananything against it.Step 3: Put in the first ingredient (2.0 kg max.) and check the quantity onthe display 4 .4Step 4: If you wish to add more ingredients push the tare button again andadd the next ingredient.Repeat these steps as often as required to the maximum weight (6 kg).The variation for up to 2 kg is +/–30 g.Working with the Thermomix <strong>TM31</strong>27
Working with the Thermomix <strong>TM31</strong>Further information about weighingThe tare function works from 5 g to 6.0 kg in steps of 3 times 2 kg. Whenweighing and adding ingredients with the help of the tare function always addingredients slowly because two to three seconds are needed before the scalesshow the correct weight.If you remove an ingredient from the mixing bowl after you have pressed thetare button, the information on picture 1 will appear on the display.1When adding ingredients with the help of the tare function do not add morethan 2.0 kg at a time. If you add more than 2.0 kg at a time the display willstart flashing, indicating an overload 2 .Always press the tare button first before weighing or using the tare function.This will increase the accuracy of the scales. Please be careful not to move theappliance during the weighing process.2After pressing the tare button the Thermomix remains in the weighing modefor 5 minutes unless another button is pushed or the speed selector is turned.After these 5 minutes the Thermomix returns to the timer mode. When thetare button is pressed once more the 5 minutes start again.The display provides you with valuable information when weighing or addingingredients. Remember to observe the maximum of 2.0 kg per adding process.28Working with the Thermomix <strong>TM31</strong>
Timer buttons and timer displayObserve the following sequence of steps if you wish to prepare or heat food in<strong>your</strong> Thermomix <strong>TM31</strong>:Step 1: Select a timeUse the timer buttons to preset an operating time of up to 60 minutes 3 .Press the + to increase time and the – button to reduce it. To change timegradually, press the button briefly. Press and hold the + button to incre mentthe timer display rapidly, e.g. 4 .Time selection:0–1 minute in increments of 1 second1–10 minutes in increments of 30 seconds10–60 minutes in increments of 1 minuteWhen the display is in the zero setting you can preset the time directly to1 minute by briefly pressing – button; therefore you do not have to count up inincrements of 1 second. Then proceed as indicated above.Press both buttons simultaneously to set the displayed time to 00:00 3 .34englishStep 2: Select a temperature (see page 30 ff.)Select the appropriate temperature if the food should be heated or cooked.If not proceed with step 3.Step 3: Turn the speed selector (see page 32 ff.)After the speed selector has been turned, the preset time is counted backwardsin steps of one second, until 00:00 is reached.When the appliance is in cold mixing mode the mixing speed switches off afterthe preset time has expired. A buzzer will sound to indicate that the job hasbeen completed.When the appliance is in heating or cooking mode the mixing knife willcontinue to rotate in the gentle stir setting after the preset time has expired.To switch off the buzzer turn the speed selector back to / .Important:Heating and cooking are only possible if a time period has been preset.Working with the Thermomix <strong>TM31</strong>29
Working with the Thermomix <strong>TM31</strong>Adjustment of preset timeThe preset time can be changed at any time during preparation.Press the – button to reduce the time, press the + button to increase it. If thespeed selector gets turned to / before the preset time has expired, forexample in order to add another ingredient, the display will flash, indicatingthe current time, until the speed selector is turned. Food preparation can thusbe continued without difficulty. If you wish again to stop the mixing procedurealtogether before the preset time has expired, press both timer buttonssimultaneously. This will stop the display flashing and you may reset the time.If no time has been preset and the speed selector is activated the appliancewill automatically stop after a maximum time of 60 minutes. After this time,a buzzer will sound.1Temperature buttons and illuminatedtemperature indicatorsThe temperature buttons can be used to set a temperature between 37°C and100°C (99°F and 212°F). Each button has a coloured indicator lamp 1 whichwill flash after the respective button has been pressed:37°C (99°F)...................................................... = green50°C and 60°C (122°F and 140°F)................. = yellow70°C and 80°C (158°F and 176°F)................ = orange90°C, 100°C andVaroma (194°F and 212°F).................................. = redThe illuminated temperature indicators are points of reference. When thepreset temperature has been reached during cooking the indicator lamp stopsflashing and changes to continuous mode. The illuminated indicators show thetemperature that has been reached during the heating process. For example, ifa temperature of 90°C (194°F) is set the related light will start flashing. As theThermomix heats up the lights for 37°C, 50°C, 60°C, 70°C and 80°C (99, 122,140, 158 and 176°F, respectively) light up one after the other until 90°C (194°F)is reached. At this point this light changes from flash ing to continuous mode.The illuminated temperature indicators are approximate values.Always ensure that none of the coloured indicator lights is flashing if you donot wish to heat or cook food. Otherwise, switch off the heating function bypressing the button. This will prevent unwanted heating of ingredients inthe mixing bowl if a time has been preset.30Working with the Thermomix <strong>TM31</strong>
Indicator for remaining heatIf the mixing bowl is re-inserted into the appliance while it is still warm therelevant light will show its remaining temperature (only 1 lamp in continuousmode, e.g 2 remaining heat 60°C). No tempe rature for warming up, cookingand steam-cooking can be set unless a time has been preset. Therefore pleasealways proceed as follows:Always start by setting a time, then choose the temperature, followed by speedselection.2englishSoft start (above 60°C/140°F)If the turbo button is pressed or the speed selector actuated while thetemperature in the mixing bowl is 60°C (140°F) or above 2 , the electronicsystem prevents the food from escaping by delaying the speed increase.This soft start only works if the food has been heated up or cooked in theThermomix <strong>TM31</strong>. Then the temperature sensor can measure the actualtemperature correctly and control soft start accordingly. If using theThermomix <strong>TM31</strong> to process food that has not been heated or cooked inthe appliance (e.g. prepar ing a gravy from hot meat juices) you should onlyincrease the speed slowly and gradually.CautionDanger of scalding by splashing hot foodNever use the turbo button or abruptly increase the speed when processinghot food (Temperature above 60°C), especially if it has not been heated inthe Thermomix <strong>TM31</strong>. Never hold the measuring cup when processing hotfood.Gentle heating settingSpeeds 2 and 3 are designed as gentle heating setting. When these speeds areselected the temperature will rise slowly leading to gentle cooking of the food.Working with the Thermomix <strong>TM31</strong>31
Working with the Thermomix <strong>TM31</strong>Varoma temperature settingIf the Varoma temperature setting 1 is selected, temperatures of up to 120°C(248°F) may be reached, depending on what ingredients you are using, e.g. oil.During 15 minutes at Varoma temperature setting 250 g water or water-basedliquids evaporate. This temperature setting is used for steam cooking (see page21 ff.) and sautéing ingredients.NoticeNever heat up the mixing bowl when empty.1Speed selectorTurn the speed selector to start the Thermomix <strong>TM31</strong>. The following speedsare available:Designation Speed level Revolution/min.2Gentle stir 40Stirring 1–3 100–500Mixing/blending 4–10 1,100–10,200Turbo mixing Turbo 10,200Gentle stir settingThe gentle stir setting 2 can be selected using the speed selector. At thissetting, the food is stirred slowly in the same way as if you periodically stirredsome food in a sauce-pan. If this setting is selected, the food is not choppedand large chunks remain.StirringUse the lower speeds 1–3 for gentle mild stirring. This lower speed range isideally suited for delicious stews!32Working with the Thermomix <strong>TM31</strong>
Mixing/blendingUse the speed range from 4 to 10 3 for coarse, fine and very fine chopping,mixing and blending.Always be sure to put the speed selector slowly to its desired position with themeasuring cup inserted.This will prevent the food to be chopped from escap ing.englishCautionDanger of injury by escaping cold food (Temperature below 60°C)Hold measuring cup firmly while operating the Thermomix <strong>TM31</strong> atmedium (3–6) and higher (7–10) speed levels or when pressing the turbobutton to chop or purée cold food.3Turbo buttonUse the turbo button 4 to operate the Thermomix <strong>TM31</strong> at maximum speed.The turbo function only works as long as this button is pressed and held.It is also useful for an “alternating” mode. If, for example, you wish to coarselychop a large quantity of food, press the turbo button 3 or 4 times (repeat asnecessary). In this way, the food will be chopped evenly.4The turbo function is available when the speed selector is set to or to speedlevel 4 or above. When the speed selector is set to the timer is activated.Turbo function is not available if the dough mode is activated.CautionDanger of scalding by splashing hot foodNever use the turbo button or abruptly increase the speed when processinghot food (Temperature above 60°C), especially if it has not been heated inthe Thermomix <strong>TM31</strong>. Never hold the measuring cup when processing hotfood.Working with the Thermomix <strong>TM31</strong>33
Working with the Thermomix <strong>TM31</strong>Clockwise/counter-clockwise operationPress the button on the control panel 1 to reverse the rotating directionof the mixing knife from clockwise to counter-clockwise. Pressing button ispossible at any speed selection and .Counter-clockwise operation is indicated by the symbol on the display.To switch off counter-clockwise operation just press the button again.Counter-clockwise operation is intended for gently stirring delicate foodwhich is not to be chopped.21Dough modeUse dough mode 2 to make heavy yeast dough or bread dough. To activate thedough mode set the speed selector to and press the button on the controlpanel.This will start the alternating operation to process the dough evenly in themixing bowl. This is an imitation of a special kneading procedure used in thebaking trade to achieve a high-quality dough.Dough mode is only available if the mixing bowl has cooled down after cookingto a temperature below 60°C (140°F). If the temperature is higher, a buzzerwill sound. To prevent accidental heating of bread dough the electronic systemblocks the heating system, Turbo button and counter-clockwise/clock-wisebutton when dough mode has been selected.NoticeThermomix <strong>TM31</strong> can movePlace <strong>your</strong> Thermomix <strong>TM31</strong> on a clean, solid, even and non-heatablesurface so that it cannot slip. Keep a sufficient distance from the edge ofthis surface to prevent Thermomix <strong>TM31</strong> from falling down.When preparing dough or chopping food, an imbalance can develop in themixing bowl which, under certain circumstances, may cause the wholeappliance to move. Do not, therefore, leave the appliance unattended whileit is operating as it might fall from the work surface.34Working with the Thermomix <strong>TM31</strong>
THINGSTO REMEMBERSleep modeFirst time use and high loadsenglishIf the Thermomix <strong>TM31</strong> is connected to mains supply butnot used (speed selector is set to ) it will automaticallyswitch to standby (sleep mode) after approx. 15 minutes.The display will be blank. To re-activate the appliancepress any button on the control panel. To switch theThermomix <strong>TM31</strong> to sleep mode press and hold thebutton for approx. 2 seconds until “OFF” appears on thedisplay. The appliance can now be re-activated only bya short press on the button. In sleep mode, powerconsumption of the Thermomix <strong>TM31</strong> is less than 1 W.If you do not use the Thermomix <strong>TM31</strong> for a prolongedperiod of time disconnect it from mains power supply.When the appliance is used for the first time it may smell.If the motor is subjected to a high load during foodpreparation, the motor may overheat and start smelling,in addition to the possibility of an automatic switch-offof the appliance. This is completely harmless and after thecooling-down time indicated above, the appliance willagain be in perfect working order.Electronic motor protectionAll recipes in the Thermomix <strong>TM31</strong> cookbook have beendeveloped in such a way that the motor protection will notactivate if all instructions are observed.But even if quantities are exceeded, the motor is protectedby an automatic switch-off function. In such cases, thedisplay will show the errormessage “LOAd”. If the motor has turned off:• put the speed selector to .• remove the mixing bowl from the appliance,• reduce the quantity contained in the bowl and/or addsome liquid,• wait for approx. 5 minutes (cooling down time),• re-insert the mixing bowl,• re-start the Thermomix <strong>TM31</strong> by means of the speedselector.• If the error message “LOAd” is still displayed after thecooling time please call our customer service.Things to remember35
CleaningAs with all kitchen appliances or tableware you should clean all parts of <strong>your</strong>Thermomix <strong>TM31</strong> – especially the mixing knife, the mixing bowl, the mixingbowl lid and its sealing ring – thoroughly before using it for the first time andafter every usage.How to clean the mixing bowl and its lid1Take apart the mixing bowl and mixing knife as well as mixing bowl lid and itssealing ring (refer to pages 13, 14, 16).CautionDanger of injury from sharp mixing knifeDo not touch the blades of mixing knife. They are very sharp. Hold upperpart of mixing knife when removing or re-inserting it.Now, clean the inside and outside of the mixing bowl (without the mixingknife) 1 , either in hot water with cleansing agent and a soft cloth or in thedishwasher; the mixing knife, spatula, butterfly, simmering basket, measuringcup, mixing bowl lid and Varoma can be cleaned in the same way.If food is sticking in the mixing bowl use a special cleansing agent for stainlesssteel.Ensure that the contact pins at the bottom of the mixing bowl are alwaysclean and dry. If necessary wipe them off. We recommend that you dismantlethe mixing bowl for cleaning, especially when you clean it in the dishwasher.Important:Never use pointed or sharp objects for cleaning as this may damagefunctional parts or affect the safety of the appliance.36 Cleaning
How to clean the mixing knifeenglishTo clean the mixing knife hold it under running water with the mixing knifepointing upwards, as shown in picture 2 . In order to facilitate the cleaning,use a brush or clean it in the dishwasher.Important:Do not leave the mixing knife in dish water for a long time as this maydamage the gasket system of the knife bearing.2Carefully re-assemble the mixing bowl and mixing knife (incl. sealing ring).How to clean the VaromaTo clean the Varoma wash dish, tray and lid carefully in warm, soapy wateror in the dishwasher.Use a soft, clean cloth and gentle cleansing agents for cleaning 3 . Avoid usingsharp objects or metal scouring pads, as these will cause scratches.3Important:All components are dishwasher-safe. Place plas tic parts, in particularthe mixing bowl lid, into the top rack of the dishwasher in order to avoiddeformation resulting from exposure to higher temperatures.Some foodstuffs such as curry, carrot juice, and those with citric acidcontent may cause stain ing. Wipe such substances off the mixing bowllid, its sealing ring, the spatula, the simmering basket and all Varomaparts as quickly as possible. Any residual staining will disappear in timeand does not affect <strong>your</strong> health or how the parts function.Cleaning37
CleaningHow to clean the main applianceDisconnect the appliance from mains power supply before cleaning.WARNINGDanger of electric shock• Disconnect the appliance from mains power supply before cleaning andif appliance is not used for a prolonged period of time.• Do not immerse the Thermomix <strong>TM31</strong> in water. Clean with a damp clothonly. No water or dirt must be allowed to enter the housing.1Wipe the main appliance with a damp soft cloth and a gentle cleansing agent 1 .Use water sparingly to prevent moisture from entering the applianceAdditional information for cleaningSome of the plastic parts may become slightly discoloured but this does notaffect <strong>your</strong> health or how the parts function.If the mixing bowl with mixing knife, mixing bowl lid and measuring cup areonly slightly soiled it is sufficient to perform a short mixing operation to cleanthem. Therefore place approx. 1 litre water and a few drops of cleansing agentinto mixing bowl, select speed 5 or 6 and press the button several times.Follow this operation by thoroughly rinsing with water and if necessary use asoft cloth as well.To improve ventilation during storage, do not close the mixing bowl with themeasuring cup.38Cleaning
Notes for <strong>your</strong>own recipesUse similar recipes in the Thermomix <strong>TM31</strong> cookbooks Example: Chopping vegetablesas a guide for adapting <strong>your</strong> own recipes. The easy tounder stand step by step design of our recipes enables you Settings: 7 sec/speed 5to prepare <strong>your</strong> own recipes with <strong>your</strong> Thermomix <strong>TM31</strong>.1 set timer to 7 seconds2 turn speed selector to 5Order of ingredientsWhen preparing food according to <strong>your</strong> own recipes consider Example: Kneading doughthe order of the steps, e.g. prepare dry ingredients first.Settings: 2 min/ /1 set timer to 2 minutesWeighing the ingredients2 turn speed selector to3 press the buttonBefore weighing each ingredient press the button andthe scales will show 0.000. Add <strong>your</strong> ingredient.Attention: Never exceed the 2 litres maximum capacityof the mixing bowl!Chopping and blendingSetting time, temperature and speedYou will achieve best results by sticking to the suggestedorder in the following examples: Presetting of time isnecessary if you want to heat the food. If you stir delicate Heating timesfood use the counter-clockwise mode .Heating time is dependent on the following:abExample: Cooking delicate foodquantity, weight and volume of ingredientsthe mixing bowl or Varoma!Settings: 5 min/100°C/ /speed 1cd heating level1 set timer to 5 minutese speed level2 press 100°C temperature buttonf3 press buttonuse of accessories4 turn speed selector to 1 (with/without simmering basket/Varoma)When chopping ingredients or blending preset first a shorttime and check the result. If the result you want to achieveis not reached prolong the time.starting temperature of the ingredients to be heatedAttention: Never exceed the maximum capacity ofheating conductibility of the food to be preparedenglishNotes for <strong>your</strong> own recipes39
TroubleshootingError:The appliance cannot be switched onThe appliance does not heatThe appliance stops during operationTrouble with scalesError display:As a special feature the Thermomix <strong>TM31</strong> will show thecause for the error on the display. If the display shows“E.r” followed by a two-digit figure please contact theresponsible <strong>Vorwerk</strong> customer service indicating theerror message (e.g. E.r 53 = temperature sensor failure)if it is not possible to solve the problem by pulling themains plug and re-starting the appliance. With respect to“LOAd” please refer to the notes on page 35.Action:Check if the connecting cable has been properlyplugged in and if the lid has been locked correctly.Check if the appliance is still in “sleep mode”.Check if a heating time and temperature have beenpreset.See section entitled “Electronic motor protection” onpage 35.Check: while pressing tare button do not touchThermomix; nothing leans against Thermomix;no tension on the cable; Thermomix “feet“ are clean;worktop is clean, solid, even and not vibrating;do not slide Thermomix over the worktop.Error messages of the appliance can be reset asfollows:1 By pulling the mains plug:E.r 23, 28, 32, 38, 39, 702 By turning the speed selector to and then to :E.r 22, 24-27, 29-31, 34-37, 51-69, OPEn, LOAd3 Only by <strong>Vorwerk</strong> customer service:E.r 71, 72WARNINGDanger of electric shockInspect <strong>your</strong> appliance and its accessories including the mixing bowlregularly for possible damage. Damaged parts can impair safety.If damage does occur, do not use the appliance and contact <strong>Vorwerk</strong>customer service or an authorised <strong>Vorwerk</strong> repairer.40 Troubleshooting
Legal regulations/CopyrightFor customers living inEU-Member States:Directions regarding theUS marketenglishAs owner of an electrical or electronic product, youare not allowed by law (according to EU-Directive2002/96/EC of 27 January 2003 on waste electricaland electronic equipment and the particular nationallaws of the EU-Member States transforming thisDirective) to dispose of this product or its electrical/electronic accessories as unsorted domestic waste.You should use the designated gratis possi bilities forreturn instead.Copyright ©Text, design, photography, illustrations by <strong>Vorwerk</strong>International Strecker & Co., Switzerland.All rights reserved.This publication may not – in part or in whole – bereproduced, stored in a retrieval system, transmittedor distributed in any form or by any means, electronic,mechanical, photocopying, recording or otherwise,without the prior permission of <strong>Vorwerk</strong> InternationalStrecker & Co.Please note that, to date, the Thermomix <strong>TM31</strong>(the “Appliance”) has and is only being produced,marketed, sold and distributed by <strong>Vorwerk</strong>International Strecker & Co. (“<strong>Vorwerk</strong>”).The Appliance has neither been developed/designed forthe US market, nor has it been approved for or releasedin the US market. Accordingly, the Appliance is purposelynot being sold or promoted in any way whatsoever by<strong>Vorwerk</strong> or any other authorised third party in the USA,and no customer service is being provided in relation tothe Appliance by <strong>Vorwerk</strong> or any authorised third partyin the USA.<strong>Vorwerk</strong> does not and will not accept any liabilitywhatsoever for any damages and/or losses whatsoever(including, but not limited to any direct, indirect, special,incidental, punitive or consequential damages or losses,any loss of profits or loss of business, and any damages inrespect of damage, injury or death) in any way arisingfrom or in connection with, or caused by or as a result ofthe use of the Appliance in the USA (including damagesand/or losses due to different voltages being utilized in theUSA). Persons utilizing the Appliance in the USA do soentirely at their own risk.Legal regulations/Copyright41
Warranty/Customer ServiceWarrantyFor the warranty period, please refer to <strong>your</strong> purchase contract.The Thermomix <strong>TM31</strong> may only be repaired by the responsible <strong>Vorwerk</strong>customer service or an authorised <strong>Vorwerk</strong> repairer.Use only parts provided with the Thermomix <strong>TM31</strong> (page 10–11) or originalspare parts from <strong>Vorwerk</strong> Thermomix.Never use the Thermomix <strong>TM31</strong> in combination with parts or equipment notprovided by <strong>Vorwerk</strong> Thermomix.Otherwise <strong>your</strong> warranty is rendered void.Customer serviceFor detailed information contact <strong>your</strong> Thermomix advisor, the sales companyin <strong>your</strong> country, or refer to www.thermomix.com.Produced by<strong>Vorwerk</strong> Elektrowerke GmbH & Co. KGBlombacher Bach 342270 Wuppertalwww.vorwerk-elektrowerke.de42 Warranty/Customer Service
ID: 23407-3312 en FR