ReadingPen TS User Manual - Scanning Pens Ltd.
ReadingPen TS User Manual - Scanning Pens Ltd.
ReadingPen TS User Manual - Scanning Pens Ltd.
You also want an ePaper? Increase the reach of your titles
YUMPU automatically turns print PDFs into web optimized ePapers that Google loves.
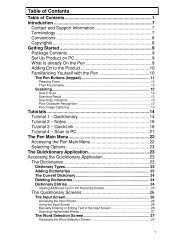
Table of ContentsTable of ContentsIntroduction ......................................................................... 3Contact and Support Information .................................... 3Getting Started .................................................................... 4The Pen Parts .................................................................. 4Unpacking the Pen .......................................................... 5Installing the PenExplorer ............................................... 5<strong>Scanning</strong> Guidelines ....................................................... 6<strong>Scanning</strong> Settings............................................................ 6Pen Maintenance............................................................. 7The Pen Power Supply .................................................... 8Tutorials ............................................................................... 9Tutorial 1: Learning to Scan (with the Trainer) .............. 13Tutorial 2: Editing and Entering Text ............................. 14Tutorial 3: Learning a Word ........................................... 16Tutorial 4: Learning a Line of Text ................................ 22Tutorial 5: Using Files .................................................... 24The Pen <strong>User</strong> Interface ....................................................... 9The Pen Keys .................................................................. 9Icons and Indicators ...................................................... 10The Pen Main Menu .......................................................... 28Connect to PC ............................................................... 28Preferences ................................................................... 28Information ..................................................................... 29The <strong>ReadingPen</strong> Application ........................................... 30The Toolbar ................................................................... 30Accessing the Toolbar .............................................. 30Toolbar Options ........................................................ 30<strong>ReadingPen</strong> Screen Functions ...................................... 34Dictionary Entries .......................................................... 42Locking Dictionary and File Access .............................. 47Games ................................................................................ 49Wordman ....................................................................... 49Scrambled Word ............................................................ 50Toolbar Options ............................................................. 501
Table of ContentsThe PenExplorer ............................................................... 52Opening the PenExplorer .............................................. 52PenExplorer Properties Window .................................... 53Taskbar Icon and Menu ................................................. 54The Notes Folder ........................................................... 54PenExplorer Functions .................................................. 54History Retrieval ....................................................... 54File Management ...................................................... 55Compacting Flash Memory ....................................... 57Troubleshooting ............................................................. 58Product Specification ....................................................... 60Copyrights and Trademarks ............................................ 61Worldwide Limited Warranty ........................................... 612
IntroductionIntroductionCongratulations on your choice of a state-of-the-artscanning Pen from WizCom Technologies. WizCom makespersonal, portable scanning <strong>Pens</strong> that assist with reading,understanding and utilizing text.Inside the tip of the Pen is a sophisticated electronic eye.This eye enables you to scan different types of printedinformation directly into your Pen. Use the Pen to scan fulllines of text, receive word-by-word translations anddefinitions, and hear scanned words pronounced aloud.The Pen comes with a touch screen and stylus, allowingeasy manipulation of the Pen user interface and quickediting of scanned texts with the Virtual Keyboard.Use this guide to find out about setting up and using yourWizCom product.Contact and Support InformationContact us at 888 777 0552 (toll free in USA and Canada)or +1 978 727 0026, or emailusa.support@wizcomtech.com.Visit our website http://www.wizcomtech.com to view theFAQ section and to register your product.3
Getting StartedGetting StartedThe Pen PartsOn the Front Panel you can see:1. Pen tip with optical scanning head (beneath theprotective cover)2. 5-way button (Enter and direction keys)3. Power/Escape key (red)4. Touch screen displayPen Front PanelOn the Top Panel you can see:1. USB cable outlet2. Stylus and stylus slot3. Insertion point for earphones4Pen Top PanelImportant: Before using the earphones, adjust the volumeusing the Voice Settings option in the Preferences menu.The Preferences menu can be accessed from the PenMain Menu or from within the Settings menu in eachapplication.
Getting StartedOn the Back Panel you can see the battery compartment.Pen Back PanelUnpacking the PenTo get started:1. Remove the Pen from the protective case.2. Lift the battery cover on the back of the Pen by pushingthe tab down and out.3. Insert the batteries into the Pen with the positive andnegative terminals corresponding to the markings on thesides of the battery compartment.4. Close the battery compartment.5. Remove the protective cover from the Pen tip.6. Turn the Pen on by pressing the red power key.The Pen is ready to scan!Note: Make sure that your Pen always contains batteries,even when connected to the PC.Installing the PenExplorerUse the PenExplorer to download files to your Pen and toextract the list of recently viewed words from the Pen.Important: Do not connect the USB cable to the PC beforeinstalling the PenExplorer.To install the PenExplorer do the following:1. Open a web browser and type in the following address:http://www.wizcomtech.com/readingpents/Download and run the file.2. Click on the PenExplorer Installation and follow theinstructions for installing the PenExplorer and the USBdriver.5
Getting Started<strong>Scanning</strong> Guidelines<strong>Scanning</strong> ModeThe Pen is in scanning mode when the red light at the tip ofthe Pen is blinking. If you scan text and the results are notaccurate, simply scan again and the text on screen will beover-written with the new text.<strong>Scanning</strong> mode is disabled when accessing a toolbar menuor when you are not in the <strong>ReadingPen</strong> application.<strong>Scanning</strong> RestrictionsThe Pen scans and recognizes printed text in a wide rangeof languages, font types and point sizes (6-22 points, up to8mm) and in a variety of colors on contrasting backgrounds(except red on white, white on red, blue on black and blackon blue).It does not recognize handwriting, cursive fonts,mathematical symbols or other profession-specific signs.Troubleshooting Poor Character RecognitionPoor character recognition may occur for several reasons:• Low quality scanning material.• <strong>Scanning</strong> settings not set correctly (e.g. Inverse).• Holding the Pen at the wrong scanning angle.• <strong>Scanning</strong> too fast.Tips for Good <strong>Scanning</strong>To ensure optimum scanning results:• Hold the Pen at the correct scanning angle.• Place the scanning material on a flat surface.• Use good quality scanning material. Note that poorlyphotocopied materials may provide bad results.• Do not scan too fast.<strong>Scanning</strong> Settings<strong>Scanning</strong> settings can be modified via the Settings ( )menu in the Pen applications.InverseThe Pen’s default scanning setting allows you to scan darktext on a light background. To enable scanning of light text6
Getting Startedon a dark background, select the Inverse option in theSettings menu.Changing the Font SizeThere are two font sizes to choose from – Regular andEnlarged. Changing the font size will mainly affect how textis seen in the File Screen and the Dictionary Screen.Change the font size by selecting or de-selecting theEnlarged Font option in the Settings menu of theapplication.Note: The default application setting is Enlarged Font. ThePreferences and Information menus are always inenlarged font.Regular FontEnlarged FontPen MaintenanceTo keep your product in good condition, follow theseguidelines:• Store in protective case when not in use.• Keep away from excessive moisture and temperatureextremes.• Clean using a soft, damp cloth.• Do not use soap or other cleaning aids on the touchscreen.• Avoid exposing to direct sunlight for long periods.• Avoid scratching or damaging the touch screen.7
Getting StartedCAUTION: To reduce the risk of electrical shock or damageto the internal components, do not spray liquid directly onthe screen or allow excess liquid to drip inside your Pen.The Pen Power SupplyThe Pen comes with 2 AAA Alkaline batteries.Safety Points (Batteries)• Always place 2 fresh batteries in the Pen. It is notadvisable to use the Pen with batteries that are not atthe same voltage level.• Do not combine different types of batteries (e.g.rechargeable and non-rechargeable).• Dispose of used batteries according to themanufacturer's instructions.CAUTION: Risk of explosion if battery is replaced by anincorrect type. Use AAA Alkaline batteries only.Preserving Battery UsageTo optimize battery usage, go to Set Auto Shut-Off Timein Preferences in the Pen Main Menu and modify thesettings according to your needs.External Power Supply (using the USBcable)Connecting the Pen to the PC using the USB cableautomatically activates the power supply from the PC. Thishas the following implications:• The Pen uses the external power supply whenconnected to the PC, so batteries last longer.• Set Auto Shut-Off Time in Preferences is disabledwhen the Pen is connected to the PC.CAUTION: Unsaved information may be lost if the USBcable is disconnected while using without batteries. It is veryimportant that the Pen always contains batteries, even whenconnected to the PC.8
The Pen <strong>User</strong> InterfaceThe Pen <strong>User</strong> InterfaceThe Pen Keys1. Power/Escape Key (red key)Power:• Start up – Short press to turn the Pen on• Shut down - Long press to turn the Pen offNote: To turn the Pen off, hold down the Power keyuntil the progress bar reaches the end.Escape (ESC):• Activate/deactivate toolbar• Close submenus and pop-ups• Stop reading/spelling aloud• Dictionary Screen: Disable highlight mode2. 5-way buttonEnter key (ENT):• Select highlighted option by pressing the key• Word Screen: Hear word read aloud• Dictionary Screens: Activate highlight modeDirection keys:Activate the direction keys (the joystick) by pushingthe 5-way button in the desired direction1. Right key – Scroll right• Dictionary Screen: Toggle dictionary views(complete/abridged forms); Switch betweenthesaurus and dictionary entries• Word Screen: Spell word aloud9
The Pen <strong>User</strong> Interface2. Left key – Scroll left• Dictionary Screen: Toggle dictionary views(complete/abridged forms); Switch betweendictionary and thesaurus entries• Word Screen: Toggle syllable and regularview3. Up key – Scroll upWord Screen: Access dictionary translation(bilingual)4. Down key – Scroll downWord Screen: Access dictionary definition(monolingual)Icons and IndicatorsThe following table contains a list of icons and graphicindicators.Icons can be selected by tapping on them with the stylus, orcan be accessed with the 5-way button. Indicators cannotbe selected. They represent the current state of the Pen.The stylus can be found in the stylus slot on the top panel ofthe Pen. See The Pen Parts on p4.Graphic FunctionCommon Toolbar Icons10Settings: Display the Settings menu options.Help: Display the Help menu options.Pen Main Menu: Exit application or menu.The <strong>ReadingPen</strong> ToolbarLock: Indicates that dictionary access is locked.Back: Return to previous screen. From crossreference:return to original dictionary entry.Read Aloud: Hear text on screen read aloud.File Operations: Open or delete files.Dictionary↔Thesaurus: Switch betweendictionary definition and thesaurus entry.
The Pen <strong>User</strong> InterfaceGraphic FunctionNo Thesaurus Entry: Indicates that there is nothesaurus entry available for the current word.Alternative Entries: See a list of additionalentries for the current word.No Alternative Entries: Indicates that there areno alternative entries for the current word.History: Open a list of recently viewed words.Edit: Use the Virtual Keyboard to edit text.<strong>ReadingPen</strong> Icons in the Word ScreenLeft arrow: Divide word into syllables. Togglesyllable and regular view.Right arrow: Spell word aloud.Up arrow: Access dictionary translation.Down arrow: Access dictionary definition.Inactive arrows: The function is unavailableThe Games ToolbarMove to Next Word: Clear the current screenand move to the next mystery word.Show Score: View the amount of correctanswers for the selected game.Dictionary and Thesaurus Display – toggle betweencomplete and abridged entries by selecting icon withstylus or using the left/right direction keys.View dictionary/thesaurus entries in completeform.View dictionary/thesaurus entries in abridgedform.Indicates that pressing the left key twice will takeyou to the thesaurus entry (from the completedictionary entry).Indicates that pressing the left key once will takeyou to the thesaurus entry (from the abridgeddictionary entry).11
The Pen <strong>User</strong> InterfaceGraphic FunctionIndicates that pressing the right key once will takeyou to the dictionary entry (from the abridgedthesaurus entry).Indicates that pressing the right key twice will takeyou to the dictionary entry (from the completethesaurus entry).<strong>Scanning</strong> Settings IndicatorsIndicates the Pen is ready to scan.Indicates the Pen is ready to scan inverse text(white text on dark background).Settings Menu – toggle optionsScrollbarsIndicates that the menu option is ON.Indicates that the menu option is OFF.Scroll using the stylus.Inactive scrollbars indicate that there is no text toscroll through.Battery IndicatorsHigh Medium Low EmptyExternal Power IndicatorsIndicates that the Pen is powered by the PC butthe Pen contains batteries.Indicates that the Pen is powered by the PC andthe Pen contains no batteries.12
TutorialsTutorialsTutorial 1: Learning to Scan (withthe Trainer)This tutorial will help you learn to scan using the Trainersupplied in the package.1. Slide the Trainer onto the tip of the Pen (instead of thecap) and press into place.2. Press the red Power key to turn the Pen on. Select the<strong>ReadingPen</strong> icon from the Pen Main Menu by tappingon it with the stylus or by using the direction keys. If youare using the Pen for the first time you will be asked toselect a dictionary. Select the dictionary appropriate foryour needs.3. Position the Trainer at the end of the practice sentencewith the Pen facing the text.4. Position the Pen so that the text is centered between thefeet of the Trainer.5. Glide the Pen from right to left in a straight line over thetext. Start scanning 1cm from the end of the sentenceand finish 1cm after.Use the following practice sentence:This sentence will help me practice scanning.Note: The Pen default is set to right-handed scanning. Tochange the Pen display to left-handed scanning, use theSet Right-/Left- Handed option from Preferences in thePen Main Menu.Positioning of Text for <strong>Scanning</strong> with Trainer13
TutorialsTutorial 2: Editing and Entering TextUse the Virtual Keyboard to enter or edit text with thestylus. To access the Virtual Keyboard select from theapplication toolbar.The Virtual KeyboardThe Editing AreaThis is the insertion point for new text, as indicated by theblinking cursor. Use the stylus to enter or edit text with thecharacter keys, or scan text directly into the editing area.Scanned text is underlined. Tapping any key other thanor will accept the inserted text.Text can be erased by:1. Using to delete individual characters.2. Highlighting the text with the stylus and selecting ,or typing/scanning over the highlighted text.The Auto Complete FeatureThe auto complete list provides potential endings to insertedcharacters. Tap on the top right box to open the pull downlist in order to select the desired word. The selected wordwill appear in the edit area.The Auto Complete List14
TutorialsNote: The auto complete list only contains words from theselected dictionary.The KeyboardThe keyboard layout corresponds to the selected scanninglanguage settings.The Keys:KeyorESCorEnterFunctionBackspace:Tap to delete characters to the left of thecursor.Close and Cancel:Tap to reject all changes and return to theapplication screen.Close and Save:Tap to accept all changes and return to theapplication screen.Shift:Tap to switch to uppercase characters. Thekeyboard will automatically return to theregular layout after selecting one character.Use to enter more than one uppercasecharacter.Caps Lock:Tap to view the uppercase characterkeyboard. Tap again to return to regularlayout.International:Tap to switch to the international keyboard.The keyboard will automatically return to theregular layout after selecting one character.Numeric:Tap to view the numeric keyboard. Tap againto return to the regular layout.15
TutorialsTutorial 3: Learning a WordUse this tutorial to learn how to access the <strong>ReadingPen</strong>features after scanning or entering a single word.Screenshots are taken from the AHD College dictionary.1. Access the Input Screena. Press the red ESC key to turn the Pen on.b. From the Pen Main Menu, enter the <strong>ReadingPen</strong>application:• By pressing ENT when the icon is highlighted.• By tapping on the icon with the stylus.The Input Screen will appear:2. Scan or enter the word you wish to learnYou can either scan a word or enter it using the VirtualKeyboard.a. <strong>Scanning</strong>:Scan the following word:reading16b. Entering the word using the Virtual Keyboard:i. Select from the toolbar to open the VirtualKeyboard.ii. Use the stylus to enter the word “reading”.iii. Press ENT or tap on the key.
TutorialsThe Word Screen will appear and the word will be readaloud.Note: If you have not changed the default Pen settingsyou will hear the word read aloud. Press ENT or tap onthe icon to hear it read aloud again.3. Hear the word spelled outUse the right direction key or tap on the icon to hearthe word spelled out. Each letter will be highlighted as itis spoken.4. View the syllabic division of the wordUse the left direction key or tap on the icon to see thesyllabic division of the word.Syllable breaks in the Word ScreenUse the same keys to toggle between the syllabic andregular word views.17
Tutorials5. Translate the worda. Use the up direction key or tap on the icon to viewthe translation of the word in the DictionaryScreen.The Spanish translation of the word “reading”b. Use the up/down direction keys to scroll through thetranslation.c. Use the up direction key or tap on the icon toreturn to the Word Screen.6. View the English definition of the worda. Use the down direction key or tap on the icon toview the English dictionary definition of the word inthe Dictionary Screen.b. Use the up/down direction keys to scroll through thedictionary definitions.c. Use the right/left direction keys to switch betweencomplete and abridged dictionary entries.• When the icon is seen on the screen: Use theright direction key or tap on the icon to view thecomplete dictionary entry.• When the icon is seen on the screen: Use theleft direction key or tap on the icon to view theabridged dictionary entry.18
Tutorials7. View synonyms of the worda. From the Dictionary Screen tap on the icon toaccess the thesaurus entry.b. Use the up/down direction keys to scroll through thethesaurus entry.c. Use the right/left direction keys to switch betweencomplete and abridged thesaurus entries.• When the icon is seen on the screen: Use theright direction key or tap on the icon to view thecomplete thesaurus entry.• When the icon is seen on the screen: Use theleft direction key or tap on the icon to view theabridged thesaurus entry.d. Tap on the icon to return to the definition.Note: If there is no corresponding thesaurus entry for theword you are viewing, the icon will appear in the toolbar.8. View alternative entriesa. Tap on the icon to see the list of alternativeentries available for the word “reading”.b. Select the word “Reading”.Note: If there are no alternative entries, the iconwill appear.c. The Definition Screen will appear showing thedictionary entry for the word reading.19
Tutorialsd. Tap on the icon to return to the Word Screen.The original word, “reading” will appear on screen.The following features (steps 9 – 11) are only availablewhen viewing English definitions:9. Activate highlight modea. Tap on the icon to reach the Dictionary Screen.b. Press the ENT key to activate highlight mode. Thefirst word or number of the first will be highlighted.10. Hear the sections read alouda. Tap on the icon to hear the whole section readaloud, word by word. Each word will be highlightedas it is spoken. At the end of the section, thehighlight will move to the next section.b. Tap on the icon to hear the next section readaloud.11. Cross-reference a word from thedefinitiona. Tap on the word “practice” with the stylus, or use thedirection keys to scroll through the words of theentry until the word 'practice' is highlighted.20
Tutorialsb. Press ENT.c. The Word Screen will appear showing the crossreferencedword.d. View the syllable breaks and hear the word spelledaloud as explained in points 3 and 4.e. View the translation or dictionary definition asexplained in points 5 and 6.f. Tap on the icon to return to the original word youcross-referenced from. The word “practice” will behighlighted on screen.Note: When viewing a cross-referenced word, the iconwill take you back to the original word you cross-referencedfrom, in this case “reading”. It will not take you back to the“practice” Word Screen. Select the word “practice” fromthe History list ( )for full functionality.21
TutorialsTutorial 4: Learning a Line of TextUse this tutorial to learn how to access the <strong>ReadingPen</strong>features after scanning or entering a line of text. Most of thefeatures are the same as those described in tutorial 3, withscreenshots taken from the AHD College dictionary.1. Access the Input Screena. Press the red ESC key to turn the Pen on.b. From the Pen Main Menu, enter the <strong>ReadingPen</strong>application:• By pressing ENT when the icon is highlighted.• By tapping on the icon with the stylus.The Input Screen appears:2. Scan the sentence you wish to learna. Scan the following sentence:I love reading interesting stories.b. The Text Screen will appear and the sentence willbe read aloud. Each word is highlighted as it is read:22
TutorialsNote: If you have not changed the default Pen settingsyou will hear the sentence read aloud. Tap on theicon to hear it read aloud again.3. Hear each word read aloudUse the left/right direction keys to scroll through thesentence on screen or tap on the word you wish to hearread aloud. Each word is highlighted as it is spoken.4. View a word in the Word Screena. Highlight the word “stories” by either tapping on itwith the stylus or by scrolling to the word using theleft/right direction keys.b. Press ENT.c. The Word Screen will appear:Note: The word on screen will not be read aloud. Ifyou wish to hear the word read aloud, press ENT ortap on the icon.d. Tap on the icon to return to the Text Screen.5. Using the Word Screene. Highlight the word “reading” by either tapping on itwith the stylus or by scrolling to the word using theleft/right direction keys.f. Press ENT.a. The Word Screen will appear. See steps 3 – 11 intutorial 3 to learn about the Word Screen functions.b. From the Word Screen, tapping on the icon willreturn you to the Text Screen with the previouslyscanned line on screen.23
TutorialsTutorial 5: Using FilesUse this tutorial to learn how to access the <strong>ReadingPen</strong>features after downloading a file to the Pen. Screenshotsare taken from the AHD College dictionary.1. Creating a File in Notepada. On your PC go to Start\Programs\Accessoriesand select the Notepad application.b. A Notepad window will open on screen.c. Type the following text into the Notepad window:This tutorial will teach me how to use files on thePen. I will be able to hear text read aloud, brokendown into syllables and spelled aloud. I will also beable to access dictionary translations and definitions.d. Go to File\Save As. Save the file to your Desktopwith the file name Document.txt.e. Make sure file type is Text Documents (*.txt).f. Change the encoding to Unicode.Note: File names must be in English and should notcontain more than 8 characters.2. Downloading the file to the Pen usingthe PenExplorerYou should have already installed the PenExplorerwhen you set up your Pen. See Installing thePenExplorer on page 5.24
Tutorialsa. Connect your Pen to the PC with the USB cable.Make sure your computer is turned on.b. From the Pen Main Menu, select Connect to PC:• By pressing ENT when the icon is highlighted.• By tapping on the icon with the stylus.c. The WizCom PenExplorer window will open andthe icon will be seen in the notification area of thewindows taskbar.d. Double-click on the Notes folder to open it.e. Copy the “Document.txt” file you created in step 1from your PC Desktop to the Notes folder.f. Press the red ESC key on the Pen to exit thePenExplorer and return to the Pen Main Menu.The PenExplorer window will close on the PC.25
Tutorials3. Working with Files on the Pena. From the Pen Main Menu, enter the <strong>ReadingPen</strong>application.b. Tap on the (File Operations) icon and selectOpen File from the drop-down menu.c. The file list will open on screen.d. Select the file “Document” by either pressing ENTor tapping on the file name with the stylus.e. The file will open in the File Screen.f. Tap on the icon with the stylus. The paragraphwill be read aloud, with each word highlighted as it isread.4. Viewing a sentence from the file26a. Use the up direction key to scroll up to the beginningof the paragraph.b. Press ENT when the word “This” is highlighted.c. The sentence beginning with the word “This” will betransferred to the Text Screen. The sentence willbe read aloud, with each word highlighted as it isread.
Tutorialsd. Scroll to the word “tutorial” and press ENT.e. The Word Screen will appear. See steps 3 – 11 intutorial 3 to learn about the Word Screen functions.g. From the Word Screen, tap on the icon to returnto the Text Screen.h. The sentence from the file will re-appear in the TextScreen. Tap on the icon to return to the FileScreen.5. Viewing a single word from the filea. Tap on the (Settings) icon and select ShowSentence/Word from File from the drop-downmenu.b. Select Word from the options on screen.c. In the file, select the word “syllables” by eitherscrolling to the word with the direction keys ortapping on it with the stylus.d. Press ENT. The word will appear in the WordScreen and will be read aloud.e. Tap on the icon to return to the Text Screen andthen to the File Screen.27
The Pen Main MenuThe Pen Main MenuTo access the Pen Main Menu, exit the application you arecurrently using by selecting from the application toolbar.The following items appear in the Pen Main Menu:• <strong>ReadingPen</strong> (see page 28)• Games (see page 49)• Connect to PC• Preferences• InformationConnect to PCUse this option to transfer files to your Pen and to retrieve alist of the last 80 viewed words from the <strong>ReadingPen</strong>application.See the PenExplorer section on page 52 for moreinformation.PreferencesModify the general Pen settings using this menu which canbe accessed from the Pen Main Menu or from theSettings ( ) menu within each application.When changing a setting, press ENT or select OK to savechanges. To return to the Preferences menu withoutmaking changes, press ESC or .Voice SettingsUse this option to modify the volume, pitch and readingspeed on the Pen. This will change the way text is readaloud in the <strong>ReadingPen</strong> application. Move the slider bar bydragging with the stylus or using the direction keys.28
The Pen Main MenuSet Auto Shut-Off TimeIf the Pen is on but is not being used, it will shut downautomatically after two minutes. Use this option to changethe default time setting. Settings range from 1min – 15min.Set Right–/Left– HandedUse this option to switch between right and left-handedscanning. The Pen default is set to right-handed scanning.Set Screen ContrastUse this option to adjust the brightness of the display. Movethe slider bar by dragging with the stylus or using thedirection keys.Calibrate Touch ScreenAt times the stylus touch may become inaccurate. If so, thetouch screen will need to be recalibrated. Select the optionand follow the instructions to calibrate the screen.Touch Screen CalibrationInformationUse the Information menu to view the followinginformation:View Memory StatusUse this option to see how much memory is available on thePen for storing files.Serial NumberUse this option to view the Pen serial number.AboutUse this option to view the Pen version and copyrightinformation.29
The <strong>ReadingPen</strong> ApplicationThe <strong>ReadingPen</strong> ApplicationThe ToolbarThe toolbar appears on the top right corner of the screen. Itcan be accessed using either the stylus or the Pen keys.Accessing the Toolbar301. Using the Stylus• Tap the icon to open the toolbar item.• Within the menu option, tap with the stylus toselect an option or scroll up/down using thescrollbar icons.• To de-select the toolbar, simply tap in a spaceoutside the menu or toolbar.2. Using the Pen Keys• Press ESC (the red key) to activate the toolbar.The leftmost active toolbar item will be highlighted.• Use the right/left direction keys to scroll betweenthe toolbar items. Press ENT to access the menuoption.• Scroll up/down within the menu using the up/downdirection keys. Exit the menu by pressing Escapeand then press Escape again to de-select thetoolbar.Toolbar OptionsBackReturn to the previous screen. If you have cross-reference aword from a dictionary entry, the Back icon will take youback to the original dictionary entry.
The <strong>ReadingPen</strong> ApplicationRead AloudHear text read aloud in all screens. Use the Voice Settingsoption in the Preferences menu to define speaker settings.File OperationsUse this menu to open or delete files downloaded to thePen using the PenExplorer.Dictionary↔ThesaurusSwitch between dictionary and thesaurus entries insupported dictionaries. This menu item is inactivated if thereare no thesaurus entries available for the selected word.Alternative EntriesView a list of alternative dictionary entries for the selectedword. This menu item is inactivated if there are noalternative entries available for the selected word.HistoryView a list of the last 80 looked-up words. Select a wordfrom the list to view it in the Word Screen. Upload theHistory list to your computer using the PenExplorer.EditAccess the Virtual Keyboard to modify scanned text or toinsert new text. See Editing and Entering Text on page14 for information on using the Virtual Keyboard.SettingsThe Settings menu contains the following options:Menu OptionEnlarged FontAlways ReadAloudFunctionUse this option to switchbetween regular and enlargeddisplay font. The Pen’s defaultsetting is enlarged font.Use this option to change thespeaker setting for reading textaloud. The Pen’s default settingis selected which means thattext is read aloud immediatelyafter it is scanned or selected.31
The <strong>ReadingPen</strong> ApplicationMenu OptionHighlight SpokenWordsInverseSpeakParagraph/Word…ShowSentence/Wordfrom File…Select Dictionary(Translation)…Select Dictionary(Definition)…FunctionUse this option to modify thePen’s highlight setting. ThePen’s default setting is selectedwhich means that each wordis highlighted as it is read aloud.The Pen is set to scan dark texton a light background. Selectthis option to scan inverse text(white text on dark background).Use this option to decide howtext is read aloud whenactivating the speaker in a file ordictionary entry. If Paragraph isselected, the entire section willbe read aloud. If Word isselected, only the highlightedword will be read aloud.This setting defines whathappens when extracting textfrom a file. If Sentence isselected, the sentence wherethe highlight is located will beextracted to the Text Screen. IfWord is selected, thehighlighted word will beextracted to the Word Screen.View a list of bilingualdictionaries and change thedefault dictionary. Only availablewhen there is more than onebilingual dictionary on the Pen.View a list of availabledictionaries for Englishdefinitions and change thedefault dictionary. Only availablewhen there is more than onemonolingual dictionary on thePen.32
The <strong>ReadingPen</strong> ApplicationMenu OptionControl DataAccess…Reset HistoryFunctionUse this option to lock dictionaryand/or file access. Use the sameoption to unlock access and forhelp with retrieving forgottenpasswords. See LockingDictionary and File Access onpage 47.Erase the History list ofpreviously viewed words.Preferences… Display the Preferences menu(from the Pen Main Menu).For further information see <strong>Scanning</strong> Settings on page 6.HelpThe Help menu contains the following options:Menu OptionPronunciationGuideAbbreviationsGuideIcons…FunctionA guide to the pronunciation ofwords using the phoneticsalphabet and symbols.A guide to the abbreviationsused in some dictionaries.An explanation of the icons andgraphic indicators seen on thePen screens.Keys…An explanation of the Pen keysand their functions.Note: Only relevant icons and menu options will be availablein each screen.33
The <strong>ReadingPen</strong> Application<strong>ReadingPen</strong> Screen FunctionsThe <strong>ReadingPen</strong> application has several different screens,each with different functions.Text can be scanned into any screen when the red light atthe tip of the Pen is blinking. Any text that has already beenscanned will be over-written by the new text.The last 80 words that you look up are saved into theHistory list which can be opened in any screen where theicon appears in the toolbar. You can upload the Historylist to your computer using the PenExplorer. See ThePenExplorer on page 52.The Help ( ) menu can be accessed from the toolbar inevery careen. It contains an explanation of all the icons andindicators used in each application as well as anexplanation of Pen key functions.Input ScreenThe Input Screen appears when you first enter the<strong>ReadingPen</strong> application from the Pen Main Menu.Input Screen Functions1. Scan/enter textScan text into the <strong>ReadingPen</strong> application, or enter textusing the Virtual Keyboard ( ).2. Open a fileUse the File Operations ( ) menu to open a file forviewing in the File Screen. Files are downloaded to thePen using the PenExplorer. See The PenExplorer onpage 52.34
The <strong>ReadingPen</strong> ApplicationFile ScreenThe File Screen appears when opening a file using the FileOperations ( ) menu. Scroll through the text using theup/down direction keys or by tapping on the scroll arrows atthe bottom-right of the screen with the stylus. Select toreturn to the Input Screen.Downloading Files to the PenDownload files to the Pen using the PenExplorer. See ThePenExplorer on page 52.File Screen Functions1. Hear text read aloudTap on the icon to hear the entire paragraph readaloud. Each word is highlighted as it is read.The default reading settings are Highlight SpokenWords and Speak Paragraph. Change these settingsby de-selecting the options in the Settings ( ) menu.You can choose whether to read the entire paragraph orindividual words, and whether words being read aloudare highlighted as they are read aloud.2. View text in Text Screen/Word ScreenTap a highlighted word or press ENT to see thesentence in the Text Screen. From the Text Screenaccess the Word Screen by selecting the word youwish to view (press ENT or tap on highlighted word). Ifthe sentence is very long, sections of up to 80characters will be transferred at a time.The default text transfer setting is Show Sentencefrom File. You can change this in the Settings ( )menu which gives you the option of transferringindividual word straight to the Word Screen.35
The <strong>ReadingPen</strong> ApplicationText ScreenThe Text Screen appears after scanning or entering morethan one word, or when selecting a word from a file whenthe file setting is Show Sentence from File.Text Screen Functions1. Hear text read aloudTap on the icon to hear the entire sentence readaloud. Each word is highlighted as it is read. Thedefault reading settings are Always Read Aloud andHighlight Spoken Words. Change these settings byde-selecting the options in the Settings ( ) menu.Scroll through the scanned text using the right/leftdirection keys or by tapping on the scrollbars at thebottom-right of the screen with the stylus.2. View word or phrase in Word ScreenSelect a word from the Text Screen by tapping on thehighlighted word with the stylus or pressing ENT. Youwill reach the Word Screen.Word ScreenThe Word Screen appears after scanning/entering a singleword, after scanning a line and selecting one word from theline or after selecting a word from a file, when the file settingis Show Word from File.36
The <strong>ReadingPen</strong> ApplicationWord Screen Functions1. Hear the word read aloudTap on the icon or press ENT to hear the word readaloud.2. Spell the word aloudTap on the icon or press the right direction key to hearthe word spelled aloud. Press ESC to cancel.3. View the syllabic division of the wordTap on the icon or press the left direction key to viewthe syllabic division of the word.If the word contains only one syllable, or if the scannedword is an inflected form that is not included in thedictionary, the inactive icon will be seen.Use the icon or the left direction key to toggle syllableand regular view.4. Translate the wordTap on the icon or press the up direction key totranslate the word. The translation from the bilingualdictionary is displayed in the Dictionary Screen.If there is no translation available for the word, or if thedictionary access is locked, the icon will be seen.Select or press the up direction key from thebeginning of the translation to return to the WordScreen.5. Define the word and access the thesaurusTap on the icon or press the down direction key toview the English definition of the word. The dictionaryentry is displayed in the Dictionary Screen.If dictionary access is locked, the icon will be seen.Select or press the up direction key from thebeginning of the definition to return to the WordScreen.Tap on the icon to view the corresponding thesaurusentry for the word. If there is no correspondingthesaurus entry, the icon will be seen.37
The <strong>ReadingPen</strong> ApplicationDictionary Screen (Translation/Definition)The Dictionary Screen appears when accessing thedefinition/translation from the Word Screen.It displays English definitions and thesaurus entries andtranslations from the bilingual dictionary.Accessing the Dictionaries1. Bilingual DictionaryAccess the translation by tapping on the icon orpressing the up direction key in the Word Screen.2. Dictionary Definition (English)Access the definition by tapping on the icon orpressing the down direction key in the Word Screen.3. Thesaurus EntriesThe thesaurus entries are accessible only through theEnglish definition entries displayed in the DictionaryScreen.To switch between dictionary and thesaurus entries:a. Using the toolbar:The icon indicates that there is a correspondingthesaurus entry for the dictionary entry. Use thisicon to switch between dictionary and thesaurusentries for the current word.If there is no corresponding thesaurus entry, theindicator will be seen.b. Using the Pen keys:The and icons visible on screenindicate that there is a corresponding thesaurusentry available for the specific word. The and38
The <strong>ReadingPen</strong> Applicationicons visible on the screen indicate thatyou are viewing a thesaurus entry.• If is visible, press the left direction keyonce to access the thesaurus.• If is visible, press the left direction keytwice to access the thesaurus.• If is visible, press the right direction keyonce to return to the dictionary entry.• If is visible, press the right direction keytwice to return to the dictionary entry.Dictionary Screen Functions1. Hear the current word read aloudTap on the icon to hear the word read aloud.Note: If highlight mode is activated (one of the words inthe entry appears highlighted), press ESC to deactivatethe highlight mode.2. Hear sections of text read aloudThis function is only available for dictionaries whichcontain voice support.To hear sections of dictionary entries read aloud:a. Scroll to the section you wish to hear read aloud.b. Press ENT to activate highlight mode. The firstword on the screen that can be spoken will behighlighted.c. Tap on the icon to hear the section read aloud.Each word is highlighted as it is read aloud. PressESC to abort the reading.d. When the section finishes reading the highlight willmove to the next section. Tap on the icon tohear the next section read aloud.e. Press ESC to de-activate highlight mode.The default setting is Highlight Spoken Words.Words on screen are highlighted as they are read, andthe screen scrolls accordingly. If Highlight SpokenWords is de-selected, the words will not be highlightedas they are read, and the screen will not scroll.39
The <strong>ReadingPen</strong> Application3. Switch between complete and abridgeddictionary viewsThe definition and thesaurus entries are available in twoviews: abridged and complete.• The abridged view shows only the basic elements ofthe entry. This is the default view, indicated by theicon on the right of the screen. Tap on the iconto switch to complete view.• The complete view contains additional textelements, such as phonetic symbols and wordhistories. The icon on the right of the screenindicates that the view is complete. Tap on theicon to switch to abridged view.4. View Alternative EntriesIf the word you are accessing has more than onedefinition or translation, the icon will appear in thetoolbar. If the current word has no alternative entries,the indicator will appear.40Tap on the icon to open the word list. Select theoption you want to view and it will appear in theDictionary Screen.5. Cross-reference from within the current entryWhen viewing a definition or translation, you can alsolook up words from within the current entry.If you are in a thesaurus entry and there is nocorresponding thesaurus entry for the word you want tocross-reference, you will be taken directly to thedefinition.a. Scroll to the word you wish to look up.b. Either tap on the word to highlight it or press ENTto activate highlight mode and use the directionkeys to highlight the word you wish to look up.
The <strong>ReadingPen</strong> Applicationc. Tap on the highlighted word or press ENT. Thehighlighted word will appear in the Word Screen.d. In the Word Screen: Hear the word read aloud,spelled aloud and see the syllable division. Accesseither the definition or translation.e. Select to return to the original dictionary entryfrom the Word Screen or the DictionaryScreen.Note: You can cross-reference as many times as youwish from the Dictionary Screen (i.e. cross-referencefrom within a cross-reference,) but selecting willtake you back to the original dictionary entry only.Cross-referencing from the Contents Index inThesaurus EntriesWords from the Contents Index are seen in smallcaps within the thesaurus entry.The Contents Index word 'luck' viewed in the thesaurusentry of the word 'happy'When cross-referencing to these words, some functionsare unavailable in the Word Screen.• The bilingual dictionary is unavailable.• Syllabic division is unavailable.• Only the thesaurus entry is available in theDictionary Screen.Cross-referencing the word 'luck' from the ContentsIndex41
The <strong>ReadingPen</strong> ApplicationDictionary EntriesThe dictionary entries contain various elements. Theseexamples are taken from the AHD College and English toSpanish dictionaries.Not all elements are seen in every dictionary.1. HeadwordThe selected word or derivative of the selected word.Includes headwords made up of more than one word.The headword ‘hello’The word ‘ate’ is a derivative of the headword ‘eat’The compound headword 'cross-country skiing'2. HomonymsTwo or more words which are spelled the same buthave different meanings.42The Alternative Entries list for the homonym ‘desert’
The <strong>ReadingPen</strong> Application3. PhoneticsThe phonetic transcription of the headword. This canbe seen when the dictionary entries are displayed incomplete form.Phonetics of the entry ‘party’For a guide to the phonetic symbols used in thedictionary, select Pronunciation Guide from theHelp menu.4. TranslationsSome words may have additional meanings whencombined with other words. These can be viewed byscrolling through the dictionary definition of theparticular word.Translation of the headword ‘text’5. DefinitionsIf the headword has more than one definition for aparticular part of speech, each definition is numbered,with the most common definition appearing first.Definitions of the noun form of the headword 'view'43
The <strong>ReadingPen</strong> ApplicationSub-definitions of the noun form of the headword 'view'6. Parts of SpeechCategories of words that describe their specificgrammatical function, e.g. nouns, verbs andadjectives. Some dictionary entries contain severalparts of speech.The different parts of speech of the word ‘bold’7. Idioms and phrasal verbsExpressions or phrases usually composed of asequence of words. They can be identified:a. Automatically within a sentence (scanned/typed).b. By scrolling through the translation of the first wordof the sequence.When you scan or enter an idiom or phrasal verb, itwill appear in the Text Screen. Highlight the first wordof the sequence and tap on it with the stylus or pressENT. The entire sequence will appear in the WordScreen. This will only occur if the sequence has acorresponding dictionary entry.The idiom ‘from A to Z’ from the headword ‘from’44
The <strong>ReadingPen</strong> ApplicationThe Alternative Entries list for ‘from A to Z’ includes thecomplete idiom and the first word of the idiom8. LabelsLabels describe a specific field in which the headwordis used, e.g. music.The label music from the headword 'note'9. and indicatorsIndicate that a thesaurus entry is available for thecurrent headword. Pressing the left direction key twicefrom the complete view and once from the abridgedview will access the thesaurus entry.10. and indicatorsIndicate that you are in the thesaurus entry. Pressingthe right direction key twice from the complete viewand once from the abridged view will access thedictionary definition.11. Alternative Spelling of HeadwordsIf the headword can be spelled in more than one way,the alternative spelling is shown beside the headword.Alternative spelling of the headword 'ax'45
The <strong>ReadingPen</strong> ApplicationAdditional Elements from the CompleteDictionary and Thesaurus Entries1. Inflected Forms and their SyllablesAn inflected form is created by adding letters to thebase form of a word to create different usages. Theinflected forms of the headword appear below thedefinitions. They appear in bold, with syllabic divisionshown using dots or stress marks.Inflected forms of the headword 'reflect'2. Sample SentencesAn example that shows how to use the headword in asentence.A sample sentence from the headword 'reflect'3. Word HistoryExtra information about the historical origin of aheadword.Word history of the headword 'Zeus'46
The <strong>ReadingPen</strong> Application4. Usage NotesInformation explaining how or where the headwordcan or cannot be used.A usage note from the headword 'alleged'5. SynonymsThe dictionary entry may contain synonyms for theheadword.Synonyms from the headword 'fast'Locking Dictionary and File AccessYou can lock access to the Pen dictionaries and files usingthe Control Data Access option from the Settings ( )menu in the <strong>ReadingPen</strong> application.1. Locking AccessTo lock the dictionary and/or file access:1. Select the icon in the toolbar.2. Select Control Data Access to open the menu.3. There are three options to choose from. You caneither lock the dictionary access, the file accessor both. Choose the option you wish to use.47
The <strong>ReadingPen</strong> Application4. The password screen will appear. Use the stylusto enter a four-number password. Press ENT ortap on the key to save the password.5. Write down your password.If you have chosen one of the options that lockdictionary access, the indicator will appear in allrelevant screens.Locking dictionary access will also lock thedictionaries in the Games application. Translationsand definitions will not be available until thedictionary is unlocked.2. Unlocking AccessTo unlock the dictionary and/or file access:1. Go to Settings/Control Data Access andselect Unlock Access.2. The password screen will appear. Use the stylusto enter your four-number password. Press ENTor tap on the key. This will unlock the Pen.3. Retrieve Lost PasswordIf you have forgotten your password:1. Go to Settings/Control Data Access andselect Retrieve Forgotten Password.2. A message will appear with the recovery code.Write the code down.3. Go to the Pen Main Menu and open theInformation menu.4. Go to Serial Number and write down yourPen’s serial number.5. Send an email to usa.support@wizcomtech.com.Include the recovery code and the serial numberin the email. Support will use this information tosend you your password.48
GamesGamesSelect this option to access the Games. The games usewords derived from the <strong>ReadingPen</strong> History list to helpyou practice words you have looked up. If you don’t haveenough words in your History list, additional words will beadded to the word list from the selected dictionary.The games use dictionaries whose source language isEnglish. Choose the dictionary you wish to use from SelectDictionary in the Settings ( ) toolbar menuIf you have locked dictionary access in the <strong>ReadingPen</strong>application, you will not be able to access the definitions ortranslations of the words being played. Translations anddefinitions will only be available when dictionary access isunlocked.WordmanGuess the mystery word by tapping on letters from thekeyboard with the stylus.If you guess a correct letter, it will appear in the matchingspace in the answer section above the keyboard. Guessinga letter which does not appear in the word will cause a bodypart to be added to the Wordman. Eight incorrect guessesand you lose!If you need help with guessing the word, use theTranslation/Definition button to view the dictionary entryfor the mystery word. Use the stylus or press ENT to accessthe Translation/Definition button. Any letters you havealready used will appear highlighted on the keyboard.49
GamesScrambled WordUnscramble the word using the letters found underneath theanswer box.If you need help with guessing the word, use theTranslation/Definition button to view the dictionary entryfor the mystery word.When you have filled in all the empty spaces, a Check boxwill appear. If you have finished unscrambling the word, tapthe Check box with the stylus to see if you have the rightanswer.Use the stylus to tap the letter you wish to move. The letterwill appear highlighted. Tap on the place in the answer boxwhere you wish to place the letter. You can move lettersinto, around and out of the box as many times as you wish.Toolbar OptionsThe following toolbar options are relevant for bothWordman and Scrambled Word. See The Toolbar onpage 30 for information on accessing the toolbar with thestylus and Pen keys.Move to Next WordUse this option to clear the current screen and move to thenext mystery word.50
GamesShow ScoreUse this option to see how many words you have guessedcorrectly. You can reset the score by selecting Reset Scorefrom the Settings menu.SettingsThe Settings menu contains the following options:Menu OptionEnlarged FontSelect DictionaryReset ScoreWord SelectionPreferences…HelpFunctionUse this option to switchbetween regular and enlargeddisplay font. The Pen’s defaultsetting is enlarged font.Choose the dictionary you wishto use with the game.Clear the score for the currentgame and start from zero.Choose which word list you wishto use – either words from your<strong>ReadingPen</strong> History list orrandom words from the selecteddictionary.Display the Preferences menu(from the Pen Main Menu).The Help menu contains the following options:Menu OptionHow to PlayIcons…Keys…FunctionView the playing instructions forthe current game.An explanation of the icons andgraphic indicators seen on thePen screens.An explanation of the Pen keysand their functions.51
The PenExplorerThe PenExplorerThe PenExplorer is the application your Pen uses tocommunicate with the PC. Use the PenExplorer for:1. History retrieval: Upload the list of recently viewedwords from the <strong>ReadingPen</strong> application to the PC.2. File management: Copy files onto the Pen for use inthe <strong>ReadingPen</strong> application.3. Compacting flash memory: Compact the Pen flashcard.Installing the PenExplorer and USB driverInstall the PenExplorer using the product installationsoftware downloaded fromhttp://www.wizcomtech.com/readingpents/.The installation also installs the USB driver needed for Pen-PC communications.The PenExplorer installs to the Program Files folder onyour computer. After installation, the PenExplorer process,PenService.exe, runs in the background in wait mode andonly becomes active when Pen-PC Communications areestablished. It can be seen in the Processes tab of theWindows Task Manager.Opening the PenExplorerTo open the PenExplorer:1. Turn the Pen on.2. Connect the Pen to the PC using the USB cable.3. Select Connect to PC from the Pen Main Menu.The PenExplorer icon will appear in the Windowstaskbar and the PenExplorer window will open on screen.52
The PenExplorerPenExplorer Properties WindowRight-click on a space in the main PenExplorer windowand select Properties from the drop-down menu. This willopen the WizCom PenExplorer Properties window.The PenExplorer Properties window has two tabs:1. General: Shows the Pen’s memory status and givesyou the option to compact the flash card memory.2. About: Displays version and copyright information forthe PenExplorer.53
The PenExplorerTaskbar Icon and MenuThe PenExplorer icon appears in the notification areaof the Windows taskbar when Pen-PC communications isestablished (Pen and PC are connected with the USB cableand Connect to PC is activated on the Pen). Clicking onthe icon opens the PenExplorer window.Right-click on the taskbar icon to open the taskbar menu.The taskbar menu has the following options:1. Open PenExplorer: Opens the PenExplorer window.2. About: Opens the PenExplorer Properties windowin the About tab. Displays version and copyrightinformation for the PenExplorer.The Notes FolderThe Notes folder contains all files copied to the Pen. It alsocontains the History.txt file which contains a list of the last80 words looked up in the <strong>ReadingPen</strong> application on thePen.Double-click on the Notes folder in the PenExplorerwindow to open the folder. Double click on a file to open thefile in Notepad.PenExplorer FunctionsHistory RetrievalThe History.txt file appears in the Notes folder after youhave entered the <strong>ReadingPen</strong> application for the first time.The file cannot be deleted from the folder and is dynamic –it is updated immediately when new words are looked up.Copy the History.txt file to your PC to save the current listof History words. Select the file with the mouse and copy itas you would copy files in standard windows folders.54
The PenExplorerFile Management1. File PropertiesYou can only copy specific files to the Pen:a. Only files with a *.txt extension (plain text files)can be transferred to the Pen.b. Files must be saved as UNICODE.c. Files cannot be longer than 9,000 characters. Youcan check this in Microsoft Word by checking theWord Count. Files that exceed the character limitwill be cut off when transferred. The PenExplorerwill request confirmation for file transfer if itidentifies a file that exceeds the limit.d. File names must be in English and should be lessthan 8 characters long. File names that are longerthan 8 characters or that contain non-ABCcharacters will be renamed when they aretransferred to the PenExplorer.2. Saving Files in the Correct FormatFiles must be saved as plain text files and in UNICODE.From Word:1. Go to File\Save As. Insert a file name.2. Change the file type to Plain Text (*.txt) andclick the Save button.3. The File Conversion dialog box appears. SelectOther encoding. Scroll through the list and selectUnicode.55
The PenExplorer4. Click the OK button.From Notepad:1. Go to File\Save As. Insert a file name.2. Make sure file type is Text Documents (*.txt).3. Change encoding to Unicode and click the Savebutton.3. Copying Files to and from the PenThe PenExplorer/Notes folder works like standardWindows folders. Copy files to and from the Notesfolder using standard Windows functions, such as dragand-drop,copy-paste and using the PC shortcut keys.Click on a file in the Notes window to highlight it. Rightclickto open the drop-down menu and select thefunction you wish to use.56
The PenExplorerCompacting Flash MemoryThe Pen’s flash memory is used to store Pen files. The flashmemory should be compacted manually every once in awhile, especially after deleting many files from the Pen. Thiswill speed up Pen performance for future file transfers.To access the Compact function:1. Right-click on a space in the main PenExplorerwindow and select Properties from the drop-downmenu to reach the General tab.2. Click on the Compact button to activate the compactfunction. If the memory requires compacting, theCompacting message will appear. Do not disconnectthe Pen until the message disappears.57
TroubleshootingTroubleshootingThis troubleshooter deals with some potential Pen-PCconnectivity issues.Issues:1. The Pen says that it is connected to the PC but thePenExplorer window hasn’t opened on screen and Ican’t see the icon in the taskbar.2. I receive the “Error connecting to PC” message onthe Pen but I have followed all the tips and thePenExplorer should be working correctly.Solutions:Try the following options, in this order:1. Disconnect the USB cable from the Pen. Restart thePen, connect the USB cable and try to re-establishcommunications (select Connect to PC from the PenMain Menu).2. On the Pen: Disconnect the USB cable from the Penand restart the Pen.On the PC:a. Press the Ctrl-Alt-Delete buttons at the sametime to open the Windows Task Manager.b. Go to the Processes tab and highlightPenService.exe in the Image Name list.58
Troubleshootingc. Click on the End Process button.d. Click Yes on the Task Manager Warning (XP) orEnd Process in the Windows Task Managerconfirmation message (Vista).e. Go to C:\Program Files (or the equivalent inVista) and open the WizCom Technologies <strong>Ltd</strong>folder. Open the WizCom PenExplorer folder andlook for the PenService.exe file.f. Double-click on the PenService.exe file toreactivate the PenExplorer. If the Windows TaskManager is still open, you will seePenService.exe reappear in the Image Namelist.On the Pen: Connect the USB cable and try to reestablishcommunications (select Connect to PC fromthe Pen Main Menu).3. Re-install the PenExplorer.On the Pen: Disconnect the USB cable from the Penand restart the Pen.On the PC:a. Go to the Control Panel and select Add orRemove Programs (XP) or Programs andFeatures (Vista).b. Highlight the WizCom PenExplorer and click onChange/Remove (XP) or Uninstall/Change(Vista). The WizCom PenExplorer –Installshield Wizard will appear.c. Select Remove and uninstall the PenExplorer.Restart the computer if requested.d. Reinstall the PenExplorer from the productinstallation software you downloaded earlier fromthe internet.e. Click Finish when the installation is complete.On the Pen: Connect the USB cable and try to reestablishcommunications (select Connect to PC fromthe Pen Main Menu).59
Product SpecificationProduct SpecificationPen SpecificationFeatureDisplay TypeKeypadCPUMemory• SRAM 64 K x 16 bit• ROM/RAM 8 MBOptical ScannerCommunicationsPowerInternal PowerExternal PowerCurrent ConsumptionDescriptionTouch Screen Monochromatic FSTNResolution: 208 x 65Size: 61mm x 20mm / 2.4” x .8”• Navigation Switch (Enter, Up,Down, Left, Right)• Push Button - Power/ESCARM7 ASIC, 16 bit, 80 MHz• 128 pixels linear array imagesensor• 400 DPI resolutionUSB1.12 x 1.5V AAA Alkaline batteriesUSB cable connected to PC• Idle mode - 42 mA• Max. (Peak) - 212 mASize L x W x H:177.5 mm x 41.5 mm x 33 mm(7” x 1.62” x 1.3”)WeightSafetyOperating TemperatureRange• 77 grams (2.716 oz.) withoutbatteries• 100 grams (3.527 oz.) with batteries• CE• UL• FCC class B0°C - 40°CPC SpecificationThe PenExplorer is compatible with Windows XP andVista. Installing the PenExplorer on a PC with anincompatible operating system may cause it to operateineffectively.The PC must have an available USB port.60
Copyrights and TrademarksCopyrights and Trademarks© 2010 WizCom Technologies <strong>Ltd</strong>. All rights reserved.WizCom Technologies <strong>Ltd</strong>. uses the Ligature OCR-on-a-Chip copyright© 1995-2010, Ligature Compression Technology copyright © 1996-2010,and Ligature reverse inflection and derivation technology copyright ©1997-2010 under license from Ligature <strong>Ltd</strong>. All rights reserved.WizCom InfoScan, QuickLink-Pen ® , Quicktionary ® , Readingpen ® ,WizCom SuperPen, WizCom and Pen design are trademarks orregistered trademarks of WizCom Technologies <strong>Ltd</strong>. All rights reserved.All other brands and product names appearing here are registeredtrademarks or trademarks of their respective owners.Worldwide Limited WarrantyWizCom Technologies <strong>Ltd</strong>. (hereinafter - "WizCom") warrants the initialpurchaser (hereinafter - "PURCHASER") of each of the products bearingthe trade names or trademarks Quicktionary, <strong>ReadingPen</strong>, SuperPen,InfoScan, QuickLink or MEK (hereinafter - "PRODUCT") sold by WizCom(including sale through WizCom's Web Site) or WizCom's authorizedlocal retail dealer (hereinafter - "AUTHORIZED RETAILER") as follows:WizCom warrants that your PRODUCT, under normal use, will be free ofdefects in materials and workmanship for a period of : two (2) years inEU countries and one (1) year for the rest of the world from the date oforiginal purchase from WizCom or from WizCom's AUTHORIZEDRETAILER along with the original purchase receipt.This limited warranty extends only to the original Purchaser of thePRODUCT and is not assignable or transferable to any subsequentpurchaser/end-user.WizCom's sole obligation, and Purchaser exclusive remedy, under thisexpress warranty, in lieu of all other warranties express or implied by lawor otherwise, shall be, at WizCom's option and expense, to repair orreplace either with new parts or used parts, without charge, PRODUC<strong>TS</strong>that are found to be defective and malfunctioning during normal usageand returned within the warranty period, provided that: (i) The PRODUCThas not been damaged or subjected to mishandling, improper storage,misuse, neglect, abuse, accident, alteration, abnormal operation orconditions, operation in an unsuitable environment or in a manner forwhich it is not intended, unauthorized repair, unauthorized modifications,or other acts which are not the fault of WizCom. (ii) The PRODUCT hasnot been damaged from external causes such as fire, flooding, sand, dirt,storm or any other damage from weather conditions, an Act of God, theft,or battery leakage, blown fuse, or improper use of any electrical source,damage caused by computer or internet viruses, bugs, worms, TrojanHorses, cancelbots or damage caused by the connection to otherproducts not recommended for interconnection by WizCom.(iii) No one other than an authorized WizCom representative opens thecasing of the PRODUCT.61
Worldwide Limited Warranty(iv) WizCom has been advised in writing by the PURCHASER of thealleged defect or malfunction of the Product within fourteen (14) daysafter the expiration of the applicable limited warranty period.(v) This limited warranty does not cover physical damage to the surfaceof the product, including breakage, cracks or scratches on the LCDscreen or outside casing.(vi) The liability under this warranty is limited to the actual cash value ofthe PRODUCT, determined by the price paid by the Consumer for theProduct less a reasonable amount for usage.Repair or replacement of the PRODUCT shall not extend the originalwarranty period.PURCHASER will be charged for all PRODUCT repairs for damage orfailure not covered by this limited warranty.Return of the PRODUCT for repair or replacement under this warranty,must be made to PURCHASER'S local dealer and must be accompaniedby proof of date of purchase, identification of the PRODUCT by modelnumber and serial number and complete description of the problem.WizCom makes no warranty or representation that the PRODUCT willmeet the PURCHASER'S requirements or will work in combination withany hardware or software products provided by third parties, that theoperation of the PRODUCT will be uninterrupted or error free, or that alldefects in the PRODUCT will be corrected.EXCEPT AS EXPRESSLY SET FORTH IN THIS WARRANTY, WIZCOMMAKES NO OTHER WARRANTIES EXPRESSED OR IMPLIED, ANDTO THE FULLEST EXTENT PERMITTED BY LAW, WIZCOMDISCLAIMS ALL OTHER WARRANTIES EXPRESSED OR IMPLIED,INCLUDING BUT NOT LIMITED TO ANY IMPLIED WARRANTIES OFMERCHANTABILITY OR FITNESS FOR A PARTICULAR PURPOSEOR USE.In no event shall WizCom, its agents, officers or employees be liable forany damages whatsoever, including (without limitation) special, direct orindirect, punitive, consequential or incidental damages, including, withoutlimitation, damages resulting from use of or reliance on the productsand/or services and/or advertisements regarding the PRODUCT, loss ofrevenues, loss of profit, business interruption, loss of information or costsof replacement goods, loss of use of the product or any associatedequipment, cost of capital, loss of enjoyment of the PRODUCT, arisingfrom claims of third parties, including customers or arising from breach ofthe warranty, breach of contract, negligence, strict tort, or any other legalor equitable theory without limitation.WizCom reserves its right to make technical alterations to the PRODUCTand such alterations shall not be considered as breach of warranty.WizCom shall not be liable for any delays or defaults hereunder byreason of fire, floods, acts of God, labor troubles, accidents tomachinery, delays of carriers or suppliers, inability of suppliers to supply,the impositions of priorities, restrictions or other acts of government, orother causes beyond its reasonable control. The agents, dealers andemployees of WizCom are not authorized to make modifications to thewarranty, or additional warranties that are binding on WizCom.62


