Control Valve Drive Parts List - Clean My Water
Control Valve Drive Parts List - Clean My Water
Control Valve Drive Parts List - Clean My Water

You also want an ePaper? Increase the reach of your titles
YUMPU automatically turns print PDFs into web optimized ePapers that Google loves.
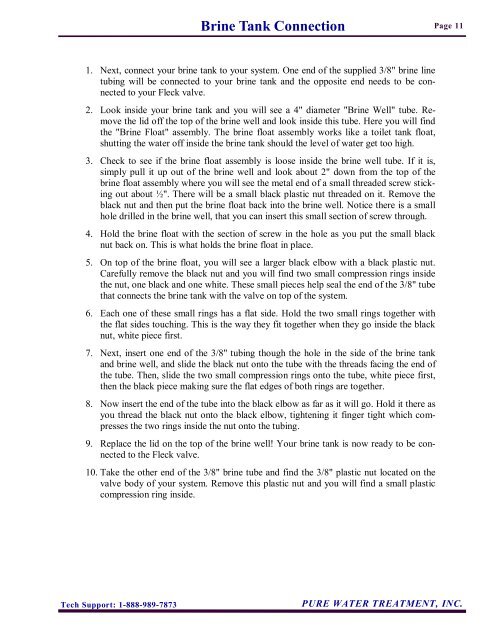
Brine Tank ConnectionPage 111. Next, connect your brine tank to your system. One end of the supplied 3/8" brine linetubing will be connected to your brine tank and the opposite end needs to be connectedto your Fleck valve.2. Look inside your brine tank and you will see a 4" diameter "Brine Well" tube. Removethe lid off the top of the brine well and look inside this tube. Here you will findthe "Brine Float" assembly. The brine float assembly works like a toilet tank float,shutting the water off inside the brine tank should the level of water get too high.3. Check to see if the brine float assembly is loose inside the brine well tube. If it is,simply pull it up out of the brine well and look about 2" down from the top of thebrine float assembly where you will see the metal end of a small threaded screw stickingout about ½". There will be a small black plastic nut threaded on it. Remove theblack nut and then put the brine float back into the brine well. Notice there is a smallhole drilled in the brine well, that you can insert this small section of screw through.4. Hold the brine float with the section of screw in the hole as you put the small blacknut back on. This is what holds the brine float in place.5. On top of the brine float, you will see a larger black elbow with a black plastic nut.Carefully remove the black nut and you will find two small compression rings insidethe nut, one black and one white. These small pieces help seal the end of the 3/8" tubethat connects the brine tank with the valve on top of the system.6. Each one of these small rings has a flat side. Hold the two small rings together withthe flat sides touching. This is the way they fit together when they go inside the blacknut, white piece first.7. Next, insert one end of the 3/8" tubing though the hole in the side of the brine tankand brine well, and slide the black nut onto the tube with the threads facing the end ofthe tube. Then, slide the two small compression rings onto the tube, white piece first,then the black piece making sure the flat edges of both rings are together.8. Now insert the end of the tube into the black elbow as far as it will go. Hold it there asyou thread the black nut onto the black elbow, tightening it finger tight which compressesthe two rings inside the nut onto the tubing.9. Replace the lid on the top of the brine well! Your brine tank is now ready to be connectedto the Fleck valve.10. Take the other end of the 3/8" brine tube and find the 3/8" plastic nut located on thevalve body of your system. Remove this plastic nut and you will find a small plasticcompression ring inside.Tech Support: 1-888-989-7873PURE WATER TREATMENT, INC.