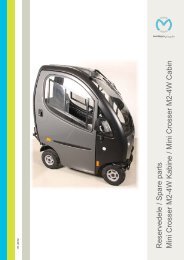
M1 GB User manual - Mini Crosser
M1 GB User manual - Mini Crosser
M1 GB User manual - Mini Crosser
- No tags were found...

Create successful ePaper yourself
Turn your PDF publications into a flip-book with our unique Google optimized e-Paper software.
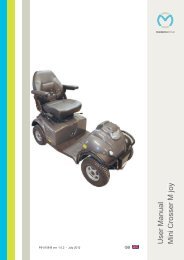
medemagroupP9-0155-B ver. 2.0.4 - July 2012<strong>GB</strong><strong>User</strong> Manual<strong>Mini</strong> <strong>Crosser</strong> M 1
Medema Production A/SSerial number: ___-______________-______-_______Delivery date: ________________ Year 20______This vehicle was supplied by: Date: /<strong>User</strong> guide P9-0155-B 2 of 52 Version 2.0.4/2012
Medema Production A/SContentsSymbols.................................................................................. 4Warning! ................................................................................. 4Contagion! .............................................................................. 4Introduction ............................................................................ 5Declaration of conformity ..................................................... 6Control panel ......................................................................... 7Preparations / Adjustments prior to use ............................. 9Electric seat adjustment ....................................................... 10Seat rotation ........................................................................... 11Steering column .................................................................... 12Serial number......................................................................... 13Driving the <strong>Mini</strong> <strong>Crosser</strong> M 1 ................................................. 14Specific driving situations .................................................... 20Long hills/difficult ground .................................................... 22Anti-tilt wheels / stabilisers .................................................. 23General care and maintenance ............................................ 24Insurance................................................................................ 25Batteries ................................................................................. 26Charging ................................................................................. 26Battery disposal..................................................................... 28Storage ................................................................................... 28Cleaning ................................................................................. 28Changing the wheels ............................................................. 29Fuses ...................................................................................... 30Brakes..................................................................................... 31Disengagement ...................................................................... 32Transporting by motor vehicle ............................................. 33Securing to vehicle floor with belts ..................................... 34Transporting by plane ........................................................... 37Towing .................................................................................... 37Dimensioned drawing, <strong>Mini</strong> <strong>Crosser</strong> M 1 3W ........................ 38Dimensioned drawing, <strong>Mini</strong> <strong>Crosser</strong> M 1 4W ........................ 39Introduction to seats - Ergo Standard ................................. 40Introduction to seats - Mando .............................................. 42Troubleshooting .................................................................... 43Programming ......................................................................... 46Technical data ........................................................................ 46Own notes .............................................................................. 49International addresses ........................................................ 50<strong>User</strong> guide P9-0155-B 3 of 52 Version 2.0.4/2012
Medema Production A/SSymbolsUsed in the <strong>manual</strong> to indicate sections describing situationswhere extra care is required owing to the risk of personal injury.Used to indicate sections on electromagnetic compatibility(EMC).Warning!For safety reasons the vehicle must not be lent to persons whoare not completely familiar with it. The vehicle is designed forone person only.The <strong>Mini</strong> <strong>Crosser</strong> M 1 has been designed for users weighingmax. 175 kg. Can be supplied in a HD version as standard for amax person weight of 250 kg.Contagion!Note!The tires can sometimes rub off on floor coverings, particularlylinoleum. Medema Production assumes no responsibility incase of contagion.To prevent this, we recommend that you protect delicate floorswith some sort of driving surface.<strong>User</strong> guide P9-0155-B 4 of 52 Version 2.0.4/2012
Medema Production A/SIntroductionCongratulations on your new <strong>Mini</strong> <strong>Crosser</strong> M 1 electric mobility scooter.You have now taken possession of an electric mobility scooterdeveloped for outdoor driving by active users. It is what iscalled a Class C vehicle in accordance with the Europeanclassifi cation of electric scooters.For optimum enjoyment of this vehicle - and to avoidbreakdowns and accidents - we recommend that you read this<strong>User</strong> Manual carefully. As a new user, you should pay particularattention to the section entitled “Driving the <strong>Mini</strong> <strong>Crosser</strong> M 1 ”.The <strong>Mini</strong> <strong>Crosser</strong> M 1 is designed for safe travel for at least 10 years,up to a max. of 5,000 hours, provided it is serviced and safetycheckedevery year, corresponding to 500 hours of operation. Theservice must be carried out by an authorised workshop.IMPORTANT! For safety reasons it is of the utmost importancethat service and safety check intervals are complied with, asthis minimises the risk of brake failure and short-circuits in thewiring, which could generate heat and cause a fire.We offer a wide range of accessories for the <strong>Mini</strong> <strong>Crosser</strong> M 1that can make everyday life easier for you. You are alwayswelcome to contact us for further information on specialaccessories and adaptations.Medema Production A/S is not responsible for any damage or injuriescaused by inappropriate or unsafe use of the <strong>Mini</strong> <strong>Crosser</strong> M 1 .If you have any further questions about the <strong>Mini</strong> <strong>Crosser</strong> M 1 orthis <strong>User</strong> Manual, you are always welcome to get in touch. Ourcontact details are as follows:Medema Production A/STel: +45 7010 2054Email: info@minicrosser.comInternet: www.medema.comNB: Errors and omissions excepted. We reserve the right toupdate this <strong>manual</strong> as required.<strong>User</strong> guide P9-0155-B 5 of 52 Version 2.0.4/2012
Medema Production A/SDeclaration of conformityMedema Production A/S hereby declares that:Machine:Use:<strong>Mini</strong> <strong>Crosser</strong>(Prescribed use in<strong>User</strong> Manual)Model No: M 1Complies with the Medical Device Directive 93/42/EECThe product is made in accordance with the harmonizedstandard EN 12184 - Electrically powered wheelchairs, scootersand their chargers.The product is risk analysed in accordance with the harmonizedstandard DS/EN ISO 14971:2007-04-10 2. edition - Medicaldevices - Application of risk management to medical devices.The <strong>Mini</strong> <strong>Crosser</strong> can, for a fee, be taken to the nearestdealer for disposal in accordance with current environmentalregulations.Manufacturer:Address:Medema Production A/SEnggårdvej 7, DK-7400 HerningTel./Fax +45 7010 2054 +45 9716 8582Date: 12.04.2010Signature: _____________________<strong>User</strong> guide P9-0155-B 6 of 52 Version 2.0.4/2012
Medema Production A/SControl panelAvoid subjecting the control panel to jarring and knocks. Takecare when driving and avoid hitting obstacles.The manufacturer accepts no liability in respect of theunauthorised opening, adjustment or modification of the controlpanel.Battery indicatorLight switchHandbrakeHazard warning lightsSpeed selectorIndicator lights, R/LIndicator lights,R/LHornHornAccelerator(four-fi nger control)Lever for adjusting the angle of thehandlebarsCharging socketKey switch<strong>User</strong> guide P9-0155-B 7 of 52 Version 2.0.4/2012
Medema Production A/SDesignationKey switchSpeed selectorBattery indicatorHandbrakeAccelerator(See picturebelow)Light switchHazard warninglightsIndicator switchHornCharging socketDescriptionTo start the vehicle:Turn the key to driving position (1) When the <strong>Mini</strong> <strong>Crosser</strong>is turned on, the control system performs a safety check ofthe electrical system. The check lasts half a second. If theaccelerator is operated during this time, the <strong>Mini</strong> <strong>Crosser</strong> will notbe able to move until you have turned the key to 0 and back to 1.The tortoise in minimum position indicates the lowest speedrange. 0-6 km/hThe hare in maximum position indicates the highest speedrange. Up to 15 km/hLights up when the key is turned. Indicates, after half asecond, the battery charge level. It gives a more preciseindication after approx. 1 minute of driving. When the red,amber and green sections are lit, the batteries are fullycharged. When the indicator is at the bottom of the ambersection, the batteries should be charged as soon as possible.If only the red section is lit or fl ashing, the batteries must becharged immediately.Acts on the rear wheel and should only be used as an extra/emergency brake and parking brake. It can be secured inlocked position. Also available as a foot brake.Activate the arm at the front slowly and the <strong>Mini</strong> <strong>Crosser</strong> willstart to move forwards. The more the arm is pressed, the fasterthe <strong>Mini</strong> <strong>Crosser</strong> will move. When the arm is released, it will flipback to starting position of its own accord and the <strong>Mini</strong> <strong>Crosser</strong>will stop. Activating the rear arm will cause the <strong>Mini</strong> <strong>Crosser</strong> toreverse. The magnetic brake on the rear wheels will engagewhen the scooter is stationary and is equivalent to the parkingbrake on a car. The accelerator can also be used to controlspeed downhill. In this case the motor will act as a brake.Turns on the front and rear lights. The key switch must be inposition 1 (driving position).Turns on all the indicator lights at once. Also works when thekey is removed or turned to position 0 (stop position).Left arrow: indicator, left-hand side. Right arrow: indicator, righthandside. Activate the same switch to turn the indicators off.Powerful electric horn. Press the horn switch to activate.Turn off the key switch during charging. Please note that it isnot possible to drive the scooter while the batteries are charging.See also the section entitled “Batteries and charging”.Accelerator(four-fi nger control)<strong>User</strong> guide P9-0155-B 8 of 52 Version 2.0.4/2012
Medema Production A/SPreparations / Adjustments prior to useAdjusting the height of the seatLift the seat off and remove the rear cover. Pull the release outand adjust the seat tube to the desired position. See the pictureon the next page. Check that the seat height is correct and letgo of the release. Move the seat tube up/down until the releaseclicks into a hole.Make sure you keep your back straight when lifting the seat,which is very heavy. (See below.)Lift the seat off the seat tube.The release button pressed in. Press thebutton out to release the seat tube.Release button pressed out. Now theseat tube can be moved up/down tothe height you wish. Press the releasebutton again and make sure it is fi tted inone of the 5 holes in the seat tube.<strong>User</strong> guide P9-0155-B 9 of 52 Version 2.0.4/2012
Medema Production A/SSeat tubeReleaseSeat tube in top position. There are fi veholes for adjusting the seat tube. Therelease must be in a hole for the seat tobe stable.Electric seat adjustmentThe <strong>Mini</strong> <strong>Crosser</strong> can be fitted with electric seat adjustment asan optional extra.To raise the seat, press the switch up. To lower the seat, pressthe switch down. If the switch is released, the seat will stopautomatically. (See figure below.)Switch for electricseat adjustmentElectric seat adjustment. If the switch is pressed up, the seatis raised. If the switch is pressed down, the seat is lowered.<strong>User</strong> guide P9-0155-B 10 of 52 Version 2.0.4/2012
Medema Production A/SSeat rotationPull the release lever back. The seat can be rotated 90° toeither side. When the lever is released, it engages with the seatand holds it in place at 45° intervals.Other seats that can be supplied for the <strong>Mini</strong> <strong>Crosser</strong> work onsimilar principles. The release lever is normally mounted on theright, but can be put on the left if so wished.IMPORTANT!The <strong>Mini</strong> <strong>Crosser</strong> is most stable when the seat is in its lowestposition. Always drive carefully when the seat is raised. Neveruse the seat adjustment when driving on an uneven surface orin hilly terrain.Take extra care when lowering the seat on a <strong>Mini</strong> <strong>Crosser</strong> usingelectric seat adjustment. Make sure that nothing is trapped inthe space between the seat and the chassis.Avoid trapping anything when lowering the seat.Release lever for seat rotation. Release lever for seat forward/back.<strong>User</strong> guide P9-0155-B 11 of 52 Version 2.0.4/2012
Medema Production A/SSteering columnCan be adjusted forward/back with the release lever. Pull downon the lever and pull the handlebars closer for a good drivingposition. Use the lever again and push the steering columnforward to make it easier to get out.The height of the steering column can be adjusted approx. 11cm up/down. First remove the rubber plug covering the Allenscrew. Adjust the height using a 4 mm Allen key.This applies to both the 3W and the 4W model. Remember toretighten properly after adjusting.Adjusting the angle ofthe handlebars. Appliesto both the 3W and the4W model.Lever for adjusting the angle ofthe handlebarsAdjusting the height ofthe handlebars. Appliesto both the 3W and the4W model.Allen screw for heightadjustment<strong>User</strong> guide P9-0155-B 12 of 52 Version 2.0.4/2012
Medema Production A/SSerial numberAll vehicles have a serial number plate showing the year ofproduction and serial number. The same serial number can alsobe found on the front of the <strong>User</strong> Manual.Please quote this number when making inquiries aboutservicing, spare parts, etc.Maximum user weightModel descriptionVehicle’s unladen weight inc.batteries and seatSerial numberYear of productionMax. speedPosition of serial number plate on vehicle.<strong>User</strong> guide P9-0155-B 13 of 52 Version 2.0.4/2012
Medema Production A/SDriving the <strong>Mini</strong> <strong>Crosser</strong> M 1Getting in and outIt is important to learn a safe technique for getting in and out ofthe <strong>Mini</strong> <strong>Crosser</strong>.In general the following method should be followed:• Make sure that the <strong>Mini</strong> <strong>Crosser</strong> M 1 is off (switch turned to 0)when getting in and out, otherwise the <strong>Mini</strong> <strong>Crosser</strong> could start ifthe accelerator was touched inadvertently.• Make sure that the brake is on. (Lever for disengaging motor intop position.)• Put the steering column in vertical position.• If necessary, turn the seat through 45° or 90° and make sure thatit is locked in position (clicked into place).• If necessary, raise the armrest.For some users the assistance of an attendant can berecommended. The attendant should:• Take care not to injure him/herself when lifting/lowering/supportingthe user.• Make sure that the <strong>Mini</strong> <strong>Crosser</strong> is stable and unable to move.Turn off the <strong>Mini</strong> <strong>Crosser</strong> and check that the brake is on and theseat has been rotated until it clicks into place at either 45° or 90°.• Make sure that the seat the user is being moved to is stable.IMPORTANT!The <strong>Mini</strong> <strong>Crosser</strong> will turnitself off automatically afterit has been stationary for10 minutes even if the keyhas been turned to drivingposition.To restart the vehicle, thekey must be turned to stopposition (0) and then to drivingposition (1).Turn the <strong>Mini</strong> <strong>Crosser</strong> off, return thesteering column to upright position, rotatethe seat and raise the armrest.<strong>User</strong> guide P9-0155-B 14 of 52 Version 2.0.4/2012
Medema Production A/SBraking systemsThere are three braking systems on the <strong>Mini</strong> <strong>Crosser</strong>:• Motor brake - adjusts vehicle speed also when going downhill.• Magnetic brake - the magnetic brake is automatic andengages when the <strong>Mini</strong> <strong>Crosser</strong> stops. In an emergency,the <strong>Mini</strong> <strong>Crosser</strong> can be stopped instantaneously by turningthe key switch. Please note that this will cause very sharpbraking. The rear wheels will lock.Must NOT be used in the normal course of driving.The brake must never be disengaged mechanically usingthe disengagement lever on a slope. This function is onlydesigned for use when pushing the <strong>Mini</strong> <strong>Crosser</strong> on a flatroad.• Electric safety brake - if the brake is somehow disengaged ona slope/hill, the <strong>Mini</strong> <strong>Crosser</strong> will brake automatically when itreaches a certain speed. There is an electric safety feature in thecontrol system, which works even if the battery is disconnected.This is also the reason why the <strong>Mini</strong> <strong>Crosser</strong> cannot be towed atmore than 5 km/h. See the section about towing.• Handbrake - intended as an emergency brake and parkingbrake. It must be operated with caution when driving inslippery conditions and downhill.When using the handbrake as a parkingbrake, lock it in braking position bypressing the button in while applying thebrake.To release the brake, press the buttonagain.Handbrake lockGeneral safety adviceMake sure that the backrest is upright and the seat is as low aspossible.Positioning belts are recommended if the user is unable tomaintain a good driving posture independently.<strong>User</strong> guide P9-0155-B 15 of 52 Version 2.0.4/2012
Medema Production A/SAdjust your driving to road conditions. Take account of light,traffi c and weather. Be particularly careful when driving in thedark or in bad weather, such as rain or snow. Avoid driving ongradients with poor surfaces, such as: snow, ice, new-mowngrass, wet grass and wet leaves.Never drive when under the influence. This applies not only toalcohol, but also to drugs and medicines.Reduce speed immediately if you feel you are losing control.Always use the indicators when changing direction.Check that lights and indicators are working before driving off.Use your lights when driving after lighting-up time.As far as possible, grip the handlebars firmly with both hands.Take care not to have anything in the basket at the front thatmight inadvertently operate the accelerator.WARNING! Do not lower the handlebars so far that theaccelerator can hit you on the leg when you turn the vehicle andso be operated in advertently. If the handlebars need to be verylow, a twist grip accelerator is recommended. This is particularlyrelevant if leg supports are being used.ALWAYS switch the scooter off when it is not in use. Turn thekey to 0.DrivingEven though the <strong>Mini</strong> <strong>Crosser</strong> is very stable, it can tip over.Avoid sudden changes of speed and direction when travelling athigh speed, on poor surfaces and, not least, on slopes.For short distances the <strong>Mini</strong> <strong>Crosser</strong> can drive up steepergradients than it has been tested as dynamically stable for. Thesame applies to driving down such gradients. In such casesthere is an increased risk of the <strong>Mini</strong> <strong>Crosser</strong> tilting and eventipping over. So be extra careful in following the driving tipsgiven below.<strong>User</strong> guide P9-0155-B 16 of 52 Version 2.0.4/2012
Medema Production A/SAnti-tilt wheels are recommended for driving in very hilly terrain.(Optional extra)New users are urged to practise the following in an area wherethere is no other traffic:• Set the <strong>Mini</strong> <strong>Crosser</strong> to low speed. Drive forwards and backwards.Gradually turn the speed selector up and feel the change in thespeed of the <strong>Mini</strong> <strong>Crosser</strong>.• Practise starting and braking. Get used to the <strong>Mini</strong> <strong>Crosser</strong>’sresponse time.• Practise driving in a narrow space, similar to inside a shop orthrough a door.• Practise turning, and get a sense of how much space is required.Always drive slowly when turning. Practise reversing too.• Practise cornering and driving over obstacles and on slopes.Always drive straight up/down kerbs and ramps. Never at anangle. See the illustrations on the following pages.• Try braking at different speeds and notice the stopping distances.• If possible, try driving on different surfaces (road, grass andgravel).• Practise assessing how far you can drive on a single batterycharge. Note how quickly the battery indicator changes fromgreen to amber to red.Note!The driving distance of the scooter will be reduced when drivingin hilly districts, into a head wind, in cold weather and with lowtyre pressure.Traffic regulationsThe traffi c legislation for scooters varies from country tocountry. Before starting to use the vehicle outdoors, it is theuser’s responsibility to familiarise him/herself with the relevantlegislation.<strong>User</strong> guide P9-0155-B 17 of 52 Version 2.0.4/2012
Medema Production A/SThe following rules apply in Denmark:Mobility vehicles such as the <strong>Mini</strong> <strong>Crosser</strong> with a maximumspeed of up to 15 km/h count as cycles in traffic legislation andthe traffi c regulations for cycles must be followed at speeds inexcess of 6 km/h.At speeds of up to 6 km/h the <strong>Mini</strong> <strong>Crosser</strong> is regarded as a“pedestrian”, and it is permissible to travel on the pavement atthis speed. “Tortoise” speed corresponds to approx. 6 km/h.Lights must only be used during lighting-up time. Crash helmetand seat belts are not compulsory.<strong>User</strong> guide P9-0155-B 18 of 52 Version 2.0.4/2012
Medema Production A/SElectromagnetic compatibilityIf the <strong>Mini</strong> <strong>Crosser</strong> starts making involuntary movements or ifthe brakes are released, turn the <strong>Mini</strong> <strong>Crosser</strong> off as soon as itis safe to do so. In certain circumstances a <strong>Mini</strong> <strong>Crosser</strong> can setoff shop alarms.The <strong>Mini</strong> <strong>Crosser</strong> satisfies the requirements for the use ofscooters in an environment with electromagnetic noise. Theremay, however, be rare situations in which electromagnetic noisecan affect the <strong>Mini</strong> <strong>Crosser</strong>. Sources of such noise include radioand television stations, amateur radio transmitters and mobilephones.If such equipment is being used close by, it is recommendedthat the <strong>Mini</strong> <strong>Crosser</strong> is switched off. Mobile phones should notbe used while driving.When driving in traffic...Be particularly aware of the following when driving in traffic:• The <strong>Mini</strong> <strong>Crosser</strong> is a low vehicle and not always easy for otherroad users to see. Make quite sure that other road users haveseen you before driving onto the highway.• Keep an eye on traffic behind you. Keep well over to the side ofthe road when driving on busy roads.• Turning right and left at crossroads. Be aware of cyclists andpedestrians. Follow the rules of the road for cyclists.• How quickly things are happening. How long do the lights staygreen? How quickly are cars approaching? etc.<strong>User</strong> guide P9-0155-B 19 of 52 Version 2.0.4/2012
Medema Production A/SSpecific driving situationsUp kerbs• Stop at right angles to the kerbstone about 5-10 cm away from it.Keep an eye on other road users.• Lean forwards.• Accelerate moderately so that your vehicle can overcome theobstacle. Do not stop halfway, but reduce speed once the vehicleis up.• If the kerb is too high, do not try again, but find an alternativeroute.Down kerbs• Lean back.• If you are driving onto a road with traffic, keep an eye on otherroad users.• Drive forwards and down the kerb at low speed. Make sure thatyour anti-tilt wheels (if fitted) do not catch on the edge.<strong>User</strong> guide P9-0155-B 20 of 52 Version 2.0.4/2012
Medema Production A/SUp a ramp/hill• There is a risk of tipping over backwards if the seat is pushedback when you start driving up a slope, e.g. a ramp.• Pull the seat forward! Check that any ramp is stable.• Lean forwards.• Accelerate moderately so that your vehicle can overcome theobstacle. Do not stop halfway. Reduce speed once the vehicle isup. If you need to start on a hill, accelerate slowly so as not to tipover backwards.Down a ramp/hill• Check that any ramp is stable.• Lean back.• Drive slowly down. Avoid stopping midway on short, steep slopes.On long hills, it is advisable to stop every now and again if youfeel your speed is getting too high.<strong>User</strong> guide P9-0155-B 21 of 52 Version 2.0.4/2012
Medema Production A/SAcross a slope• Lean into the slope.• Avoid sudden and sharp movements. This is particularly relevantwhen reversing.• Always drive at low speed.Long hills/difficult groundThe <strong>Mini</strong> <strong>Crosser</strong> is at risk of overheating on very long andsteep hills or on very soft ground, possibly also combined withhigh user weight.To protect the <strong>Mini</strong> <strong>Crosser</strong> motor from overheating, there is abuilt-in thermoswitch, which initially sets the <strong>Mini</strong> <strong>Crosser</strong> to halfspeed.However, if you carry on moving over diffi cult ground, the <strong>Mini</strong><strong>Crosser</strong> will at some stage stop completely, and the batteryindicator will flash with 6 lamps. The <strong>Mini</strong> <strong>Crosser</strong> must be leftto cool down for 3-5 minutes before it can start again.To reset the fault, switch off the <strong>Mini</strong> <strong>Crosser</strong> then turn it onagain.If the <strong>Mini</strong> <strong>Crosser</strong> has not had long enough to cool down whenit is restarted, it will initially only run at half speed.Note:The situation described above will never happen in normal use.It only happens if the conditions are extremely challenging.<strong>User</strong> guide P9-0155-B 22 of 52 Version 2.0.4/2012
Medema Production A/SAnti-tilt wheels / stabilisersThe <strong>Mini</strong> <strong>Crosser</strong> is a very stable vehicle. HOWEVER, in thecase of incorrect weight distribution or careless driving there isa risk of tipping over.We therefore recommend fitting anti-tilt wheels in suchcircumstances. (See picture below)(Anti-tilt wheels / stabilisers are optional extras.)Anti-tilt wheels<strong>User</strong> guide P9-0155-B 23 of 52 Version 2.0.4/2012
Medema Production A/SGeneral care and maintenanceA <strong>Mini</strong> <strong>Crosser</strong> M 1 does not require much maintenance. Itshould be kept in a generally good condition, however. Thefollowing should be checked regularly:• Tyre pressure (if pneumatic tyres are fitted)• Tyre wear• Keep the control panel, the charging socket and the electronicsbox under the seat dry.• Battery chargingNever wash the <strong>Mini</strong> <strong>Crosser</strong> with a high-pressure cleaneror direct water jet! This could damage the <strong>Mini</strong> <strong>Crosser</strong>’selectronics.To keep the <strong>Mini</strong> <strong>Crosser</strong> in good condition safety-wise, werecommend the following regular checks:Daily:• Test the indicators and driving lights before using the <strong>Mini</strong> <strong>Crosser</strong>in the dark or poor visibility.Every three months:Test the brakes and motor disengagementWith the disengagement lever up, it must not be possible topush the <strong>Mini</strong> <strong>Crosser</strong>.Test the brake disengagement functionWhen the brake disengagement lever is down, the batteryindicator should flash to show an error if the <strong>Mini</strong> <strong>Crosser</strong> isturned on. In this case the <strong>Mini</strong> <strong>Crosser</strong> must not be able tomove when the accelerator is activated.Test the handbrake.Apply the handbrake for a couple of seconds at low speed. Thiswill ensure that the lever arm and brake shoes do not seize up.Lubricate the lever arm on the brake hub with acid-free oil - lefthandrear wheel.<strong>User</strong> guide P9-0155-B 24 of 52 Version 2.0.4/2012
Medema Production A/SAnnualThe <strong>Mini</strong> <strong>Crosser</strong> M 1 is designed for safe travel for at least10 years, up to a max. of 5,000 hours, provided it is servicedand safety-checked every year, corresponding to 500 hours ofoperation. The service must be carried out by an authorisedworkshop.IMPORTANT! For safety reasons it is of the utmost importancethat the servicing and safety check intervals are complied with,as this minimises the risk of brake failure and short-circuits inthe wiring, which could generate heat and cause a fire.(For further information see the Service Manual.)InsuranceIn the eyes of the law a <strong>Mini</strong> <strong>Crosser</strong> M 1 with a maximum speedof 15 km/h is a cycle, so separate insurance is not required.Most contents/home insurance policies include third-partyliability insurance for cyclists and so also cover <strong>Mini</strong> <strong>Crosser</strong> M 1users.We recommend that you talk to your insurance company aboutthis when the vehicle is delivered.If necessary, comprehensive insurance will have to be taken outseparately.<strong>User</strong> guide P9-0155-B 25 of 52 Version 2.0.4/2012
Medema Production A/SBatteriesThe <strong>Mini</strong> <strong>Crosser</strong> uses sealed, maintenance-free GEL batteries(Exide 12 V/56 Ah or AGM 12 V/71 Ah).They do not generate gas and do not have to be topped up withwater.ChargingPlease NOTE that the <strong>Mini</strong> <strong>Crosser</strong> can be equipped withseveral types of charger (ask your dealer for information on thevarious types).IMPORTANT! Only ever use a charger designed for chargingdry maintenance-free batteries. The max. charging current is12 A.If charging is to take place outdoors, an enclosed chargerwithout a fan should be chosen.The battery manufacturer recommends charging the batteries attemperatures between +10° and +30°C in order to achieve thecharging times specified in “Technical data”.Charging will take longer at temperatures below +20°C. This isbecause the battery finds it more difficult chemically to absorbthe current.Please NOTE that the capacity of the batteries will reduceover time and at low temperatures. In practice this means thatvehicles with old batteries have a shorter driving distance thanthey had when the batteries were new.Battery capacity at -10°C is about half the equivalent capacity at+20°C.Avoid draining the batteries completely. We recommendcharging the batteries in a heated room. If it is not possible todo this every day, it is a good idea to charge the <strong>Mini</strong> <strong>Crosser</strong> ina heated room (approx. 20°C) once a week.<strong>User</strong> guide P9-0155-B 26 of 52 Version 2.0.4/2012
Medema Production A/SNew batteries do not reach full capacity until they have beencharged and discharged about 20 times.It is IMPORTANT to fit the batteries correctly. The batteryterminals and snap locks are marked +/-. They must be fittedas shown in the sketch below. Make sure that the snap locksare properly closed. For the same reason there must not be anyburrs on the terminals.The <strong>Mini</strong> <strong>Crosser</strong> should be charged while not in use. Thecharger supplied from the factory switches over to tricklecharging (very low power consumption) automatically when thebatteries are fully charged. You can therefore leave the chargerconnected until the <strong>Mini</strong> <strong>Crosser</strong> is next used. The chargercannot overcharge the batteries.The charger will flash until charging is complete. Then it willshow a steady light.The charger must not be placed on the seat during charging.IMPORTANT! Never use charging devices other than thosesupplied from the factory without first contacting the dealer.NEUTRIK NC3MX charging plugConnect the charging plug to the 3-pinsocket on the steering column. Thecharging socket is located under theprotective cover.<strong>User</strong> guide P9-0155-B 27 of 52 Version 2.0.4/2012
Medema Production A/SBattery disposalUsed batteries must be disposed of through your supplier or ata recycling centre.Take care when handling leaky batteries, as the gel containscorrosive acid.INFO!New batteries can be purchased from Medema Danmark A/S.StorageThe scooter should be stored and charged under cover,preferably at temperatures above 0°C.Note!The charger must be kept dry, but should not be covered whenin use.In the case of long-term storage we recommend covering the<strong>Mini</strong> <strong>Crosser</strong> M to protect it from dust, rain and sunlight.CleaningClean the <strong>Mini</strong> <strong>Crosser</strong> M 1 with a damp cloth. If necessary, wipedry with a chamois leather.Wipe the covers dry and polish with car wax.IMPORTANT! Never use a high-pressure cleaner or hose, as itcould damage the <strong>Mini</strong> <strong>Crosser</strong>’s electronics.<strong>User</strong> guide P9-0155-B 28 of 52 Version 2.0.4/2012
Medema Production A/SChanging the wheelsIf you get a puncture in one of the pneumatic tyres or if atyre is so badly worn that it needs to be replaced, follow theinstructions below.Tyres and inner tubes can be purchased from the authoriseddealer who supplied the <strong>Mini</strong> <strong>Crosser</strong>.The <strong>Mini</strong> <strong>Crosser</strong> must be TURNED OFF before you start.Changing the wheels onthe 4W model5 mm Allen key• Undo the five bolts.• Take the wheel off.• When the wheel is putback on, the springwashers must be refittedbetween the wheel rimand bolts.The bolts must be doneup tightly.Changing the wheels onthe 3W modelRear wheels: Take offin the same way asdescribed above.Front wheel:17 mm fork spanner6 mm Allen key5 mm Allen keyREMEMBER!• to let all the air out before takingthe wheel apart to repair a puncture• to secure the bolts with springwashersRemove the mountingbolts with a fork spannerand Allen key.Take the wheel off in thesame way as the back wheelusing a 5 mm Allen key.<strong>User</strong> guide P9-0155-B 29 of 52 Version 2.0.4/2012
Medema Production A/SFusesThe <strong>Mini</strong> <strong>Crosser</strong> has the following protection systems:• Automatic overload protection, which limits the current to themotor. This protection is integral to the control system and cannotbe adjusted. It prevents both the control system and the motorfrom being overloaded. In the event of overload the current to themotor is reduced - full speed and traction can be resumed afterthe motor has cooled down for 2-5 minutes.• The control fuse protects against mains faults. It is located underthe rear cover.• The main fuse protects against short-circuits in the main currentcircuit. The fuses are located under the rear cover behind thebatteries. Fuse type DIN 2581.• If the ignition key is turned at the same time as the accelerator isoperated, the vehicle will not move off for safety reasons.• The lights and horn are protected by electronic fuses, whichprotect against any short-circuiting that may occur. To preventaccidental short-circuiting when a bulb is changed, the <strong>Mini</strong><strong>Crosser</strong> must be turned off when the new bulb is fi tted and thenturned on again afterwards.Take the rear cover off. The plastic cover can be removed by squeezing the sides.Now the fuses can be replaced.<strong>User</strong> guide P9-0155-B 30 of 52 Version 2.0.4/2012
Medema Production A/SBrakesThere are three braking systems on the <strong>Mini</strong> <strong>Crosser</strong> M:• Motor brake• Magnetic brake• Handbrake• Motor brake: adjusts vehicle speed also when going downhill.• Magnetic brake: automatic and comes on when accelerator isreleased. It also acts as a parking brake when the <strong>Mini</strong> <strong>Crosser</strong> isat a standstill.In an emergency, the <strong>Mini</strong> <strong>Crosser</strong> can be stoppedinstantaneously by turning the key switch. Please note that thiswill cause very sharp braking. The rear wheels will lock!Must not be used in the normal course of driving!• Electric safety brake - if the brake is somehow disengaged ona slope/hill, the <strong>Mini</strong> <strong>Crosser</strong> will brake automatically when itreaches a certain speed. There is an electric safety feature in thecontrol system, which works even if the battery is disconnected.This is also the reason why the <strong>Mini</strong> <strong>Crosser</strong> cannot be towed atmore than 5 km/h. See the section about towing.• Handbrake: intended as an emergency brake and parkingbrake. It must be operated with caution when driving in slipperyconditions and downhill.<strong>User</strong> guide P9-0155-B 31 of 52 Version 2.0.4/2012
Medema Production A/SDisengagement• Turn the key to (0) position.• Push the disengagement lever at the back down.The motor brake is now disengaged and the vehicle can bepushed or towed, but not driven.NOTE!The motor brake must never be disengaged on slopingterrain.if the brake is somehow disengaged on a slope/hill, the <strong>Mini</strong><strong>Crosser</strong> will brake automatically when it reaches a certainspeed. There is an electric safety feature in the control system,which works even if the battery is disconnected. This is also thereason why the <strong>Mini</strong> <strong>Crosser</strong> cannot be towed at more than 5km/h. See the section about towing.Once the motor brake has been disengaged, the <strong>Mini</strong><strong>Crosser</strong> can only be stopped with the hand brake.Push the disengagement lever down todisengage (only handbrake works) andpush up to reactivate the motor (normaldriving now possible).Disengagement lever<strong>User</strong> guide P9-0155-B 32 of 52 Version 2.0.4/2012
Medema Production A/STransporting by motor vehicleThe <strong>Mini</strong> <strong>Crosser</strong> must always be restrained and the handbrakelocked during transport in a motor vehicle or trailer.Avoid lifting by the seat, covers, handlebars and armrestsIf you just need to lift the scooter slightly, take hold of it betweenthe rear lights and by the front bumper.Secure it in the vehicle with belts attached to the two eyes atthe front and two at the back. All the eyes are marked in yellow.See the section entitled “Securing to vehicle floor with belts”.<strong>User</strong> guide P9-0155-B 33 of 52 Version 2.0.4/2012
Medema Production A/SSecuring to vehicle floor with beltsDahl Engineering belt set for securing in motor vehicles. ItemNo. C2-0242ALWAYS use four belts at the back and two at the front.The belts must always be attached to approved fittings in thevehicle and the four eyes welded to the scooter.The belts MUST be attached within the angles shown in thepicture for optimum security.45˚45˚<strong>User</strong> guide P9-0155-B 34 of 52 Version 2.0.4/2012
Medema Production A/SAttachment pointGreater thanthe anchoragepoints on thescooterCentre lineAttachment pointGreater thanthe anchoragepoints on thescooter<strong>User</strong> guide P9-0155-B 35 of 52 Version 2.0.4/2012
Medema Production A/SFor transport in an estate car, the seatcan be lifted off and the handlebarsfolded down. This reduces themaximum height to 69 cm.The <strong>Mini</strong> <strong>Crosser</strong> can be used as a seat during transport ina van or bus, provided it is securely anchored to the vehiclewith approved four-point belts attached to the restraint pointsprovided on the <strong>Mini</strong> <strong>Crosser</strong>.The <strong>Mini</strong> <strong>Crosser</strong>’s restraint points have been tested andapproved in accordance with ISO 7176-19.The user must also always be independently restrained in theactual motor vehicle in accordance with traffic legislation rules.ExampleRestraining thepassenger with a static3-point seat belt:Secure to the rearmostretractors.The shoulder belt must restagainst the collar bone andfall diagonally to the hip,where it is secured.Tighten the belt by pulling on the loose strap. Undo it again bylifting the buckle. This is the same as on an aircraft.Retractorwith beltMale andfemale partsof belt doneup<strong>User</strong> guide P9-0155-B 36 of 52 Version 2.0.4/2012
Medema Production A/SRemember to turn the <strong>Mini</strong> <strong>Crosser</strong> off during transport. Turnthe key to 0.However, if at all possible, we recommend that the useroccupies one of the seats in the motor vehicle. All other thingsbeing equal, this is safer.Transporting by planeIf the <strong>Mini</strong> <strong>Crosser</strong> is to be transported by plane, the airlinesrequire:• the batteries to be flight-approved• the air to be let out of the tyres• the battery leads to be disconnected (not always, but frequently)The seat and cover have to be removed to disconnect thebattery leads.A battery declaration for air travel can be found on the <strong>Mini</strong><strong>Crosser</strong> website:http://www.minicrosser.dk/Download_brochurer.aspTowingIf you should be unfortunate enough to break down, the <strong>Mini</strong><strong>Crosser</strong> can be towed or pushed. The <strong>Mini</strong> <strong>Crosser</strong> mustalways be turned off and the motor brake disengaged duringtowing. See the section on Brakes.If the <strong>Mini</strong> <strong>Crosser</strong> is to be towed, secure a rope to the towfi tting on the front - marked with a yellow “hook mark”. Do nottow faster than 5 km/h. The scooter will generate electricitywhen it is towed, with the motor acting as a dynamo. If itis towed at more than 5 km/h, there is a risk of the motorgenerating enough electricity to damage the scooter and, in theworst case, cause a fire.The <strong>Mini</strong> <strong>Crosser</strong> will try to brake if it is towed at more than 5 km/h.<strong>User</strong> guide P9-0155-B 37 of 52 Version 2.0.4/2012
Medema Production A/SDimensioned drawing, <strong>Mini</strong> <strong>Crosser</strong> M 1 3W1090 mmM 1 : 305 mmM 1+ : 225 mm450 mm625 mm980 mm150 mm1340 mm680 mm460 mm526 mm190 mm<strong>User</strong> guide P9-0155-B 38 of 52 Version 2.0.4/2012
Medema Production A/SDimensioned drawing, <strong>Mini</strong> <strong>Crosser</strong> M 1 4WM 1 : 370 mmM 1+ : 290 mm135 mm175 mm490 mm610 mm1090 mm1030 mm1400 mm680 mm460 mm526 mm<strong>User</strong> guide P9-0155-B 39 of 52 Version 2.0.4/2012
Medema Production A/SIntroduction to seats - Ergo StandardLever for seat rotationPull the lever back to releasethe seat. The seat can then beturned 90° to either side with astop every 45°.The lever is spring-loaded and the seat locks automaticallywhen the lever is released.This lever is located on the right as standard, but can also beput on the left.Lever for seat forward/backPull the lever out/up to releasethe seat on the slide rail.The seat can then be movedforward or back as required.When the lever is released, the seat automatically locks at thenearest stop.There is a chock block on the front and back of the slide rail.Adjusting the angle of the armrestThe adjusting screw makes itpossible to alter the angle ofthe armrest by about 15°.The arm can be folded rightup to make it easier to get inand out.(Height adjustment of the armrest is an optional extra.)<strong>User</strong> guide P9-0155-B 40 of 52 Version 2.0.4/2012
Medema Production A/SAdjusting the angle of thebackrestThe angle of the backrest can beadjusted by about 30°. This canbe done by undoing the adjustingscrew and changing the position ofthe spacer. Do the screw up againafter making the adjustment.Optional extra:The seat can be fitted with agas cylinder for adjusting theangle of the backrest.Armrest forward / back:The armrest can be movedforward / back on the C-rail.This can be done by undoingthe screws indicated. Do thescrews up again after makingthe adjustment.Backrest forward / back:The depth of the seat can beadjusted. This can be done bymoving the backrest forwardand back while the seatcushion is held in position.Undo the screws indicated onboth sides. The backrest canthen be moved as far back as the edge of the rail and about 15cm forward. Do the screws up after making the adjustment. Thescrews must be at least 2 cm from the end of the C-rail.<strong>User</strong> guide P9-0155-B 41 of 52 Version 2.0.4/2012
Medema Production A/SIntroduction to seats - MandoAdjusting the angle of thebackrest:The angle of the backrest canbe adjusted by about 30° byraising this lever.Adjusting the angle of thearmrest:The angle of the armrest canbe adjusted by turning thisscrew.Adjusting the height of thearmrest:The armrest can be raised/lowered by undoing thetwo screws and moving thebracket one hole up or down.Headrest:The headrest can be raisedand lowered steplessly.<strong>User</strong> guide P9-0155-B 42 of 52 Version 2.0.4/2012
Medema Production A/STroubleshootingThe following is a list of various problems that, in ourexperience, may occur. The list gives possible causes andremedies.Problem Possible causes RemedyThe <strong>Mini</strong> <strong>Crosser</strong> will notgo.The battery indicator isnot lit.The <strong>Mini</strong> <strong>Crosser</strong> willnot go, but the batteryindicator is lit.The driving speed is toolow.The <strong>Mini</strong> <strong>Crosser</strong> stopsmoving.It has been running at halfspeed for a while.There are 6 lamps in thebattery indicatorThe driving distance percharge is too short.The charging lamp onthe charger does not lightup when the charger isconnected to the mainsand the <strong>Mini</strong> <strong>Crosser</strong>.The key has not beenturned to start.The batteries arecompletely fl at.The control fuse has blown.The main fuses have blown.The <strong>Mini</strong> <strong>Crosser</strong> hasbeen overloaded.The handbrake is on.There is a fault in theelectronics.The batteries are fl at.The charging plug has notbeen removed.The speed selector is onslow.The electronics areoverloaded.There is too little air in thetyres.The motor hasoverheated.There is a problem withthe batteries.Low temperature.There is a problem withthe charger.There is too little air in thetyres.The charging method iswrong.No power to the switch.Fault in cable.Fault in charger.Turn the key and wait 5sec. before activating theaccelerator.Charge the batteries.Change the fuse.Contact supplier.Wait approx. 1 min. beforetrying again. The vehiclemust be turned off (seesection on Fuses).Release the handbrake.Contact supplier.Contact supplier.Remove the chargingplug.Change to a faster speed.Stop and wait a fewseconds before starting.Pump the tyres up to theright pressure.Stop the unit and wait 3-5minutes before restarting.Turn the key to 0 and thento 1 to reset the fault.Charge the batteries andcheck that the green lampon the charger lights upbefore driving off.Contact supplier.Pump the tyres up to theright pressure.Read the section onCharging in the <strong>User</strong>Manual.Turn the switch on.Contact supplier.Read the operatinginstructions for thecharger.Contact supplier.<strong>User</strong> guide P9-0155-B 43 of 52 Version 2.0.4/2012
Medema Production A/SProblem Possible causes RemedyThe “ready” lamp on thecharger does not light upeven though the chargerhas been on for 10-12hours.The “ready” lamp on thecharger lights up evenwhen partly dischargedbatteries are connected.The charger lamp isshowing an error.There has been a powercut.The charger is doing atop-up charge.There is a problem withthe batteries.There is a fault in thecharging plug for the <strong>Mini</strong><strong>Crosser</strong> M 1 .The fuse in the chargerhas blown.The switch in the chargingplug is malfunctioning.The charging plug has notbeen inserted or there is amains fault.The battery voltage is toolow for charging to start.Reconnect the chargerand repeat the chargingprocess.Check again half an hourlater.Contact supplier.Push the charging plug allthe way in and repeat thecharging process. Readthe operating instructionsfor the charger.Contact supplier.Contact suppliers - readthe operating instructionsfor the charger.Push the charger plug inor contact the supplier.Read the operatinginstructions for thecharger - or contact thesupplier.<strong>User</strong> guide P9-0155-B 44 of 52 Version 2.0.4/2012
Medema Production A/SIf there is an electronic fault, a number of lamps in the batteryindicator will light up. The following table shows what theymean.Lamps Causes Remedy1 lamp The batteries needcharging or theconnection to a battery ispoor.2 lamps Poor connection to themotor.3 lamps Short-circuit betweenthe motor and a batteryconnection.4 lamps Not in use5 lamps Not in use6 lamps The S180 is preventedfrom driving. Inhibit 2 isactive. This may be due tothe battery charger beingconnected, the plug to thethermal switches beingdisconnected, a fault inthe thermal switch or thescooter is overheating.Check all connectionsbetween the controllerand batteries. If theseare fi ne, try charging thebatteriesCheck the connectionbetween the motorand controller. Contactsupplier.Contact supplier - sayhow many lamps are lit.Stop the unit and wait 3-5minutes before restarting.Turn the key to 0 and thento 1 to reset the fault.Contact supplier.7 lamps Accelerator fault. Make sure that theaccelerator is in neutralwhen the <strong>Mini</strong> <strong>Crosser</strong> isturned on.8 lamps Controller fault. Contact supplier.9 lamps Poor connection to motorbrake.Magnetic brake isdisengaged.10 lamps The controller has beensupplied with a highvoltage in excess of 38 V.Usually seen in the caseof a poor connection.Check the connectionsfrom brake to controller, orpush the brake lever up.Check that the vehicle isnot disengaged.Check all connectionsfrom the batteries to thecontroller.Running lights Charger is connected. Remove charger.<strong>User</strong> guide P9-0155-B 45 of 52 Version 2.0.4/2012
Medema Production A/SProgrammingNOTE! For safety reasons, modifications may only be made bytrained personnel, such as <strong>Mini</strong> <strong>Crosser</strong> service engineers andconsultants or authorised service personnel at mobility centres,etc.Technical dataM 1 3WM 1 4WGeneral information:Transport height without seat(Steering column folded down)Total length:Total length incl. anti-tilt wheel:Total width:Total weight incl. batteries and ErgoStd seat.Weight without seat (Ergo Standard45 cm).69 cm 69 cm134 cm143 cm68 cm140 cm148,5 cm68 cm151 kg 168 kg130 kg 147 kgDynamic stability in all directions. 10° - 17% 10° - 17%Kerb climbing 11 cm 11 cmMax. speed 15 km/h 15 km/hBraking distance10 km/h15 km/h2.0 metres3.5 metres2.0 metres3.5 metresController S-180 S-180KW transaxle 0,7 kW 0,7 kWTurning radius 105 cm 141 cmMax user weight - standard 175 kg 175 kgMax user weight inc. assessories HDversion.------ 250 kgWheelsM-127-3-16513x5.00-6” ext. Ø325 mmWheel Norway black - T, E, Nordic,MaxX, MaxX HD and M-model4,1 bar 4,1 barM-127-3-165P13x5.00-6” ext. Ø325 mmWheel Norway black w/spikes - T,E, Nordic, MaxX, MaxX HD andM-model4,1 bar 4,1 bar<strong>User</strong> guide P9-0155-B 46 of 52 Version 2.0.4/2012
Medema Production A/SM-127-3-06513x3.00-8” ext. Ø340 mmWheel black - T and M-modelM 1 3WM 1 4W3,5 bar 3,5 barT-127-3-06813x3.00-8” ext. Ø340 mmWheel black puncture free - T andM-modelPURPURClassifi cation, ISO Class C Class CSeats:Effective seat width:Ergo StandardSpinalusMandoHD (user weight max 250 kg)Ergo child / juniorEffective seat depth:Ergo, Spinalus and HD seatsMandoErgo child / juniorHeight of backrestErgo standrad / HDSpinalusMandoErgo child / juniorHeight: front edge of seat to groundErgo Standard with slide railErgo Standard without slide railMando seat with slide railMando seat without slide railHeight: footplate to front edge of seatErgo Standard with slide railErgo Standard without slide railMando seat with slide railMando seat without slide railAngle of backrestErgo standard / HD (<strong>manual</strong>)Ergo standard / HD (EL)SpinalusMandoErgo child / juniorBatteries:56 Ah batteriesMaximum driving distance with newbatteries at +20° on fl at, fi rm surface75/80 Ah batteriesMaximum driving distance with newbatteries at +20° on fl at, fi rm surface40,45,50,55,60 cm40, 45, 50 cm48 cm------35, 37 cm32-52 cm48 cm20-30 and 25-40 cm48 cm56 cm53 cm36-41 cm64 - 74 cm61 - 71 cm64 - 74 cm61 - 71 cm45 - 55 cm41 - 51 cm45 - 55 cm41 - 51 cmApprox. -5° to +20°Approx. -5° to +30°Approx. -5° to +20°Approx.+5° to +30°Approx. -5° to +20°Standard40 kmOption60 km40,45,50,55,60 cm40, 45, 50 cm48 cm60, 65, 70 cm35, 37 cm32-52 cm48 cm20-30 and 25-40 cm48 cm56 cm53 cm36-41 cm64 - 74 cm61 - 71 cm64 - 74 cm61 - 61 cm45 - 55 cm41 - 51 cm45 - 55 cm41 - 51 cmApprox. -5° to +20°Approx. -5° to +30°Approx. -5° to +20°Approx.+5° to +30°Approx. -5° to +20°Standard35 kmOption55 km<strong>User</strong> guide P9-0155-B 47 of 52 Version 2.0.4/2012
Medema Production A/S110/115 Ah batteriesMaximum driving distance with newbatteries at +20° on fl at, fi rm surfaceM 1 3WOption80 kmM 1 4WOption75 kmOptimum battery capacity isreached after approx. 20 charges /discharges.Battery type:Standard:Option:Option:2 x 12 V / 56 Ah2 x 12 V / 75 Ah2 x 12 V / 110 AhMax. battery dimensions in cm. 26.5 x 17 x 2228.4 x 26.7 x 23Battery weight, 2 batteries56 Ah75/80 Ah110/115 AhEnergy consumption in kWh, whencharging from “empty”56 Ah75/80 Ah110/115 AhCharging device, 24 V DC56 Ah75 Ah110 Ah43 kg50 kg80 kgApprox. 1.5Approx. 1.5Approx. 3.06 - 10 A6 - 10 A10 - 12 A2 x 12 V / 56 Ah2 x 12 V / 75 Ah2 x 12 V / 110 Ah26.5 x 17 x 2228.4 x 26.7 x 2343 kg50 kg80 kgApprox. 1.5Approx. 1.5Approx. 3.06 - 10 A6 - 10 A10 - 12 AApprox. charging time at 20° C 8 hours 8 hoursLighting:Bulb, headlight 24 V - 21 W 24 V - 21 WDiode, rear light 24 V - 2 W 24 V - 2 WDiode, indicator 24 V - 2 W 24 V - 2 WStandard colour Grey - metallic Grey - metallicThe <strong>Mini</strong> <strong>Crosser</strong> has been tested for the requirementsdescribed in EN 12184, which are the basis for CE marking.That means that it has also been tested for the durabilityrequirements (ISO 7176-8), fire safety requirements (ISO 7176-16) and the ISO 7176-19 Crash Test.<strong>User</strong> guide P9-0155-B 48 of 52 Version 2.0.4/2012
Medema Production A/SOwn notes<strong>User</strong> guide P9-0155-B 49 of 52 Version 2.0.4/2012
Medema Production A/SInternational addressesAustralia / New ZealandPride Mobility ProductsTel: +61 3 9706-4611Fax: +61 3 9706-4622Email: prideaustralia@pride-mobility.com.auInternet: www.pridemobility.com/international/Australia/australia.aspBelgienMobile BelgiumTel: +32 (0)50 317919Fax: +32 (0)50 311026Email: info@mobilescooter.beInternet: www.mobilescooter.beDenmarkHead Office/JutlandMedema Danmark A/STel: +45 7010 1755Fax: +45 9718 8835Email: info@medema.comInternet: www.medema.dkDenmarkZealandMedema Danmark A/STel: +45 7010 1755Fax: +45 5664 3388Email: info@medema.comInternet: www.medema.dkDenmarkFunenMedema Danmark A/STel: +45 7010 1755Email: info@medema.comInternet: www.medema.dkFinlandRespecta OYTel: Sales and service +358 (0 )207649748Email: myynti@respecta.Fax: +358 ( 0 )207649735Tel: Maintenance - parts and service: +358 ( 0 )207649747Email : huolto@respecta.FranceICARETel: +33 (0)1 60 78 94 84Fax:+33 (0)1 69 13 09 78Email: icarejmb@wanadoo.frInternet: http://www.icare-jmb.comGermanyBaden Württemberg BavariaDraisin GmbHTel: (+49) 0 78 41 66 77 0Fax: (+49) 0 78 41 66 77 88Email: info@draisin.comInternet: www.draisin.com/GermanyBaden WürttembergElofahr PalmTel: +49 07225 918 831Fax: +49 07225 988 070Mobile: +49 0171 314 7726Email: uwepalm@web.deGermanyBerlin, Mecklenburg-West Pomerania, Saxony-Anhalt,Thuringia, Brandenburg and SaxonyConze Elektro-MobileTel: +49 030 6789 7969Fax: +49 030 6789 7968Email: info@elektro-mobile.deInternet: www.elektro-mobile.deGermanyHesse, Rhineland-Palatinate, Saarland and LowerFranconiaBeromobil GmbHElektromobile TreppenlifteTel: +49 06123 - 60 57 22Fax: +49 06123 - 60 57 23Email: info@beromobil.deInternet: www.beromobil.deGermanySchleswig-Holstein, Lower Saxony and North Rhine-WestphaliaWiggers GmbH - Reha / Rollstuhl WerkstattTel: (+49) 0441 36 111 302Fax: (+49) 0441 36 111 309Email: wiggers.gmbh@ewetel.netInternet: www.minicrosser.info; www.ot-wiggers.deGreeceAMEASHOPel.: 210 7777545Fax.: 210 7777835Mobile: 6970021890Internet: www.ameashop.grEmail: faidros@ameashop.gr<strong>User</strong> guide P9-0155-B 50 of 52 Version 2.0.4/2012
Medema Production A/SHollandRichard van Seenus Nederland B.V.Tel: +31 (0) 36 53 20 450Fax: +31 (0) 36 53 21 308Email: info@vanseenus.nlInternet: www.vanseenus.nlSwitzerlandDegonda Rehab SATel: +41 033 345 83 00Fax: +41 033 345 83 01Email: info@turbo-twist.chInternet: www.turbo-twist.chIslandIcepharma HFTel: +354 540 8000Fax: +354 540 8001Email: icepharma@icepharma.isInternet: www.icepharma.isUK<strong>Mini</strong> <strong>Crosser</strong> LtdTel: Sales +(44) 0800 043 0029Tel: Service & Warranty +(44) 0800 169 9588Email: sales@mini-crosser.co.ukInternet: www.mini-crosser.co.ukItalyComfort Online s.r.l. - Società UnipersonaleTel.: +39 041 5461105Fax: +39 041 5462098Email: info@comfortonline.itInternet: www.comfortonline.itNorwayMedema gruppen ASTel: +47 6706 4900Fax: +47 6706 4990Email: rmapost@medema.noInternet: www.medema.noUKActive MobilityTel.: +(44) 0135 77 44 22Internet: www.active-mobility.co.ukUSA / CanadaPride Mobility Products Corp.Tel: +1 800 800 8586Fax: +1 800 800 1636Internet: www.pridemobility.comPolandJ.A.S.Tel.: +48 667 432 282, +48 605 674 017Fax: +48 33 810 54 58Email: biuro@jas-bielsko.plInternet: http://jas-bielsko.pl/SpainAssessorament I Mobilitat. S.L.Tel: +34 93 666 55 23Fax: +34 93 666 88 85Email: info@assessoramentimobilitat.comInternet: http://www.assessoramentimobilitat.comSweden<strong>Mini</strong>crosser ABTel: (+46) 303 245 200Fax: (+46) 303 245 228Email: info@minicrosser.seInternet: www.minicrosser.se<strong>User</strong> guide P9-0155-B 51 of 52 Version 2.0.4/2012
medemagroup