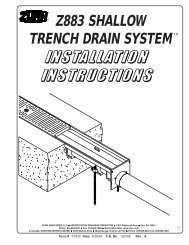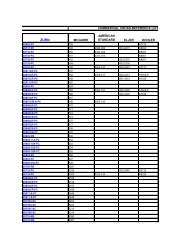
z884 shallow trench drain system⢠installation instructions - Zurn
z884 shallow trench drain system⢠installation instructions - Zurn
z884 shallow trench drain system⢠installation instructions - Zurn
- No tags were found...

Create successful ePaper yourself
Turn your PDF publications into a flip-book with our unique Google optimized e-Paper software.
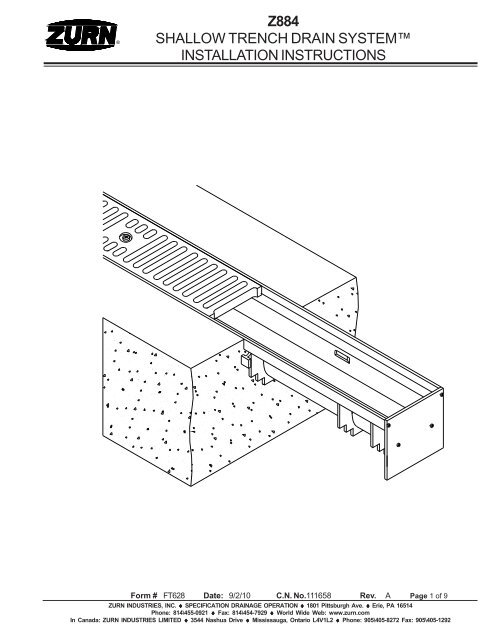
®Z884SHALLOW TRENCH DRAIN SYSTEMINSTALLATION INSTRUCTIONSForm # FT628 Date: 9/2/10 C.N. No.111658 Rev. A Page 1 of 9ZURN INDUSTRIES, INC. ♦ SPECIFICATION DRAINAGE OPERATION ♦ 1801 Pittsburgh Ave. ♦ Erie, PA 16514Phone: 814\455-0921 ♦ Fax: 814\454-7929 ♦ World Wide Web: www.zurn.comIn Canada: ZURN INDUSTRIES LIMITED ♦ 3544 Nashua Drive ♦ Mississauga, Ontario L4V1L2 ♦ Phone: 905\405-8272 Fax: 905\405-1292
®Z884SHALLOW TRENCH DRAIN SYSTEMINSTALLATION INSTRUCTIONSACCESSORIESAbove are some of the <strong>trench</strong> <strong>drain</strong> components typical to an <strong>installation</strong>. Double check your order to ensurethat you have all components particular to your job before beginning your <strong>installation</strong>.Contact <strong>Zurn</strong> Customer Service at 1-877-ZURN-NOW should additional material be required.Form # FT628 Date: 9/2/10 C.N. No.111658 Rev. A Page 2 of 9ZURN INDUSTRIES, INC. ♦ SPECIFICATION DRAINAGE OPERATION ♦ 1801 Pittsburgh Ave. ♦ Erie, PA 16514Phone: 814\455-0921 ♦ Fax: 814\454-7929 ♦ World Wide Web: www.zurn.comIn Canada: ZURN INDUSTRIES LIMITED ♦ 3544 Nashua Drive ♦ Mississauga, Ontario L4V1L2 ♦ Phone: 905\405-8272 Fax: 905\405-1292
®Z884SHALLOW TRENCH DRAIN SYSTEMINSTALLATION INSTRUCTIONSEXCAVATIONTrench excavation must be 4 inches greater than the <strong>trench</strong> depth and a minimum width of 14 inches.Soft and/or shifting soil substrates may cause cracking of the concrete and consequent movement ofthe <strong>trench</strong>. It is critical that the concrete be poured on an adequate foundation.Form # FT628 Date: 9/2/10 C.N. No.111658 Rev. A Page 3 of 9ZURN INDUSTRIES, INC. ♦ SPECIFICATION DRAINAGE OPERATION ♦ 1801 Pittsburgh Ave. ♦ Erie, PA 16514Phone: 814\455-0921 ♦ Fax: 814\454-7929 ♦ World Wide Web: www.zurn.comIn Canada: ZURN INDUSTRIES LIMITED ♦ 3544 Nashua Drive ♦ Mississauga, Ontario L4V1L2 ♦ Phone: 905\405-8272 Fax: 905\405-1292
®Z884SHALLOW TRENCH DRAIN SYSTEMINSTALLATION INSTRUCTIONSOVERALL LAYOUTUpon completion of the <strong>trench</strong> excavation, the channels should be placed in order alongside theexcavation and according to the job layout. Grates are not installed at this time.Form # FT628 Date: 9/2/10 C.N. No.111658 Rev. A Page 4 of 9ZURN INDUSTRIES, INC. ♦ SPECIFICATION DRAINAGE OPERATION ♦ 1801 Pittsburgh Ave. ♦ Erie, PA 16514Phone: 814\455-0921 ♦ Fax: 814\454-7929 ♦ World Wide Web: www.zurn.comIn Canada: ZURN INDUSTRIES LIMITED ♦ 3544 Nashua Drive ♦ Mississauga, Ontario L4V1L2 ♦ Phone: 905\405-8272 Fax: 905\405-1292
®Z884SHALLOW TRENCH DRAIN SYSTEMINSTALLATION INSTRUCTIONSSUSPENDED INSTALLATIONAn alternative means of <strong>installation</strong> is to suspend the <strong>trench</strong> <strong>drain</strong> asshown. Wooden braces to hang the <strong>trench</strong> run can be attached to the<strong>drain</strong> body through the grate lock down bars as illustrated above.Note: unless Grate Lockdown option is specified, the supsended<strong>installation</strong> method can not be utilized.Form # FT628 Date: 9/2/10 C.N. No.111658 Rev. A Page 5 of 9ZURN INDUSTRIES, INC. ♦ SPECIFICATION DRAINAGE OPERATION ♦ 1801 Pittsburgh Ave. ♦ Erie, PA 16514Phone: 814\455-0921 ♦ Fax: 814\454-7929 ♦ World Wide Web: www.zurn.comIn Canada: ZURN INDUSTRIES LIMITED ♦ 3544 Nashua Drive ♦ Mississauga, Ontario L4V1L2 ♦ Phone: 905\405-8272 Fax: 905\405-1292
®Z884SHALLOW TRENCH DRAIN SYSTEMINSTALLATION INSTRUCTIONSJOINT CONNECTIONAssembling the <strong>trench</strong> run is easy using ‘Flo-thru’s’ mechanical interlocking joints. Simply align the twomating ends of the <strong>trench</strong> sections and fasten with the hardware fasteners provided. A silicone caulk, or aconstruction adhesive, such as Liquid Nails, is recommended to be used at each joint as a sealer.Form # FT628 Date: 9/2/10 C.N. No.111658 Rev. A Page 6 of 9ZURN INDUSTRIES, INC. ♦ SPECIFICATION DRAINAGE OPERATION ♦ 1801 Pittsburgh Ave. ♦ Erie, PA 16514Phone: 814\455-0921 ♦ Fax: 814\454-7929 ♦ World Wide Web: www.zurn.comIn Canada: ZURN INDUSTRIES LIMITED ♦ 3544 Nashua Drive ♦ Mississauga, Ontario L4V1L2 ♦ Phone: 905\405-8272 Fax: 905\405-1292
®Z884SHALLOW TRENCH DRAIN SYSTEMINSTALLATION INSTRUCTIONSOUTLETS & ACCESSORIESTo attach an end outlet or end cap, cut <strong>trench</strong> to desired length if necessary and attachwith provided screws and a silicone caulk or a construction adhesive if desired.A bottom outlet is attached to the bottom side of the <strong>trench</strong> <strong>drain</strong> withprovided screws and a silicone caulk or a construction adhesive if desiredas shown below. A hole saw can be used to cut the appropriate size holethrough the bottom of the <strong>trench</strong>.Form # FT628 Date: 9/2/10 C.N. No.111658 Rev. A Page 7 of 9ZURN INDUSTRIES, INC. ♦ SPECIFICATION DRAINAGE OPERATION ♦ 1801 Pittsburgh Ave. ♦ Erie, PA 16514Phone: 814\455-0921 ♦ Fax: 814\454-7929 ♦ World Wide Web: www.zurn.comIn Canada: ZURN INDUSTRIES LIMITED ♦ 3544 Nashua Drive ♦ Mississauga, Ontario L4V1L2 ♦ Phone: 905\405-8272 Fax: 905\405-1292
®Z884SHALLOW TRENCH DRAIN SYSTEMINSTALLATION INSTRUCTIONSPOURING THE CONCRETEIt is necessary to install a 108mm wide spacer (supplied by others) in the grate section of the <strong>trench</strong> tomaintain the width during the concrete pour.Pour the concrete around the three sides of the <strong>trench</strong> <strong>drain</strong>. Be certain to adequately VIBRATE the concreteas it is being placed. Proper vibration will eliminate any unwanted voids within the concrete pour.Finish troweling should be done to set the top edge of the <strong>trench</strong> <strong>drain</strong> about 1/16” below the floor grade.Remember to compensate for concrete shrink that may occur during cure so that the edge of the <strong>trench</strong> <strong>drain</strong>does not protrude above the finished floor grade.Form # FT628 Date: 9/2/10 C.N. No.111658 Rev. A Page 8 of 9ZURN INDUSTRIES, INC. ♦ SPECIFICATION DRAINAGE OPERATION ♦ 1801 Pittsburgh Ave. ♦ Erie, PA 16514Phone: 814\455-0921 ♦ Fax: 814\454-7929 ♦ World Wide Web: www.zurn.comIn Canada: ZURN INDUSTRIES LIMITED ♦ 3544 Nashua Drive ♦ Mississauga, Ontario L4V1L2 ♦ Phone: 905\405-8272 Fax: 905\405-1292
®Z884SHALLOW TRENCH DRAIN SYSTEMINSTALLATION INSTRUCTIONSAFTER THE POURAfter the concrete has been poured, vibrated, and given sufficient time to dry, both the grates and grate lockdown bolts must be installed. The center of the grate should straddle the toggle-in lockdown bar. The exceptionis when the channel is cut. To place these grates, line up the lock down hole in the grate with the lock down holein the bar. Grates with a length of under 12” will not be able to be locked down. Lock down bolts can be installedusing a 7/16” socket. Insert a thin screwdriver through the grate to support the right side of the lockdown bar tohold it in the slots while tightening the lockdown bolt.Form # FT628 Date: 9/2/10 C.N. No.111658 Rev. A Page 9 of 9ZURN INDUSTRIES, INC. ♦ SPECIFICATION DRAINAGE OPERATION ♦ 1801 Pittsburgh Ave. ♦ Erie, PA 16514Phone: 814\455-0921 ♦ Fax: 814\454-7929 ♦ World Wide Web: www.zurn.comIn Canada: ZURN INDUSTRIES LIMITED ♦ 3544 Nashua Drive ♦ Mississauga, Ontario L4V1L2 ♦ Phone: 905\405-8272 Fax: 905\405-1292