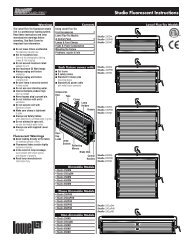
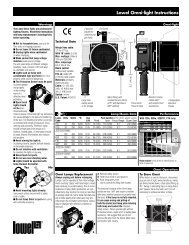
Learn to Light BetterOnline ResourcesThe world of professional imaging is rapidlychanging. With new cameras creating higher resolution images, in lowerlight levels, some can be led to believe they no longer need to use lighting.Lighting is a creative process.The more in control of the its components you are, the more successful you canbe in realizing the needs of your production. Understanding the art & craft oflighting can help you do that.Good lighting can set a mood, and help createa sense of time & place. It can establish a sense of depth and help leadthe viewers eye thru the image, so that it is seen the way you want it to be.<strong>Lowel</strong> EDU is a free Lighting Resources Center atlowel.com. You will find a wealth of user friendly information for boththe new pro, and the experienced veteran. Take a look next time you are online.There is a lot to explore there, as you can see in these excerpts.Foundations of Lighting Placement (excerpt)Looking at the image player you will seethat the starting position for our Key lightis 6:00, the same angle that the camerashooting the closeups will also be placed.Lighting from this angle will be flat andstraight on, and there will be very littleshadow because the light source is comingfrom approximately the same angle as thecamera is seeing the subject. Notice theeffect on the subject as the Key light movesaround her. A normal position for the Keylight in conventional portrait or talkinghead type lighting is around 5:00 or 7:00.Which side you chose to light with theKey from depends on which one looksbetter on the subjects face for therequirements of the shot. Lighting fromthis position is sometimes called the"3/4 position", since the light is clearlyhitting 3/4 of the subjects face.This image player allows you to move the key light around the models face, to see the effect that lightingfrom different angles can have on an image.Some lighting angles are more flatteringthan others. Some angles are moredramatic with great contrast betweenthe areas of the face that are lit and thosethat are not, such as the 3:00 or 9:00positions. Some angles, such as the12:00 position behind her, are unsuitablefor most normal shots, unless you areinterviewing someone in the witnessprotection program. Keep in mind thatwe also had some low level ambient lighton, so you could see the positions inthe wide shots. Without that added light,the contrast effects would be even moredramatic. But, as you can see, there area number of creative possibilities thatone light can offer, just based on whereyou position it.Understanding Soft Light (excerpt)Outdoors, our subject is being lit by the sun, which, in reality, is much larger than thesubject. But, since its so far away, it appears smaller and therefore is light quality will be"harder". Note the sharp shadowsIndoors, our subject is being lit by a 250W Pro-light, which is much smaller than thesun, but also much closer. It still appears much smaller than the subject, and therefore islight quality will be "harder". These shadows are also sharp.Outdoors, our subject is now being lit by the overcast sky. Unlike the "point source"effect of the sun, the entire white cloudy sky is now the light source. In relation to oursubject, the source is much larger. It lights our subject from a very large angle, so its effectis ultra soft. Note how subtle the shadows are.Indoors, our subject is now being lit by a 750W Rifa eX 66. While its not as large asource as the overcast sky, it is a much larger source than the Pro-light, especially whenused this close. So the effect will be much softer than the Pro-light. Compare the shadowsbetween Pro & Rifa.78
Online ResourcesLearn to Light BetterLighting for Green Screen (excerpt)In this example we tried to match the light direction andquality of the scene that is matted into the background.The sun's direction is indicated by the shadows on thewindow frames. There is no hair light. In this case it wouldhave been an unnatural second source. Notice, the biggestlight is not always the key light.The green screen background is being evenly lit bytwo Omni-lights with 300watt bulbs and diffused withSpecial / White Tota-brellas. The barndoors were left on toblock the direct light from the front of the light flaring thecamera lens.DP Light with a Special / White DP Brella and a 1000 Wattbulb is providing the fill to open up the shadows on themodel. Again the barndoors were used to flag the front ofthe light. A combination of distance and adjusting thebarndoors allowed us to get the fill level where we wanted.BeforeThe overhead office lights provide enough light to make an exposurebut you can see they have a very unflattering effect on the subject. Her eyes are nearly lostin shadows, her forehead is the brightest part of her face, and there is a long shadow underher nose. We turned them all off.The Omni-light from the kit was fitted with the gel frame and frost gel.With the subject facing the interviewer's position, placement and height of the light wereadjusted until the subject's nose shadow blended along the line below her cheek to the endof her mouth. A stand with the Tota-light and umbrella was placed just to the left of thecamera position, a little higher than her head. This caused the shadows from the light to falllower, behind the subject; avoiding a second set of shadows from being visible behind her.We adjusted the light's distance to the subject until we saw the amount of fill, or lighteningof shadows, we wanted. The Pro-light was placed as far behind her as possible withoutbeing visible in the frame. It added a shine to her hair that appears to be coming from thelamp in the background. If we placed this Back or Hair light too high there would be a hardshadow on the desktop in front of her, and the tip of her nose would have a distractingbright spot. The barn doors on this light werepinched together to only allow lighton her hair.In the final image, overall, the lightinghas a smoother appearance. The hair lightputs a more subtle shine on her hair. Theimage has less contrast but there is stillenough difference between the Key and Filllights to show the contours of her face.Lighting for Interviews (excerpt)Lit with the DV Creator 1 KitAfterCameraLighting Glass (excerpt)Placing an average wine glass on a table with a darkbackround, and taking a close look at it, you will immediatelyfind that its curved reflective surface will tend to show theentire room. Every window, table lamp, or any other brightobject will be visible. You need to control the lighting of theroom around the glass, to affect what is seen in the glass.In many cases the glass object you light will beclear, so it is often a combination of lighting what is behindthe glass (and seen through it), as well as what is seenreflected in the glass. Properly placed, reflections can do a lotto help define the shape of the object. Paying attention tothese 2 aspects can bring creative possibilities that, while simple in theory, can bechallenging to actually execute. The narrow white highlights on the sides of the glass arereflections from the large white panels placed on each side of the dark centered background.They are lit by a 250W focusable Pro-light. Since any light shining in front of the glass willbe reflected in it, we need to block the beam of the Pro-light from hitting the glass, hencethe Tota-flag attached to the light stand. Lighting glassrequires attention to detail & can be painstaking work. Theback of the setup is actually a full width white cardboard with asmaller black cloth draped in the center.By changing the area size of the white panels,we can change the width of the reflections in the glass. Thisgives us more creative flexibility, by narrowing the width of thecenter black cloth, the white sides get larger and have a directeffect on what shows up in the glass. Using white cardreflection to define the shape of a glass object is called"White Line Lighting".79