Quickstart: Crestron Mobile® and Crestron Mobile Pro®
Quickstart: Crestron Mobile® and Crestron Mobile Pro®
Quickstart: Crestron Mobile® and Crestron Mobile Pro®

Create successful ePaper yourself
Turn your PDF publications into a flip-book with our unique Google optimized e-Paper software.
quickstart guide<br />
Control Apps for Android <strong>Crestron</strong> <strong>Mobile</strong><br />
Devices<br />
® <strong>and</strong> <strong>Crestron</strong> <strong>Mobile</strong> Pro ®<br />
1<br />
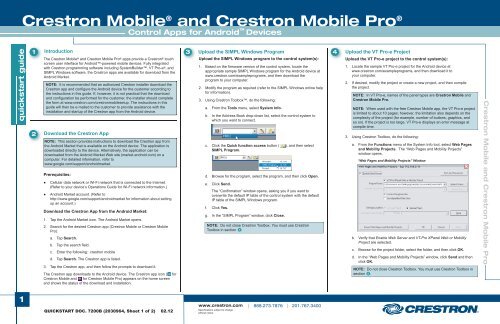
1 Introduction 3 Upload the SIMPL Windows Program<br />
Upload the SIMPL Windows program to the control system(s):<br />
The <strong>Crestron</strong> <strong>Mobile</strong> ® <strong>and</strong> <strong>Crestron</strong> <strong>Mobile</strong> Pro ® apps provide a <strong>Crestron</strong> ® touch<br />
screen user interface for Android-powered mobile devices. Fully integrated<br />
with <strong>Crestron</strong> programming software including SystemBuilder, VT Pro-e ®, <strong>and</strong><br />
SIMPL Windows software, the <strong>Crestron</strong> apps are available for download from the<br />
Android Market.<br />
NOTE: It is recommended that an authorized <strong>Crestron</strong> installer download the<br />
<strong>Crestron</strong> app <strong>and</strong> configure the Android device for the customer according to<br />
the instructions in this guide. If, however, it is not practical that the download<br />
<strong>and</strong> configuration be performed for the customer, the installer should complete<br />
the form at www.crestron.com/crestronmobilesetup. The instructions in this<br />
guide will then be e-mailed to the customer to provide assistance with the<br />
installation <strong>and</strong> startup of the <strong>Crestron</strong> app from the Android device.<br />
2 Download the <strong>Crestron</strong> App<br />
NOTE: This section provides instructions to download the <strong>Crestron</strong> app from<br />
the Android Market that is available on the Android device. The application is<br />
downloaded directly to the device. Alternatively, the application can be<br />
downloaded from the Android Market Web site (market.<strong>and</strong>roid.com) on a<br />
computer. For detailed information, refer to<br />
www.google.com/support/<strong>and</strong>roidmarket.<br />
Prerequisites:<br />
● Cellular data network or Wi-Fi network that is connected to the Internet.<br />
(Refer to your device’s Operations Guide for Wi-Fi network information.)<br />
● Android Market account. (Refer to<br />
http://www.google.com/support/<strong>and</strong>roidmarket for information about setting<br />
up an account.)<br />
Download the <strong>Crestron</strong> App from the Android Market:<br />
1. Tap the Android Market icon. The Android Market opens.<br />
2. Search for the desired <strong>Crestron</strong> app (<strong>Crestron</strong> <strong>Mobile</strong> or <strong>Crestron</strong> <strong>Mobile</strong><br />
Pro):<br />
a. Tap Search.<br />
b. Tap the search field.<br />
c. Enter the following: crestron mobile<br />
d. Tap Search. The <strong>Crestron</strong> app is listed.<br />
3. Tap the <strong>Crestron</strong> app, <strong>and</strong> then follow the prompts to download it.<br />
The <strong>Crestron</strong> app downloads to the Android device. The <strong>Crestron</strong> app icon ( for<br />
<strong>Crestron</strong> <strong>Mobile</strong> <strong>and</strong> for <strong>Crestron</strong> <strong>Mobile</strong> Pro) appears on the home screen<br />
<strong>and</strong> shows the status of the download <strong>and</strong> installation.<br />
QUICKSTART DOC. 7200B (2030964, Sheet 1 of 2) 02.12<br />
1. Based on the firmware version of the control system, locate the<br />
appropriate sample SIMPL Windows program for the Android device at<br />
www.crestron.com/exampleprograms, <strong>and</strong> then download the<br />
program to your computer.<br />
2. Modify the program as required (refer to the SIMPL Windows online help<br />
for information).<br />
3. Using <strong>Crestron</strong> Toolbox, do the following:<br />
a. From the Tools menu, select System Info.<br />
b. In the Address Book drop-down list, select the control system to<br />
which you want to connect.<br />
c. Click the Quick function access button ( ), <strong>and</strong> then select<br />
SIMPL Program.<br />
d. Browse for the program, select the program, <strong>and</strong> then click Open.<br />
e. Click Send.<br />
The “Confirmation” window opens, asking you if you want to<br />
overwrite the default IP table of the control system with the default<br />
IP table of the SIMPL Windows program.<br />
f. Click Yes.<br />
g. In the “SIMPL Program” window, click Close.<br />
NOTE: Do not close <strong>Crestron</strong> Toolbox. You must use <strong>Crestron</strong><br />
Toolbox in section 4 .<br />
www.crestron.com 888.273.7876 201.767.3400<br />
Specifications subject to change<br />
without notice.<br />
4 Upload the VT Pro-e Project<br />
Upload the VT Pro-e project to the control system(s):<br />
1. Locate the sample VT Pro-e project for the Android device at<br />
www.crestron.com/exampleprograms, <strong>and</strong> then download it to<br />
your computer.<br />
2. If desired, modify the project or create a new project, <strong>and</strong> then compile<br />
the project.<br />
NOTE: In VT Pro-e, names of the panel types are <strong>Crestron</strong> <strong>Mobile</strong> <strong>and</strong><br />
<strong>Crestron</strong> <strong>Mobile</strong> Pro.<br />
NOTE: When used with the free <strong>Crestron</strong> <strong>Mobile</strong> app, the VT Pro-e project<br />
is limited to about 10 pages; however, the limitation also depends on the<br />
complexity of the project (for example, number of buttons, graphics, <strong>and</strong><br />
so on). If the project is too large, VT Pro-e displays an error message at<br />
compile “Web time. Pages <strong>and</strong> Mobility Projects” Window<br />
3. Using <strong>Crestron</strong> Toolbox, do the following:<br />
a. From the Functions menu of the System Info tool, select Web Pages<br />
<strong>and</strong> Mobility Projects. The “Web Pages <strong>and</strong> Mobility Projects”<br />
window opens.<br />
“Web Pages <strong>and</strong> Mobility Projects” Window<br />
b. Verify that Enable Web Server <strong>and</strong> VT-Pro XPanel Web or Mobility<br />
Project are selected.<br />
c. Browse for the project folder, select the folder, <strong>and</strong> then click OK.<br />
d. In the “Web Pages <strong>and</strong> Mobility Projects” window, click Send <strong>and</strong> then<br />
click OK.<br />
NOTE: Do not close <strong>Crestron</strong> Toolbox. You must use <strong>Crestron</strong> Toolbox in<br />
section 5 .<br />
<strong>Crestron</strong> <strong>Mobile</strong> <strong>and</strong> <strong>Crestron</strong> <strong>Mobile</strong> Pro
quickstart guide<br />
Control Apps for Android <strong>Crestron</strong> <strong>Mobile</strong><br />
Devices<br />
® <strong>and</strong> <strong>Crestron</strong> <strong>Mobile</strong> Pro ®<br />
2<br />
5 Connect the Device to the <strong>Crestron</strong> Control System(s)<br />
5A<br />
To connect the Android device to the <strong>Crestron</strong> control system(s), perform the<br />
steps in section 5A or 5B :<br />
● Section 5A : <strong>Mobile</strong> Solution. Use this solution if the customer<br />
requires access within <strong>and</strong> also outside of the home network.<br />
● Section 5B : Local Solution. Use this solution if the customer requires<br />
access within the home network only (refer to page 3).<br />
<strong>Mobile</strong> Solution<br />
NOTE: To use the mobile solution, you must obtain a DNS host name<br />
from the customer’s ISP or use a service such as mycrestron.com. For<br />
information about setting up a host name, refer to Answer ID 4863 in the<br />
Online Help section of the <strong>Crestron</strong> Web site (http://support.crestron.com).<br />
1. Using <strong>Crestron</strong> Toolbox, configure the Ethernet addressing parameters<br />
of the control system:<br />
a. From the Functions menu of the System Info tool, select<br />
Ethernet Addressing.<br />
The “Ethernet Addressing” window opens.<br />
“Ethernet Addressing” Window<br />
b. Enter a static IP address <strong>and</strong> related network information.<br />
c. Verify that the HTTP Port: field is set to the default value of 80.<br />
d. Click OK.<br />
2. From the router configuration utility, configure the router.<br />
Open up two TCP control ports to the control system using the port<br />
numbers assigned in the SIMPL Windows program. The default port<br />
numbers are 41790 <strong>and</strong> 41791 <strong>and</strong> are used for Android1 <strong>and</strong> Android2<br />
as shown in the sample configuration screen at the top of the next<br />
column.<br />
NOTE: If the firmware version of the control system is 4.003.0029 or<br />
later, only one TCP control port is needed.<br />
QUICKSTART DOC. 7200B (2030964, Sheet 1 of 2) 02.12<br />
Sample Router Configuration Screen<br />
Android1<br />
Android2<br />
NOTE: The router configuration screen shown above is a sample<br />
screen only. The screen that appears for the particular router you are<br />
configuring may differ from the sample screen shown.<br />
3. Configure the Android device:<br />
NOTE: The form at www.crestron.com/crestronmobilesetup should be<br />
completed by an authorized <strong>Crestron</strong> installer if the customer is to<br />
configure the Android device. The instructions in this guide will then be<br />
e-mailed to the customer to provide assistance with the installation <strong>and</strong><br />
startup of the <strong>Crestron</strong> app from the Android device.<br />
The setup screen opens.<br />
a. On the home screen, tap the <strong>Crestron</strong> app icon ( for <strong>Crestron</strong><br />
<strong>Mobile</strong> or for <strong>Crestron</strong> <strong>Mobile</strong> Pro).<br />
The setup screen opens.<br />
Setup Screen (Empty)<br />
When configuring the Android device for<br />
the first time, the screen appears empty.<br />
NOTE: Touch My <strong>Crestron</strong> Demo to<br />
run a demo project for an Android phone<br />
or tablet.<br />
b. Tap Add System.<br />
The system configuration screen opens.<br />
www.crestron.com 888.273.7876 201.767.3400<br />
Specifications subject to change<br />
without notice.<br />
c. Tap the Friendly Name/Location field.<br />
Sample System Configuration<br />
d. Enter the name or location of the control system<br />
to which you want to connect. The name/location<br />
is for user reference only <strong>and</strong> is not a host name.<br />
e. Tap the Host Name or IP Address field, <strong>and</strong> then<br />
enter the host name or IP address of the<br />
control system.<br />
NOTE: It is recommended that you enter a host<br />
name rather than an IP address because ISPs<br />
may change the IP address periodically.<br />
f. The HTTP Port field is automatically populated with<br />
the default value of 80. To enter a different value,<br />
tap the HTTP Port field, <strong>and</strong> replace 80 using the<br />
TCP port number assigned when configuring the<br />
router in step 2<br />
g. The CIP field is automatically populated with the default value of 41790. If the<br />
TCP/IP server port number in the SIMPL Windows program was changed from<br />
the default value of 41790 to another value, tap the CIP Port field <strong>and</strong> replace<br />
41790 with the assigned value.<br />
h. Tap the Passcode field, <strong>and</strong> then enter the<br />
passcode assigned in the SIMPL Windows<br />
SSL Configuration<br />
program. (The default passcode is 1234.)<br />
i. If using Secure Sockets Layer (SSL) encryption<br />
between the device <strong>and</strong> the control system, tap<br />
Advanced to configure the feature.<br />
1. Touch the Enable SSL checkbox to enable the<br />
feature.<br />
2. If authentication is set on the control system<br />
side, enter a user name <strong>and</strong> password in the<br />
User Name <strong>and</strong> Password fields.<br />
3. Enable SSL on the control system. For details,<br />
refer to the control system’s Operations Guide.<br />
4. Tap Return to return to the previous screen.<br />
NOTE: If using SSL, the default value in the<br />
HTTP Port field changes from 80 to 443.<br />
j. Tap Save. The setup screen opens, listing the<br />
control system that has been added.<br />
k. Select the name/location of the control system, <strong>and</strong><br />
tap Connect. The Loading Configuration message<br />
appears with a progress indicator.<br />
Once the Android device connects to the control system,<br />
the device is ready for use as a <strong>Crestron</strong> touch screen.<br />
NOTE: When multiple control systems are set up, multiple<br />
systems are listed in the setup screen. When the <strong>Crestron</strong><br />
app is restarted, the application automatically connects to<br />
the last control system that was connected (default<br />
setting). To allow the customer to select a system from<br />
among multiple systems when the <strong>Crestron</strong> app is<br />
restarted, refer to section 6 .<br />
Sample System Setup<br />
<strong>Crestron</strong> <strong>Mobile</strong> <strong>and</strong> <strong>Crestron</strong> <strong>Mobile</strong> Pro
quickstart guide<br />
Control Apps for Android <strong>Crestron</strong> <strong>Mobile</strong><br />
Devices<br />
® <strong>and</strong> <strong>Crestron</strong> <strong>Mobile</strong> Pro ®<br />
3<br />
5B<br />
5B<br />
Local Solution<br />
1. Using <strong>Crestron</strong> Toolbox, configure the Ethernet addressing parameters<br />
of the control system:<br />
a. From the Functions menu of the System Info tool, select<br />
Ethernet Addressing.<br />
The “Ethernet Addressing” window opens.<br />
“Ethernet Addressing” Window<br />
b. Enter a static IP address <strong>and</strong> related network information.<br />
c. Verify that the HTTP Port: field is set to the default value of 80.<br />
d. Click OK.<br />
2. Verify that the Android device can connect to the wireless access point in<br />
the home. To do so, browse Web pages on the Internet using the<br />
Android device’s Web browser from within the home network:<br />
● If you can browse Web pages, proceed to step 3 at the top of the<br />
next column.<br />
● If you cannot browse Web pages, refer to the router documentation<br />
for configuration information or to your device’s Operations Guide.<br />
QUICKSTART DOC. 7200B (2030964, Sheet 2 of 2) 02.12<br />
3. Configure the Android device:<br />
NOTE: The form at www.crestron.com/crestronmobilesetup should be<br />
completed by the authorized <strong>Crestron</strong> installer if the customer is to<br />
configure the Android device. The instructions in this guide will then be<br />
e-mailed to the customer to provide assistance with the installation <strong>and</strong><br />
startup of the <strong>Crestron</strong> app from the Android device.<br />
a. On the home screen, tap the<br />
<strong>Crestron</strong> app icon ( for <strong>Crestron</strong><br />
<strong>Mobile</strong> or for <strong>Crestron</strong> <strong>Mobile</strong> Pro).<br />
The setup screen opens.<br />
When configuring the Android device<br />
for the first time, the screen<br />
appears empty.<br />
NOTE: Touch My <strong>Crestron</strong> Demo to<br />
run a demo project for an Android<br />
phone or tablet.<br />
b. Tap Add System.<br />
The system configuration<br />
screen opens.<br />
c. Tap the Friendly Name/Location field.<br />
d. Enter the name or location of the<br />
control system to which you want<br />
to connect. The name/location is<br />
for user reference only <strong>and</strong> is not<br />
a host name.<br />
e. Tap the Host Name or IP Address<br />
field, <strong>and</strong> enter the host name or IP<br />
address of the control system.<br />
f. Verify that the HTTP Port field is<br />
automatically populated with the<br />
default value of 80, which matches<br />
the value assigned in the<br />
“Ethernet Addressing” window<br />
in step 1c.<br />
Setup Screen (Empty)<br />
Sample System Configuration<br />
www.crestron.com 888.273.7876 201.767.3400<br />
Specifications subject to change<br />
without notice.<br />
g. Observe that the CIP field is automatically populated with the default value<br />
of 41790. If the TCP/IP server port number in the SIMPL Windows program<br />
was changed from the default value of 41790 to another value, tap the CIP<br />
Port field <strong>and</strong> replace 41790 with the assigned value.<br />
h. Tap the Passcode field, <strong>and</strong> then enter the passcode assigned in the SIMPL<br />
Windows program. (The default passcode is 1234.)<br />
i. If using Secure Sockets Layer (SSL) encryption between the device <strong>and</strong> the<br />
control system, tap Advanced to configure the feature.<br />
1. Touch the Enable SSL checkbox to enable<br />
the feature.<br />
SSL Configuration<br />
2. If authentication is set on the control system<br />
side, enter a user name <strong>and</strong> password in the<br />
User Name <strong>and</strong> Password fields.<br />
3. Enable SSL on the control system. For details,<br />
refer to the control system’s Operations Guide.<br />
4. Tap Return to return to the previous screen.<br />
NOTE: If using SSL, the default value in the<br />
HTTP Port field changes from 80 to 443.<br />
j. Tap Save. The setup screen opens, listing the<br />
control system that has been added.<br />
k. Select the name/location of the control system, <strong>and</strong><br />
tap Connect. The Loading Configuration message<br />
appears in addition to a progress indicator.<br />
Once the Android device connects to the control system,<br />
the device is ready for use as a <strong>Crestron</strong> touch screen.<br />
NOTE: When the <strong>Crestron</strong> app is restarted, the<br />
application automatically reconnects to the last control<br />
system that was connected (default setting). As a result,<br />
when only one control system is set up <strong>and</strong> connected,<br />
the need to manually reconnect to the control system is<br />
eliminated. For additional information, refer to section 6 .<br />
Sample System Setup<br />
<strong>Crestron</strong> <strong>Mobile</strong> <strong>and</strong> <strong>Crestron</strong> <strong>Mobile</strong> Pro
quickstart guide<br />
<strong>Crestron</strong> <strong>Mobile</strong> ® <strong>and</strong> <strong>Crestron</strong> <strong>Mobile</strong> Pro ®<br />
4<br />
6<br />
5B<br />
Additional Information<br />
By default, the Auto Reconnect <strong>and</strong> Check for Updates functions of the<br />
<strong>Crestron</strong> app are enabled. The Lock Configuration is disabled.<br />
● Enable the Lock Configuration function to prevent the end user from<br />
adding or deleting systems. When enabled, the My <strong>Crestron</strong> Demo<br />
button is also hidden.<br />
● The Auto Reconnect function allows startup of the application to<br />
reconnect automatically to the last control system that was connected.<br />
The default setting (enabled) is the recommended setting when only one<br />
control system is set up. When multiple control systems are set up,<br />
however, it is recommended that the Auto Reconnect function be<br />
disabled. When Auto Reconnect is disabled, the customer can select the<br />
particular control system to be reconnected.<br />
● The Check for Updates function allows startup of the application to check<br />
for an update of the VT Pro-e project that is loaded in the control system.<br />
If an updated project is found, the project is automatically loaded to the<br />
Android device. If Check for Updates is disabled (unchecked), the<br />
<strong>Crestron</strong> app uses the last project that was loaded to the Android device.<br />
NOTE: While developing <strong>and</strong> testing your projects, be sure to have the<br />
Check for Updates function enabled (checked) so you can see your<br />
project changes after you upload a new project.<br />
To disable the Lock Configuration, Auto Reconnect or Check for Updates<br />
function:<br />
1. While using the <strong>Crestron</strong> <strong>Mobile</strong> or <strong>Mobile</strong> Pro, press the menu button.<br />
2. Tap Settings. The “Settings” screen is displayed, allowing you to<br />
configure the Lock Configuration, Auto Reconnect, <strong>and</strong> Check for<br />
Updates functions as desired.<br />
3. To disable the Lock Configuration function,<br />
the Auto Reconnect function, or the<br />
Check for Updates function, touch the<br />
respective checkbox to enable or disable<br />
the function.<br />
QUICKSTART DOC. 7200B (2030964, Sheet 2 of 2) 02.12<br />
Control Apps for Android Devices<br />
Auto Reconnect <strong>and</strong> Check<br />
for Updates Set to ON<br />
(Default Settings)<br />
www.crestron.com 888.273.7876 201.767.3400<br />
Specifications subject to change<br />
without notice.<br />
The specific patents that cover <strong>Crestron</strong> products are listed at patents.crestron.com.<br />
<strong>Crestron</strong>, the <strong>Crestron</strong> logo, <strong>Crestron</strong> <strong>Mobile</strong>, <strong>Crestron</strong> <strong>Mobile</strong> Pro, <strong>Crestron</strong> Toolbox, SystemBuilder, <strong>and</strong> VT Pro-e are<br />
either trademarks or registered trademarks of <strong>Crestron</strong> Electronics, Inc. in the United States <strong>and</strong>/or other countries. Android<br />
is either a trademark or registered trademark of Google Inc. in the United States <strong>and</strong>/or other countries. Linksys is either a<br />
trademark or registered trademark of Cisco Systems, Inc. in the United States <strong>and</strong>/or other countries. Other trademarks,<br />
registered trademarks, <strong>and</strong> trade names may be used in this document to refer to either the entities claiming the marks <strong>and</strong><br />
names or their products. <strong>Crestron</strong> disclaims any proprietary interest in the marks <strong>and</strong> names of others.<br />
©2012 <strong>Crestron</strong> Electronics, Inc.<br />
<strong>Crestron</strong> <strong>Mobile</strong> <strong>and</strong> <strong>Crestron</strong> <strong>Mobile</strong> Pro