2006 - Junior T
2006 - Junior T
2006 - Junior T
- No tags were found...

You also want an ePaper? Increase the reach of your titles
YUMPU automatically turns print PDFs into web optimized ePapers that Google loves.
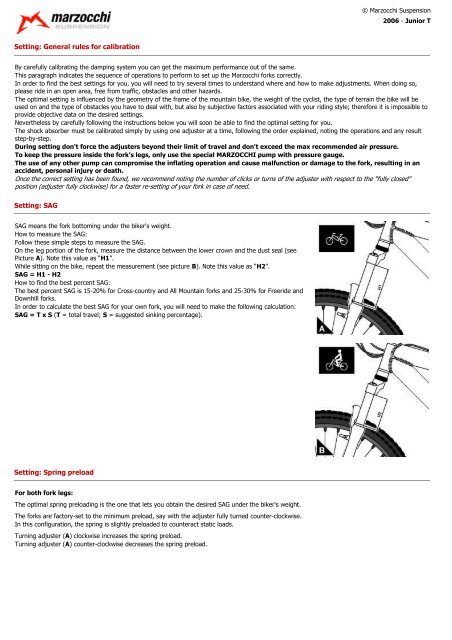
© Marzocchi Suspension<strong>2006</strong> - <strong>Junior</strong> TSetting: General rules for calibrationBy carefully calibrating the damping system you can get the maximum performance out of the same.This paragraph indicates the sequence of operations to perform to set up the Marzocchi forks correctly.In order to find the best settings for you, you will need to try several times to understand where and how to make adjustments. When doing so,please ride in an open area, free from traffic, obstacles and other hazards.The optimal setting is influenced by the geometry of the frame of the mountain bike, the weight of the cyclist, the type of terrain the bike will beused on and the type of obstacles you have to deal with, but also by subjective factors associated with your riding style; therefore it is impossible toprovide objective data on the desired settings.Nevertheless by carefully following the instructions below you will soon be able to find the optimal setting for you.The shock absorber must be calibrated simply by using one adjuster at a time, following the order explained, noting the operations and any resultstep-by-step.During setting don't force the adjusters beyond their limit of travel and don't exceed the max recommended air pressure.To keep the pressure inside the fork’s legs, only use the special MARZOCCHI pump with pressure gauge.The use of any other pump can compromise the inflating operation and cause malfunction or damage to the fork, resulting in anaccident, personal injury or death.Once the correct setting has been found, we recommend noting the number of clicks or turns of the adjuster with respect to the "fully closed"position (adjuster fully clockwise) for a faster re-setting of your fork in case of need.Setting: SAGSAG means the fork bottoming under the biker's weight.How to measure the SAG:Follow these simple steps to measure the SAG.On the leg portion of the fork, measure the distance between the lower crown and the dust seal (seePicture A). Note this value as “H1”.While sitting on the bike, repeat the measurement (see picture B). Note this value as “H2".SAG = H1 - H2How to find the best percent SAG:The best percent SAG is 15-20% for Cross-country and All Mountain forks and 25-30% for Freeride andDownhill forks.In order to calculate the best SAG for your own fork, you will need to make the following calculation:SAG = T x S (T = total travel; S = suggested sinking percentage).Setting: Spring preloadFor both fork legs:The optimal spring preloading is the one that lets you obtain the desired SAG under the biker's weight.The forks are factory-set to the minimum preload, say with the adjuster fully turned counter-clockwise.In this configuration, the spring is slightly preloaded to counteract static loads.Turning adjuster (A) clockwise increases the spring preload.Turning adjuster (A) counter-clockwise decreases the spring preload.