U Scanner Manual - Beat The Garage
U Scanner Manual - Beat The Garage
U Scanner Manual - Beat The Garage

You also want an ePaper? Increase the reach of your titles
YUMPU automatically turns print PDFs into web optimized ePapers that Google loves.
Table of Contents1. Safety Precautions and Warnings Page 12. General Information Page 1• Diagnostic Trouble Codes (DTC’s)• Location of the Data Link Connector (DLC)• OBDII Readiness Monitors• Continuous Monitors• Non-Continuous Monitors• OBDII Monitor Readiness Status• OBDII Definitions3. Using the Scan Tool Page 6-12• Specifications• Accessories Included• Keyboard• Power• Product Setup• Vehicle Coverage• Product Troubleshooting• OBDII Diagnostics• Reading Codes• Erasing Codes• Viewing Data• Recording Data• Playing Back Data• Viewing Freeze Frame Data• Retrieving I/M Readiness Status• O2 Monitor Test• On Board Monitor Test• Component Test• Viewing Vehicle Information• Modules Present4. Warranty and Service Page 12
1. Safety Precautions and WarningsTo prevent personal injury or damage to vehicles and/or the scan tool, read thisinstruction manual first and observe the following safety precautions wheneverworking on a vehicle:• Always perform automotive testing in a safe environment.• Wear safety eye protection that meets the required standards.• Keep clothing, hair, hands, tools, test equipment etc away from allmoving or hot engine parts.• Operate the vehicle in a well ventilated work area. Exhaust gasesare poisonous.• Put blocks in front of the drive wheels and never leave the vehicleunattended while running tests.• Use extreme caution when working around the ignition coil, distributorcap ignition wires and spark plugs. <strong>The</strong>se components createhazardous voltages when the engine is running.• Put the transmission in PARK (for automatic transmission) or NEUTRAL(for manual transmission) and make sure the parking brake is engaged.• Keep a fire extinguisher suitable for gasoline/chemical/electrical firesnearby.• Don’t connect or disconnect any test equipment while the ignition is onor the engine is running.• Don’t connect or disconnect any test equipment while the ignition is onor the engine is running.• Keep the scan tool dry, clean, free from oil/water or grease. Use a milddetergent on a clean cloth to clean the outside of the scan tool whennecessary.2. General Information<strong>The</strong> first generation of On-Board Diagnostics called OBDI were developed bythe California Air Resources Board (ARB) and implemented in 1988 to monitorsome of the emission control components on vehicles. As technology evolvedand the desire to improve the On-Board Diagnostic system increased, a newgeneration of On-Board Diagnostic System was developed. This secondgeneration of On-Board Diagnostic regulations is called OBDII.<strong>The</strong> OBDII system is designed to monitor emission control systems and keyengine components and vehicle conditions. When a problem is detected, theOBDII system turns on a warning lamp (MIL) on the vehicle instrument panel toalert the driver typically by the phrase of “Check Engine” or “Service EngineSoon”. <strong>The</strong> system will also store important information about the detected
malfunction so that a technician can accurately find and fix the problem. Threesuch examples of this are:• Whether the Malfunction Indicator Light (MIL) is commanded “on” or“off”.• Which, if any, Diagnostics Trouble Codes (DTC’s) are stored.• Readiness Monitor Status.Diagnostic Trouble Codes (DTC’s)OBDII Diagnostic Trouble Codes are codes that are stored by the On-BoardComputer Diagnostic System in response to a problem found in the vehicle.<strong>The</strong>se codes identify a particular problem area and are intended to provide youwith a guide as to where a fault might be occurring within a vehicle.OBDII Diagnostic Trouble Codes consist of a five digit alphanumeric code. <strong>The</strong>first character, a letter, identifies which control system sets the code. <strong>The</strong>other four characters, all numbers, provide additional information on where theDTC originated and the operating conditions that caused it to set.Location of the Data Link Connector (DLC)<strong>The</strong> DLC (Data Link Connector or Diagnostic Link Connector) is thestandardized 16-cavity connector where diagnostic scan tools interface withthe vehicle’s On-Board Computer. <strong>The</strong> DLC is usually located 12 inches fromthe centre of the instrument panel (dash), under or around the driver’s side formost vehicles. If the DLC is not located under the dashboard, there should bea label telling the location. For some Asian and European vehicles, the DLC islocated behind the ashtray and this must be removed to access the connector.If the DLC cannot be found, refer to the vehicle’s service manual for thelocation.OBDII Readiness MonitorsAn important part of a vehicle’s OBDII system is the Readiness Monitors, whichare indicators used to find out if all the emission components have beenevaluated by the OBDII system. <strong>The</strong>y are running periodic tests on specificsystems and components to ensure that they are performing within allowablelimits.Continuous MonitorsSome of the vehicle components or systems are continuously tested by thevehicle’s OBDII system, while others are tested only under specific vehicle
operating conditions. <strong>The</strong> continuously monitored components listed below arealways ready:• Misfire• Fuel System• Comprehensive Components (CCM)Once the vehicle is running, <strong>The</strong> OBDII system is continuously checking theabove components, monitoring key engine sensors, watching for engine misfireand monitoring fuel demands.Non-Continuous MonitorsUnlike the continuous monitors, many emissions and engine systemcomponents require the vehicle to be operated under specific conditions beforethe monitor is ready. <strong>The</strong>se monitors are termed non-continuous monitors andare listed below:• EGR System• O2 Sensors• Catalyst• Evaporative System• O2 Sensor Heater• Secondary Air• Heated Catalyst• A/C SystemOBDII Monitor Readiness StatusOBDII systems must indicate whether or not the vehicle’s PCM’s monitor systemhas completed testing on each component. Components that have beentested will be reported as “Ready” or “Complete” meaning they have beentested by the OBDII system. <strong>The</strong> purpose of recording readiness status is toallow inspectors to determine if the vehicles OBDII system has tested all thecomponents and/or systems.<strong>The</strong> Powertrain Control Module (PCM) sets a monitor to “Ready” or “Complete”after an appropriate drive cycle has been performed. <strong>The</strong> drive cycle thatenables a monitor and sets readiness codes to “Ready” varies for eachindividual monitor. Once a monitor is set as “Ready” or “Complete” it willremain in this state. A number of factors, including erasing of DiagnosticTrouble Codes (DTC’s) with a scan tool or a disconnected battery, can result inReadiness Monitors being set or “Not Ready”. Since the three continuousmonitors are constantly evaluating, they will be reported as “Ready” all of thetime. If testing of a particular supported non-continuous monitor has not been
completed, the monitor status will be reported as “Not Complete” or “NotReady”.In order for the OBD monitor system to become ready, the vehicle should bedriven under a variety of normal operating conditions. <strong>The</strong>se operatingconditions may include a mix of motorway driving and stop and go, city typedriving, and at least one overnight-off period.For specific information on getting your vehicle’s OBD Monitor System Ready,please consult your vehicle owner’s manual.OBDII DefinitionsPowertrain Control Module (PCM) – OBDII terminology for the On-BoardComputer that controls engine and drive train.Malfunction Indicator Light (MIL) – Malfunction Indicator Light (ServiceEngine Soon/Check Engine) is a term for the light of the instrument panel. It isto alert the driver and/or the repair technician that there is a problem with oneor more of the vehicle’s systems and may cause emissions to exceedstandards. If the MIL illuminates with a steady light, it indicates that a problemhas been detected and the vehicle should be serviced as soon as possible.Under certain conditions, the dashboard light will blink or flash. This indicates asevere problem and flashing is intended to discourage vehicle operation. <strong>The</strong>vehicle On-Board Diagnostic System cannot turn the MIL off until necessaryrepairs are completed or the condition no longer exists.Diagnostic Trouble Codes (DTC) – Identify which section of the EmissionControl System has malfunctioned.Enabling Criteria – Also termed Enabling Conditions. <strong>The</strong>y are the vehiclespecific events or conditions that must occur within the engine before thevarious monitors will set, or run. Some monitors require the vehicle to follow aprescribed “drive cycle” routine as part of the enabling criteria. Drive cyclesvary among vehicles and for each monitor in any particular vehicle.OBDII Drive Cycle – A specific mode of vehicle operation that providesconditions required to set all the readiness monitors applicable to the vehicle to“Ready” condition. <strong>The</strong> purpose of completing an OBDII drive cycle is to forcethe vehicle to run its onboard diagnostics. Some drive cycle needs to beperformed after DTC’s have been erased from the PCM’s memory or after thebattery has been disconnected. Running through a vehicle’s complete drivecycle will “Set” the readiness monitors so that future faults can be detected.
Drive cycles vary depending on the vehicle and the monitor that needs to bereset. For vehicle specific drive cycle, consult the vehicle’s owner manual.3. Using the Scan ToolSpecifications• Display: Backlit 128x64 pixel display with contract adjustment.• Operating Temperature: 0 to 60°C (32 to 140°F).• Storage Temperature: -20 to 70°C (-4 to 158°F).• Dimensions: 178mm(L) x 85mm (W) x 30mm (H)• Weight: 197g.Accessories Included• Online user <strong>Manual</strong>• Online DTC Library Software• OBDII Cable• USB Cable• Carry CaseKeyboardNo solvents such as alcohol are allowed to clean the keypad or display. Use amild non-abrasive detergent and a soft cotton cloth. Do no soak the keypad asit is not waterproof.PowerExternal Power – External power of the scan tool is provided via the vehicleData Link Connector (DLC). Just follow the steps below to turn on the scantool:1. Connect the OBDII Cable to scan tool.2. Find DLC on vehicle. A plastic DLC cover may be found for somevehicles and you need to remove it before plugging in the OBDIIcable.3. Plug OBDII cable into DLC.Product Setup<strong>The</strong> scan tool allows you to make the following adjustments and settings:• Language: Selects the desired language.
• Contrast Adjustment: Adjusts the contrast of the LCD Display.• Unit of Measure: Sets the unit of measure to English or Metric.• Auto Power Off: Sets automatic power off limits.• Beep Set: Turns beep on/off.• Tool Self Test: Checks if the LCD display and keyboard are workingnormally.Settings of the unit will remain until change to the existing settings is made.To enter the setup menu mode from the keyboard: Press ESC button to entersystems setup menu. Follow the instructions to make adjustments and settingsas described in the following setup options.From Main Menu: Use the UP/DOWN scroll button to select System Setup andpress ENTER button. Follow the instructions to make adjustments and settingsas described in the following setup options.Vehicle Coverage<strong>The</strong> U <strong>Scanner</strong> OBDII/EOBD <strong>Scanner</strong> is specially designed to work with allOBDII compliant vehicles, including those quipped with next generation protocol– Control Area Network (CAN). It is required that all 2001 Petrol and newer and2004 Diesel and newer cars sold in the UK must be OBDII compliant (manyprior to this are also compliant).A small number of 1994 and 1995 model petrol vehicles are OBDII compliant.To verify if a 1994 or 1995 vehicle is OBDII compliant, check the VehicleEmissions Control Information (VECI) label which is located under the hood orby the radiator of most vehicles. If the vehicle is OBDII compliant, the label willdesignate “OBDII Certified”. Additionally, Government regulations mandate thatOBDII compliant vehicles must have a common 16pin Data Link Connector(DLC).For you vehicle to be OBDII compliant it must have a 16pin port under the dashand the Vehicle Emission Control Information Label must state that the vehicleis OBDII compliant or the car must use one of the standard protocols.Product TroubleshootingVehicle Linking Error – A communication error occurs if the scan tool failsto communicate with the vehicle’s ECU (Engine Control Unit). You need to dothe following to check:• Verify that the ignition is ON.
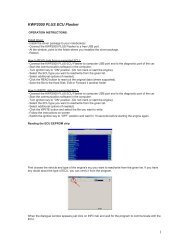
• Check if the scan tool’s OBDII connector is securely connected to thevehicle’s DLC.• Verify that the vehicle is OBDII compliant.• Turn the ignition off and wait for about 10 seconds, turn the ignitionback on and continue the testing.• Verify the control module is not defective.Operating Error – If the scan tool freezes, then an exception occurs or thevehicles ECU (Engine Control Unit) is too slow to respond to requests. Youneed to do the following to reset the tool:• Press and hold POWER button for at least 2 seconds to reset the scantool.• Turn the ignition off and wait for about 10 seconds. Turn the ignitionback to on and continue the testing.Scan tool doesn’t power up – if the scan tool won’t power up or operatesincorrectly in any other way, you need to do the following to check:• Check the scan tool’s OBDII connector is securely connect to thevehicles DLC• Check if the DLC pins are bent or broken. Clean the DLC pins ifnecessary.• Check vehicle battery to make sure it is still good with at least 8V.OBDII DiagnosticsWhen more than one Vehicle Control Module is detected by the scan tool, youwill be prompted to select the module where the data may be retrieved. <strong>The</strong>most often to be selected are the Powertrain Control Module (PCM) andTransmission Control Module (TCM.CAUTION: Do not connect or disconnect any test equipment with ignition onor engine running.DTC Lookup<strong>The</strong> DTC Lookup function is used to search for definitions of DTC’s stored inthe built in DTC library.From Main Menu use UP/DOWN scroll button To select DTC Lookup and pressENTER button.
<strong>The</strong> number to the right indicates total number of items under this menu andsequence of highlighted item. <strong>The</strong> “?” to the right indicates help informationavailable. Press HELP button to view help information for selected item.From DTC Lookup menu, use LEFT/RIGHT button to move to the desiredcharacter use UP/DOWN button to change selected digit/character and pressENTER button to confirm.To view the DTC definition on screen. When DTC definition covers more thanone screen, use LEFT/RIGHT button to view additional information onprevious/next screens.For manufacturer specific codes, you need to select a vehicle make on anadditional screen to look for DTC definitions. If definition could not be found(SAE or Manufacturer Specific), the scan tool displays “DTC definition notfound”. Please refer to vehicle service manual.To view next or previous DTC in the built in DTC library, use UP/DOWN button.To enter another DTC, press ESC button to return to previous screen.To exit to MAIN MENU press ESC button.Reading CodesReading codes can be done with the key on engine off (KOEO) or with the keyon engine running (KOER).Stored codes are also known as “hard codes” or “permanent codes”. <strong>The</strong>secodes cause the control module to illuminate the malfunction indicator lamp(MIL) when emission-related fault occurs.Pending Codes are also referred to as “maturing codes” or “continuous monitorcodes”. <strong>The</strong>y indicate problems that the control module has detected duringthe current or last driving cycle but are not considered serious yet. PendingCodes will not turn on the malfunction indicator lamp (MIL). If the fault does notoccur within a certain number of warm up cycles, the code clears from memory.Erasing CodesCAUTION: Erasing the Diagnostic Trouble Codes may allow the scan tool todelete not only the codes from the vehicle’s on board computer andmanufacturer specific enhanced data. Further, the I/M Readiness MonitorStatus for all vehicle monitors is reset to Not Ready or Not Complete status.
Do not release the codes before the system has been checked completely bya technician.This function is performed with key on engine off (KOEO). Do not start theengine.Viewing Data<strong>The</strong> View Data function allows viewing of live or real time PID data of vehicle’scomputer module(s).To view live data, use UP/DOWN scroll button to select Live Data fromDiagnostic Menu and press ENTER button.Recording Data<strong>The</strong> Record Data function allows recoding vehicle modules’ ParameterIdentification (PID) data to help diagnose intermittent vehicle problems. Arecording includes 5 frames of live data before trigger event and severalframes after trigger event.<strong>The</strong>re are two trigger modes used to record data:• <strong>Manual</strong> Trigger – allows user to press ENTER button to start recording.• DTC Trigger – automatically records PID data when a fault that causesa DTC to set is detected by vehicle.CAUTION: DO NOT try to drive and operate the scan tool at the same time!Always have another person operate the scan tool while driving.Playing Back Data<strong>The</strong> Playback Data function allows viewing of previously stored PID Data.Viewing Freeze Frame DataAllows you to view any previously freeze framed data.Retrieving I/M Readiness StatusI/M Readiness function is used to check the operations of the Emission Systemon OBDII compliant vehicles. It is an excellent function to use prior to having avehicle inspected for compliance to a state emissions program.Some latest vehicle models may support two types of I/M Readiness tests.
• Since DTC’s cleared – indicates status of the monitors since the DTC’sare erased.• This Drive Cycle – indicates status monitors since the beginning of thecurrent drive cycle.An I/M Readiness Status result of “NO’ does not necessarily indicate that thevehicle being tested will fail the state I/M inspection. For some states, one ormore such monitors may be allowed to be “Not Ready” to pass the emissionsinspection.OK – Indicates that a particular monitor being checked has completed itsdiagnostic testing.INC – Indicates that a particular monitor being checked has not completed itsdiagnostic testing.N/A – <strong>The</strong> monitor is not supported on that vehicle.O2 Monitor TestOBDII regulations set by SAE require that relevant vehicles monitor and test theoxygen (O2) sensors to identify problems related to fuel efficiency and vehicleemissions. <strong>The</strong>se tests are not on-demand tests and they are doneautomatically when engine operating conditions are within specified limits.<strong>The</strong>se tests results are saved in the on-board computers memory.<strong>The</strong> O2 Monitor Test function allows retrieval and viewing of O2 sensor monitortest results for the most recently performed tests form the vehicle’s on-boardcomputer.<strong>The</strong> O2 Monitor Test function is not supported by vehicles which communicateusing a controller area network (CAN). For O2 Monitor Test results of CANequippedvehicles, see chapter “On-Board Mon. Test”.On-Board Monitor Test<strong>The</strong> On-Board Monitor Test is useful after servicing or after erasing a vehicle’scontrol module memory. <strong>The</strong> On-Board Monitor Test for non-CAN equippedvehicles retrieves and displays test results for emission related powertraincomponents and systems that are not continuously monitored. <strong>The</strong> On-BoardMonitor Test for CAN-equipped vehicles retrieves and displays test results foremission related powertrain components and systems that are and are notcontinuously monitored. Test and components IDs are determined by thevehicle manufacturer.Component Test
<strong>The</strong> Component Test function allows initiating a leak test for the vehicle’sEVAP system. <strong>The</strong> scan tool itself does not perform the leak test, butcommands the vehicle’s on-board computer to start the test. Different vehiclemanufacturers might have different criteria and methods for stopping the testonce it has been started. Before starting the Component Test, refer to thevehicle service manual for instructions to stop the test.Viewing Vehicle Information<strong>The</strong> Vehicle Info function enables retrieval of Vehicle Identification No. (VIN),Calibration ID Nos. (CINs), Calibration Verification Nos. (CVNs) and In-usePerformance Tracking on 2000 and newer vehicles that support Mode 9.Modules Present<strong>The</strong> Modules Present function allows viewing of the module IDs andcommunication protocols for OBDII modules in the vehicle.7. Warranty and ServiceLimited One Year WarrantyNE Diagnostics Ltd warrants to its customers that this product will be free fromall defects in materials and workmanship for a period of one year from the dateof the original purchase, subject to the following terms and conditions.1. <strong>The</strong> sole responsibility of NE Diagnostics Ltd under the Warranty islimited to either the repair or, at the option of NE Diagnostics Ltd,replacement of the scan tool at no charge with Proof of Purchase. <strong>The</strong>sales receipt may be used for this purpose.2. This warranty does not apply to damages caused by improper use,accident, flood, lightning, or if the product was altered or repaired byanyone other than the Manufacturer’s Service Centre.3. NE Diagnostics shall not be liable for any incidental or consequentialdamages arising from the sue, misuspe, or mounting of the scan tool.4. All information in this manual is based on the latest information availableat the time of publication and no warranty can be made for its accuracyor completeness. NE Diagnostics reserve the right to make changes atany time without notice.Service ProceduresIf you have any questions, please contact your local store, distributor or visitour website at www.beatthegarage.com.
If it becomes necessary to return the scan tool for repair, contact you localdistributor for more information.