GeoJot+ Set-up Instructions - GeoSpatial Experts
GeoJot+ Set-up Instructions - GeoSpatial Experts
GeoJot+ Set-up Instructions - GeoSpatial Experts

Create successful ePaper yourself
Turn your PDF publications into a flip-book with our unique Google optimized e-Paper software.
<strong>GeoJot+</strong> <strong>Set</strong>-<strong>up</strong><strong>Instructions</strong>John ClarkDirector, Business DevelopmentJohn.Clark@<strong>GeoSpatial</strong><strong>Experts</strong>.comOffice: 303 255.2908cell: 720 431.8550www.<strong>GeoSpatial</strong><strong>Experts</strong>.comThis handbook is designed to give customersand potential customers an overview of<strong>GeoJot+</strong>. Content specific help is available inboth the <strong>GeoJot+</strong> app and <strong>GeoJot+</strong> Core(desktop portion).Sign <strong>up</strong> for a free trial atwww.<strong>GeoSpatial</strong><strong>Experts</strong>.com/GeoJot
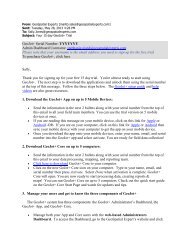
Follow these instructions to start using <strong>GeoJot+</strong>1. Step One: Get the serial number to activate your trial. When you click "Try <strong>GeoJot+</strong>" and complete the form, you will receive a confirmation page andan email with an 8 digit serial number. The serial number will be used to activatethe computer and mobile devices. The email and password you put in the form willnow be your user name and log in on the Administrative Dashboard.Send the download links with the serial number to the mobile devices andcomputers where you want to use <strong>GeoJot+</strong>.2. Step Two: <strong>Set</strong> <strong>up</strong> <strong>GeoJot+</strong> on your computer.Download GeoJot Core on your computer: Click here to download <strong>GeoJot+</strong> Core to your computer.Activate Core: Click on the new GoJot+ icon on your computer. Type in your name, email, and the serialnumber (at the top of this email message) and press Activate. Select Done when activation iscomplete. <strong>GeoJot+</strong> Core will open. You are now ready to start processing data, creating reports& maps! You can use the trial version on 5 instances of Core at once. Check out the quick startguide on the Start Page and watch for <strong>up</strong>dates and tips.<strong>Set</strong> <strong>up</strong> Dropbox: If you are using Dropbox to transfer your photos from the mobile devices to your computer youwill need to make sure both the mobile devices and the computer arelinked to the same Dropbox account. If you don't have one already, createan account at www.Dropbox.com. An icon will appear on your desktop. This is where you willfind the photos from the app. The default folder for <strong>GeoJot+</strong> photos is called <strong>GeoJot+</strong>. Thisfolder will be created the first time a photo is sent from a mobile device.Create a list (optional): An attribute list is a list of fields that you wish toenter each time you take a photo. <strong>Set</strong>ting this <strong>up</strong>in advance creates the simple drop-down lists yourfield teams will be prompted to enter each timethey take a photo. Doing this is in advance isoptional, however, it will save you a great deal oftime and ensure consistent data collection.To begin, click Tools- List Editor. Select ADD andset your desired fields on the left with each field'svalues on the right. You may copy from Excel oranother list you already have. Save when completed.Next email your new attribute list to your mobile device. Click Attach to Email on the toolbarand enter an email address that can be opened on the mobile device.<strong>GeoSpatial</strong> <strong>Experts</strong> <strong>GeoJot+</strong> Handbook: April 2013 Page 1
3. Step Three: <strong>Set</strong> <strong>up</strong> mobile devices.Download the app on your mobile device: If you are reading this message on your mobile device, click on this link for Apple or Android -OR- If you are on your computer, click on this link for Apple or Android then sync your mobiledevice with your computer to get the app on your mobile device. You can use the trial versionon 5 mobile devices at once.Activate app: From the mobile device: type in your name and email for that device. (This information will beused by your account administrator to manage your licenses in the Administrative Dashboard.)Type or paste in the serial number provided in the registration and press "Activate".<strong>Set</strong> <strong>up</strong> Dropbox: From the <strong>GeoJot+</strong> App home screen, select <strong>Set</strong>tings-Cloud-Provider-Dropbox.Then select the green arrow next to the word Dropbox. Link GeoJot to Dropbox(tap the green bar and complete the Dropbox instructions. Make sure you link to the samedropbox account that you used in <strong>GeoJot+</strong> Core.)Other setting options on your mobile device offer file path, folder destination and photo sizeoptions. Adjust as desired.Open List: Open the email sent from the PC. The list you created will be attached. Open the list and allow<strong>GeoJot+</strong> to use it. (If you skip this step you can use the default list.)Now you are ready to use <strong>GeoJot+</strong>Begin taking photos and entering field data on your mobile devices. The photos will automatically<strong>up</strong>load into Dropbox. Use <strong>GeoJot+</strong> Core on the computer to import the photos from Dropbox,edit them and create reports. Use the Contact specific help on each page of the App and Core tosee all the available features.4. Step Four: Use the Administrative Dashboard to manage your users.<strong>GeoJot+</strong> revolutionizes apps by providing an AdministrativeDashboard. This allows you to centralize all your licenses andmove them among your employees across devices andplatforms anytime, anywhere.To access the Administrative Dashboard click on the link:https://store.geospatialexperts.com/ You can also access itfrom the <strong>GeoSpatial</strong> <strong>Experts</strong> webpage on the "<strong>GeoJot+</strong> Login"menu item. To log in, use the email and password you usedwhen you initially signed <strong>up</strong> for the trial. (Your email addressis listed on the confirmation email you received.)<strong>GeoSpatial</strong> <strong>Experts</strong> <strong>GeoJot+</strong> Handbook: April 2013 Page 2
Once the users have downloaded and activated the software (see steps 2-3 of this guide)you will be able to view them in the Administrative Dashboard by clicking the Activationstab. Users do not appear until they have activated the app or Core on their device/computer.The following screen shot shows that the app has been used on 5 devices and that one of them -The Android-Motorola-DROIDX owned by Rick Bobbitt is currently active. It also shows that <strong>GeoJot+</strong>Core is currently being used by Rick.To change the status of any user, click theedit symbol.<strong>GeoSpatial</strong> <strong>Experts</strong> <strong>GeoJot+</strong> Handbook: April 2013 Page 3
The edit icon brings you to this page. Here you can change the status from active to deactivated ordisabled. Deactivated means that the license is available to be used on another device or this device bysimply clicking "Activate". Disabled means that it can no longer be used on this device until you changethe status.To summarize:Deactivate = temporarily turned off and available for use. May be reactivated by user.Disabled = cannot be used on this device again until you give permission.With the Administrative Dashboard you never have to worry about losing your software when you loseor break a device. Now your administrator can allow different users access to this powerful tool ondemand making the most out of your licenses and your teams.<strong>GeoSpatial</strong> <strong>Experts</strong> <strong>GeoJot+</strong> Handbook: April 2013 Page 4