Deploying the BIG-IP System v11 with Microsoft IIS - F5 Networks
Deploying the BIG-IP System v11 with Microsoft IIS - F5 Networks
Deploying the BIG-IP System v11 with Microsoft IIS - F5 Networks
- No tags were found...
Create successful ePaper yourself
Turn your PDF publications into a flip-book with our unique Google optimized e-Paper software.
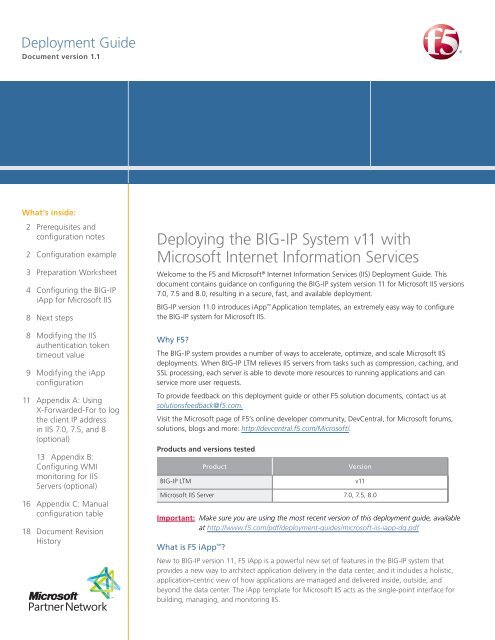
DEPLOYMENT GUIDE<strong>Microsoft</strong> <strong>IIS</strong>Preparation WorksheetIn order to use <strong>the</strong> iApp for <strong>Microsoft</strong> <strong>IIS</strong>, you need to ga<strong>the</strong>r some information, such as server <strong>IP</strong>addresses and domain information. Use <strong>the</strong> following worksheet to ga<strong>the</strong>r <strong>the</strong> information you willneed while running <strong>the</strong> template. The worksheet does not contain every question in <strong>the</strong> template,but ra<strong>the</strong>r includes <strong>the</strong> information that is helpful to have in advance. More information on specifictemplate questions can be found on <strong>the</strong> individual pages.You might find it useful to print this table and <strong>the</strong>n enter <strong>the</strong> information.ÂÂNote: Although we show space for 10 pool members, you may have more or fewer membersin each pool.<strong>IP</strong> Addresses/FQDN SSL Offload Pool Members Sync/Failover Groups * TCP requestqueuing *WAN or LANclients<strong>IP</strong> address you will usefor <strong>the</strong> LTM virtual server:FQDN that will resolve to<strong>the</strong> virtual server address:Oflloading SSL? Yes| NoIf offloading SSL, import acertificate and key into <strong>the</strong><strong>BIG</strong>-<strong>IP</strong> LTM before running<strong>the</strong> template.Certificate:Key:<strong>IIS</strong> server <strong>IP</strong> addresses:1:2:3:4:5:6:7:8:9:10:If using <strong>the</strong> Advancedfeature of Sync/FailoverGroups, you must alreadyhave a Device Group anda Traffic GroupDevice Group name:Traffic Group name:If using TCP requestqueuing, you shouldknow <strong>the</strong> queue lengthand timeout, as well as<strong>the</strong> connection limit for<strong>the</strong> node.Request queue length:Timeout:Node Connection limit:Most clients connectingthrough <strong>BIG</strong>-<strong>IP</strong> to <strong>IIS</strong>are coming over a:LANWANPort used by <strong>IIS</strong>:Optional Modules (you must have provisioned modules before running <strong>the</strong> template)Application Visibility Reporting (AVR)*If using AVR, we strongly recommend you first create ancustom Analytics profile before running <strong>the</strong> template.Analytics profile name:WebAccelerator*All FQDNs for <strong>IIS</strong>:1:2:3:4:5:* Optional3
DEPLOYMENT GUIDE<strong>Microsoft</strong> <strong>IIS</strong>SSL Encryption questionsBefore running <strong>the</strong> template you should have already imported a certificate and key onto <strong>the</strong><strong>BIG</strong>-<strong>IP</strong> system. While <strong>the</strong> <strong>BIG</strong>-<strong>IP</strong> system does include a self-signed SSL certificate that can be usedinternally or for testing, we strongly recommend importing a certificate and key issued from atrusted Certificate Authority.For information on SSL certificates on <strong>the</strong> <strong>BIG</strong>-<strong>IP</strong> system, see <strong>the</strong> online help or <strong>the</strong> ManagingSSL Certificates for Local Traffic chapter in <strong>the</strong> Configuration Guide for <strong>BIG</strong>-<strong>IP</strong> Local TrafficManager available at http://support.f5.com/kb/en-us.html.To configure <strong>the</strong> <strong>BIG</strong>-<strong>IP</strong> to offload SSL, select Yes from <strong>the</strong> list.1. CertificateSelect <strong>the</strong> certificate for you imported for <strong>IIS</strong> from <strong>the</strong> certificate list.2. KeySelect <strong>the</strong> associated key from <strong>the</strong> list.Server Pool, Load Balancing, and Service Monitor questionsLLTipIn this section, you add <strong>the</strong> <strong>Microsoft</strong> <strong>IIS</strong> servers, and configure <strong>the</strong> health monitor and pool.1. New PoolChoose Create New Pool unless you have already made a pool on <strong>the</strong> LTM for <strong>the</strong> <strong>IIS</strong>devices.2. Load balancing methodWhile you can choose any of <strong>the</strong> load balancing methods from <strong>the</strong> list, we recommend <strong>the</strong>default, Least Connections (member).If you want to implement <strong>the</strong> Windows Management Interface (WMI) monitor, as describedin Appendix B: Configuring WMI monitoring for <strong>IIS</strong> Servers (optional) on page 13, youmust select Dynamic Ratio (Node).3. Address/PortType <strong>the</strong> <strong>IP</strong> Address and Port for each <strong>IIS</strong> server. You can optionally add a Connection Limit(see note on <strong>the</strong> left). Click Add to add additional servers to <strong>the</strong> pool.4. TCP Request QueuingTCP request queuing provides <strong>the</strong> ability to queue connection requests that exceed <strong>the</strong>capacity of connections for a pool as determined by <strong>the</strong> connection limit. Consequently,instead of dropping connection requests that exceed <strong>the</strong> capacity of a pool, TCP requestqueuing enables those connection requests to reside <strong>with</strong>in a queue in accordance <strong>with</strong>defined conditions until capacity becomes available. For more information on TCP RequestQueuing, see <strong>the</strong> Preventing TCP Connection Requests From Being Dropped chapter in <strong>the</strong><strong>BIG</strong>-<strong>IP</strong> Local Traffic Manager: Implementations guide, available on Ask <strong>F5</strong>.ImportantTCP Request Queuing is an advanced feature and should be used only if you understand howit will affect your deployment, including application behavior and <strong>BIG</strong>-<strong>IP</strong> performance.If you enable TCP Request Queuing, you must have a Connection Limit set on at least one of<strong>the</strong> nodes when configuring <strong>the</strong> Address/Port for <strong>the</strong> Client Access Server nodes.If you want <strong>the</strong> <strong>BIG</strong>-<strong>IP</strong> to queue TCP requests, select Yes from <strong>the</strong> list. Additional optionsappear.6
DEPLOYMENT GUIDE<strong>Microsoft</strong> <strong>IIS</strong>Disabling Strict UpdatesIf you need to manually modify any of <strong>the</strong> configuration objects created by <strong>the</strong> template, youmust first disable <strong>the</strong> Strict Updates feature. By disabling Strict Updates, if you re-enter <strong>the</strong>iApp template and modify <strong>the</strong> configuration <strong>with</strong>in <strong>the</strong> iApp, you must make all changes againmanually.You only need to turn off <strong>the</strong> Strict Updates feature once, unless you have re-enabled it.To disable Strict Updates1. On <strong>the</strong> Main tab, expand iApp and <strong>the</strong>n click Application Services.2. Click <strong>the</strong> name of your <strong>Microsoft</strong> <strong>IIS</strong> Application service from <strong>the</strong> list.3. From <strong>the</strong> Application Service list, select Advanced.4. In <strong>the</strong> Strict Updates row, clear <strong>the</strong> check from <strong>the</strong> box to disable Strict Updates.5. Click <strong>the</strong> Update button.6. You must restart bigd after making changes that require disabling Strict Updates. You onlyneed to restart bigd once, after making all modifications. See Restart bigd after makingchanges that require disabling Strict Updates on page 15.10
DEPLOYMENT GUIDE<strong>Microsoft</strong> <strong>IIS</strong>Appendix A: Using X-Forwarded-For to log <strong>the</strong> client <strong>IP</strong> address in<strong>IIS</strong> 7.0, 7.5, and 8 (optional)When you configure <strong>BIG</strong>-<strong>IP</strong> LTM to use SNAT, <strong>the</strong> <strong>BIG</strong>-<strong>IP</strong> system replaces <strong>the</strong> source <strong>IP</strong> address of anincoming connection <strong>with</strong> its local self <strong>IP</strong> address (in <strong>the</strong> case of SNAT Automap), or an address youhave configured in a SNAT pool. As a result, <strong>Microsoft</strong> <strong>IIS</strong> logs each connection <strong>with</strong> its assignedSNAT address, ra<strong>the</strong>r than <strong>the</strong> address of <strong>the</strong> client. The iApp produces an HTTP profile on <strong>the</strong> <strong>BIG</strong>-<strong>IP</strong> system which inserts an X-Forwarded-For header, so <strong>the</strong> original client <strong>IP</strong> address is sent as well;however, in default <strong>IIS</strong> configuration, this information is not logged.Beginning <strong>with</strong> <strong>IIS</strong> 7, <strong>Microsoft</strong> provides an optional Advanced Logging Feature for <strong>IIS</strong> that allowsyou to define custom log definitions that can capture additional information such as <strong>the</strong> client <strong>IP</strong>address included in <strong>the</strong> X-Forwarded-For header.Modifying <strong>the</strong> HTTP profile to enable X-Forwarded-ForThe first task is to modify <strong>the</strong> HTTP profile created by <strong>the</strong> template to enable <strong>the</strong> X-Forwarded-Forheader. This requires disabling <strong>the</strong> Strict Updates feature.To modify <strong>the</strong> HTTP profile1. If you have not already disabled Strict Updates, follow Disabling Strict Updates on page 102. On <strong>the</strong> Main tab, expand Local Traffic, and <strong>the</strong>n click Profiles.3. From <strong>the</strong> HTTP profile list, select <strong>the</strong> profile created by <strong>the</strong> template. This profile is precededby <strong>the</strong> name you gave <strong>the</strong> iApp, followed by _http_profile.4. In <strong>the</strong> Settings section, on <strong>the</strong> Insert X-Forwarded-For row, click <strong>the</strong> Custom box. From<strong>the</strong> list, select Enabled.5. Click <strong>the</strong> Update button.6. You must restart bigd after making changes that require disabling Strict Updates. You onlyneed to restart bigd once, after making all modifications. See Restart bigd after makingchanges that require disabling Strict Updates on page 15.<strong>Deploying</strong> <strong>the</strong> Custom Logging role serviceThe first task is to deploy <strong>the</strong> Custom Logging role service. If you do not deploy this role service,you may receive a “Feature not supported” error when trying to edit <strong>the</strong> log definition in <strong>the</strong> nextsection. If you receive this error, ensure that you are editing <strong>the</strong> log definition at <strong>the</strong> server level in<strong>IIS</strong> Manager.The configuration is slightly different depending on which version of <strong>IIS</strong> you are running. Use <strong>the</strong>procedure applicable to your version of <strong>IIS</strong>.To deploy <strong>the</strong> Custom Logging role service for <strong>IIS</strong> 7.0 and 7.5 (Windows Server 2008)1. From your Windows Server 2008 or Windows Server 2008 R2 device, open Server Manager.2. In <strong>the</strong> Navigation pane, expand Roles.3. Right-click Web Server, and <strong>the</strong>n click Add Role Services.4. Under Health and Diagnostics, check <strong>the</strong> box for Custom Logging, and <strong>the</strong>n click Next.5. On <strong>the</strong> Confirmation page, click Install.6. After <strong>the</strong> service has successfully installed, click <strong>the</strong> Close button.11
DEPLOYMENT GUIDE<strong>Microsoft</strong> <strong>IIS</strong>d. From Connections, expand (MachineName\UserName).e. Right click <strong>the</strong> Application Pools menu and choose Add Application Pool.f. In <strong>the</strong> Name box, type <strong>F5</strong> Application Pool.g. Click OK.7. Create a new application named scripts:a. Expand and Sites.b. Right click "Default Web Site" (or <strong>the</strong> applicable web site), and choose AddApplication.c. In <strong>the</strong> Alias box, type scripts.d. To change <strong>the</strong> application pool, click Select.e. For <strong>the</strong> physical path, type <strong>the</strong> directory you created in step 1 (C:\Inetpub\scripts\).f. Click OK.8. Change <strong>the</strong> Au<strong>the</strong>ntication setting to Basic Au<strong>the</strong>ntication:a. Select scripts.b. In <strong>the</strong> center pane, double click Au<strong>the</strong>ntication.c. Verify that <strong>the</strong> status of all items under Au<strong>the</strong>ntication is Disabled, except for <strong>the</strong> BasicAu<strong>the</strong>ntication item. To enable or disable an au<strong>the</strong>ntication item, right click <strong>the</strong> name andchoose Enable or Disable.Creating <strong>the</strong> WMI Monitor on <strong>the</strong> <strong>BIG</strong>-<strong>IP</strong> LTMThe next task is to create <strong>the</strong> WMI monitor on <strong>the</strong> applicable <strong>BIG</strong>-<strong>IP</strong> LTM systems. Use <strong>the</strong>following table:<strong>BIG</strong>-<strong>IP</strong> LTM ObjectHealth Monitors(Main tab-->Local Traffic-->Monitors)Non-default settings/NotesNameType a unique nameTypeWMIInterval30 (recommended)Timeout91 (recommended)User NameType <strong>the</strong> appropriate user namePasswordType <strong>the</strong> associated passwordURL: /scripts/<strong>F5</strong>Isapi.dll (for <strong>IIS</strong> 6, 7, and 7.5)Create this monitor on all applicable <strong>BIG</strong>-<strong>IP</strong> LTM systems.Apply <strong>the</strong> monitor on <strong>the</strong> <strong>BIG</strong>-<strong>IP</strong> LTM devicesNext, we apply <strong>the</strong> monitor to <strong>the</strong> <strong>IIS</strong> nodes on <strong>the</strong> <strong>BIG</strong>-<strong>IP</strong> LTM system.To apply <strong>the</strong> monitor to <strong>the</strong> nodes1. On <strong>the</strong> Main tab, expand Local Traffic and <strong>the</strong>n click Nodes.2. From <strong>the</strong> list of nodes, click <strong>the</strong> <strong>IP</strong> address of one of your <strong>IIS</strong> server.3. In <strong>the</strong> Configuration section, from <strong>the</strong> Health Monitor list, select Node Specific.14
DEPLOYMENT GUIDE<strong>Microsoft</strong> <strong>IIS</strong>4. From <strong>the</strong> Available list, select <strong>the</strong> WMI monitor you created, and <strong>the</strong>n click <strong>the</strong> Add (
DEPLOYMENT GUIDE<strong>Microsoft</strong> <strong>IIS</strong>Appendix C: Manual configuration tableWe strongly recommend using <strong>the</strong> iApp template to configure <strong>the</strong> <strong>BIG</strong>-<strong>IP</strong> LTM for <strong>Microsoft</strong> <strong>IIS</strong>. Advanced users extremely familiar <strong>with</strong><strong>the</strong> <strong>BIG</strong>-<strong>IP</strong> system can use <strong>the</strong> following table to manually configure <strong>the</strong> <strong>BIG</strong>-<strong>IP</strong> system.The following table contains a list of <strong>BIG</strong>-<strong>IP</strong> LTM configuration objects along <strong>with</strong> any non-default settings you should configure asa part of this deployment. Unless o<strong>the</strong>rwise specified, settings not mentioned in <strong>the</strong> table can be configured as applicable for yourconfiguration. For specific instructions on configuring individual objects, see <strong>the</strong> online help or product manuals.<strong>BIG</strong>-<strong>IP</strong> LTM ObjectHealth Monitor(Main tab-->Local Traffic-->Monitors)Pool (Main tab-->LocalTraffic -->Pools)Profiles(Main tab-->Local Traffic-->Profiles)NameTypeIntervalTimeoutNameHealth MonitorSlow Ramp Time 1 300Load Balancing MethodAddressService PortHTTP(Profiles-->Services)TCP WAN(Profiles-->Protocol)TCP LAN(Profiles-->Protocol)Persistence(Profiles-->Persistence)OneConnect(Profiles-->O<strong>the</strong>r)Client SSL 2(Profiles-->SSL)Web Acceleration(Profiles-->Services)Type a unique nameNon-default settings/NotesHTTP (see Appendix B: Configuring WMI monitoring for <strong>IIS</strong> Servers (optional) on page13 for an alternate monitor.30 (recommended)91 (recommended)Type a unique nameSelect <strong>the</strong> monitor you created aboveChoose a load balancing method. We recommend Least Connections (Member)Type <strong>the</strong> <strong>IP</strong> Address of <strong>the</strong> <strong>IIS</strong> nodes80 (click Add to repeat Address and Service Port for all nodes)NameParent ProfileRewrite Redirect 2Insert X-Forwarded-ForNameParent ProfileNameParent ProfileNamePersistence TypeNameParent ProfileNameParent ProfileCertificate and KeyNameParent ProfileType a unique namehttpMatchingEnabled (see page 11 for adding <strong>the</strong> X-Forwarded-For log field to <strong>IIS</strong>)Type a unique nametcp-wan-optimizedType a unique nametcp-lan-optimizedType a unique nameCookieType a unique nameoneconnectType a unique nameclientsslSelect <strong>the</strong> Certificate and Key you imported from <strong>the</strong> associated listType a unique nameoptimized-cachingHTTP Compression(Profiles-->Services)NameParent ProfileContent List-->Include List(Add each entry to <strong>the</strong>Content Type box and<strong>the</strong>n click Include)1You must select Advanced from <strong>the</strong> Configuration list for <strong>the</strong>se options to appear2Only required if offloading SSL 16on <strong>the</strong> <strong>BIG</strong>-<strong>IP</strong> LTMType a unique namewan-optimized-compressionapplication/vnd.ms-publisherapplication/(xls|excel|msexcel|ms-excel|x-excel|x-xls|xmsexcel|x-ms-excel|vnd.excel|vnd.msexcel|vnd.ms-excel)application/(word|doc|msword|winword|ms-word|x-word|x-msword|vnd.word|vnd.msword|vnd.ms-word)application/(xml|x-javascript|javascript|x-ecmascript|ecmascript)application/(powerpoint|mspowerpoint|ms-powerpoint|x-powerpoint|xmspowerpoint|vnd.powerpoint|vnd.mspowerpoint|vnd.ms-powerpoint|vnd.ms-pps)application/(mpp|msproject|x-msproject|x-ms-project|vnd.ms-project)application/(visio|x-visio|vnd.visio|vsd|x-vsd|x-vsd)application/(pdf|x-pdf|acrobat|vnd.pdf)
DEPLOYMENT GUIDE<strong>Microsoft</strong> <strong>IIS</strong>Configuration table, continued<strong>BIG</strong>-<strong>IP</strong> LTM ObjectVirtual Servers(Main tab-->Local Traffic-->Virtual Servers)HTTPNameAddressService Port 80Protocol Profile (client) 1,2Protocol Profile (server) 1,2HTTP Profile 2Web Acceleration profile 2HTTP Compression profile 2OneConnect 2Non-default settings/NotesType a unique name.Type <strong>the</strong> <strong>IP</strong> Address for <strong>the</strong> virtual serverSelect <strong>the</strong> WAN optimized TCP profile you created aboveSelect <strong>the</strong> LAN optimized TCP profile you created aboveSelect <strong>the</strong> HTTP profile you created aboveSelect <strong>the</strong> Web Acceleration profile you created aboveSelect <strong>the</strong> HTTP Compression profile you created aboveSelect <strong>the</strong> OneConnect profile you created aboveSNAT Pool 3 Automap (optional; see footnote 3 )Default Pool 2Persistence Profile 2iRule 4HTTPS 5NameAddressService Port 443Protocol Profile (client) 1Protocol Profile (server) 1HTTP ProfileWeb Acceleration profileHTTP Compression profileOneConnectSSL Profile (client)Select <strong>the</strong> pool you created aboveSelect <strong>the</strong> Persistence profile you createdIf offloading SSL only: Enable <strong>the</strong> built-in_sys_https_redirect iruleType a unique name.Type <strong>the</strong> <strong>IP</strong> Address for <strong>the</strong> virtual serverSelect <strong>the</strong> WAN optimized TCP profile you created aboveSelect <strong>the</strong> LAN optimized TCP profile you created aboveSelect <strong>the</strong> HTTP profile you created aboveSelect <strong>the</strong> Web Acceleration profile you created aboveSelect <strong>the</strong> HTTP Compression profile you created aboveSelect <strong>the</strong> OneConnect profile you created aboveSelect <strong>the</strong> Client SSL profile you created aboveSNAT Pool 2 Automap (optional; see footnote 3 )Default PoolPersistence ProfileSelect <strong>the</strong> pool you created aboveSelect <strong>the</strong> Persistence profile you created1You must select Advanced from <strong>the</strong> Configuration list for <strong>the</strong>se options to appear2Do not enable <strong>the</strong>se objects on <strong>the</strong> HTTP virtual server if offloading SSL. The HTTP virtual server is only used for redirectingusers to <strong>the</strong> HTTPS virtual server, and only requires a name, <strong>IP</strong> address, Port, and <strong>the</strong> redirect iRule.3If want to use SNAT, and you have a large <strong>IIS</strong> deployment expecting more than 64,000 simultaneousconnections, you must configure a SNAT Pool <strong>with</strong> an <strong>IP</strong> address for each 64,000 simultaneous connections you expect. See<strong>the</strong> <strong>BIG</strong>-<strong>IP</strong> documentation on configuring SNAT Pools.4Only enable this iRule if offloading SSL5Only create this virtual server if offloading SSL17
18DEPLOYMENT GUIDE<strong>Microsoft</strong> <strong>IIS</strong>Document Revision HistoryVersion Description Date1.0 New Version 08/24/20111.1- Added support for <strong>Microsoft</strong> <strong>IIS</strong> 8.0- Added <strong>the</strong> procedure Modifying <strong>the</strong> <strong>IIS</strong> au<strong>the</strong>ntication token timeout value onpage 8.- Added <strong>IIS</strong> 8 specific configuration to Appendix A for deploying <strong>the</strong> CustomLogging role service.- Added Appendix A: Using X-Forwarded-For to log <strong>the</strong> client <strong>IP</strong> address in <strong>IIS</strong>7.0, 7.5, and 8 (optional) on page 11- Added Appendix B: Configuring WMI monitoring for <strong>IIS</strong> Servers (optional) onpage 13.06/08/2012<strong>F5</strong> <strong>Networks</strong>, Inc. 401 Elliott Avenue West, Seattle, WA 98119 888-882-4447 www.f5.com<strong>F5</strong> <strong>Networks</strong>, Inc.Corporate Headquarters<strong>F5</strong> <strong>Networks</strong>Asia-Pacific<strong>F5</strong> <strong>Networks</strong> Ltd.Europe/Middle-East/Africa<strong>F5</strong> <strong>Networks</strong>Japan K.K.info@f5.comapacinfo@f5.comemeainfo@f5.comf5j-info@f5.com©2012 <strong>F5</strong> <strong>Networks</strong>, Inc. All rights reserved. <strong>F5</strong>, <strong>F5</strong> <strong>Networks</strong>, <strong>the</strong> <strong>F5</strong> logo, and IT agility. Your way., are trademarks of <strong>F5</strong> <strong>Networks</strong>, Inc. in <strong>the</strong> U.S. and in certain o<strong>the</strong>r countries. O<strong>the</strong>r <strong>F5</strong> trademarks areidentified at f5.com. Any o<strong>the</strong>r products, services, or company names referenced herein may be trademarks of <strong>the</strong>ir respective owners <strong>with</strong> no endorsement or affiliation, express or implied, claimed by <strong>F5</strong>.


