
Create successful ePaper yourself
Turn your PDF publications into a flip-book with our unique Google optimized e-Paper software.
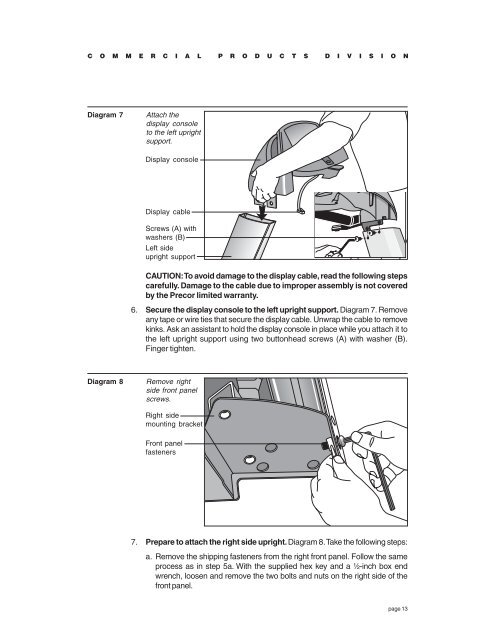
C O M M E R C I A L P R O D U C T S D I V I S I O NDiagram 7Attach thedisplay consoleto the left uprightsupport.Display consoleDisplay cableScrews (A) withwashers (B)Left sideupright supportCAUTION: To avoid damage to the display cable, read the following stepscarefully. Damage to the cable due to improper assembly is not coveredby the <strong>Precor</strong> limited warranty.6. Secure the display console to the left upright support. Diagram 7. Removeany tape or wire ties that secure the display cable. Unwrap the cable to removekinks. Ask an assistant to hold the display console in place while you attach it tothe left upright support using two buttonhead screws (A) with washer (B).Finger tighten.Diagram 8Remove rightside front panelscrews.Right sidemounting bracketFront panelfasteners7. Prepare to attach the right side upright. Diagram 8. Take the following steps:a. Remove the shipping fasteners from the right front panel. Follow the sameprocess as in step 5a. With the supplied hex key and a ¹⁄₂-inch box endwrench, loosen and remove the two bolts and nuts on the right side of thefront panel.page 13