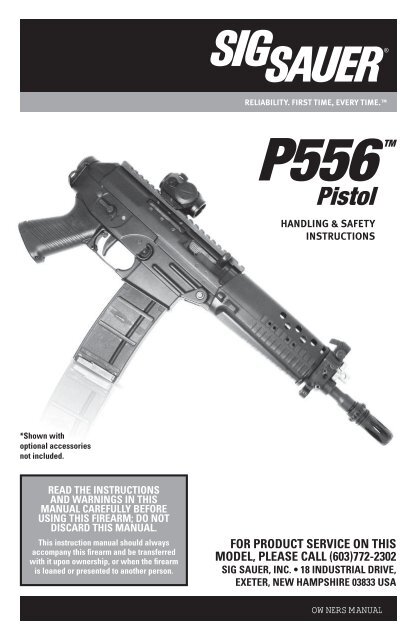
P556 Pistol new - Sig Sauer
P556 Pistol new - Sig Sauer
P556 Pistol new - Sig Sauer
- No tags were found...

Create successful ePaper yourself
Turn your PDF publications into a flip-book with our unique Google optimized e-Paper software.
“IT IS UNLAWFUL TO STORE OR KEEP A FIREARM,PISTOL, SHOTGUN OR MACHINE GUN IN ANY PLACEUNLESS THAT WEAPON IS EQUIPPED WITH A TAMPERRESISTANT SAFETY DEVICE OR IS STORED OR KEPT INA SECURELY LOCKED CONTAINER.”NEW JERSEY:“IT IS A CRIMINAL OFFENSE TO LEAVE A LOADEDFIREARM WITHIN EASY ACCESS OF A MINOR.”NEW YORK CITY, NY:“THE USE OF A LOCKING DEVICE OR SAFETY LOCK ISONLY ONE ASPECT OF RESPONSIBLE FIREARMSSTORAGE. FOR INCREASED SAFETY, FIREARMSSHOULD BE STORED UNLOADED AND LOCKED IN ALOCATION THAT IS BOTH SEPARATE FROM THEIRAMMUNITION AND INACCESSIBLE TO CHILDREN ANDOTHER UNAUTHORIZED PERSONS.”NORTH CAROLINA:“IT IS UNLAWFUL TO STORE OR LEAVE A FIREARMTHAT CAN BE DISCHARGED IN A MANNER THAT AREASONABLE PERSON SHOULD KNOW IS ACCESSIBLETO A MINOR.”TEXAS:“IT IS UNLAWFUL TO STORE, TRANSPORT, ORABANDON AN UNSECURED FIREARM IN A PLACEWHERE CHILDREN ARE LIKELY TO BE AND CANOBTAIN ACCESS TO THE FIREARM.”<strong>P556</strong> <strong>Pistol</strong> Operators Manual 4 1511582 VER 08.01.08
4.1.1. Unlocking Of Bolt, Extraction, & Ejection4.1.2. Bolt AdvanceTo Unload Magazine and <strong>Pistol</strong>5.0. UnloadingTo Extract and Eject a Chambered Cartridge .To Clear a Malfunction (“Jam”)6.0. Procedures In Case Of MalfunctionTo Minimize Malfunctions (“Jams”)To Disassemble7.0. Field Strip DisassemblyTo Reassemble7.1. Reassembly7.2. Function CheckMagazine Inspection and CareCare and CleaningTransportation & Storage<strong>Sig</strong>hts8.0. <strong>Sig</strong>ht OptionsMaintenance9.0. Maintenance9.1. CleaningService and Parts PolicyShipping Firearms for RepairOrdering Parts10.0. Parts List10.1. Parts DiagramThe Basic Rules of Safe Firearms HandlingWarranty Information31323636373838404040444447484949505051515152545556575859<strong>P556</strong> <strong>Pistol</strong> Operators Manual 7 1511582 VER 08.01.08
WARNINGS OF GREAT IMPORTANCE ARE FOUNDON THE FOLLOWING PAGES:Locking Devices 5 Handling 26Alterations 8 Firing 35<strong>Sig</strong>hts 16 Handling 35Manual Safety 20 Unloading 37Lead Exposure 25 Storage 50Ammunition 25 Parts Purchasers 53OTHER CAUTIONS AND WARNINGS APPEARTHROUGHOUT THE MANUALFIREARMS ARE DANGEROUS WEAPONS –READ THE INSTRUCTIONS AND WARNINGSIN THIS MANUAL THOROUGHLY AND CAREFULLYBEFORE USING.WARNING - ALTERATIONThis product was designed to function properlyin its original condition. Alterations can make itunsafe. Do not alter any part or add or substituteany parts or accessories not manufactured by SIGSAUER Inc.DO NOT ALTER ANY GUN<strong>P556</strong> <strong>Pistol</strong> Operators Manual 8 1511582 VER 08.01.08
GENERAL SAFETY INFORMATIONAND MECHANICAL CHARACTERISTICS1.0. Safety InformationThe safety warnings in this manual are important. Byunderstanding the dangers inherent in the use of any firearm, andby taking the precautions described herein, you can enjoycomplete safety in the use of your pistol. Failure to heed anyof these warnings may result in serious injury to you or others,as well as severe damage to the firearm or other property. SIGSAUER Inc. shall not be responsible in any mannerwhatsoever for malfunctioning of the firearm, physical injury orproperty damage resulting in whole or in part from:1) criminal or negligent discharge;2) improper or careless handling;3) unauthorized modifications;4) defective, improper, hand-loaded, or reloaded ammunition;5) corrosion;6) neglect; or7) other influences beyond our direct and immediate control.This limitation applies regardless of whether liability is assertedon the basis of contract, negligence, or strict liability (includingany failure to warn). Under no circumstance shall SIG SAUERInc. be liable for incidental or consequential damages, such asloss of use of property, commercial loss, and loss of earningsor profits.1.1. Protect Your Eyes And EarsAlways wear safety glasses and ear plugs or “earmuff” type protectorswhenever you are shooting. Always make certain that personsclose to you are similarly protected. Unprotected eyes maybe injured by powder, gas, carbon residue, lubricant, metallic particles,or similar debris which may emanate occasionally from anyfirearm in normal use. Without ear protection, repeated exposureto shooting noise may lead to cumulative, permanent hearing loss.<strong>P556</strong> <strong>Pistol</strong> Operators Manual 9 1511582 VER 08.01.08
2.0. Mechanical Characteristics & Weapon Theory2.1. Weapon Description2.1.1. GeneralThe <strong>P556</strong> <strong>Pistol</strong> is a semi-automatic, gas operated weapon with arotary bolt mechanism. Semi-automatic means one round will fireeach time the trigger is pulled until the magazine is emptied ofammunition. The pistol is chambered in 5.56mm NATO andis compatible with .223 Remington ammunition.2.1.2. Barrel With Receiver And Gas SystemThe barrel is mechanically mated to the receiver. The flashsuppressor is screwed onto the muzzle end of the barrel whichfeatures a Ω x 28 TPI thread pattern. The gas block, which isfixed on the barrel, contains the gas port, locates the gas system(gas tube and operating rod), accepts the front sight and alsoserves as support for the hand guards. The receiver guides thebolt and bolt carrier, and houses the locking system. An accessorymounting rail is fixed to the upper part of the receiver, providingan attachment point for sighting systems and other accessories.<strong>P556</strong> <strong>Pistol</strong> Operators Manual 10 1511582 VER 08.01.08
2.1.3. BoltThe bolt consists of two main parts:• Bolt Carrier• Bolt Heada. Bolt Carrier: The bolt carrier guides the bolt head, controls thelocking and unlocking by means of the cam, holds the operatingrod, and cocks the hammer.b. Bolt Head: The bolt headlocks the bolt assembly,houses the firing pin andextractor and feeds thecartridges from themagazine to the chamber.2.1.4. Hand GuardsThe hand guards protect thebarrel and the gas system fromdamage. They also provide ergonomic positioning of the handsduring operation as well as protecting the hands from burns.<strong>P556</strong> <strong>Pistol</strong> Operators Manual 11 1511582 VER 08.01.08
2.1.5. Trigger Casing AssemblyThe trigger casing assembly contains the internal components ofthe firing and safety mechanisms, bolt catch, magazine well,magazine catch, trigger, trigger guard and pistol grip.The safety lever, located on both sides of the trigger casing, canbe set to two positions:• Position “S:” The weapon is locked in the safe position.• Position “F:” The weapon will fire in the semi-automatic mode.<strong>P556</strong> <strong>Pistol</strong> Operators Manual 12 1511582 VER 08.01.08
The trigger guard may be released from its normal position tomake the trigger accessible for shooting with gloves. For safetyreasons the trigger guard must not be released until just beforefiring the weapon, and after firing should be immediately returnedto the normal (closed) position.CAUTION: Be careful of accidental discharges when insertinggloved fingers into the trigger guard.2.1.6. Gas Valve PositionThe gas volume required for the function of the <strong>P556</strong> pistol canbe controlled by the gas valve. The gas valve has two positions:a. Position 1 (Rib of gas valve in vertical position).Under normal conditions, the gas valve should remain in Position1. This will give the best all-around performance and function.b. Position 2 (Rib of gas valve in the slanted position).When cycling or ejection problems are encountered due to heavyfouling, the gas valve can be moved to Position 2 by rotatingclockwise as far as the stop. In this position, a larger gas volumeis released against the operating rod. The need to use the gasvalve in Position 2 is an indication that the pistol requirescleaning.<strong>P556</strong> <strong>Pistol</strong> Operators Manual 13 1511582 VER 08.01.08
CAUTION: In the case of a hot or heavily fouled weapon, use acartridge or auxiliary aid to prevent burns to your fingers.CAUTION: Firing with the gas valve in Position 2 is anexception. As soon as normal function returns, the gas valve mustbe returned to Position 1. Continued operation with the gas valve inPosition 2 will increase recoil and place unnecessary stress on thepistol. The pistol should be cleaned as soon as conditions permit.WARNING: Always ensure the pistol is unloaded and clearof ammunition when manipulating the gas valve.2.1.8. Trigger Guard Operation1. The trigger guard opens to accommodate firing the pistol withgloves or mittens.2. To open the trigger guard, depress the spring loaded pin on thefront right and rotate downward.3. When glove access is no longer required, rotate the triggerguard back into place, depressing the spring loaded pin andensure the trigger guard is locked closed.WARNING: Do not manipulate the trigger guard unless thepistol’s safety lever is on “S” (SAFE) and unloaded.<strong>P556</strong> <strong>Pistol</strong> Operators Manual 14 1511582 VER 08.01.08
2.1.9. <strong>Sig</strong>htsThe <strong>P556</strong> pistol features an integrated accessory rail on the upperreceiver for attaching a variety of sighting systems, both opticaland fixed. The accessory rail is compatible with all Picatinnystandard mounting systems. The pistol also features “emergency”flip up blade sights. These sights are designed to provide abackup aiming solution in the event your optics should fail butare certainly capable of be used as the sole sightingsystem for the pistol.Windage (left / right) adjustment:Windage adjustments are made by rotating the front sight screwleft or right. The adjustment screw headis located on the left side of the front sightassembly. Adjustments are made using a4mm allen key, available at any hardwarestore.- Rotate front sight screw right(clockwise) to move impact right.- Rotate front sight screw left (counter-clockwise)to moveimpact left.One full rotation of the front sight screw will move the impact ofthe rounds approximately 1” at 100 yards.<strong>P556</strong> <strong>Pistol</strong> Operators Manual 15 1511582 VER 08.01.08
WARNING - SIGHTSDo not adjust or otherwise manipulateany sight system on the rifle without firstconfirming the magazine is removed, therifle is on “SAFE” and fully unloaded.Failure to heed this warning could resultin unintentional discharge, resulting ininjury or deathUNLOAD RIFLE BEFORE MANIPULATING SIGHTS.Emergency sight deploymentThe pistol’s emergency sights are normally stored in a “stowed”condition to protect them from damage and prevent interferencewith optical sighting systems.To deploy the emergency sights for use, do the following:1. Flip the front sight blade into the “up”position. The front sight blade is retainedin position by spring tension.2. Flip the rear sight blade into the “up”position. The rear sight blade is held inposition by spring tension.3. When the emergency sights are no longerrequired, rotate the front and rear sight blades to theirstowed position.<strong>P556</strong> <strong>Pistol</strong> Operators Manual 16 1511582 VER 08.01.08
2.1.10. MagazineThe pistol ships standard with (1) 30-round magazine. The <strong>P556</strong>is compatible with M16/AR-15 type magazines.2.2. Technical SpecificationsCaliber5.56mm NATO (.223 Remington)Total length21.5 inchesBarrel length10 inchesNumber of grooves 6Rifling 1 in 7Weight (w/out mag) 6.3 lbs (Quad Rail add 0.4 lbs)Specifications are approximate and subject to change without notice.<strong>P556</strong> <strong>Pistol</strong> Operators Manual 18 1511582 VER 08.01.08
OPERATION OF SAFETYThe <strong>P556</strong> has a manual safety which is located on the left andright side of the trigger casing, just forward of the pistol gripand above the trigger. The safety levers may be operated fromeither side.The safety is “on” when the safety lever is in the “S” (SAFE)position and the trigger guard is closed. In this position, the pistolcannot be fired with a normal pull of the trigger.The safety lever should always be in the “S” (SAFE) positionexcept when the shooter is actually firing the pistol. The safetylever should be moved to the “S” (SAFE) position whenever theshooter ceases firing, even temporarily.The safety is “off” when the safety lever is in the “F” (FIRE)position. When the safety lever is in the “F” (FIRE) position thepistol will fire in the semi-automatic mode each time the trigger ispulled until all the ammunition is expended.<strong>P556</strong> <strong>Pistol</strong> Operators Manual 19 1511582 VER 08.01.08
Manual Safety “on”Manual Safety “off”WARNING - MANUAL SAFETYKeep the safety “ON” unless actually firing.Always move the safety to its intendedposition and check it. The safety is not “ON”unless it is completely “ON.” Never dependon a safety mechanism or any other mechanicaldevice to justify careless handling or permittingthe pistol to point in an unsafe direction.The only “safe” pistol is one in whichthe bolt is open, the chamber is empty, andthere is no magazine in the pistol.KNOW HOW TO USE THE SAFETY<strong>P556</strong> <strong>Pistol</strong> Operators Manual 20 1511582 VER 08.01.08
Bolt Catch LeverThe <strong>P556</strong> pistol is equipped with a bolt catch lever. Thepurpose of the bolt catch lever is two-fold. The bolt catch may bemanually engaged with the bolt pulled to the rear (open position).This action locks the bolt open, allowing an unobstructed viewof the chamber area. During firing, with a magazine inserted, thebolt catch will lock the bolt open after the last round in themagazine has been expended, giving a visual indication themagazine is empty and allowing the shooter to visually check thatthe chamber is clear. The bolt is engaged by the bolt catch leverwhen the bolt catch lever is pushed upward by the magazinefollower during the cycle of operation. The bolt can be manuallyreleased (closed) by either depressing the bolt catch lever or bypulling rearward on the charging handle and releasing.CAUTION: Dropping or jarring the pistol with the bolt lockedopen can cause the bolt catch lever to disengage. If a magazine,loaded with ammunition, is inserted in the pistol when thisoccurs, a round will chamber with the potential for anunintentional discharge. ALWAYS handle the pistol as if loadedwhenever a magazine is inserted in the pistol. ALWAYS placethe safety lever in the “S” (SAFE) position and unload the pistolwhenever shooting is complete.<strong>P556</strong> <strong>Pistol</strong> Operators Manual 21 1511582 VER 08.01.08
AMMUNITION1. Use only high quality, original, factory-manufacturedammunition. Do not use cartridges that are dirty, wet, corroded,bent, or damaged. Do not oil cartridges. Do not spray aerosoltypelubricants, preservative, or cleaners directly onto cartridgesor where excess spray may flow into contact with cartridges.Lubricant or other foreign matter on cartridges can causepotentially dangerous ammunition malfunctions. Use onlyammunition of the caliber for which your firearm is chambered.The proper caliber is permanently engraved on your firearm;never attempt to use ammunition of any other caliber.2. The use of reloaded, “remanufactured” hand-loaded, or othernon-standard ammunition voids all warranties. Reloading is ascience and improperly loaded ammunition can be extremelydangerous. Severe damage to the firearm and serious injury to theshooter or to others may result. Always use ammunition thatcomplies with the industry performance standards established bythe Sporting Arms and Ammunition Manufacturers’ Institute, Inc.of the United States (SAAMI) or ammunition manufactured tomilitary specifications.AMMUNITION (CARTRIDGE) NOTICESIG SAUER Inc. SPECIFICALLY DISCLAIMSRESPONSIBILITY FOR ANY DAMAGE OR INJURYWHATSOEVER OCCURRING IN CONNECTION WITH,OR AS A RESULT OF, THE USE IN ANY SIG SAUERFIREARM OF FAULTY, NON-STANDARD,“REMANUFACTURED” HAND LOADED (RELOADED)AMMUNITION, OR CARTRIDGES OTHER THAN THOSEFOR WHICH THE FIREARM WAS ORIGINALLYCHAMBERED.<strong>P556</strong> <strong>Pistol</strong> Operators Manual 22 1511582 VER 08.01.08
3. Firearms may be severely damaged and serious injury to theshooter or to others may result from any condition causingexcessive pressure inside the chamber or barrel during firing.Excessive pressure can be caused by obstructions in the barrel,propellant powder overloads, the use of incorrect cartridges ordefectively assembled cartridges. In addition, the use of a dirty,corroded, or damaged cartridge can lead to a burst cartridge caseand consequent damage to the firearm and personal injury fromthe sudden escape of high-pressure propellant gas within the firearm’smechanism.4. Immediately stop shooting and check the barrel for a possibleobstruction whenever:• You have difficulty in, or feel unusual resistance in,chambering a cartridge;• A cartridge misfires (does not go off);• The mechanism fails to extract a fired cartridge case;• Unburned grains of propellant powder are discoveredspilled in the mechanism;• A shot sounds weak or abnormal. In such cases it ispossible that a bullet is lodged part way down the barrel.Firing a subsequent bullet into the obstructed barrel canwreck the firearm and cause serious injury to the shooteror to bystanders.5. Bullets can become lodged in the barrel:• If the cartridge has been improperly loaded without propellant powder, or if the powder fails to ignite (ignition ofthe cartridge primer alone will push the bullet out of thecartridge case, but usually does not generate sufficientenergy to expel the bullet completely from the barrel);• If the bullet is not properly seated in the cartridge case. Whensuch a cartridge is extracted from the chamber without beingfired, the bullet may be left behind in the bore at the point wherethe rifling begins. Subsequent chambering of another cartridgemay push the first bullet further into the bore.<strong>P556</strong> <strong>Pistol</strong> Operators Manual 23 1511582 VER 08.01.08
6. If there is any reason to suspect that a bullet is obstructing thebarrel, immediately unload the firearm and look through the bore.It is not sufficient to merely look in the chamber. A bullet maybe lodged some distance down the barrel where it cannot easilybe seen.IF A BULLET IS IN THE BORE, DO NOT ATTEMPT TOSHOOT IT OUT BY USING ANOTHER CARTRIDGE ORBY BLOWING IT OUT WITH A BLANK OR ONE FROMWHICH THE BULLET HAS BEEN REMOVED. SUCHTECHNIQUES CAN GENERATE EXCESSIVE PRESSURE,WRECK THE FIREARM, AND CAUSE SERIOUSPERSONAL INJURY.If the bullet can be removed with a cleaning rod, clean anyunburned powder grains from the bore, chamber, and mechanismbefore resuming shooting. If the bullet cannot be dislodged bytapping it with a cleaning rod, take the firearm to a gunsmith.7. Dirt, corrosion, or other foreign matter on a cartridge canimpede complete chambering and may cause the cartridge case toburst upon firing. The same is true of cartridges which aredamaged or deformed.8. Do not oil cartridges, and be sure to wipe the chamber clean ofany oil or preservative before commencing to shoot. Oil interfereswith the friction between cartridge case and chamber wall that isnecessary for safe functioning, and subjects the firearm to stresssimilar to that imposed by excessive pressure.9. Use lubricants sparingly on the moving parts of your firearm.Avoid excessive spraying of any aerosol gun care product, especiallywhere it may get on ammunition. All lubricants and aerosolspray lubricants in particular can penetrate cartridge primersand cause misfires. Some highly penetrative lubricants can alsomigrate inside cartridge cases and cause deterioration of thepropellant powder; on firing, the powder may not ignite. If only<strong>P556</strong> <strong>Pistol</strong> Operators Manual 24 1511582 VER 08.01.08
the primer ignites, there is danger that the bullet may becomelodged in the barrel.WARNING - AMMUNITIONDeath, serious injury, and damage canresult from the use of wrong ammunition,bore obstructions, powder overloads,or incorrect cartridge components.Always wear shooting glasses andhearing protectors.IMPROPER AMMUNITION DESTROYS GUNSWARNING - LEAD EXPOSUREDischarging firearms in poorly ventilatedareas, cleaning firearms, or handlingammunition may result in exposure to leadand other substances known to the state ofCalifornia to cause birth defects, reproductiveharm, and other serious physical injury.Maintain adequate ventilation at all times.Wash hands thoroughly after exposure.SHOOTING OR CLEANING GUNSMAY EXPOSE YOU TO LEAD<strong>P556</strong> <strong>Pistol</strong> Operators Manual 25 1511582 VER 08.01.08
TO LOAD AND FIRE (WITH MAGAZINE)3.0. Handling3.1. Important Instructions• Before manipulating the weapon, ensure the safety lever isin the “S” (SAFE) position and the trigger guard is in theclosed position.• Use only factory-<strong>new</strong> ammunition which corresponds tothe caliber of the weapon.• During all manipulations of the pistol, point the weapon ina safe direction.• Do not place your finger on the trigger until the target hasbeen verified and you intend to shoot.• Do not load the weapon until immediately before use.• Unload weapon immediately after shooting is finished.• Remove the bolt carrier assembly and magazine from theweapon prior to transportation.WARNING - HANDLINGNever carry the pistol loaded with thesafety lever in the “F” (FIRE) position.If dropped or struck with the safetyoff (“F”), the pistol may fire. Such adischarge can occur with or without thetrigger being directly struck or touched.Never rest a loaded pistol against anyobject (wall, tree, fence, vehicle, etc.)because there is always the possibilitythat the pistol will be jarred or slidefrom its position and fall with sufficient force to discharge.Keep the safety lever on “S” (SAFE) unless actually firing.ANY GUN MAY FIRE IF DROPPED<strong>P556</strong> <strong>Pistol</strong> Operators Manual 26 1511582 VER 08.01.08
3.2. Loading The <strong>Pistol</strong>1. Ensure the safety lever is in the “S” (SAFE) position;2. Insert the magazine and check that it is properly seated;3. Bolt forward: Pull the charginghandle back fully and release; or4. Bolt locked open: Depress boltcatch fully to release bolt.WARNINGDO NOT LOAD A PISTOL WITH A HOT CHAMBERBECAUSE A ROUND MAY “COOK” OFF (i.e., a round maydetonate (fire) unexpectedly just because it is exposed to theheat of the pistol’s chamber).3.3. Loading The Magazine1. Ensure the magazine is the proper type and caliber;2. Hold the magazine vertically;3. Place a round between the feed lips and press down - ensurethe bullet is facing the front of the magazine; and4. Place the next round on top of the previous round and repeatuntil the desired number of rounds are loaded.<strong>P556</strong> <strong>Pistol</strong> Operators Manual 27 1511582 VER 08.01.08
3.4. Changing The Magazine1. Ensure the safety lever is in the “S” (SAFE) position;2. Remove the magazine by depressing the magazine catch;3. Insert loaded magazine and check that it is properly seated.3.5. Reloading (<strong>Pistol</strong> Empty, Bolt Locked Open)1. Ensure the safety lever is in the “S” (SAFE) position;2. Remove the empty magazine by depressing the magazinecatch;3. Insert a loaded magazine and check that it is properly seated;4. Release the bolt:a. Depress the bolt catch fully; orb. Pull the charging handle back slightly and release.Always make sure the muzzle is pointed in a safe direction!Never attempt to load or unload any firearm inside a vehicle,<strong>P556</strong> <strong>Pistol</strong> Operators Manual 28 1511582 VER 08.01.08
uilding, or other confined space (except a properly constructedshooting range). Enclosed areas frequently offer no completelysafe direction to point the firearm; if an accidental dischargeoccurs, there is great risk of bodily injury or property damage.Before loading, always clean all grease and oil from the bore andchamber, and check to be certain that no obstruction is in thebarrel. Any foreign matter in the barrel could result in a bulged orburst barrel or other damage to the firearm, and could causeserious injury to the shooter or to others.4.0. Ready To FireWhen the pistol is in a “ready to fire” condition the bolt is closedand locked.• The recoil spring (2) holds the bolt carrier in the fullforward position, via the operating rod (1);• The bolt head (5) is rotated by the control cam (3) of thebolt carrier (4) so that its locking lugs (8) engage in thecorresponding recesses of the monoblock (9);• The hammer (7) is cocked.<strong>P556</strong> <strong>Pistol</strong> Operators Manual 29 1511582 VER 08.01.08
WARNING: DO NOT TOUCH THE TRIGGER UNTILYOU ARE ACTUALLY READY TO FIRE THE PISTOL4.1. Firing• By depressing the trigger (11) the hammer (7) is released.• The hammer, under tension from the main spring (12),strikes the firing pin (10) which impacts the cartridge primer (P).Caution: Immediately following the firing of a shot, if asubsequent shot is not fired at once, put the safety lever in the “S”(SAFE) position and point the pistol in a safe direction. Thesafety should be moved to the “S” (SAFE) position as soon asfiring is completed, and it should be “on” at all times except whenthe pistol is targeted and being fired.<strong>P556</strong> <strong>Pistol</strong> Operators Manual 30 1511582 VER 08.01.08
4.1.1. Unlocking of Bolt; Extraction & Ejection• The gas pressure, generated by the burning powder, drivesthe bullet up the barrel (13).• As soon as the projectile passes the gas port (15),propellant gas flows through the adjustable gas valve (14).• The gas pressure acts on the operating rod (1) whichpushes the bolt carrier (4) to the rear.<strong>P556</strong> <strong>Pistol</strong> Operators Manual 31 1511582 VER 08.01.08
• During the rearward motion of the bolt carrier (4), the bolthead (5) is rotated by the control cam (3) so that the locking lugs(8) are disengaged. The bolt is now unlocked.• The bolt assembly moves rearward along the receiver rails(16) as far as the stop (17) with the following taking place:• the recoil spring (2) is compressed;• the hammer (7) is cocked;• the extractor (18) extracts the case from thechamber; and• the ejector (19) ejects the case through the port inthe receiver (16).4.1.2. Bolt Advance• The force of the compressed recoil spring (2) pulls thebolt forward.• The bolt head (5) feeds the next round from the magazine(20) into the chamber.<strong>P556</strong> <strong>Pistol</strong> Operators Manual 32 1511582 VER 08.01.08
• In the final stage of the advance, the bolt head (5) lockinglugs, via the cam, rotate and lock within the monoblock.• The weapon is ready to be fired.Keep the muzzle pointed in a safe direction and your finger awayfrom the trigger when cocking any firearm.Never carry or leave unattended any firearm which is cocked andready to fire! When cocked, it could fire from slight pressure onthe trigger. An accidental discharge could easily result if you fallor drop the firearm, or if the firearm is struck or disturbed bysomeone or something.Never fire any firearm with your finger, hand, face, or other partof your body over or adjacent to the ejection port, or in anyposition where you may be struck by reciprocating movementof the breech. Both the ejection of empty cartridge cases and themovement of the breech are part of the normal operating cycle offirearms, and pose no safety hazard to the shooter if the firearm isheld in a normal grip and fired at arm’s length.<strong>P556</strong> <strong>Pistol</strong> Operators Manual 33 1511582 VER 08.01.08
Never allow other persons to stand beside you where they mightbe struck by an ejected cartridge case. The case is hot, and maybe ejected with sufficient force to cause a burn, cut or injury toan unprotected eye. Make certain there is a clear, unobstructedpath for safe ejection of the fired case. Remember, the case maybounce off a hard object nearby and strike you or someone else.If, while shooting, your firearm develops a mechanicalmalfunction or binding, or “spits” powder/gas, or if a cartridgeprimer is punctured or a cartridge case is bulged or ruptured, or ifthe report on firing does not sound quite right, STOP SHOOTINGIMMEDIATELY! It may be dangerous to continue. UNLOADTHE FIREARM — do NOT try “one more shot”. Take the firearmand the ammunition to a gunsmith for examination.While shooting any firearm, an unfired cartridge or fired cartridgecase may occasionally become jammed between the bolt and thebarrel. Clear the jam as follows, WHILE KEEPING THEMUZZLE POINTED IN A SAFE DIRECTION: Remove themagazine, then pull back the bolt by way of the charging handleand lock it to the rear by pushing up the slide catch. The jammedcartridge or case now can be removed by shaking it out or pickingit out.<strong>P556</strong> <strong>Pistol</strong> Operators Manual 34 1511582 VER 08.01.08
WARNING - FIRINGThe bolt automatically opens and shutsquickly while firing. Keep face and handsaway from it. Hot brass and powder gas isejected quickly and can burn you. Alwayswear shooting glasses and hearingprotectors.BOLT OPENS FAST – HOT BRASS EJECTEDWARNING - HANDLINGIf dropped or struck with the safety “off,” thepistol may fire. Keep chamber empty unlessactually firing! Keep safety in the “S” (SAFE)position unless actually firing!ANY GUN MAY FIRE IF DROPPED<strong>P556</strong> <strong>Pistol</strong> Operators Manual 35 1511582 VER 08.01.08
TO UNLOAD MAGAZINE AND PISTOL5.0. Unloading1. Ensure the safety lever is in the “S” (SAFE) position.2. Ensure bolt is locked open (chamber visible);3. Remove magazine by depressing the magazine catch; and4. Verify the chamber is empty, both visually and physically.Always make sure the muzzle is pointed in a safe direction!Remember to clear the chamber after the magazine has beenremoved.Never assume that any gun is unloaded until you have personallychecked it, visually and physically!After every shooting practice, make a final check to be certain thefirearm is unloaded before leaving the range.<strong>P556</strong> <strong>Pistol</strong> Operators Manual 36 1511582 VER 08.01.08
WARNING - UNLOADINGRemoving cartridges from the magazinedoes not prevent the pistol from beingfired! When there is a cartridge in thechamber and the safety lever is in the“F” (FIRE) position, the cartridge willdischarge if the trigger is pulled. It isabsolutely essential for the user to knowhow to completely unload the pistol.“Completely” means emptying themagazine and removing a chamberedcartridge. The safety lever shouldalways be in the “S” (SAFE) positionwhen the pistol is being unloaded.THE PISTOL WILL FIRE EVENIF THE MAGAZINE IS EMPTY OR REMOVEDTO EXTRACT AND EJECT A CHAMBERED CARTRIDGEWhen the pistol is fired, the same gas pressure which drives thebullet forward also acts through the cartridge case to push the boltto the rear. That action causes extraction and ejection of the firedcase. But, when the bolt is operated by hand, there can be afailure to extract the cartridge from the chamber, or a failure toeject the cartridge clear of the pistol. These failures usually arethe result of the bolt not being pulled rearward vigorously,coupled with an accumulation of firing residue in the chamber.From the foregoing it is clear that the gun user must:1. Always visually check the chamber after opening the bolt toeject a chambered cartridge. If the bolt is not vigorously retractedwhen being operated by hand, the extracted cartridge can be<strong>P556</strong> <strong>Pistol</strong> Operators Manual 37 1511582 VER 08.01.08
“ejected” into the magazine area instead of outside the pistol.(Remember that the magazine should be removed prior tounloading the chamber.)2. Thoroughly clean the chamber and the extractor as often asnecessary to prevent accumulation of grease and dirt.3. If an empty magazine is in the pistol when the bolt is beinghand retracted to extract a cartridge, the cartridge may drop ontop of the magazine. Then, when the bolt goes forward, thecartridge will be chambered again! Always remove the magazinebefore clearing the chamber, and visually ensure that nocartridges remain in the pistol.TO CLEAR A MALFUNCTION (“JAM”)6.0. Procedures In Case Of MalfunctionShould the pistol fail to fire, perform the following actions:• Cycle the bolt; and• Continue firing.If the pistol does not fire after cycling the bolt:• Insert a fresh magazine;• Cycle the bolt; and• Continue firing.If the pistol still does not fire:• Put safety lever in the “S” (SAFE) position;• Remove magazine;• Lock the bolt to the rear;• Ensure the chamber is clear of all ammunition and foreignmatter (visual & physical check);• Turn gas valve on Position 2 when weapon is heavily fouled;• Insert fresh magazine;• Release bolt; and• Place safety lever in the “F” (FIRE) position, continue firing.<strong>P556</strong> <strong>Pistol</strong> Operators Manual 38 1511582 VER 08.01.08
If the pistol still will not fire:• Put safety lever in the “S” (SAFE) position;• Unload per section 5.0;• Clean weapon per section 9.1;• Load; and• Place safety lever on position “F” (FIRE), and continue firing.If the pistol malfunction cannot be corrected, the pistol should bereturned to SIG SAUER Inc. for evaluation by a factory trainedtechnician.In the case of a malfunction, the following steps must befollowed:• If the weapon cannot be unloaded immediately and thereis any danger of self-ignition due to a hot barrel, wait atleast 15 minutes before manipulating the weapon.• The weapon must remain pointed in a safe direction aslong as it is loaded.WARNING: If your pistol stops firing with a live round in thechamber of a hot barrel (a misfire or jam), remove the roundimmediately. If you cannot remove the round within 10seconds, remove the magazine and wait at least 15 minuteswith the pistol pointing in a safe direction. This way, neitherthe user nor any other person would be injured by thepossibility of a round “cooking-off” (a round detonating dueto the heat of the barrel). Keep your face away from theejection port while clearing a hot chamber.WARNING: A cartridge fires when the firing pin impacts theprimer, and also can be “discharged” before it is chamberedif its primer receives a sharp blow. If a cartridge hangs up,jams, or binds when being chambered or when fed from themagazine into the chamber, do not attempt force it into thechamber by pushing or striking the charging handle. Any jamor feeding problem is a signal to immediately stop using thepistol until the issue can be determined. Most failures of a<strong>P556</strong> <strong>Pistol</strong> Operators Manual 39 1511582 VER 08.01.08
cartridge to feed or to chamber are caused by a damagedmagazine, improper handling, or defective ammunition.Cartridge jams can result in the potentially dangeroussituation of a cartridge discharging before it is chambered. Ifthis occurs, the cartridge case will rupture and its fragmentswill fly out of the pistol with sufficient force to cause injury.Always wear shooting glasses and hearing protectors, andkeep your face away from the chamber!TO MINIMIZE MALFUNCTIONS (“JAMS”)Malfunctions can largely be avoided by cleaning the pistol persection 9.1:• After each firing session;• When performance requires switching the gas valve toposition 2;• Whenever a buildup of firing residue is suspected; or• Whenever the pistol is exposed to extreme environmentalconditions (rain, snow, freezing temperatures, etc.).TO DISASSEMBLE7.0. Field Strip Disassembly1. Unload pistol (see section 5.0) – visually and physically checkto ensure the pistol is clear of all ammunition;2. Ensure the bolt is forward;3. Retract the takedown pin (rear pin) – this pin is captured anddoes not fully remove;<strong>P556</strong> <strong>Pistol</strong> Operators Manual 40 1511582 VER 08.01.08
4. Remove the pivot pin (forwardpin): unscrew the pivot pin screw(left side) and remove the pivotpin from the trigger casing;5. Separate the trigger casing from the receiver;6. Depress the charging handlecatch and remove the charginghandle;7. Using the charging handle,push the bolt carrier assemblyto the rear and remove it fromthe receiver;8. Rotate the bolt head counterclockwiseuntil thelug clears the cam andpull to remove it fromthe bolt carrier;9. Pull lowerhand guard to therear and downand remove;<strong>P556</strong> <strong>Pistol</strong> Operators Manual 41 1511582 VER 08.01.08
10. Lift upper hand guard at the rear and pull away from gasblock;11. Depress the stop pin andhold. Rotate the gas valve tothe left and pull forward toremove;12. Push the operatingrod assembly forward andremove from the gas tube;13. Depress the stop pinand rotate the gas tube to theleft ninety degrees (90°) untilthe gas tube notch faces the barrel;14. Remove the gas tube from the gas block;15. Remove the firing pin:a. Depress the firing pin by pressing the rear of the bolt headagainst a flat surface until flush and hold;<strong>P556</strong> <strong>Pistol</strong> Operators Manual 42 1511582 VER 08.01.08
. Remove the firing pin studusing an aid (small punch, nail,or pencil) and SLOWLY raisethe bolt head until tension isreleased on the firing pin spring;andc. Remove firing pin and firingpin spring from the bolt head.CAUTION: The firing pin is under spring tension when installedin the bolt head. Use caution during removal to prevent injury toyourself and others. The use of eye protection is recommended.<strong>P556</strong> <strong>Pistol</strong> Operators Manual 43 1511582 VER 08.01.08
TO REASSEMBLE7.1. ReassemblyThe pistol should always be reassembled in the reverse order ofdisassembly:1. Install the firing pin:a. Insert the firing pin and firing spring spring into the bolt head.The spring should be at the rear. Ensure that the notch on the firingpin is aligned with the firing pin stud.b. With one hand, place the bolt head (firing pin at the bottom)on a flat surface and depress the firing pin until the notch in thefiring pin is aligned with the hole in the bolt shaft for the firingpin stud.c. With the other hand, insert the firing pin stud and releasetension on the firing pin. Ensure the firing pin stud is centered.2. Install the gas tube:a. Slide the gas tube (notch down) through the gas block andinsert into the gas tube opening in the receiver.b. Press the gas tube against the gas block (compressing the stoppin) and rotate the gas tube to the right beyond ninety degrees(90°) until the stop pin locks into the gas tube notch.3. Install the operating rod assembly:a. Insert the operating rod assembly into the gas tube. Ensurethe end with the charging handle notch enters first, notch facingdown.b. Push the operating rod in until fully seated. The operating rodshould move freely through the gas tube.<strong>P556</strong> <strong>Pistol</strong> Operators Manual 44 1511582 VER 08.01.08
4. Install the gas valve:a. Ensure the stop pin recesses on the back of the gas valve tabface the barrel.b. Insert the gas valve into the gas tube (the gas valve will seatover the operating rod).c. Depress the stop pin and rotate the gas valve to the right toPosition 1.d. Release the stop pin. Check to ensure the gas valve indexes inPositions 1 and 2.5. Install the upper hand guard:a. Insert the front into the gas block.b. Push the rear downward until seated.6. Install the lower hand guard:a. Press the hand guard upward against the upper hand guard,ensuring the locking tabs are aligned with each other.b. Press the lower hand guard forward until the front is secured bythe gas block and the pivot pin notch is aligned.7. Assemble the bolt head and bolt carrier:a. Place the bolt carrier in your hand, upside down, cam tothe front.b. With the notch facing up, slide the bolt head shaft fully into thebolt carrier.<strong>P556</strong> <strong>Pistol</strong> Operators Manual 45 1511582 VER 08.01.08
c. Rotate the bolt head to the left until the notch rests in the cam.d. Press forward on the firing pin until the bolt head is fullyforward.8. Install the bolt assembly into the receiver:a. Hold the receiver muzzle down.b. Holding the bolt carrier, align the left lug on the bolt head withthe lug channel in the receiver.c. Ease the bolt assembly forward until the left and right receiverrails are riding in the rail channels on the bolt carrier.d. Release the bolt carrier — it should drop freely into thereceiver until the bolt is fully locked.e. Depress the charging handle catch and insert the charging handleinto the slot on the bolt carrier.f. Release the charging handle catch. Tug on the charginghandle to ensure it is secured by the charging handle catch.g. Verify correct installation by pulling the bolt to the rear — itshould be connected to the operating rod and move under thetension of the recoil spring.9. Connect trigger casing assembly to receiver assembly:a. Mate the receiver and trigger casing together at the fronttakedown pin, ensuring the pivot pin holes overlap.b. Install the pivot pin from the right side and secure the pivotpin screw.c. Rotate the trigger casing until the rear takedown pin holes in<strong>P556</strong> <strong>Pistol</strong> Operators Manual 46 1511582 VER 08.01.08
the trigger casing assembly and receiver are aligned.d. Press the rear takedown pin in fully10. Perform a function check in accordance with Section 7.2.7.2. Function CheckThe function check described below should be performedwhenever the pistol is disassembled and reassembled, orwhenever proper function of the pistol is suspect.1. Unload weapon (see section 5.0) — visually and physicallycheck to ensure the pistol is clear of all ammunition;2. Place the safety lever in the “S” (SAFE) position;3. Pull the bolt fully to the rear and release;4. Pull the trigger — the trigger must remain blocked and thehammer must not release;5. Rotate the safety lever to the “F” (FIRE) position;6. Pull the trigger and hold — the trigger is not blocked and thehammer releases (falls);7. With the trigger held to the rear, pull the bolt fully to the rearand release — the hammer must not release;8. Release the trigger and pull the trigger again — the trigger isnot blocked and the hammer must release (fall);9. Cycle the trigger several times to verify tension and movementof the pressure point spring;<strong>P556</strong> <strong>Pistol</strong> Operators Manual 47 1511582 VER 08.01.08
WARNING: Visually and physically verify the magazine isempty before performing the next step.10. Insert an empty magazine and ensure it is firmly seated;11. Pull the bolt fully to the rear and release — the bolt mustremain locked open;12. Depress the bolt catch — the bolt must fully close;13. Pull the trigger; and14. Place the safety lever in the “S” (SAFE) position.MAGAZINE INSPECTION AND CAREInspect the magazine frequently. The magazine follower mustmove freely and have adequate spring tension so that eachcartridge is quickly raised to the feeding position. The magazinelips should be clean and free of cracks, dents, or nicks, so thatcartridges are held in their proper feeding position.When cleaning is necessary, use a solvent that will not rust themetal components or adversely affect the magazine follower.After the magazine has been soaked in solvent to loosen foreignmatter, be certain to shake it vigorously (with the loading openingaway from you) to remove solvent or residue from within themagazine. Penetrating oils and solvent inside a magazine can“kill” or weaken cartridge primers, which can result in failuresto fire or other possibly dangerous malfunctions, such asleaving a bullet in the bore!After cleaning, always check to be certain that the magazinefollower movement and spring tension are correct, and that nosolvent or debris remain. Improper reassembly of the magazinespring can cause a potentially dangerous malfunction. Ifcleaning does not restore proper tension, or if you experiencea problem with the magazine, do not use it. Get a <strong>new</strong> one.<strong>P556</strong> <strong>Pistol</strong> Operators Manual 48 1511582 VER 08.01.08
DAMAGED, NON-STANDARD, OR IMPROPERLYASSEMBLED MAGAZINES SHOULD NOT BE USED.THEY CAN CAUSE THE PISTOL TO MALFUNCTION.CARE AND CLEANING1. Your pistol is delivered factory packaged and preserved with alight coating of protective grease and oils. Before loading makecertain that all packing grease and oil has been cleaned from thebore and exposed mechanism.2. Before you begin to disassemble your firearm for cleaning,always double-check to make sure it is unloaded!3. After cleaning always check to be sure that no cleaningpatch or other obstruction remains in the bore or chamber!4. For maintenance guidelines, see section 9.0TRANSPORTATION AND STORAGEWhen transporting your firearm to and from shooting activities,keep it unloaded for your safety and for the safety of others.When storing your firearm, keep it separated from ammunition,under lock and key if possible, and out of the reach of childrenand other inexperienced or unauthorized persons.<strong>P556</strong> <strong>Pistol</strong> Operators Manual 49 1511582 VER 08.01.08
WARNING - STORAGENever place or store any firearm insuch a manner that it may be dislodged.Firearms should always be stored securelyand unloaded, away from children andother unauthorized users. Use the lockingdevice originally supplied with thisfirearm for storage. The use of a lockingdevice or safety lock is only one aspectof responsible firearms storage. Forincreased safety, firearms should bestored unloaded and locked in a locationthat is both separate from theirammunition and inaccessible to childrenand any other unauthorized person.STORE SECURELY & UNLOADEDSIGHTS8.0. <strong>Sig</strong>ht Options1. The <strong>P556</strong> pistol is equipped with an accessory mounting railthat allows a wide variety of sighting systems to be utilized.2. Always follow the manufacturer’s instructions when mountinga sighting system.3. ALWAYS ensure the pistol is unloaded and clear ofammunition when installing or removing a sighting system orother accessory.<strong>P556</strong> <strong>Pistol</strong> Operators Manual 50 1511582 VER 08.01.08
MAINTENANCE9.0. MaintenanceAll firearms require periodic maintenance and inspection whichmay reveal a need for adjustment or repair. Have your firearmchecked by a competent gunsmith annually even if it seems to beworking well, since breakage, improper functioning or corrosionof some components may not be apparent from externalexamination. If you notice any mechanical malfunction, DONOT continue to use the firearm. UNLOAD the firearm andtake it to a competent gunsmith immediately for a thoroughexamination. Similarly, if water, sand, or other foreign matterenters the internal mechanism, immediately dismantle the firearmfor a complete and thorough cleaning. Failure to keep your firearmclean and in proper working order can lead to a potentiallydangerous condition and an accident causingserious bodily injury or property damage may result.9.1. CleaningThe <strong>P556</strong> pistol must be cleaned after each shooting session orwhenever performance is suspect. Clean the pistol as follows:1. Unload the weapon per Section 5.0;2. Field strip the weapon per Section 7.0;3. Clean the barrel and chamber from the rear;4. Clean other parts of the pistol, using care to remove carbonand firing residue. Pay particular attention to the operating rod,gas valve, and chamber areas;5. Lightly lubricate areas of metal contact with a high qualityfirearms lubricant or grease, paying particular attention to thebolt/bolt carrier, receiver rails, operating rod, and gas valve;<strong>P556</strong> <strong>Pistol</strong> Operators Manual 51 1511582 VER 08.01.08
6. Apply a light coating of high quality firearms lubricant orgrease to exposed metal surfaces to enhance corrosion protection;7. Reassemble the pistol per section 7.1; and8. Perform a function check in accordance with section 7.2.SERVICE AND PARTS POLICYParts PolicyOur Service Department maintains a full complement ofreplacement parts. Even though most gunsmiths have theknowledge, training, and the ability to make necessary repairs toyour firearm, the skill and workmanship of any particulargunsmith is totally beyond our control.Should your firearm ever require service, we strongly recommendthat you return it to SIG SAUER Inc. (see page 53). A firearm isa precision instrument and some replacement parts will requireindividual fitting to ensure correct operation. A wrong part,improper fitting, or incorrect mechanical adjustment may result inan unsafe condition or dangerous malfunction, damage to the firearm,or cause possible serious injury to the shooter or others.IF ANY PART IS ORDERED WITHOUT RETURNINGTHE FIREARM TO SIG SAUER Inc., the customer bears fullresponsibility for ensuring that the part supplied is correct fortheir particular firearm and is properly installed and fitted by aqualified gunsmith.SIG SAUER Inc. CANNOT BE RESPONSIBLE FORTHE FUNCTIONING OF ANY FIREARM IN WHICHREPLACEMENT PARTS ARE INSTALLED BY OTHERS.<strong>P556</strong> <strong>Pistol</strong> Operators Manual 52 1511582 VER 08.01.08
WARNING - PARTS PURCHASERSIt is the purchaser’s responsibility tobe absolutely certain that any partsordered from the factory are correctlyfitted and installed. Firearms are complicatedmechanisms and IMPROPERFITTING OF PARTS MAY RESULTIN A DANGEROUS MALFUNCTION,DAMAGE TO THE FIREARM, ANDSERIOUS INJURY TO THE SHOOTERAND OTHER PERSONS. The purchaserand installer of parts must accept fullresponsibility for the correct adjustmentand functioning of the rifle after suchinstallation.PARTS MUST FIT CORRECTLYService PolicyIf you have questions concerning the performance or servicing ofyour pistol, please write or call:SIG SAUER Inc.Attention: Customer Service18 Industrial Drive Exeter, NH 03833Phone: (603) 772-2302Fax: (603) 772-9082IF YOU DO NOT UNDERSTAND THE INSTRUCTIONSFOR OPERATING YOUR PISTOL, IT IS YOURRESPONSIBILITY TO CALL OUR CUSTOMER SERVICEDEPARTMENT AT (603) 772-2302 BEFORE USING YOURPISTOL.<strong>P556</strong> <strong>Pistol</strong> Operators Manual 53 1511582 VER 08.01.08
SHIPPING FIREARMS FOR REPAIRReturning Your Firearm For ServiceIn the event you need to return your pistol to the SIG SAUERService Department, here’s what to do:1. The first step is to contact Customer Service at (603) 772-2302for an RMA number. This number allows SIG SAUER to trackthe status of your return from its receipt at SIG SAUER throughits return to you. Please do not send your firearm until youobtain an RMA number.2. Make sure that the chamber and magazine(s) are unloaded andthat no ammunition is included with your returned firearm.3. Package the firearm securely to prevent damage. Enclose aletter which includes your name, street address, daytime phonenumber, model and serial number, and a detailed description ofthe problem you have experienced or the work you wantperformed. With the exception of extra magazines, do not includescopes, mounts, or other accessories.4. Generally, an individual may ship firearms to the manufacturerfor repair or service. Some states and localities, however, prohibitthis. If you live in such an area, the firearms must be shipped byand returned to a Federally Licensed Firearms Dealer.5. Federal law prohibits persons who do not possess a FederalFirearms License from shipping a firearm via the U.S. PostalService. (Note: any shipment of firearms outside U.S. borders issubject to the export laws of the United States and to the validlaws of the specific country, which you must strictly follow; priorto exporting any firearm you should seek legal counsel.)6. SIG SAUER is not responsible for any firearm until it isreceived, nor for damage incurred during shipment.<strong>P556</strong> <strong>Pistol</strong> Operators Manual 54 1511582 VER 08.01.08
7. Ship your firearms insured and prepaid (we do not acceptcollect shipments) to:SIG SAUER Inc.Attention: Service Department18 Industrial Drive Exeter, NH 03833This instruction manual should always accompany this pistoland be transferred with it upon change of ownership.WARNING: BEFORE SHIPPING ANY FIREARM, BEABSOLUTELY CERTAIN THAT THE FIREARM ANDITS MAGAZINE ARE UNLOADED. DO NOT SHIPCARTRIDGES WITH A FIREARM.ORDER PARTSIn the event you want to order parts for your <strong>P556</strong> pistol,contact Customer Service at (603) 772-2302.Have available the serial number of your pistol and the partdiagram number for the part(s) you wish to order. A parts list anddiagram of the pistol is provided in sections 10.0 and 10.1.Please refer to the Service & Parts Policy on pages 52-53.<strong>P556</strong> <strong>Pistol</strong> Operators Manual 55 1511582 VER 08.01.08
10.0. Parts List100 Receiver Group111 Receiver assembly112 Accessory rail114 Bolt cover115 Bolt cover Rivet116 Pin117 <strong>Sig</strong>ht base118 <strong>Sig</strong>ht blade119 Screw200 Barrel & Gas System Group211 Barrel212 Flash suppressor213 Collar214 Gas block215 Roll pin216 Stop pin217 Compression spring218 Roll pin219 Gas valve220 Gas tube221 Operating rod222 Recoil spring223 Spring pin224 Support washer225 <strong>Sig</strong>ht screw226 <strong>Sig</strong>ht nut227 Roll pin228 <strong>Sig</strong>ht blade229 Stop pin230 Spring231 Roll pin232 <strong>Sig</strong>ht base300 Handguard Group311 Upper handguard312 Lower handguard400 Bolt Group411 Bolt head412 Firing pin413 Firing pin stud414 Firing pin spring415 Extractor416 Extractor spring417 Pin418 Bolt carrier419 Charging handle catch420 Charging handle catch pin421 Charging handle catch spring422 Charging handle500 Trigger Assembly Group501 Trigger casing502 Magazine catch503 Magazine catch spring504 Magazine catch button505 <strong>Pistol</strong> grip506 <strong>Pistol</strong> grip bolt507 <strong>Pistol</strong> grip nut508 Pressure point screw509 Stop nut510 Pressure point spring511 Trigger guard512 Trigger guard roll pin513 Hammer514 Hammer pin515 Main spring516 Bolt catch517 Bolt catch spring518 Bolt catch pin519 Safety lever520 Safety shaft521 Locking spring522 Spring pin523 Trigger524 Trigger spring525 Sear (trigger rod)526 Trigger pivot pin527 Trigger bushing528 Sear spring529 Takedown pin530 Pivot pin531 Pivot pin screw700 Magazine Group701 Magazine, 30 rd<strong>P556</strong> <strong>Pistol</strong> Operators Manual 56 1511582 VER 08.01.08
10.1. Parts Diagram<strong>P556</strong> <strong>Pistol</strong> Operators Manual 57 1511582 VER 08.01.08
THE BASIC RULES OF SAFE FIREARMS HANDLING1. ALWAYS treat every gun as if it were loaded.2. ALWAYS be sure the barrel is clear of any obstruction.3. ALWAYS be sure of your backstop, what lies beyond, and thesafety of bystanders before you shoot.4. ALWAYS use clean, dry, original factory-made ammunition ofthe proper type and caliber for your gun.5. ALWAYS wear ear protection and safety glasses whenshooting.6. ALWAYS carry your gun so that you can control the directionof the muzzle if you fall or stumble.7. NEVER shoot at a flat surface or water.8. DO NOT leave an unattended gun loaded. Guns and ammunitionshould be stored separately, locked if possible, beyond thereach of children, careless adults, and unauthorized users.9. NEVER allow your firearm to be used by anyone who has notread and understood this operator’s manual.10. DO NOT point any gun, loaded or unloaded, at any undesiredtarget.11. NEVER fire your pistol near an animal unless it is trained toaccept the noise: an animal’s startled reaction could injure it orcause an accident.12. NEVER drink alcoholic beverages or take drugs before orduring shooting, as your vision and judgment could be seriouslyimpaired, making your gun handling unsafe.<strong>P556</strong> <strong>Pistol</strong> Operators Manual 58 1511582 VER 08.01.08
SIG SAUER ® Limited Lifetime Firearms WarrantySIG SAUER ® warrants that the enclosed firearm was originally manufacturedfree of defects in material, workmanship and mechanical function.For the lifetime of the original purchaser, SIG SAUER agrees to correctany defect in the firearm for the original purchaser by repair, adjustmentor replacement, at SIG SAUER’s option, with the same or comparablequality components (or by replacing the firearms at SIG SAUER’soption); provided, however, that the firearm is returned unloaded andfreight prepaid to SIG SAUER at 18 Industrial Drive, Exeter, NH 03833.This limited warranty is null and void if the firearm has been misused,damaged (by accident or otherwise), fired with handloaded, reloaded orimproper ammunition, fired with an obstruction in the barrel, damagedthrough failure to provide reasonable and necessary maintenance asdescribed in the manual accompanying the firearm, or if unauthorizedrepair or any alteration, including of a cosmetic nature, has been performedon the firearm. This limited warranty does not apply to normalwear and tear of any parts.Subject to the foregoing, this limited warranty confers the right to havethe covered firearm or its parts repaired, adjusted or replaced exclusivelyupon the original purchaser, which right is not transferable to anyother person. No implied warranties of any kind are made herein andthis warranty does not apply to any accessory items attached or appurtenantto the firearm. In no event shall SIG SAUER be liable for anyincidental or consequential damages arising from or in connection withthis limited warranty.NOTES<strong>P556</strong> <strong>Pistol</strong> Operators Manual 59 1511582 VER 08.01.08
®Reliability. First time, every time. TM18 Industrial Drive, Exeter, NH 03833(603) 772-2302 > www.sigsauer.com