Patrolling Organization.pdf - UNC Charlotte Army ROTC
Patrolling Organization.pdf - UNC Charlotte Army ROTC
Patrolling Organization.pdf - UNC Charlotte Army ROTC
- No tags were found...

Create successful ePaper yourself
Turn your PDF publications into a flip-book with our unique Google optimized e-Paper software.
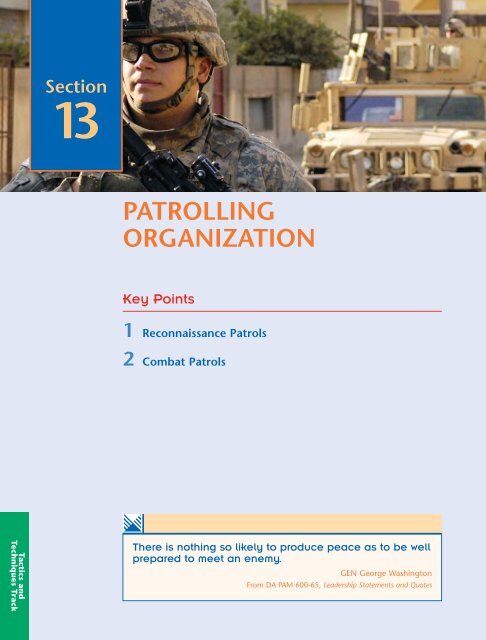
<strong>Patrolling</strong> <strong>Organization</strong> • 435ZONE RECONNAISSANCEAREA RECONNAISSANCEROUTERECONNAISSANCEFigure 13.1Types of Reconnaissance PatrolsReconnaissance PatrolsReconnaissance and combat patrols are broken down into types (Figure 13.1). The fourmost common types of reconnaissance patrols, and the ones we will focus on in this section,are: area, route, zone, and point.Reconnaissance patrols provide timely and accurate information on the enemy andterrain. They confirm the leader’s plan before it is executed. Before the mission begins, thehigher commander must inform the patrol leader of the specific information he or she wantsto receive from the patrol.The intent of a reconnaissance patrol is to move stealthily, avoid enemy contact, andaccomplish its tactical task without engaging in close combat. With one exception (presencepatrols), reconnaissance patrols always try to accomplish their mission without beingdetected or observed. Because detection cannot always be avoided, a reconnaissance patrolcarries the necessary arms and equipment to protect itself and break contact with the enemy.A reconnaissance patrol normally travels light, with as few personnel, arms, ammunition,and equipment as possible. This increases stealth and cross-country mobility in close terrain.Regardless of how the patrol is armed and equipped, the leader always plans for the worstcase: direct-fire contact with a hostile force. Leaders must anticipate where they might beobserved and control the hazard by taking measures to lessen their risk. If detected orunanticipated opportunities arise, reconnaissance patrols must be able to rapidly transitionto combat.
436 • SECTION 13PATROL HQ1PATROL HQ2RECON ELEMENTSECURITY ELEMENTRECON ELEMENT 1 RECON ELEMENT 2RECONTM ARECONTM BSECURITYTM ASECURITYTM BR&STM AR&STM BR&STM AR&STM BPATROL HQ3RECON ELEMENTSECURITY ELEMENTR&STM AR&STM BFigure 13.2<strong>Organization</strong> of Reconnaissance Patrols<strong>Organization</strong> of Reconnaissance PatrolsBesides the elements common to all patrols (see Section 12), reconnaissance patrols havea reconnaissance element and a security element (Figure 13.2). Reconnaissance elementsreconnoiter the objective area once the security elements are in position. Normallyreconnaissance elements consist of two Soldiers (buddy teams) to reduce the possibilityof detection.As the patrol leader, you normally use reconnaissance and security (R&S) elements ina zone reconnaissance. However, R&S elements may be useful in any situation when it’snot practical to separate the responsibilities for reconnaissance and security.Normally the platoon headquarters controls the platoon on a reconnaissance patrolmission. As platoon leader, you become the patrol leader and must consider the requirementsfor reconnaissance and security in assigning tasks to your squads or fire teams. You mayseparate the tasks so that one or more squads conduct the reconnaissance while other squadsor fire teams provide security, or you may assign R&S tasks to each squad or team.
<strong>Patrolling</strong> <strong>Organization</strong> • 437When a fire team conducts a reconnaissance patrol, it operates as a single R&S team.In assigning tasks, you must also consider the size and number of reconnaissance objectives,the need to secure the objective rally point (ORP) and other points, and the time youhave available to conduct the mission.Types of Reconnaissance PatrolsArea Reconnaissance PatrolThe area reconnaissance patrol focuses only on obtaining detailed information about theterrain or enemy activity within a prescribed area. You conduct an area reconnaissance toobtain information about a certain location and the area around it such as road junctions,hills, bridges, or enemy positions. You locate the objective by either grid coordinates or amap overlay. A boundary line encircles the area. In an area reconnaissance, use surveillancepoints, vantage points, or observation posts (OPs) around the objective to observe it andthe surrounding area.Actions at the objective for an area reconnaissance begin with the patrol in the ORP,and end with a distribution of information after a linkup of the patrol’s subordinate units.The critical actions include:• actions from the ORP• execute the observation plan• link up and continue the mission.Actions From the Objective Rally Point (ORP)Your patrol occupies the ORP and conducts associated priorities of work. While the patrolestablishes security and prepares for the mission, you and selected personnel conduct aleader’s reconnaissance. You must accomplish three things during this reconnaissance:1. Pinpoint the objective and establish surveillance2. Identify a release point and follow-on linkup point (if required)3. Confirm the observation plan.Observation Plan for Area ReconnaissanceUpon returning from your reconnaissance, you distribute information and fragmentaryorders (FRAGOs) as required. Once everything is ready, the patrol departs. Your first tasksis to establish security. Once security is in position, the reconnaissance element movesalong the specified routes to the observation posts and vantage points in accordance withthe observation plan.Route Reconnaissance PatrolThe route reconnaissance patrol obtains detailed information about a specified route andany terrain where the enemy could influence movement along that route (Figure 13.3). Aroute reconnaissance can orient on a road, a narrow axis such as an infiltration lane, or ageneral direction of attack. Patrols conducting route reconnaissance operations attemptto view the route from both the friendly and enemy perspective. Infantry platoons requireadded technical expertise for a complete detailed route reconnaissance. However, platoonscan conduct hasty route reconnaissance or area reconnaissance of selected route areas. Aplatoon conducts a hasty route reconnaissance when there is too little time for a detailedroute reconnaissance or when the mission requires less-detailed information. Informationsought in a hasty route reconnaissance is restricted to the type of route (limited or unlimited),obstacle limitations (maximum weight, height, and width), and observed enemy.
438 • SECTION 13Figure 13.3Route Reconnaissance Using FansThe platoon reports conditions likely to affect friendly movement. These conditionsinclude:• enemy presence• terrain information• location and condition of bypasses, fords, and obstacles• choke points• route and bridge conditions.If all or part of the proposed route is a road, treat the road as a danger area. Your platoonmoves parallel to the road, using a covered and concealed route. When required, reconnaissanceand security teams move close to the road to reconnoiter key areas. The platoon plans adifferent route for its return.Zone Reconnaissance PatrolZone reconnaissance patrols involve a directed effort to obtain detailed information on allroutes, obstacles, terrain, and enemy forces within a zone defined by boundaries. Zonereconnaissance techniques include the use of moving elements, stationary teams, or multiplearea reconnaissance actions.Moving Element TechniquesWhen using moving elements, the elements (squads or fire teams) move along multiple routesto cover the whole zone. When the mission requires a unit to saturate an area, the unituses one of the following techniques: the fan, the box, converging routes, or successive sectors.Fan Method. First, you select a series of ORPs throughout the zone to operate from.Establish security at the first ORP. Upon confirming the ORP location, confirmreconnaissance routes out from and back to the ORP. These routes form a fan-shapedpattern around the ORP. The routes must overlap to ensure the entire area isreconnoitered.Once you have confirmed the routes, send out R&S teams along the routes. When allR&S teams have returned to the ORP, collect and disseminate all information to everySoldier before moving on to the next ORP.Each R&S team moves from the ORP along a different fan-shaped route that overlapswith others to ensure reconnaissance of the entire area (Figure 13.4). These routesshould be adjacent to each other. Adjacent routes prevent the patrol from potentiallymaking contact in two different directions. You should maintain a reserve at the ORP.
<strong>Patrolling</strong> <strong>Organization</strong> • 439R&S TEAMSADJACENT ROUTESPLANNED ROUTETO NEXT ORPORPRESERVEFigure 13.4Fan MethodTRAILORPSTREAMORPROADORPTM 1TM 2TM 3Figure 13.5Box MethodBox Method. In this method, you send your R&S teams from the ORP along routesthat form a boxed-in area (Figure 13.5). You send other teams along routes throughthe area within the box. All teams meet at a linkup point at the far side of the box fromthe ORP. Your assistant patrol leader (APL) should travel with one of the R&S teamsand be responsible for executing the linkup.
440 • SECTION 13RENDEZVOUS POINTORPTO FRIENDLY LINESFigure 13.6Converging Routes MethodConverging Routes Method. In this method, you select routes from the ORP throughthe zone to a linkup point at the far side of the zone from the ORP. Each R&S teammoves along a specified route and uses the fan method to reconnoiter the area betweenroutes (Figure 13.6). You designate a time for all teams to link up and delegate yourAPL the task of linking up.Successive Sector Method. This is a continuation of the converging routes method (Figure13.7). You divide the zone into a series of sectors. Your platoon uses the converging routeswithin each sector to reconnoiter to an intermediate linkup point where it collects anddisseminates the information gathered to that point. It then reconnoiters to the next sector.Using this method, select an ORP, a series of reconnaissance routes, and linkup points.The actions from each ORP to each linkup point are the same as in the converging routesmethod. Each linkup point becomes the ORP for the next phase. Upon linkup at a linkuppoint, again confirm or select reconnaissance routes, a linkup time, and the next linkuppoint. Continue this action until you have reconnoitered the entire zone. Once thereconnaissance is completed, the unit returns to friendly lines.
<strong>Patrolling</strong> <strong>Organization</strong> • 441RENDEZVOUS POINTORPORPRENDEZVOUS POINTORPORPFigure 13.7Successive Sector MethodFigure 13.8Zone Reconnaissance Using the Stationary Element TechniqueStationary Element TechniquesUsing the stationary element technique, you position surveillance teams in locations wherethey can collectively observe the entire zone for long-term, continuous informationgathering (Figure 13.8). You must consider sustainment requirements when developingyour Soldiers’ load plan; that is, how much each Soldier will carry.
442 • SECTION 13Figure 13.9Zone Reconnaissance Using Multiple Area ReconnaissanceMultiple Area ReconnaissanceWhen using multiple area reconnaissance, you task each of your subordinate units to conducta series of area reconnaissance actions within the zone. This technique calls for you to taskeach of your squads to conduct a series of area reconnaissance actions along a specifiedroute (Figure 13.9). This task is very similar to the task required of a listening/observationpost (LP/OP).Critical ThinkingeWhy is it essential that you distribute information gathered to every Soldier?Combat Patrolsraida surprise attack againsta position or installationfor a specific purposeother than seizing andholding the terrainIn Section 12, you learned that the three types of combat patrols are raid patrols, ambushpatrols, and security patrols.RaidThe sequence of a patrol’s actions for a raid is similar to those for an ambush. Additionally,the patrol’s assault element may have to conduct a breach of an obstacle. It may haveadditional tasks to perform on the objective (for example, demolition of fixed facilities).Squads do not execute raids independent of larger units.
<strong>Patrolling</strong> <strong>Organization</strong> • 443The characteristics of a raid are:• destroying key systems or facilities (command and control nodes, logistical areas,other high-value areas)• providing or denying critical information• securing hostages or prisoners• confusing the enemy or disrupting his plans• collecting detailed intelligence (significant ISR assets committed)• command and control from the higher HQ to synchronize the operation• creating a window of opportunity for the raiding force.You normally conduct raids in five phases (Figure 13.10):• Approach the objective• Isolate the objective area• Set conditions for the assault element• Assault the objective• Tactical movement away from the objective area.A successful raid includes surprise, overwhelming firepower, violence of action, and plannedwithdrawal. This last factor is what makes a raid different from a deliberate attack—yourpatrol will not remain to defend the objective.234215RALLY POINTFigure 13.10The Five Phases of a Raid
444 • SECTION 13ambusha surprise attack froma concealed positionon a moving ortemporarily halted targetAmbushLike a raid, an ambush need not seize or hold ground. The purpose of an ambush is todestroy or harass enemy forces.The ambush combines the advantages of the defense with the advantages of the offense,allowing a smaller force with limited means the ability to destroy a much larger force.Ambushes are enemy-oriented. You hold terrain only long enough to conduct the ambush;then the force withdraws. Ambushes range from very simple to complex and synchronized;from short duration of minutes to long duration of hours; and from hand-grenade rangeto maximum standoff.Ambushes employ direct fire systems as well as other destructive means, such ascommand-detonated mines and explosives, and indirect fires on the enemy force. The attackmay include an assault to close with and destroy the enemy, or may just be a harassing attackby fire. You may conduct ambushes as independent operations or as part of a larger operation.There are countless ways to develop an ambush. To help in clarifying what you want,develop the ambush based on its purpose, type, time, and formation. The purpose of anambush is either harassment or destruction. A harassing ambush is one in which you attackby fire only (meaning there is no assault element). A destruction ambush includes assaultto close with and destroy the enemy. The two types of ambushes are point ambush andarea ambush. In a point ambush, Soldiers deploy to attack a single kill zone. In an areaambush, Soldiers deploy as two or more related point ambushes. These ambushes at separatesites are related by their purpose (Figure 13.11).POINT AMBUSHAAEAAREA AMBUSHAAEAEAEAFigure 13.11Point and Area Ambush
<strong>Patrolling</strong> <strong>Organization</strong> • 445Based on the amount of time available to set an ambush, ambushes are either hastyor deliberate.You conduct a hasty ambush based on an unanticipated opportunity. Use it when yourpatrol sees the enemy before the enemy sees you, and you have time to act. You give theprearranged signal to start the action, and all Soldiers move to concealed firing positions,prepared to engage the enemy. Depending on the mission, the patrol may allow the enemyto pass if the enemy does not detect the patrol.You conduct a deliberate ambush against a specific target at a location chosen based onintelligence. With a deliberate ambush, you plan and prepare based on detailed informationthat allows you to anticipate enemy actions and enemy locations. Detailed informationincludes the type and size of target; its organization or formation; routes and direction ofmovement; the time the force will reach or pass certain points on its route; and the weaponsand equipment you are carrying.TerminologyDuring terrain analysis, you identify at least four different locations: the ambush site, thekill zone, security positions, and rally points. As far as possible, so-called “ideal” ambushsites should be avoided because alert enemies avoid them if possible and increase theirvigilance and security when they must enter them. This makes surprise difficult to achieve.Instead, you should choose unlikely sites when possible. Following are the ideal characteristicsof the four locations:Ambush SiteThe ambush site is the terrain on which you establish a point ambush. The ambush siteconsists of a support-by-fire position for the support element and an assault position forthe assault element. An ideal ambush site:• has good fields of fire into the kill zone• has good cover and concealment• has a protective obstacle• has a covered and concealed withdrawal route• makes it difficult for the enemy to conduct a flank attack.Kill ZoneThe kill zone is the part of an ambush site where fire is concentrated to isolate or destroythe enemy. An ideal kill zone has these characteristics:• Enemy forces are likely to enter it• It has natural tactical obstacles• It is large enough to observe and engage the anticipated enemy force.kill zonethe part of an ambushsite where fire isconcentrated to isolateor destroy the enemy
446 • SECTION 13In planning the kill zone, you should consider:Claymorea command-detonatedM18A1 antipersonnelmine weighing 3.5 lbs,containing explosivesand ball bearings—used to defend Soldiersfrom mass infantryattacks and to producemass casualties duringambushesisolatea tactical task givento a unit to seal off(both physically andpsychologically) anenemy from sourcesof support, deny enemyfreedom of movement,and prevent an enemyunit from having contactwith other enemy forces• covering the entire kill zone by fire• using existing or reinforcing obstacles (Claymores and other mines) to keep theenemy in the kill zone• protecting the assault and support elements with mines, Claymores, or explosives• using security elements or teams to isolate the kill zone• assaulting into the kill zone to search dead and wounded, assemble prisoners, andcollect equipment—the assault element must be able to move quickly through itsown protective obstacles• timing the actions of all platoon elements to preclude loss of surprise• using only one squad to conduct the entire ambush and rotating squads over timefrom the ORP—this technique is useful when you must man the ambush for a longtime.When conducting an ambush, you task organize your platoon into three elements—security,support, and assault. As the patrol leader (PL), you will lead the assault element while yourAPL (platoon sergeant) will lead the support element. Ambushes, like all combat patrols,also use other combat patrol elements such as aid and litter teams, enemy prisoner of war(EPW) teams, surveillance teams, en route recorders, compass man, and pace man.The distance your assault element is from the kill zone distinguishes a near ambushfrom a far ambush. A near ambush is a point ambush in which the assault element is withinreasonable assaulting distance of the kill zone (less than 50 meters). Close terrain, such asan urban area or heavy woods, may require this positioning. It may also be appropriatein open terrain in a “rise from the ground” ambush. A far ambush is a point ambush inwhich the assault element is beyond reasonable assaulting distance of the kill zone (beyond50 meters). This location may be appropriate in open terrain offering good fields of fireor when you attack by fire for a harassing ambush.Security PositionsAn ideal security position:• does not mask fires of the main body• provides timely information for the main body (that is, it gives the leader enoughtime to act on information provided)• can provide a support-by-fire position.Rally PointsRecall from Section 12 that rally points must:• be easy to find• have cover and concealment• be away from natural lines of drift• be defendable for short periods.
<strong>Patrolling</strong> <strong>Organization</strong> • 447KILL ZONER GRN AR TL SL TLARGRNRRARGRNTLTLARRGRNSLRALLY POINTFigure 13.12Squad Hasty AmbushHasty AmbushAs previously stated, you conduct a hasty ambush when you see an enemy force before it seesyou and you have time to establish an ambush without the enemy detecting you. You mustrehearse the actions for a hasty ambush well so your Soldiers know what to do on your signal.They must also know what action to take if the enemy detects them before they are ready toinitiate the ambush. Executing a smooth hasty ambush also requires a detailed unit standingoperating procedure (SOP) that identifies which squads are to execute the tasks of the support,security, and assault elements when the situation calls for a hasty ambush. When the enemyis approaching you is not the time to try to figure out who will do which task. In planningand rehearsing a hasty ambush, you should consider the following sequence of actions:1. Using visual signals, any Soldier alerts the platoon that an enemy force is in sight.The Soldier continues to monitor the location and activities of the enemy forceuntil the team or squad leader assumes the task.2. The platoon or squad halts and remains motionless.3. You determine the best nearby location for a hasty ambush. You use hand-and-armsignals to direct Soldiers to covered and concealed positions. You decide where thekill zone will be and how big it will be.4. The security element sends out left and right flank security and, if required, rearsecurity. You direct the security elements to move a given distance, set up, and rejointhe platoon on your signal when the ambush is completed. At the squad level, the twooutside buddy teams normally provide flank security as well as fire into the kill zone(Figure 13.12). At platoon level, a squad will provide its fire teams to make up thesecurity elements (Figure 13.13).
448 • SECTION 13KILL ZONESECURITYPLT LDRSECURITYKILL ZONEPLT LDRRALLY POINTFigure 13.13Platoon Hasty Ambush5. You direct your APL to take charge and emplace the support element while youemplace the assault element. Soldiers move quickly to covered and concealed positions,normally five to 10 meters apart. Soldiers ensure that they have good cover andconcealment, observation, and fields of fire onto the kill zone that you have selected.6. As the PL, you initiate the ambush with the most-casualty-producing weapon whenthe majority of the enemy force enters the kill zone. In a hasty ambush, you willprobably not have the time to emplace a Claymore, so you must signal your APLto initiate the ambush with a machine gun. Of course, your backup plan must beyour own weapon if the method for signaling your APL fails. Using a hand grenadeto initiate an ambush is not desirable, as the noise from the initiator and spoonwill give the enemy nearly four seconds to react to your ambush.Note: If the enemy detects a Soldier, the Soldier initiates the ambushby opening fire and alerting the rest of the platoon, saying “Enemy Right”(or “Left” or “Front,” as the case may be). One of the reasons you planfor a rear security element is to thwart the enemy from flanking youto your rear if the enemy detects your ambush too early.7. As the PL, you control the rate and distribution of fire. You order cease fire whenthe enemy force is destroyed or stops resisting. You lead the assault element to moveinto the kill zone and conduct a hasty search of the enemy soldiers. All your otherSoldiers remain in place to provide security.
<strong>Patrolling</strong> <strong>Organization</strong> • 4498. The security elements rejoin the platoon after the assault element has clearedthrough the kill zone. Your patrol withdraws from the ambush site using a coveredand concealed route. The patrol returns to the current ORP, collects and distributesall information, reorganizes as necessary, and continues the mission.Deliberate AmbushYou conduct a deliberate ambush against a specific target at a predetermined location. Youneed detailed information to plan a deliberate ambush:• the size and composition of the enemy unit you will ambush• the weapons and equipment available to the enemy• the enemy’s route and direction of movement• the times that the targeted unit will reach or pass specified points along the route.Deliberate Ambush TypesThere are two kinds of deliberate ambush: the point ambush and the area ambush.Point AmbushIn a point ambush, the patrol is task organized to attack an enemy in a single kill zone. Youshould consider the following sequence of actions when planning a deliberate point ambush:1. SecurityPosition the security or surveillance team(s) first. The support element shouldbe in position before the assault element moves forward of the release point. Thesupport element must oversee the movement of the assault element into position.2. AssaultThe PL leads the assault element. The PL must position the assault elementso that its fires are centered on the kill zone. The PL checks each Soldier’s cover,concealment, observation, and fields of fire once the assault element is in placeand adjusts positions as necessary. The PL can signal for the surveillance teamto rejoin the assault element, or the PL can leave the surveillance team to therear of the ambush site to perform the rear-security task.The assault element should:• identify individual sectors of fire as you assign them and set up aiming stakes• set up Claymores and other protective devices• set up Claymores, mines, or other explosives in dead space within the kill zone• camouflage its positions• take weapons off “safe”—taking care not to compromise the mission by thesound of the metallic click when moving the selection lever. (This must bethe last action all Soldiers perform before waiting to initiate the ambush.)release pointa location on a routewhere elementsare released fromcentralized control3. SupportThe PL identifies the kill zone to the APL, and the APL positions the supportelement and identifies sectors of fire for all its weapons, especially the machineguns. Gunners set up limiting stakes to prevent friendly fires from hitting theassault element in an L-shaped ambush. They also set up Claymores and otherprotective devices to guard against the enemy overrunning the support element’sposition after the ambush has begun.
450 • SECTION 134. CommunicationYour instructions to security teams must include the method for notifying youof the enemy force’s approach into the kill zone; its size, composition, types ofweapons, and rate of march; and whether the enemy is using a traveling overwatchformation or an advance guard. The security element must also inform youif any additional enemy forces are following the lead force, especially after youhave initiated the ambush.5. InitiationYou must determine how large an element you can successfully ambush, and youmust be prepared to let units that are too large pass by. You must report to higherheadquarters any units that pass your ambush that you did not engage.As PL, you initiate the ambush; you should always use a command-detonatedClaymore to do so, not only because it is the most-casualty-producing weapon,but also because its initiation method (clacker) is silent and its blast produces aninstantaneous shock effect on the enemy. You must also plan a backup methodfor initiating the ambush—which should always be a second Claymore—shouldthe primary means fail. If both Claymores fail, your tertiary plan should be touse the machine gun. All your Soldiers must understand how you will begin theambush and practice it during rehearsals.Your Soldiers must have a way to engage the enemy in the kill zone during limitedvisibility. You must balance using tracers with the risk that doing so might help theenemy to identify your positions. You may use handheld or indirect illuminationflares. As a PL conducting an ambush, you must always weigh the importance ofeach Soldier’s ability to see the kill zone against the risk that the enemy will spota pair of eyes peering through concealment. If a Soldier can see the enemy, thenit’s possible that the enemy will also spot one or more of your Soldiers lying in waitfor the ambush. This would negate the element of surprise. This is especially truefor near ambushes.Technically, only one member of the ambush needs to see the center of the killzone, and that is the patrol leader, because the PL must know when to initiate theambush. If you think about it, once the patrol leader initiates the ambush with theClaymores, the support and assault elements need only to unload their individualweapons at grazing level and between their sector stakes to achieve massed andconcentrated fires into the kill zone. So when planning your ambush, think abouthow many sets of eyes you want looking out at the enemy, and consider how thisincreases the chances that the enemy will detect you early.6. Indirect FireYour ambush plan should include indirect fire support. Indirect fires can coverthe flanks and far side of the kill zone to seal the enemy from escaping as well asto isolate the kill zone from follow-on reinforcements. Preplanned fires at the releasepoint and ORP can also help the patrol disengage if the ambush is compromised,or the patrol must depart the ambush site under pressure.
<strong>Patrolling</strong> <strong>Organization</strong> • 4517. SignalsYou must have a good plan to signal the advance of your assault element into thekill zone to begin its search and collection activities. Remember that the supportelement may not be able to see smoke or hear a whistle. All Soldiers must knowand practice relaying this signal during rehearsals.8. Actions in the Kill ZoneThe assault element must be prepared to move across the kill zone using individualmovement techniques if there is any return fire once they begin to search. Otherwise,the assault element moves across by bounding fire teams.While in the kill zone, the assault element also collects and secures all enemyprisoners of war (EPWs) and moves them out of the kill zone before searching bodies.Consider moving them to the designated release point as you will already have rearsecurity there and your APL will be there for accountability purposes. If you are nottaking EPWs, you must place them in a location that provides them cover, yet allowstheir units to find them easily. The search team searches from one side to the otherand marks bodies that it has searched to ensure the area is thoroughly covered andto avoid duplication of effort. It uses the two-man search technique:• As the search team approaches an enemy soldier, one Soldier aims a weapon at theenemy’s head and guards while the other Soldier searches. First, the searcher kicksthe enemy weapon away. Second, the searcher lies over the enemy and rolls thebody in a manner that exposes the enemy’s stomach to the guard to check forgrenades. The guard gives the all clear and the searcher begins to search the enemy.• The searchers then perform a systematic search of the enemy from head totoe, removing all papers and collecting all items that are priority informationrequirements (PIR) for the command. Record rank, insignia, types of weapons,amount of ammo, condition of uniforms. and enemy’s health and morale. Takenote of the radio frequency, signal operating instruction (SOI), and maps. Thesearchers continue in this manner until they have searched all enemy personnelin and near the kill zone.The search team identifies and collects equipment it will carry back, and preparesit for transport. (Clear all weapons and place them on “safe.”) It identifies andcollects remaining equipment for destruction. The demolition team prepares dualprimedexplosives and awaits the signal to initiate. This is normally the last actionperformed before departing the objective and may signal the security elementsto return to the ORP. The aid and litter team treats friendly wounded first, thenenemy wounded, time permitting.signal operatinginstruction (SOI)unit daily frequencies,call signs, andpasswords the unitmembers use9. Flank Security TeamsThe flank security teams move, if necessary, to a more advantageous positionto seal off the objective from reinforcements. The flank security teams may alsoplace out antiarmor mines after you have begun the ambush if you know the enemyhas armor. If a flank security team makes contact, it fights as long as possiblewithout becoming decisively engaged. It uses a prearranged signal to let you knowit is breaking contact. You may direct a portion of the support element to assist thesecurity team in breaking contact.
452 • SECTION 1310. WithdrawalAs the platoon leader, you must plan the withdrawal from the ambush site. Normallyelements withdraw in the reverse order that they established their positions. Theelements may return first to the release point, where the APL counts them, then moveto the ORP as a patrol. Depending on the distance from the ambush site to the ORP,you can plan to have elements move from the ambush site directly back to the ORP,and the APL will conduct accountability before departing the ORP. The securityelement at the ORP must be alert to assist the platoon’s return to the ORP. Itmaintains security for the ORP while the rest of the platoon prepares to leave.Once you have returned to the ORP, you must see that all Soldiers and equipmentare accounted for. Before departing the ORP you must recover the platoon’srucksacks and other equipment left at the ORP during the ambush.Critical ThinkingeConsider and compare the advantages and disadvantages of accountingfor your personnel and equipment at the release point versus waiting untilyou return to the ORP.Critical ThinkingeWhy is a platoon the smallest unit that can conduct an area ambush?.Area AmbushIn an area ambush, Soldiers deploy in two or more related point ambushes. You shouldconsider the following when planning a deliberate area ambush:1. A platoon is the smallest unit to conduct an area ambush. Platoons conductarea ambushes where enemy movement is largely restricted to trails or streams(Figure 13.14).2. You should select one principal ambush site around which you organize outlyingambushes. Position these secondary sites along the enemy’s most likely approachto and escape from the principal ambush site. Squad-sized elements are normallyresponsible for each ambush site. They establish an area ambush as described above.3. You must determine the best employment of your machine guns. You normallyposition them both with the support element of the principal site.4. The squads responsible for outlying ambushes begin their ambushes after youinitiate the principal one. They then engage to prevent enemy forces from escapingor reinforcing.
<strong>Patrolling</strong> <strong>Organization</strong> • 453OUTLYINGAMBUSHCENTRAL AMBUSHOUTLYINGAMBUSHSTOPPING ENEMY ESCAPEFigure 13.14Area AmbushAmbush FormationsYou conduct a deliberate ambush using either the linear or L-shaped formations.Linear FormationIn an ambush using a linear formation, the assault and support elements deploy parallelto the enemy’s route (Figure 13.15). This positions both elements on the long axis of thekill zone and subjects the enemy to flanking fire. You use this formation in close terrainthat restricts the enemy’s ability to maneuver against your platoon, or in open terrain—provided you have a way to keep the enemy in the kill zone. A linear ambush is most effectiveif you establish the kill zone next to impassable or severely restricted terrain such as a wall,canal, deep ditch, or water source. Doing so will prevent the enemy from escaping to thefar side of the kill zone.FLANKS RESTRICTED BY TERRAIN, MINES,MANTRAPS, OR COMBINATIONKILL ZONESECURITYTEAMMANTRAPS MANTRAPS MANTRAPSACCESS LANESASSAULT ELEMENTSECURITYTEAMRALLY POINTSECURITY TEAMFigure 13.15Linear Ambush Formation
454 • SECTION 13LEFT FLANKSECURITYTEAMEPW/SEARCHDEMO TMAID/LITTERLIMIT OF ADVANCEKILL ZONEAR TL AR TL SL GRN RRPTEAM ASSAULTELEMENTORPRGRNTEAM BSECURITYTEAMMGTEAMFigure 13.16L-Shaped Ambush Formationenfilade firefire delivered on thebroad side of a targetin such a manner thatthe range pattern ofthe fall of shot generallyaligns with the long axisof the targetL-Shaped FormationIn an L-shaped ambush, the assault element forms the long leg parallel to the enemy’sdirection of movement along the kill zone (Figure 13.16). The support element forms theshort leg at one end of and at right angles to the assault element. This provides both flanking(long leg) and enfilade fire (short leg) against the enemy. You can use the L-shaped ambushat a sharp bend in a trail, road, or stream, but don’t use it where the short leg would haveto cross a straight road or trail. As with the linear ambush, try to tie the kill zone to impassableor severely restricted terrain.Fundamentals of a Successful AmbushA successful ambush includes the elements of surprise, coordinated fire, and control.Surprise. Surprise is a major feature that distinguishes an ambush from other formsof attack. Surprise allows the patrol to seize control of the situation. If you cannotachieve complete surprise, the surprise must be so nearly complete that the target doesnot know of the ambush until it is too late for effective reaction. You achieve surpriseby good planning, preparation, and execution.Coordinated Fire. You must position all weapons, including mines and demolitions,and you must coordinate all fire, including that of supporting artillery and mortars,to achieve:• the isolation of the kill zone to prevent escape or reinforcement• the surprise delivery of a large volume of highly concentrated fire into the kill zone;this fire must inflict as much damage as possible so that the target can be quicklyassaulted, when required, and destroyed.Control. As the platoon leader, you must maintain close control during movement to,occupation of, and withdrawal from the ambush site. Control is most critical at thetime of the target’s approach. Control measures must provide for:• early warning of target approach• withholding fire until the target has moved into the kill zone• opening fire at the proper time• initiation of proper action if the ambush is prematurely detected• lifting or shifting of supporting fire when the attack includes assault of the target• timely and orderly withdrawal of the patrol to the ORP.
<strong>Patrolling</strong> <strong>Organization</strong> • 455RaidA raid is a combat operation to attack a position or installation followed by a plannedwithdrawal. Squads do not execute raids independent of larger units. The sequence of apatrol’s actions for a raid is similar to those for an ambush. Additionally, the patrol’s assaultelement may have to conduct a breach of an obstacle. It may have additional tasks to performon the objective (for example, demolition of freed facilities).A raid has at least one of these five main purposes:1. To capture enemy soldiers or destroy enemy equipment or supplies2. To destroy installations, positions, facilities, or key points3. To harass enemy forces or gain the initiative4. To gain intelligence5. To rescue friendly personnel.You organize a raid similarly to other patrol activities (see Section 12). A raid has headquarters,assault, support, and security teams. As with a patrol and ambush, you appoint a series ofspecial teams for aid and litter for the wounded, handling EPWs, demolition, and breach.These special teams are members of the assault element. You should always designatealternate special teams to back up the primary teams. A successful raid includes surprise,overwhelming firepower, violence of action, and planned withdrawal. This last factor iswhat makes a raid different from a deliberate attack—your patrol will not remain to defendthe objective.Critical ThinkingeWhat other kinds of offensive operations have surprise as a key element?
456 • SECTION 13eCONCLUSION<strong>Patrolling</strong> is at the heart of an infantry platoon’s work. But in the ContemporaryOperating Environment, units from many other <strong>Army</strong> branches are now findingthemselves with the responsibility of conducting patrols as well. The key toconducting successful patrols with as few casualties as possible lies in learninghow to plan and execute the different types of patrols. As a platoon leader, youwill be in charge of planning and organizing these combat and reconnaissancepatrols. Your Soldiers will look to you to lead them in these operations. Yoursuperior officers will depend heavily on the information you gather in patrolling.To be a successful junior officer, you must make the effort to master thisimportant task. You and your Soldiers will be glad you did.Key Wordsraidambushkill zoneClaymoreisolaterelease pointsignal operating instructionenfilade fireLearning Assessment1. Identify and describe the two categories of patrols.2. What are the three main types of combat patrols?3. What are the four most common types of reconnaissance patrols?4. What are the two types of ambush?5. What are the two formations for an ambush?
<strong>Patrolling</strong> <strong>Organization</strong> • 457ReferencesDA PAM 600-65, Leadership Statements and Quotes. 1 November 1985.Field Manual 1, The <strong>Army</strong>. 14 June 2005.Field Manual 1-02, Operational Terms and Graphics. 21 September 2004.Field Manual 3-21.8, The Infantry Rifle Platoon and Squad. 28 March 2007.US <strong>Army</strong>, Center of Military History. (1946). Guam: Operations of the 77th Division. 1990ed. Retrieved 18 August 2005 from http://www.army.mil/cmh-pg/books/wwii/guam/guam77-pursuit.htm