Too Many Men
Too Many Men
Too Many Men

Create successful ePaper yourself
Turn your PDF publications into a flip-book with our unique Google optimized e-Paper software.
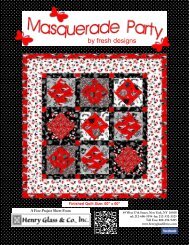
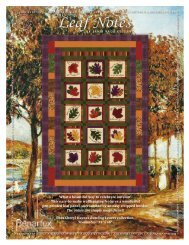
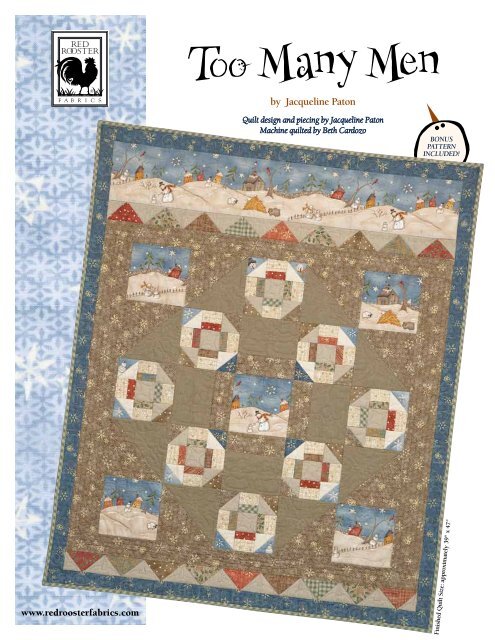
y Jacqueline PatonQuilt design and piecing by Jacqueline PatonMachine quilted by Beth CardozobonusPAtternincluDeD!www.redroosterfabrics.comFinished Quilt Size: approximately 39" x 47"
Fabrics from the <strong>Too</strong> <strong>Many</strong> <strong>Men</strong> fabric collection (Style #4182) by Jacqueline Paton for Red Rooster Fabrics.Fabric Requirements:A. Pattern #22676 – MUL1....................... 1 1 /8 yardsB. Pattern #22677 – DKBLU1....................... 1 /2 yardC. Pattern #22677 – RED1.......................Fat EighthD. Pattern #22678 – BRO1.......................Fat EighthE. Pattern #22678 – RED1.......................Fat EighthF. Pattern #22679 – CRE1.......................Fat EighthG. Pattern #22680 – BRO1.......................Fat EighthH. Pattern #22680 – RED1.......................Fat EighthI. Pattern #22682 – BLU1.....................Fat QuarterNot <strong>Too</strong> <strong>Many</strong> Neutrals:J. Pattern #20961 – CRE1.......................Fat EighthK. Pattern #21996 – BRO1.......................Fat EighthL. Pattern #22677 – BEI1.........................Fat EighthM. Pattern #22677 – BRO1............................ 3 /4 yardThe Heritage Collection:N. Pattern #21049 – BEI1.............................. 3 /8 yardO. Pattern #21049 – GRE1............................ 3 /8 yardP. Pattern #21050 – TAN1............................ 3 /4 yardQ. Pattern #21052 – RUS1.......................Fat EighthR. Pattern #21053 – GRE1..........................Fat EighthBacking of choice..........................................2 1 /2 yardsBatting...........................................................45" x 53"Cutting Instructions:Please read all instructions carefully before beginning.1/4" seam allowance is included in measurements andall strips are cut across the width of the fabric unlessnoted otherwise. Width of fabric is perpendicular toselvage. Label pieces and keep together until readyto sew.A. Pattern #22676 – MUL1 (border):1. Cut five 6 1 /2" squares from largest landscapestripe. Label V.2. Cut 1 strip 6 1 /2" x 36 1 /2". Label GG.B. Pattern #22677 – DKBLU1 (snowflake):1. Cut three strips 2" x width of fabric. Sewtogether end to end; press. Label HH.2. Cut two strips 2" x 39 1 /2". Label II.3. Cut two 2 7 /8" squares. Recut diagonally intofour half-square triangles. Label Q.C. Pattern #22677 – RED1 (snowflake):1. Cut two 2 7 /8" squares. Recut diagonally intofour half-square triangles. Label CC.2. Cut two 1 1 /4" x 2 1 /2" rectangles. Label S.D. Pattern #22678 – BRO1 (holly):1. Cut one strip 1 1 /4" x width of fabric. Subcutinto six 1 1 /4" x 2 1 /2" rectangles. Label G.2. Cut four 2 7 /8" squares. Recut diagonally intoeight half-square triangles. Label Z.E. Pattern #22678 – RED1 (holly):1. Cut two 2 7 /8" squares. Recut diagonally intofour half-square triangles. Label EE.2. Cut two 1 1 /4" x 2 1 /2" rectangles. Label U.F. Pattern #22679 – CRE1 (twig):1. Cut eight 2 7 /8" squares. Recut diagonally intosixteen half-square triangles. Label O.G. Pattern #22680 – CRE1 (icicle/dot):1. Cut six 2 7 /8" squares. Recut diagonally intotwelve half-square triangles. Label K.H. Pattern #22680 – RED1 (icicle/dot):1. Cut one 2 7 /8" square. Recut diagonally intotwo half-square triangles. Label Y.2. Cut one strip 1 1 /4" x width of fabric. Subcutinto six 1 1 /4" x 2 1 /2" rectangles. Label E.I. Pattern #22682 – BLU1 (snowmen):1. Fussy-cut twelve triangles using triangletemplate. Label N.Not <strong>Too</strong> <strong>Many</strong> Neutrals:J. Pattern #20961 – CRE1 (plaid):1. Cut two strips 1 3 /4" x width of fabric. Subcutinto sixteen 1 3 /4" x 2 1 /2" rectangles. Label F.K. Pattern #21996 – BRO1 (texture):1. Cut two 2 7 /8" squares. Recut diagonally intofour half-square triangles. Label AA.2. Cut one strip 1 1 /4" x width of fabric. Subcutinto four 1 1 /4" x 2 1 /2" rectangles. Label R.L. Pattern #22677 – BEI1 (snowflake):1. Cut two strips 1 3 /4" x width of fabric. Subcutinto sixteen 1 3 /4" x 2 1 /2" rectangles. Label I.M. Pattern #22677 – BRO1 (snowflake):1. Cut four 6 7 /8" squares. Recut diagonally intoeight half-square triangles. Label A.2. Cut one strip 2 1 /2" x width of fabric. Subcutinto four 2 1 /2" x 6 1 /2" rectangles. Label C.3. Cut two strips 2 1 /2" x 36 1 /2". Label X.4. Cut two strips 3 1 /2" x 30 1 /2". Label W.5. Cut four 2 7 /8" squares. Recut diagonally intoeight half-square triangles. Label M.The Heritage Collection:N. Pattern #21049 – BEI1 (texture):1. Cut three strips 2 7 /8" x width of fabric. Subcutinto twenty-six 2 7 /8" squares. Recut diagonallyinto fifty-two half-square triangles. Label L.2. Cut one strip 2 1 /2" x width of fabric. Subcutinto eight 2 1 /2" squares. Label P.O. Pattern #21049 – GRE1 (texture):1. Cut four 6 7 /8" squares. Recut diagonally intoeight half-square triangles. Label B.2. Cut one strip 4 1 /2" x width of fabric. Subcutinto four 4 1 /2" x 6 1 /2" rectangles. Label D.P. Pattern #21050 – TAN1 (check):1. For bias binding, cut enough 2 1 /2" bias stripsto equal 185" of bias binding2. Cut two 2 7 /8" squares. Recut diagonally intofour half-square triangles. Label BB.3. Cut four 1 1 /4" x 2 1 /2" rectangles. Cut these onbias if you prefer. Label J.Q. Pattern #21052 – RUS1 (plaid):1. Cut one 2 7 /8" square. Recut diagonally intotwo half-square triangles. Label FF.2. Cut two 1 1 /4" x 2 1 /2" rectangles. Cut these onbias if you prefer. Label T.R. Pattern #21053 – GRE1 (check):1. Cut one strip 1 1 /4" x width of fabric. Subcutinto six 1 1 /4" x 2 1 /2" rectangles. Label H.2. Cut two 2 7 /8" squares. Recut diagonally intofour half-square triangles. Label DD.Piecing instructions:1. Sew triangle A + B to form square.Make eight. Press toward A (Figure 1).2. Sew rectangles C + D. Make four.Press toward C (Figure 2).A. Snowball Block #1 (Figure 3):1. Sew E to F. Make four. Press toward E.2. Sew G to F. Make four. Press toward G.3. Sew H to I. Make four. Press toward H.4. Sew J to I. Make four. Press toward J.5. Sew K to L. Make four. Press toward K.6. Sew M to L. Make four. Press toward M.7. Sew N to O. Make eight. Press toward N.8. Sew NO to EF to NO. Make four. Press toward EF.9. Sew IH to P to GF. Make four. Press toward HI and GF.10. Sew KL to JI to LM. Make four. Press toward JI.11. Sew rows together. Press toward top and bottom rows.B. Snowball Block #2 (Figure 4):NOIKMLU P H ILFERFOQKLF R P T IQOFSGINOLMMLFigure 4 Make 1 of each. Finished size: 6"NOABFigure 1 Figure 2Make 8. Make 4.Finished size for both: 6"IGQOF S P R FTILKNOIHLKDCFEPJINOGFLMFigure 3Make 4.Finished size: 6"QOIHLMFRPEFKLUION1. Sew N to O. Make four. Press toward N.2. Sew Q to O Make four. Press toward Q.3. Sew M to L. Make four. Press toward M.4. Sew K to L. Make four. Press toward K.5. Sew R to F. Make four. Press toward R.6. Sew S to F. Make two. Press toward S.7. Sew E to F. Make two. Press toward E.8. Sew H to I. Make two. Press toward H.9. Sew T to I. Make two. Press toward T.10. Sew G to I. Make two. Press toward G.11. Sew U to I. Make two. Press toward U.12. Assemble blocks as for Snowball Block #1. Make four blocks with cornersand center matched to the project photo or do your own placement.Quilt Assembly: Refer to Quilt Photo and Diagram.A. Block Row Assembly:1. Assemble rows, referring to quilt photo and diagram for placement. Press seamsin alternate directions.2. Sew rows 1-5 together, press seams toward rows with beginning with AB block.3. Sew W to each side of quilt. Press toward W.4. Sew X to top and bottom edges. Press toward X.B. Triangle Border:Top BorderFigure 51. Sew L + Y. Make two. Press toward Y (Figure 5).Make 182. Sew LY squares together; press (Figure 5).assorted units.3. Refer to quilt diagram to sew eighteen total border units using designated fabrics.LYYL
4. Refer to quilt photo and diagram to piece nineunits together. Make two borders. Sew one to GG,press toward GG. Sew one to X, press toward X.5. Refer to quilt photo and diagram, sew each borderunit to top and bottom of quilt.6. Cut HH strips to measure 2" x 44 1 /2".7. Sew HH border strip to each side of quilt. Presstoward HH.8. Sew II strip to top and bottom edges. Presstoward II.Finishing:1. Prepare backing to measure 45" x 53". Pressseams open.2. Layer quilt top, batting and backing. Bastelayers together.3. Quilt as desired.4. Trim layers even with quilt top.5. Sew binding strips together with diagonal seams.Press seams open. Sew binding to quilt using yourfavorite method.VGGLY Y Z Z AA AA BB BB CC CC Z Z K K DD DD EE EESBIIXSB#1SB#2VHHWSB#2SBSBV#1SB#2 #2#1SBWHHTemplate100%Use to cutFabric I, Piece NV#1XEE EE DD DD K K Z Z CC CC AA AA BB BB Z Z FF FFVIIQuilt DiagramUse one <strong>Too</strong> <strong>Many</strong> <strong>Men</strong> panel to make this quick and easy wall hanging!Fabric Requirements:A. Pattern #22675 – MUL1..............................1 PanelB. Pattern #20961 – RED ................................ 1 /2 yardC. Pattern #22678 – BRO1.............................. 5 /8 yardD. Pattern #22681 – MUL1.............................. 7 /8 yardE. Pattern #22677 – BRO1.............................. 1 /2 yard(for binding)Backing............................................................. 3 yardsBatting............................................................54" x 57"Cutting Instructions:Please read all instructions carefully before beginning.1/4" seam allowance is included in measurements andall strips are cut across the width of the fabric unlessnoted otherwise. Label pieces and keep together untilready to sew.A. Pattern #22675 – MUL1 (panel):1. Fussy cut the large panel to measure22 1 /2" x 29 1 /2".2. Fussy cut the four small panels to measure6 1 /2" x 11 1 /2".B. Pattern #20961 – RED1 (rust plaid):1. Cut two 1 1 /2" x 31 1 /2" strips and two1 1 /2" x 22 1 /2" strips for the center borders.2. Cut five 2" strips. Piece the strips togetherto make four 2" x 46 1 /2" strips for theouter borders.C. Pattern #22678 – BRO1 (tan holly):1. Cut four 2" x 31 1 /2" strips for the top andbottom borders.2. Cut four 2" x 24 1 /2" strips for the side borders.D. Pattern #22681 – MUL1 (tossed houses):1. Cut two 8 1 /2" x 31 1 /2" strips for the top andbottom borders.2. Cut two 3 1 /2" x 24 1 /2" strips for the side borders.E. Pattern #22677 – BRO1(brown snowflakes):1. Cut five 2 1 /2" strips for the binding.Piecing instructions:A. Center Panel:1. Sew one 1 1 /2" x 22 1 /2" B strip to each side of the22 1 /2" x 29 1 /2" A panel. Sew one 1 1 /2" x 31 1 /2" Bstrip to the top and bottom of the A panel to makeone 24 1 /2" x 31 1 /2" center panel (Figure 1).BFigure 1A
B. Pieced Borders:1. Sew one 2" x 31 1 /2" C strip to the top and bottom of one8 1 /2" x 31 1 /2" D strip to make the top pieced border. Repeatto make the bottom pieced border (Figure 2).Top and Bottom Pieced BordersCQuilt design and piecing by Heidi PridemoreMachine quilted by Doris PridemoreDSide Pieced BorderCFigure 2CDC2. Sew one 2" x 24 1 /2" C strip to the top and bottom of one3 1 /2" x 24 1 /2" D strip to make one side border (Figure 2).Repeat to make the second side pieced border.3. Sew one 6 1 /2" x 11 1 /2" A panel to each end of the top andbottom pieced borders to complete the borders (Figure 3).CADAFigure 3Quilt Assembly:Refer to Quilt Diagram.1. Sew each side pieced border to the center panel.2. Sew the top and bottom pieced borders to the centerpanel to make the 43 1 /2" x 46 1 /2" quilt top.3. Sew one 2" x 46 1 /2" B strip to each side of the quilt top.Sew one 2" x 46 1 /2" B strip to the top and bottom ofthe quilt top.Finishing:1. Prepare backing to measure 54" x 57" square.Press seams open.2. Layer quilt top, batting and backing.Baste layers together.3. Quilt as desired.4. Trim layers even with quilt top.5. Sew binding strips together withdiagonal seams. Press seams open.Sew binding to quilt using yourfavorite method.CBTop BorderFinished Quilt Size: approximately 46" x 49"BSide BorderCenter PanelSide BorderBBottom BorderQuilt DiagramB©2012 Red Rooster Fabrics. All rights reserved. Not intended for individual resale. The design for this Red Rooster Fabrics’ pattern is protected by U.S. copyright law. For additional copies of this patternplease call or write Red Rooster Fabrics at the address listed: 253 West 35th Street, 11th Floor, New York, NY 10001 • 401.728.4200 • www.redroosterfabrics.comWe take great care to ensure that the information included in our free pattern is accurate and presented in good faith. No warranty is provided nor results guaranteed. For your convenience, we post an up-todatelisting of corrections on our website: http://www.redroosterfabrics.com/quilt/oops.php If a correction is not noted, please contact our customer service department at info@redroosterfabrics.com. You mayalso call or write us at the address above.