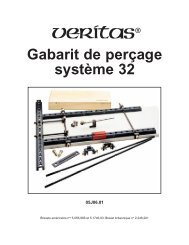
Print article - Lee Valley Tools
Print article - Lee Valley Tools
Print article - Lee Valley Tools
- No tags were found...

Create successful ePaper yourself
Turn your PDF publications into a flip-book with our unique Google optimized e-Paper software.
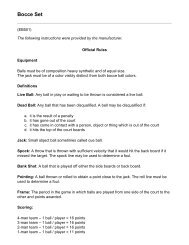
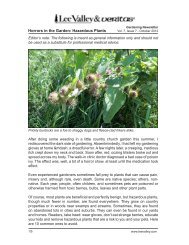
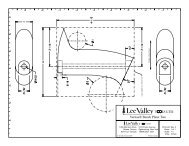
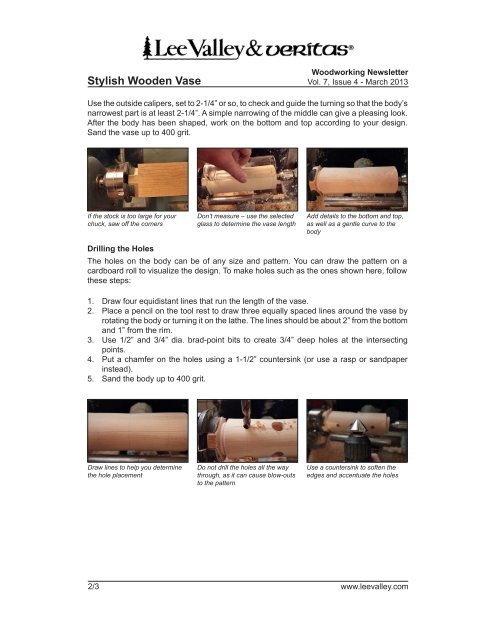
Stylish Wooden VaseWoodworking NewsletterVol. 7, Issue 4 - March 2013Use the outside calipers, set to 2-1/4” or so, to check and guide the turning so that the body’snarrowest part is at least 2-1/4”. A simple narrowing of the middle can give a pleasing look.After the body has been shaped, work on the bottom and top according to your design.Sand the vase up to 400 grit.If the stock is too large for yourchuck, saw off the cornersDon’t measure – use the selectedglass to determine the vase lengthAdd details to the bottom and top,as well as a gentle curve to thebodyDrilling the HolesThe holes on the body can be of any size and pattern. You can draw the pattern on acardboard roll to visualize the design. To make holes such as the ones shown here, followthese steps:1.2.3.4.5.Draw four equidistant lines that run the length of the vase.Place a pencil on the tool rest to draw three equally spaced lines around the vase byrotating the body or turning it on the lathe. The lines should be about 2” from the bottomand 1” from the rim.Use 1/2” and 3/4” dia. brad-point bits to create 3/4” deep holes at the intersectingpoints.Put a chamfer on the holes using a 1-1/2” countersink (or use a rasp or sandpaperinstead).Sand the body up to 400 grit.Draw lines to help you determinethe hole placementDo not drill the holes all the waythrough, as it can cause blow-outsto the patternUse a countersink to soften theedges and accentuate the holes2/3 www.leevalley.com